Home>Furniture & Design>Bathroom Fixtures>How To Paint Over A Shower Tile
Bathroom Fixtures
How To Paint Over A Shower Tile
Modified: September 2, 2024
Learn how to update your bathroom fixtures with our step-by-step guide on painting over shower tiles. Transform your space with our expert tips.
(Many of the links in this article redirect to a specific reviewed product. Your purchase of these products through affiliate links helps to generate commission for Storables.com, at no extra cost. Learn more)
Introduction
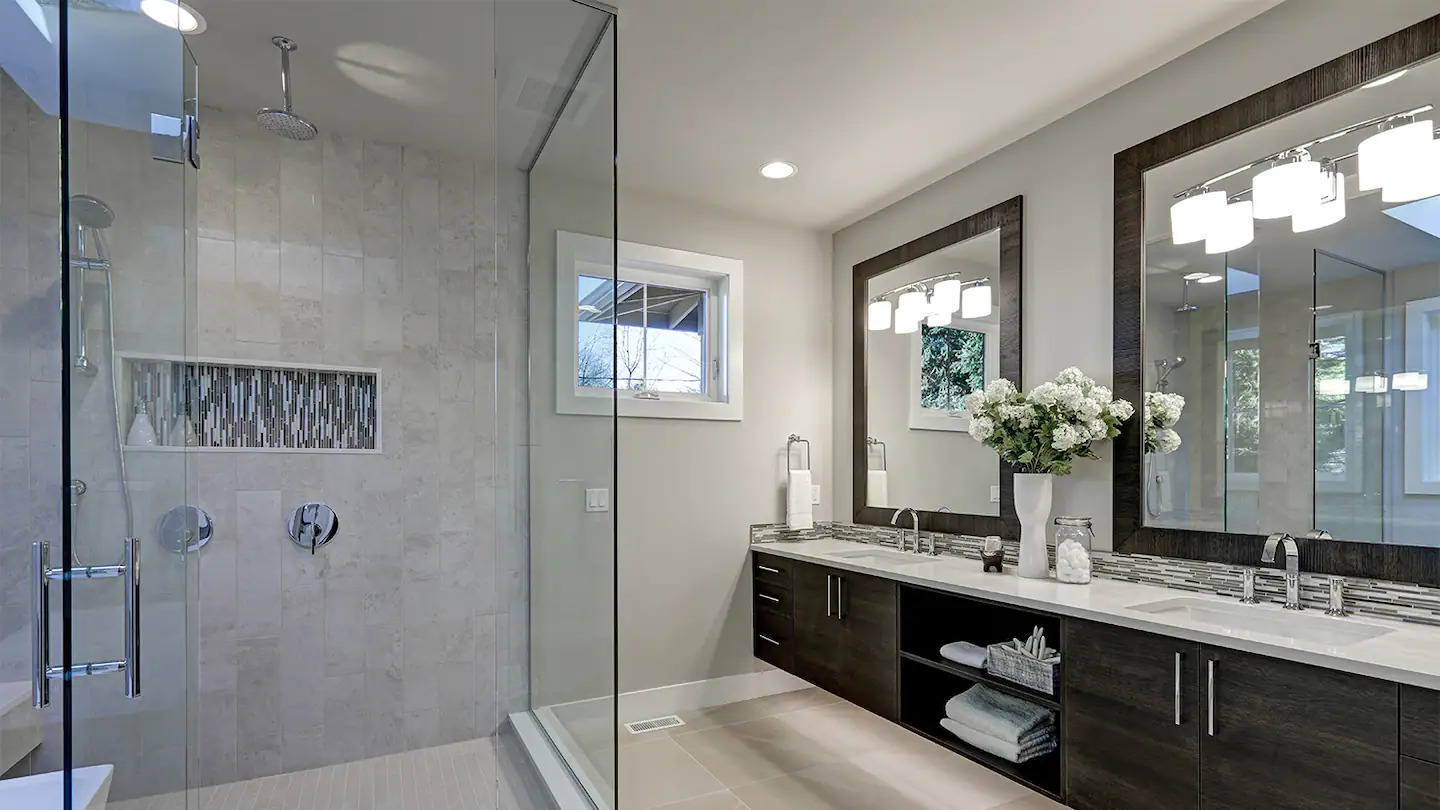
Welcome to the ultimate guide on how to transform your bathroom by painting over shower tiles. While remodeling a bathroom can be a costly and time-consuming project, painting over shower tiles offers a budget-friendly and relatively simple way to update the look of your space. Whether you’re looking to cover up outdated or unappealing tile colors, or simply want to give your bathroom a fresh new look, this DIY project can make a significant impact without breaking the bank.
With the right tools, materials, and techniques, you can achieve a professional-looking finish that revitalizes your shower area. In this comprehensive guide, we’ll walk you through the step-by-step process of preparing the tiles, selecting the appropriate paint, and executing the painting and sealing stages with precision. By the end of this tutorial, you’ll be equipped with the knowledge and confidence to tackle this rewarding home improvement project and enjoy a beautifully updated bathroom space.
Key Takeaways:
- Transform your bathroom on a budget by painting over shower tiles. With the right prep, paint, and sealing, achieve a professional finish that revitalizes your space and reflects your unique style.
- Embrace creativity and personalize your bathroom with painted shower tiles. Enjoy a refreshed look that withstands moisture and elevates the ambiance, showcasing your DIY prowess and enhancing your home.
Read also: 15 Best Shower Tile Paint For 2025
Step 1: Prepare the Shower Tile
Before diving into the painting process, it’s crucial to prepare the shower tiles to ensure optimal adhesion and a flawless finish. Here are the essential steps to prepare the shower tile:
- Clean the Tiles: Start by thoroughly cleaning the shower tiles to remove any soap scum, mineral deposits, or grime. Use a high-quality tile and grout cleaner, along with a scrub brush, to meticulously clean the surfaces. Rinse the tiles with water and allow them to dry completely before proceeding.
- Repair Any Damage: Inspect the tiles for any cracks, chips, or loose grout. Repair any damaged areas using a suitable tile repair kit or epoxy compound. Ensuring that the tile surface is smooth and free of imperfections is essential for achieving a professional-looking result.
- Sand the Tiles: To promote paint adhesion, lightly sand the tiles with fine-grit sandpaper. This step helps create a slightly rough surface for the paint to grip onto, enhancing its durability and longevity.
- Protect Surrounding Areas: Use painter’s tape and plastic sheeting to cover and protect the surrounding fixtures, hardware, and surfaces in the shower area. This precaution will prevent accidental paint splatters and ensure a clean and tidy workspace.
By diligently preparing the shower tiles, you’ll set the stage for a successful painting process and lay the foundation for a stunning transformation. Taking the time to complete these initial steps will ultimately contribute to a professional and long-lasting finish.
Step 2: Choose the Right Paint
When it comes to painting over shower tiles, selecting the appropriate paint is paramount to achieving a durable and aesthetically pleasing result. Here’s what you need to consider when choosing the right paint for your project:
- Tile-Specific Paint: Opt for a high-quality, tile-specific paint designed to withstand moisture, humidity, and frequent cleaning. Look for epoxy or epoxy acrylic paints formulated for use on tile surfaces. These specialized paints offer exceptional adhesion and durability, making them ideal for shower environments.
- Color and Finish: Consider the color and finish that will best complement your bathroom’s aesthetic. Whether you prefer a classic white tile makeover or a bold pop of color, ensure that the paint color and finish align with your overall design vision. Satin or semi-gloss finishes are popular choices for their moisture resistance and ease of cleaning.
- Primer Requirements: Some tile paints are designed to be used without a separate primer, while others may necessitate the use of a bonding primer for enhanced adhesion. Check the paint manufacturer’s recommendations and instructions to determine if a specific primer is required for your chosen paint.
- Moisture and Mold Resistance: Prioritize paints that offer moisture and mold resistance, especially for shower tile applications. These properties will help maintain the integrity of the paint finish and protect against the growth of mold and mildew in damp environments.
- Compatibility with Grout: If your shower tiles feature grout lines, ensure that the selected paint is compatible with grout and can adhere effectively to both tile and grout surfaces. This consideration is essential for achieving a cohesive and uniform appearance.
By carefully evaluating these factors and choosing a paint specifically formulated for shower tile applications, you’ll set the stage for a successful and long-lasting transformation. Investing in high-quality, tile-appropriate paint will ensure that your newly painted shower tiles maintain their beauty and resilience for years to come.
Step 3: Prime the Tiles
Before applying the paint, priming the shower tiles is a crucial step that enhances adhesion and promotes a smooth, uniform finish. Follow these essential guidelines to prime the tiles effectively:
- Choose a High-Quality Primer: Select a primer specifically formulated for use on tile surfaces. Look for a bonding primer designed to create a strong foundation for the paint and ensure long-term adhesion. Epoxy or urethane bonding primers are excellent choices for shower tile applications.
- Clean and Dry the Tiles: Ensure that the tiles are clean, dry, and free of any residual dust or debris before applying the primer. Thoroughly clean the surfaces and allow them to dry completely to promote optimal primer adhesion.
- Apply the Primer: Using a high-quality synthetic paintbrush or a low-nap roller, apply the primer evenly across the shower tiles. Work in manageable sections to ensure thorough coverage and avoid streaks or uneven application. Pay special attention to grout lines and intricate tile details to ensure comprehensive priming.
- Allow Sufficient Drying Time: Follow the manufacturer’s recommendations regarding drying times between primer coats, as well as the total curing time before applying the paint. Adequate drying time is essential for the primer to create a strong bond with the tile surface and optimize paint adhesion.
- Inspect for Uniform Coverage: After the primer has dried, inspect the tiles to ensure that the primer has been applied uniformly and that all surfaces, including grout lines, have been adequately primed. Touch up any missed areas or uneven spots as needed before proceeding to the painting stage.
By priming the shower tiles with a high-quality bonding primer, you’ll create an ideal surface for the paint to adhere to, resulting in a durable and professional-looking finish. This essential preparation step significantly contributes to the longevity and resilience of the painted tiles in the demanding shower environment.
Before painting over shower tile, make sure to thoroughly clean and dry the surface. Use a high-quality, waterproof primer and paint specifically designed for wet areas. Apply multiple thin coats for best results.
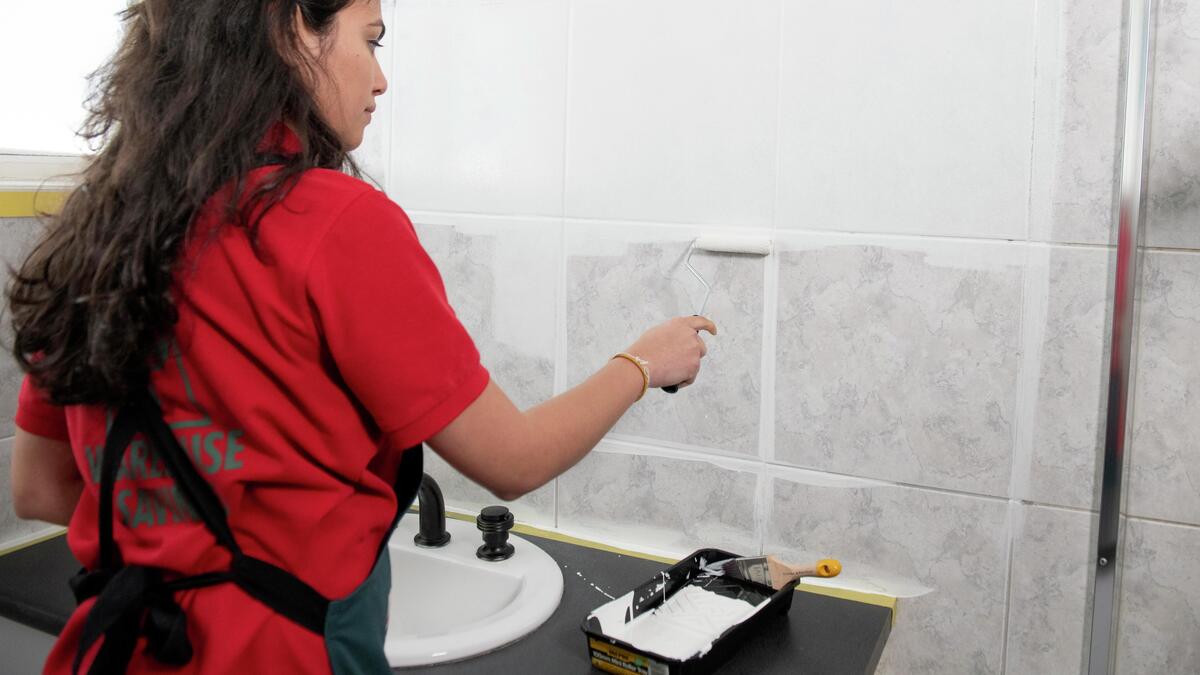
Step 4: Paint the Tiles
With the tiles properly prepared and primed, it’s time to embark on the transformative painting process. Follow these key steps to achieve a flawless and long-lasting finish when painting the shower tiles:
- Choose the Right Application Tools: Opt for high-quality synthetic paintbrushes or foam rollers designed for smooth surfaces. Selecting the appropriate tools will facilitate even application and help you achieve a professional finish.
- Mix the Paint Thoroughly: If the tile paint requires mixing, ensure that it is thoroughly stirred to achieve a consistent color and texture. Follow the manufacturer’s instructions for mixing and any additional preparation steps.
- Apply the Paint in Thin, Even Coats: Begin by applying the paint to the tiles in thin, even coats, working methodically across the surface. Avoid overloading the brush or roller to prevent drips and uneven coverage. Multiple thin coats are preferable to a single heavy application, allowing for better adhesion and a smoother finish.
- Address Grout Lines and Edges: Pay special attention to grout lines and edges, ensuring that the paint is applied evenly and consistently. Use a smaller brush or a detail roller to navigate intricate areas and achieve a uniform appearance throughout the tiled surface.
- Allow Sufficient Drying Time Between Coats: Follow the paint manufacturer’s instructions regarding drying times between coats. Adequate drying time is essential to allow each coat to cure properly and prevent the risk of smudging or imperfections.
- Inspect and Touch Up as Needed: After each coat has dried, inspect the painted tiles for any missed spots, streaks, or imperfections. Address any touch-ups promptly to maintain a seamless and professional result.
By following these guidelines and taking a meticulous approach to the painting process, you’ll achieve a beautifully refreshed shower tile surface that enhances the overall aesthetic of your bathroom. With patience and attention to detail, the painted tiles will exude a renewed vibrancy and charm, creating a stunning focal point in your bathroom space.
Step 5: Seal the Paint
After successfully painting the shower tiles, it’s essential to protect and seal the newly applied paint to ensure its longevity and durability in the demanding shower environment. Follow these crucial steps to seal the paint effectively:
- Choose a High-Quality Sealant: Select a clear, waterproof sealant designed for use on painted tile surfaces. Look for a sealant specifically formulated for bathrooms and high-moisture areas to provide optimal protection against water exposure and frequent cleaning.
- Apply the Sealant Evenly: Using a clean, high-quality paintbrush or foam roller, apply the sealant evenly across the painted tiles, working in manageable sections. Ensure thorough coverage and pay special attention to grout lines and edges to create a uniform, protective barrier.
- Allow Sufficient Drying Time: Follow the manufacturer’s recommendations for drying times and curing periods for the sealant. Adequate drying time is essential to allow the sealant to form a strong, protective layer over the painted tiles.
- Inspect for Uniform Coverage: After the sealant has dried, inspect the tiles to ensure that the sealant has been applied uniformly and that all painted surfaces are adequately protected. Address any missed spots or uneven application as needed to maintain consistent coverage.
- Reapply for Enhanced Protection: Depending on the specific sealant product and the manufacturer’s recommendations, consider applying a second coat of sealant for enhanced protection, especially in high-moisture areas such as showers. A second coat can provide an additional layer of defense against water and humidity, further safeguarding the painted tiles.
By sealing the painted shower tiles with a high-quality, waterproof sealant, you’ll fortify the surface against moisture, stains, and wear, ensuring that the newly transformed tiles maintain their beauty and integrity over time. This essential final step completes the painting process and sets the stage for long-term enjoyment of your refreshed shower space.
Conclusion
Congratulations on successfully completing the transformative journey of painting over your shower tiles! By following the comprehensive steps outlined in this guide, you’ve embarked on a rewarding DIY project that has revitalized your bathroom space with a fresh and updated look. Through meticulous preparation, thoughtful paint selection, and precise execution, you’ve achieved a professional-quality finish that enhances the aesthetic appeal of your shower area.
Not only does painting over shower tiles offer a budget-friendly alternative to costly renovations, but it also provides the opportunity to unleash your creativity and personalize your bathroom according to your unique style preferences. Whether you’ve opted for a classic, timeless white finish or added a splash of color to infuse vibrancy into the space, the painted tiles now serve as a captivating focal point that elevates the overall ambiance of your bathroom.
Furthermore, the protective sealing of the painted tiles ensures their resilience and longevity in the moisture-rich environment of the shower, allowing you to enjoy the refreshed look for years to come. The combination of high-quality tile-specific paint, meticulous application, and effective sealing sets the stage for a durable and visually stunning result that enhances the functionality and appeal of your bathroom.
As you revel in the transformation of your shower space, take pride in the accomplishment of this DIY endeavor and the significant impact it has made on your home. The revitalized shower tiles not only reflect your attention to detail and craftsmanship but also contribute to a welcoming and stylish bathroom environment that you can enjoy and showcase with pride.
Embrace the newfound beauty of your shower area, and relish in the satisfaction of having achieved a stunning transformation through the art of painting over shower tiles. Your dedication to this project has not only refreshed the aesthetics of your bathroom but has also demonstrated the potential for creativity and innovation within the realm of home improvement.
With your shower tiles now exuding renewed charm and elegance, you’ve unlocked the potential for further DIY endeavors and home enhancement projects, empowered by the knowledge and experience gained from this transformative painting process. As you continue to embark on future home improvement ventures, may the success of this project inspire and embolden your creative spirit, leading to even more remarkable enhancements within your living space.
Frequently Asked Questions about How To Paint Over A Shower Tile
Was this page helpful?
At Storables.com, we guarantee accurate and reliable information. Our content, validated by Expert Board Contributors, is crafted following stringent Editorial Policies. We're committed to providing you with well-researched, expert-backed insights for all your informational needs.


0 thoughts on “How To Paint Over A Shower Tile”