Home>Maintenance & Safety>Child & Elderly Safety at Home>How To Take Graco High Chair Cover Off
Child & Elderly Safety at Home
How To Take Graco High Chair Cover Off
Modified: August 25, 2024
Learn how to safely remove the cover from your Graco high chair to ensure child and elderly safety at home. Follow these step-by-step instructions for a hassle-free process.
(Many of the links in this article redirect to a specific reviewed product. Your purchase of these products through affiliate links helps to generate commission for Storables.com, at no extra cost. Learn more)
Introduction
Taking off the cover of a Graco high chair may seem like a daunting task, but with the right guidance, it can be a straightforward process. Whether you're looking to clean the cover, replace it with a new one, or simply want to give your high chair a thorough refresh, understanding the steps involved is essential. By following a systematic approach, you can ensure that the cover is removed and reinstalled correctly, maintaining the safety and comfort of the high chair for your little one.
In this comprehensive guide, we will walk you through the step-by-step process of taking off the cover of your Graco high chair. From gathering the necessary tools to cleaning the cover and reassembling the high chair, each step is designed to provide clarity and ease throughout the entire process. By the end of this guide, you will have the confidence and know-how to effectively remove the cover, giving you the flexibility to clean or replace it as needed.
Taking the time to familiarize yourself with the process of removing the cover of your Graco high chair is a proactive step in maintaining a safe and hygienic environment for your child. With the right approach and attention to detail, you can ensure that your high chair remains a secure and comfortable space for your little one to enjoy meal times and activities. Let's dive into the step-by-step process of taking off the cover of your Graco high chair and discover how simple and rewarding it can be.
Key Takeaways:
- Removing the cover of a Graco high chair is a manageable task with the right tools and steps. By following the guide, you can clean or replace the cover, ensuring a safe and hygienic space for your child.
- Cleaning the cover and reassembling the high chair are essential for maintaining a secure and inviting space for your child. With attention to detail, you can ensure a comfortable seating area for meal times and activities.
Read more: How To Turn Graco High Chair Into Table
Step 1: Gather necessary tools
Before embarking on the process of removing the cover of your Graco high chair, it's essential to gather the necessary tools to ensure a smooth and efficient experience. Having the right tools at your disposal will not only simplify the task but also contribute to the overall safety and effectiveness of the process. Here's a detailed look at the tools you'll need:
-
Screwdriver: Depending on the specific model of your Graco high chair, you may need a screwdriver to detach certain components before accessing the cover. It's important to have a screwdriver with the appropriate head size to fit the screws securely.
-
Cleaning Supplies: Since the primary purpose of removing the cover may be to clean it, having the necessary cleaning supplies is crucial. This may include mild detergent, a soft-bristled brush, and a clean cloth for wiping down the cover.
-
Container for Small Parts: As you disassemble the high chair to remove the cover, it's advisable to have a small container or bag to store any screws, nuts, or other small parts that are removed. This will prevent them from getting misplaced and ensure they are readily available when reassembling the high chair.
-
Replacement Parts (Optional): If your intention is to replace the cover with a new one, ensure that the replacement cover is readily available. Having the new cover on hand will allow for a seamless transition once the old cover has been removed.
-
Work Area Preparation: Clear a suitable work area where you can comfortably disassemble the high chair and work on removing the cover. This may involve laying down a clean sheet or working in a space that allows for easy access to the high chair without any obstructions.
By gathering these essential tools and preparing the work area, you set the stage for a successful cover removal process. With the right tools at your disposal, you can approach each subsequent step with confidence, knowing that you are well-equipped to handle the task at hand. Now that you have all the necessary tools in place, let's move on to the next step in the process of removing the cover from your Graco high chair.
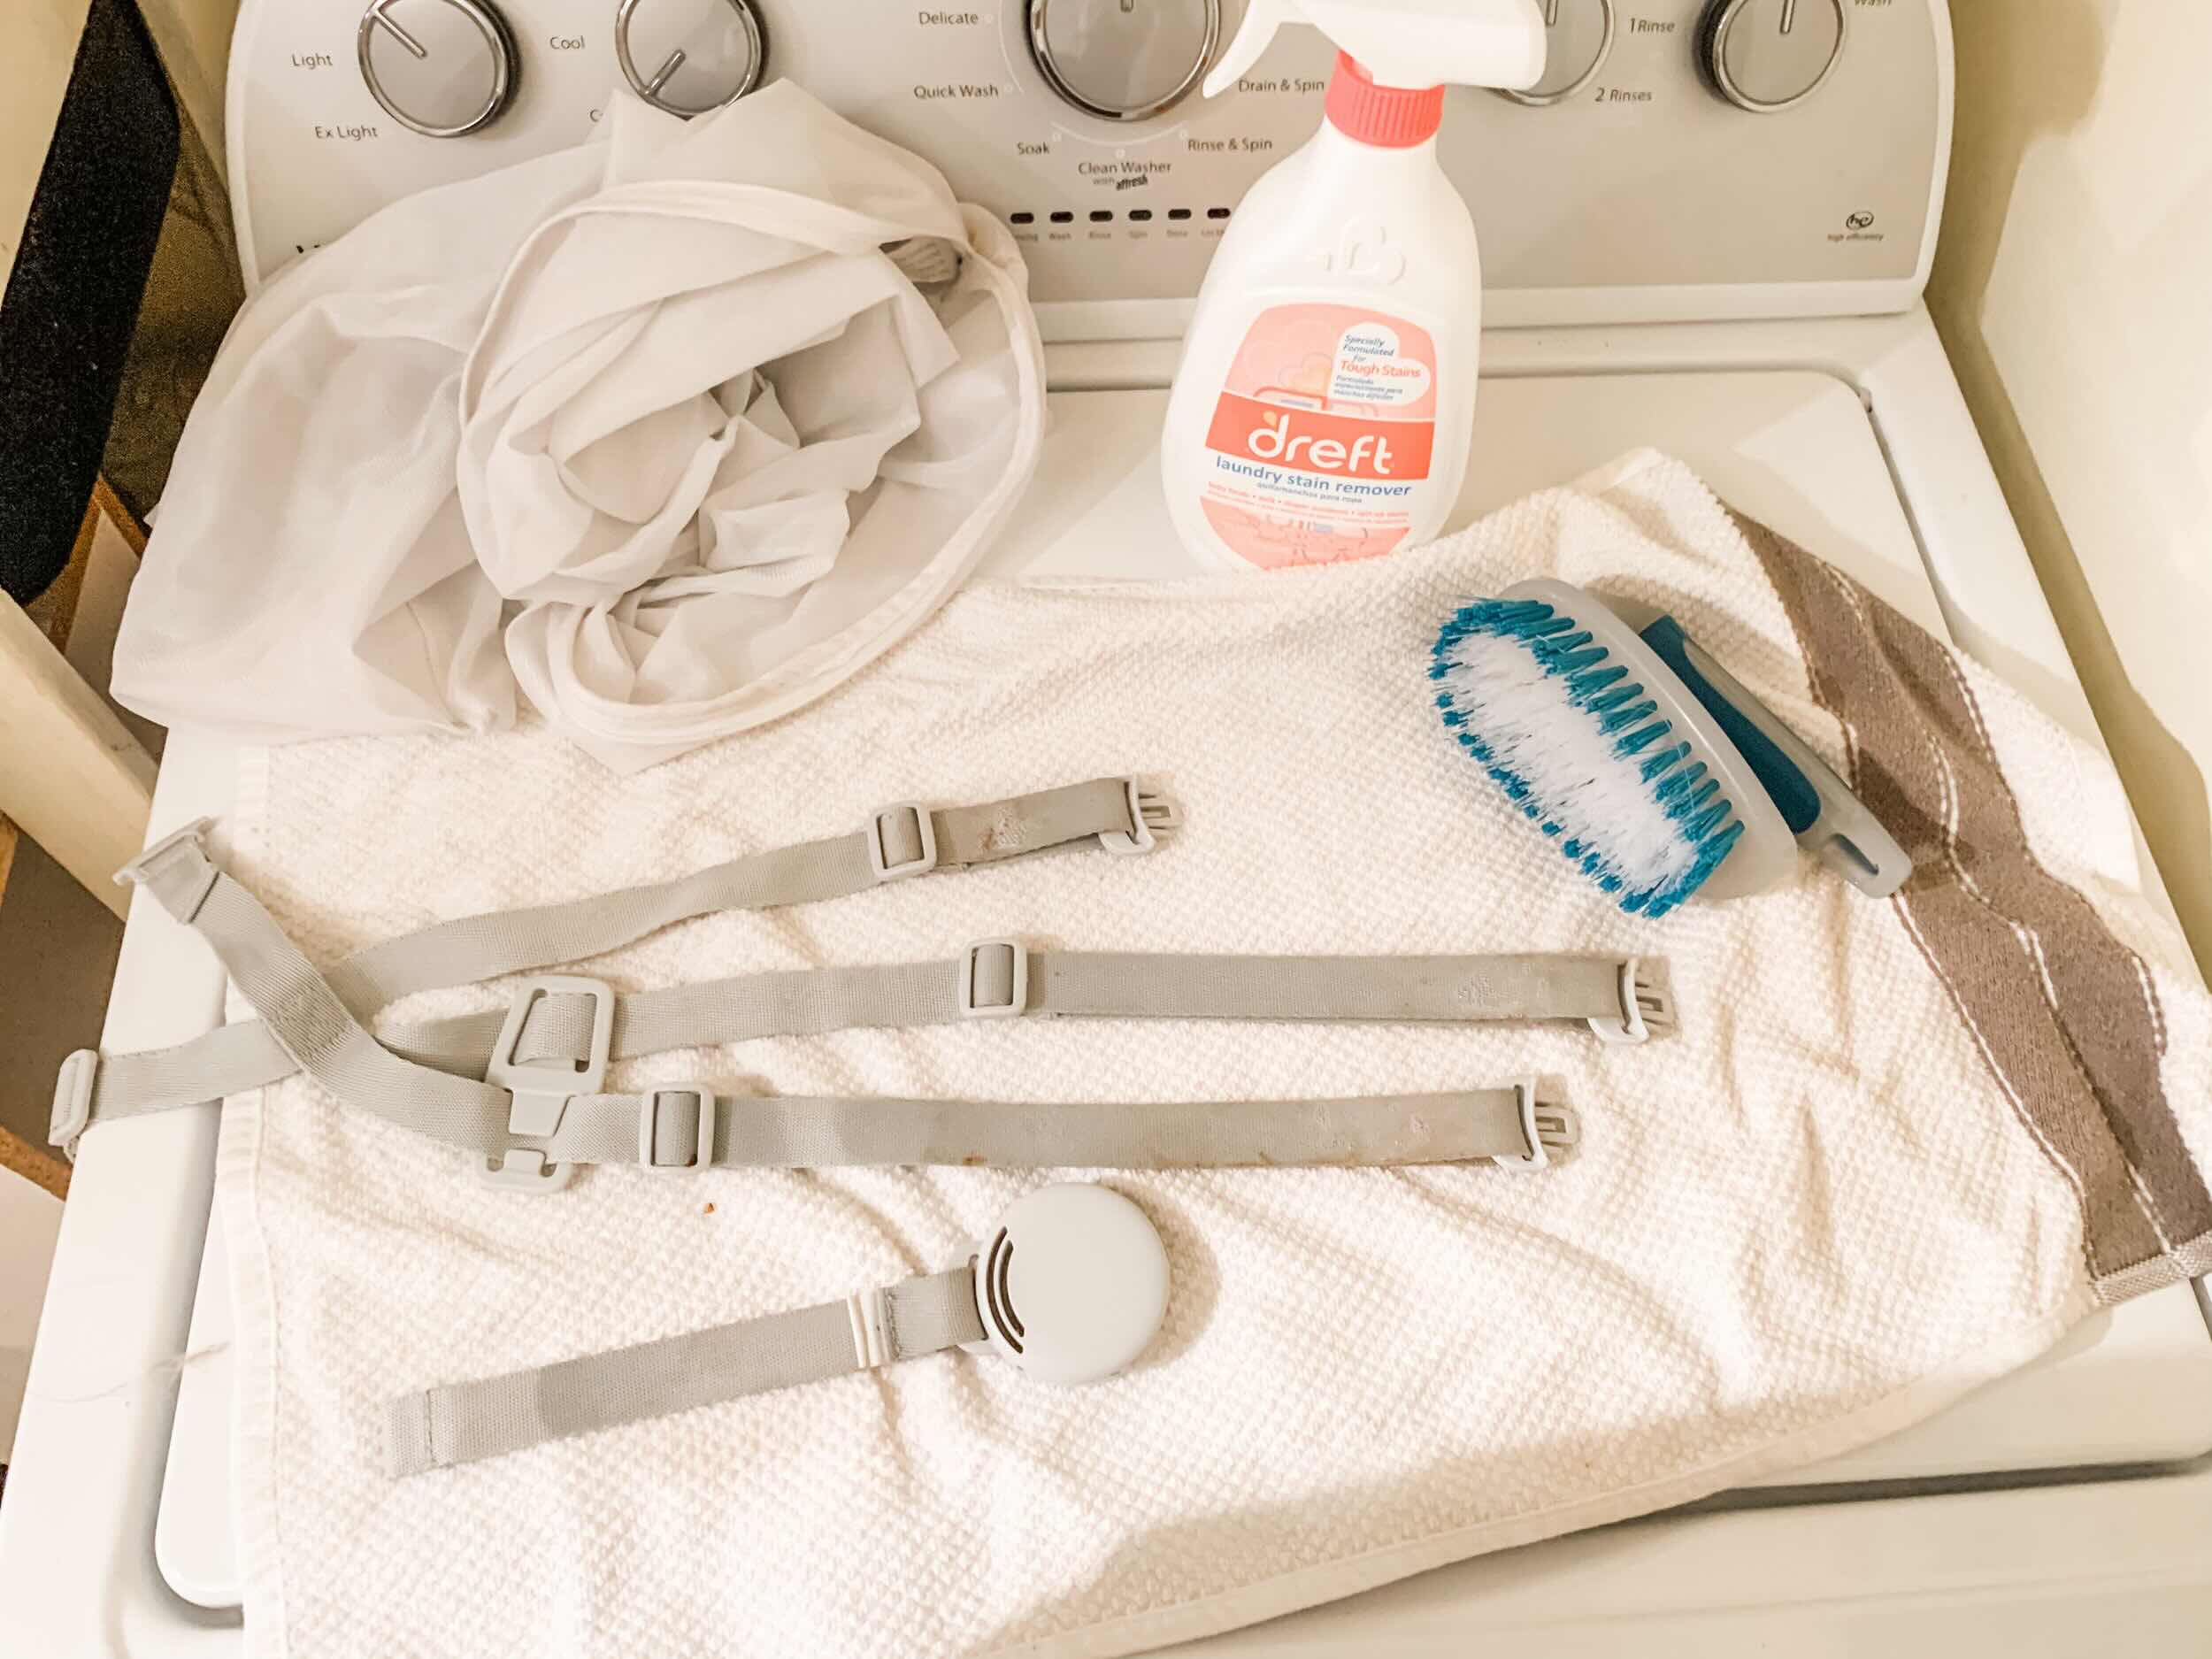
Step 2: Remove the harness straps
Removing the harness straps is a crucial step in the process of taking off the cover of your Graco high chair. The harness straps are designed to secure your child safely in the high chair, and detaching them is necessary to access and remove the cover effectively. Here's a detailed guide on how to remove the harness straps with precision and care:
-
Position the High Chair: Begin by placing the Graco high chair on a stable surface, ensuring that it is secure and will not tip over during the removal process. This step is essential for both your safety and the integrity of the high chair.
-
Locate the Harness Buckle: Identify the harness buckle, which is typically located at the back of the high chair seat. Depending on the specific model of your Graco high chair, the buckle may be secured with snaps or clips.
-
Unfasten the Straps: Carefully unfasten the harness straps from the buckle, ensuring that there are no twists or tangles in the straps. Gently pull the straps through the buckle to release them completely.
-
Remove the Shoulder Straps: Once the buckle is undone, locate the attachment points of the shoulder straps on the back of the high chair. These attachment points may be secured with snaps or loops. Unfasten the shoulder straps from these points, allowing them to hang freely.
-
Detach the Waist Straps: Similarly, locate the attachment points of the waist straps at the base of the high chair seat. Depending on the design, these attachment points may be secured with snaps or loops. Unfasten the waist straps from these points, ensuring that they are completely detached.
-
Organize the Straps: As you remove the harness straps, it's important to keep them organized and tangle-free. Consider securing the straps together with a twist tie or placing them in a small bag to prevent them from getting tangled or misplaced.
By following these steps, you can effectively remove the harness straps from your Graco high chair, paving the way for the subsequent steps in the cover removal process. With the harness straps detached, you are now ready to proceed to the next phase of removing the cover from your high chair.
Now that the harness straps have been successfully removed, let's move on to the next step in the process of taking off the cover of your Graco high chair.
Step 3: Unsnap the cover from the chair
With the harness straps successfully removed, the next pivotal step in the process of taking off the cover of your Graco high chair is unsnapping the cover from the chair. This step requires attention to detail and a methodical approach to ensure that the cover is detached without causing any damage. Here's a detailed guide on how to unsnap the cover from the chair with precision and care:
-
Identify the Snap Fasteners: Begin by carefully examining the underside of the high chair seat to locate the snap fasteners securing the cover. These snap fasteners are designed to hold the cover in place and may be positioned at strategic points around the perimeter of the seat.
-
Release the Snap Fasteners: Using your fingers or a flat-edged tool, gently release each snap fastener by applying pressure to unsnap them from their corresponding sockets. It's important to exercise caution and avoid using excessive force to prevent any damage to the cover or the chair.
-
Work Methodically: As you release each snap fastener, work methodically around the perimeter of the seat, ensuring that all snap fasteners are fully disengaged. Take your time to carefully inspect and locate each snap fastener, maintaining a steady and deliberate approach.
-
Handle with Care: Throughout the process of unsnapping the cover, handle the cover and the chair with care to avoid any unnecessary strain or stress. By being mindful of the materials and components, you can ensure that the cover is detached smoothly and without any unintended damage.
-
Inspect for Additional Fastenings: In some instances, there may be additional fastenings or attachments securing the cover to the chair frame. These may include Velcro straps or other securing mechanisms. Thoroughly inspect the underside of the seat to identify and release any additional fastenings as needed.
-
Remove the Cover: Once all snap fasteners and additional fastenings have been released, carefully lift the cover away from the chair, ensuring that it is completely detached. Take note of any specific areas where the cover may be tucked or secured, and gently maneuver it to free it from the chair.
By following these detailed steps, you can effectively unsnap the cover from your Graco high chair, setting the stage for the subsequent phases of the cover removal process. With the cover successfully detached, you are now ready to proceed to the next crucial step in the process of taking off the cover from your high chair.
Now that the cover has been successfully unsnapped from the chair, let's move on to the next step in the process of removing the cover of your Graco high chair.
To take the Graco high chair cover off, start by removing the harness straps and then unhook the cover from the frame. Check the manual for specific instructions.
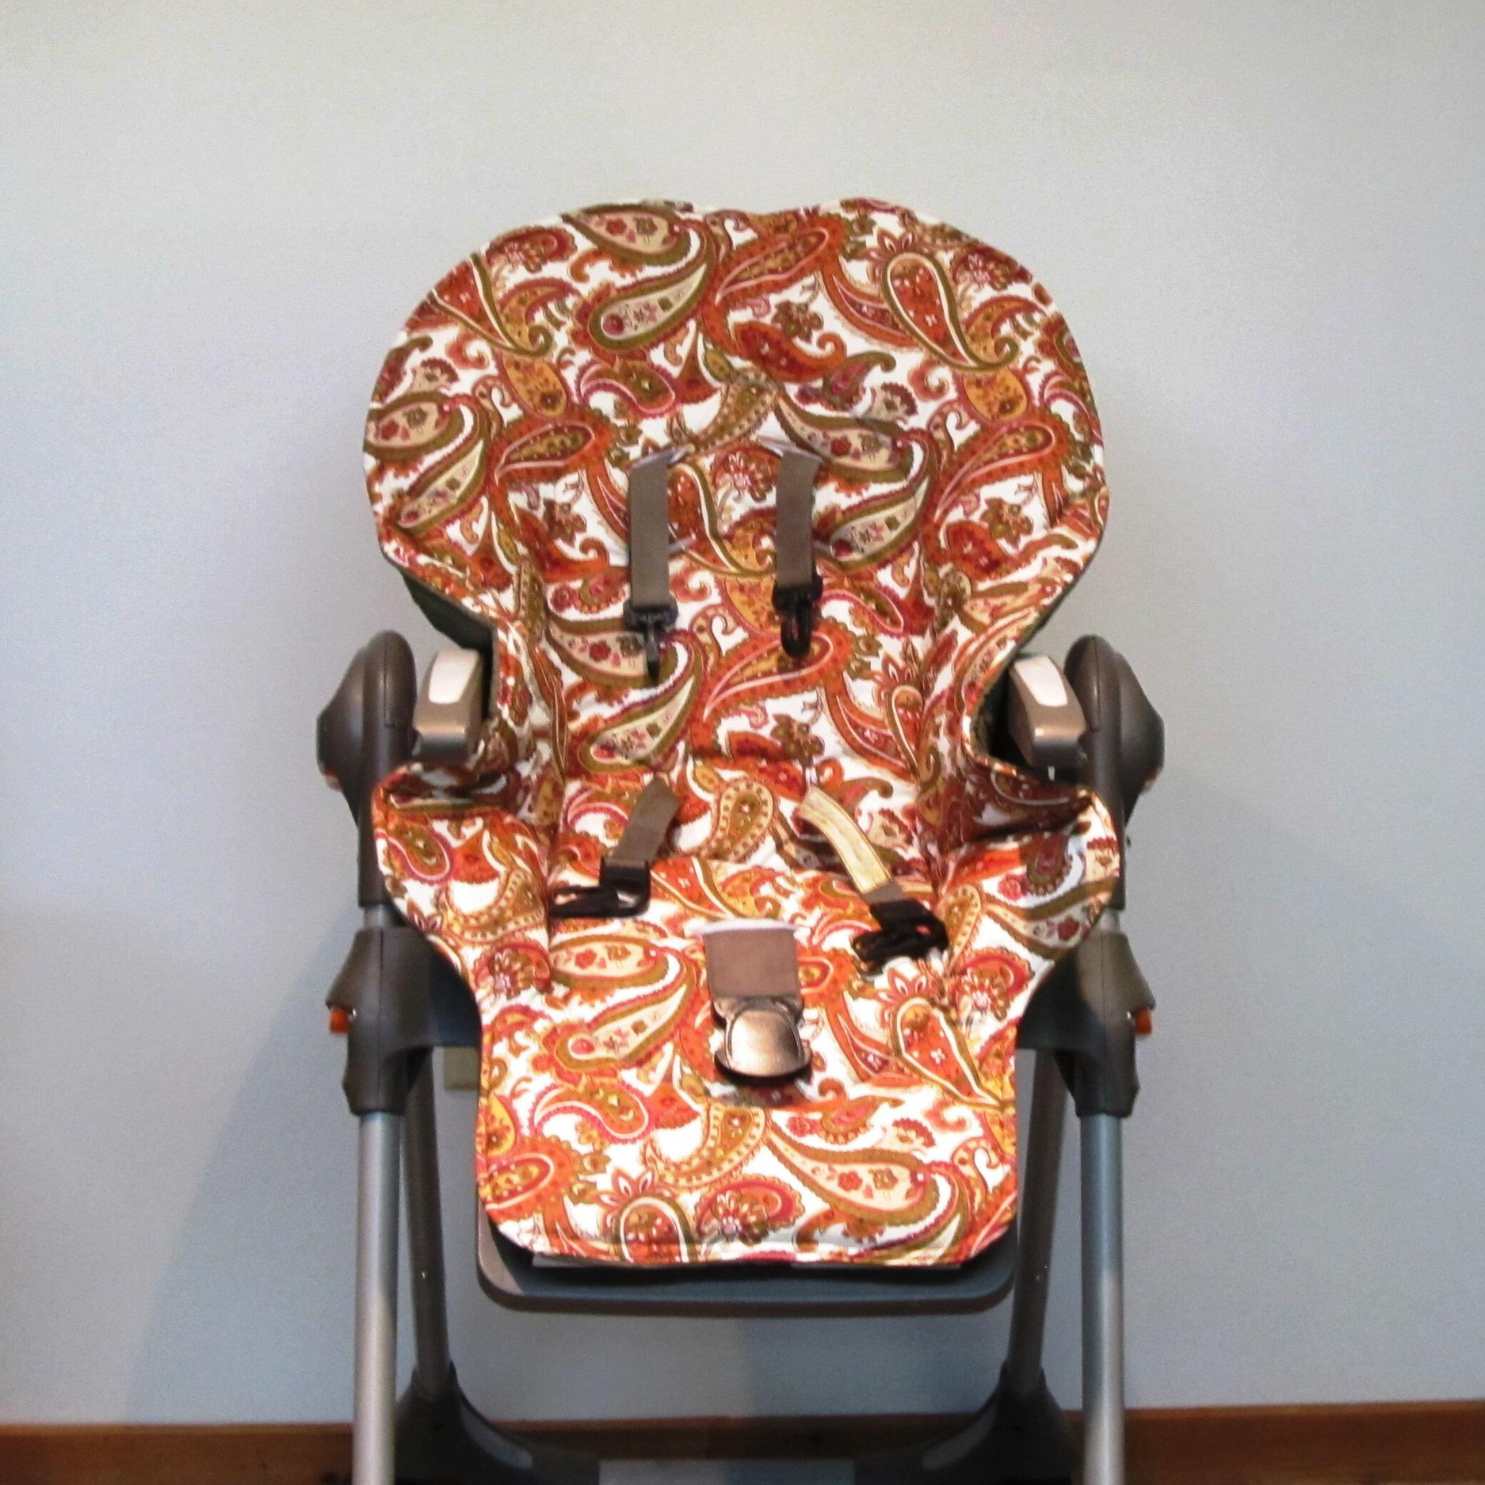
Step 4: Remove the cover from the seat pad
Removing the cover from the seat pad of your Graco high chair is a pivotal step in the process of refreshing or replacing the cover. This step requires attention to detail and a methodical approach to ensure that the cover is detached without causing any damage. Here's a detailed guide on how to remove the cover from the seat pad with precision and care:
-
Inspect the Seat Pad: Begin by carefully examining the seat pad to identify any securing mechanisms or attachments holding the cover in place. Depending on the specific model of your Graco high chair, the seat pad cover may be secured using Velcro, snaps, or other fastening methods.
-
Release the Fastenings: Once you have identified the securing mechanisms, proceed to release them systematically. If the cover is secured with Velcro, gently pull apart the Velcro strips to detach the cover from the seat pad. If snaps are used, carefully unsnap each fastener to free the cover.
-
Handle with Care: Throughout the process of removing the cover from the seat pad, handle the cover and the seat pad with care to avoid any unnecessary strain or damage. Be mindful of the materials and components, ensuring that the cover is detached smoothly and without causing any unintended harm to the seat pad.
-
Work Methodically: As you release the fastenings, work methodically around the perimeter of the seat pad, ensuring that all securing mechanisms are fully disengaged. Take your time to carefully inspect and release each fastening, maintaining a steady and deliberate approach.
-
Free the Cover: Once all fastenings have been released, carefully lift the cover away from the seat pad, ensuring that it is completely detached. Take note of any specific areas where the cover may be tucked or secured, and gently maneuver it to free it from the seat pad.
-
Inspect for Cleaning or Replacement: With the cover removed from the seat pad, take the opportunity to inspect it for any stains, spills, or signs of wear. If your intention is to clean the cover, proceed with the appropriate cleaning methods based on the manufacturer's guidelines. Alternatively, if you are replacing the cover, ensure that the new cover is readily available for installation.
By following these detailed steps, you can effectively remove the cover from the seat pad of your Graco high chair, setting the stage for the subsequent phases of the cover removal process. With the cover successfully detached from the seat pad, you are now ready to proceed to the next crucial step in the process of taking off the cover from your high chair.
Read more: How To Fold Graco Slim Snacker High Chair
Step 5: Clean the cover
Once the cover has been removed from the seat pad of your Graco high chair, it's an opportune time to address any stains, spills, or general dirt that may have accumulated over time. Cleaning the cover is essential not only for maintaining a hygienic environment but also for prolonging the lifespan of the cover itself. Here's a detailed guide on how to effectively clean the cover with precision and care:
-
Assess the Cleaning Needs: Begin by assessing the condition of the cover to determine the extent of cleaning required. Identify any specific areas of staining or soiling, taking note of the fabric type and any manufacturer's cleaning recommendations.
-
Follow Manufacturer's Guidelines: If the manufacturer has provided specific cleaning instructions for the cover, it's crucial to adhere to these guidelines. This may include recommended cleaning agents, washing temperatures, and any precautions to be observed during the cleaning process.
-
Spot Treatment: For localized stains or spills, consider spot-treating the affected areas with a mild detergent or stain remover. Gently dab the cleaning solution onto the stained areas and allow it to sit for the recommended duration before gently blotting with a clean cloth.
-
Machine Wash (If Applicable): If the cover is machine washable, carefully place it in the washing machine according to the manufacturer's instructions. Use a gentle cycle and a mild detergent to ensure that the fabric is cleaned effectively without causing damage.
-
Hand Wash (If Applicable): For covers that require hand washing, prepare a solution of mild detergent and lukewarm water in a clean basin or sink. Gently agitate the cover in the soapy water, paying particular attention to any soiled areas. Rinse thoroughly with clean water to remove any detergent residue.
-
Air Drying: Once the cover has been cleaned, it's essential to allow it to air dry thoroughly. Lay the cover flat or hang it in a well-ventilated area, avoiding direct sunlight or heat sources that may cause shrinkage or damage to the fabric.
-
Inspect for Residual Stains: After the cover has dried, inspect it for any residual stains or spots. If necessary, repeat the cleaning process or target specific areas with additional spot treatment to ensure that the cover is thoroughly clean.
-
Ironing and Reassembly: If the cover requires ironing to remove wrinkles or creases, use a low heat setting and iron the fabric gently. Once the cover is clean and dry, proceed with reassembling it onto the seat pad of the high chair.
By following these detailed steps, you can effectively clean the cover of your Graco high chair, ensuring that it remains fresh, hygienic, and ready for continued use. Taking the time to clean the cover thoroughly contributes to a safe and comfortable environment for your child, while also preserving the overall quality and appearance of the high chair. Now that the cover has been cleaned, you are ready to proceed with reassembling the high chair and enjoying the refreshed and revitalized seating space for your little one.
Step 6: Reassemble the high chair
With the cover of your Graco high chair now clean and refreshed, the final step in the process involves reassembling the high chair to ensure that it is fully functional and ready for use. Reassembling the high chair is a critical phase that requires attention to detail and a methodical approach to ensure that each component is securely in place. Here's a detailed guide on how to effectively reassemble the high chair with precision and care:
-
Prepare the Seat Pad: Lay the clean cover flat and ensure that it is free of any wrinkles or creases. If necessary, gently iron the cover using a low heat setting to achieve a smooth and tidy appearance.
-
Position the Seat Pad: Place the seat pad on a clean, flat surface, ensuring that it is oriented correctly to align with the high chair frame. Smooth out the cover to ensure that it fits snugly and uniformly over the seat pad.
-
Secure the Cover: If the cover is designed with snap fasteners or Velcro attachments, carefully secure it to the seat pad, ensuring that it is evenly positioned and taut. Take care to align the cover with any specific contours or edges of the seat pad for a neat and tailored fit.
-
Reattach the Harness Straps: Begin by reattaching the harness straps to the high chair. Secure the waist straps to the base of the seat, ensuring that they are threaded through the appropriate slots or attachment points. Next, fasten the shoulder straps to the backrest of the high chair, ensuring that they are positioned securely.
-
Check for Stability and Security: Once the cover and harness straps are in place, carefully inspect the high chair to ensure that the cover is securely attached and that the harness straps are properly fastened. Gently tug on the straps to verify their stability and ensure that they provide a secure restraint for your child.
-
Inspect and Test: Before placing your child in the high chair, perform a thorough inspection of the reassembled components. Check for any loose fastenings, misalignments, or irregularities that may require adjustment. Once satisfied, gently test the high chair for stability and comfort.
By following these detailed steps, you can effectively reassemble the high chair, ensuring that it is restored to its optimal condition for your child's use. Taking the time to reassemble the high chair with care and precision contributes to a safe and reliable seating space for your little one, allowing them to enjoy meals and activities with comfort and security. Now that the high chair has been successfully reassembled, it is ready to provide a secure and inviting space for your child's daily routines.
Conclusion
In conclusion, the process of taking off the cover of your Graco high chair is a manageable task that can be approached with confidence and a systematic approach. By following the step-by-step guide outlined in this comprehensive article, you have gained valuable insights into the essential procedures for removing, cleaning, and reassembling the cover, ensuring that your high chair remains a safe and hygienic space for your child.
Throughout the process, the importance of gathering the necessary tools, including a screwdriver, cleaning supplies, and a suitable work area, has been emphasized. This proactive step sets the stage for a smooth and efficient cover removal process, allowing you to approach each subsequent step with confidence and preparedness.
The detailed instructions for removing the harness straps, unsnapping the cover from the chair, and detaching the cover from the seat pad have provided you with a clear roadmap for navigating each phase of the cover removal process. By handling each step with care and precision, you have ensured that the cover is removed effectively without causing any damage to the high chair or the cover itself.
Furthermore, the guide on cleaning the cover has equipped you with the knowledge and methods to address any stains, spills, or general dirt that may have accumulated over time. By following the recommended cleaning techniques and adhering to manufacturer's guidelines, you have taken proactive steps to maintain a hygienic and inviting seating space for your child.
Finally, the process of reassembling the high chair has underscored the importance of attention to detail and a methodical approach. By carefully securing the cover to the seat pad and reattaching the harness straps, you have restored the high chair to its optimal condition, ensuring that it provides a secure and comfortable space for your child's daily activities.
In essence, the process of taking off the cover of your Graco high chair is not only a practical endeavor but also a proactive step in maintaining a safe and inviting environment for your child. By following the comprehensive guide provided in this article, you have gained the knowledge and confidence to navigate each phase of the cover removal process with ease and effectiveness. As a result, you can take pride in knowing that your high chair remains a reliable and secure space for your child to enjoy meal times and activities with comfort and peace of mind.
Frequently Asked Questions about How To Take Graco High Chair Cover Off
Was this page helpful?
At Storables.com, we guarantee accurate and reliable information. Our content, validated by Expert Board Contributors, is crafted following stringent Editorial Policies. We're committed to providing you with well-researched, expert-backed insights for all your informational needs.


0 thoughts on “How To Take Graco High Chair Cover Off”