Home>Renovation & DIY>Home Renovation Guides>How To Get Rid Of Crawl Space Smell In House

Home Renovation Guides
How To Get Rid Of Crawl Space Smell In House
Modified: February 18, 2024
Learn effective methods to eliminate crawl space smell in your house with our comprehensive home renovation guide. Say goodbye to unpleasant odors for good!
(Many of the links in this article redirect to a specific reviewed product. Your purchase of these products through affiliate links helps to generate commission for Storables.com, at no extra cost. Learn more)
Identifying the Source of the Crawl Space Smell
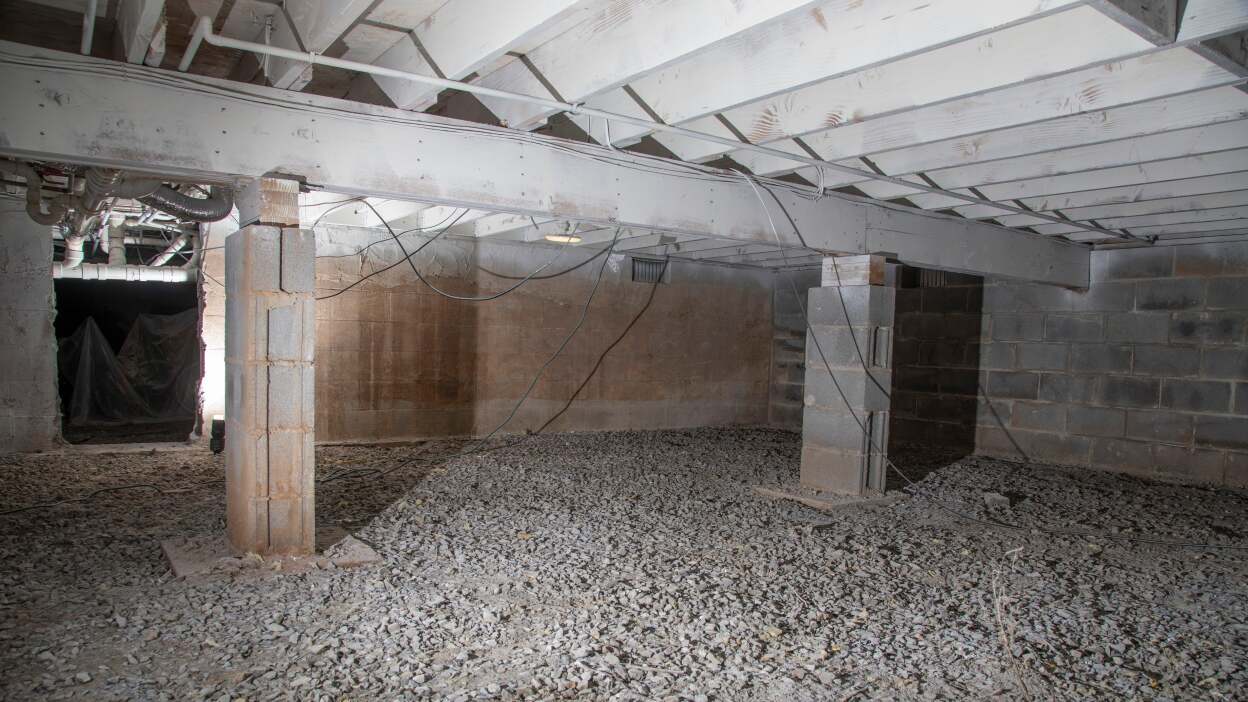
The presence of a foul odor in your home can be quite distressing, and often, the source of the problem lies within the crawl space. Identifying the cause of the unpleasant smell is the crucial first step in addressing this issue effectively.
-
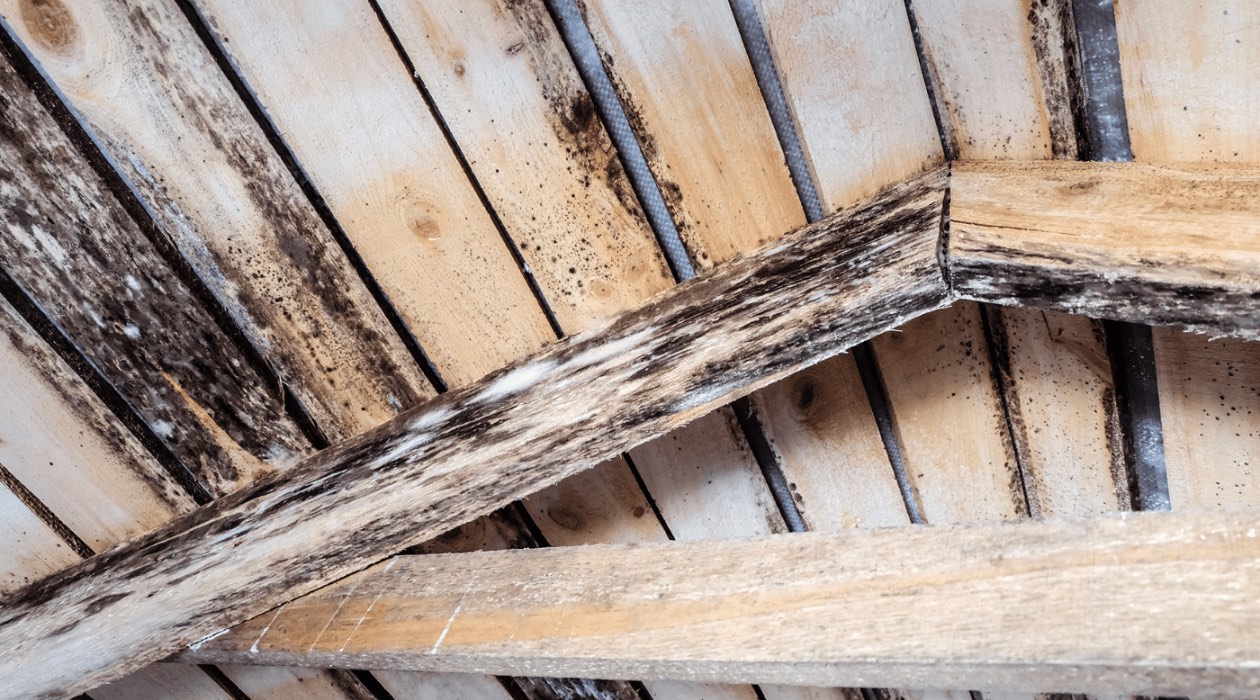
Inspecting for Moisture and Mold: The musty odor commonly associated with crawl spaces is often indicative of excess moisture and mold growth. Begin by inspecting the crawl space for any signs of water accumulation or dampness. Look for water stains, condensation on surfaces, or visible mold growth on the walls, floor, or ceiling. These are telltale signs that moisture-related issues are contributing to the unpleasant smell.
-
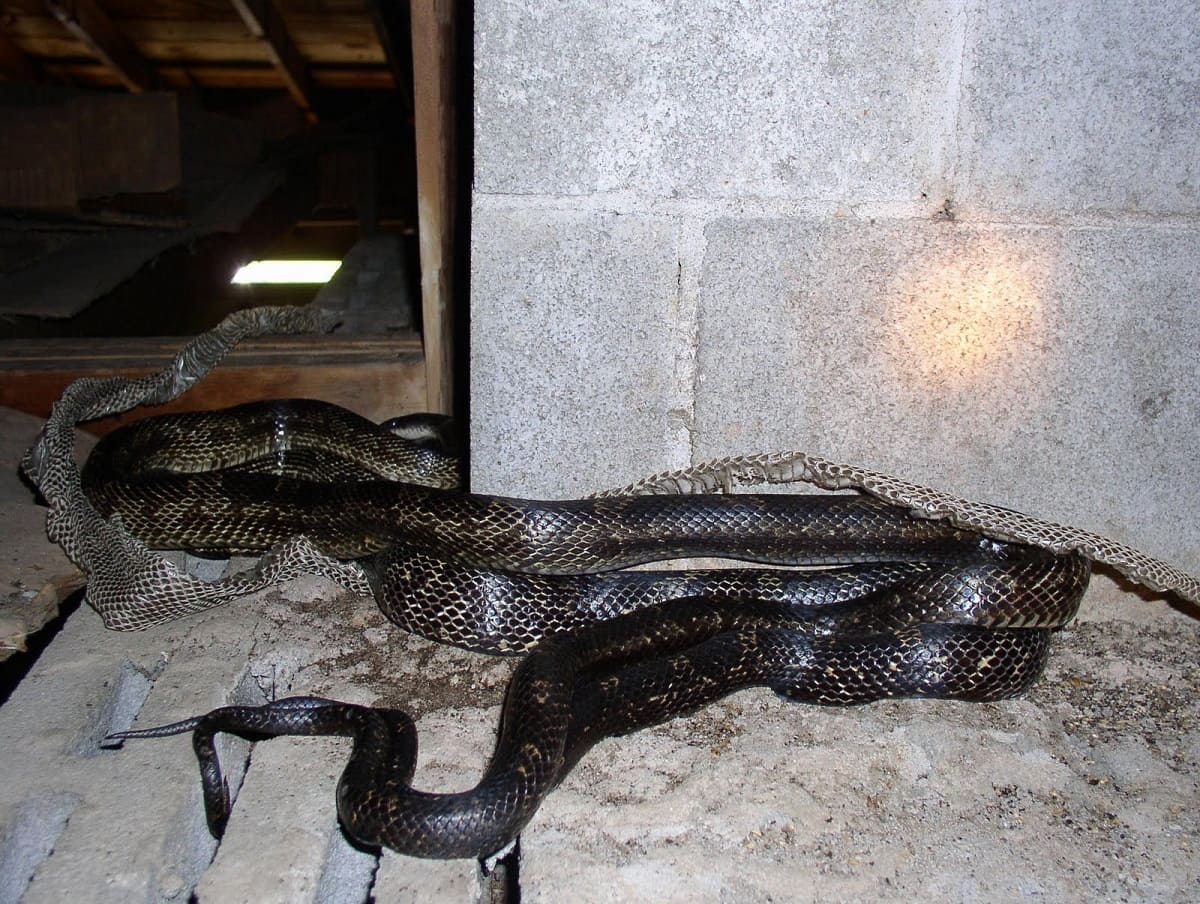
Checking for Pest Infestations: Another common source of crawl space odors is pest infestations. Rodents, insects, and other pests can leave behind droppings, urine, and decaying matter, all of which can emit strong and unpleasant odors. Inspect the crawl space for any signs of pest activity, such as droppings, gnaw marks, or nests, to determine if this is the source of the smell.
-
Assessing Ventilation and Air Circulation: Poor ventilation and inadequate air circulation in the crawl space can also lead to stagnant, musty air that permeates into the living spaces above. Check for blocked or insufficient vents, as well as any obstructions that may be impeding the flow of fresh air into the crawl space.
-
Evaluating the Condition of Insulation and Building Materials: Deteriorating insulation, wood rot, or decaying building materials can emit unpleasant odors. Inspect the insulation for signs of damage, moisture saturation, or pest activity. Additionally, check for any structural issues or water damage that may be contributing to the smell.
By carefully assessing these potential sources of the crawl space smell, you can gain valuable insights into the underlying issues that need to be addressed. Once the root cause has been identified, you can proceed with targeted solutions to eliminate the odor and create a healthier, more pleasant living environment.
Key Takeaways:
- Say goodbye to crawl space odors by identifying and addressing moisture, mold, pest infestations, and ventilation issues. Creating a healthier living environment starts with tackling the root causes of unpleasant smells.
- Combat crawl space odors with moisture and mold removal, improved ventilation, encapsulation, and vapor barrier installation. These proactive steps not only eliminate odors but also enhance indoor air quality and energy efficiency.
Read more: How To Get Rid Of Fungus In A Crawl Space
Removing Moisture and Mold from the Crawl Space
Excess moisture and mold growth in the crawl space not only contribute to unpleasant odors but also pose potential health risks and structural damage to your home. Addressing these issues effectively is crucial for creating a clean and healthy living environment. Here's how you can tackle the removal of moisture and mold from the crawl space:
-
Moisture Assessment: Begin by conducting a thorough assessment of the crawl space to identify areas of excessive moisture. Look for signs of water intrusion, such as pooling water, damp surfaces, or water stains. Use a moisture meter to measure the moisture levels in different areas of the crawl space, pinpointing the areas that require immediate attention.
-
Repairing Water Leaks: Address any sources of water leaks or intrusion that may be contributing to the moisture problem. This may involve repairing damaged pipes, sealing foundation cracks, or redirecting surface water away from the foundation. By preventing water from entering the crawl space, you can effectively reduce the moisture levels.
-
Mold Remediation: If mold growth is present in the crawl space, it's essential to initiate mold remediation procedures. This typically involves the thorough cleaning and disinfection of affected surfaces to remove mold spores and prevent regrowth. Protective gear, such as gloves, a mask, and goggles, should be worn during this process to minimize exposure to mold spores.
-
Improving Ventilation: Enhancing the ventilation in the crawl space is crucial for reducing moisture levels and preventing mold growth. Ensure that vents are unobstructed and functioning properly to facilitate the flow of fresh air. Consider installing a dehumidifier to regulate humidity levels and promote a drier environment.
-
Encapsulation and Waterproofing: For long-term moisture control, encapsulating the crawl space and implementing waterproofing measures can be highly effective. This involves sealing the crawl space with a durable vapor barrier to prevent moisture from seeping through the ground and walls. Additionally, waterproofing the exterior foundation can further safeguard the crawl space against water intrusion.
By systematically addressing moisture issues and implementing targeted mold remediation strategies, you can effectively eliminate the root causes of the unpleasant crawl space smell. Not only will this improve indoor air quality and create a more comfortable living environment, but it will also protect your home from the detrimental effects of excess moisture and mold.
Sealing and Insulating the Crawl Space
Sealing and insulating the crawl space is a critical step in creating a healthier and more energy-efficient home environment. By effectively sealing off the crawl space from external elements and insulating it against temperature fluctuations, you can significantly improve indoor air quality, enhance structural integrity, and reduce energy consumption. Here's a detailed look at the key aspects of sealing and insulating the crawl space:
Assessing the Crawl Space Environment
Before embarking on the sealing and insulation process, it's essential to assess the current condition of the crawl space. This involves inspecting the walls, floor, and ceiling for any signs of air leaks, moisture intrusion, or structural vulnerabilities. Additionally, evaluating the existing insulation and its effectiveness in regulating temperature and moisture levels is crucial for determining the necessary improvements.
Sealing Air Leaks and Vents
One of the primary objectives of sealing the crawl space is to eliminate air leaks that can allow external air, moisture, and contaminants to infiltrate the space. Begin by sealing off any gaps, cracks, or openings in the walls, foundation, and around utility penetrations using a durable sealant or insulation material. Additionally, ensure that crawl space vents are properly sealed or equipped with vent covers to prevent unwanted air exchange between the crawl space and the exterior.
Read more: How To Get Rid Of Spiders In A Crawl Space
Insulating the Crawl Space
Insulation plays a pivotal role in regulating temperature and moisture levels within the crawl space, as well as in the adjacent living areas. Opt for high-quality insulation materials that are suitable for the crawl space environment, such as rigid foam boards, spray foam, or fiberglass insulation. Install insulation along the walls, floor, and ceiling of the crawl space to create a thermal barrier that minimizes heat transfer and prevents condensation.
Vapor Barrier Installation
In conjunction with insulation, installing a vapor barrier is essential for controlling moisture and preventing water vapor from permeating through the crawl space surfaces. A durable vapor barrier, typically made of polyethylene or similar materials, should be carefully installed to cover the ground and walls of the crawl space, creating a moisture-resistant barrier that safeguards against dampness and mold growth.
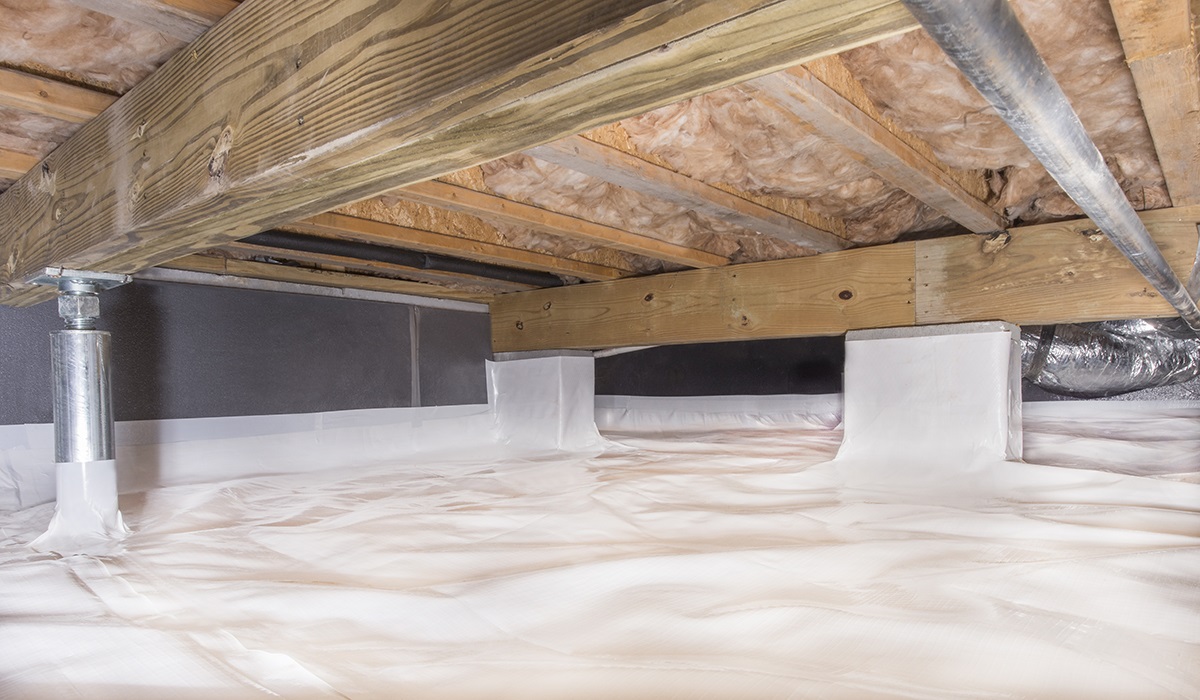
Encapsulating the Crawl Space
For comprehensive protection, encapsulating the crawl space with a robust encapsulation system can provide long-term benefits. This involves sealing the crawl space with a high-quality encapsulation liner, ensuring airtightness, and further enhancing moisture control. By encapsulating the crawl space, you can create a clean, conditioned space that contributes to improved indoor air quality and energy efficiency.
By meticulously sealing and insulating the crawl space, you can effectively mitigate the entry of external contaminants, regulate temperature and moisture levels, and enhance the overall comfort and durability of your home. This proactive approach not only contributes to a healthier living environment but also yields long-term energy savings and structural preservation.
Installing a Vapor Barrier
Installing a vapor barrier in the crawl space is a fundamental step in controlling moisture and safeguarding the structural integrity of your home. A vapor barrier, typically made of polyethylene or similar materials, serves as a protective barrier against moisture infiltration, preventing water vapor from permeating through the ground and walls of the crawl space. This essential component plays a pivotal role in creating a drier, more controlled environment that mitigates the risk of mold growth, wood rot, and structural damage.
The process of installing a vapor barrier involves meticulous attention to detail and adherence to best practices to ensure its effectiveness. Here's a comprehensive guide to the key steps involved in installing a vapor barrier in the crawl space:
Read more: How To Get Rid Of Fireplace Smell In House
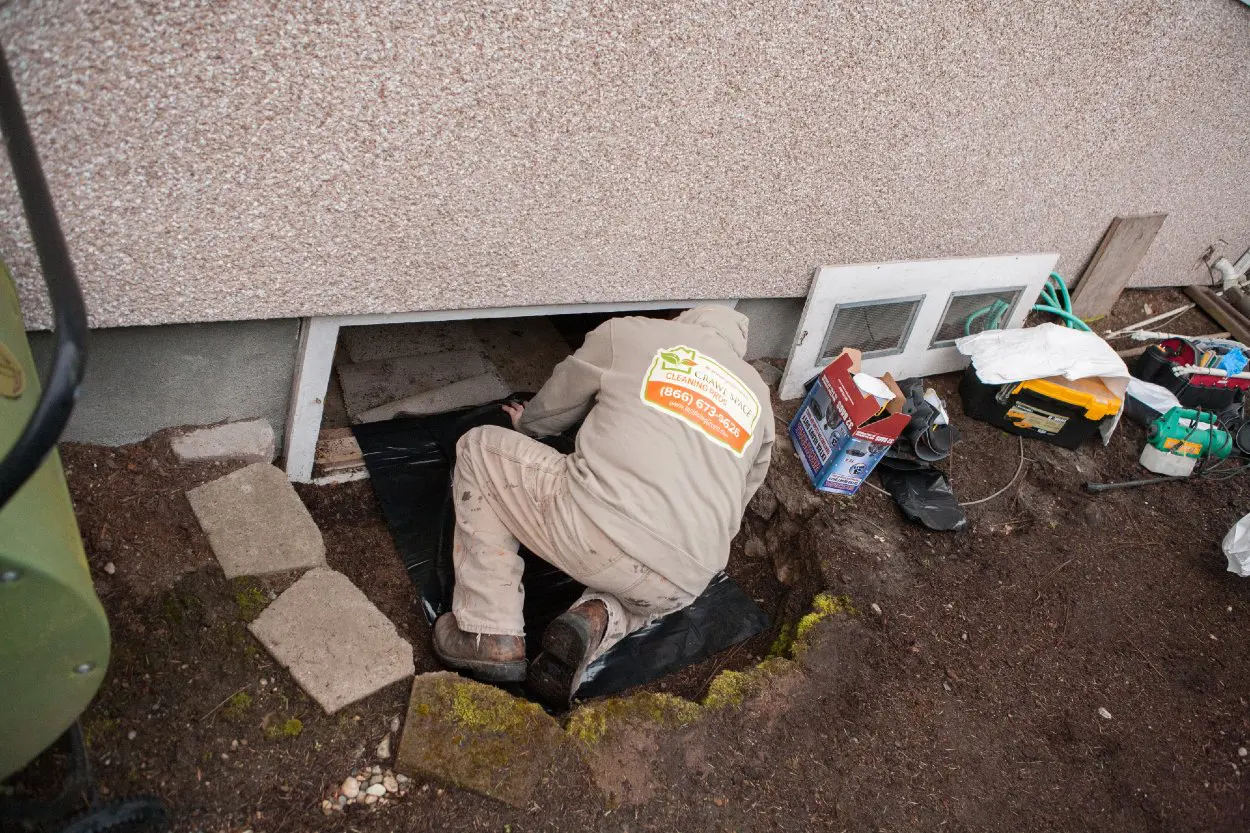
Preparing the Crawl Space
Before installing the vapor barrier, it's crucial to prepare the crawl space by clearing any debris, obstructions, or existing insulation materials. The crawl space should be clean, dry, and free of any potential sources of moisture or contaminants. Additionally, addressing any existing moisture issues and ensuring proper drainage and ventilation are essential preparatory measures.
Selecting the Vapor Barrier Material
Choosing the right vapor barrier material is paramount to its performance and longevity. Opt for a high-quality, durable vapor barrier that is specifically designed for crawl space applications. The material should be resistant to tears, punctures, and degradation, ensuring long-term effectiveness in moisture control.
Measuring and Cutting the Vapor Barrier
Accurately measuring the dimensions of the crawl space is essential for customizing the vapor barrier to fit the space precisely. Carefully cut the vapor barrier material to the appropriate size, allowing for sufficient coverage of the ground and walls. Overlapping seams and edges should be factored in to create a seamless, continuous barrier.
Securing the Vapor Barrier
Once the vapor barrier is cut to size, it should be securely fastened to the crawl space surfaces. Utilize adhesive tape, sealant, or mechanical fasteners to affix the vapor barrier to the ground and walls, ensuring a tight seal that prevents any moisture penetration. Attention to detail in securing the barrier is crucial for its overall effectiveness.
Read more: How To Get Rid Of Musty Smell In Closet
Sealing Joints and Edges
To maintain the integrity of the vapor barrier, all joints, seams, and edges must be meticulously sealed to prevent any gaps or openings. Use high-quality seam tape or sealant to create airtight seals, minimizing the risk of moisture seepage and ensuring comprehensive coverage.
Inspecting and Maintaining the Vapor Barrier
Regular inspections of the vapor barrier are essential to identify any signs of damage, wear, or displacement. Any issues should be promptly addressed to uphold the barrier's effectiveness in moisture control. Additionally, maintaining proper ventilation and addressing any underlying moisture sources are crucial for maximizing the vapor barrier's performance.
By following these meticulous steps and ensuring the proper installation of a vapor barrier, you can effectively create a moisture-resistant environment in the crawl space, contributing to improved indoor air quality, structural preservation, and overall home comfort. The installation of a vapor barrier is a proactive measure that offers long-term benefits in mitigating moisture-related issues and enhancing the overall health and durability of your home.
Using Odor Absorbers and Air Fresheners in the House
In addition to addressing the root causes of crawl space odors, utilizing odor absorbers and air fresheners in the house can provide immediate relief from lingering smells and contribute to a more pleasant indoor environment. These solutions are particularly beneficial during the process of identifying and resolving underlying issues, as they help to mitigate the impact of odors on daily comfort. Here's a detailed exploration of the effective use of odor absorbers and air fresheners:
Odor Absorbers
Odor absorbers are designed to neutralize and eliminate unpleasant odors, rather than simply masking them with fragrances. Activated charcoal-based absorbers, for example, work by trapping odor molecules and impurities, effectively purifying the air. Placing odor absorbers strategically in areas affected by crawl space odors, such as near vents or in proximity to the source of the smell, can significantly reduce the perceptibility of the odors. Additionally, incorporating natural odor absorbers, such as baking soda or white vinegar, can help to absorb and neutralize odors in a cost-effective and environmentally friendly manner.
Read more: How To Get Rid Of Weed Smell In Closet
Air Fresheners
While odor absorbers target the elimination of odors, air fresheners are designed to impart pleasant scents, thereby enhancing the overall indoor ambiance. When selecting air fresheners, opt for products that utilize natural fragrances and essential oils, as these can contribute to a healthier indoor environment. Consider diffusing essential oils with antimicrobial properties, such as tea tree oil or eucalyptus, to not only mask odors but also purify the air. Furthermore, utilizing air fresheners with adjustable settings allows for controlled and consistent fragrance distribution, ensuring a balanced and non-overpowering scent experience.
Targeted Placement
Strategic placement of odor absorbers and air fresheners is key to maximizing their effectiveness. Positioning odor absorbers in close proximity to the crawl space access point, HVAC vents, or areas with poor air circulation can help intercept and neutralize odors before they permeate throughout the house. Similarly, placing air fresheners in central locations, such as the living room or kitchen, can help disperse pleasant scents throughout the home, creating a more inviting atmosphere.
Regular Maintenance
Consistent maintenance of odor absorbers and air fresheners is essential to ensure their ongoing efficacy. This includes replacing or recharging odor absorbers according to manufacturer recommendations and refreshing air freshener supplies to maintain a consistent and desirable scent profile. Additionally, periodic cleaning of air vents and ducts can prevent the accumulation of odors and enhance the overall performance of odor control measures.
By incorporating odor absorbers and air fresheners into the home environment, you can effectively mitigate the impact of crawl space odors while working towards comprehensive solutions. These measures provide immediate relief and contribute to a more enjoyable living space, complementing the efforts to address underlying issues and create a healthier, odor-free home environment.
Frequently Asked Questions about How To Get Rid Of Crawl Space Smell In House
Was this page helpful?
At Storables.com, we guarantee accurate and reliable information. Our content, validated by Expert Board Contributors, is crafted following stringent Editorial Policies. We're committed to providing you with well-researched, expert-backed insights for all your informational needs.


0 thoughts on “How To Get Rid Of Crawl Space Smell In House”