Home>Storage Ideas>Kitchen Storage>How To Clean An Instant Pot, Including The Parts You Might Miss
Kitchen Storage
How To Clean An Instant Pot, Including The Parts You Might Miss
Modified: September 2, 2024
Learn how to thoroughly clean your Instant Pot, including those often overlooked parts, with these essential kitchen storage ideas.
(Many of the links in this article redirect to a specific reviewed product. Your purchase of these products through affiliate links helps to generate commission for Storables.com, at no extra cost. Learn more)
Introduction
Welcome to the world of the Instant Pot! If you’re one of the millions of people who own this versatile kitchen appliance, you know how it has revolutionized meal preparation. From cooking tender meats to creating delectable desserts, the Instant Pot has become a trusted companion in many households. However, like any kitchen tool, it requires regular cleaning and maintenance to ensure optimal performance and longevity.
In this article, we will guide you through the process of cleaning an Instant Pot, paying special attention to the parts that are often overlooked. Whether you’re new to the Instant Pot or a seasoned user, our expert tips and techniques will help you keep your appliance in tip-top shape.
But before we delve into the cleaning process, let’s take a moment to understand the basic components of an Instant Pot.
Key Takeaways:
- Regularly cleaning and maintaining your Instant Pot is essential for its longevity, optimal performance, and the safety of your meals. Follow the expert tips and techniques to keep your appliance in excellent condition.
- Prioritize safety by following key precautions, such as unplugging the Instant Pot, allowing it to cool down, and handling the various parts with care. Incorporate regular maintenance habits to prevent odor buildup and optimize performance.
Read more: How To Do Hot Pot In Instant Pot
Understanding the Instant Pot
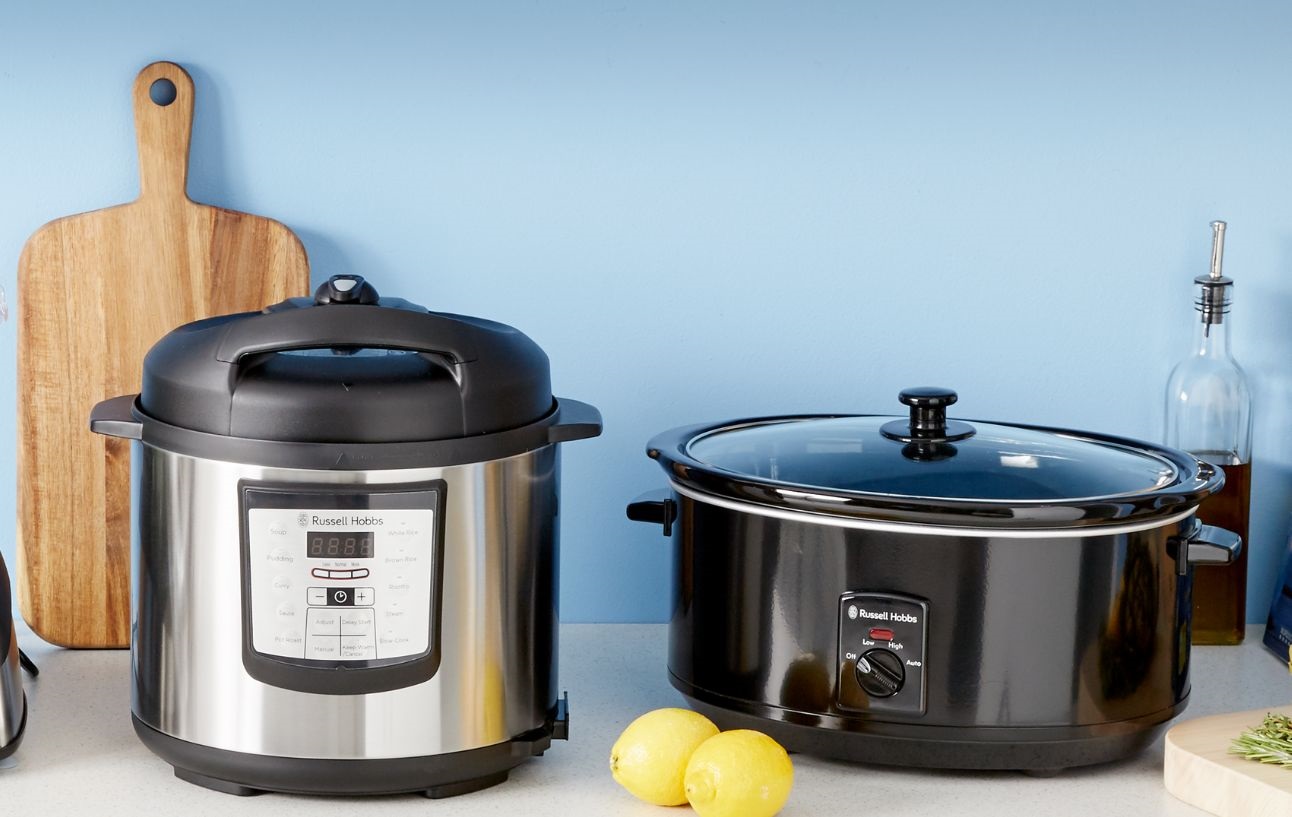
The Instant Pot is a multi-functional pressure cooker that combines the functions of several kitchen appliances, including a slow cooker, rice cooker, steamer, and yogurt maker. It’s designed to save time and energy while producing delicious and nutritious meals. The appliance consists of several key parts that need to be thoroughly cleaned and maintained to ensure optimal performance.
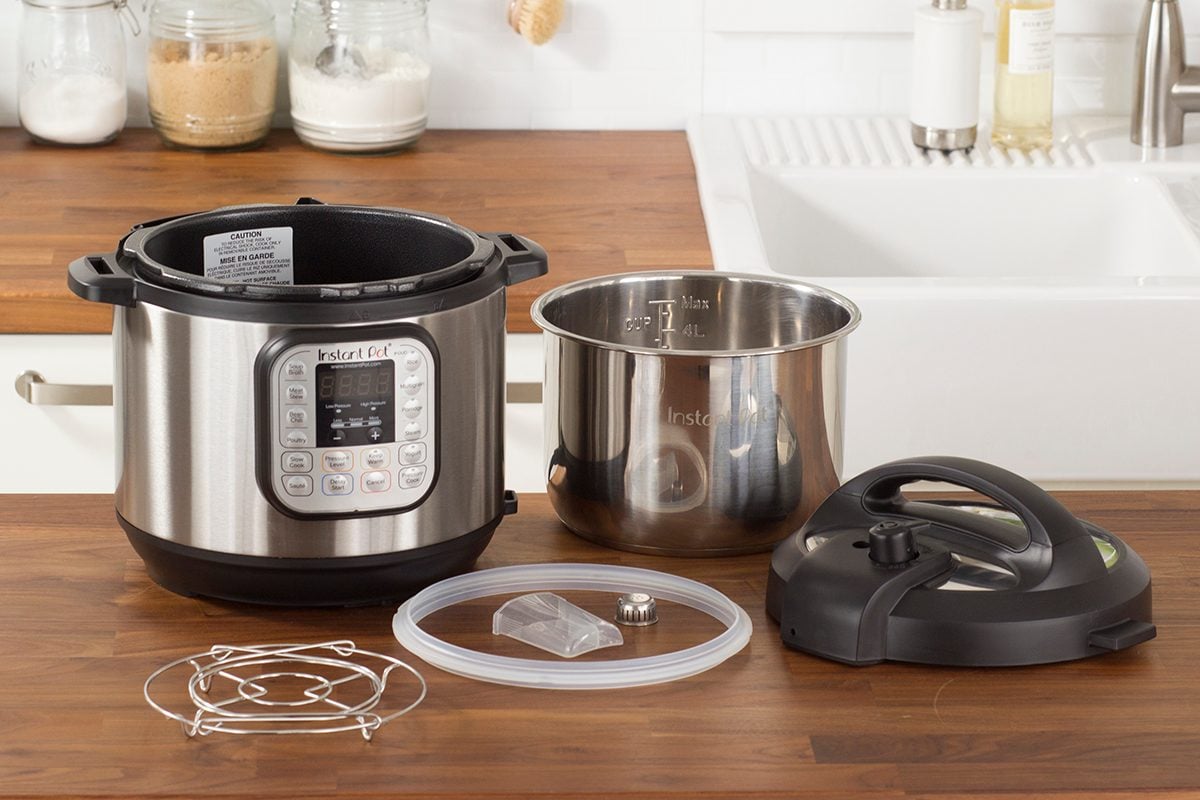
The main components of an Instant Pot include:
- Exterior: This is the outer casing of the Instant Pot, usually made of stainless steel. It’s important to keep the exterior clean, as it can accumulate dirt, grease, and fingerprints over time.
- Inner Pot: The inner pot is where you cook your food. It’s usually made of stainless steel or non-stick material. Cleaning the inner pot is essential to prevent residue buildup and ensure the longevity of the appliance.
- Lid: The lid of the Instant Pot features a sealing ring, a steam release valve, and a float valve. These parts play a crucial role in the cooking and safety functions of the appliance and require regular cleaning.
- Sealing Ring: The sealing ring creates an airtight seal during the cooking process. It can absorb odors and retain food particles, so it’s important to clean it thoroughly.
- Steam Release Valve: The steam release valve allows steam to escape during cooking and must be cleaned regularly to prevent clogging.
- Anti-Block Shield: The anti-block shield is located under the steam release valve and helps prevent food particles from clogging the steam release pipe.
- Condensation Collector: The condensation collector collects excess moisture that accumulates during cooking. It needs to be cleaned to maintain optimal performance.
- Float Valve: The float valve indicates the pressure level inside the Instant Pot and should be cleaned to ensure accurate pressure readings.
- Steam Rack: The steam rack is used for steaming food and should be cleaned to prevent cross-contamination and the buildup of food residue.
- Silicone Gasket: The silicone gasket forms a secure seal between the lid and the inner pot. It can absorb odors and should be cleaned to maintain its effectiveness and prevent flavor transfer.
- Control Panel: The control panel is the interface that allows you to set the cooking functions. It should be cleaned gently to avoid damaging the buttons and display.
Now that we have a clear understanding of the Instant Pot’s components, let’s move on to the cleaning process, starting with the exterior of the appliance.
Safety Precautions
Before you begin the cleaning process, it’s important to prioritize safety. Here are some key precautions to keep in mind:
- Unplug the Instant Pot: Always make sure that the Instant Pot is unplugged from the power source before starting the cleaning process. This eliminates the risk of electric shock or damage to the appliance.
- Allow the Instant Pot to Cool Down: After cooking, give the Instant Pot some time to cool down before cleaning. This will prevent burns or injuries caused by hot surfaces or steam.
- Take Out the Inner Pot: Remove the inner pot from the Instant Pot before cleaning. This makes it easier to clean both the inner pot and the exterior of the appliance.
- Do Not Submerge the Instant Pot: The Instant Pot is an electrical appliance and should not be submerged in water. Instead, use a damp cloth or sponge to clean the exterior and removable parts.
- Follow Manufacturer’s Instructions: Always consult the user manual for specific cleaning instructions provided by the manufacturer. Different models may have slightly different cleaning requirements.
- Be Gentle with Control Panel: When cleaning the control panel, avoid using abrasive materials or excessive force. Gently wipe with a soft cloth to avoid damaging the buttons and display.
- Ensure Proper Drying: After cleaning, make sure that all parts of the Instant Pot are thoroughly dried before reassembling. Moisture or water residue can compromise the functionality of the appliance.
- Inspect Sealing Ring: Regularly inspect the sealing ring for any signs of wear or damage. If it’s torn or cracked, replace it to maintain the proper seal during cooking.
By following these safety precautions, you can ensure a safe and effective cleaning process for your Instant Pot. Now, let’s move on to cleaning the different parts of the appliance, starting with the exterior.
Cleaning the Exterior
The exterior of the Instant Pot can accumulate dirt, grease, and fingerprints over time. Keeping the exterior clean not only enhances the appearance of the appliance but also helps maintain its longevity. Here’s how you can clean the exterior of your Instant Pot:
- Unplug the Instant Pot: Make sure the Instant Pot is unplugged from the power source before proceeding with the cleaning process.
- Wipe with a Damp Cloth: Use a damp microfiber cloth or sponge to gently wipe the exterior surfaces of the appliance. Be sure to wring out the cloth or sponge to avoid excessive moisture.
- Use Mild Detergent (if necessary): If there are stubborn stains or grease on the exterior, you can use a mild dish detergent. Apply a small amount of detergent to the cloth or sponge and gently scrub the affected area. Rinse the cloth or sponge and continue wiping to remove any soap residue.
- Dry with a Soft Cloth: After cleaning, use a soft, dry cloth to thoroughly dry the exterior surfaces of the Instant Pot. This prevents moisture buildup and potential damage to the appliance.
- Clean the Control Panel: To clean the control panel, gently wipe it with a soft, damp cloth. Avoid using abrasive materials or excessive force that may cause damage. Dry the control panel with a soft, dry cloth.
- Polish (optional): If you want to give the stainless steel exterior added shine, you can use a stainless steel cleaner or polish. Follow the manufacturer’s instructions to apply the cleaner or polish, and then buff the surface with a soft cloth to restore the stainless steel’s luster.
It’s important to note that you should never submerge the Instant Pot’s exterior in water or use abrasive cleaners, as this can damage the appliance.
Now that the exterior of your Instant Pot is sparkling clean, let’s move on to the next step: cleaning the inner pot.
Cleaning the Inner Pot
The inner pot of the Instant Pot is where you cook your food, so it’s crucial to keep it clean to maintain food safety and prevent residue buildup. Here’s how you can clean the inner pot of your Instant Pot:
- Remove Food Residue: After cooking, remove any leftover food or residue from the inner pot using a soft sponge or brush. Avoid using abrasive materials or scouring pads that can damage the pot’s surface.
- Soak in Warm, Soapy Water: Fill the sink or a basin with warm water and add a few drops of mild dish soap. Submerge the inner pot in the soapy water and let it soak for about 10-15 minutes. This will help loosen any stuck-on food or stains.
- Scrub Gently: After soaking, use a non-abrasive sponge or brush to gently scrub the inner pot. Pay extra attention to any areas with stubborn stains or residue. Be sure to scrub all sides of the pot, including the bottom and corners.
- Rinse Thoroughly: Once you’ve scrubbed the inner pot, rinse it thoroughly with warm water to remove any soap residue. Make sure to rinse off all the detergent to avoid any flavor or smell transfer during future cooking.
- Dry Completely: After rinsing, dry the inner pot with a soft, clean towel. Ensure that there is no moisture left on the pot before placing it back into the Instant Pot.
- Non-stick Inner Pot (if applicable): If your Instant Pot has a non-stick inner pot, avoid using abrasive cleaning tools or harsh chemicals that can damage the non-stick coating. Stick to gentle cleaning methods to preserve the non-stick surface.
Regularly cleaning the inner pot of your Instant Pot prevents residue buildup, promotes better cooking performance, and ensures that your meals are free from any off-flavors or contaminants.
Now that the inner pot is clean, let’s move on to the next step: cleaning the lid of your Instant Pot.
Read more: How To Store Instant Pot
Cleaning the Lid
The lid of the Instant Pot is an essential component that houses various parts responsible for the appliance’s safety and functionality. To maintain hygienic cooking conditions and prevent odors or residue from affecting future dishes, it’s important to clean the lid regularly. Here’s how you can clean the lid of your Instant Pot:
- Detach the Sealing Ring: Begin by removing the sealing ring from the lid. The sealing ring can be gently pulled out, ensuring not to damage or stretch it.
- Hand Wash the Sealing Ring: Wash the sealing ring with warm, soapy water. Use a soft sponge or brush to gently remove any food particles or residue. Rinse the sealing ring thoroughly to ensure no soap residue remains.
- Clean the Lid Exterior: Use a soft, damp cloth or sponge to wipe the exterior of the lid. Pay attention to any areas with stains or greasy residue. If necessary, use a mild dish soap to remove stubborn stains.
- Inspect the Steam Release Valve: Check the steam release valve for any buildup or blockage. Gently wipe it with a damp cloth to remove any residue. Ensure that the valve moves freely without any obstruction.
- Wash the Float Valve: The float valve, also known as the pressure release valve, should be carefully cleaned to ensure proper functioning. Use a soft cloth or brush to clean the valve and remove any debris or residue.
- Clean the Anti-Block Shield: Underneath the steam release valve, you’ll find the anti-block shield. This component prevents food particles from blocking the steam release pipe. Clean it thoroughly with warm, soapy water or a soft brush to remove any buildup.
- Dry Completely: After cleaning the lid, ensure that all parts are completely dry before reassembling. This prevents any moisture from compromising the performance of the Instant Pot during future use.
By regularly cleaning the lid of your Instant Pot, you can ensure proper functionality and eliminate any potential sources of contamination. With the lid clean, we can now move on to cleaning the sealing ring, a vital component of the Instant Pot.
Cleaning the Sealing Ring
The sealing ring of the Instant Pot plays a crucial role in creating an airtight seal during cooking. Over time, the sealing ring can absorb odors and retain food particles, which can affect the flavors of your dishes. It’s important to clean the sealing ring regularly to maintain its effectiveness and prevent any cross-contamination. Here’s how:
- Remove the Sealing Ring: Carefully remove the sealing ring from the lid of the Instant Pot. Gently pull it out, taking care not to damage or stretch it.
- Hand Wash with Warm, Soapy Water: Wash the sealing ring with warm, soapy water. Use a soft sponge or brush to gently scrub the ring and remove any food particles or residue. Avoid using abrasive materials that could damage the ring.
- Inspect for Residue or Stains: While washing, inspect the sealing ring for any residue or stains that may still be present. If needed, repeat the washing process or use a mild dish soap to remove stubborn stains.
- Rinse Thoroughly: Rinse the sealing ring with warm water to remove any soap residue. Ensure that all traces of detergent are rinsed off to prevent any flavor or smell transfer during future cooking.
- Allow it to Dry: After rinsing, pat the sealing ring with a clean towel or paper towel to remove excess moisture. Then, leave it in a well-ventilated area to air dry completely. Make sure there is no moisture left before reattaching the sealing ring to the Instant Pot lid.
- Inspect Regularly: Regularly inspect the sealing ring for signs of wear, tear, or damage. If you notice any cracks, tears, or signs of degradation, it’s time to replace the sealing ring with a new one.
By keeping the sealing ring of your Instant Pot clean, you ensure that it functions optimally and maintains the quality of your dishes. With the sealing ring cleaned, let’s move on to cleaning the steam release valve.
Cleaning the Steam Release Valve
The steam release valve is a crucial component of the Instant Pot, responsible for releasing steam and regulating pressure during cooking. Over time, it can become clogged with food particles or residue, which can affect the functionality of your appliance. Regularly cleaning the steam release valve ensures proper operation and prevents any blockages. Here’s how you can clean the steam release valve:
- Ensure the Instant Pot is Unplugged and Cooled Down: Prior to cleaning the steam release valve, make sure the Instant Pot is unplugged from the power source and has completely cooled down to prevent any accidents or burns.
- Remove the Steam Release Valve: Gently twist and remove the steam release valve from the lid of the Instant Pot. Some models may have a detachable valve that can be easily removed, while others might require a bit of twisting.
- Soak in Warm, Soapy Water: Fill a bowl or basin with warm water and add a few drops of mild dish soap. Submerge the steam release valve in the soapy water and let it soak for about 10-15 minutes. This helps to loosen any food particles or residue.
- Scrub with a Soft Brush: After soaking, use a soft brush, such as a toothbrush, to gently scrub the steam release valve. Pay attention to the small holes or slits where steam is released, ensuring that they are clear of any debris.
- Rinse Thoroughly: Rinse the steam release valve under warm water to remove any soap residue or loosened debris. Ensure that all the holes are clean and free from any obstruction.
- Dry Completely: After rinsing, pat the steam release valve dry with a clean towel or paper towel. Ensure that it is completely dry before reattaching it to the lid of the Instant Pot.
- Reattach the Steam Release Valve: Once the valve is thoroughly dry, carefully reattach it to the lid of the Instant Pot, making sure it is securely in place.
Regularly cleaning the steam release valve of your Instant Pot is essential to maintain proper pressure regulation and prevent clogs. With the steam release valve clean, let’s move on to cleaning the anti-block shield.
Use a mixture of white vinegar and water to clean the inner pot and steam rack of your Instant Pot. Let it soak for 30 minutes before scrubbing with a sponge.
Cleaning the Anti-Block Shield
The anti-block shield is an important component located under the steam release valve of the Instant Pot. It helps prevent food particles from clogging the steam release pipe and ensures proper pressure release during cooking. Cleaning the anti-block shield is necessary to remove any residue or debris that may accumulate over time. Here’s how you can clean the anti-block shield:
- Remove the Steam Release Valve: Twist and remove the steam release valve from the lid of the Instant Pot. The anti-block shield is located underneath, so you need to remove the steam release valve to access it.
- Inspect the Anti-Block Shield: Take a close look at the anti-block shield and check for any visible debris or residue. Use a flashlight if needed to ensure a thorough inspection. If there is any buildup, it’s time to clean it.
- Clean with Warm, Soapy Water: Fill a bowl or basin with warm water and add a few drops of mild dish soap. Submerge the anti-block shield in the soapy water and let it soak for a few minutes to loosen any trapped debris.
- Scrub Gently: After soaking, use a soft brush or sponge to gently scrub the anti-block shield. Pay attention to the edges and small crevices where residue may accumulate. Be careful not to apply excessive force that could damage the shield.
- Rinse Thoroughly: Rinse the anti-block shield under warm water to remove any soapy residue and dislodged debris. Ensure that it is clean and free from any remaining particles.
- Dry Completely: After rinsing, pat the anti-block shield dry with a clean towel or paper towel. Make sure it is completely dry before reattaching it to the Instant Pot lid.
- Reattach the Steam Release Valve: Once the anti-block shield is dry, carefully reattach the steam release valve to the Instant Pot lid, ensuring that it is securely in place.
Regularly cleaning the anti-block shield helps maintain the proper functioning of your Instant Pot and ensures that steam is released efficiently during cooking. With the anti-block shield clean, let’s move on to cleaning the condensation collector.
Read more: How To Use Instant Pot Dehydrator
Cleaning the Condensation Collector
The condensation collector is an essential part of the Instant Pot, collecting excess moisture that accumulates during the cooking process. It helps prevent water from dripping onto your countertop and keeps the appliance clean. Regular cleaning of the condensation collector is necessary to maintain optimal performance and hygiene. Here’s how you can clean the condensation collector:
- Remove the Condensation Collector: Locate the condensation collector at the back of the Instant Pot. Given its location, you may need to tilt the appliance or slide it out slightly to access the collector.
- Empty the Collector: Once you remove the condensation collector, empty any liquid or residue that may have accumulated in it. Discard the contents in the sink or trash.
- Wash with Warm, Soapy Water: Fill a bowl or basin with warm water and add a few drops of mild dish soap. Place the condensation collector in the soapy water and allow it to soak for several minutes.
- Scrub Gently: After soaking, use a soft brush or sponge to gently scrub the condensation collector. Pay attention to any stubborn residue or debris and ensure it is thoroughly cleaned.
- Rinse Thoroughly: Rinse the condensation collector under warm water to remove any soap residue and dislodged particles. Ensure that it is clean and free from any remaining debris.
- Dry Completely: After rinsing, pat the condensation collector dry with a clean towel or paper towel. Ensure that it is completely dry before reattaching it to the Instant Pot.
- Reattach the Condensation Collector: Once the condensation collector is dry, carefully reattach it to the back of the Instant Pot, ensuring that it fits securely into place.
Regular cleaning of the condensation collector helps maintain a clean and hygienic cooking environment. By removing excess moisture, you can prevent the buildup of mold or mildew and ensure the proper functioning of your Instant Pot. With the condensation collector clean, let’s move on to cleaning the float valve.
Cleaning the Float Valve
The float valve of the Instant Pot is a small component that indicates the pressure level inside the appliance. It’s important to keep the float valve clean and free from any debris to ensure accurate pressure readings and prevent any potential issues. Here’s how you can clean the float valve:
- Ensure the Instant Pot is Unplugged and Cooled Down: Before cleaning the float valve, make sure the Instant Pot is unplugged from the power source and has completely cooled down to prevent any accidents or burns.
- Locate the Float Valve: The float valve is usually situated in the center of the lid, on top of the steam release valve. It moves up and down based on the pressure inside the Instant Pot.
- Inspect the Float Valve: Take a close look at the float valve and check for any visible debris or residue. Ensure that it moves freely and is not stuck in the raised or lowered position.
- Wipe with a Damp Cloth: Use a soft cloth or sponge dampened with warm water to wipe the float valve. Gently remove any visible debris or residue, being careful not to apply excessive force that could damage or dislodge the valve.
- Check for Proper Movement: After wiping, verify that the float valve moves freely and smoothly. Ensure that it can rise and fall without any obstruction.
- Dry Thoroughly: After cleaning, use a clean, dry cloth or paper towel to thoroughly dry the float valve. Ensure that it is completely free from moisture before reassembling the Instant Pot.
Regularly cleaning the float valve ensures accurate pressure readings and proper functioning of your Instant Pot. By keeping it clean and well-maintained, you can continue to enjoy hassle-free cooking experiences. Now that the float valve is clean, let’s move on to cleaning the steam rack.
Cleaning the Steam Rack
The steam rack is a versatile accessory that allows you to steam food items in the Instant Pot. It’s important to clean the steam rack after each use to remove food residue and ensure proper hygiene. Here’s how you can clean the steam rack:
- Remove Food Residue: After using the steam rack, remove any leftover food or debris from its surface. Use a soft sponge or brush to gently scrub away any stuck-on particles.
- Soak in Warm, Soapy Water: Fill a sink or basin with warm water and add a few drops of mild dish soap. Submerge the steam rack in the soapy water and let it soak for about 10-15 minutes. This will help to loosen any remaining food residue.
- Scrub Gently: After soaking, use a non-abrasive sponge or brush to gently scrub the steam rack. Pay extra attention to any areas with stubborn residue. Be sure to clean both sides of the rack, ensuring all surfaces are thoroughly cleaned.
- Rinse Thoroughly: Rinse the steam rack under warm water to remove any soap residue and dislodged particles. Ensure that all traces of detergent are rinsed off to avoid any flavor transfer during future use.
- Dry Completely: After rinsing, pat the steam rack dry with a clean towel or allow it to air dry completely. Ensure that there is no moisture left on the rack before storing or using it again.
Cleaning the steam rack after each use ensures that it remains free from food particles and maintains its optimal performance. By keeping it clean, you can continue to enjoy healthy and delicious steamed dishes with your Instant Pot. With the steam rack clean, let’s move on to cleaning the silicone gasket.
Cleaning the Silicone Gasket
The silicone gasket, or sealing ring, forms a secure seal between the lid and the inner pot of the Instant Pot. It’s important to regularly clean the silicone gasket to prevent odors, residue, and cross-contamination of flavors. Here’s how you can clean the silicone gasket:
- Remove the Silicone Gasket: Carefully remove the silicone gasket from the lid of the Instant Pot. Gently pull it out, ensuring not to damage or stretch it.
- Inspect for Debris: Take a close look at the silicone gasket and check for any visible debris or residue. Look for any signs of wear or tear, such as cracks or tears. If you notice any damage, it’s time to replace the silicone gasket.
- Wash with Warm, Soapy Water: Fill a bowl or basin with warm water and add a few drops of mild dish soap. Place the silicone gasket in the soapy water and let it soak for a few minutes to loosen any trapped debris.
- Scrub Gently: After soaking, use a soft brush or sponge to gently scrub the silicone gasket. Pay attention to any areas with stains or residue. Be gentle while scrubbing to avoid damaging the gasket.
- Rinse Thoroughly: Rinse the silicone gasket under warm water to remove any soap residue and dislodged debris. Ensure that it is clean and free from any remaining particles.
- Dry Completely: After rinsing, pat the silicone gasket dry with a clean towel or paper towel. Ensure that it is completely dry before reattaching it to the Instant Pot lid.
- Reattach the Silicone Gasket: Once the silicone gasket is dry, carefully reattach it to the lid of the Instant Pot, ensuring that it fits securely into place.
Regularly cleaning the silicone gasket helps maintain its effectiveness and prevents any unwanted flavors from transferring between different dishes. By keeping it clean, you ensure optimal sealing and a pleasant cooking experience. Now that the silicone gasket is clean, let’s move on to cleaning the control panel.
Read more: How To Use Instant Pot As A Rice Cooker
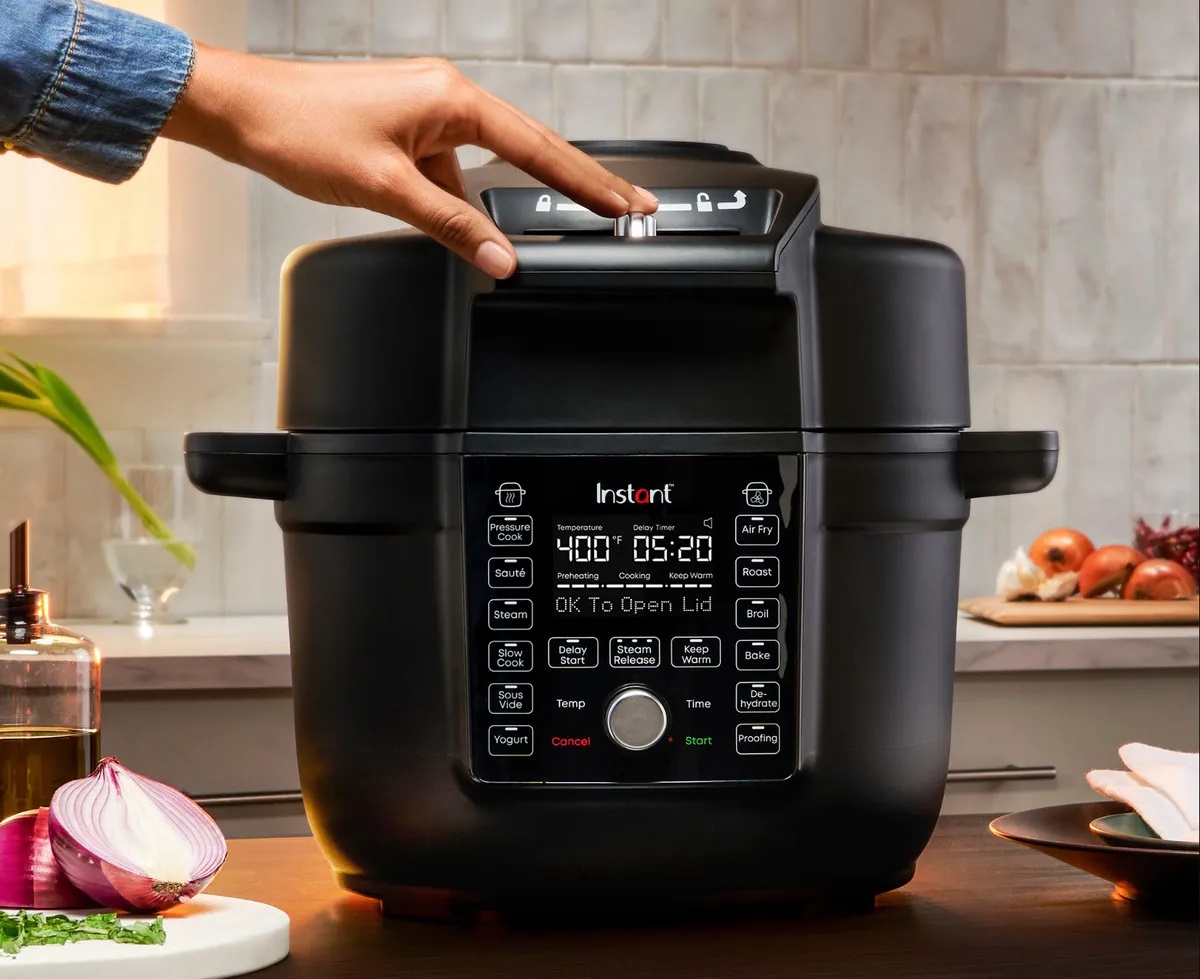
Cleaning the Control Panel
The control panel is the interface of the Instant Pot that allows you to set different cooking functions and adjust settings. While cleaning the control panel, it’s important to be gentle and cautious to avoid causing any damage. Here’s how you can clean the control panel of your Instant Pot:
- Unplug the Instant Pot: Before cleaning the control panel, ensure that the Instant Pot is unplugged from the power source to prevent any electrical accidents.
- Prepare a Damp Cloth: Dampen a soft, non-abrasive cloth with a small amount of water. Ensure the cloth is not dripping wet, as excessive moisture can damage the control panel.
- Gently Wipe the Control Panel: Using the damp cloth, gently wipe the control panel to remove any dust, food splatters, or fingerprints. Take care not to press too hard or scrub vigorously, as this can damage the buttons or display.
- Dry with a Soft Cloth: After wiping, use a dry, clean cloth to gently wipe the control panel and remove any remaining moisture. Ensure that the control panel is completely dry before plugging in the Instant Pot or using it again.
- Avoid Harsh Chemicals: Do not use harsh cleaning chemicals, abrasive cleaners, or solvents on the control panel, as they can damage the surface and affect the functionality of the buttons.
- Take Extra Care for Display: If your Instant Pot has an LCD display, be extra cautious while cleaning around it. Use a soft cloth or microfiber cloth to gently wipe the display, ensuring that it doesn’t get scratched or damaged.
- Clean Buttons Individually (if needed): If any buttons on the control panel appear dirty or sticky, you can use a cotton swab dipped in a mixture of warm water and mild dish soap to gently clean them. Wipe away any residue and ensure the buttons are dry before using the Instant Pot.
By taking care of the control panel and cleaning it regularly, you ensure that your Instant Pot remains in optimal condition and that you can easily navigate the various cooking functions. With the control panel clean and shining, let’s move on to some tips for regular maintenance of your Instant Pot.
Tips for Regular Maintenance
Maintaining your Instant Pot through regular maintenance helps prolong its lifespan, ensures optimal performance, and keeps it in pristine condition. Here are some tips to help you with the regular maintenance of your Instant Pot:
- Read and Follow the User Manual: Familiarize yourself with the user manual that comes with your Instant Pot. It provides valuable information on cleaning, maintenance, and specific instructions for your model.
- Clean After Every Use: Develop a habit of cleaning your Instant Pot after each use. This prevents food residue from accumulating and keeps your appliance in top shape for the next cooking session.
- Descale When Needed: If you notice mineral deposits or scaling on the stainless steel inner pot or other parts, descaling is necessary. Follow the manufacturer’s instructions to remove the deposits and maintain optimal performance.
- Replace Parts when Necessary: Over time, certain parts of your Instant Pot may need to be replaced, such as the sealing ring or steam release valve. Keep an eye on their condition and replace them according to the manufacturer’s recommendations.
- Store Properly: When not in use, store your Instant Pot in a clean and dry place. Ensure that all parts are completely dry before storing to prevent any moisture buildup or odor development.
- Use Accessories Carefully: If you use accessories such as silicone molds, steam baskets, or trivets, clean them thoroughly after each use. Follow the manufacturer’s instructions for cleaning these accessories.
- Avoid Submerging Electrical Components: Never submerge the base or electrical components of the Instant Pot in water. This can cause damage to the appliance and pose a safety hazard.
- Regularly Inspect and Maintain Sealing Ring: The sealing ring is a critical component for proper sealing. Inspect it regularly for any signs of wear or damage. Clean it after each use and replace it as needed.
- Keep the Exterior Clean: Wipe the exterior of the Instant Pot regularly to maintain its appearance and cleanliness. Stainless steel cleaner or polish can be used to restore its shine if necessary.
- Stay Up-to-Date with Firmware Updates: Check for firmware updates specific to your Instant Pot model. Updating the firmware can provide new features, improvements, and bug fixes.
By following these tips for regular maintenance, you can enhance the longevity and performance of your Instant Pot. Now that you know how to keep your Instant Pot in pristine condition, let’s wrap up this article.
Conclusion
Cleaning and maintaining your Instant Pot is key to ensuring its longevity, optimal performance, and the safety of your meals. By following the proper cleaning techniques for each component, such as the exterior, inner pot, lid, sealing ring, steam release valve, anti-block shield, condensation collector, float valve, steam rack, silicone gasket, and control panel, you can keep your Instant Pot in excellent condition.
Remember to prioritize safety by unplugging the Instant Pot, allowing it to cool down, and handling the various parts with care. Regularly inspect and replace any damaged or worn-out components to maintain the effectiveness of your appliance.
Additionally, incorporating regular maintenance habits, such as thorough cleaning after each use and ensuring proper storage, can help prevent odor buildup, maintain hygiene, and optimize performance. Regularly descaling when needed and staying up to date with firmware updates are crucial steps to keep your Instant Pot running smoothly.
By following the tips and techniques outlined in this article, you can confidently clean and maintain your Instant Pot, paving the way for countless delicious and hassle-free meals.
Remember that a well-maintained Instant Pot not only ensures a pleasant cooking experience but also contributes to the longevity and reliability of this versatile kitchen appliance. So, get ready to dive into an array of culinary delights with your sparkling clean Instant Pot!
Frequently Asked Questions about How To Clean An Instant Pot, Including The Parts You Might Miss
Was this page helpful?
At Storables.com, we guarantee accurate and reliable information. Our content, validated by Expert Board Contributors, is crafted following stringent Editorial Policies. We're committed to providing you with well-researched, expert-backed insights for all your informational needs.


0 thoughts on “How To Clean An Instant Pot, Including The Parts You Might Miss”