Home>Storage Ideas>Kitchen Storage>How To Clean A Copper Sink And Restore Its Patina
Kitchen Storage
How To Clean A Copper Sink And Restore Its Patina
Modified: January 18, 2024
Want to restore the beautiful patina of your copper sink? Discover effective cleaning methods and maintenance tips for your kitchen storage ideas.
(Many of the links in this article redirect to a specific reviewed product. Your purchase of these products through affiliate links helps to generate commission for Storables.com, at no extra cost. Learn more)
Introduction
Welcome to the world of kitchen storage ideas! If you’re someone who loves organization and wants to make the most of your kitchen space, you’re in the right place. In this comprehensive guide, we’ll explore various creative and practical kitchen storage ideas that will transform your cooking space into a clutter-free and efficient haven.
Having a well-organized kitchen not only makes meal preparation easier but also enhances the overall aesthetic appeal of the space. From optimizing cabinet space to utilizing wall-mounted racks and clever drawer organizers, there are endless possibilities to maximize storage in your kitchen. Whether you have a small apartment kitchen or a spacious culinary masterpiece, these ideas will help you optimize every inch of your storage space.
Before we dive into the specific kitchen storage ideas, it’s important to assess your needs and preferences. Take some time to evaluate your cooking habits, the items you frequently use, and any specific challenges you’re facing in terms of storage. By having a clear understanding of your requirements, you’ll be able to choose the best storage solutions that fit your unique needs.
Keep in mind that the key to successful kitchen organization lies in a combination of storage solutions. It’s not just about buying a few storage containers and hoping for the best. Instead, think of it as a puzzle where each piece plays a crucial role in creating a harmonious and functional space. From clever cabinet organizers to space-saving drawer dividers, every element should work together seamlessly.
As we delve into the world of kitchen storage ideas, I’ll also provide insights on how to implement effective SEO strategies to optimize your online visibility. Whether you’re a kitchen enthusiast sharing your tips or a business selling kitchen storage products, these optimization techniques will help you attract more readers and potential customers.
So, let’s roll up our sleeves and dive into the wonderful world of kitchen storage ideas. Get ready to transform your kitchen into a space that is not only visually appealing but also highly functional. Together, we’ll make the most of your kitchen storage and bring order to the heart of your home.
Key Takeaways:
- Transform your kitchen with creative storage ideas and maintain a clutter-free space by optimizing every inch. Embrace the beauty of a clean and restored copper sink to enhance your culinary haven.
- Infuse your kitchen with personal style and balance functionality with visual appeal. Implement SEO strategies to attract more readers and customers while exploring the world of kitchen storage ideas.
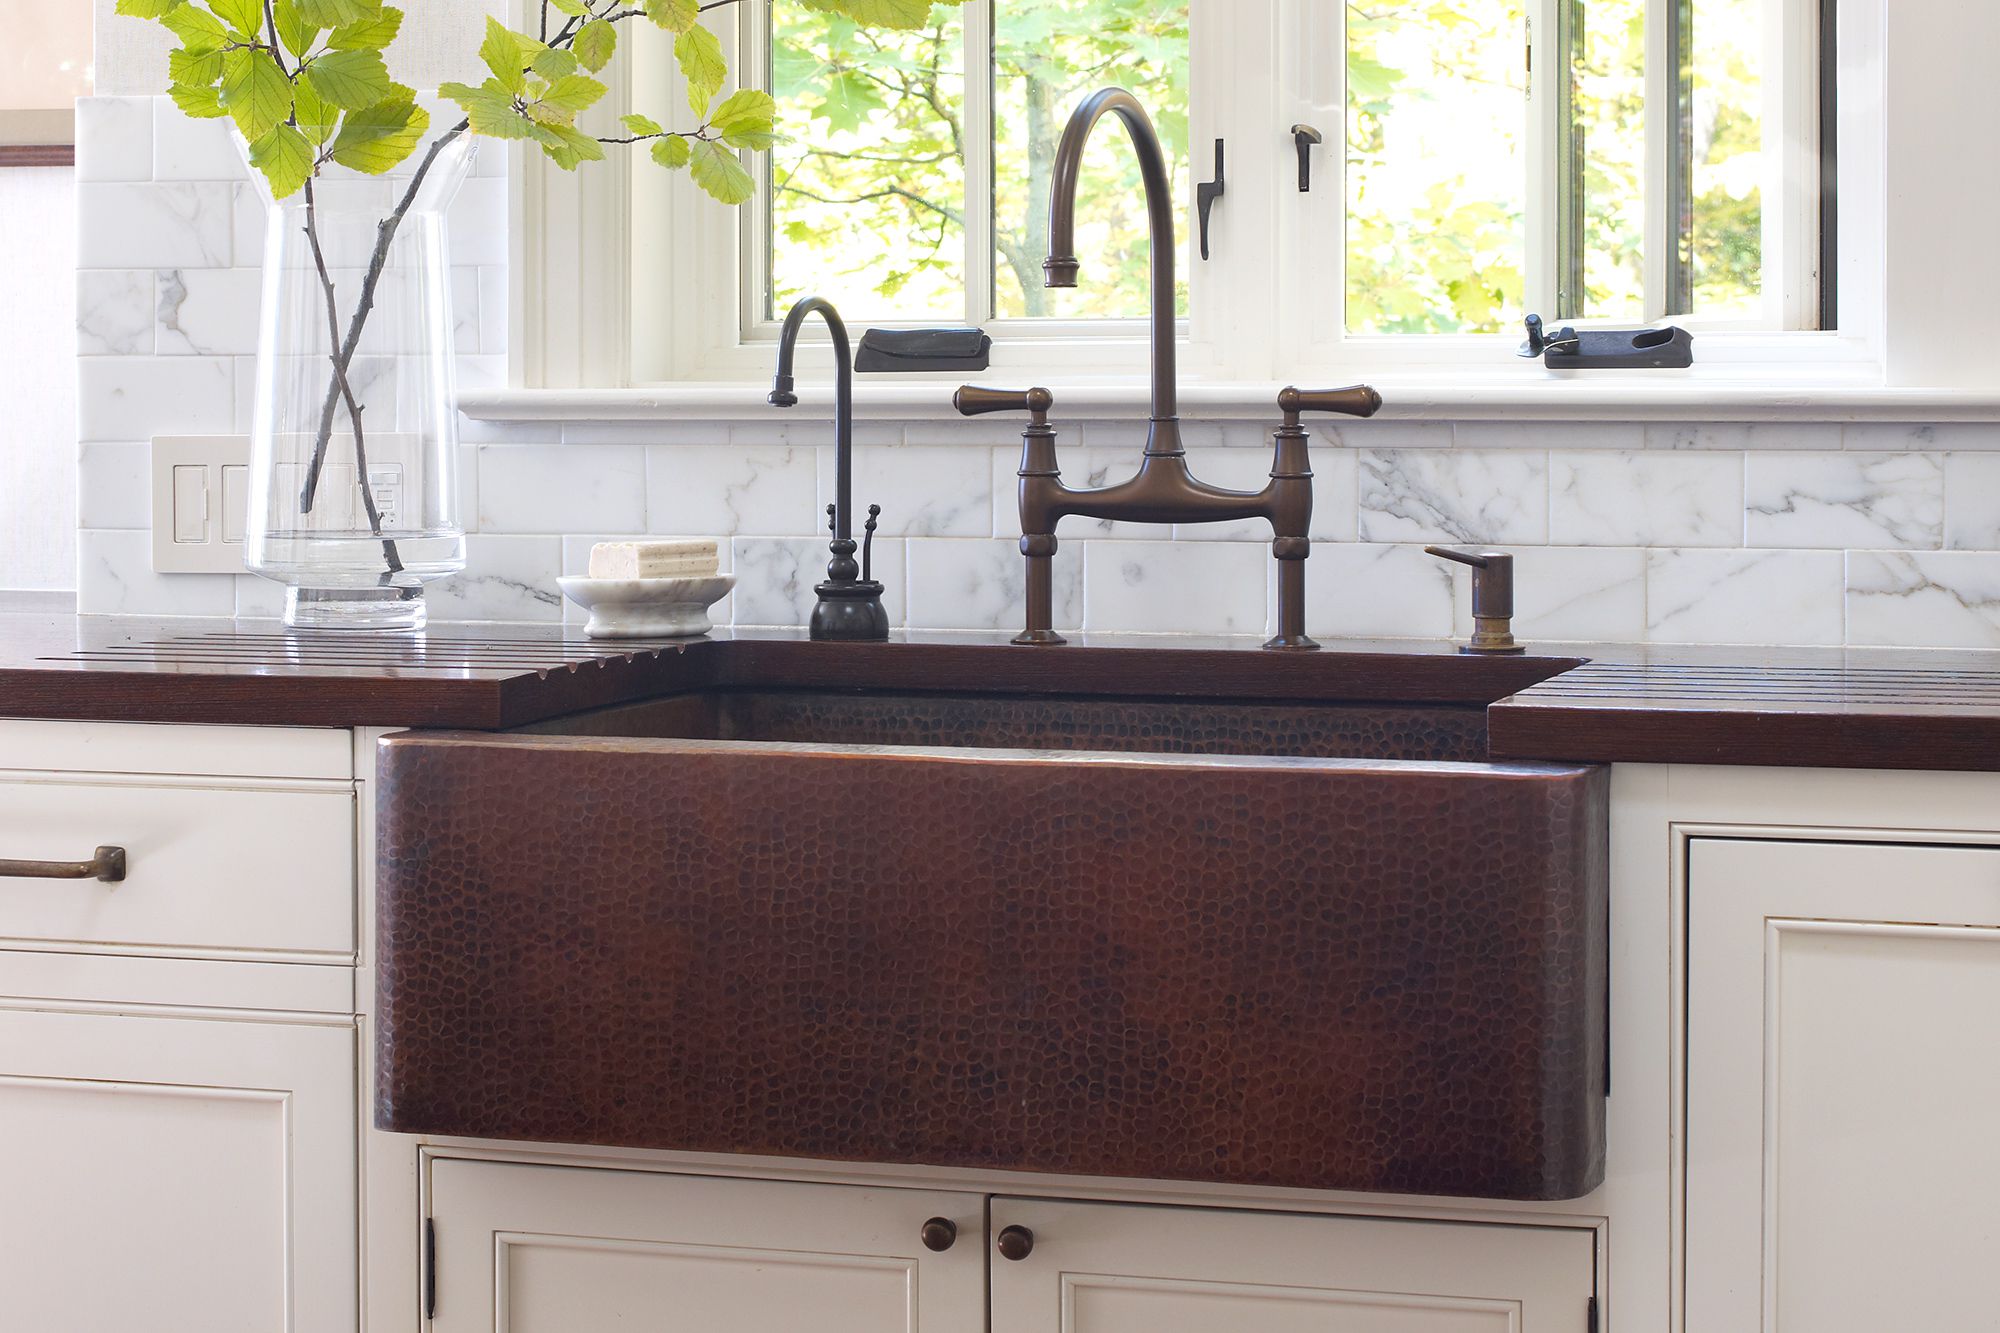
Understanding the Patina on a Copper Sink
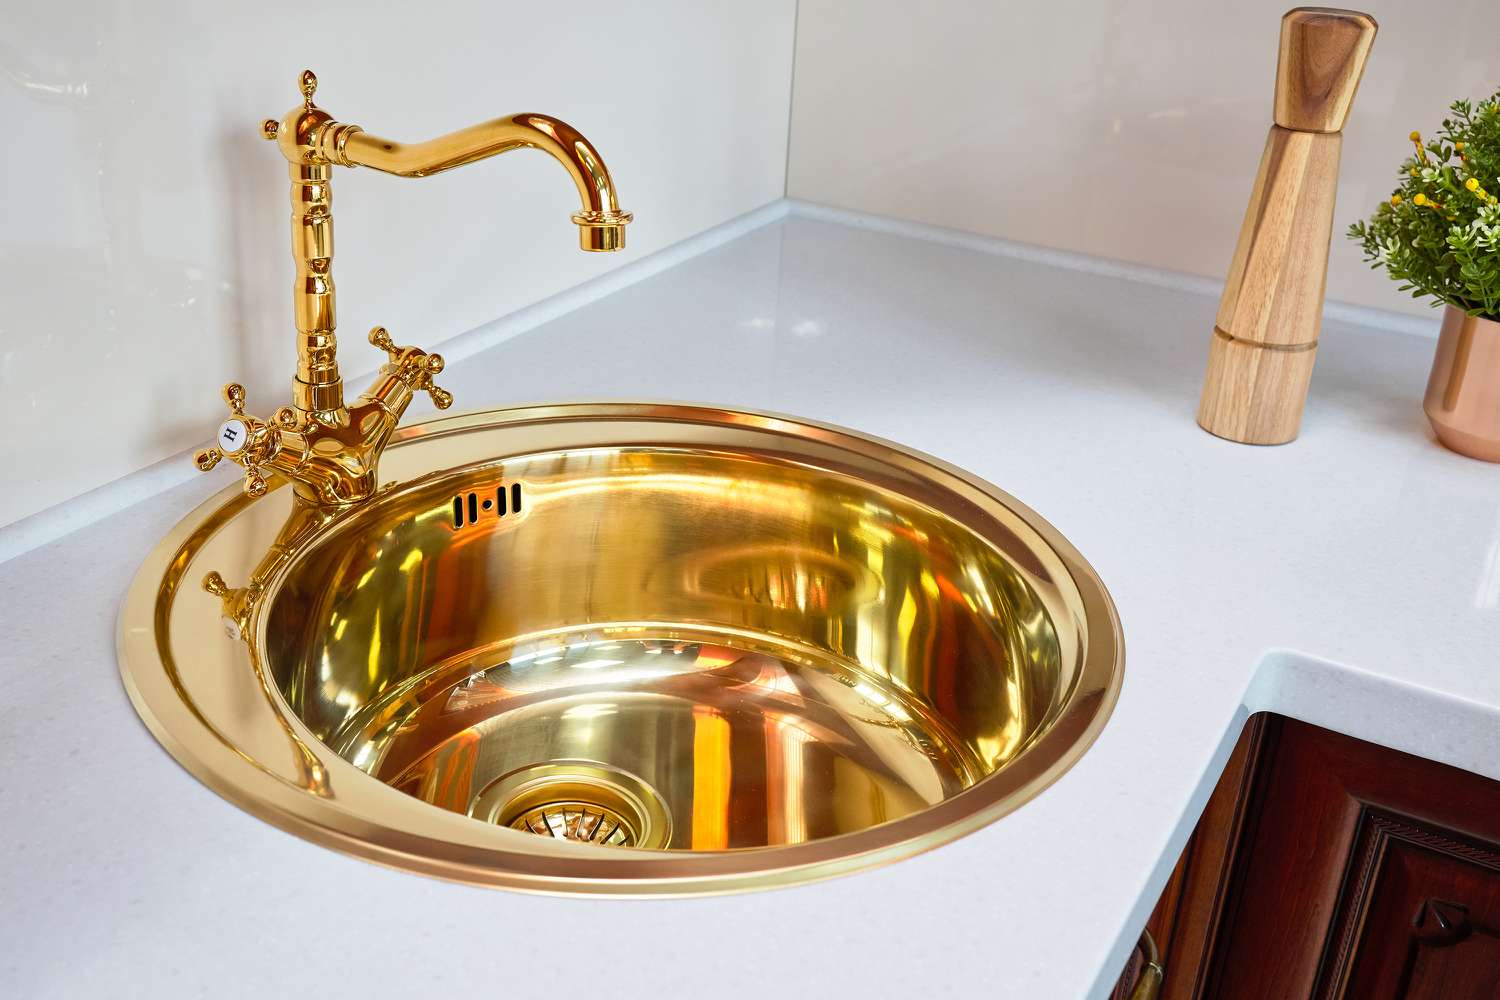
If you have a copper sink or are considering getting one, it’s important to understand the unique properties and characteristics of copper. Copper sinks are known for their beauty and durability, but over time, they develop a natural patina that adds to their charm and uniqueness.
The patina on a copper sink is a thin layer that forms on the surface due to the exposure to air and moisture. It is a normal and desirable process that occurs over time, giving the sink a rich and aged appearance. The patina not only enhances the visual appeal of the sink but also acts as a protective layer, preventing further corrosion and maintaining the sink’s integrity.
Over time, the patina on a copper sink can range in color from deep brown to greenish hues of turquoise. This color variation is a result of the copper reacting with different elements in the environment. While some homeowners prefer the natural patina, others may want to restore the sink’s original shine and color.
If you’re unsure about whether to embrace the patina or restore the sink, consider the style and aesthetics of your kitchen. Copper sinks with a patina can add a rustic and vintage charm to your space, while a polished copper sink can create a more modern and sleek look. Ultimately, the choice depends on your personal preference and the overall design theme of your kitchen.
To clean and maintain a copper sink, it’s important to use the right products and techniques that won’t damage the patina. Harsh chemicals and abrasive scrubbers can strip away the patina or cause scratching, so it’s best to opt for gentle and natural cleaning methods.
In the next sections, we’ll explore the supplies needed for cleaning and restoring a copper sink, as well as step-by-step instructions on how to remove stains and tarnish, and how to restore the patina if desired. By following these guidelines, you can keep your copper sink looking beautiful and maintain its longevity.
Supplies Needed for Cleaning and Restoring a Copper Sink
Before you begin cleaning and restoring your copper sink, it’s essential to gather the necessary supplies. By having everything on hand, you can ensure a smooth and efficient process. Here are the supplies you’ll need:
- Mild dish soap: Choose a non-abrasive and gentle dish soap that won’t damage the copper surface.
- Warm water: You’ll need warm water to mix with the dish soap for cleaning.
- Soft sponge or cloth: Opt for a soft sponge or cloth that won’t scratch the copper sink.
- Vinegar: Vinegar is an excellent natural cleaner that can help remove stains and tarnish from the copper surface.
- Lemon juice: Lemon juice is another natural ingredient that can be effective in removing stains and restoring shine to copper.
- Baking soda: Baking soda is a gentle abrasive that can help remove tough stains and tarnish on copper.
- Olive oil or copper wax: Once the sink is clean and restored, you’ll need olive oil or copper wax to protect the surface and enhance its shine.
- Microfiber cloth: A microfiber cloth is ideal for buffing and polishing the copper sink.
- Protective gloves: It’s advisable to wear protective gloves to prevent any skin irritation or contact with cleaning solutions.
These supplies will provide you with everything you need to effectively clean and restore your copper sink. It’s important to note that while some commercial copper cleaners are available in the market, they may contain harsh chemicals that can damage the patina on your sink. Therefore, using natural ingredients like vinegar, lemon juice, and baking soda is often a safer and more eco-friendly choice.
Now that you have all the necessary supplies, let’s move on to the step-by-step process of cleaning and restoring your copper sink. With a little effort and the right techniques, you’ll be able to bring back the shine and beauty of your beloved copper sink.
Step 1: Preparation
Before you start cleaning and restoring your copper sink, it’s important to prepare the area and gather all the necessary tools. The preparation stage sets the foundation for a successful cleaning process. Here’s what you need to do:
- Clear the sink: Remove any dishes, utensils, or other items from the sink. This will give you a clean and empty workspace.
- Protect surrounding surfaces: Place a protective cloth or mat on the countertop or surrounding surfaces to prevent any accidental spills or damage.
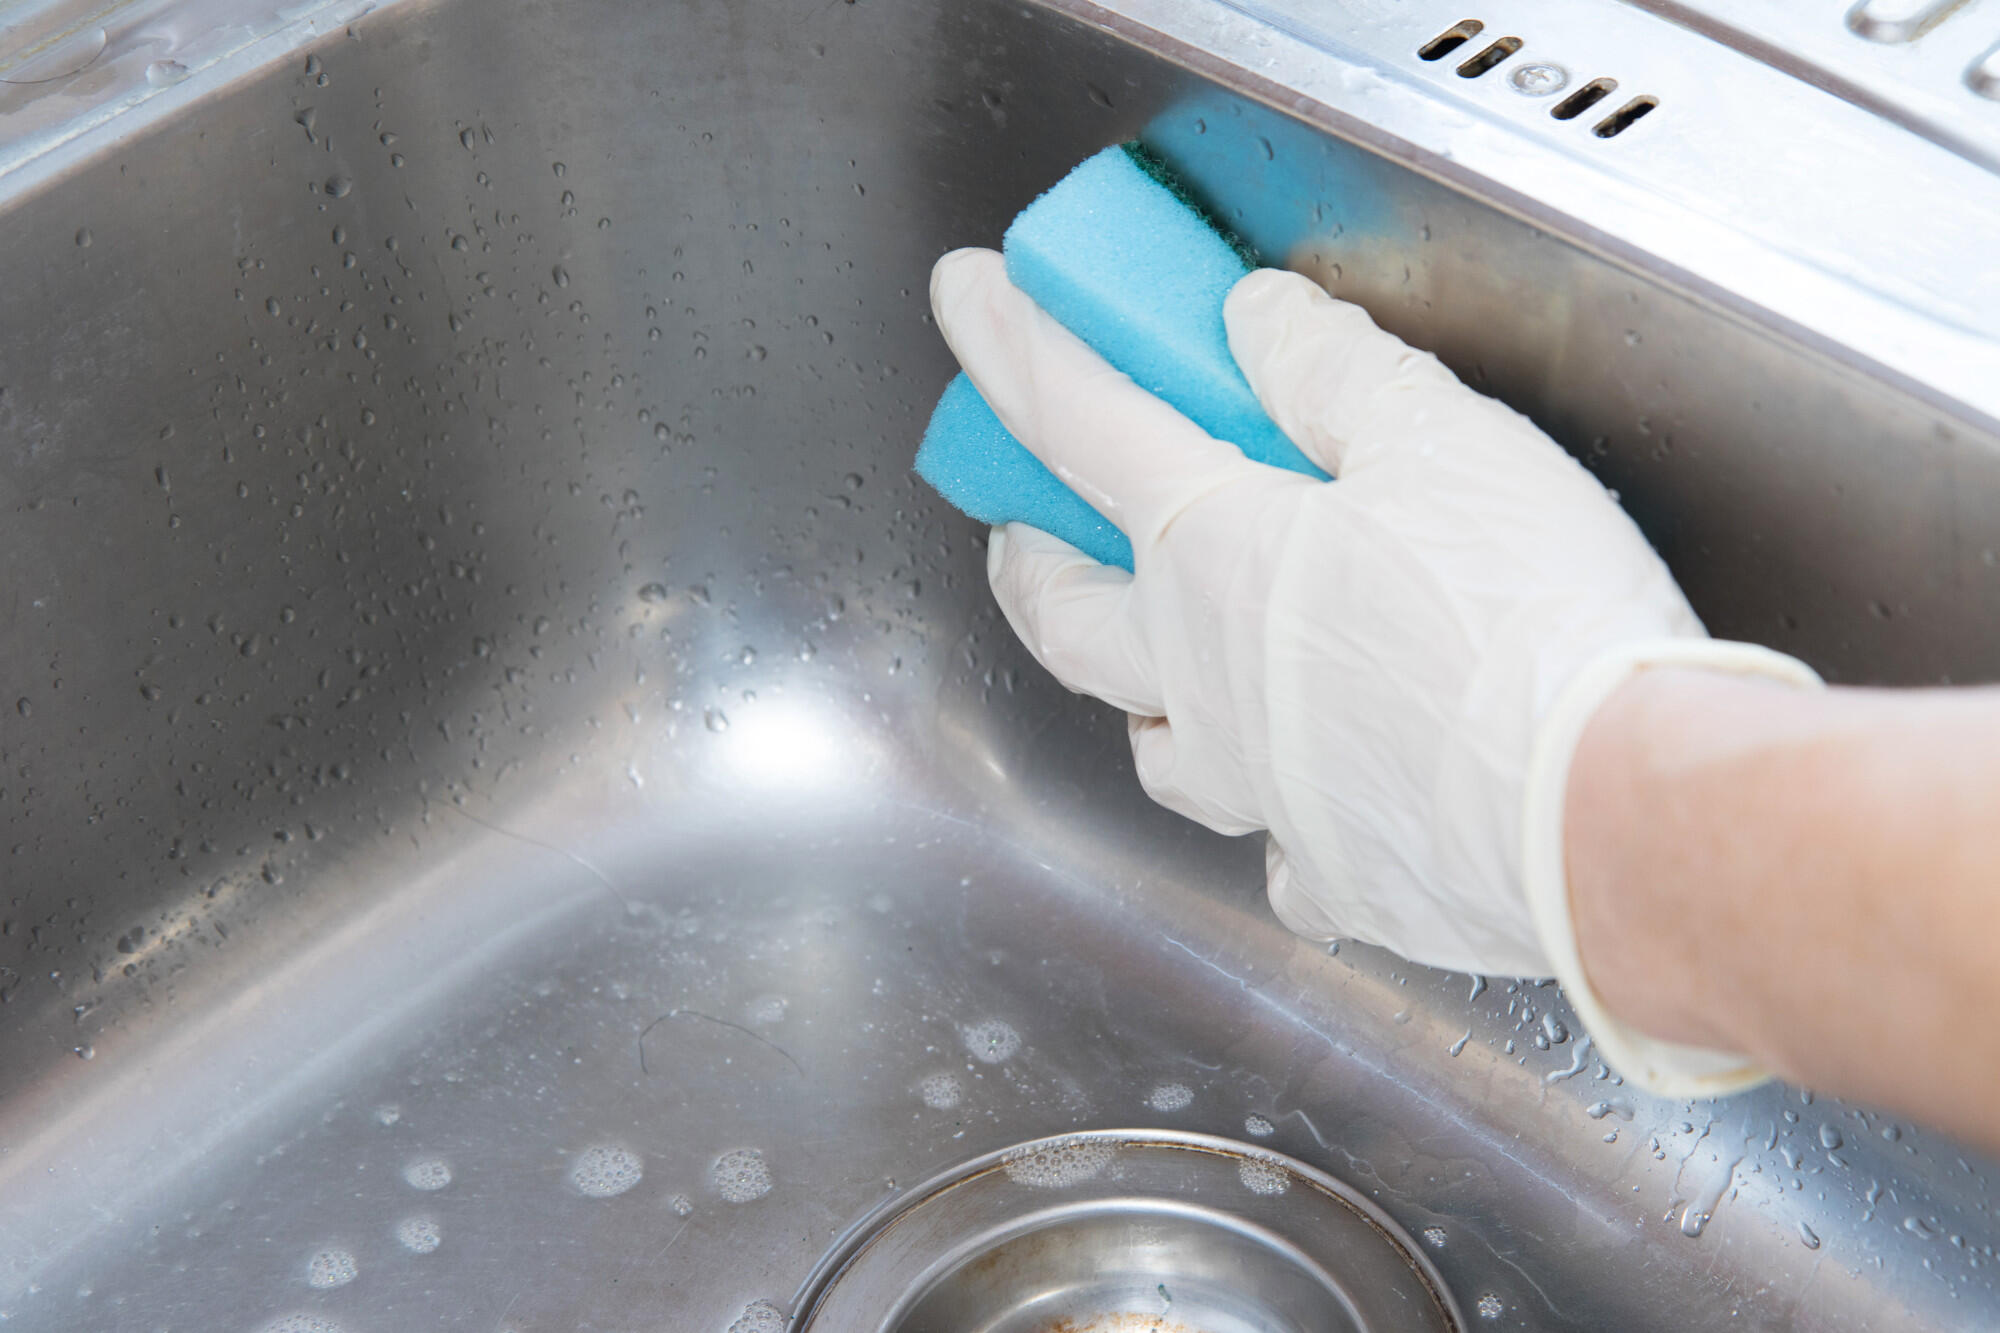
- Put on protective gloves: To protect your hands from any skin irritation or contact with cleaning solutions, it’s advisable to wear protective gloves throughout the process.
- Gather the supplies: Make sure you have all the supplies mentioned earlier, such as mild dish soap, warm water, soft sponge or cloth, vinegar, lemon juice, baking soda, olive oil or copper wax, microfiber cloth, and protective gloves.
- Read product instructions: If you’re using a commercial copper cleaner or any specific products, take a moment to read and understand the instructions provided by the manufacturer.
Once you’ve completed these steps, you’re ready to move on to the actual cleaning and restoring process. By taking the time to prepare and gather the necessary supplies, you’ll ensure a smooth and efficient experience.
Remember, proper preparation is key to achieving the best results. So, take a few extra minutes to clear the sink, protect the surrounding surfaces, put on your gloves, and gather all the supplies. Your copper sink will thank you for the care and attention you give it during this process.
To clean a copper sink and restore its patina, mix equal parts of lemon juice and salt to create a paste. Gently scrub the sink with the paste using a soft cloth, then rinse and dry thoroughly. This will help remove tarnish and restore the natural patina of the copper.
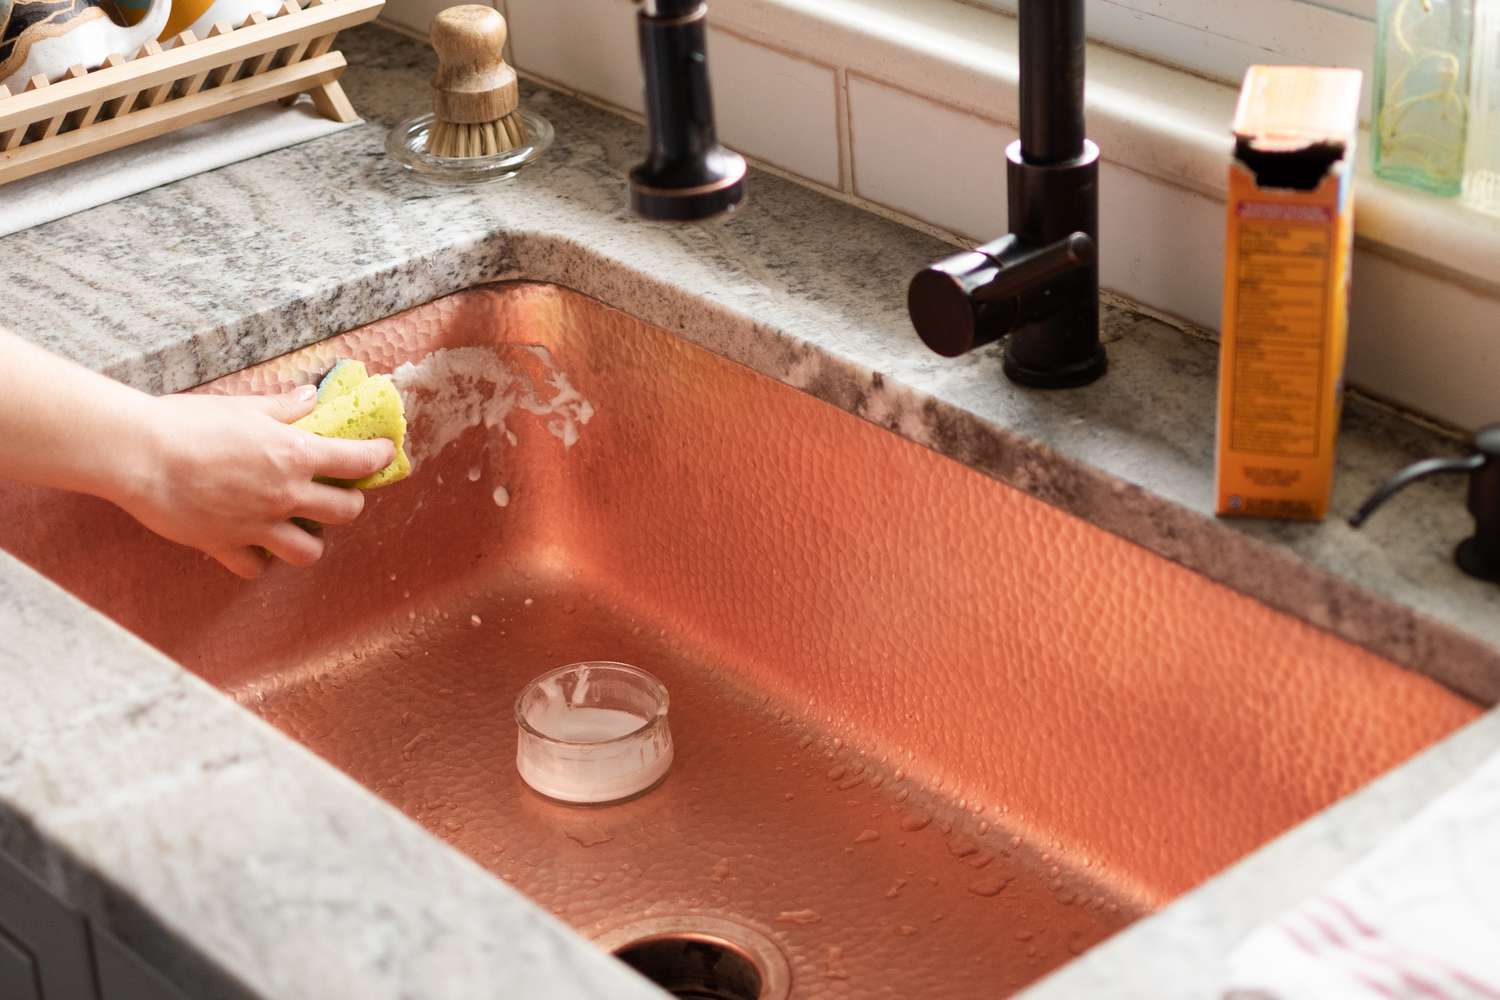
Step 2: Removing Stains and Tarnish
After completing the preparation stage, it’s time to tackle stains and tarnish on your copper sink. Over time, copper can develop discoloration and tarnish due to exposure to water, chemicals, and other factors. Here’s how you can effectively remove stains and tarnish from your sink:
- Mix a cleaning solution: In a bowl or bucket, mix warm water with a small amount of mild dish soap. The soap will help break down grease and grime on the surface of the sink.
- Apply the cleaning solution: Dip a soft sponge or cloth into the cleaning solution and gently scrub the stained areas of the sink. Pay special attention to any stubborn stains or tarnish spots.
- Rinse with warm water: Rinse the sink thoroughly with warm water to remove the soap residue and any loosened dirt or stains.
- Use natural cleaners: If there are remaining stains or tarnish, you can try using natural cleaners like vinegar, lemon juice, or baking soda. Here are some methods you can use:
- Vinegar: Soak a cloth in vinegar and apply it to the stained areas. Let it sit for a few minutes, then scrub gently with a soft sponge or cloth. Rinse thoroughly with warm water.
- Lemon juice: Squeeze fresh lemon juice onto a cloth and rub it onto the stains. Let it sit for a few minutes, then scrub gently and rinse with warm water.
- Baking soda paste: Mix baking soda with a small amount of water to create a paste. Apply the paste to the stained areas and scrub gently with a soft sponge or cloth. Rinse thoroughly with warm water.
- Dry the sink: Use a clean towel or microfiber cloth to dry the sink completely. This will help prevent water spots and maintain the shine of the copper.
By following these steps, you can effectively remove stains and tarnish from your copper sink. Remember to be gentle when scrubbing to avoid scratching the surface. Additionally, never use abrasive cleaners or scrubbers on your copper sink, as they can damage the patina and leave permanent marks.
Once you’re satisfied with the removal of stains and tarnish, move on to the next step, where we’ll explore how to restore the patina on your copper sink if desired.
Step 3: Restoring the Patina
If you’ve decided to restore the patina on your copper sink, this step will guide you through the process of bringing back its natural beauty and rich color. Restoring the patina can be a rewarding endeavor that adds character and elegance to your kitchen. Here’s how you can do it:
- Clean the sink: Before restoring the patina, ensure that the sink is clean and free from any residue or cleaning agents. Use mild dish soap and warm water to thoroughly clean the sink. Rinse and dry it completely.
- Apply natural patina enhancers: There are several natural patina enhancers you can use to restore the color and depth of the patina. For example:
- White vinegar: Dampen a soft cloth with white vinegar and gently rub it onto the surface of the sink. Use circular motions to evenly distribute the vinegar. Let it sit for a few minutes, then rinse with warm water and dry.
- Ammonia solution: Mix equal parts of ammonia and water in a bowl. Dip a soft cloth into the solution and apply it to the sink, rubbing gently in circular motions. Let it sit for a few minutes, then rinse with warm water and dry.
- Allow natural patina development: To further enhance the patina, you can also let nature take its course. Over time, exposure to air and moisture will naturally deepen and develop the patina on the copper sink. Simply use mild dish soap and warm water for routine cleaning to maintain the patina’s beauty.
- Protect the patina: To protect the restored patina and prevent it from fading or tarnishing, you can apply a thin layer of olive oil or copper wax to the sink’s surface. Use a clean microfiber cloth to evenly distribute the oil or wax, following the manufacturer’s instructions.
Remember, restoring the patina is an organic process that may take time to achieve the desired results. Patience is key. Additionally, be mindful of the natural variations in patina color and intensity, as these contribute to the unique character of your copper sink.
By following these steps, you can successfully restore the patina on your copper sink and enjoy its timeless beauty. Now, let’s move on to the final step: regular maintenance tips to keep your copper sink looking its best.
Step 4: Regular Maintenance Tips for a Copper Sink
Once you’ve cleaned, restored, and admired your beautiful copper sink, it’s important to maintain its appearance and prolong its lifespan. Regular maintenance will help prevent tarnish, stains, and corrosion, ensuring that your copper sink remains a stunning focal point in your kitchen. Here are some maintenance tips to keep in mind:
- Wipe the sink after each use: To prevent water spots and mineral deposits, wipe the sink dry after each use. This will help maintain the natural shine and patina of the copper.
- Avoid harsh chemicals: Harsh cleaning chemicals, abrasive scrubbers, and acidic substances can damage the patina and surface of the copper sink. Stick to mild dish soap and warm water for regular cleaning.
- Use cutting boards and trivets: Avoid placing hot pots, pans, or sharp objects directly on the sink surface. Use cutting boards and trivets to protect the copper from scratches and heat damage.
- Avoid heavy impact: Copper is a relatively soft metal, so avoid heavy impact or dropping heavy objects into the sink. This can dent or damage the surface.
- Periodic deep cleaning: Even with regular maintenance, occasional deep cleaning is necessary to remove stubborn stains or grime. Use natural cleaning solutions like vinegar, lemon juice, or baking soda, following the instructions mentioned earlier.
- Reapply patina enhancers: Over time, the patina on your copper sink may fade or become dull. If you wish to maintain the patina’s depth and color, you can periodically reapply natural patina enhancers like vinegar or ammonia solutions.
- Protect the sink from hard water: If you have hard water, it can leave mineral deposits on the sink surface. Consider using a water softener or wiping the sink with a solution of equal parts vinegar and water to remove these deposits.
By following these maintenance tips, you can keep your copper sink looking pristine and ensure its longevity. Remember, regular care and attention will go a long way in preserving the beauty and functionality of your copper sink.
With these essential steps and tips, you now have the knowledge to clean, restore, and maintain your copper sink. Embrace the natural patina or bring back its original shine—it’s your choice! Enjoy the beauty and warmth that a copper sink brings to your kitchen and revel in its timeless appeal.
Conclusion
Congratulations! You’ve reached the end of our comprehensive guide on kitchen storage ideas, and learned how to clean and restore a copper sink. By implementing the tips and techniques provided in this article, you can transform your kitchen into an organized and efficient space while preserving the beauty of your copper sink.
From understanding the patina on a copper sink to gathering the necessary supplies and following the step-by-step process of cleaning and restoring, you now have the knowledge and tools to keep your sink looking its best. Remember to maintain regular cleaning and practice proper maintenance to ensure the longevity and beauty of your copper sink.
As you explore the world of kitchen storage ideas, don’t forget to infuse your own creativity and personal style into the organization process. Every kitchen is unique, and finding the right storage solutions that suit your needs and preferences is key to creating a functional and visually appealing space.
Whether you’re looking to optimize cabinet space, utilize wall-mounted racks, or get creative with drawer organizers, there are endless possibilities to maximize storage in your kitchen. Keep in mind the importance of balance, both in terms of visual appeal and optimization for search engines. By seamlessly incorporating keywords into your content, you can attract more readers and potential customers.
So go ahead, apply the knowledge you’ve gained, and embark on the journey of transforming your kitchen. Embrace organization, functionality, and the beauty of a clean and restored copper sink. Enjoy the benefits of an efficient cooking space, and revel in the joy of a well-organized kitchen that reflects your personal style and enhances your culinary experiences.
Thank you for joining us on this kitchen storage ideas and copper sink cleaning journey. Here’s to a beautifully organized kitchen that inspires your inner chef!
Frequently Asked Questions about How To Clean A Copper Sink And Restore Its Patina
Was this page helpful?
At Storables.com, we guarantee accurate and reliable information. Our content, validated by Expert Board Contributors, is crafted following stringent Editorial Policies. We're committed to providing you with well-researched, expert-backed insights for all your informational needs.

0 thoughts on “How To Clean A Copper Sink And Restore Its Patina”