Home>Storage Ideas>Kitchen Storage>Walk-in Pantry Ideas: 10 Tips For Stylish Kitchen Storage
Kitchen Storage
Walk-in Pantry Ideas: 10 Tips For Stylish Kitchen Storage
Modified: August 25, 2024
Looking for stylish kitchen storage ideas? Check out these 10 walk-in pantry tips to keep your kitchen organized and clutter-free. Improve your kitchen storage today!
(Many of the links in this article redirect to a specific reviewed product. Your purchase of these products through affiliate links helps to generate commission for Storables.com, at no extra cost. Learn more)
Introduction
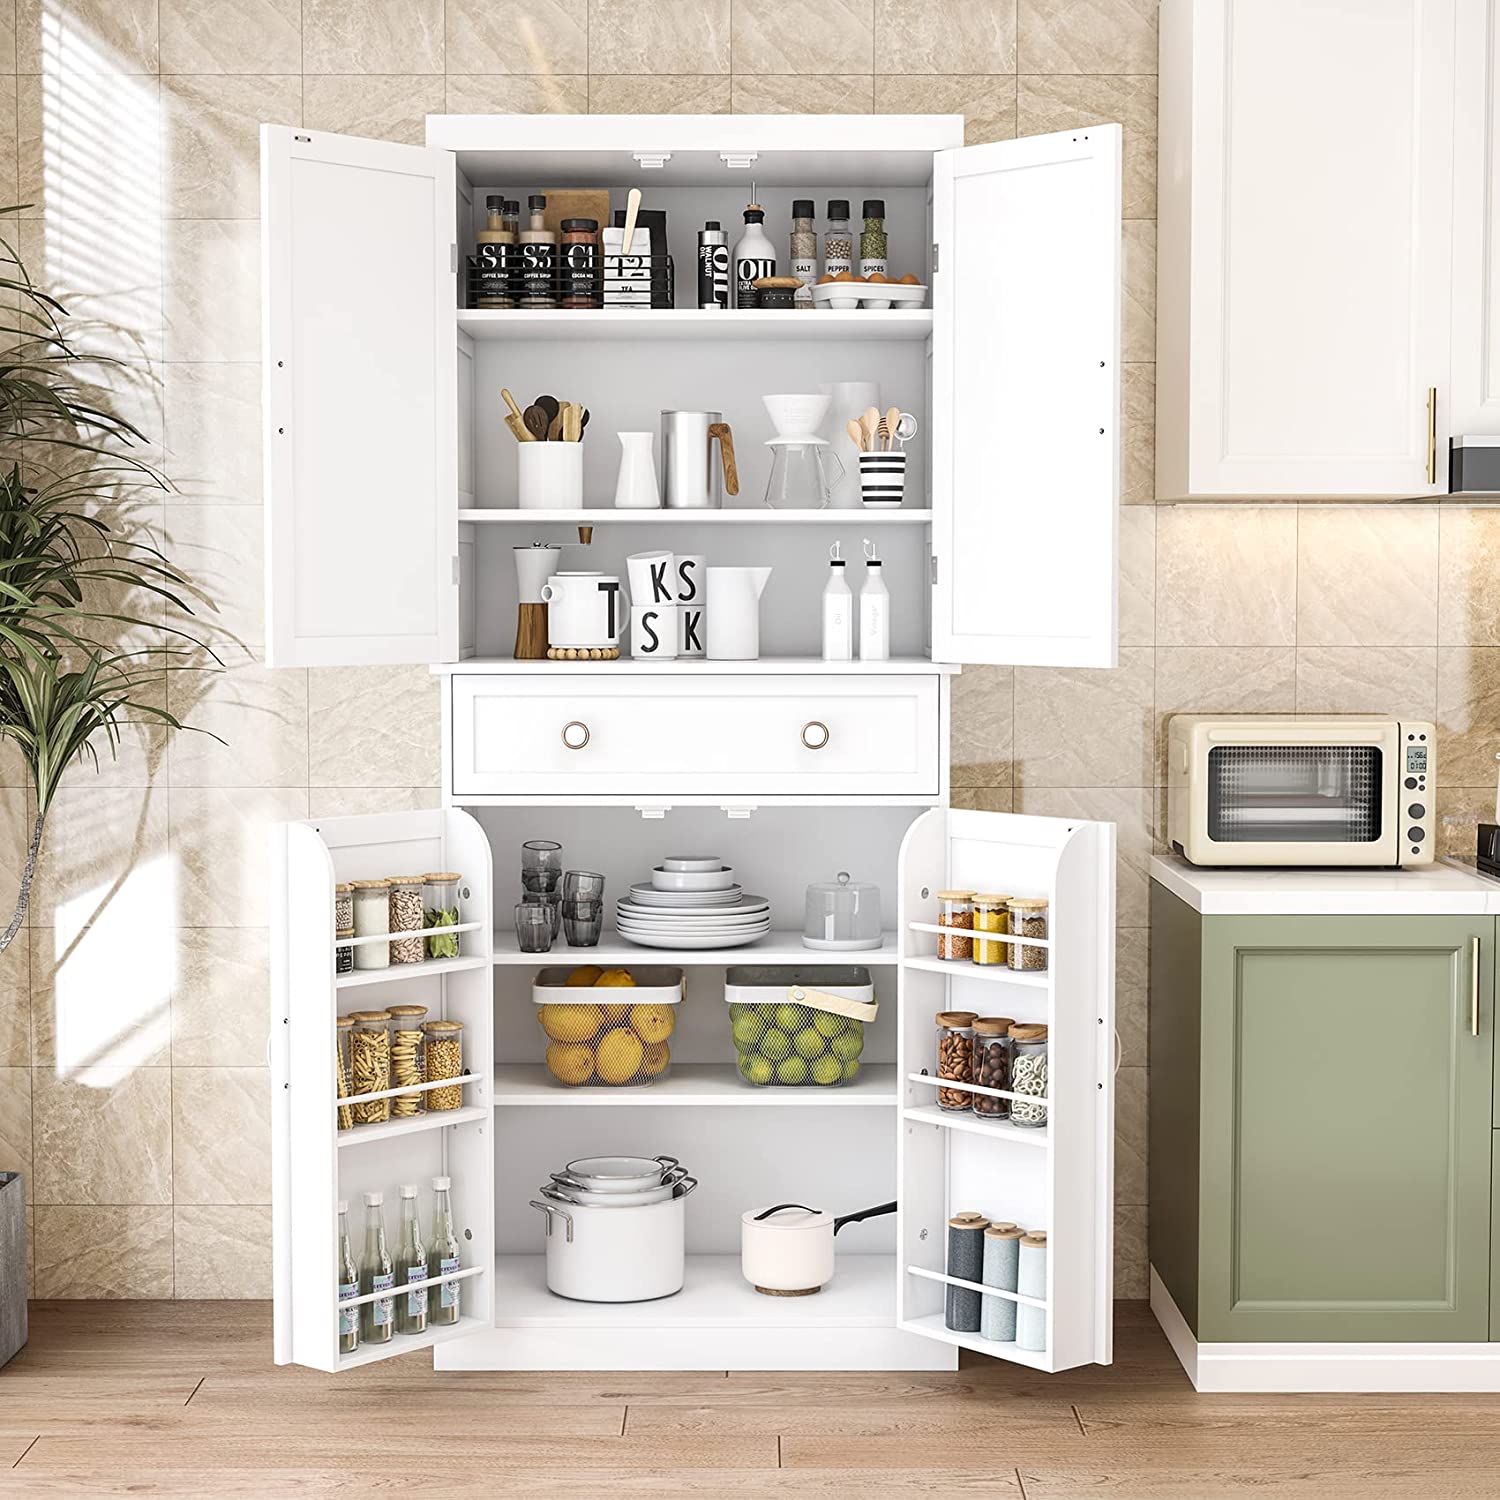
Welcome to our comprehensive guide on kitchen storage ideas, specifically focusing on walk-in pantry solutions. A well-organized and stylish pantry can transform your kitchen space, making it functional, efficient, and aesthetically pleasing. Whether you have a small pantry or a spacious walk-in pantry, implementing the right storage ideas can maximize your storage capacity and provide easy access to all your essential items.
In this article, we will share ten tips to help you create a stylish and practical walk-in pantry that meets your storage needs. From utilizing vertical space to incorporating labeled containers, these ideas will help you optimize your pantry’s functionality while elevating its overall design.
So, let’s dive in and discover some fantastic ideas to revolutionize your kitchen storage!
Key Takeaways:
- Maximize your walk-in pantry’s storage potential by utilizing vertical space, installing adjustable shelving, and incorporating pull-out baskets. These tips create a well-organized and functional pantry while optimizing every inch of available room.
- Transform your walk-in pantry into a stylish and efficient space by adding a counter, proper lighting, labeled containers, and a chalkboard wall. Organize by categories and maintain regular cleaning to ensure a well-maintained and enjoyable pantry experience.
Read more: How To Organize A Walk-in Pantry
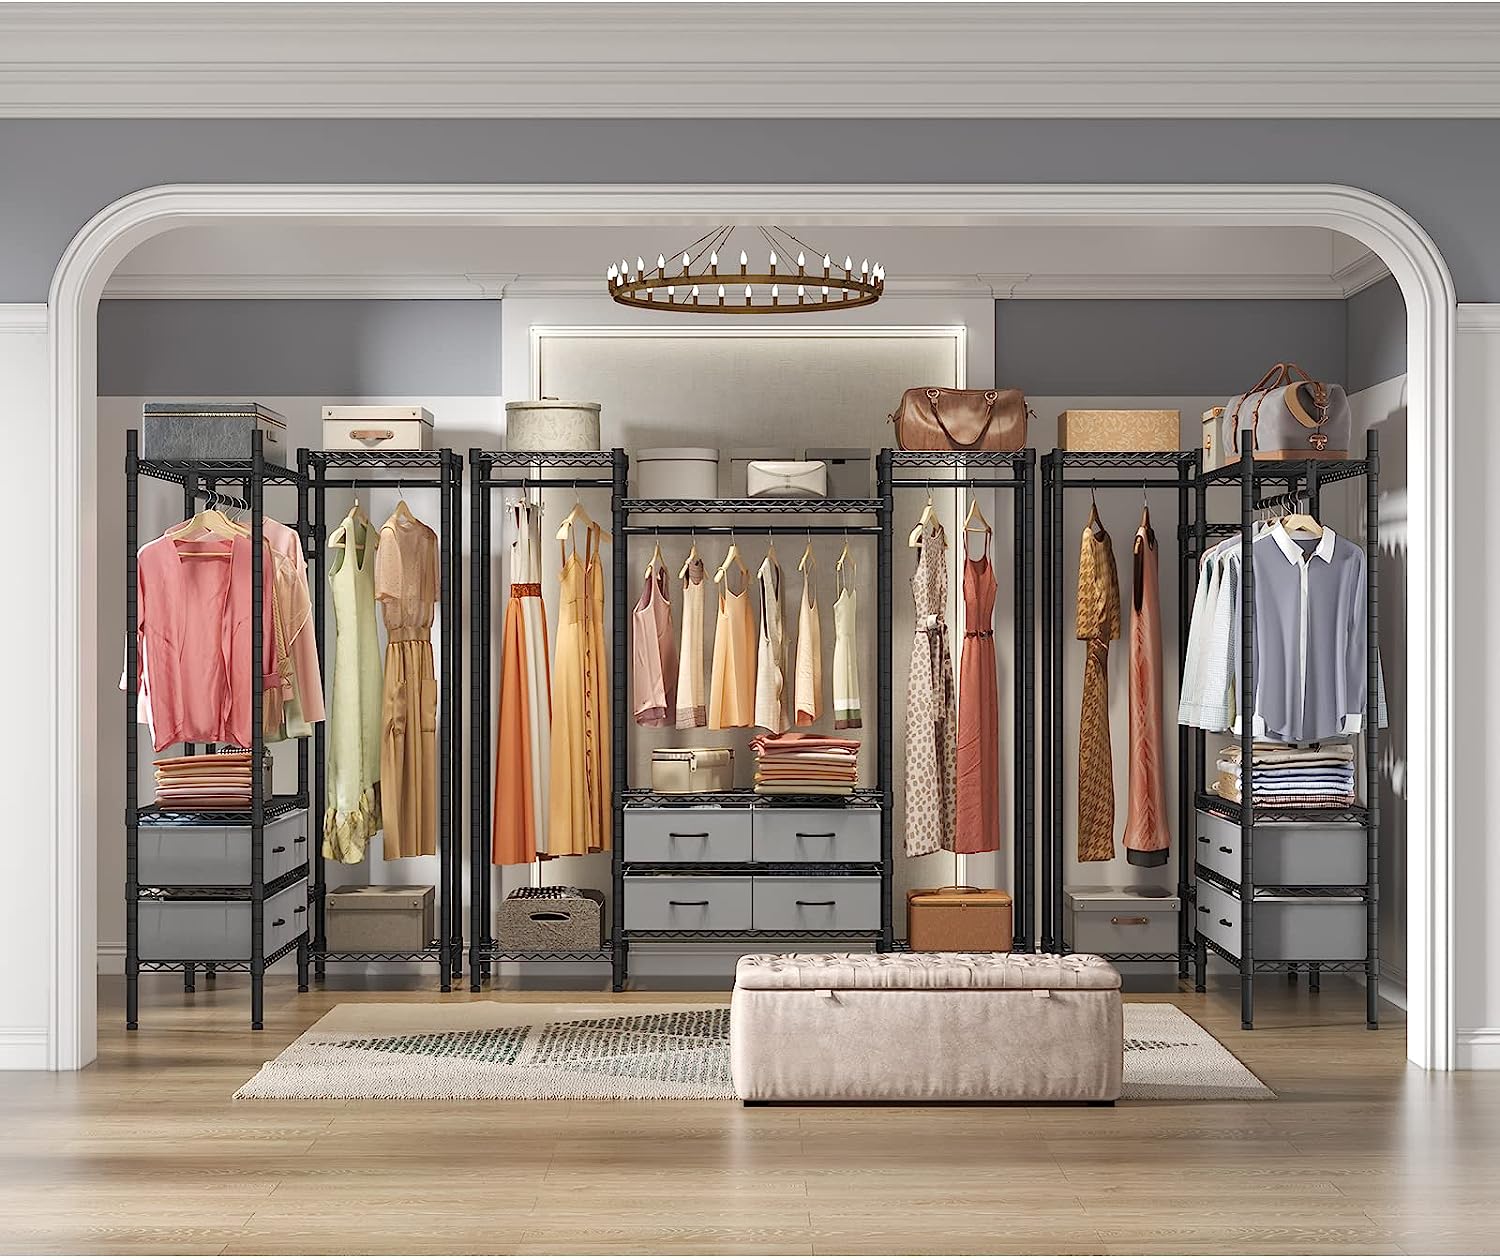
Tip 1: Utilize Vertical Space
When it comes to maximizing storage in your walk-in pantry, utilizing vertical space is essential. Vertical storage not only allows you to make the most of every inch but also keeps your pantry organized and easily accessible.
Start by installing tall shelves that extend from floor to ceiling. These shelves provide ample space for storing items such as canned goods, jars, and small appliances. Consider adjustable shelves to accommodate items of different heights, ensuring efficient use of vertical space.
In addition to shelves, take advantage of the inside of doors by attaching hooks or installing door-mounted organizers. These can hold items like spatulas, measuring cups, and oven mitts, keeping them within reach and saving valuable shelf space.
Another clever way to utilize vertical space is by installing a pegboard on one wall of your pantry. This versatile solution allows you to hang pots, pans, and utensils, freeing up cabinet space and creating a visually appealing display.
Lastly, don’t forget to use the topmost portions of your pantry for storage. For high cabinets or hard-to-reach areas, consider storing infrequently used items such as specialty bakeware or seasonal decorations.
By maximizing the vertical space in your walk-in pantry, you can create a well-organized and functional storage area that optimizes every inch of available room.
Tip 2: Install Adjustable Shelving
One of the keys to creating a well-organized and versatile walk-in pantry is to install adjustable shelving. Adjustable shelves allow you to customize the height and spacing between shelves to accommodate items of various sizes and shapes.
With adjustable shelves, you have the flexibility to change the layout of your pantry as your storage needs evolve. This is especially useful when storing bulky items like kitchen appliances or tall food containers.
When installing adjustable shelving, consider using wire or mesh shelves. These types of shelves allow for better ventilation and visibility, making it easier to locate items and preventing any unpleasant odors from lingering.
Ensure that the shelves are sturdy and can support the weight of your stored items. Invest in high-quality brackets and supports to maintain the stability of the shelves, especially when you plan to store heavier items like large jars or appliances.
Your walk-in pantry should be a space that adapts to your needs and is reconfigurable when necessary. Installing adjustable shelving provides you with the versatility to optimize your pantry storage and easily accommodate a variety of items.
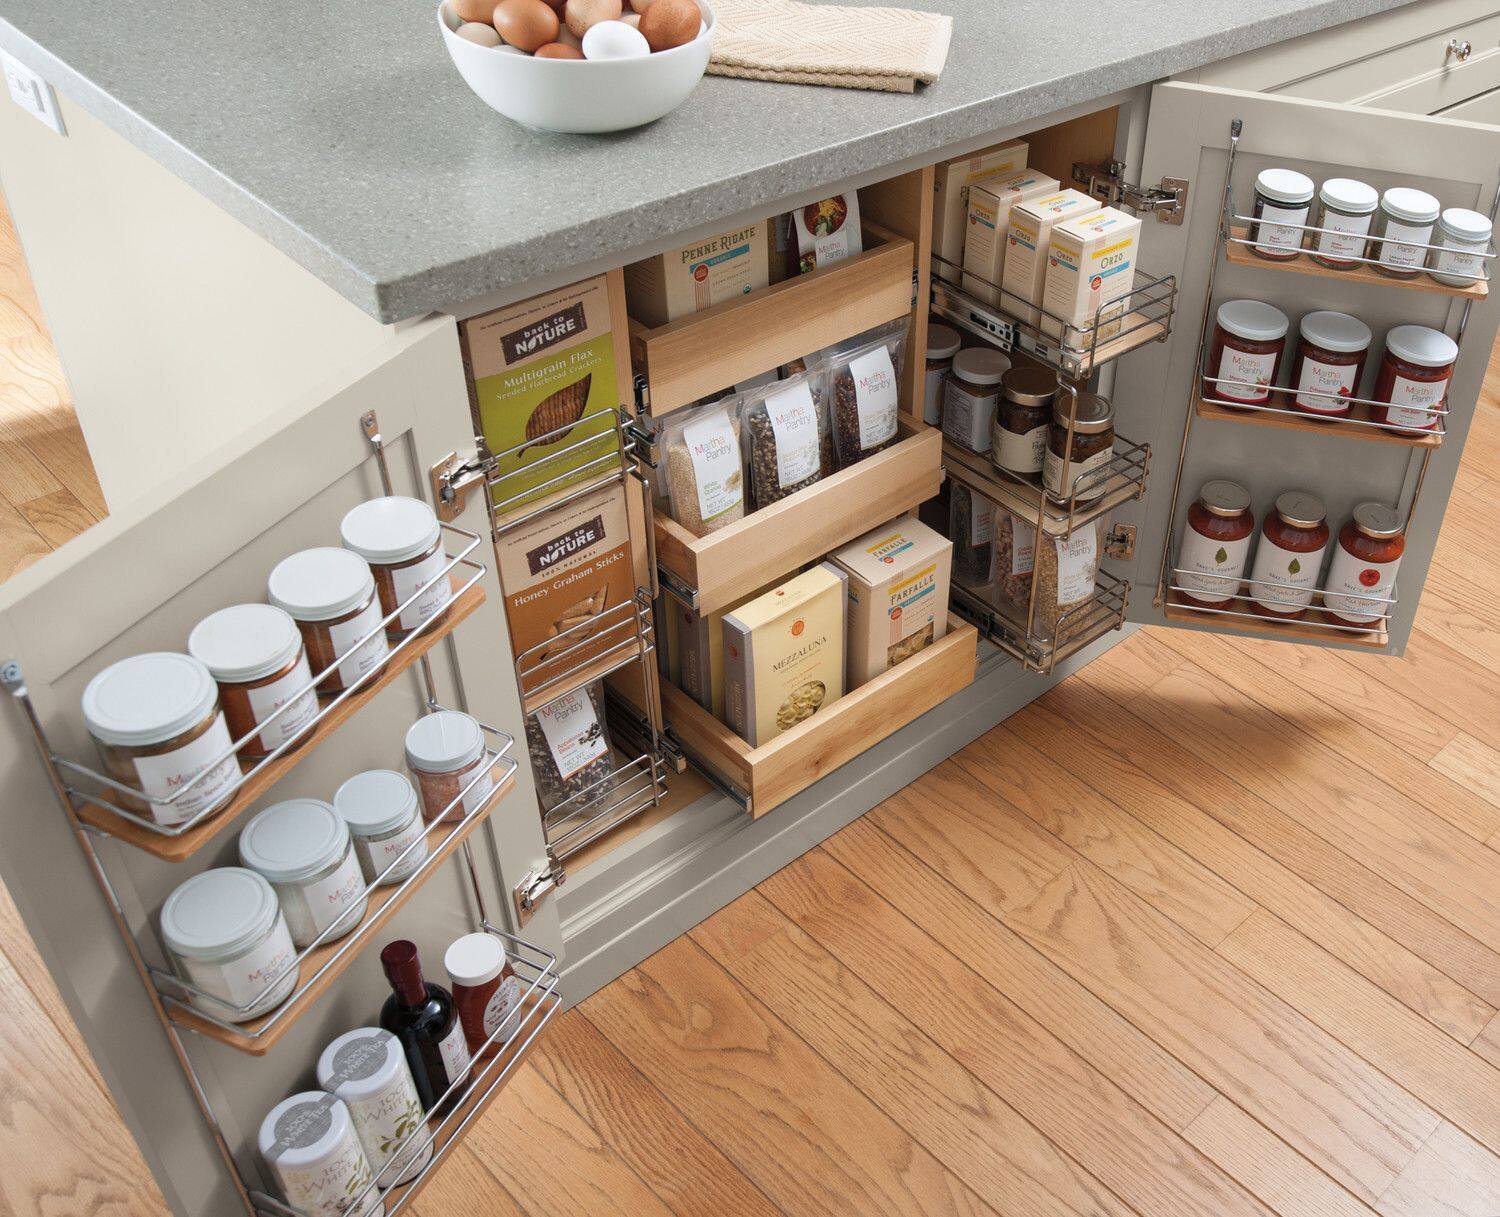
Tip 3: Incorporate Pull-Out Baskets
Incorporating pull-out baskets in your walk-in pantry is a fantastic way to enhance organization and accessibility. Pull-out baskets allow you to maximize space by utilizing the depth of your pantry shelves while providing easy access to stored items.
These baskets come in various sizes and can be installed on full-extension slides, allowing them to glide smoothly in and out of the pantry. They are ideal for storing fruits, vegetables, snacks, and other loose items.
By using pull-out baskets, you can categorize and separate different types of items for better organization. For example, you can dedicate one pull-out basket for snacks, another for spices, and another for baking supplies.
Labeling the baskets can further enhance organization by making it quick and easy to locate specific items. You can use small chalkboard labels, adhesive tags, or even colored tape to identify the contents of each basket.
When installing pull-out baskets, consider the overall height and depth of your pantry shelves to ensure that they fit properly. Opt for durable and easy-to-clean materials like wire or plastic-coated metal.
Incorporating pull-out baskets in your walk-in pantry not only maximizes storage space but also improves accessibility and organization. Say goodbye to rummaging through stacks of items and hello to a well-organized pantry that simplifies your everyday kitchen tasks.
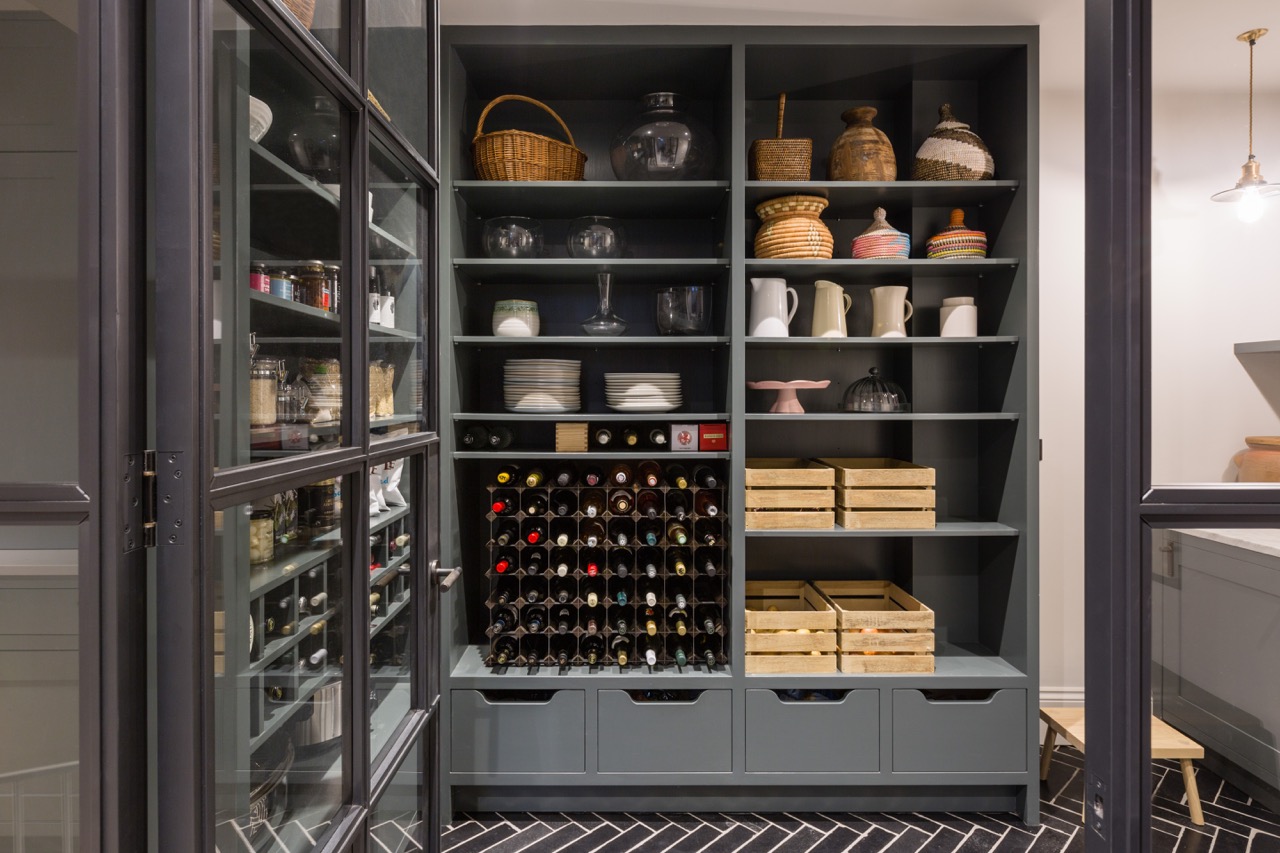
Tip 4: Opt for Open Shelving
Consider opting for open shelving in your walk-in pantry to create a visually appealing and accessible storage solution. Open shelves provide a sense of openness and allow you to showcase your pantry items, making them both functional and decorative.
Open shelves are perfect for displaying items that you use frequently or want to keep within easy reach. This can include items like cookbooks, decorative jars filled with grains or pasta, or colorful dishes and glassware.
When designing your open shelves, consider incorporating a mix of different shelf depths to accommodate varying sizes of items. This helps create visual interest and allows for more efficient use of space.
To keep items organized on open shelves, use baskets, bins, or decorative storage containers. This helps group similar items together and prevents the shelves from looking cluttered.
One important consideration with open shelving is to regularly declutter and dust the items on display. Since everything is visible, it’s essential to keep the shelves neat and tidy. But, with proper maintenance, open shelving can add a touch of elegance and charm to your walk-in pantry.
Another advantage of open shelving is that it can make your pantry feel more spacious, as the absence of cabinet doors visually expands the room. This is especially beneficial if you have a small pantry.
Don’t be afraid to get creative with the design of your open shelves. Consider using reclaimed wood for a rustic look or sleek metal shelves for a modern touch. The possibilities are endless!
By opting for open shelving in your walk-in pantry, you can create a visually appealing storage solution that allows you to showcase your favorite items and keep your pantry well-organized.
Read more: 20 Best Walk In Pantry Ideas For More Space
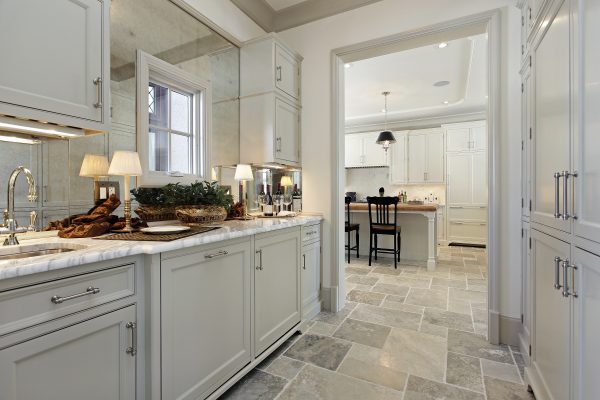
Tip 5: Add a Counter Space
Adding a counter space to your walk-in pantry is a game-changer when it comes to functionality and convenience. A dedicated counter provides a convenient area to prep food, store small appliances, or even work on crafts or projects.
When choosing the right counter space for your pantry, consider the available space and your specific needs. If you have ample room, you can opt for a large countertop that spans the length of the pantry. Alternatively, if space is limited, a smaller, compact counter will still provide a useful work surface.
Make sure the counter surface is durable and easy to clean. Materials like granite, quartz, or laminate are popular choices for pantry countertops. They offer durability, a smooth surface for food preparation, and are resistant to stains and scratches.
Incorporating additional storage beneath the counter can create even more functionality. Install cabinets, drawers, or open shelves to keep your pantry essentials or small appliances within reach and neatly organized.
Consider adding electrical outlets underneath the counter as well. This allows you to conveniently plug in appliances like mixers, blenders, or juicers without the hassle of searching for an outlet elsewhere in the kitchen.
A counter space in your walk-in pantry not only provides a practical area for various tasks but also helps to keep your kitchen counters clutter-free. It offers a dedicated space for prepping meals, storing and using small appliances, and keeping your pantry organized and efficient.
Get creative with the design of your pantry counter by adding decorative elements, such as a backsplash, to enhance the overall aesthetics of the space. Don’t forget to personalize it with your favorite kitchen gadgets or decor!
With a dedicated counter space in your walk-in pantry, you can streamline your kitchen activities and make meal preparation a breeze.
Consider using clear storage containers to keep your pantry organized and easily visible. This will help you quickly identify items and keep track of your inventory.
Tip 6: Include Proper Lighting
Proper lighting is crucial for a functional and inviting walk-in pantry. It not only helps you easily locate items but also enhances the overall ambiance of the space. Including the right lighting fixtures can transform your pantry into a well-lit and efficient storage area.
Start by ensuring that your pantry has sufficient general lighting. Install overhead fixtures such as recessed lights or flush mount ceiling lights to provide even illumination throughout the space. This ensures that every corner of your pantry is well-lit and easily accessible.
In addition to general lighting, incorporate task lighting in specific areas where you need focused illumination. For example, install under-cabinet lighting to illuminate countertops or shelves where you do most of your food preparation or reading labels.
Consider using LED lights for your pantry as they are energy-efficient, long-lasting, and provide crisp, bright illumination. LED strip lights can be installed along shelves or underneath cabinets to provide subtle and practical lighting.
If you want to add a touch of elegance to your walk-in pantry, consider installing decorative lighting fixtures. Pendant lights or chandeliers can create a focal point and add a stylish element to the space.
Don’t forget about natural light! If your pantry has a window or glass door, take advantage of the natural sunlight during the day. Opt for sheer curtains or blinds that can be easily opened and closed to control the amount of light entering the space.
Lighting controls are another important aspect to consider. Install dimmer switches so you can adjust the brightness levels based on your needs and create different moods within your pantry.
Properly lighting your walk-in pantry enhances visibility, improves functionality, and enhances the overall aesthetics of the space. It ensures that you can easily find and access your pantry items, making your kitchen tasks more efficient and enjoyable.
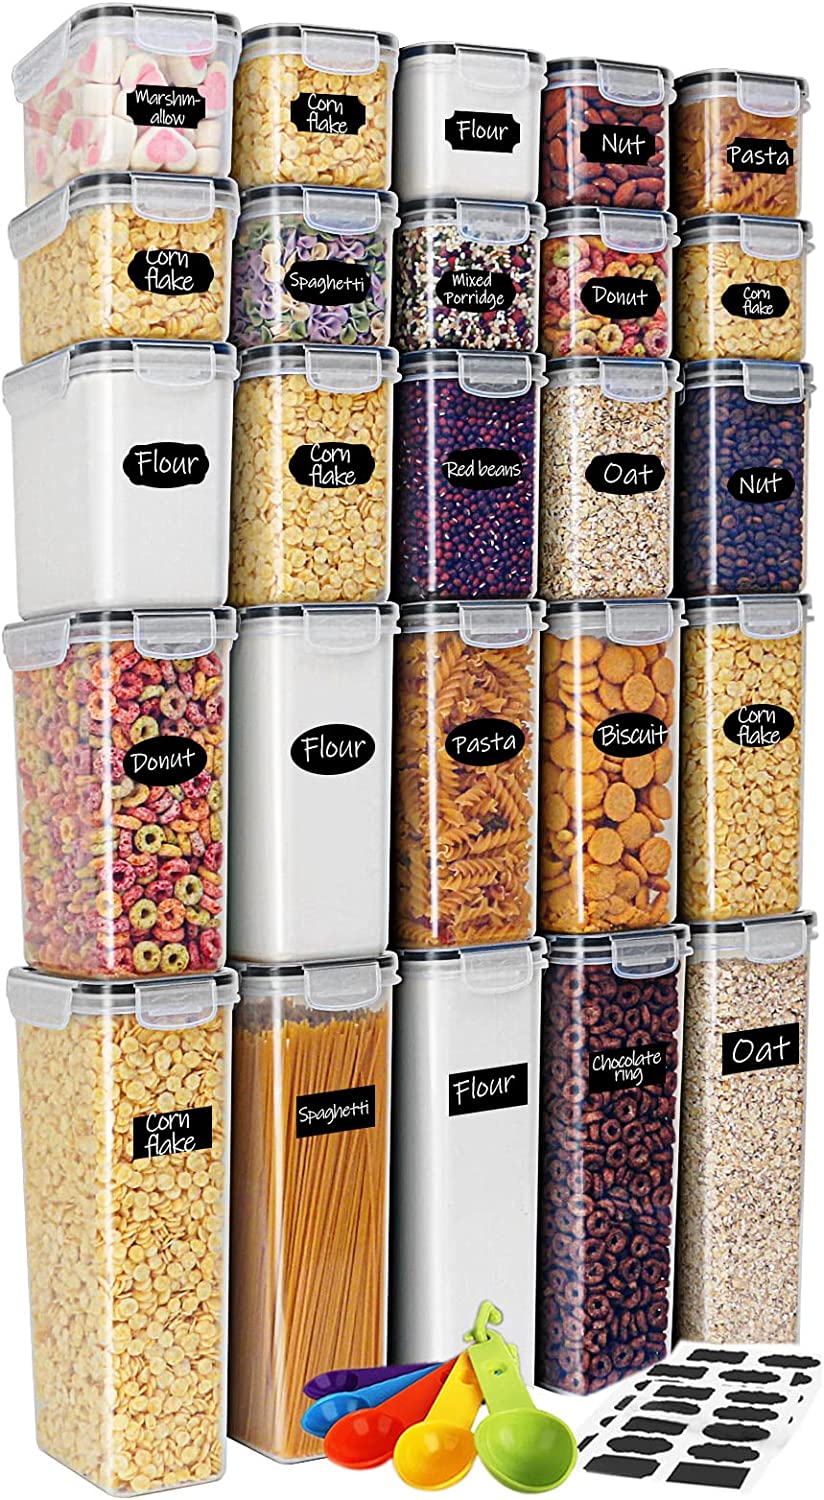
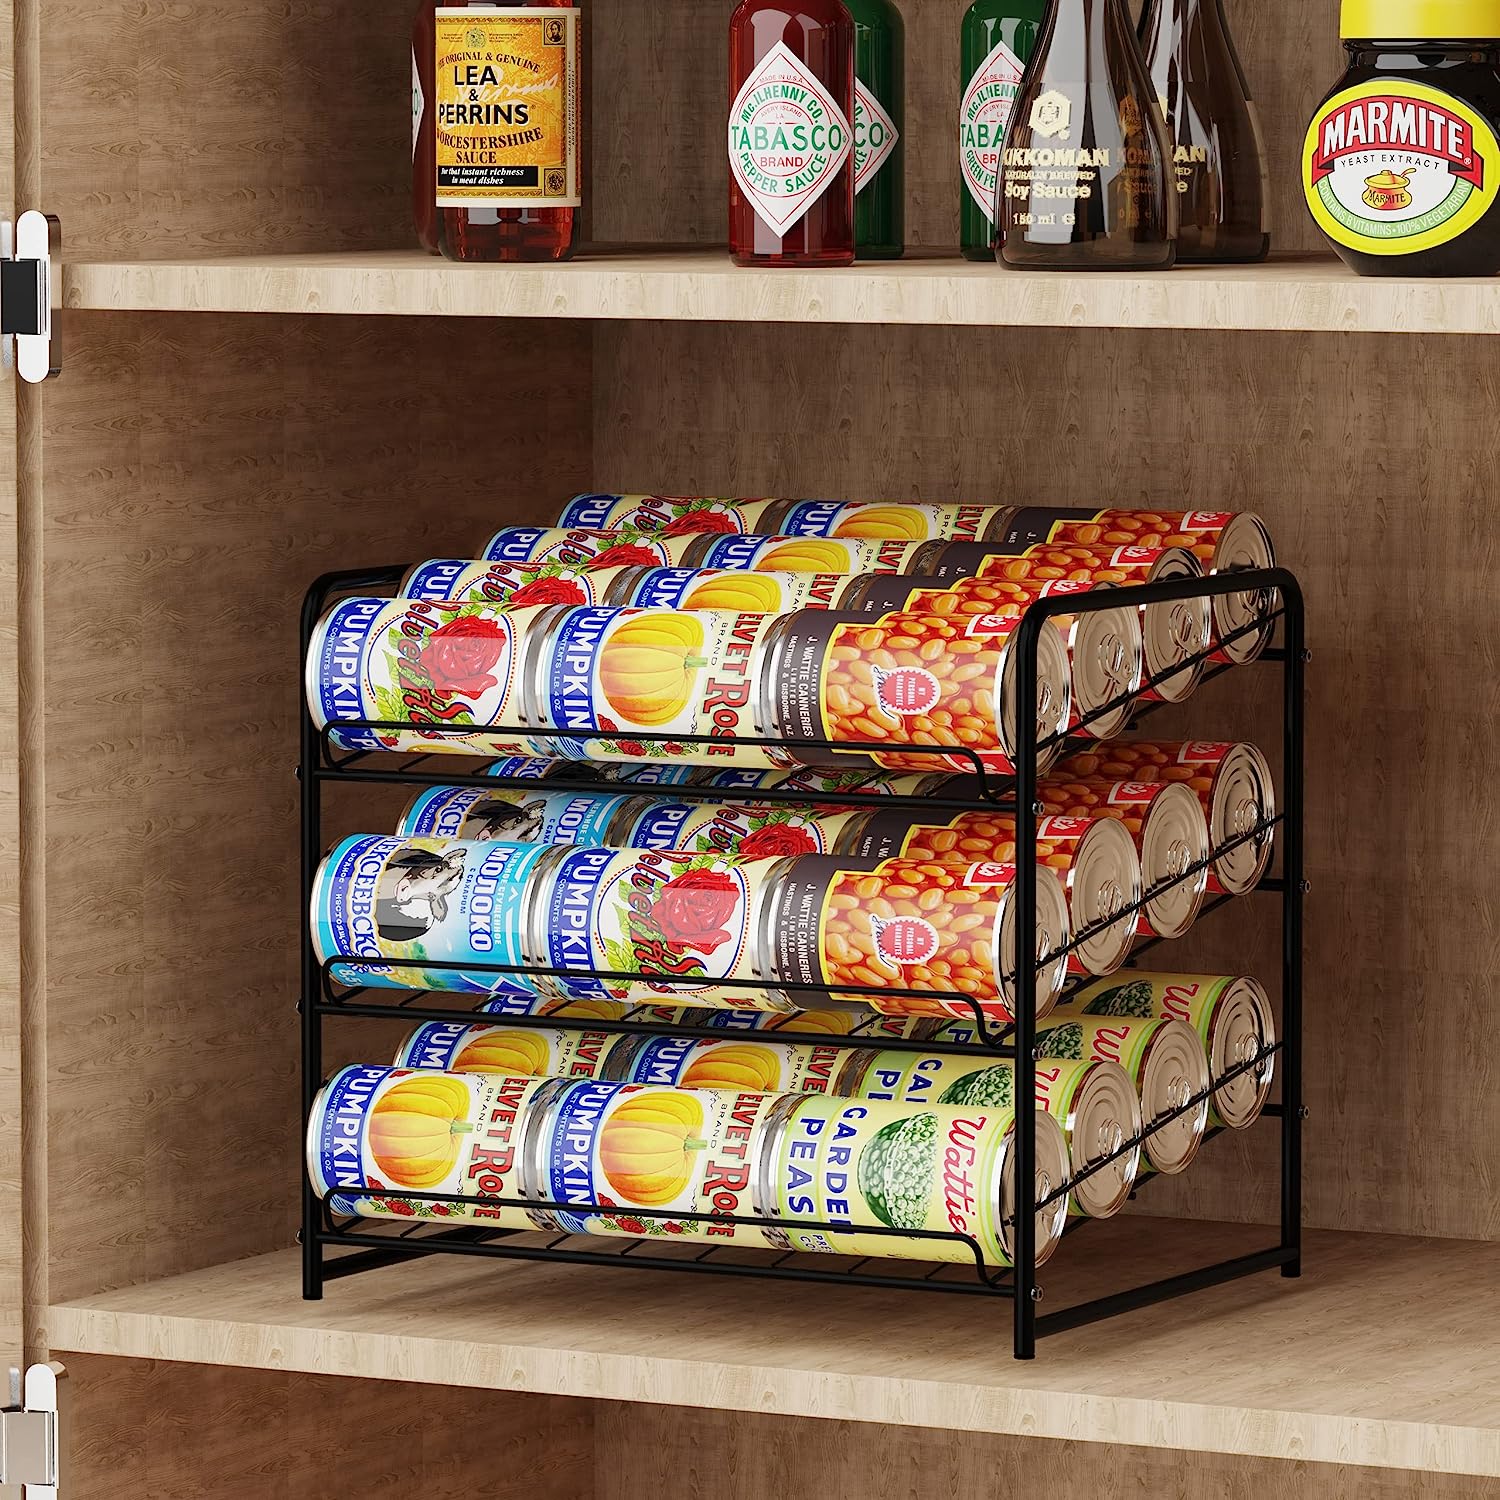
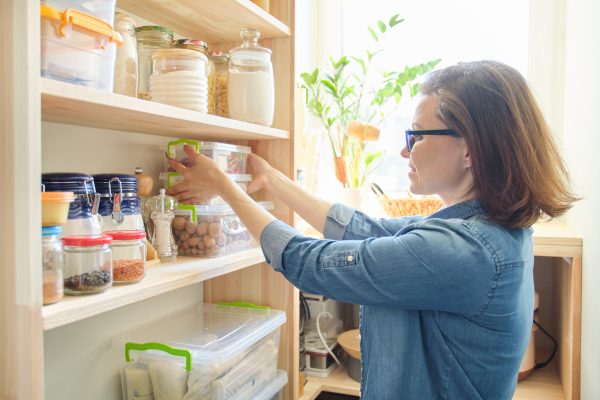
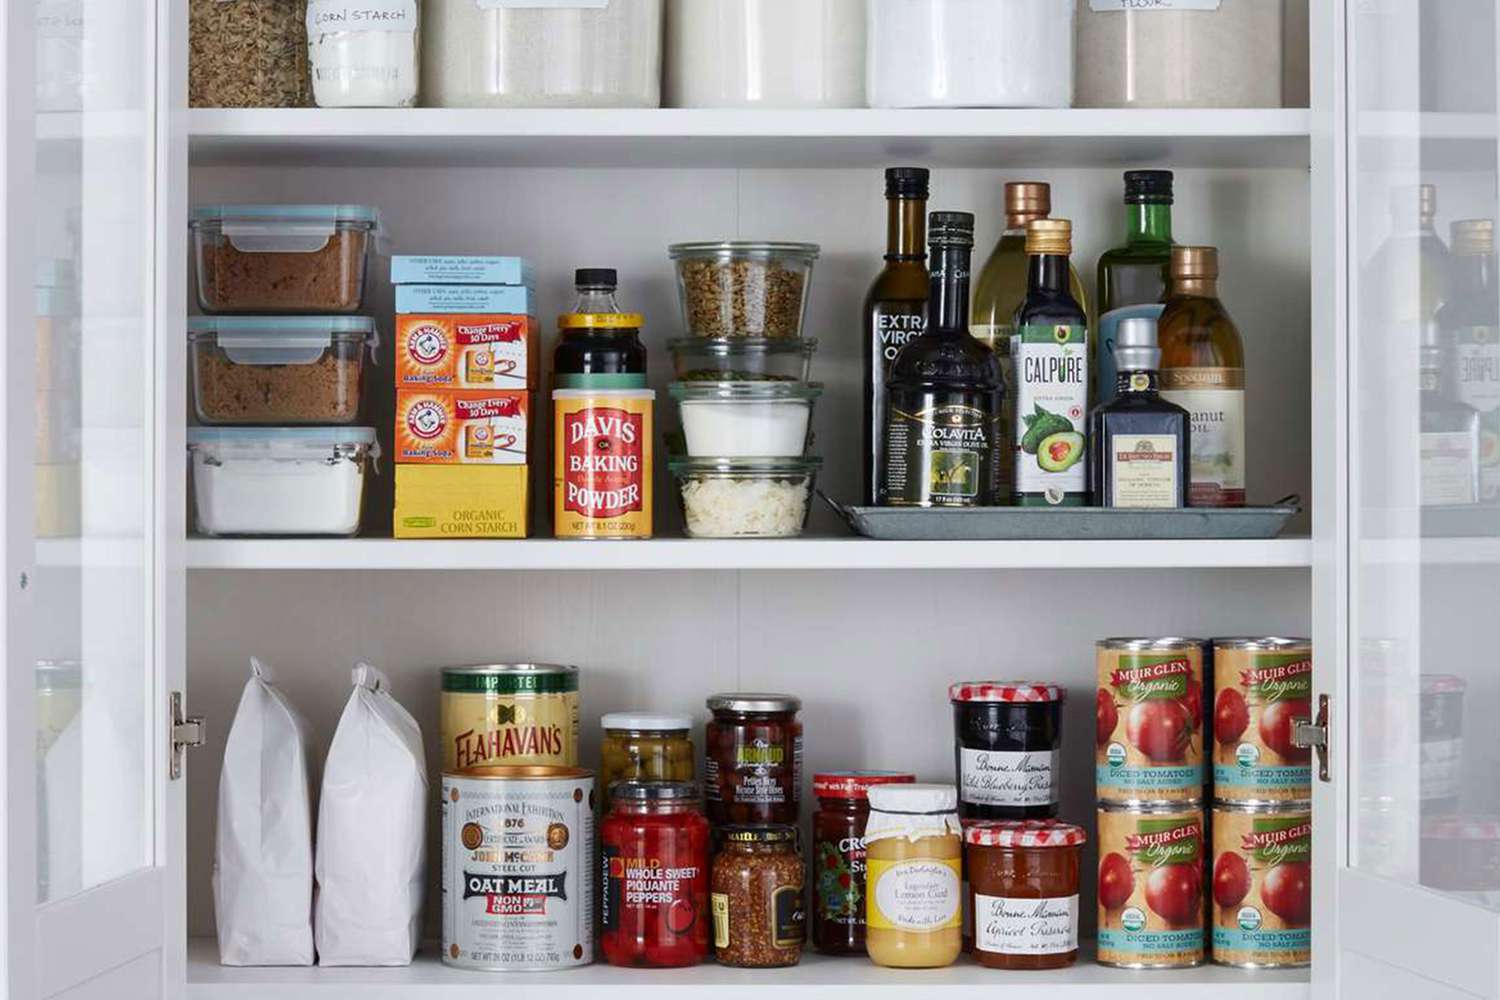
Tip 7: Use Labeled Containers
Using labeled containers is a game-changer when it comes to organizing your walk-in pantry. Not only do labeled containers keep your items neatly organized, but they also make it quick and easy to find what you’re looking for.
Start by transferring dry goods such as grains, cereals, and pasta into airtight containers. Clear containers are ideal as they allow you to see the contents at a glance. Label each container with the name of the item using a label maker, adhesive labels, or even chalkboard labels for a stylish touch.
For smaller items like spices, tea bags, or snacks, use smaller containers or jars and label them accordingly. This prevents them from getting lost or forgotten in the pantry and helps you easily identify them.
Containers are also a great solution for storing baking ingredients such as flour, sugar, and baking soda. Not only do they keep these items fresh, but they also prevent unwanted spills or messes. Labeling them ensures you can grab the right ingredient with ease.
Another tip is to use clear, stackable bins or baskets to group similar items together. For example, you can have a basket for baking supplies, another for canned goods, and another for snacks. Label each basket or bin to make it clear which category of items it contains.
Don’t forget about labeling the shelves themselves. Attach small labels or signs to each shelf to indicate what items should be stored there. This helps maintain a consistent and organized system that is easy to maintain.
The benefits of labeled containers go beyond organization. They also contribute to the overall aesthetics of your pantry, giving it a clean and streamlined look.
Take the time to create a labeling system that works for you. It may involve using different colors or fonts for different categories or using a specific organizational structure that makes sense to you.
By using labeled containers in your walk-in pantry, you can create a visually appealing and organized storage space that makes meal prep and pantry management a breeze.
Tip 8: Consider a Chalkboard Wall
Adding a chalkboard wall to your walk-in pantry is a creative and functional way to stay organized and add a touch of personality to the space.
A chalkboard wall serves as a versatile and interactive tool where you can write down your grocery list, meal plans, or important reminders. It allows you to easily jot down notes and erase them when they’re no longer needed.
Consider dedicating an entire wall or a portion of it to a chalkboard surface. You can either paint the wall with chalkboard paint or purchase peel-and-stick chalkboard panels for easy installation.
Using different colored chalk or chalk markers can make your chalkboard wall visually appealing and help categorize your notes. For example, you can use one color for grocery lists, another for meal plans, and another for important reminders.
Get creative with your chalkboard wall by adding decorative elements or labels. Consider framing the wall with molding or adding a decorative border to make it stand out. You can also create different sections on the wall for specific purposes like a meal planning section or a space for notes and messages.
Don’t forget the practical side of the chalkboard wall. Keep a tray or small container nearby to hold chalk or chalk markers, making it easy to update your notes whenever needed.
The versatility of a chalkboard wall allows you to adapt it to your needs. Whether you want to write down a last-minute ingredient you ran out of or leave a loving message for your family, the chalkboard wall becomes the central hub of communication in your pantry.
Not only does it serve as a functional tool, but a chalkboard wall also adds a fun and whimsical element to your walk-in pantry. Be creative and express yourself by utilizing this unique and practical storage solution!
Read more: 10 Steps To A Perfectly Organized Pantry
Tip 9: Organize by Categories
Organizing your walk-in pantry by categories is a simple yet effective way to maintain order and ease of access. Categorizing your items makes it easier to find what you need and helps prevent clutter from building up.
Start by grouping similar items together. For example, create separate zones or sections for canned goods, baking supplies, snacks, condiments, and so on. This allows you to quickly locate specific items when you need them.
Within each category, arrange items in a way that makes sense to you. For instance, arrange canned goods by type or expiration date, and stack them so that the labels are visible. Place frequently used items at eye level or within easy reach, while keeping lesser-used items on higher or lower shelves.
Utilize storage containers, bins, or baskets to further compartmentalize and organize your items. This helps keep smaller items contained and prevents them from getting lost or buried in the pantry.
Label each category using clear, easily readable labels. You can use adhesive labels, label makers, or even chalkboard labels for a stylish touch. This not only adds to the overall organization but also makes it easier for other family members to find and put away items.
Consider using clear containers for bulk items or loose items like pasta, rice, or snacks. This allows you to see the contents at a glance and helps prevent food waste or duplication of items.
Regularly assess your pantry and adjust the organization as needed. Over time, your storage needs may change, and it’s important to adapt accordingly. Take the opportunity to declutter and donate any items that you no longer use or have expired.
By organizing your walk-in pantry by categories, you create a system that simplifies meal preparation, grocery shopping, and overall pantry management. It brings order and efficiency to your pantry, making it a pleasure to use.
Tip 10: Maintain Regular Cleaning and Decluttering
Maintaining regular cleaning and decluttering practices is essential for keeping your walk-in pantry organized, functional, and visually appealing. By setting aside time to clean and declutter, you can prevent the accumulation of excess items and ensure that your pantry remains a well-organized space.
Start by scheduling regular cleaning sessions for your pantry. This includes wiping down shelves, cleaning spills, and removing any food crumbs or debris that may have accumulated. Use non-toxic cleaning solutions to keep your pantry free from harmful chemicals.
During the cleaning process, take the opportunity to assess your pantry items. Discard any expired or spoiled food items, as well as any duplicates or items that you no longer need or use. This helps free up valuable space and keeps your pantry stocked with fresh and usable items.
Consider investing in suitable storage solutions that help optimize space and keep items organized. This can include additional shelves, bins, or specialized storage containers. Find storage solutions that work best for your pantry layout and specific needs.
Regularly review the organization system in your pantry. Ask yourself if it is still efficient and if it meets your current storage needs. Make adjustments as necessary to ensure your items are easily accessible and properly categorized.
Encourage everyone in the household to put items back in their designated places after use. This helps maintain the organization and prevents clutter from building up. Foster a habit of tidying up the pantry daily to keep it in good order.
Additionally, make it a habit to check the expiry dates on products regularly. This ensures that you’re using items before they go bad and helps maintain a fresh and safe food supply in your pantry.
Lastly, consider implementing a regular rotation system for pantry items. This involves placing newly purchased items towards the back of the shelves and moving older items to the front. Doing so helps ensure that items are used before they expire, reducing food waste.
Maintaining regular cleaning and decluttering practices in your walk-in pantry is essential for keeping it organized and functional. By making it a priority, you’ll enjoy a well-maintained space that enhances your kitchen experience.
Conclusion
Creating a stylish and functional walk-in pantry is an essential aspect of kitchen organization. By implementing the tips and ideas outlined in this article, you can transform your pantry into a well-organized and efficient space that meets your storage needs. From utilizing vertical space to incorporating labeled containers, each tip plays a crucial role in optimizing your pantry storage and enhancing its overall design.
Remember to consider your specific requirements and personal preferences when implementing these ideas. Every pantry is unique, and what works well for one person may not necessarily work for another. Tailor these tips to suit your space, lifestyle, and storage demands.
Maintaining an organized pantry requires ongoing effort and commitment. Regularly clean and declutter your pantry, assess your storage needs, and make adjustments as necessary. By practicing regular cleaning and organizing habits, you can ensure that your pantry remains a functional and enjoyable space to work in.
We hope that this comprehensive guide on kitchen storage ideas has inspired you to revamp your walk-in pantry. With creativity, thoughtful organization, and attention to detail, you can create a pantry that not only provides ample storage but also enhances the overall aesthetics of your kitchen. Enjoy the process of transforming your pantry into a haven of organization and efficiency!
Frequently Asked Questions about Walk-in Pantry Ideas: 10 Tips For Stylish Kitchen Storage
Was this page helpful?
At Storables.com, we guarantee accurate and reliable information. Our content, validated by Expert Board Contributors, is crafted following stringent Editorial Policies. We're committed to providing you with well-researched, expert-backed insights for all your informational needs.

0 thoughts on “Walk-in Pantry Ideas: 10 Tips For Stylish Kitchen Storage”