Home>Storage Ideas>Kitchen Storage>How To Install Kitchen Cabinets On The Floor And Walls
Kitchen Storage
How To Install Kitchen Cabinets On The Floor And Walls
Modified: October 28, 2024
Learn how to install kitchen cabinets on the floor and walls with our step-by-step guide. Discover practical kitchen storage ideas for maximizing space.
(Many of the links in this article redirect to a specific reviewed product. Your purchase of these products through affiliate links helps to generate commission for Storables.com, at no extra cost. Learn more)
Introduction
Welcome to our comprehensive guide on how to install kitchen cabinets. Whether you’re remodeling your kitchen or building a brand new one, properly installing kitchen cabinets is an essential part of the process. Installing cabinets can significantly enhance the functionality and appeal of your kitchen while providing ample storage space for all your cookware, utensils, and ingredients.
In this step-by-step guide, we’ll walk you through the process of installing both base cabinets on the floor and wall cabinets. We’ll provide you with valuable tips and expert advice to ensure a smooth and successful installation.
Before we dive into the installation process, let’s take a look at the tools and materials you’ll need to have on hand:
Key Takeaways:
- Transform your kitchen with expertly installed cabinets, enhancing storage and style. Follow precise measurements, secure fastening, and attention to detail for a professional and durable result.
- Enjoy a functional and organized kitchen with properly installed cabinets. From floor to wall, follow step-by-step guidance for a seamless and visually appealing installation.
Read more: How To Install Cabinet On Wall
Tools and Materials Needed
- Measuring tape
- Screwdriver
- Drill
- Level
- Pencil
- Cabinet screws
- Wall anchors
- Shims
- Caulk gun
- Caulk
- Spackle
- Paint or stain
Once you have gathered all of the necessary tools and materials, it’s time to prepare your work area for the cabinet installation. Let’s move on to the next step.
Key Takeaways:
- Transform your kitchen with expertly installed cabinets, enhancing storage and style. Follow precise measurements, secure fastening, and attention to detail for a professional and durable result.
- Enjoy a functional and organized kitchen with properly installed cabinets. From floor to wall, follow step-by-step guidance for a seamless and visually appealing installation.
Read more: How To Install Cabinet On Wall
Tools and Materials Needed
To ensure a successful kitchen cabinet installation, it’s important to have the right tools and materials on hand. Here’s a list of what you’ll need:
Tools:
- Measuring tape: You’ll need a measuring tape to accurately measure and mark the layout of your cabinets.
- Screwdriver: A screwdriver will be necessary for driving screws into the cabinets and securing them in place.
- Drill: A drill will come in handy for pre-drilling holes and driving screws into the walls or cabinet frames.
- Level: A level is essential for ensuring that your cabinets are installed straight and level.
- Pencil: You’ll need a pencil for marking measurements and guidelines on the walls and cabinets.
Materials:
- Cabinet screws: These screws are specifically designed for installing cabinets and provide sturdy support.
- Wall anchors: Wall anchors will be necessary if you’re installing cabinets on drywall or plaster.
- Shims: Shims are used to adjust and level the cabinets, ensuring a professional and even installation.
- Caulk gun: A caulk gun is needed for applying caulk to fill any gaps between the cabinets and the walls or seams.
- Caulk: Caulk is used for sealing and finishing the installation, creating a clean and polished look.
- Spackle: Spackle is useful for filling any holes or imperfections in the walls before installing the cabinets.
- Paint or stain: If you’re planning to paint or stain your cabinets, make sure you have the appropriate materials on hand.
Having these tools and materials readily available will make the installation process smoother and more efficient. Now that you’ve gathered everything you need, it’s time to move on to preparing the work area for the cabinet installation.
Preparing the Work Area
Before you start installing your kitchen cabinets, it’s important to properly prepare the work area. Taking the time to do this will ensure a more efficient and successful installation process. Here are the steps to follow:
1. Clear the Space:
Remove any obstacles or furniture that may hinder your work. Clear the area where the cabinets will be installed to provide ample space for maneuvering and assembling the cabinets.
2. Measure and Mark:
Using a measuring tape, take accurate measurements of the walls and floor where the cabinets will be installed. Mark the layout of the cabinets on the walls using a pencil. This will help you visualize the placement of each cabinet and ensure proper alignment.
3. Locate Studs:
Use a stud finder to locate the studs in the wall. Mark the locations of the studs using a pencil. It’s important to secure your cabinets to the studs for maximum stability.
4. Check for Level and Plumb:
Using a level, check the walls and floor for level and plumb. This will help you identify any uneven spots that may require adjustments or shimming during the installation process.
5. Remove Baseboards:
If there are baseboards along the walls where the cabinets will be installed, it’s recommended to remove them. This will ensure a flush and seamless installation.
6. Patch and Repair:
Inspect the walls for any holes, cracks, or imperfections. Use spackle or putty to fill in any gaps and sand the surfaces smooth. This will create a clean canvas for the cabinet installation.
By following these steps, you’ll have a well-prepared work area that is ready for the installation of your kitchen cabinets. Next, we’ll walk you through the process of installing base cabinets on the floor.
Installing Base Cabinets on the Floor
Now that you have prepared the work area, it’s time to start installing the base cabinets on the floor. Follow these step-by-step instructions for a successful installation:
1. Set a Starting Point:
Begin by establishing a starting point for your cabinets. This is typically a corner cabinet or a cabinet adjacent to an appliance. Measure the width of the cabinet and mark a guideline on the floor using a pencil.
2. Install Corner Cabinets:
If you have corner cabinets, start by installing them first. Place the corner cabinet on the starting point and adjust it so that it is level and plumb. Secure it to the wall using cabinet screws.
3. Install Remaining Cabinets:
Continue installing the remaining base cabinets one at a time. Place each cabinet along the guideline on the floor and adjust them to be level and plumb. Use clamps to hold the cabinets together as you install them.
4. Secure Cabinets to Each Other:
Once all the cabinets are in place, secure them to each other using cabinet screws. Drill pilot holes through the cabinet sides and attach them with screws. This will ensure that the cabinets are firmly connected and aligned.
Read more: How To Install A Cabinet Pantry Toe Kick
5. Check for Level and Adjust:
Using a level, check that the cabinets are level from front to back and side to side. Adjust the height of each cabinet by placing shims underneath as necessary. This will ensure that the countertop will be level when installed.
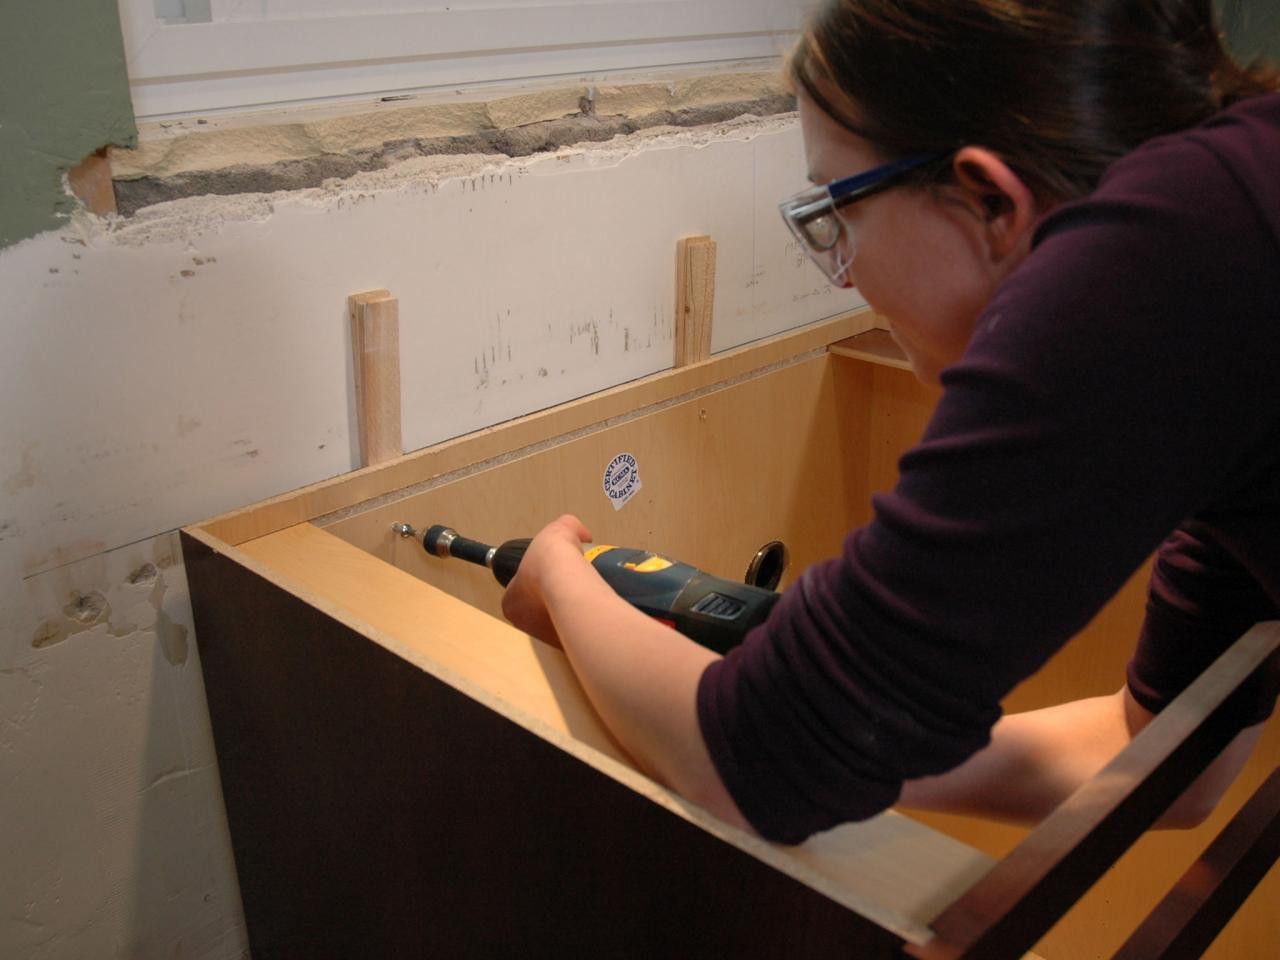
6. Secure Cabinets to the Wall:
Finally, secure the base cabinets to the wall. Drill pilot holes through the back of the cabinets and into the wall studs. Use cabinet screws to attach the cabinets securely to the wall. Repeat this process for all the cabinets.
With the base cabinets successfully installed on the floor, you have laid a solid foundation for your kitchen. Now, let’s move on to measuring and marking for the wall cabinets.
Measuring and Marking for Wall Cabinets
After you have installed the base cabinets on the floor, it’s time to measure and mark for the installation of the wall cabinets. Proper measurements and accurate markings are crucial to ensure that the wall cabinets are aligned and evenly spaced. Follow these steps for measuring and marking:
1. Find the High Point:
Start by determining the high point on the floor. Use a level and a measuring tape to find the highest spot where the wall cabinets will be installed. This will help ensure that your cabinets are level and properly aligned.
2. Measure Cabinet Height:
Measure the height of each wall cabinet and mark a level line on the wall along the high point. Make sure to account for the height of any crown molding or trim that will be installed between the top of the cabinets and the ceiling.
3. Determine Cabinet Placement:
Decide on the placement of each wall cabinet. Start with a corner cabinet or any cabinet adjacent to an appliance. Measure the width of each cabinet and mark its location on the wall using a pencil.
4. Mark Placement Guidelines:
Using a level and a pencil, draw vertical lines on the wall to represent the outer edges of each cabinet. Make sure the lines are plumb and perfectly vertical to ensure a professional finish.
5. Find the Studs:
Use a stud finder or tapping method to locate the wall studs within the marked area. Mark the stud locations on the vertical lines using a pencil or painter’s tape. It is crucial to secure the wall cabinets to the studs for maximum stability.
6. Double-Check Measurements:
Double-check your measurements and markings to ensure accuracy. Use a tape measure and level to verify that the cabinet placements and vertical lines are correctly aligned.
By carefully measuring and marking for the wall cabinets, you will ensure that your installation is precise and visually appealing. In the next section, we will guide you through the process of hanging the wall cabinets.
Hanging Wall Cabinets
With the measurements and markings in place, it’s time to move on to the exciting part – hanging the wall cabinets. This step requires precision and attention to detail to ensure secure and level installations. Follow these steps to hang your wall cabinets:
1. Gather Assistance:
Hanging wall cabinets can be a two-person job, especially if the cabinets are large or heavy. Enlist the help of a friend or family member to make the installation process easier and safer.
2. Locate Studs:
Using the markings you made earlier, locate the studs on the wall. This is where you will anchor the cabinets for maximum stability. Mark the stud locations clearly with a pencil or painter’s tape.
3. Install a Ledger Board:
To support the weight of the cabinets during installation, you may want to install a temporary ledger board. This can be a straight piece of wood or a long level placed horizontally on the marked lines. Secure the ledger board to the wall, making sure it is level and aligned with the marked lines.
4. Pre-Drill Holes:
Pre-drill holes at the back of the cabinets where they will be attached to the wall. Make sure the holes align with the stud locations. Use a drill bit slightly smaller than the diameter of your screws to avoid splitting the wood.
5. Lift and Hang Cabinets:
With the help of your assistant, carefully lift the first wall cabinet and place it onto the ledger board or against the wall. Make sure it is level and aligned with the vertical markings. Insert screws through the pre-drilled holes and into the studs to secure the cabinet in place.
6. Repeat for Remaining Cabinets:
Continue hanging the remaining wall cabinets in the same manner. Make sure each cabinet is level, aligned, and securely attached to the wall studs. Use clamps or shims to adjust the position if necessary.
Read more: How To Mount A Cabinet To The Wall
7. Remove the Ledger Board:
Once all the wall cabinets are installed, you can remove the temporary ledger board if you used one. Fill in any remaining screw holes with wood putty or caulk, and touch up the finish as needed.
By following these steps, you will successfully hang your wall cabinets, creating a beautiful and functional storage solution in your kitchen. In the next section, we will discuss how to secure the cabinets to the wall for added stability.
Securing Cabinets to the Wall
After hanging the wall cabinets, it’s crucial to secure them to the wall for added stability and safety. This step ensures that the cabinets stay securely in place, even with daily use. Follow these steps to properly secure your cabinets to the wall:
1. Locate Wall Studs:
Use a stud finder or the markings you made earlier to locate the wall studs. These vertical framing members provide the strongest support for your cabinets.
2. Measure and Mark Cabinet Positions:
Measure the distance between the top edge of the base cabinets and the bottom edge of the wall cabinets. Mark this measurement on the wall, indicating the height at which you’ll secure the cabinets.
3. Drill Pilot Holes:
Using a drill bit slightly smaller than the diameter of the screws, drill pilot holes through the back of the cabinets near the top and bottom. Make sure the holes align with the marked positions on the wall.
4. Insert Wall Anchors:
If the screw holes in your cabinets don’t align with the wall studs, you’ll need to use wall anchors for added support. Insert wall anchors into the drilled pilot holes according to the manufacturer’s instructions.
5. Secure Cabinets to Wall:
Starting with the top cabinets, place screws through the pilot holes and wall anchors (if used) into the wall studs. Tighten the screws until the cabinets feel secure and firmly attached to the wall. Repeat this process for all cabinets.
6. Check for Stability:
After securing the cabinets to the wall, check for stability by gently pushing and pulling on them. If any cabinets feel wobbly, tighten the screws further or reposition the wall anchor for better support.
Read more: How To Install Flooring
7. Verify Levelness:
Use a level to verify that the cabinets are still level and aligned. Adjust the positioning if necessary by loosening the screws and repositioning the cabinets slightly.
Securing the cabinets to the wall is an essential step in ensuring their stability and longevity. It minimizes the risk of accidents and ensures that your kitchen remains functional for years to come. In the next section, we will discuss the process of installing cabinet doors and hardware to complete the installation.
Installing Cabinet Doors and Hardware
Installing cabinet doors and hardware is the final step in completing the installation of your kitchen cabinets. This step adds functionality and aesthetic appeal to your cabinets, allowing you to fully utilize their storage space. Follow these steps to install cabinet doors and hardware:
1. Measure and Mark for Hinges:
Measure and mark the locations for the hinges on both the cabinet doors and the cabinet frames. Use a pencil to make small marks or use a template for accuracy.
2. Install Hinges:
Attach the hinges to the cabinet doors and frames. Follow the manufacturer’s instructions for the specific type of hinges you have. Typically, you’ll need to screw the hinges into the pre-marked locations.
Read more: How To Install Cabinets And Countertops
3. Hang the Doors:
Mount the cabinet doors onto the hinges. Align them properly and ensure that they open and close smoothly. Adjust the hinges as needed to achieve a proper fit.
4. Attach Knobs or Pulls:
Measure and mark the desired locations for the cabinet knobs or pulls. Use a drill to create small pilot holes. Attach the knobs or pulls to the cabinet doors using screws or bolts provided.
5. Test Functionality:
Open and close the cabinet doors to ensure they function properly. Make any necessary adjustments to the hinges or hardware to ensure smooth operation.
6. Adjust Alignment:
If the doors are not aligned properly, you can adjust them by tightening or loosening the screws on the hinges. Use a level to ensure the doors are straight and aligned properly.
Read more: How To Install Pantry Cabinet
7. Install Drawer Pulls (If Applicable):
If your kitchen cabinets include drawers, install the drawer pulls or knobs in a similar manner as the cabinet doors. Measure and mark the locations, create pilot holes, and attach the pulls securely.
By following these steps, you’ll successfully install cabinet doors and hardware, completing the installation of your kitchen cabinets. Remember to double-check the functionality and alignment of the doors before moving on to the next step. In the following section, we’ll discuss how to adjust and align the cabinets for a seamless look.
Adjusting and Aligning the Cabinets
After installing the cabinet doors and hardware, it’s important to adjust and align the cabinets to ensure a seamless and professional look. This step ensures that the doors and drawers line up properly and that the overall appearance of the cabinets is visually pleasing. Follow these steps to adjust and align your cabinets:
1. Check for Levelness:
Use a level to check if the cabinets are level both vertically and horizontally. Adjust the position of the cabinets by adding shims or tightening screws until they are perfectly level in all directions.
2. Adjust Door Alignment:
If the cabinet doors are not aligned properly or are not closing smoothly, you can make adjustments. Loosen the screws on the hinges and reposition the doors until they are properly aligned. Then, tighten the screws to secure the hinges in place.
Read more: How To Install Base Cabinet
3. Align Drawer Fronts:
If you have drawers, check if the front panels align properly. If they are uneven or misaligned, you can adjust them by loosening the screws on the drawer glides. Reposition the drawer fronts and tighten the screws to secure them in the desired position.
4. Ensure Even Gaps:
Check the gaps between the cabinet doors and drawers. Ensure that they are even and consistent across the entire set of cabinets. Adjust the position of the doors and drawers if needed to achieve a uniform appearance.
5. Test Functionality:
Open and close the cabinet doors and drawers to ensure they operate smoothly. Check that they align properly and do not rub or catch on other cabinets or surfaces. Make any necessary adjustments to the hinges or glides for optimal functionality.
6. Make Final Tweaks:
Take a step back and visually inspect the cabinets as a whole. Look for any areas that may require additional adjustments, such as minor leveling or alignment issues. Make any final tweaks to achieve the desired look.
By following these steps, you’ll be able to adjust and align your cabinets, ensuring a cohesive and visually appealing installation. Taking the time to make these adjustments will enhance both the functionality and aesthetics of your kitchen. In the next section, we’ll cover the finishing touches and clean-up to complete the cabinet installation process.
Read more: How To Install Cabinet Handles
Finishing Touches and Clean-Up
Congratulations! You’re in the final stage of your kitchen cabinet installation. It’s time to add the finishing touches and clean up to complete the project. These steps will ensure that your cabinets are not only functional but also visually appealing. Follow these guidelines for a successful finish:
1. Fill in Nail Holes and Caulk:
Inspect the cabinets for any visible nail holes or gaps between the cabinets and the walls. Use spackle or wood putty to fill in the holes and create a smooth surface. Apply caulk to any visible gaps or seams to achieve a seamless look.
2. Sand and Smooth Surfaces:
Once the spackle or putty has dried, lightly sand the filled areas to create a smooth finish. Use fine-grit sandpaper to avoid damaging the surface of the cabinets. Wipe away any dust with a clean cloth or tack cloth.
3. Apply Paint or Stain (If Necessary):
If you haven’t already done so, now is the time to apply paint or stain to your cabinets. Follow the manufacturer’s instructions for the specific type of paint or stain you’re using. Apply multiple coats for a durable and even finish.
Read more: How Much Is Cabinet Installation
4. Install Trim and Molding:
If you’re adding trim or molding to your cabinets, now is the right time to install them. Measure and cut the trim to size, then attach it to the cabinets using a nail gun or screws. Ensure the trim is level and aligned with the cabinet edges.
5. Clean Up the Work Area:
Take the time to clean up any debris, dust, or packaging materials from the installation. Use a broom or vacuum to remove dust and particles from the floor. Wipe down the cabinets and countertops with a damp cloth to remove any excess dust or dirt.
6. Test Functionality:
Open and close the cabinet doors and drawers to ensure they operate smoothly. Check that the hardware is secure and functions properly. Make any final adjustments if necessary to ensure optimal functionality.
With the finishing touches complete and the work area cleaned up, you have successfully completed the installation of your kitchen cabinets! Take a moment to admire your hard work and enjoy the beautiful and functional storage space you’ve created in your kitchen.
Remember, the key to a successful cabinet installation is careful measurement, precise installation, and attention to detail. By following these steps and guidelines, you can ensure a smooth process and achieve outstanding results.
Conclusion
Congratulations on successfully completing the installation of your kitchen cabinets! By following this comprehensive guide, you have transformed your kitchen into a functional and organized space. Properly installed cabinets not only enhance the storage capacity of your kitchen but also add a touch of style and sophistication.
Throughout the installation process, you have learned how to prepare the work area, install base cabinets on the floor, measure and mark for wall cabinets, hang the wall cabinets, secure them to the wall, install cabinet doors and hardware, and adjust and align the cabinets for a seamless look. Each step is crucial in ensuring a professional and durable installation.
Remember, attention to detail is key. Take the time to measure accurately, use the right tools and materials, and make necessary adjustments to achieve optimal results. Proper alignment, secure fastening, and functional hardware will contribute to the longevity and functionality of your cabinets.
With your kitchen cabinets installed, don’t forget to take a moment to appreciate your hard work and creativity. Your kitchen is now ready to serve you with storage, organization, and functionality for all your culinary adventures.
Thank you for following this guide, and we hope you enjoy your new kitchen cabinets for years to come! Should you have any questions or need further assistance, don’t hesitate to consult with a professional or refer back to this guide as a reference.
Frequently Asked Questions about How To Install Kitchen Cabinets On The Floor And Walls
Was this page helpful?
At Storables.com, we guarantee accurate and reliable information. Our content, validated by Expert Board Contributors, is crafted following stringent Editorial Policies. We're committed to providing you with well-researched, expert-backed insights for all your informational needs.
0 thoughts on “How To Install Kitchen Cabinets On The Floor And Walls”