Home>Storage Ideas>Living Room Storage>3 TikTok Cleaning Hacks You Should Skip—and 1 Worth Trying
Living Room Storage
3 TikTok Cleaning Hacks You Should Skip—and 1 Worth Trying
Modified: August 28, 2024
Discover 3 TikTok cleaning hacks to avoid, and why the one for living room storage is worth a shot. Maximize organization and efficiency today!
(Many of the links in this article redirect to a specific reviewed product. Your purchase of these products through affiliate links helps to generate commission for Storables.com, at no extra cost. Learn more)
Introduction
Keeping a clean and organized living room is essential for a comfortable and inviting space. One aspect of maintaining a tidy living room is finding effective storage solutions for all your belongings. In today’s world, where we often have an abundance of items and limited space, having proper living room storage is more important than ever.
In this article, we will delve into the world of living room storage and explore various options, tips, and ideas to help you optimize your space. Whether you have a small apartment or a spacious home, there are numerous creative and functional storage solutions available that can transform your living room into a clutter-free oasis.
We will discuss different types of living room storage furniture, including bookcases, shelves, cabinets, and media consoles. We will also explore the top considerations when selecting furniture, such as size, style, and material. Additionally, we will provide tips on how to effectively organize and arrange your belongings within your storage furniture to maximize space and accessibility.
Furthermore, we will highlight the importance of integrating multifunctional furniture into your living room storage strategy. By investing in pieces that can serve multiple purposes, such as ottomans with hidden storage or coffee tables with built-in compartments, you can make the most of your limited space while also adding a touch of style to your living room.
In addition to furniture, we will discuss the utilization of wall space for storage purposes. Hanging shelves, floating shelves, and wall-mounted cabinets are excellent options for those who want to maximize vertical space. We will provide ideas on how to select and arrange wall-mounted storage units for both functional and aesthetic benefits.
To create a cohesive and organized look in your living room, we will explore the concept of color coordination and how it can enhance the overall appearance of your storage solutions. By selecting storage furniture and accessories in complementary colors or matching them with your living room decor, you can create a harmonious and visually appealing space.
Finally, we will touch upon the importance of regular decluttering and maintenance to ensure that your living room storage remains effective and efficient. We will provide tips on how to efficiently declutter your living room and maintain a clutter-free environment in the long term.
So, whether you’re looking to revamp your living room storage or seeking inspiration for a new design, this article will equip you with the knowledge and ideas to transform your living room into a well-organized and stylish space. Let’s dive in!
Key Takeaways:
- Transform your living room into a clutter-free oasis with creative storage solutions, multifunctional furniture, and color coordination. Regular maintenance is key to keeping your space organized and visually appealing.
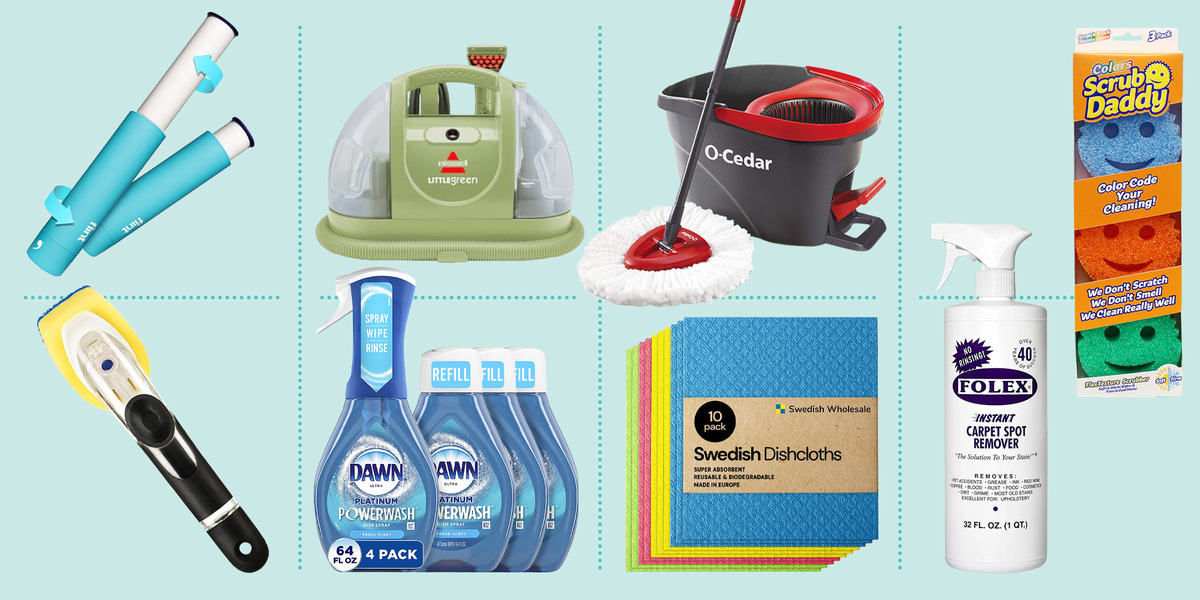
- Discover simple and affordable cleaning hacks using everyday items like toothpaste, dish soap, and lemon juice to tackle grout, makeup brushes, and rust stains. Embrace creativity and organization for a stylish living room.
Hack #1: Using Toothpaste to Clean Grout
Grout is notorious for collecting dirt, grime, and stains over time, especially in high traffic areas. While there are plenty of commercial grout cleaners available, a simple and affordable alternative is right in your medicine cabinet – toothpaste!
Toothpaste contains mild abrasives and cleaning agents that can effectively remove dirt and brighten grout lines. Here’s how to use toothpaste to clean grout:
- Gather Your Supplies: In addition to toothpaste, you’ll need an old toothbrush or a small cleaning brush, a bowl of water, and a clean cloth.
- Apply Toothpaste: Squeeze a small amount of toothpaste onto the grout lines you wish to clean. A pea-sized amount should be sufficient for a small area.
- Scrub Gently: Dip the toothbrush or cleaning brush into the water and use it to scrub the toothpaste into the grout lines. Apply light pressure and use circular motions to work the toothpaste into the grout.
- Rinse and Wipe: Once you have scrubbed the grout lines, rinse the area with clean water to remove the toothpaste residue. Use a clean cloth or towel to dry the grout.
It’s important to note that toothpaste works best on light stains and dirt buildup. For more stubborn stains or heavily discolored grout, you may need to consider other cleaning methods or consult a professional.
There are a few additional tips to keep in mind when using toothpaste to clean grout:
- Test in an inconspicuous area: Before applying toothpaste to the entire grout area, test it in a small, hidden section to ensure it doesn’t cause any damage or discoloration.
- Choose a non-gel toothpaste: Gel toothpaste may not have the same cleaning properties as regular toothpaste. Opt for a non-gel formula for the best results.
- Use an old toothbrush: Instead of throwing away your old toothbrushes, repurpose them for cleaning tasks like this. The bristles will help agitate the toothpaste into the grout lines.
- Maintain regularly: To keep your grout looking fresh and clean, incorporate regular maintenance. Wipe down the grout lines with a damp cloth or brush after showering or cooking to prevent buildup and stains.
Using toothpaste to clean grout is not only cost-effective but also an environmentally friendly alternative to harsh chemical cleaners. Next time you notice your grout looking dull or dirty, give this toothpaste grout-cleaning hack a try!
Hack #2: Cleaning Makeup Brushes with Dish Soap
Makeup brushes are essential tools in any beauty routine, but they can quickly accumulate product buildup, oil, and bacteria if not cleaned regularly. While there are specialized brush cleaners available on the market, a simple and effective alternative is using dish soap.
Dish soap is designed to cut through grease and remove stubborn stains, making it a perfect option for cleaning makeup brushes. Here’s how to clean your brushes using dish soap:
- Gather Your Supplies: You’ll need dish soap (preferably mild or gentle), a clean bowl or sink, lukewarm water, and a clean towel or paper towels.
- Prepare the Solution: Fill the bowl or sink with lukewarm water and add a small amount of dish soap. Swirl the water gently to create a soapy solution.
- Wet the Brushes: Submerge the bristles of the makeup brushes into the soapy water. Make sure to avoid getting water near the handle, as it can damage the glue that holds the bristles in place.
- Clean the Brushes: Gently swirl the brushes in the soapy water, making sure to work the soap through the bristles to remove any makeup residue. You can also use your fingers to massage the bristles to ensure a thorough cleaning.
- Rinse the Brushes: Once the brushes are clean, rinse them under lukewarm water until the water runs clear and all the soap is removed. Make sure to keep the brushes pointing downwards to prevent water from seeping into the handle.
- Dry the Brushes: Pat the brushes gently with a clean towel or paper towels to remove excess water. Reshape the bristles and lay the brushes flat on a clean surface to air dry completely. Avoid using a hairdryer or placing the brushes upright while wet, as this can cause the water to seep into the handle and loosen the bristles.
It’s important to clean your makeup brushes regularly to maintain their performance and hygiene. Here are some additional tips to keep in mind when cleaning brushes with dish soap:
- Spot Clean Between Uses: To avoid product buildup, try spot cleaning your brushes between uses. Simply dampen a clean cloth or paper towel with a small amount of dish soap and gently swirl the bristles on it to remove excess makeup. Rinse the bristles with water and let them air dry.
- Use a Brush Cleaning Mat: If you have several brushes to clean, invest in a brush cleaning mat with different textured surfaces. These mats can help agitate the bristles and remove stubborn buildup more effectively.
- Condition the Brushes: Occasionally, you can use a small amount of conditioner on your makeup brushes after cleaning to keep the bristles soft and prevent them from becoming brittle. Rinse the conditioner off thoroughly and let the brushes dry completely before using them again.
By using dish soap to clean your makeup brushes, you can save money and ensure that your brushes remain clean and in good condition. Remember to clean your brushes regularly to maintain their performance and keep your skin free from unwanted bacteria.
When trying out cleaning hacks from TikTok, always research and verify the effectiveness and safety of the method before attempting it. Look for reputable sources and consider the materials and surfaces you will be cleaning.
Hack #3: Removing Stains with Nail Polish Remover
We’ve all experienced those frustrating moments when we accidentally spill or drip something onto our clothing or upholstery, leaving behind unsightly stains. While stain removers are readily available, there’s another household item that can come to the rescue – nail polish remover.
Nail polish remover, which typically contains acetone or non-acetone solvents, is designed to dissolve nail polish. However, it can also be effective in removing certain types of stains. Here’s how you can use nail polish remover to tackle stains:
- Assess the Stain: Identify the type of stain you’re dealing with. Nail polish remover works best on stains caused by ink, marker, lipstick, or certain types of dyes. It may not be as effective on other stains, such as oil-based stains.
- Perform a Patch Test: Before applying nail polish remover to the stained area, do a small patch test in an inconspicuous spot to ensure it doesn’t cause any color fading or damage to the fabric.
- Apply the Nail Polish Remover: Moisten a clean cloth or cotton ball with a small amount of nail polish remover. Gently blot the stained area, starting from the outer edges and working your way toward the center. Avoid rubbing the stain, as it can spread and make it more difficult to remove.
- Keep Blotting: Continue blotting the stain until it starts to lift. If necessary, apply more nail polish remover to the cloth or cotton ball and repeat the process. Patience is key, as some stains may require multiple attempts to fully remove.
- Rinse and Launder: Once the stain has been lifted, rinse the area with clean water to remove any residue from the nail polish remover. Launder the garment or upholstery item as you normally would.
It’s important to note that nail polish remover should be used on washable fabrics only, as it can damage delicate or sensitive materials. Additionally, it’s always a good idea to read the care label of the item you’re treating and follow any specific instructions or warnings provided.
While nail polish remover can be effective in removing certain stains, it is not a foolproof solution for all types of stains. Some stains may require specialized stain removers or professional cleaning. If you’re dealing with a particularly stubborn or delicate stain, it’s always best to consult a professional cleaner.
Remember to test the nail polish remover in a small, inconspicuous area before treating the stain. This will help you ensure that the remover is safe to use and won’t cause any damage to the fabric or material.
Next time you encounter a stubborn stain, consider reaching for the nail polish remover as a quick and convenient solution to help minimize the mark on your clothing or upholstery.
Worth Trying: Removing Rust Stains with Lemon Juice
Rust stains can be a stubborn and unsightly problem, especially when they appear on surfaces like metal or ceramic. While there are commercial rust removers available, you may be surprised to learn that a natural and inexpensive alternative is right in your kitchen – lemon juice.
Lemon juice contains citric acid, which is a mild and natural acid that can help break down rust and remove stains. Here’s how you can use lemon juice to tackle rust stains:
- Gather Your Supplies: You’ll need fresh lemons or bottled lemon juice, a clean cloth or sponge, water, and a scrub brush or toothbrush.
- Extract the Juice: If you’re using fresh lemons, cut them in half and squeeze out the juice. If you’re using bottled lemon juice, pour a sufficient amount into a small bowl.
- Apply the Lemon Juice: Dip the cloth or sponge into the lemon juice and saturate the rust-stained area. Make sure the entire stain is thoroughly covered in lemon juice.
- Leave it to Soak: Allow the lemon juice to sit on the rust stain for at least 30 minutes. The citric acid will work to loosen the rust and make it easier to remove.
- Scrub the Stain: After the lemon juice has soaked, use a scrub brush or toothbrush to gently scrub the stained area. Apply some pressure to ensure the lemon juice penetrates the rust and lifts it away.
- Rinse and Repeat: Once you’ve scrubbed the rust stain, rinse the area with clean water to remove any residue. If the stain persists, you can repeat the process until the rust is completely gone.
It’s important to note that lemon juice may not be as effective on heavily corroded or deeply embedded rust stains. In these cases, you may need to consider other rust removal methods or seek professional assistance.
Here are a few additional tips to keep in mind when using lemon juice to remove rust stains:
- Protect the Surrounding Area: Before applying lemon juice, cover any nearby surfaces or objects that may be sensitive to acid. Lemon juice can cause discoloration or damage to certain materials, so it’s best to take precautionary measures.
- Test on a Small Area: Conduct a patch test on a small, inconspicuous area to ensure that the lemon juice doesn’t cause any adverse reactions, such as color fading or etching.
- Use Gloves: Lemon juice can have a drying effect on the skin, so it’s advisable to wear gloves while handling it to protect your hands.
- Consider Prevention: To prevent future rust stains, consider applying a protective coating or sealant to susceptible surfaces. This can help minimize the risk of rust formation.
While lemon juice is a natural and eco-friendly option for removing rust stains, it may not be suitable for all surfaces or types of rust. If you’re unsure or dealing with a challenging rust problem, it’s always best to consult a professional rust removal service or seek advice from a trusted source.
So, the next time you notice rust stains marring your metal or ceramic surfaces, give lemon juice a try. You may be pleasantly surprised by its rust-busting abilities!
Read more: How To Fix E2 Error In A Washing Machine
Conclusion
Living room storage plays a crucial role in maintaining a clean, organized, and functional space. With the increasing need for storage solutions in today’s homes, it’s important to explore different options and hacks to optimize your living room storage. From furniture choices to creative organization techniques, there are numerous strategies you can employ to make the most of your space.
In this article, we’ve discussed a few popular hacks for living room storage. We learned about using toothpaste to clean grout, taking advantage of the cleaning properties in nail polish remover, and the power of lemon juice in removing rust stains. These hacks offer simple and affordable alternatives to commercial solutions, allowing you to tackle common problems with everyday items you may already have at home.
However, it’s important to note that these hacks may not work for every situation, and there may be instances where professional assistance or specialized products are necessary. It’s always best to assess the specific conditions and needs of your living room storage and make informed decisions accordingly.
In addition to the hacks, we explored various aspects of living room storage, such as selecting the right furniture, utilizing wall space, incorporating multifunctional pieces, and maintaining regular decluttering routines. By considering these factors and adopting effective storage strategies, you can create a harmonious and functional living room environment that suits your needs and aesthetics.
Remember that living room storage is not just about optimizing space but also about enhancing the overall look and feel of the room. By coordinating storage furniture and accessories with your existing decor and color scheme, you can create a cohesive and visually appealing living room.
Lastly, it’s crucial to embrace regular maintenance and organization practices to ensure that your living room storage remains effective in the long term. By consistently decluttering, cleaning, and maintaining your storage solutions, you can ensure that your living room stays organized and free from unnecessary clutter.
In conclusion, with some creativity, organization, and the implementation of these hacks and strategies, you can transform your living room into a functional and stylish space with optimal storage solutions. So, unleash your inner organizer, and let your living room storage shine!
Frequently Asked Questions about 3 TikTok Cleaning Hacks You Should Skip—and 1 Worth Trying
Was this page helpful?
At Storables.com, we guarantee accurate and reliable information. Our content, validated by Expert Board Contributors, is crafted following stringent Editorial Policies. We're committed to providing you with well-researched, expert-backed insights for all your informational needs.


0 thoughts on “3 TikTok Cleaning Hacks You Should Skip—and 1 Worth Trying”