Home>Storage Ideas>Living Room Storage>The Complete Fall Cleaning Checklist For A Tidy Home


Living Room Storage
The Complete Fall Cleaning Checklist For A Tidy Home
Modified: January 19, 2024
Keep your home tidy this fall with our comprehensive cleaning checklist. Find tips and tricks for organizing your living room storage to maximize space and minimize clutter.
(Many of the links in this article redirect to a specific reviewed product. Your purchase of these products through affiliate links helps to generate commission for Storables.com, at no extra cost. Learn more)
Introduction
Welcome to the complete fall cleaning checklist for a tidy home! As the leaves start to change colors and the air becomes crisp, it’s the perfect time to give your living space a thorough cleaning and organization. Fall cleaning is not only essential for maintaining a healthy and inviting home, but it also prepares you for the upcoming colder months when we tend to spend more time indoors.
In this comprehensive guide, we will walk you through a step-by-step checklist that covers every nook and cranny of your living space. From decluttering and organizing to deep cleaning and sanitizing, we’ll help you transform your home into the cozy haven you deserve.
So grab your cleaning supplies, put on your favorite playlist, and let’s get started!
Key Takeaways:
- Transform your home into a clean, organized, and inviting haven with a comprehensive fall cleaning checklist. From decluttering to last-minute touch-ups, create a fresh and cozy living space for the new season.
- Embrace the positive energy and peace of a clean home by following the fall cleaning checklist. Enjoy the fruits of your labor and maintain a tidy, inviting living environment all year round.
Decluttering and Organizing
Before diving into the deep cleaning process, it’s crucial to declutter and organize your living space. Clutter not only creates visual chaos, but it can also hinder your ability to clean effectively. Here are some steps to help you declutter and organize your home:
- Start small: Begin with one room or even a specific area within a room. This way, you won’t feel overwhelmed and can focus on one task at a time.
- Sort and categorize: Create three piles – keep, donate, and discard. Evaluate each item and decide whether it’s something you truly need or if it’s time to let go.
- Create a system: Establish designated spaces for different categories of items. Invest in storage solutions such as bins, baskets, and shelves to keep things organized.
- Simplify your belongings: Do you really need five pairs of jeans that no longer fit? Let go of items that no longer serve a purpose or bring you joy.
- Deal with paper clutter: Sort through your mail, bills, and paperwork. Create a filing system or consider going digital to minimize paper accumulation.
- Clear countertops and surfaces: Keep countertops and surfaces clean and clutter-free by only displaying essential items. Use drawer organizers and small containers to keep things tidy.
- Donate or sell unwanted items: If you have items in good condition that you no longer need, consider donating them to local charities or selling them online. It’s a win-win situation – you declutter and potentially help someone in need.
Decluttering and organizing your home not only makes cleaning more efficient but also creates a more peaceful and serene living environment. So take the time to tackle the clutter before moving on to the cleaning tasks. Trust us, you’ll be glad you did!
Cleaning the Windows and Doors
Clear windows and sparkling doors not only enhance the aesthetic appeal of your home but also allow more natural light to brighten up your space. Here’s how you can achieve gleaming windows and doors:
- Gather your tools: Start by gathering the necessary tools such as glass cleaner, microfiber cloths, a squeegee, and a bucket of warm, soapy water.
- Remove dust and dirt: Begin by dusting the windowsills, frames, and doors to remove any loose dirt or debris.
- Clean the glass: Spray an appropriate glass cleaner onto the glass surface and use a microfiber cloth or squeegee to wipe away the cleaner, ensuring there are no streaks.
- Pay attention to detail: Don’t forget to clean the corners and edges of the windows and doors, where dirt and grime tend to accumulate.
- Wash window screens: Remove and gently wash your window screens with warm, soapy water. Rinse well and allow them to air dry before reinstalling.
- Consider professional cleaning: For hard-to-reach windows or if you prefer a hands-off approach, hire professional window cleaners to ensure a thorough and spotless job.
Not only will clean windows and doors make your home feel brighter and more inviting, but they also allow you to enjoy the beautiful fall views from the comfort of your living room. So grab your cleaning supplies and let the sunshine in!
Deep Cleaning the Floors
As the foundation of your living space, clean and fresh floors are essential for a tidy and comfortable home. Follow these steps to give your floors a deep and thorough cleaning:
- Vacuum or sweep: Start by removing loose dirt, dust, and debris from the floors. Use a vacuum cleaner or a broom and dustpan to effectively clean the surface.
- Spot treat stains: If you notice any stubborn stains on your floors, use a suitable stain remover or a mild detergent to treat them. Allow the cleaner to sit for a few minutes before scrubbing gently with a soft brush or cloth.
- Mop the floors: Depending on the type of flooring you have, choose an appropriate cleaning solution. For hardwood floors, use a specialized hardwood cleaner, while for tile or linoleum floors, opt for a multi-purpose floor cleaner. Dilute the cleaner in a bucket of water, following the instructions on the packaging, and use a mop to thoroughly clean the floor surface.
- Pay attention to corners and edges: Use a microfiber cloth or a soft-bristle brush to clean hard-to-reach areas, corners, and edges where dirt and dust tend to accumulate.
- Consider deep cleaning: For carpets or rugs, consider renting or hiring a professional carpet cleaner for a deep and thorough clean. This will help remove deep-seated dirt and allergens from the fibers.
- Dry the floors: After mopping or deep cleaning, allow the floors to air dry or use clean, dry microfiber mops or towels to speed up the drying process.
Remember to follow the manufacturer’s recommendations for cleaning and maintaining your specific type of flooring. Deep cleaning your floors not only improves the appearance of your home but also helps to maintain their longevity and durability.
Now that your floors are fresh and clean, it’s time to move on to the next task. Keep up the momentum to achieve a thoroughly organized and tidy living space!
Dusting and Polishing Furniture
Now it’s time to give your furniture some much-needed attention. Dusting and polishing will not only remove allergens and dust buildup but also leave your furniture looking clean and rejuvenated. Here’s how to tackle this task:
- Gather your cleaning supplies: Prepare a microfiber cloth, a feather duster, a furniture polish or a homemade solution, and any necessary tools such as a soft brush or a vacuum cleaner with a brush attachment.
- Dust first: Begin by dusting off your furniture using a feather duster or a microfiber cloth. Pay attention to areas where dust tends to accumulate, such as tabletops, shelves, and intricate woodwork.
- Remove stains and spills: If you spot any stains or spills on your furniture, use a mild detergent or a specialized cleaner to gently remove them. Be sure to follow the manufacturer’s instructions and test the cleaner on a small, inconspicuous area first to check for any adverse reactions.
- Polish wooden furniture: For wooden furniture, use a furniture polish or make a DIY solution using equal parts white vinegar and olive oil. Apply the polish or mixture onto a clean cloth and buff the surface of the furniture in circular motions. This will leave the wood with a beautiful sheen.
- Refresh upholstery: Vacuum upholstered furniture using a brush attachment to remove any loose dirt and debris. For stains and spills, refer to the manufacturer’s recommendations or use a suitable upholstery cleaner. Allow the upholstery to dry completely before using the furniture.
- Clean leather furniture: For leather furniture, use a damp cloth or a solution of mild soap and water to wipe away any dirt or spills. Avoid using harsh chemicals that can damage the leather. Follow up with a leather conditioner to keep the material soft and supple.
Dusting and polishing your furniture not only improves its appearance but also prolongs its lifespan. It’s a simple task that can make a big difference in the overall cleanliness and aesthetics of your home.
Now that your furniture is looking pristine, it’s time to move on to the next step in our fall cleaning checklist. Keep up the momentum and transform your home into a haven of cleanliness and organization!
Refreshing Upholstery and Drapes
Upholstery and drapes can accumulate dust, dirt, and odors over time. Refreshing them not only improves the overall cleanliness of your home but also gives your living space a fresh and inviting feel. Follow these steps to refresh your upholstery and drapes:
- Check the care labels: Before beginning any cleaning process, check the care labels on your upholstery and drapes to ensure you use the appropriate cleaning methods and products.
- Vacuum first: Use a vacuum cleaner with an upholstery attachment to remove loose dirt, dust, and debris from the surfaces of your upholstery and drapes.
- Spot clean stains: If you notice any stains or spills on your upholstery or drapes, treat them immediately. Refer to the care labels for specific stain removal instructions or use a gentle upholstery cleaner that is suitable for the fabric type.
- Regular wash: If your upholstery and drapes are machine washable, follow the care instructions and wash them accordingly. Be sure to use a gentle cycle and a mild detergent. It may be best to wash the items separately to avoid any color bleeding.
- Professional cleaning: For delicate fabrics or if you prefer to leave the task to the experts, consider hiring a professional upholstery and drape cleaning service. They have the expertise and equipment to deep clean and safely remove stains without damaging the fabric.
- Deodorize: Upholstery and drapes can trap odors. To freshen them up, sprinkle some baking soda on the fabric and let it sit for a few hours before vacuuming it off. This will help neutralize any unpleasant odors.
- Air dry: After cleaning, allow your upholstery and drapes to air dry completely before repositioning them in your living space. This will prevent any mildew or mold growth.
Refreshing your upholstery and drapes not only improves their appearance but also creates a cleaner and more pleasant environment in your home. Take the time to pay attention to these areas and enjoy the fresh and inviting atmosphere they bring.
Now that your upholstery and drapes are refreshed, let’s move on to the next task on our fall cleaning checklist. Keep up the great work!
Cleaning and Organizing Closets
Closets often become a catch-all for clutter, making them a prime target for cleaning and organizing. Clearing out and organizing your closets not only creates more storage space but also helps you find what you need quickly and efficiently. Follow these steps to clean and organize your closets:
- Empty the closet: Start by completely emptying the contents of your closet. This allows you to see everything you have and assess what should be kept, donated, or discarded.
- Declutter: Sort through the items and decide what to keep, what to donate, and what to throw away. Be honest with yourself and let go of things you no longer use or need.
- Clean the closet: Take the opportunity to thoroughly clean the inside of the closet. Dust shelves, wipe down surfaces, and vacuum the floor. If there are any stains, use appropriate cleaners to remove them.
- Maximize storage space: Consider using storage solutions such as hanging organizers, baskets, or stackable bins to maximize the space in your closet. Utilize hooks or hanging rods for items that can be hung, keeping them easily accessible and wrinkle-free.
- Organize by category: Arrange your belongings by category, such as clothing, shoes, accessories, or seasonal items. This will make it easier to find what you need when you’re in a hurry.
- Label containers and shelves: Labeling containers and shelves adds an extra level of organization and helps you maintain the order in your closet. Use labels or write on clear containers to easily identify the contents.
- Donate or sell unwanted items: If you come across items in good condition that you no longer use or need, consider donating or selling them. This not only helps declutter your closet but also gives someone else the opportunity to enjoy them.
Cleaning and organizing your closets not only creates more space but also brings a sense of calm and order to your home. By implementing these steps, you’ll have a well-organized closet that makes getting ready in the mornings a breeze.
Now that your closets are clean and organized, let’s move on to the next task on our fall cleaning checklist. Keep up the great work!
Emptying and Cleaning Cabinets and Drawers
Cabinets and drawers are often overlooked when it comes to cleaning and organizing. However, they are important spaces to tackle as they can accumulate dirt, dust, and clutter. Follow these steps to empty and clean your cabinets and drawers:
- Empty the cabinets and drawers: Start by removing all items from the cabinets and drawers. This will allow you to thoroughly clean and declutter the spaces.
- Sort through items: As you remove items, evaluate what you truly need and what can be discarded or donated. Consider the expiration dates of food items, the functionality of kitchen gadgets, and the condition of other items.
- Wipe down surfaces: Use a damp cloth or a mild cleaning solution to wipe down the inside and outside surfaces of the cabinets and drawers. Pay attention to any sticky or greasy spots, and don’t forget to clean the handles and knobs too.
- Organize and arrange: Decide on a system for organizing your items and arrange them accordingly in the cabinets and drawers. Consider using drawer dividers, shelf inserts, or clear containers to maintain order and maximize space.
- Label containers and shelves: Labeling containers and shelves can help you easily find what you need and maintain the organization. Use labels, sticky notes, or a label maker to identify the contents of each cabinet or drawer.
- Clean and organize the pantry: If you have a pantry, follow similar steps to clean and organize it. Sort through food items, discard expired products, clean shelving, and arrange items in a way that makes sense to you.
- Consider adding shelf liners: For added protection and easy cleanup, you may want to consider adding shelf liners to your cabinets and drawers. Shelf liners not only protect the surfaces from spills and stains but also add a decorative touch.
Emptying and cleaning your cabinets and drawers not only improves the cleanliness of your kitchen or storage spaces but also makes it easier to find and access items when you need them. Take the time to reorganize and establish an efficient system that works for you.
Now that your cabinets and drawers are clean and organized, let’s move on to the next step in our fall cleaning checklist. Keep up the great work!
Scrubbing and Disinfecting the Kitchen
The kitchen is often the heart of the home, and keeping it clean and sanitary is essential for a healthy living environment. Follow these steps to thoroughly scrub and disinfect your kitchen:
- Clear countertops: Begin by removing all items from your countertops. This will allow you to easily access and clean the surface.
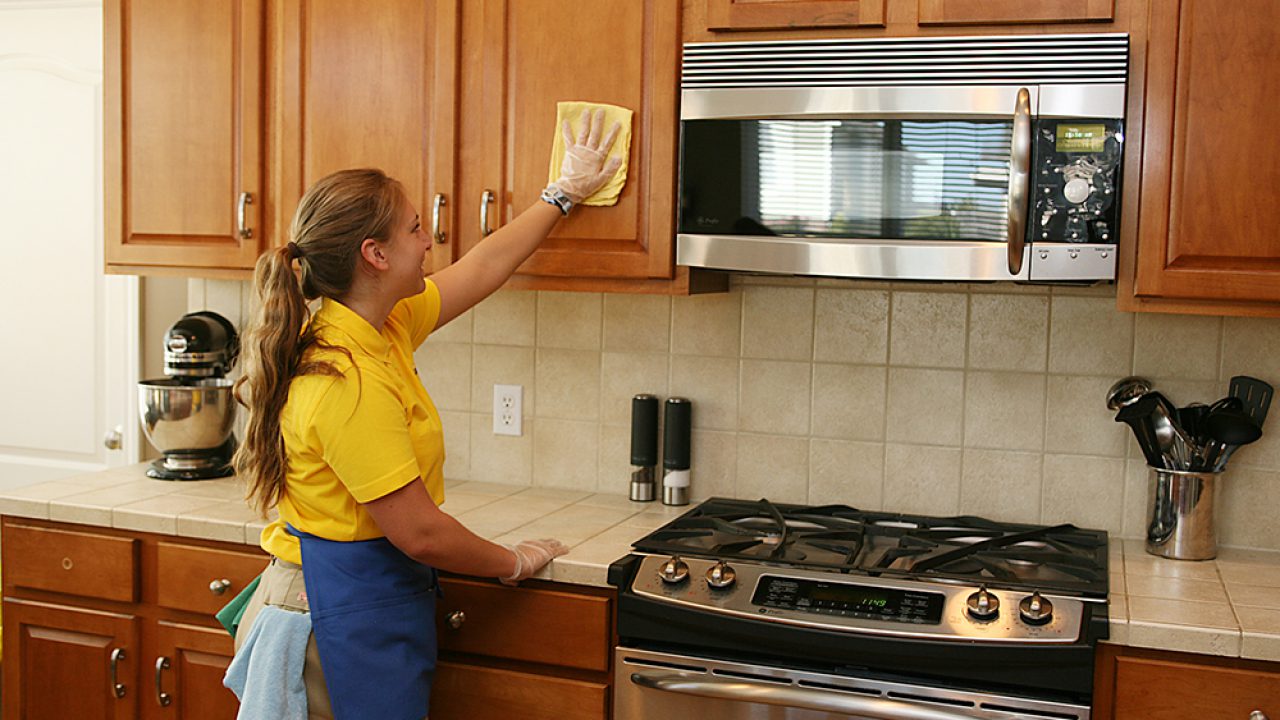
- Wipe down surfaces: Use a mild cleaner or a mixture of water and dish soap to wipe down countertops, backsplashes, and other surfaces. Pay special attention to areas prone to spills and stains, such as around the stove or sink.
- Clean appliances: Refer to the manufacturer’s instructions and clean all kitchen appliances, such as the oven, microwave, refrigerator, and dishwasher. Remove any food spills, stains, or grime using appropriate cleaners or homemade solutions.
- Scrub the sink: Use a non-abrasive cleaner or cleaning solution to scrub and disinfect the sink. Pay attention to the faucet, handles, and drain area, as these can harbor bacteria and germs.
- Deep clean the stove: Remove burner grates, knobs, and other removable parts from the stove. Clean them separately in warm, soapy water. Use a degreaser or a mixture of baking soda and water to scrub the stove top and remove any built-up grease or stains.
- Sanitize cutting boards and utensils: Use a mixture of warm water and mild dish soap to clean cutting boards and utensils. For an extra level of sanitization, you can use a diluted bleach solution or a food-safe sanitizer.
- Disinfect high-touch areas: Wipe down high-touch areas, such as cabinet handles, drawer pulls, light switches, and door knobs, with a disinfecting cleaner or a mixture of water and vinegar. This will help eliminate bacteria and viruses.
- Mop the floor: Finish off by thoroughly mopping the kitchen floor. Use a floor cleaner that is suitable for your flooring type and follow the instructions on the packaging.
Keeping your kitchen clean and disinfected is not only important for aesthetics but also for maintaining a healthy environment. Regularly following these cleaning steps will help prevent the spread of germs and ensure a clean and inviting kitchen for you and your family.
Now that your kitchen is sparkling clean, let’s move on to the next task on our fall cleaning checklist. Keep up the great work!
Don’t forget to clean and organize your outdoor spaces during fall cleaning. Sweep the porch, patio, and deck, and put away summer furniture and decor to prepare for the colder months.
Sanitizing the Bathroom
The bathroom is a space that requires special attention when it comes to cleaning and sanitizing. Follow these steps to thoroughly sanitize your bathroom and keep it fresh and germ-free:
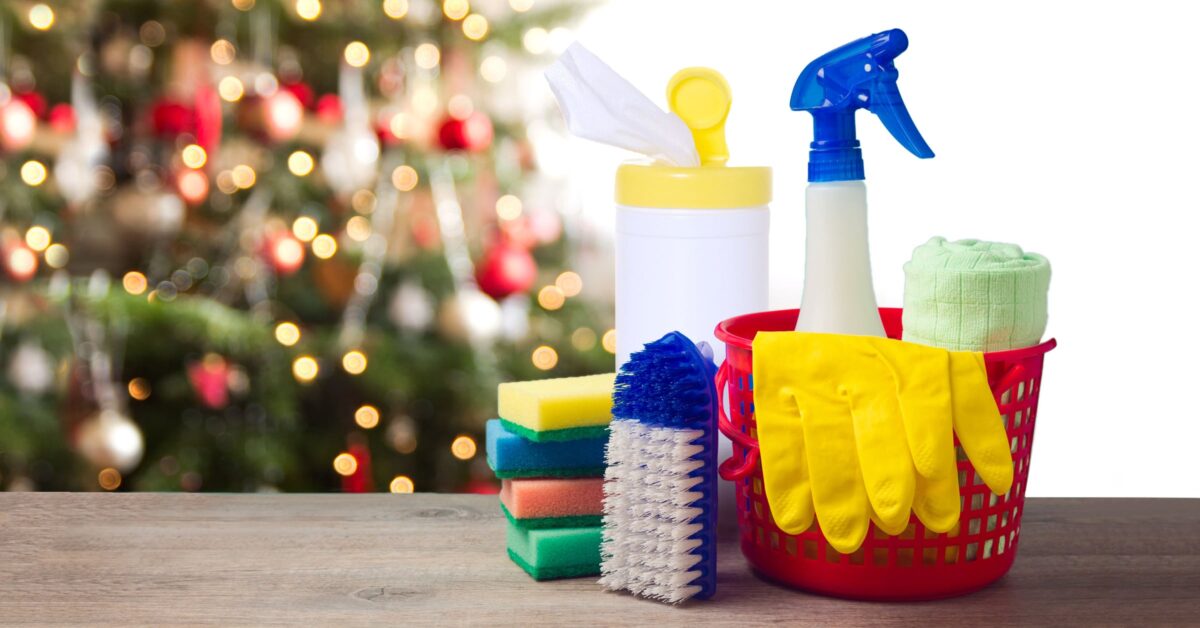
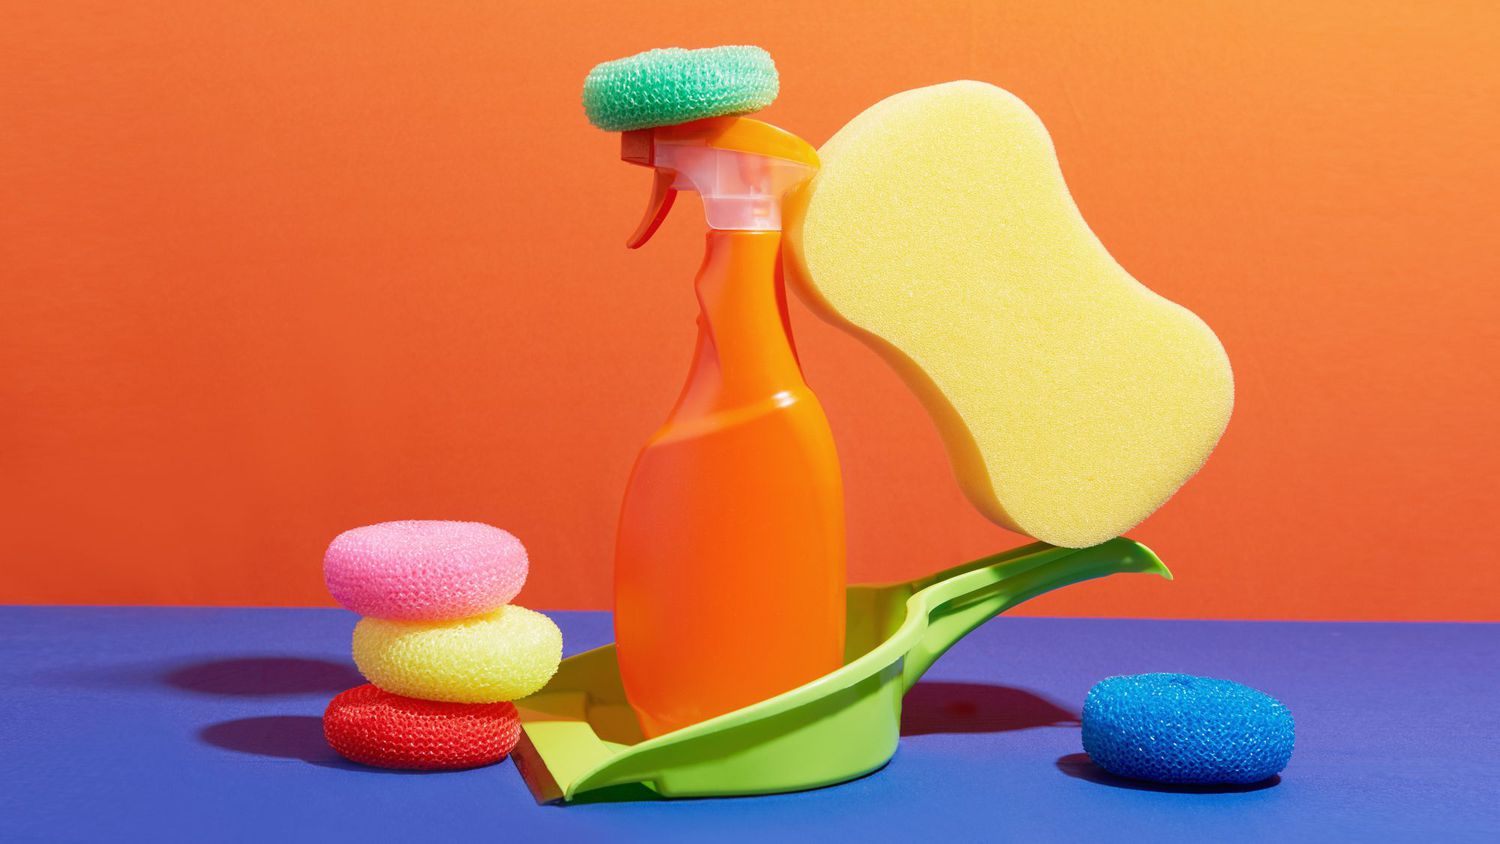
- Gather your supplies: Start by gathering all the necessary cleaning supplies, including gloves, a toilet brush, a scrub brush, a disinfecting cleaner, a toilet bowl cleaner, a glass cleaner, and microfiber cloths.
- Clear the counters and surfaces: Remove all items from the bathroom counters, shelves, and other surfaces to allow for a thorough cleaning.
- Clean the toilet: Apply a toilet bowl cleaner and let it sit for a few minutes before scrubbing the bowl with a toilet brush. Don’t forget to clean under the rim and the exterior surfaces of the toilet as well. Finally, wipe down the seat, lid, and handle with a disinfecting cleaner.
- Scrub the shower and bathtub: Use a scrub brush or a sponge to clean the shower walls, bathtub, and any other surfaces. Pay attention to soap scum, grime, and mildew. Rinse thoroughly to remove any cleaner residue.
- Clean the sink and vanity: Use a disinfecting cleaner to wipe down the sink and vanity surfaces. Pay attention to faucets, handles, and any other high-touch areas. Polish any mirrors or glass surfaces with a glass cleaner.
- Disinfect the floors: Sweep or vacuum the bathroom floor to remove any dirt or hair. Then, mop the floors with a designated bathroom floor cleaner or a mixture of warm water and a mild disinfectant.
- Clean the fixtures: Take a microfiber cloth and wipe down light fixtures, towel racks, and any other fixtures in the bathroom. This will remove dust and give them a shiny, clean appearance.
- Replace towels and linens: Replace any used towels and linens with fresh ones. Be sure to wash the used towels and linens in hot water to kill any germs or bacteria.
- Empty and clean the trash can: Empty the trash can and clean it with a disinfecting cleaner to eliminate any odor and bacteria.
Regularly sanitizing your bathroom helps maintain cleanliness and hygiene in one of the most utilized spaces in your home. Follow these steps to ensure a fresh and germ-free bathroom environment.
Now that your bathroom is sparkling clean, let’s move on to the next task on our fall cleaning checklist. Keep up the great work!
Cleaning and Organizing the Garage or Basement
The garage or basement often becomes the dumping ground for items we don’t use regularly, resulting in clutter and disorganization. Use these steps to clean and organize your garage or basement:
- Remove everything: Start by emptying the entire space, taking everything out of the garage or basement. This will allow you to see the space clearly and evaluate your belongings.
- Sort and declutter: Sort through your items, separating them into categories – keep, donate, and discard. Be honest with yourself and let go of items you no longer need or use.
- Clean the space: Once the space is empty, take the time to clean the floors, walls, and any surfaces. Sweep or vacuum away any dirt and dust. Wipe down surfaces with a damp cloth or use a mild cleaning solution as needed.
- Organize and assign storage zones: Assign specific zones for different items, such as tools, sports equipment, and seasonal decorations. Utilize shelves, cabinets, pegboards, or storage bins to keep items organized and easily accessible.
- Invest in storage solutions: Consider purchasing storage solutions that fit your needs, such as pegboards for hanging tools, sturdy shelving units for bins and boxes, or wall-mounted racks for bikes and sports equipment.
- Label storage containers: Use labels or clear containers to easily identify the contents of storage bins or boxes. This will prevent the need to open multiple containers to find what you’re looking for.
- Create a maintenance plan: Once everything is organized, establish a maintenance plan to prevent future clutter and disarray. Regularly go through your items, donate or discard things you no longer need, and ensure everything is returned to its designated spot.
- Optimize wall and ceiling space: Maximize your storage options by utilizing wall space for hanging tools or installing ceiling racks to store items like ladders or large bins.
- Don’t forget safety: Ensure that any hazardous materials, such as chemicals or power tools, are stored safely and out of reach of children or pets. Check fire extinguishers for expiration dates and replace as needed.
Cleaning and organizing your garage or basement not only creates more space but also helps you find items when you need them and reduces stress. Follow these steps to transform your garage or basement into a functional and well-organized space.
Now that your garage or basement is clean and organized, let’s move on to the next task on our fall cleaning checklist. Keep up the great work!
Washing and Storing Seasonal Items
As the seasons change, it’s important to wash and properly store seasonal items to keep them in good condition and ready for the next year. Follow these steps to wash and store your seasonal items:
- Wash clothes and linens: If you have seasonal clothing, such as winter coats, sweaters, or summer dresses, make sure to wash them before storing. Follow the care instructions on the labels and use the appropriate settings for each item.
- Clean and store bedding: Wash and dry any seasonal bedding, such as heavy comforters, quilts, or lighter duvets. Consider using duvet covers for easy removal and cleaning. Fold and store them in breathable storage bags or containers to prevent dust and insects.
- Care for seasonal footwear: Clean and polish your seasonal footwear, whether it’s snow boots, sandals, or hiking shoes. Remove any dirt or stains and store them in a cool, dry place. Stuff shoes with tissue or shoe trees to maintain their shape.
- Protect outdoor furniture and cushions: Clean and dry your outdoor furniture and cushions before storing them. Remove any debris, give them a thorough cleaning, and allow them to air dry completely. Store cushions in breathable, waterproof covers or in a dry location to prevent mold or mildew.
- Prepare gardening tools and equipment: Clean and dry your gardening tools and equipment, such as shovels, rakes, and hoses. Remove any dirt or debris and consider applying a light coat of oil to prevent rust. Store them in a designated area or hang them on hooks to keep them organized.
- Organize holiday decorations: If you have seasonal decorations, such as Halloween or Christmas ornaments, carefully pack them away in labeled containers. Use bubble wrap or tissue paper to protect delicate items. Keep holiday lights untangled by winding them around a spool or piece of cardboard before storing.
- Label and store: As you pack away your seasonal items, label the containers or boxes with their contents for easy retrieval next year. Store them in a dry and temperature-controlled area, such as a basement or attic.
Properly washing and storing seasonal items ensures their longevity and keeps them in good condition for future use. By following these steps, you’ll be prepared and organized when the next season arrives.
Now that your seasonal items are washed and safely stored, let’s move on to the next task on our fall cleaning checklist. Keep up the great work!
Cleaning Outdoor Spaces
The outdoor spaces of your home deserve just as much attention when it comes to cleaning and maintenance. Follow these steps to clean and refresh your outdoor areas:
- Sweep or pressure wash surfaces: Start by sweeping or pressure washing outdoor surfaces such as decks, patios, and driveways. This will remove dirt, debris, and stains accumulated over time.
- Clean outdoor furniture: Thoroughly clean your outdoor furniture to remove dust, pollen, and stains. Use a mild soap or a specialized cleaner suitable for the material of the furniture. Rinse well and allow the furniture to dry completely before using or covering.
- Wash exterior windows and surfaces: Clean your exterior windows and surfaces like siding or bricks using a window cleaner or a mixture of water and mild detergent. A long-handled brush or a soft cloth can be used to reach high areas.
- Clean and maintain outdoor structures: If you have outdoor structures such as sheds, gazebos, or play equipment, clean and maintain them as well. Scrub away dirt, cobwebs, and any signs of wear. Repair or repaint as necessary.
- Remove debris from gutters and downspouts: Clear out any leaves, twigs, or debris from your gutters and downspouts to ensure proper water flow. This will prevent potential water damage and clogs.
- Prune and trim plants: Trim overgrown bushes, trees, and shrubs in your outdoor spaces. Remove dead branches and leaves to promote healthy growth and prevent potential hazards during storms.
- Remove weeds and tidy up flower beds: Take the time to remove weeds from your flower beds and garden areas. Apply mulch to suppress weed growth and keep the area looking neat and well-maintained.
- Check and clean outdoor lighting: Inspect and clean outdoor light fixtures, ensuring they are in working order. Replace any burnt-out bulbs and wipe away dirt or grime from the surfaces.
- Inspect and clean outdoor equipment: Check and clean outdoor equipment such as grills, lawnmowers, and trimmers. Remove any built-up grease or debris and make sure they are in good working condition.
- Inspect and clean the grill: Clean the grill thoroughly, removing any leftover food, grease, or residue. Scrub the grates, burners, and other parts, and make sure all connections and hoses are secure.
Cleaning and maintaining your outdoor spaces not only improves their appearance but also promotes safety and extends the lifespan of outdoor equipment and furniture. By following these steps, you’ll create an enjoyable and well-cared-for outdoor environment.
Now that your outdoor spaces are clean and refreshed, let’s move on to the next task on our fall cleaning checklist. Keep up the great work!
Read more: The Ultimate Bathroom Cleaning Checklist
Maintaining HVAC Systems
Maintaining your HVAC (Heating, Ventilation, and Air Conditioning) systems is crucial for ensuring proper functioning, energy efficiency, and indoor comfort. Follow these steps to maintain your HVAC system:
- Replace air filters: Check and replace the air filters in your HVAC system regularly. Dirty filters restrict airflow and reduce efficiency. Aim to replace them every 1-3 months, or as recommended by the manufacturer.
- Clean air vents and registers: Remove dust and debris from air vents and registers using a vacuum cleaner or a damp cloth. Ensure that airflow is not obstructed and that the vents are open and unobstructed.
- Clean outdoor condenser coils: If you have an outdoor condenser unit, inspect it for any debris or dirt that may have accumulated on the coils. Use water or a specialized coil cleaner to clean the coils and improve system efficiency.
- Clear debris around the outdoor unit: Remove any leaves, grass, or other debris from around the outdoor unit to ensure proper airflow. Trim vegetation that could obstruct or hinder the unit’s performance.
- Inspect and clean condensate drain line: Check the condensate drain line for any blockages or clogs. Use a mixture of water and bleach to flush out the line and prevent mold or algae buildup.
- Schedule professional maintenance: Consider scheduling professional HVAC maintenance at least once a year. A licensed technician can inspect and tune up your system, ensuring optimal performance and identifying any potential issues.
- Program and adjust thermostat: Utilize a programmable thermostat to save energy and maintain comfortable temperatures. Adjust the settings to reflect your heating and cooling needs for different times of the day or when you’re away.
- Seal air leaks: Inspect around doors, windows, and ductwork for any air leaks. Seal any gaps or cracks to prevent air leakage, improve energy efficiency, and maintain consistent indoor temperatures.
- Monitor energy consumption: Keep track of your HVAC system’s energy consumption. If you notice a significant increase in energy usage or unexpected changes in performance, it may indicate a need for professional attention.
- Keep the area around indoor units clean: Ensure that the area around your indoor HVAC units, such as furnaces or air handlers, is clean and free from obstructions. Vacuum any dust or debris and keep the area well-ventilated.
Maintaining your HVAC system is essential for its longevity and functionality. By following these steps and addressing any issues promptly, you’ll enjoy a comfortable and efficient indoor environment.
Now that you have maintained your HVAC system, let’s move on to the next task on our fall cleaning checklist. Keep up the great work!
Checking and Changing Batteries in Smoke Detectors
Smoke detectors are vital for alerting us to potential fires and ensuring the safety of our homes and loved ones. Regularly checking and changing the batteries in your smoke detectors is a simple yet crucial task. Follow these steps to ensure your smoke detectors are functioning properly:
- Check every smoke detector: Start by checking each smoke detector in your home. Test the alarm functionality by pressing the test button or following the manufacturer’s instructions.
- Replace batteries: If you hear a weak sound or no sound at all during the test, it’s time to replace the batteries. Use fresh, high-quality batteries that are recommended by the manufacturer.
- Set a schedule: Establish a regular schedule for checking and changing the batteries in your smoke detectors. It may be helpful to do this when you change your clocks for daylight saving time as a reminder.
- Check battery expiration dates: Occasionally check the expiration dates on your batteries to ensure they are not outdated. Replace them as needed to maintain the effectiveness and reliability of your smoke detectors.
- Keep spare batteries on hand: Always have spare batteries available in case a smoke detector battery needs immediate replacement. Store them in a designated location that is easily accessible.
- Dust and clean smoke detectors: Regularly dust the exterior of your smoke detectors to prevent debris from obstructing the sensors. Use a soft, dry cloth or a vacuum cleaner attachment to gently remove any accumulated dust.
- Install smoke detectors in proper locations: Ensure that you have smoke detectors installed in every bedroom, outside sleeping areas, and on every level of your home. Follow the manufacturer’s instructions for the optimum placement and quantity of smoke detectors.
- Replace expired or malfunctioning detectors: Smoke detectors have a limited lifespan, typically around 10 years. If your smoke detectors are older or no longer function properly after changing batteries, it’s time to replace them with new ones.
- Teach fire safety to your family: Use the opportunity of checking smoke detectors to remind your family members about fire safety practices. Review escape plans, emphasize the importance of smoke detectors, and discuss what to do in the event of a fire.
Regularly checking and changing the batteries in your smoke detectors is a critical task that can save lives. By following these steps and staying proactive, you’re taking an essential step in ensuring the safety of your home and family.
Now that you’ve taken care of your smoke detectors, let’s move on to the next task on our fall cleaning checklist. Keep up the great work!
Properly Disposing of Household Hazardous Waste
Household hazardous waste refers to products and materials that are potentially harmful to human health and the environment. It’s crucial to handle and dispose of these items properly to prevent contamination and minimize the negative impact on our surroundings. Follow these steps to dispose of household hazardous waste:
- Identify hazardous waste: Take stock of the hazardous waste items you have in your home. This may include products such as paints, solvents, pesticides, cleaning agents, batteries, light bulbs, and electronic waste.
- Read labels and manufacturer instructions: Pay attention to warning labels and instructions on the products. They often have specific guidance on how to safely handle and dispose of the item.
- Separate and store hazardous waste: Keep hazardous waste items separate from other household items. Store them securely in their original containers or in properly labeled containers to prevent leaks or accidental mixing.
- Research local disposal options: Check with your local municipality or waste management facility for guidelines on how to dispose of hazardous waste. They may have specific drop-off locations or scheduled collection events for these types of materials.
- Attend community collection events: Take advantage of community collection events for hazardous waste disposal. These events provide a safe and convenient way to dispose of items that cannot be put in regular trash or recycling bins.
- Recycle or donate if possible: Some household hazardous waste items, such as batteries or electronics, can be recycled or donated. Research local programs or organizations that accept these items for proper recycling or reuse.
- Follow disposal instructions: When disposing of hazardous waste, follow the instructions provided by your local waste management facility or collection event. This may include packaging the waste properly, labeling containers, or sealing them in specific bags.
- Do not pour down drains or in the trash: Avoid pouring hazardous waste down drains, sinks, toilets, or storm drains as it can contaminate water sources. Similarly, do not dispose of them in regular trash bins, as they can pose a risk to sanitation workers and end up in landfills.
- Teach others about proper disposal: Share knowledge about proper disposal of hazardous waste with your family, friends, and neighbors. Encourage them to handle these materials responsibly to protect the environment and the community.
Properly disposing of household hazardous waste is vital for the well-being of both people and the environment. By following these steps and being proactive in handling these materials responsibly, you’re contributing to a cleaner and safer world.
Now that you’ve learned how to handle household hazardous waste, let’s move on to the final task on our fall cleaning checklist. You’re almost there!
Last Minute Touch-Ups
As you near the end of your fall cleaning checklist, it’s time for some last-minute touch-ups to ensure your home is looking its best. Follow these steps for those final touches:
- Spot clean walls and baseboards: Inspect walls and baseboards for any scuffs, stains, or marks. Use a damp cloth or gentle cleaner to spot clean these areas, restoring the fresh appearance of your walls.
- Check and replace light bulbs: Walk through your home and check all the light bulbs. Replace any burnt-out bulbs to ensure a well-lit and inviting ambiance.
- Polish hardware and fixtures: Pay attention to doorknobs, handles, faucets, and other hardware. Polish them with an appropriate cleaner or a mixture of vinegar and water to remove smudges and fingerprints.
- Dust blinds and window treatments: Use a duster or a microfiber cloth to gently dust blinds, curtains, or other window treatments. This will remove any accumulated dust and give your windows a fresh, clean look.
- Deodorize and refresh: Light scented candles, use air fresheners, or open windows to create a pleasant and inviting aroma throughout your home. This final touch will leave a positive impression on anyone who enters.
- Double-check organization and decluttering: Take a final look around your home to ensure everything is in its designated place and clutter has been eliminated. Tidy up any areas that may have become disorganized during the cleaning process.
- Inspect and clean mirrors: Spray a glass cleaner or a mixture of water and vinegar on mirrors, then wipe them down with a clean cloth or newspaper for streak-free shine.
- Set the ambiance: Create a cozy and welcoming atmosphere by adjusting lighting, arranging pillows, and adding fresh flowers or other decorative elements to key areas.
- Take a moment to appreciate your efforts: Finally, take a step back and admire the results of your hard work. Enjoy the clean, organized, and refreshed space you’ve created.
These last-minute touch-ups will add those final details to your cleaning efforts, making your home truly shine. Take pride in the work you’ve done and enjoy the rejuvenated space.
Congratulations! You’ve completed your fall cleaning checklist. Your home is now clean, organized, and ready to embrace the season. Take a moment to relax and enjoy the fruits of your labor.
Conclusion
Congratulations on completing your comprehensive fall cleaning checklist! By following these steps and dedicating time and effort to each task, you have successfully transformed your living space into a clean, organized, and inviting haven. Your home is now ready to embrace the new season with freshness and comfort.
Through decluttering and organizing, you have created space and removed unnecessary items, making your living areas more functional and aesthetically pleasing. Cleaning windows, floors, furniture, upholstery, and drapes ensures a sparkling and sanitary environment. By tackling closets, cabinets, and garages/basements, you have eliminated clutter and maximized storage space.
Sanitizing the kitchen and bathroom protects your health and promotes cleanliness. Washing and storing seasonal items, along with refreshing outdoor spaces, contribute to a seamless transition as the weather changes. Maintaining HVAC systems and smoke detectors ensures safety and proper functioning, while responsibly disposing of hazardous waste showcases your commitment to the environment.
Lastly, the last-minute touch-ups add those final details that make your home truly shine. Throughout this process, you have demonstrated a deep understanding of the importance of a clean and organized living space, and the impact it has on your overall well-being.
As you relax and enjoy the results of your fall cleaning efforts, take a moment to appreciate the positive energy and peace that a clean home brings. Embrace the cozy and welcoming atmosphere you have created and share it with your loved ones.
Remember, the fall cleaning checklist is not a one-time event but a foundation for maintaining a tidy home. By incorporating these cleaning habits into your routine, you can ensure that your living space remains fresh, organized, and inviting all year round.
Thank you for investing your time and effort into making your home the best it can be. Enjoy the beauty and comfort of your clean living environment!
Frequently Asked Questions about The Complete Fall Cleaning Checklist For A Tidy Home
Was this page helpful?
At Storables.com, we guarantee accurate and reliable information. Our content, validated by Expert Board Contributors, is crafted following stringent Editorial Policies. We're committed to providing you with well-researched, expert-backed insights for all your informational needs.




0 thoughts on “The Complete Fall Cleaning Checklist For A Tidy Home”