Home>Storage Ideas>Storage Baskets>How To Paint Wicker Baskets
Storage Baskets
How To Paint Wicker Baskets
Modified: December 7, 2023
Learn how to beautifully paint wicker storage baskets with our step-by-step guide. Transform your baskets into stylish and functional decor pieces.
(Many of the links in this article redirect to a specific reviewed product. Your purchase of these products through affiliate links helps to generate commission for Storables.com, at no extra cost. Learn more)
Introduction
Welcome to the world of wicker baskets! Whether you’re a fan of rustic farmhouse decor or simply looking for a creative storage solution, wicker baskets are a versatile and stylish choice. And what better way to personalize and add a pop of color to your wicker baskets than by painting them?
In this article, we will guide you through the step-by-step process of how to paint wicker baskets. With a few materials, a little bit of patience, and a touch of creativity, you can transform your plain wicker baskets into eye-catching home accents.
Before we dive into the painting process, it’s important to note that wicker baskets are made from a variety of materials, such as willow, rattan, or bamboo. The specific material can affect how the paint adheres and dries. Therefore, it’s essential to properly prepare the basket and choose the right paint to ensure a successful outcome.
So, grab your paintbrushes and let’s get started on this exciting DIY project to give your wicker baskets a fresh new look!
Key Takeaways:
- Transform plain wicker baskets into personalized home accents with a pop of color by following a step-by-step guide to painting. Embrace creativity and enjoy the process of making unique, eye-catching pieces.
- Proper preparation, choosing the right materials, and allowing adequate drying time are essential for achieving a professional-looking result when painting wicker baskets. Unleash your creativity and enjoy the process of transforming plain baskets into personalized, eye-catching home accents.
Read more: How To Bleach Wicker Baskets
Materials Needed
Before you start painting your wicker baskets, you’ll need a few materials to ensure a smooth and successful process. Here’s a list of what you’ll need:
- Wicker baskets: Choose the baskets you want to paint. Make sure they are clean and free from any dust or debris.
- Paint: Select a paint suitable for wicker material. Acrylic paint or spray paint works well for wicker baskets.
- Primer: A primer is essential to help the paint adhere better to the wicker surface and ensure an even finish. Look for a primer specifically designed for wicker or universal primer.
- Paintbrushes: Depending on the size of your baskets, have a variety of paintbrushes on hand. A small brush for intricate details and a larger brush for larger areas will suffice.
- Sandpaper: If your wicker baskets have a rough or uneven surface, some sandpaper will be useful to smooth them out.
- Spray bottle: Fill a spray bottle with water to lightly mist the wicker baskets. This will help the paint adhere better and reduce brush strokes.
- Drop cloth or newspaper: To protect your workspace from paint spills or drips, lay down a drop cloth or spread out some old newspapers.
- Disposable gloves: It’s always a good idea to wear disposable gloves when handling paint to protect your hands.
- Masking tape: If you plan to paint specific sections or create designs on your wicker baskets, masking tape will come in handy to create clean, straight lines.
- Sealant: Once you’ve finished painting your wicker baskets, a sealant will help protect the paint and provide a longer-lasting finish. Look for a clear polyurethane spray or brush-on sealant suitable for wicker.
With these materials in hand, you’re now ready to dive into the exciting process of painting your wicker baskets. Let’s move on to the first step: preparing the wicker basket.
Step 1: Prepare the Wicker Basket
Before you begin painting your wicker basket, it’s crucial to properly prepare the surface to ensure the paint adheres well and the finished result is smooth and professional-looking. Follow these steps to prepare your wicker basket:
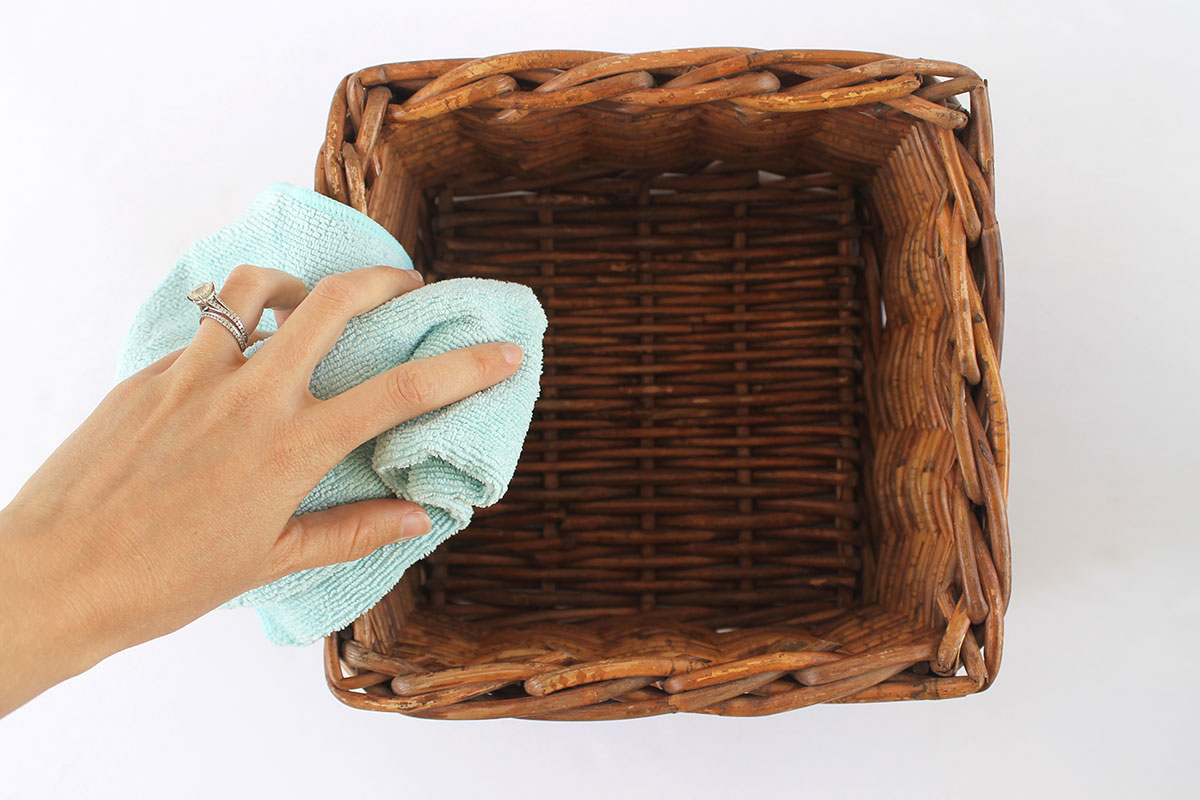
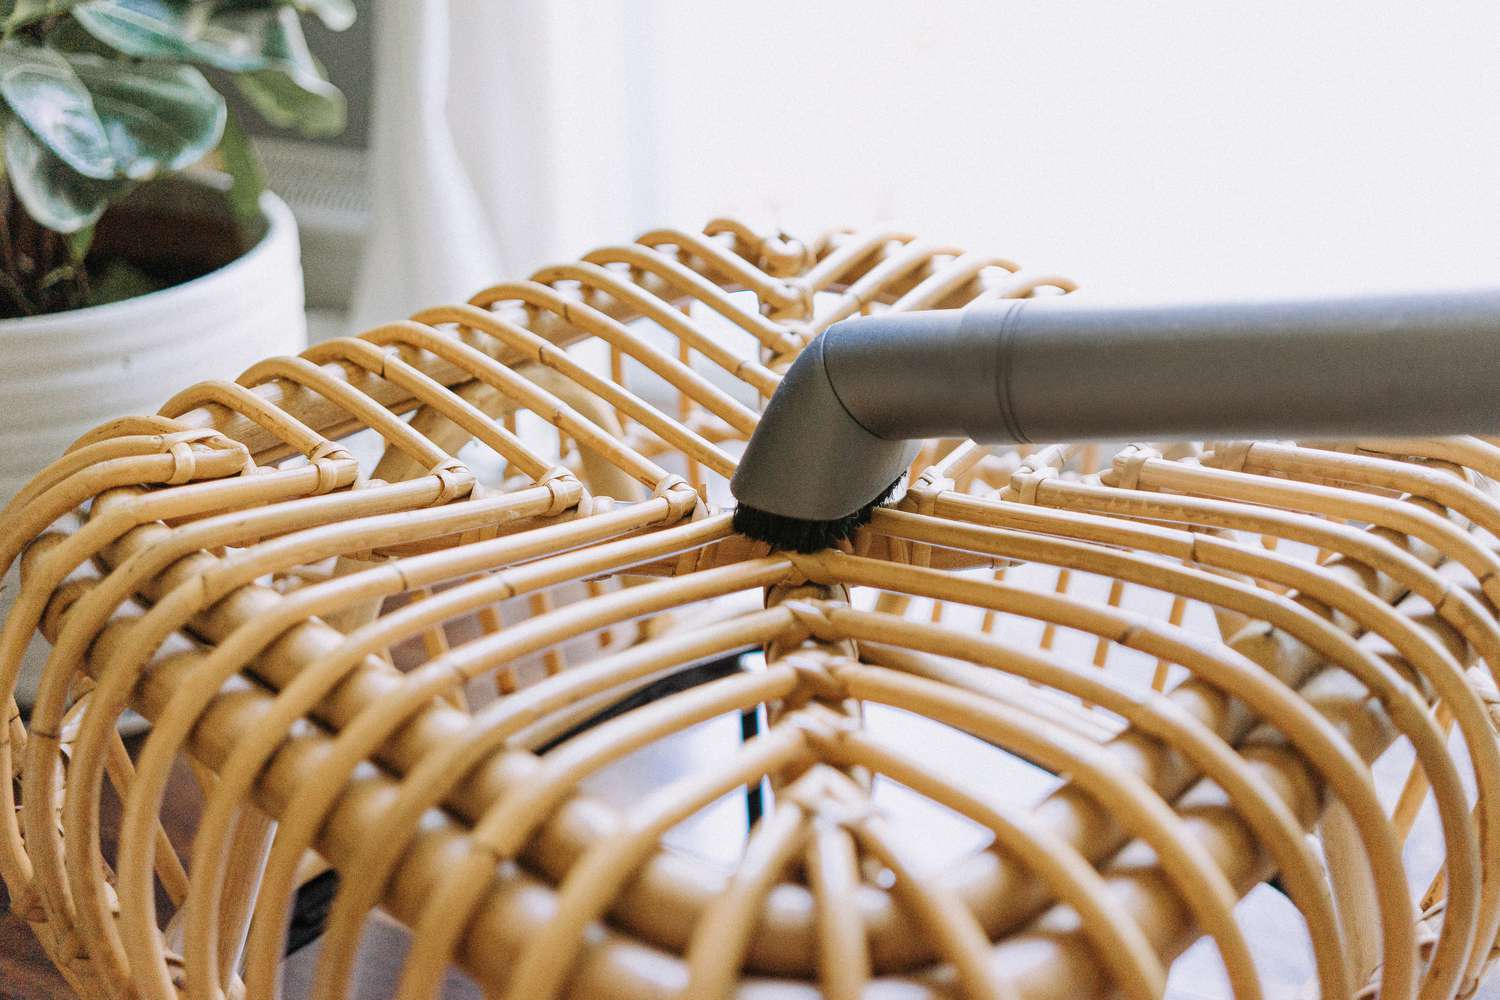
- Clean the basket: Start by giving your wicker basket a thorough cleaning. Remove any dust, dirt, or debris by gently wiping it with a damp cloth or using a soft brush. Allow the basket to dry completely before proceeding to the next step.
- Inspect for damage: Check the wicker basket for any loose or damaged strands. Trim any loose strands and repair any broken or damaged parts as needed. This will ensure a sturdy surface for painting.
- Smooth out rough surfaces: If your wicker basket has rough or uneven areas, lightly sand them with fine-grit sandpaper. This will create a smoother surface for the paint to adhere to. After sanding, remove any dust or debris by wiping the basket with a damp cloth.
- Protect surrounding areas: To avoid accidentally getting paint on other surfaces, use masking tape to cover any areas of the basket that you don’t want to paint. This can include handles, edges, or specific sections that you want to keep unpainted.
By taking the time to properly prepare your wicker basket, you’ll ensure that the paint adheres well and that the final result is smooth and professional-looking. Once your basket is prepped and ready, it’s time to move on to the next step: choosing the right paint.
Step 2: Choose the Right Paint
When it comes to painting wicker baskets, selecting the right type of paint is essential for achieving a beautiful and long-lasting finish. Consider the following factors when choosing the paint for your project:
- Paint type: Acrylic paint or spray paint are both suitable options for painting wicker baskets. Acrylic paint offers a wide range of colors and is easy to apply with a brush, while spray paint provides a quick and even coverage. Choose the paint type that best suits your preferences and project requirements.
- Compatibility with wicker: Look for a paint that is specifically designed for use on wicker or similar materials. These paints are formulated to adhere well to the wicker surface and provide a durable finish.
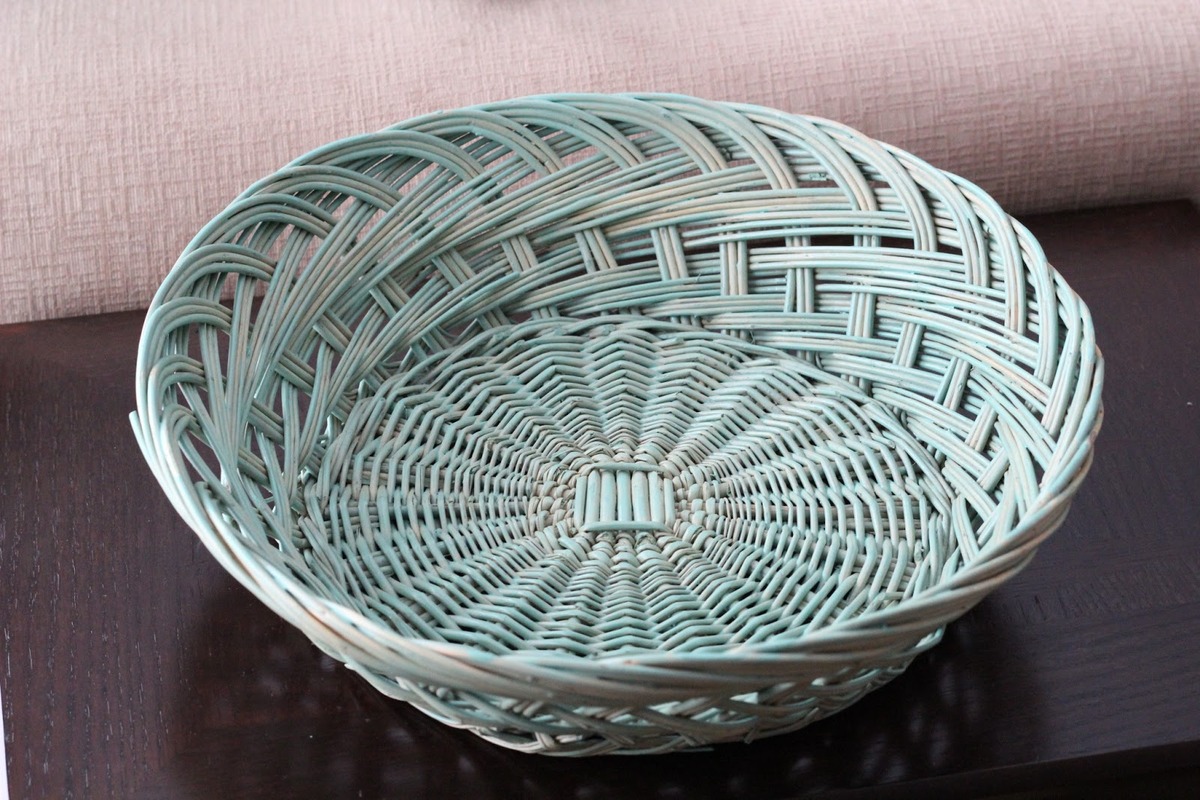
- Finish: Decide on the desired finish for your wicker basket. You can choose from a matte, satin, or glossy finish, depending on the look you want to achieve. Keep in mind that a glossier finish may require additional coats to achieve full coverage.
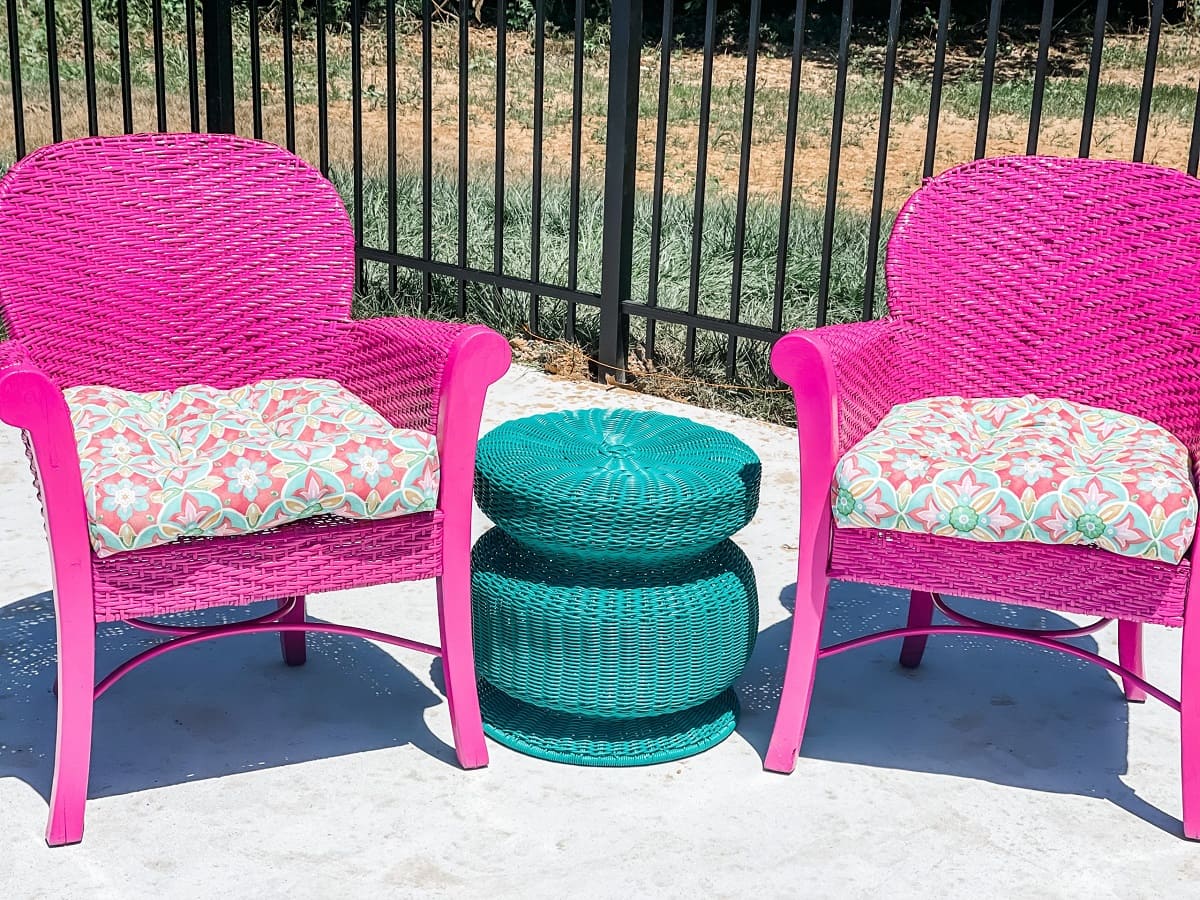
- Color selection: The color of your paint is a personal choice and should align with your overall design vision. Consider the existing color scheme in the room where the basket will be displayed, or choose a color that adds a bold pop of contrast.
Before starting the painting process, make sure to read the instructions on the paint can or bottle for any specific recommendations or precautions. It’s always a good idea to test the paint on a small, inconspicuous area of the basket to ensure compatibility and desired results.
Now that you’ve chosen the right paint for your wicker basket, it’s time to move on to the next step: priming the basket to ensure proper adhesion of the paint.
Step 3: Prime the Basket
Before applying the paint to your wicker basket, it’s important to prime the surface. Priming helps the paint adhere better to the wicker and ensures a smooth and even finish. Follow these steps to prime your wicker basket:
- Choose a suitable primer: Look for a primer specifically designed for use on wicker or a universal primer that is compatible with various materials. Check the label for any recommendations specific to wicker.
- Prepare the primer: Follow the instructions on the primer can and mix the primer, if required. Some primers may need to be stirred or shaken before use.
- Apply the primer: Using a paintbrush or a spray can, apply an even coat of primer to the entire surface of the wicker basket. Make sure to get into all the nooks and crannies of the basket. Use smooth, even strokes to ensure an even application.
- Allow drying time: Let the primer dry completely according to the instructions on the can. This usually takes about 1 to 2 hours, but it’s always best to check the label for the recommended drying time.
- Inspect for coverage: After the primer has dried, inspect the basket to ensure that it is evenly coated. If there are any bare spots or areas that need additional coverage, apply a second coat of primer and let it dry again.
By properly priming your wicker basket, you create a solid foundation for the paint to adhere to. This step also helps to prevent the paint from chipping or peeling over time. Once the primer has dried and your wicker basket is fully prepped, it’s time to move on to the exciting part: applying the paint!
Read more: What Are Wicker Baskets Made From?
Step 4: Start Painting
Now that your wicker basket is primed and ready, it’s time to bring out the paint and start adding color to your project. Follow these steps to ensure a successful painting process:
- Select your paint: Use the paint you previously chose for your wicker basket project. Make sure to stir the paint well if needed, to ensure an even consistency.
- Choose your brush: For small areas and intricate details, use a smaller paintbrush. For larger sections, a larger brush will work well. Synthetic brushes with firm bristles are often recommended for painting wicker.
- Apply the paint: Dip your brush into the paint and start applying it to the wicker basket. Use smooth and even strokes, following the natural weave of the wicker. Pay attention to any crevices or hard-to-reach areas, making sure to get full coverage on the basket.
- Blend the paint: As you paint, periodically mist the basket with a spray bottle filled with water. This will help the paint blend and reduce the appearance of brush strokes. Avoid oversaturating the basket with water.
- Take breaks when needed: If your wicker basket is large or you’re painting multiple baskets, take breaks to avoid fatigue and ensure better concentration. Allow the paint to dry between coats if you need to apply more than one coat.
Remember to have fun with the process and embrace your creativity! Experiment with different painting techniques, such as adding texture or creating patterns, to make your wicker basket truly unique.
After you’ve finished applying the paint, take a step back and assess the coverage and color. If necessary, apply additional coats to achieve your desired look. Once you’re satisfied with the paint job, it’s time to move on to the next step: applying additional coats for a more vibrant finish.
When painting wicker baskets, make sure to clean the surface thoroughly and use a primer to help the paint adhere better. Additionally, consider using spray paint for a smooth and even finish.
Step 5: Apply Additional Coats
To achieve a vibrant and even finish on your painted wicker basket, it’s often necessary to apply multiple coats of paint. This step ensures that the color is fully saturated and any underlying imperfections are covered. Follow these steps to apply additional coats to your wicker basket:
- Allow the first coat to dry: Before applying additional coats, make sure that the previous coat of paint is completely dry. Check the drying time specified on the paint can, as it can vary depending on the type of paint used.
- Assess the coverage: Take a step back and evaluate the coverage and color intensity of your wicker basket. If you’re satisfied with the result, you may choose to stop at one coat. However, if you desire a more opaque or vibrant finish, apply additional coats as needed.
- Apply subsequent coats: Using the same techniques as before, apply subsequent coats of paint to the wicker basket. Make sure to overlap the brush strokes from the previous coat to ensure a seamless finish. Allow each coat to dry according to the recommended drying time.
- Inspect for evenness: After each coat has dried, inspect the wicker basket for any areas that may require touch-ups or additional coats. Pay close attention to corners, crevices, and any spots where the previous coat may have shown through.
- Repeat as necessary: Repeat the process of applying additional coats and allowing them to dry until you achieve the desired color and coverage on your wicker basket. Remember to take your time and be patient with the process to ensure a professional-looking finish.
Keep in mind that the number of coats needed can vary depending on factors such as the color of the paint, the type of paint used, and the original color and condition of the wicker basket. Trust your artistic instinct and adjust the number of coats accordingly to achieve the desired result.
Once you are satisfied with the coverage and color of your painted wicker basket, it’s time to move on to the next step: letting the paint fully dry before proceeding with the final steps.
Step 6: Let It Dry
After applying the final coat of paint to your wicker basket, it’s crucial to allow ample drying time so that the paint can fully set and cure. This step ensures that the paint adheres properly and provides a durable finish. Follow these guidelines to properly dry your painted wicker basket:
- Find a well-ventilated area: Place the wicker basket in a well-ventilated space, away from direct sunlight and excessive humidity. Adequate air circulation will help the paint dry evenly and prevent any potential issues, such as bubbling or cracking.
- Follow the recommended drying time: Consult the paint can label for the manufacturer’s recommended drying time. This can vary depending on the type of paint used. Typically, acrylic paint on wicker may take 24 to 48 hours to dry completely.
- Avoid touching or moving the basket: While the paint is drying, avoid touching or moving the wicker basket to prevent smudging or damaging the finish. Be patient and allow the paint to cure undisturbed.
- Check for dryness: After the recommended drying time has passed, gently touch a small, inconspicuous area of the basket to ensure that the paint is dry to the touch. If the paint feels sticky or tacky, give it more time to dry before proceeding.
It’s important to note that drying times may vary depending on environmental conditions such as temperature and humidity. If you live in a particularly humid or cold climate, it might take longer for the paint to dry. Exercise patience and allow extra time if needed.
Once you are confident that the paint is completely dry, it’s time to move on to the final steps: sealing the paint to protect the finish and adding any finishing touches to your painted wicker basket.
Step 7: Seal the Paint
Sealing the paint on your painted wicker basket is an important step to protect the finish and ensure its longevity. A sealant creates a protective barrier that safeguards the paint from scratches, moisture, and general wear and tear. Follow these steps to properly seal the paint on your wicker basket:
- Choose a suitable sealant: Look for a clear polyurethane spray or brush-on sealant that is compatible with the type of paint you used. Read the label to ensure it is suitable for use on wicker and provides a protective finish.
- Prepare the sealant: If you are using a brush-on sealant, stir it well before application. If you are using a spray sealant, shake the can thoroughly to mix the contents.
- Apply the sealant: Using a brush or a spray can, apply a thin, even coat of the sealant to the entire surface of the wicker basket. Make sure to reach all the nooks and crannies for complete coverage. Avoid applying the sealant too thickly, as it can cause drips or an uneven finish.
- Follow the instructions: Refer to the instructions on the sealant can or bottle for specific drying and curing times. It’s important to allow the sealant to dry completely between coats if you decide to apply multiple layers for added protection.
- Inspect for desired finish: After the sealant has dried, assess the finish to ensure it meets your expectations. The sealant may slightly enhance the sheen of the painted surface, so take that into consideration if you prefer a specific finish.
Sealing the paint on your wicker basket not only protects it from damage but also makes it easier to clean and maintain. It adds an extra layer of durability, allowing your painted wicker basket to withstand everyday use without the risk of the paint chipping or peeling.
Once the sealant has fully dried and cured, your painted wicker basket is almost complete. Now, it’s time to add some finishing touches to enhance its visual appeal and make it truly stand out.
Step 8: Finishing Touches
Adding the finishing touches to your painted wicker basket is the final step in transforming it into a unique and personalized piece. These touches will enhance its visual appeal and tie it into your overall design aesthetic. Consider the following ideas to add those special finishing touches:
- Decorative accents: Attach decorative accents such as ribbons, bows, or fabric trims to the handle or rim of the basket. Choose materials and colors that complement the paint color and style of your basket.
- Stencil designs: Use stencils to create intricate patterns or designs on the surface of the basket. This can be achieved by using contrasting paint colors or simply adding metallic accents for a touch of elegance.
- Personalization: Add a personal touch to the basket by painting initials, a monogram, or a meaningful symbol on the side. This will make the basket truly unique and reflective of your personality.
- Distressing: If you prefer a more vintage or rustic look, consider distressing the painted surface of the wicker basket. Use sandpaper or a dry brush to gently remove some of the paint and create a worn, weathered effect.
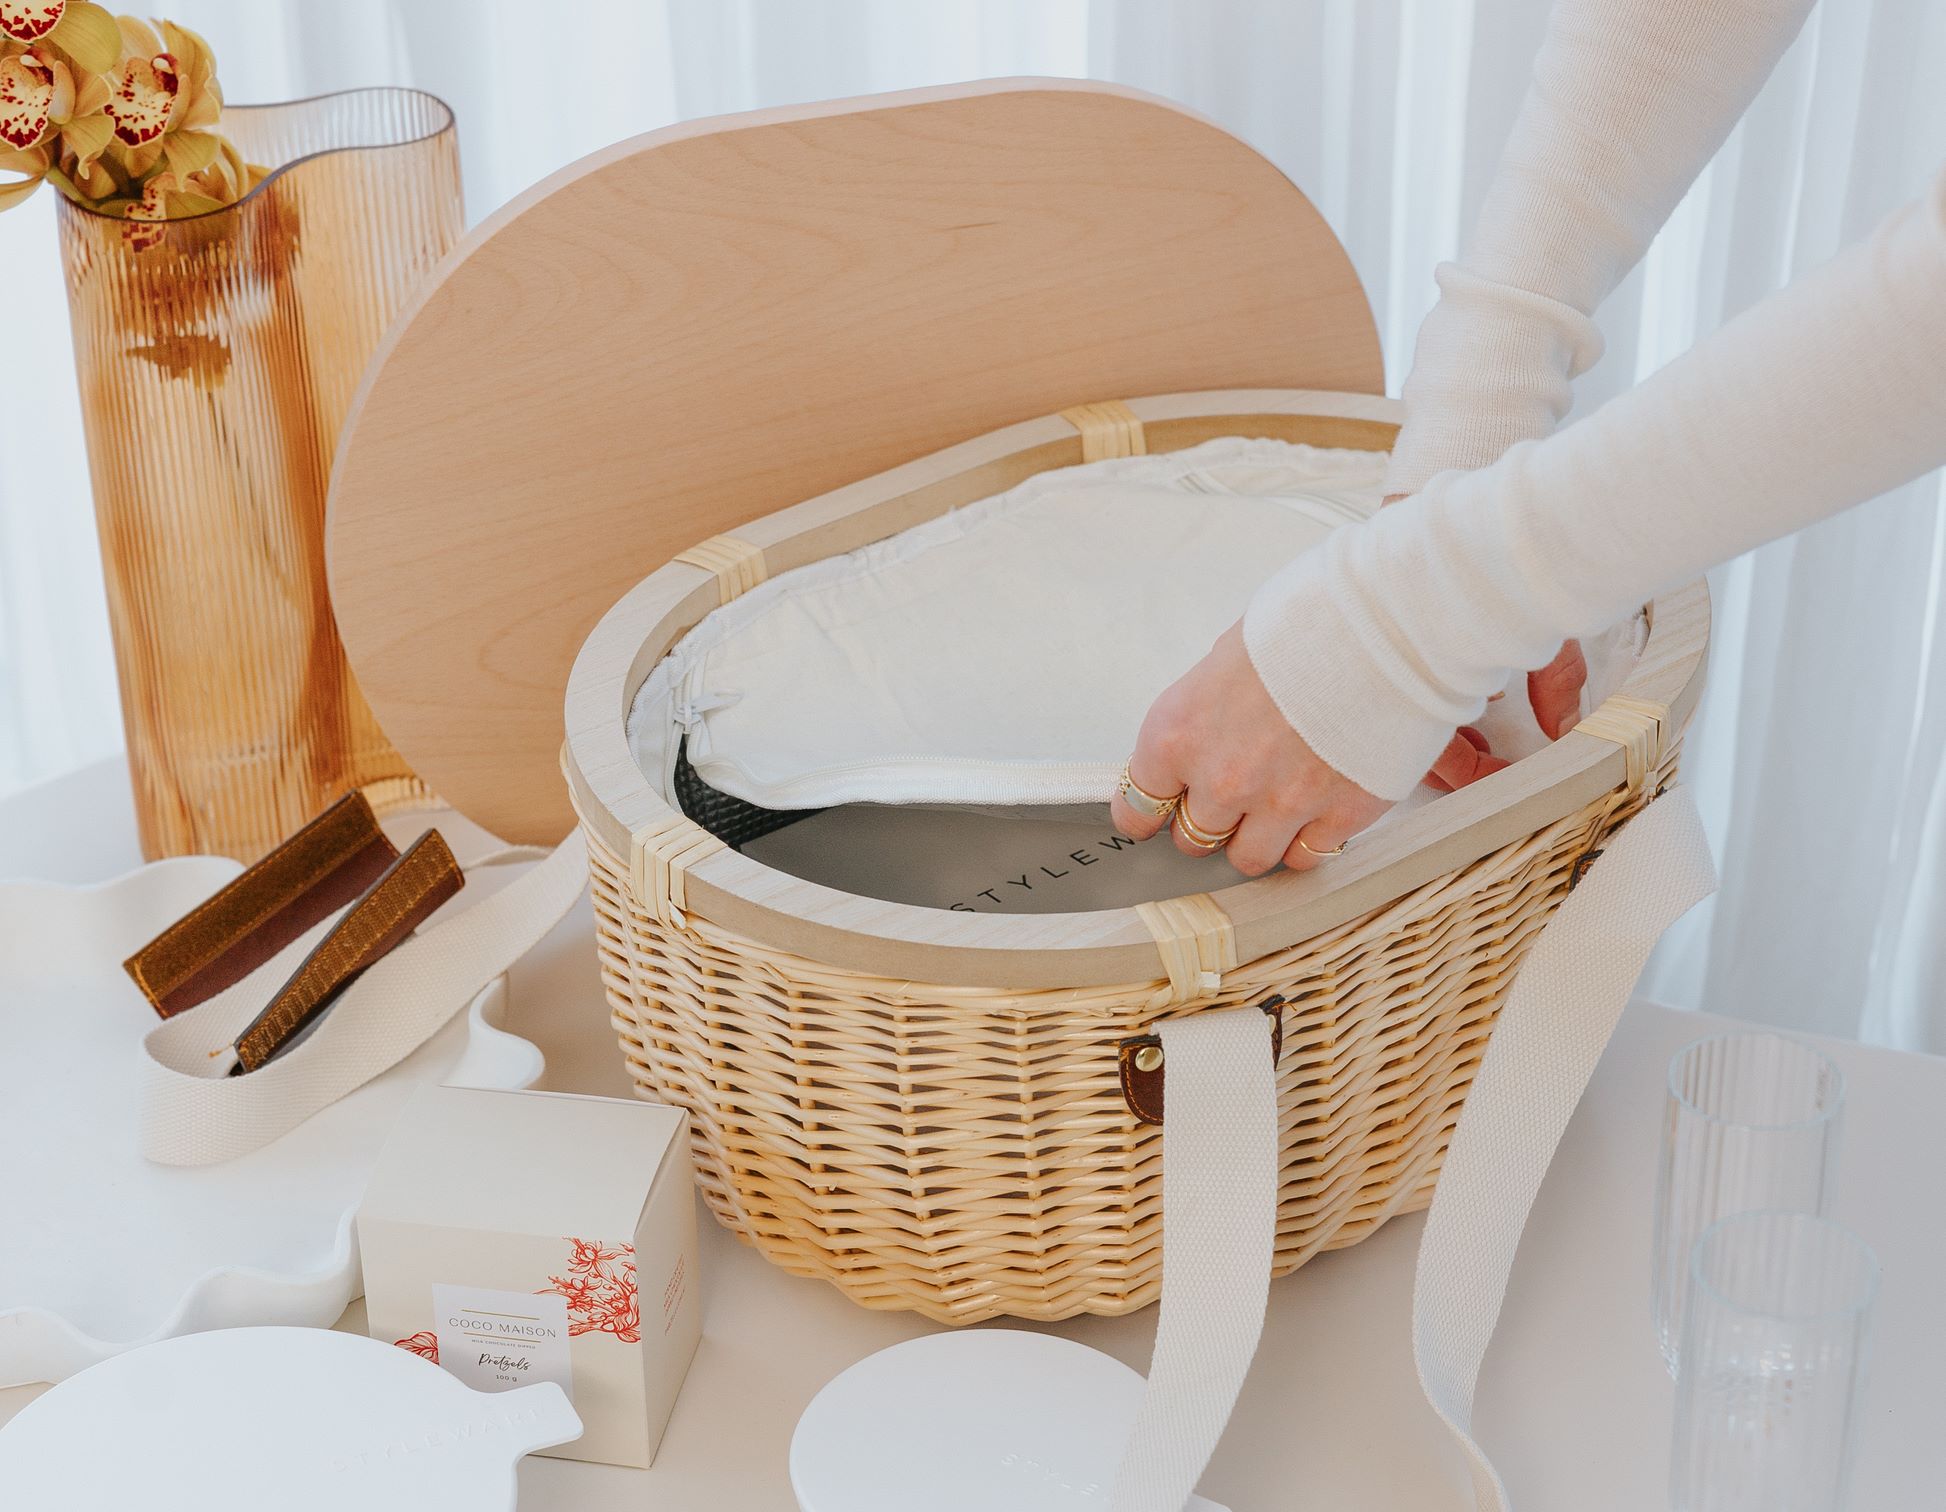
- Inside lining: For a polished and finished look, consider adding a fabric lining to the inside of the basket. This can be done with a sturdy fabric that complements the paint color or a pattern that matches your décor.
- Embellishments: Add embellishments such as beads, buttons, or charms to further enhance the visual appeal of your painted wicker basket. This can be done by attaching them to the handle, rim, or sides of the basket.
Remember to let your creativity shine and experiment with different techniques and ideas. The finishing touches will help make your painted wicker basket a true statement piece and a reflection of your personal style.
Once you have added the finishing touches, your painted wicker basket is ready to be proudly displayed or put to practical use. Whether you use it for storage, as a centerpiece, or simply as a decorative accent, your painted wicker basket will bring a touch of color and personality to any space.
Congratulations on completing the process of painting and finishing your wicker basket! We hope this step-by-step guide has been helpful in your DIY project. Now, sit back, admire your handiwork, and enjoy the beauty of your newly painted wicker basket!
Conclusion
Painting wicker baskets is a fun and rewarding DIY project that allows you to transform plain and ordinary baskets into eye-catching and personalized home accents. By following the step-by-step guide outlined in this article, you can confidently embark on your wicker basket painting journey.
From preparing the surface and choosing the right paint to applying multiple coats and sealing the finish, each step is essential in creating a beautifully painted wicker basket. The finishing touches add that extra touch of flair and personalization, making your painted wicker basket truly unique.
As you embark on your painting adventure, remember to embrace your creativity and have fun with the process. Play with different colors, patterns, and techniques to achieve the desired look that perfectly complements your home decor. Don’t be afraid to let your imagination soar and experiment with various styles.
Painted wicker baskets make great storage solutions, decorative accents, or thoughtful gifts for friends and loved ones. They can brighten up any room and instantly add a touch of charm and personality to your space.
Just keep in mind that proper preparation, choosing the right materials, and allowing adequate drying time are key to achieving a professional-looking result. Whether you’re aiming for a contemporary, rustic, or bohemian style, with the right tools and techniques, you can breathe new life into your wicker baskets and showcase your own unique artistic flair.
So, unleash your creativity, gather your materials, and let your painting adventure begin. Enjoy the process, and be proud of your painted wicker basket masterpiece!
Frequently Asked Questions about How To Paint Wicker Baskets
Was this page helpful?
At Storables.com, we guarantee accurate and reliable information. Our content, validated by Expert Board Contributors, is crafted following stringent Editorial Policies. We're committed to providing you with well-researched, expert-backed insights for all your informational needs.


0 thoughts on “How To Paint Wicker Baskets”