Home>Storage Ideas>Storage Baskets>How To Weave Baskets
Storage Baskets
How To Weave Baskets
Modified: December 7, 2023
Learn how to weave storage baskets with our step-by-step guide. Create beautiful and functional baskets for all your storage needs.
(Many of the links in this article redirect to a specific reviewed product. Your purchase of these products through affiliate links helps to generate commission for Storables.com, at no extra cost. Learn more)
Introduction
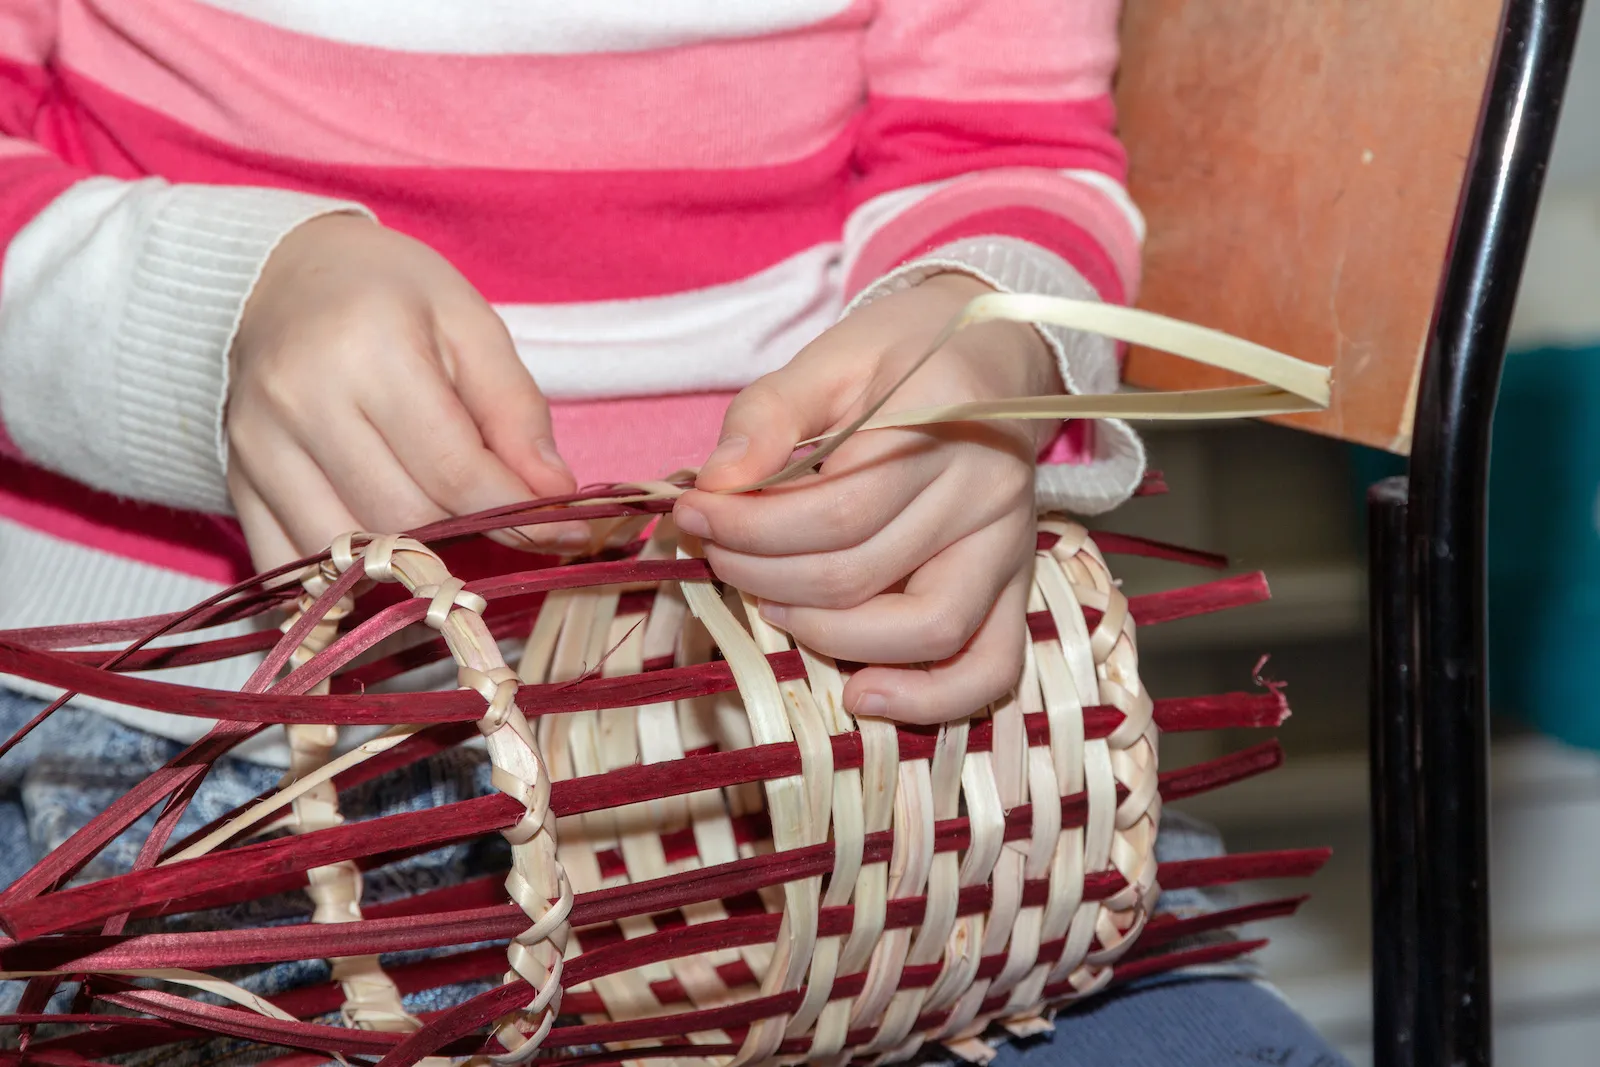
Welcome to the fascinating world of basket weaving! Whether you’re a beginner or an experienced crafter, there’s something enchanting about creating a beautiful and functional basket from scratch. Basket weaving is a centuries-old art form that not only allows us to tap into our creativity but also provides us with a practical and decorative item.
In this article, we’ll explore the art of basket weaving step by step. We’ll cover the materials you’ll need, provide tips on choosing the right materials, guide you through the essential techniques, and even delve into some advanced variations. So, grab your weaving supplies and let’s get started on this delightful journey!

Key Takeaways:
- Embrace the ancient art of basket weaving by selecting durable materials, mastering basic techniques, and adding personal touches to create unique and functional baskets that reflect your creativity and style.
- Dive into the world of basket weaving, from crafting a sturdy base to adding decorative handles, and explore advanced techniques to push the boundaries of traditional weaving and unleash your artistic expression.
Read more: How To Weave A Placemat
Materials Needed
Before we jump into the world of basket weaving, it’s essential to gather the necessary materials. Here’s a list of items you’ll need to get started:
- Rattan or Cane Strips: These are the most common materials used for basket weaving. They come in various sizes and can be found at craft stores or online.
- Scissors: A good pair of scissors is essential for cutting the materials to the desired length and trimming any excess.
- Measuring Tape: This will help you ensure that your basket has the correct dimensions and proportions.
- Awl or Bodkin: These tools are used for poking holes in the weaving material and manipulating the strands to create intricate patterns.
- Clothespins or Clamps: These are handy for holding the strips in place while you weave.
- Spray Bottle or Water Container: The moisture from water helps to soften the weaving materials and make them more pliable.
- Optional Decorative Materials: Depending on the design and style you want for your basket, you may want to gather additional embellishments such as ribbon, beads, or colored threads.
These are the basic materials you’ll need to get started with basket weaving. As you progress and explore more advanced techniques, you may find yourself wanting to experiment with different materials and tools. But for now, this list will equip you with everything you need to create your first basket.
Choosing the Right Materials
When it comes to basket weaving, selecting the right materials is crucial for a successful project. Here are a few tips to help you choose the best materials for your basket:
- Consider the Purpose: Think about the purpose of your basket. Will it be used for carrying items, storing objects, or purely as a decorative piece? The purpose will determine the size and strength of the materials you’ll need.
- Start with Durable Materials: Use materials that are sturdy and long-lasting, such as rattan or cane strips. These materials are flexible, easy to manipulate, and can withstand the weaving process without breaking or unraveling.
- Color and Texture: Pay attention to the color and texture of your materials. If you want a natural-looking basket, opt for materials in their original hues. However, if you’re looking for a vibrant or decorative basket, you can find materials in various colors and patterns to suit your preferences.
- Size Matters: Consider the size of your basket and choose materials that are appropriate for its dimensions. Thicker and wider strips are ideal for larger baskets, while thinner strips work well for smaller ones.
- Experiment with Different Materials: Don’t be afraid to get creative and experiment with unconventional materials such as fabric strips, yarn, or even recycled materials. These can add unique textures and visual interest to your basket.
- Test the Flexibility: Before purchasing a large quantity of materials, test their flexibility. Bend and twist the strips to ensure they are pliable and won’t snap during the weaving process.
Remember, the choice of materials can greatly impact the final outcome of your basket. Take your time to explore different options, and don’t hesitate to ask for advice from experienced weavers or local craft stores. With the right materials in hand, you’ll be well on your way to creating beautiful, functional, and durable baskets.
Preparing the Materials
Once you have gathered the necessary materials for your basket weaving project, it’s important to properly prepare them before you start weaving. Here are the essential steps to prepare your materials:
- Soak the Materials: Most weaving materials, such as rattan or cane strips, need to be softened before they can be easily manipulated. Fill a container or spray bottle with water and soak the strips for about 30 minutes to an hour. This will make them more pliable and reduce the risk of breakage while weaving.
- Remove Excess Water: After soaking the materials, gently remove any excess water by patting them with a clean towel. You can also let them air dry for a while before using them, depending on your project’s timeline.
- Sort and Organize: Take the time to sort and organize your materials. Separate them based on size, color, or any specific pattern you plan to create. This will save you time and make it easier to find the right strip for each weaving step.
- Cut the Materials: Measure and cut your materials to the desired length for your basket. Use a measuring tape to ensure consistency in size if you are creating multiple strips of the same length. A good pair of scissors will come in handy for this task.
- Bundle or Wrap the Strips: If you have a large number of strips, it’s a good idea to bundle or wrap them together using rubber bands or twine. This will prevent them from getting tangled or misplaced during the weaving process.
- Optional: Dye or Stain the Materials: If you want to add a personal touch to your basket, you can choose to dye or stain the materials before weaving. This allows you to create unique patterns or achieve a specific color palette for your basket. Follow the instructions on the dye or stain packaging for the best results.
Properly preparing your materials ensures that they are flexible, organized, and ready to be woven into a beautiful basket. Taking the time to complete these steps will make the weaving process smoother and more enjoyable, setting you up for success in creating your masterpiece.
Basic Basket Weaving Techniques
Mastering the basic basket weaving techniques is key to creating a beautiful and sturdy basket. Here are the fundamental techniques to familiarize yourself with:
- Over and Under: This is the most basic weaving technique and forms the foundation of many basket patterns. It involves alternately weaving the strips over and under each other to create a tight and consistent pattern. Start by securing the strips at the base and weave them in a continuous, spiral motion.
- Twining: Twining is another commonly used technique that involves weaving two or more strands together. It creates a visually appealing pattern and adds strength to the basket’s structure. To twine, start by overlapping two strips at a right angle and then weave the weavers over and under the stakes, repeating the process until you reach the desired height.
- Randing: Randing involves weaving horizontal strips across vertical stakes. It is often used to create the sides of baskets or add decorative elements. Start by inserting the horizontal strips through the vertical stakes, alternating over and under. Repeat this pattern as you build up the sides of your basket.
- Coiling: Coiling is a technique that involves wrapping the weaving material around a core, usually a thicker strip or rope. This technique allows you to create baskets with a round or oval shape. Begin by coiling the weaver strip around the core, securing it with each revolution. As you continue coiling, stitch the weaver through the previous coil to hold it in place.
- Packaging: Packaging is a technique used to secure the ends of the woven strips and create a clean finish. It involves folding the end of a strip and tucking it under the neighboring strip to anchor it. This ensures that the ends are hidden and the basket has a neat appearance.
- Plaiting: Plaiting is a technique that involves weaving strips diagonally to create a patterned effect. It adds a decorative touch to the basket and allows you to experiment with different colors and textures. Start by crossing the weavers over and under at a diagonal angle, repeating the pattern to achieve the desired design.
These basic techniques lay the foundation for more intricate and advanced basket weaving patterns. Take the time to practice each technique and experiment with different patterns and materials. As you gain proficiency, you’ll be able to create unique and stunning baskets that showcase your creativity and weaving skills.
Read more: How To Weave Rugs
Creating the Base
The base of a basket serves as its foundation and determines its size and stability. Here’s how to create a sturdy and well-formed base:
- Start with stakes: Begin by laying out the base stakes in a circular or rectangular shape, depending on the desired shape of your basket. These stakes will form the outer edge of the base.
- Weave the base: Take a weaver strip and secure it to one of the stakes by wrapping it around and tying a knot. This strip will act as the “anchor” for the base. From there, weave the weaver strip in an over and under pattern with each stake, gradually moving around the circle or rectangle.
- Secure the ends: Once you’ve woven around the entire base, secure the ends of the weaver strip by tucking it under the neighboring strip or using a small clip or clothespin to hold it in place. This ensures that the base stays intact during the weaving process.
- Add additional rows: To build a stronger base, continue weaving additional rows using the same over and under pattern. As you add more rows, gently push the weaver strips closer together to create a tight and sturdy base.
- Shape the base: If you’re aiming for a circular or oval-shaped base, gently push the stakes inward as you weave the additional rows. This will help to shape the base and achieve the desired form.
- Measure and adjust: Measure the base periodically to ensure that it has the desired dimensions. Make any necessary adjustments by adding or removing stakes or adjusting the tension of the weaver strips to maintain an even shape.
Creating a strong and well-formed base is the first step in weaving a beautiful basket. Take your time to weave each row carefully, paying attention to the tension and alignment of the weaver strips. With a solid base, you’re ready to build up the sides of your basket and let your creativity shine.
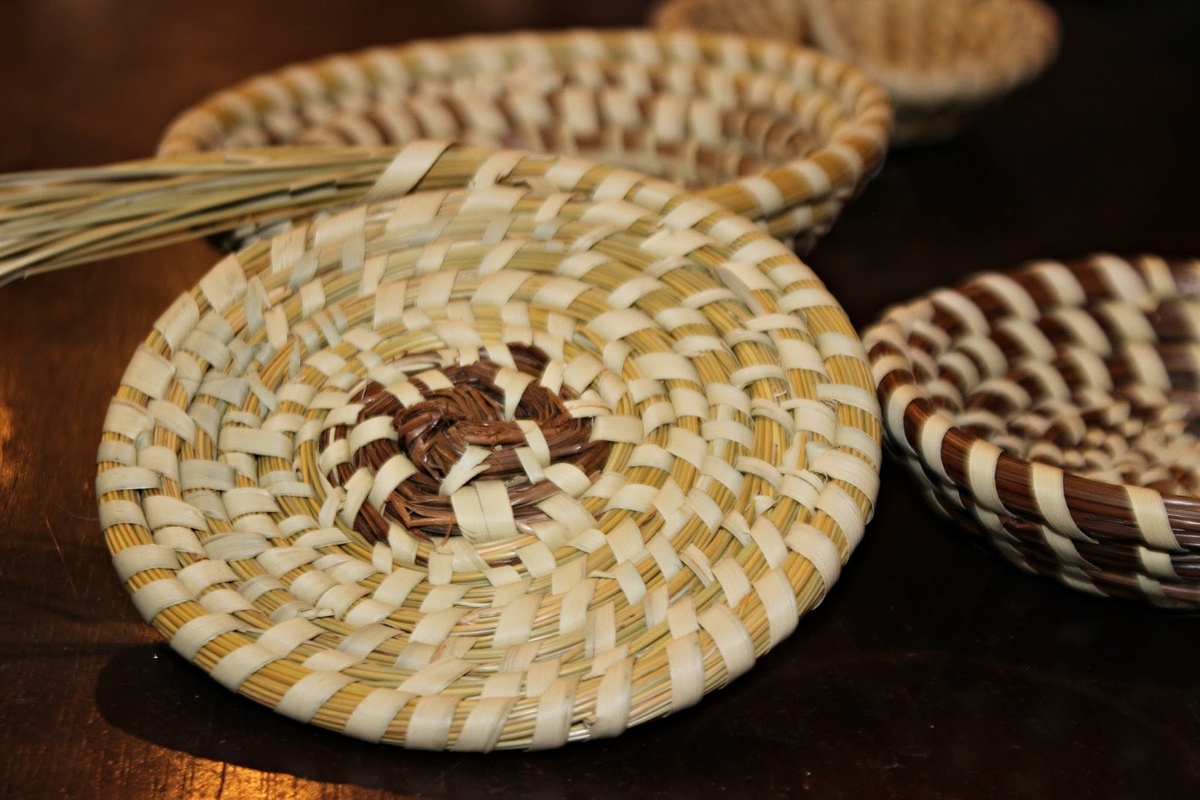
When weaving baskets, start with a sturdy base and use even tension to create a uniform weave. Experiment with different materials for unique designs.
Building Up the Sides
Once you have created a sturdy base for your basket, it’s time to start building up the sides. Here’s how to ensure that your basket sides are strong, even, and aesthetically pleasing:
- Choose a weaving pattern: Determine the weaving pattern you’ll use for the sides of your basket. This could be a simple over-and-under pattern or a more intricate design such as twining, randing, or plaiting.
- Secure the first row: Start by inserting the weaver strip through the base stakes, securing it with a clip or clothespin to hold it in place. This will be the starting point for weaving the sides.
- Weave the side rows: Continue weaving the weaver strip in the chosen pattern, either over and under or using the selected technique. Work your way around the basket, making sure to maintain a consistent tension and alignment as you go.
- Add more weaver strips: Depending on the size and height of your basket, you may need to add more weaver strips as you build up the sides. Secure each new strip by overlapping it with the previous strip and tucking the end under the neighboring strip to ensure a seamless transition.
- Check the alignment: Regularly check the alignment of your side rows to ensure they are straight and even. Adjust the tension of the weaver strips if needed to maintain a consistent appearance.
- Trim and secure the ends: Once you’ve reached the desired height for your basket, trim the excess weaver strip, leaving a small tail. Tuck the end under a neighboring strip or secure it with a small clip or clothespin to prevent it from unraveling.
- Optional: Add decorative elements: If desired, you can incorporate decorative elements such as different colored strips, beads, or patterns as you weave the sides. This adds a personal touch and enhances the visual appeal of your basket.
Remember to take your time while weaving the sides, ensuring the rows are aligned and the tension is consistent. Neat and even sides will not only enhance the structural integrity of your basket but also contribute to its overall aesthetic appeal. With each row, you’ll see your basket take shape and come to life.
Adding Handles (Optional)
Adding handles to your basket not only provides functionality but also adds a decorative element. Here’s how you can incorporate handles into your basket weaving project:
- Select the handle style: Determine the type of handle you want for your basket. Popular options include loop handles, arched handles, or flat handles. Each style has its own unique look and functionality.
- Choose the material: Decide on the material you will use for the handles. You can use the same weaving material as the rest of the basket or opt for a contrasting material to create visual interest.
- Measure and cut the handles: Measure the desired length for your handles and cut two equal-sized strips of your chosen material. Make sure the length is appropriate for the size and shape of your basket. It’s a good idea to make the handles slightly longer than needed, as you can always trim them later.
- Attach the handles: Position the handles on the sides of the basket where you want them to be. Weave each strip through the weaving pattern of the basket, securing them tightly and evenly on both sides. You can secure the ends of the handle strips using the packaging technique mentioned earlier.
- Reinforce the handle attachment: To ensure that the handles are securely attached and can withstand the weight of the basket, weave additional rows around the handle attachment points. This will provide extra strength and stability.
- Shape the handles: If you want your handles to have a curved or arched shape, gently mold them by bending or shaping them after they are securely attached to the basket. This will give your basket a more customized and refined look.
- Trim and finish: Once you are satisfied with the position and shape of the handles, trim any excess length. Tuck the trimmed ends under nearby weaver strips or secure them with clips or clothespins to create a neat and finished look.
Adding handles to your basket is a great way to make it more functional and visually appealing. Take your time to select the style and material that best suits your basket design. With careful attachment and reinforcement, your handles will provide a sturdy and elegant finishing touch to your woven masterpiece.
Finishing Touches
Once you have completed the main weaving of your basket, it’s time to add some finishing touches. These final steps will give your basket a polished and refined look:
- Check for any loose ends: Inspect your basket for any loose ends or protruding weaver strips. Trim them carefully and tuck them under neighboring strips to ensure a clean and neat finish.
- Smooth out any uneven areas: If you notice any uneven or bulging areas in the weaving, gently push and adjust the weaver strips to create a more uniform appearance.
- Secure the weaving: Use a small amount of clear glue or a fine needle and thread to secure any loose or weak sections of the weaving. This will provide added stability and ensure that your basket withstands the test of time.
- Apply a protective finish (optional): If you want to protect the surface of your basket and add a touch of shine, you can apply a protective finish such as varnish or a sealant. Follow the instructions on the product packaging to achieve the best results.
- Personalize your basket (optional): Add a personal touch to your creation by attaching embellishments such as ribbons, bows, beads, or small trinkets. These can further enhance the visual appeal of your basket and make it uniquely yours.
- Clean and polish your basket: Once your basket is complete, wipe it clean with a soft cloth to remove any dust or debris. You can also gently buff the surface to bring out its natural sheen.
- Display and enjoy: Your basket is now ready to be displayed or put to use! Whether you use it for storage, as a decorative piece, or as a gift, take pride in your handcrafted creation.
Remember, the finishing touches contribute to the overall quality and presentation of your basket. By paying attention to these final details, you can transform a simple woven structure into a beautiful and functional work of art. Take your time and enjoy the process of perfecting your basket.
Read more: How To Fix Weave Patio Furniture
Variations and Advanced Techniques
Once you have mastered the basic basket weaving techniques, you can explore a variety of variations and advanced techniques to further enhance your skills and create more intricate designs. Here are some options to consider:
- Coiling with Different Materials: Instead of using traditional weaving materials, experiment with coiling techniques using alternative materials such as fabric strips, yarn, wire, or even recycled materials. This allows for endless creativity and the incorporation of different textures and colors into your baskets.
- Double Weave: Double weave involves weaving two layers of strips simultaneously, creating a basket with a double-walled construction. This technique allows for unique and intricate designs, as well as the opportunity to experiment with different patterns and colors in the two layers.
- Splint Weaving: Splint weaving involves using flat, wide strips of material, such as ash, oak, or reed, to create baskets with a distinct and rustic look. This technique requires weaving the splints over and under a series of vertical stakes, resulting in a sturdy and durable basket.
- Nantucket Baskets: Nantucket baskets are a specific type of basket woven using a combination of cane or rattan and a wooden base and rim. This technique originated in Nantucket, Massachusetts, and is known for its distinct shape and intricate detailing, including carved wooden handles and decorative embellishments.
- Wire Wrapped Baskets: For a unique and modern twist, try incorporating wire wrapping into your basket weaving projects. This technique involves weaving the strips around wire structures, adding strength, flexibility, and an industrial aesthetic to your baskets.
- Basket Sculpting: Push the boundaries of traditional basket weaving by exploring basket sculpting techniques. This involves shaping the basket into three-dimensional forms, such as animal shapes, masks, or abstract sculptures. Basket sculpting allows for artistic expression and can be a great way to showcase your creativity and imagination.
Remember, these advanced techniques offer you the opportunity to push your boundaries as a basket weaver and explore new artistic possibilities. Don’t be afraid to experiment with materials, shapes, and patterns to create truly unique and captivating baskets that reflect your personal style and creativity.
Conclusion
Congratulations! You have now embarked on a creative journey into the fascinating world of basket weaving. From selecting the right materials to mastering basic techniques and exploring advanced variations, you have gained the knowledge and skills to create beautiful and functional baskets.
Throughout this article, we discussed the importance of choosing high-quality materials, preparing them properly, and understanding the basic weaving techniques. We covered the steps involved in creating a sturdy base, building up the sides, and optionally adding handles to your baskets. We also explored the finishing touches that give your baskets a polished look.
Remember, basket weaving is not just a craft; it is an art form that allows you to channel your creativity and express your unique style. As you gain experience, don’t be afraid to experiment with different designs, materials, and techniques. Each basket you create will be a reflection of your individuality and artistic flair.
Whether you choose to weave baskets as a hobby, to give as personalized gifts, or to pursue as a professional craftsperson, the possibilities are endless. Take your time, enjoy the process, and let your imagination flourish.
So, gather your materials, set up your workspace, and let the rhythmic motion of weaving take you on a journey of self-expression and satisfaction. Whether you’re weaving simple market baskets or intricate sculptural forms, each piece you create will be a testament to your skill, dedication, and creativity.
Happy weaving, and may your baskets bring joy and functionality into the lives of those who admire and use them!
Frequently Asked Questions about How To Weave Baskets
Was this page helpful?
At Storables.com, we guarantee accurate and reliable information. Our content, validated by Expert Board Contributors, is crafted following stringent Editorial Policies. We're committed to providing you with well-researched, expert-backed insights for all your informational needs.


0 thoughts on “How To Weave Baskets”