Home>Technology>Home Entertainment Systems>How To Set Up A Home Theater Projector
Home Entertainment Systems
How To Set Up A Home Theater Projector
Modified: August 28, 2024
Learn how to set up a home theater projector and create the ultimate home entertainment system with our step-by-step guide. Discover tips for optimizing your viewing experience.
(Many of the links in this article redirect to a specific reviewed product. Your purchase of these products through affiliate links helps to generate commission for Storables.com, at no extra cost. Learn more)
Choosing the Right Projector
Selecting the right projector is crucial for creating an immersive home theater experience. With a myriad of options available in the market, it's essential to consider several factors to ensure that the chosen projector aligns with your specific needs and preferences.
Consider the Room Size and Ambient Light
The first step in choosing the right projector is to assess the room where it will be installed. Consider the size of the room and the amount of ambient light it receives. For smaller rooms, a projector with a shorter throw distance may be more suitable, while larger rooms may benefit from projectors with longer throw distances. Additionally, rooms with significant ambient light may require projectors with higher brightness levels to maintain image clarity and vibrancy.
Resolution and Aspect Ratio
When selecting a projector, it's important to consider the desired resolution and aspect ratio. For a truly cinematic experience, a projector with a high native resolution, such as 1080p or 4K, is recommended. Additionally, the aspect ratio should align with the content you intend to watch, whether it's standard 16:9 widescreen content or wider cinematic formats like 2.35:1.
Throw Ratio and Lens Shift
The throw ratio of a projector determines the size of the image it can produce based on the distance from the screen. Understanding the throw ratio is essential for determining the projector's placement in the room. Additionally, lens shift capabilities can greatly facilitate the installation process by allowing for vertical and horizontal adjustments of the projected image without physically moving the projector.
Connectivity and Compatibility
Consider the connectivity options offered by the projector. Ensure that it has the necessary ports to connect to your preferred audio and video sources, such as Blu-ray players, gaming consoles, and streaming devices. Compatibility with HDMI, USB, and wireless connectivity can enhance the versatility of the projector.
Noise Levels and Maintenance
Projectors generate varying levels of operational noise, which can impact the overall viewing experience. Opt for a projector with low noise output to minimize distractions during quiet scenes. Additionally, consider the maintenance requirements of the projector, including lamp life and filter replacement, to ensure long-term usability and cost-effectiveness.
By carefully considering these factors, you can narrow down the options and select a projector that perfectly complements your home theater setup, delivering stunning visuals and an immersive viewing experience for years to come.
Key Takeaways:
- Choose the right projector by considering room size, resolution, connectivity, and noise levels. This ensures a stunning and immersive home theater experience tailored to your specific needs and preferences.
- Position your projector thoughtfully, considering room layout, screen surface, ambient light, and accessibility. This creates unobstructed sightlines and a captivating viewing experience for all.
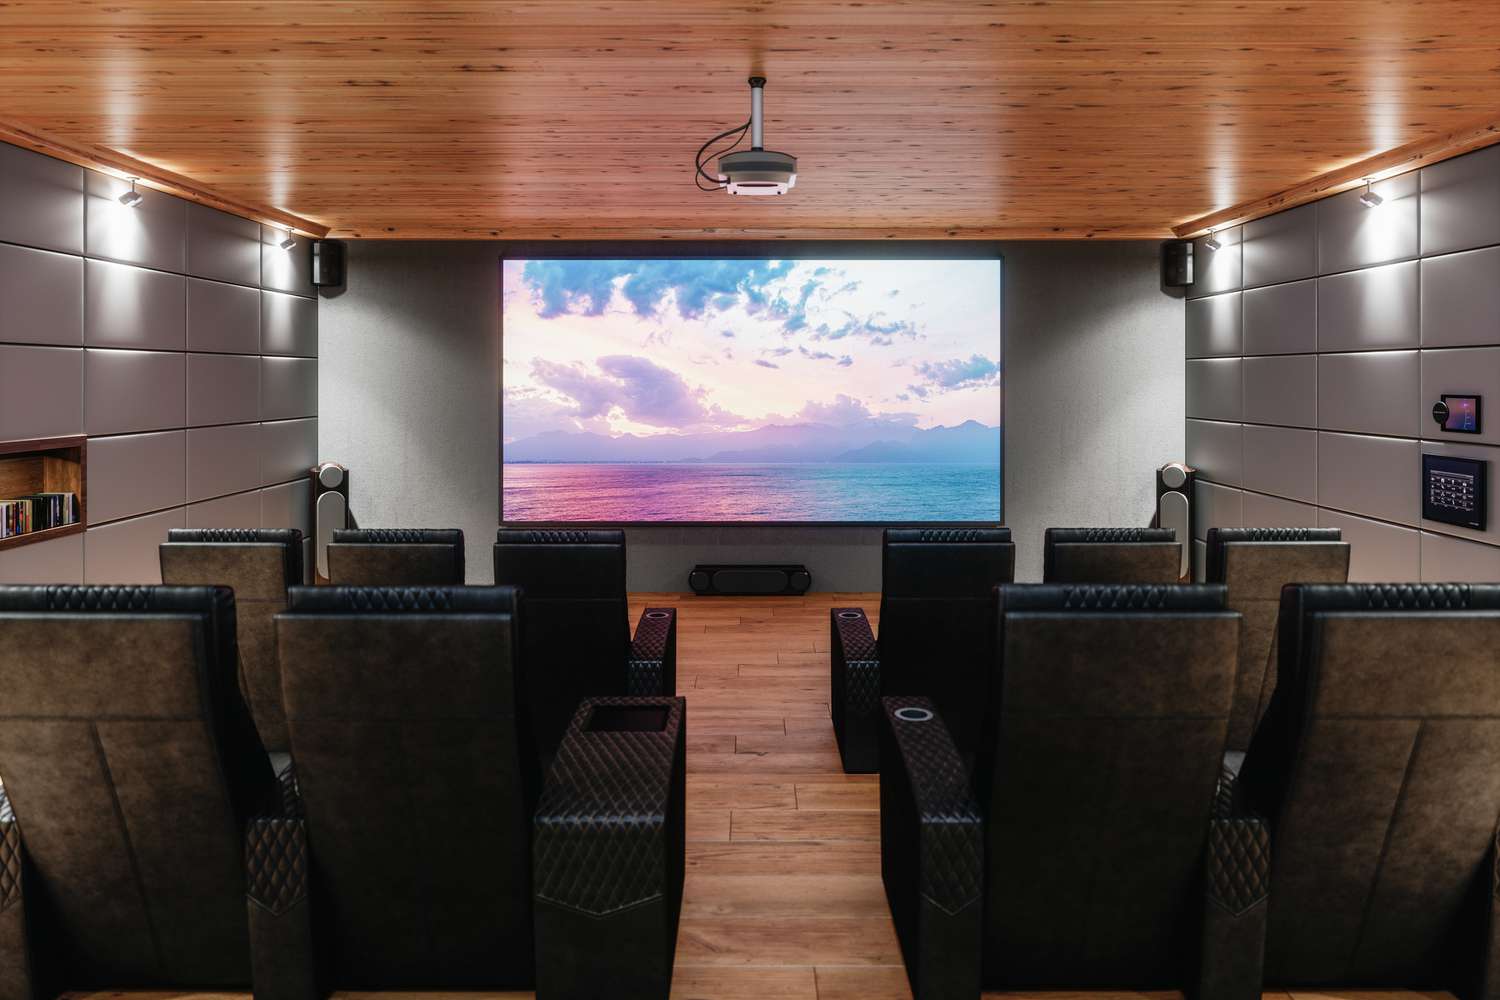
Selecting the Ideal Location
Selecting the ideal location for your home theater projector is a pivotal step in ensuring optimal viewing quality and overall enjoyment of your entertainment space. The placement of the projector can significantly impact the immersive experience, making it essential to carefully consider various factors when determining its position within the room.
Room Layout and Seating Arrangement
The layout of the room plays a crucial role in determining the ideal location for the projector. Consider the seating arrangement and the viewing angles from different positions within the room. Ideally, the projector should be positioned in a way that provides unobstructed sightlines from all seating areas, allowing every viewer to enjoy a clear and immersive view of the projected content.
Projection Surface and Screen Size
When selecting the location for the projector, it's important to assess the characteristics of the projection surface. Whether you opt for a dedicated projector screen or a blank wall, ensure that the surface is smooth, flat, and free from any imperfections that may affect the image quality. Additionally, consider the desired screen size and aspect ratio to determine the optimal distance between the projector and the screen for achieving the desired image dimensions.
Read more: How Many Lumens For A Home Theater Projector
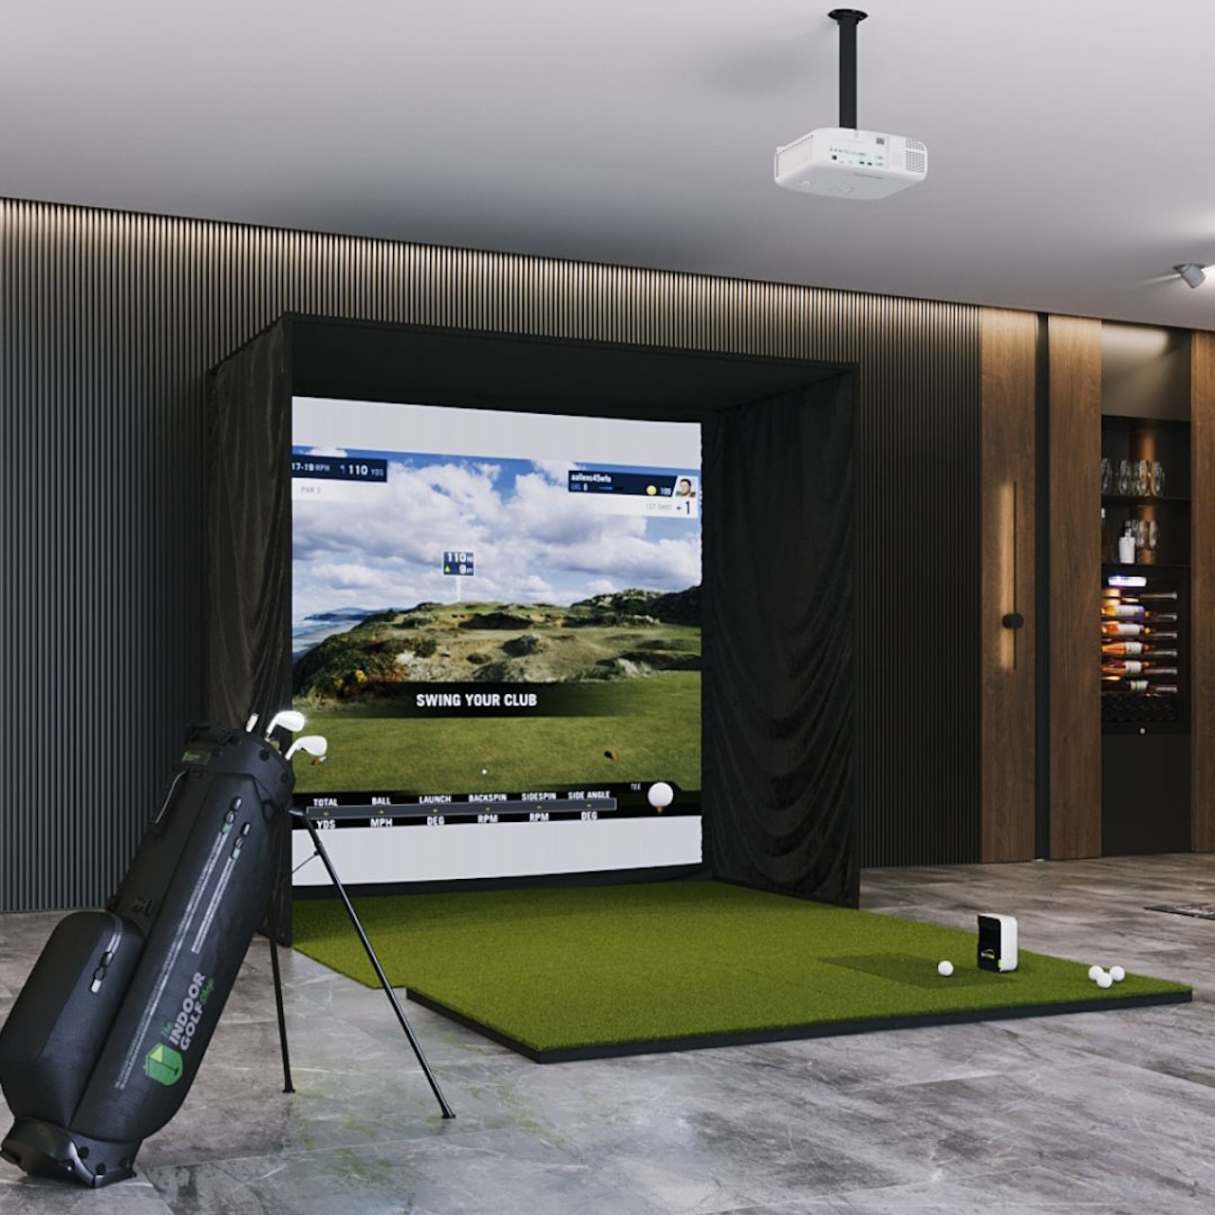
Ceiling Mount vs. Table Placement
The decision to mount the projector on the ceiling or place it on a table depends on various factors, including room layout, ceiling height, and personal preference. Ceiling mounting can help maximize floor space and minimize obstructions, creating a clean and uncluttered aesthetic. Alternatively, placing the projector on a table or shelf offers flexibility in positioning and easy access for maintenance and adjustments.
Ambient Light and Light Control
Assess the ambient light conditions in the room to determine the impact on image quality. Rooms with significant natural or artificial light may require additional light control measures, such as blackout curtains or ambient light-rejecting screens, to minimize glare and maintain optimal image clarity. Selecting a location that minimizes the impact of ambient light can enhance the overall viewing experience.
Accessibility and Cable Management
Consider the accessibility of the chosen location for the projector, ensuring convenient access for maintenance, adjustments, and cable management. Additionally, plan for cable routing and management to ensure a tidy and organized setup, minimizing the visibility of cables and reducing potential trip hazards.
By carefully evaluating these factors and considering the specific characteristics of your home theater space, you can select the ideal location for your projector, setting the stage for a captivating and immersive viewing experience for you and your guests.
Setting Up the Screen
Setting up the screen is a crucial aspect of creating a captivating home theater experience. The screen serves as the canvas for the projected images, playing a pivotal role in delivering stunning visuals and immersive entertainment. When setting up the screen for your home theater projector, several key considerations come into play to ensure optimal performance and viewing pleasure.
Read more: How To Set Up A Home Theater
Screen Selection and Placement
The first step in setting up the screen is selecting the appropriate screen type and determining its placement within the room. Consider the screen material, gain, and aspect ratio to align with the projector's specifications and the desired viewing experience. Whether opting for a fixed-frame, motorized, or retractable screen, ensure that it complements the projector's capabilities and the room's layout.
Screen Size and Viewing Distance
Determining the ideal screen size and viewing distance is essential for creating an immersive and comfortable viewing environment. The screen size should be proportional to the room dimensions and seating arrangement, allowing for an expansive yet comfortable viewing experience. Consider the recommended viewing distances based on the screen size and resolution to optimize visual clarity and engagement.
Screen Installation and Calibration
Once the screen is selected and positioned, meticulous installation and calibration are necessary to ensure optimal performance. Ensure that the screen is securely mounted or positioned to maintain a taut and wrinkle-free surface, minimizing any distortions in the projected images. Additionally, calibrate the screen to achieve optimal color reproduction and contrast, enhancing the overall visual impact of the projected content.
Ambient Light Rejection and Reflection
Consider the impact of ambient light on the screen's performance and visibility. If the room is susceptible to ambient light, consider screens with ambient light rejection properties to maintain image clarity and contrast in well-lit environments. Additionally, assess the potential for screen reflections and glare, implementing light control measures to minimize distractions and enhance the viewing experience.
Read more: How To Set Up Sonos Home Theater
Screen Maintenance and Care
Regular maintenance and care are essential for preserving the screen's quality and longevity. Follow manufacturer recommendations for cleaning and upkeep to ensure that the screen remains free from dust, debris, and blemishes that may affect image quality. Additionally, consider protective measures to prevent accidental damage and maintain the screen's pristine condition.
By meticulously addressing these considerations and taking a thoughtful approach to setting up the screen, you can elevate the visual impact of your home theater projector, creating a captivating and immersive viewing environment for enjoying your favorite movies, shows, and multimedia content.
Connecting the Projector to Audio and Video Sources
Connecting the projector to audio and video sources is a critical step in establishing a seamless and immersive home theater setup. By integrating the projector with various audio and video devices, you can unlock a rich multimedia experience that brings your favorite content to life in stunning detail and captivating sound. Here's a detailed look at the process of connecting the projector to audio and video sources, along with essential considerations for optimizing the overall viewing and listening experience.
Audio Connectivity
When connecting the projector to audio sources, consider the available audio output options on the projector and the compatibility with your preferred audio devices. Many projectors feature built-in speakers, providing basic audio playback directly from the projector. However, for a more robust audio experience, consider connecting the projector to an external sound system or audio receiver. Common audio connectivity options include HDMI, optical audio, 3.5mm audio jack, and Bluetooth. Select the appropriate audio connection based on the capabilities of your audio equipment and the projector.
Video Sources
Integrating video sources with the projector involves establishing connections with devices such as Blu-ray players, gaming consoles, streaming devices, and cable or satellite boxes. The primary video input on projectors is typically HDMI, offering high-definition video transmission and audio support through a single cable. Ensure that the video sources are equipped with HDMI outputs for seamless connectivity to the projector. Additionally, consider the availability of other video input options on the projector, such as VGA, component, or composite inputs, to accommodate a diverse range of video sources.
Cable Management and Organization
Effective cable management is essential for maintaining a tidy and organized home theater setup. Plan the routing of audio and video cables to minimize clutter and potential tripping hazards. Consider using cable management solutions such as cable raceways, wall-mounted cable channels, and cable ties to neatly secure and conceal the cables. Additionally, label the cables to easily identify and troubleshoot connectivity issues in the future, streamlining the maintenance and management of the audio and video connections.
Wireless Connectivity Options
In addition to traditional wired connections, explore wireless connectivity options for audio and video transmission to the projector. Wireless HDMI transmitters and receivers enable cable-free transmission of high-definition audio and video signals, offering flexibility in device placement and reducing the reliance on physical cable connections. Similarly, wireless audio adapters and Bluetooth transmitters can facilitate wireless audio streaming to compatible speakers or sound systems, enhancing the convenience and versatility of the audio setup.
Compatibility and Signal Quality
Ensure that the audio and video sources are compatible with the projector's supported formats and resolutions. Verify the signal compatibility, resolution capabilities, and audio format support to ensure seamless playback and optimal performance. Consider the use of high-quality HDMI cables and audio interconnects to maintain signal integrity and minimize potential signal degradation, preserving the audiovisual fidelity of the connected devices.
By carefully addressing the process of connecting the projector to audio and video sources, you can establish a cohesive and integrated home theater system that delivers exceptional visual and audio immersion. The seamless integration of audio and video devices with the projector sets the stage for an unparalleled entertainment experience, allowing you to enjoy your favorite movies, games, and multimedia content with captivating visuals and immersive sound.
Adjusting the Projector Settings
Fine-tuning the projector settings is a crucial step in optimizing the visual performance and ensuring that the projected images align with your preferences and the characteristics of the viewing environment. By adjusting various settings, you can enhance image clarity, color accuracy, and overall visual impact, creating a tailored viewing experience that brings your favorite content to life in stunning detail.
Read more: How To Set Up Alexa With Home Theater
Image Alignment and Keystone Correction
Begin by adjusting the image alignment to ensure that the projected image is properly centered and proportionate to the screen or projection surface. Use the projector's manual or digital keystone correction features to rectify any trapezoidal distortion caused by the angle of the projector relative to the screen. By fine-tuning the keystone correction, you can achieve a geometrically accurate and visually pleasing image, free from distortion or misalignment.
Brightness, Contrast, and Color Settings
Optimize the brightness, contrast, and color settings to achieve a balanced and vibrant image quality. Adjust the brightness level to suit the ambient light conditions in the room, ensuring that the projected images remain clear and visible without appearing washed out or overly dim. Fine-tune the contrast to enhance the depth and richness of the image, accentuating details and improving overall visual impact. Additionally, adjust the color settings to achieve accurate color reproduction, ensuring that the projected content reflects the intended color palette with fidelity and vibrancy.
Aspect Ratio and Overscan Adjustment
Verify that the projector's aspect ratio settings align with the content being displayed, whether it's standard 16:9 widescreen content or wider cinematic formats. Ensure that the aspect ratio setting corresponds to the native resolution of the content, preventing any stretching or distortion of the images. Additionally, adjust the overscan settings to eliminate any unnecessary cropping of the projected image, maximizing the visible screen area and preserving the integrity of the content.
Image Enhancement and Noise Reduction
Explore the projector's image enhancement features, such as sharpness adjustment and noise reduction, to refine the visual clarity and overall image quality. Fine-tune the sharpness settings to achieve a balance between crisp detail and natural image rendering, enhancing the clarity of text and fine textures without introducing artificial artifacts. Similarly, utilize noise reduction settings to minimize visual noise and disturbances, ensuring a clean and smooth image presentation, particularly in low-light scenes or subtle gradients.
Advanced Calibration and Custom Presets
For enthusiasts seeking a more advanced level of calibration, delve into the projector's advanced settings to customize gamma curves, color temperature, and individual color adjustments. By fine-tuning these parameters, you can achieve precise color accuracy, grayscale neutrality, and optimal gamma response, tailoring the image characteristics to your specific preferences and the capabilities of the projection system. Additionally, consider creating custom presets for different viewing scenarios, allowing you to quickly switch between optimized settings for movies, gaming, sports, and other content types.
By meticulously adjusting the projector settings, you can unlock the full potential of your home theater projector, creating a visually captivating and personalized viewing experience that showcases your favorite content with exceptional clarity, vibrancy, and fidelity. Fine-tuning the projector settings not only enhances the visual impact of the projected images but also allows you to tailor the viewing experience to your preferences, ensuring that every movie, show, or multimedia presentation is presented in its best possible light.
Calibrating the Image and Sound Quality
Calibrating the image and sound quality of your home theater projector is a pivotal step in achieving a truly immersive and captivating entertainment experience. By meticulously adjusting the visual and audio parameters, you can fine-tune the presentation of your favorite movies, shows, and multimedia content, ensuring that every detail is rendered with precision and every sound is reproduced with clarity and depth.
Visual Calibration
Begin the calibration process by focusing on the visual elements of the projection system. Utilize test patterns and calibration discs to assess and adjust various visual parameters, including brightness, contrast, color accuracy, and image sharpness. By meticulously calibrating these settings, you can achieve a balanced and vibrant visual presentation that faithfully reproduces the intended color palette, contrast levels, and image detail.
Color Accuracy and Gamut Calibration
Calibrate the color accuracy and gamut of the projector to ensure that the projected images reflect the true color characteristics of the content. Adjust the color temperature to achieve neutral grayscale and accurate color reproduction, aligning the projected colors with industry-standard color spaces such as Rec. 709 or DCI-P3. Fine-tune the color gamut to expand or restrict the color range based on the capabilities of the projector and the characteristics of the content being displayed.
Gamma and Dynamic Range Adjustment
Optimize the gamma response and dynamic range of the projector to enhance the depth and tonal gradation of the projected images. Adjust the gamma curve to achieve a balanced and natural transition between shadow and highlight details, ensuring that the projected content retains its intended contrast and depth. Explore the dynamic range settings to maximize the visibility of subtle details in dark and bright areas, creating a visually engaging and immersive viewing experience.
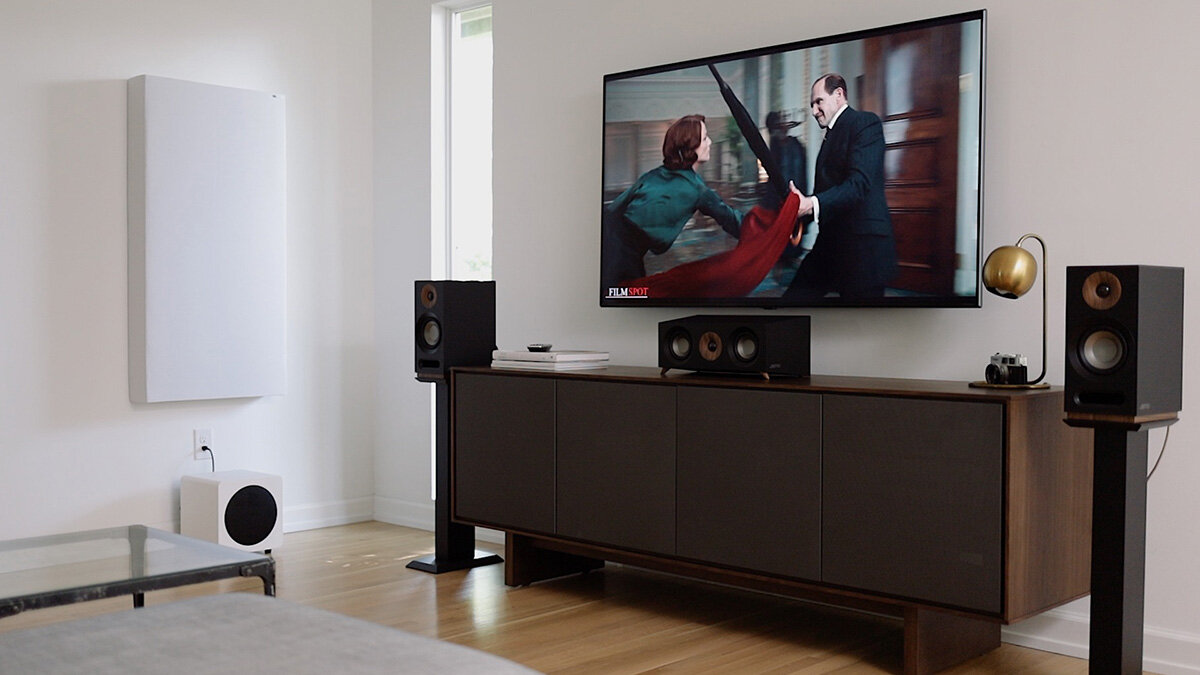
Sound System Calibration
In addition to visual calibration, it's essential to calibrate the sound system to achieve optimal audio performance. Utilize a sound pressure level (SPL) meter and test tones to calibrate the speaker levels, ensuring a balanced and cohesive audio presentation across all channels. Adjust the crossover frequencies and equalization settings to tailor the sound reproduction to the acoustics of the room, minimizing potential resonances and frequency imbalances.
Room Acoustics and Sound Reflection
Consider the impact of room acoustics and sound reflection on the audio performance. Implement acoustic treatments such as sound-absorbing panels, bass traps, and diffusers to minimize unwanted reflections and reverberations, creating a more controlled and immersive listening environment. Additionally, strategically position the speakers to optimize sound dispersion and minimize potential obstructions that may affect the overall sound quality.
Subwoofer Integration and Bass Management
Calibrate the subwoofer integration and bass management to achieve a seamless and impactful low-frequency reproduction. Adjust the subwoofer phase and crossover settings to seamlessly blend the low-frequency output with the main speakers, ensuring a cohesive and balanced bass response. Fine-tune the bass management to optimize the distribution of low frequencies, preventing localization and achieving a uniform bass presentation throughout the listening area.
By meticulously calibrating the image and sound quality of your home theater projector, you can elevate the entertainment experience to new heights, immersing yourself in a visually stunning and sonically captivating environment. The meticulous attention to visual and audio calibration ensures that every movie, show, or multimedia presentation is presented with precision and fidelity, allowing you to experience your favorite content as intended by the creators, with breathtaking visuals and enveloping soundscapes.
Frequently Asked Questions about How To Set Up A Home Theater Projector
Was this page helpful?
At Storables.com, we guarantee accurate and reliable information. Our content, validated by Expert Board Contributors, is crafted following stringent Editorial Policies. We're committed to providing you with well-researched, expert-backed insights for all your informational needs.

0 thoughts on “How To Set Up A Home Theater Projector”