Home>Technology>Home Entertainment Systems>How To Hook Up A Sony Home Theater System
Home Entertainment Systems
How To Hook Up A Sony Home Theater System
Modified: October 27, 2024
Learn how to hook up a Sony home theater system for an immersive home entertainment experience. Our step-by-step guide simplifies the setup process. Perfect for home entertainment systems enthusiasts.
(Many of the links in this article redirect to a specific reviewed product. Your purchase of these products through affiliate links helps to generate commission for Storables.com, at no extra cost. Learn more)
Introduction
Setting up a Sony home theater system can transform your living space into a captivating entertainment hub, where you can immerse yourself in the world of cinema without leaving the comfort of your home. Whether you're a movie enthusiast, a gaming aficionado, or a music lover, a well-configured home theater system can elevate your audio-visual experience to new heights. With the right guidance, you can seamlessly connect the components of your Sony home theater system to create a captivating and immersive entertainment environment.
In this comprehensive guide, we will walk you through the process of setting up your Sony home theater system, ensuring that you can enjoy the full potential of your audio-visual equipment. From unpacking the components to fine-tuning the audio and video settings, each step is designed to simplify the setup process and optimize the performance of your home theater system.
By following the instructions provided in this guide, you will gain the confidence and expertise needed to seamlessly integrate your Sony home theater system into your living space. Whether you are a tech-savvy individual or a newcomer to the world of home entertainment systems, this guide will equip you with the knowledge and skills to create a captivating audio-visual experience that resonates with your personal preferences.
So, let's embark on this journey together and unlock the full potential of your Sony home theater system. Get ready to immerse yourself in the captivating world of high-definition visuals and immersive soundscapes, right in the heart of your home. Let's dive into the step-by-step process of setting up your Sony home theater system and unleash the power of cinematic entertainment within your living space.
Key Takeaways:
- Transform your living space into a captivating entertainment hub with a Sony home theater system. Unbox, connect, and fine-tune for an immersive audio-visual experience that brings the magic of cinema into your home.
- Create a captivating entertainment sanctuary within your home with a Sony home theater system. Meticulously connect speakers, fine-tune audio-visual settings, and validate seamless integration for endless immersive enjoyment.
Read more: How To Set Up A Home Theater
Step 1: Unpack the Sony Home Theater System
Unboxing your Sony home theater system marks the exciting beginning of your journey towards creating an immersive entertainment space within your home. As you carefully unpack the components, you'll unveil the building blocks of a captivating audio-visual experience, each meticulously designed to deliver exceptional performance and seamless integration.
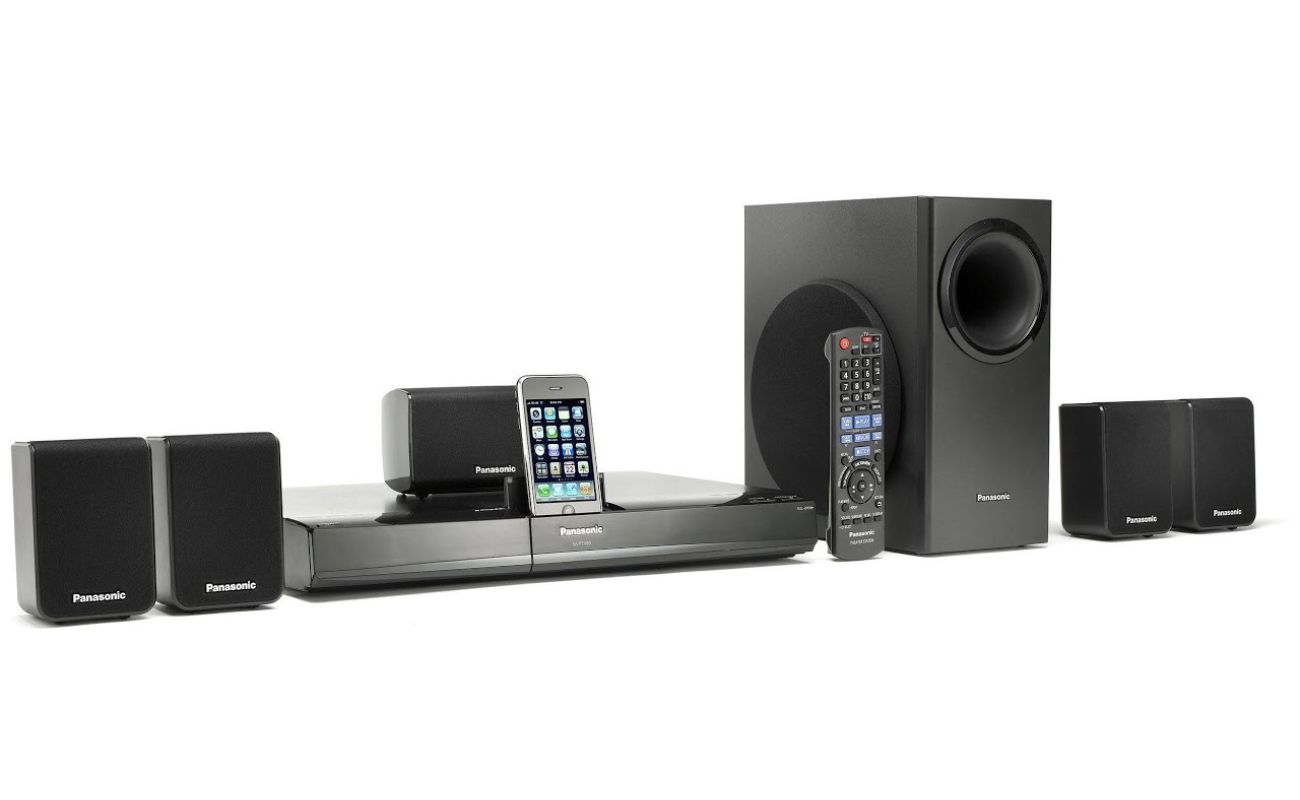
Start by locating the main components of the Sony home theater system, including the receiver, speakers, subwoofer, and any additional accessories. As you unpack each item, handle them with care to avoid any damage to the delicate components. The receiver serves as the central hub of your home theater system, connecting all the audio and video sources to deliver a cohesive and powerful entertainment experience. The speakers and subwoofer are designed to deliver rich, high-fidelity audio, enveloping you in a captivating soundscape that complements the visual elements of your home theater setup.
Once you have unpacked the components, take a moment to familiarize yourself with each item and its corresponding accessories. Check for any included cables, connectors, or mounting hardware that may be essential for the setup process. It's important to ensure that all the necessary components are present and in good condition before proceeding to the next steps.
As you unpack the Sony home theater system, you'll likely encounter user manuals and setup guides provided by the manufacturer. These resources are invaluable assets that offer detailed instructions on how to assemble and configure the components of your home theater system. Take the time to review these documents, as they often contain essential information regarding the placement of speakers, connection diagrams, and troubleshooting tips.
By carefully unpacking and familiarizing yourself with the components of the Sony home theater system, you are laying the foundation for a seamless and successful setup process. With each component unboxed and inspected, you are one step closer to creating a captivating entertainment space that brings the magic of cinema into your home.
Unpacking the Sony home theater system is not just a practical task; it's an exciting prelude to the immersive audio-visual experience that awaits. As you handle each component with care and attention to detail, you are setting the stage for a seamless and rewarding setup process that will unlock the full potential of your home theater system.
Step 2: Connect the Speakers to the Receiver
Connecting the speakers to the receiver is a pivotal step in the setup process of your Sony home theater system. This crucial stage lays the groundwork for delivering immersive, high-fidelity audio that complements the visual elements of your home entertainment experience. By establishing a seamless connection between the speakers and the receiver, you are poised to unlock the full potential of your audio setup and create a captivating soundscape within your living space.
1. Speaker Placement
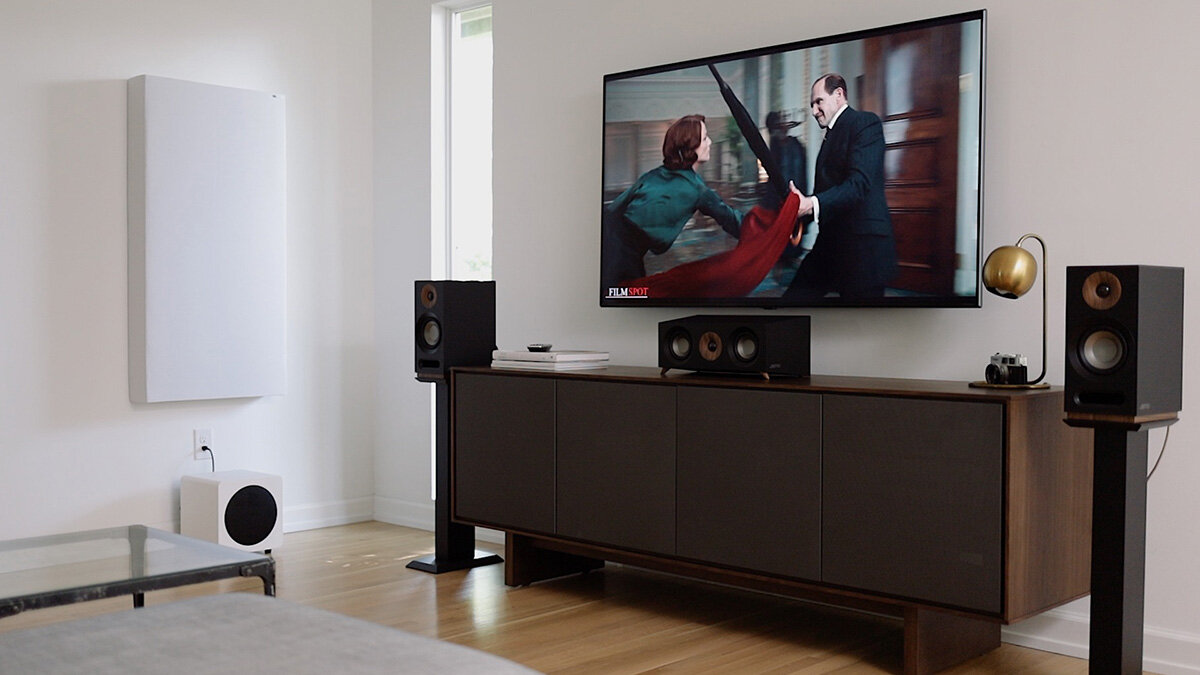
Before connecting the speakers to the receiver, it's essential to consider the optimal placement for each speaker within your home theater environment. The placement of speakers significantly impacts the audio performance and the overall immersive experience. Typically, the front speakers should be positioned at ear level when seated, creating a balanced soundstage. The center speaker, responsible for dialogue and vocal clarity, should be placed above or below the TV, ensuring that it is aligned with the front speakers. The surround speakers should be positioned to the sides or slightly behind the primary seating area, enveloping the audience in a 360-degree audio experience. Finally, the subwoofer, designed to deliver deep bass frequencies, can be placed anywhere in the room to achieve optimal low-frequency response.
2. Speaker Wire Connection
Once the speakers are strategically positioned, it's time to connect them to the receiver using speaker wire. Begin by identifying the speaker wire terminals on the back of the receiver and the corresponding terminals on each speaker. Ensure that the polarity is maintained, with the positive terminal (+) on the receiver connected to the positive terminal on the speaker, and the same for the negative terminals (-). This polarity alignment is crucial for preserving the integrity of the audio signal and ensuring that the speakers operate in phase, delivering coherent sound reproduction.
Read more: How To Set Up Sonos Home Theater
3. Subwoofer Connection
If your Sony home theater system includes a subwoofer, it can be connected to the receiver using a dedicated subwoofer cable. Most receivers feature a dedicated subwoofer output, allowing for a straightforward connection to the subwoofer's input. This connection enables the subwoofer to reproduce low-frequency effects and enhance the overall depth and impact of the audio, especially during intense movie scenes and dynamic musical performances.
By meticulously connecting the speakers to the receiver, you are establishing the foundation for a captivating audio experience that complements the visual elements of your home theater system. Each speaker, meticulously positioned and connected, contributes to a cohesive and immersive soundscape that elevates your entertainment experience to new heights. With the speakers seamlessly integrated into the setup, you are ready to embark on the next steps of configuring your Sony home theater system, bringing you closer to a captivating audio-visual journey within the comfort of your home.
Step 3: Connect the Receiver to the TV
Connecting the receiver to the TV is a pivotal step in the setup process of your Sony home theater system. This crucial stage lays the groundwork for delivering immersive, high-definition visuals that complement the captivating audio experience. By establishing a seamless connection between the receiver and the TV, you are poised to unlock the full potential of your visual setup and create a captivating viewing experience within your living space.
1. HDMI Connection
The most common and recommended method for connecting the receiver to the TV is through an HDMI cable. HDMI (High-Definition Multimedia Interface) offers the advantage of transmitting high-definition audio and video signals through a single cable, simplifying the setup process and ensuring optimal signal quality. Begin by identifying the HDMI output port on the receiver and the HDMI input port on the TV. Connect one end of the HDMI cable to the HDMI output port on the receiver and the other end to the HDMI input port on the TV. Once the connection is established, the receiver becomes the central hub for routing audio and video signals to the TV, enabling a seamless integration of your home theater components.
2. Additional Audio Connections
In addition to the HDMI connection, you may also consider utilizing alternative audio connections, such as digital optical or coaxial cables, to transmit audio signals from the TV to the receiver. These connections can be particularly useful when dealing with older TV models that may not support HDMI ARC (Audio Return Channel) functionality. By connecting the TV's audio output to the receiver, you can ensure that audio from various sources, including built-in smart TV apps and external devices, is seamlessly routed through the home theater system, enhancing the overall audio experience.
3. Configuration and Settings
Once the physical connections are in place, it's essential to configure the TV and the receiver to recognize each other and establish the appropriate audio and video settings. Access the TV's settings menu to designate the connected HDMI input as the primary source for audio and video playback. Similarly, navigate the receiver's settings menu to select the corresponding input source for the TV connection. By ensuring that both devices are synchronized and configured to communicate effectively, you can seamlessly control the audio and video playback through the home theater system, creating a cohesive and immersive viewing experience.
By meticulously connecting the receiver to the TV, you are establishing the foundation for a captivating visual experience that complements the immersive audio elements of your home theater system. With the audio and video components seamlessly integrated into the setup, you are ready to embark on the next steps of fine-tuning the audio-visual settings, bringing you closer to a captivating home entertainment journey within the comfort of your home.
Step 4: Set Up the Audio and Video Settings
Setting up the audio and video settings is a pivotal phase in optimizing the performance of your Sony home theater system. This step allows you to fine-tune the audio and visual parameters, ensuring that your entertainment experience is tailored to your preferences and the capabilities of your home theater components.
Audio Configuration
1. Speaker Calibration
Many modern home theater receivers are equipped with automated speaker calibration systems, such as Audyssey or MCACC, designed to optimize the audio performance based on the acoustics of your room. Initiate the calibration process by accessing the receiver's setup menu and following the on-screen prompts. During calibration, the system emits test tones and analyzes the acoustic characteristics of each speaker, adjusting parameters such as speaker distance, level, and frequency response to achieve a balanced and immersive audio environment.
2. Surround Sound Modes
Explore the various surround sound modes offered by your home theater receiver, such as Dolby Atmos, DTS:X, or Virtual Surround. These modes are designed to create a spatial audio experience, enveloping you in a multidimensional soundscape that enhances the realism of movies, games, and music. Experiment with different surround sound modes to discover the one that best complements your content and personal preferences, whether it's creating a cinematic atmosphere or optimizing dialogue clarity.
3. Audio Equalization
Fine-tune the audio equalization settings to tailor the sound reproduction to your liking. Most receivers offer manual equalization controls, allowing you to adjust parameters such as bass, treble, and individual speaker levels. By customizing the equalization settings, you can optimize the audio output to suit your room acoustics and sonic preferences, ensuring a personalized and immersive listening experience.
Video Configuration
1. Display Resolution and Refresh Rate
Navigate to the video settings menu on your TV and ensure that the display resolution and refresh rate are optimized for your viewing preferences and the capabilities of your TV. Select the appropriate resolution, such as 4K or 1080p, and verify that the refresh rate aligns with the specifications of your content and the TV's capabilities, ensuring smooth and artifact-free visuals.
2. Color and Contrast Adjustment
Explore the color and contrast adjustment options available on your TV to fine-tune the visual output. Adjust parameters such as brightness, contrast, color saturation, and color temperature to achieve a visually appealing and accurate representation of your content. By calibrating the color and contrast settings, you can enhance the vibrancy and realism of the visuals, creating a captivating viewing experience.
3. HDMI Control and CEC
Consider enabling HDMI control and Consumer Electronics Control (CEC) features if supported by your TV and home theater components. These features allow for seamless integration and control of multiple devices through a single remote, simplifying the operation of your home theater system and enhancing the overall user experience.
By meticulously configuring the audio and video settings, you are customizing the performance of your Sony home theater system to align with your preferences and the capabilities of your audio-visual components. Each adjustment and optimization brings you closer to a personalized and immersive entertainment experience, where the audio and visual elements harmonize to create a captivating home theater environment.
Read more: How To Set Up Alexa With Home Theater
Step 5: Test the System
With the components of your Sony home theater system meticulously connected and the audio-visual settings finely tuned, it's time to embark on the exhilarating phase of testing the system. This pivotal step allows you to validate the seamless integration of your home theater components and experience the captivating audio-visual performance firsthand.
Audio Testing
Initiate the testing process by selecting a piece of audio content that showcases a diverse range of frequencies and spatial effects. Whether it's a favorite music track, a scene from a blockbuster movie, or a dynamic video game sequence, the chosen content should encompass the sonic elements that your home theater system is designed to deliver. As the audio fills the room, pay close attention to the spatial distribution of sound, the clarity of dialogue, and the impact of low-frequency effects. The immersive audio environment created by your home theater system should transport you into the heart of the content, enveloping you in a captivating soundscape that enhances the overall entertainment experience.
Visual Testing
Simultaneously, engage in visual testing by selecting high-definition content that accentuates the capabilities of your TV and home theater components. Whether it's a visually stunning movie, a vibrant nature documentary, or a visually immersive video game, the chosen content should highlight the clarity, color accuracy, and motion handling of your TV. As the visuals unfold on the screen, observe the richness of colors, the depth of contrast, and the fluidity of motion, ensuring that your home theater system faithfully reproduces the visual intricacies of the content. The captivating visuals should draw you into the on-screen narrative, creating an engaging and immersive viewing experience that resonates with the capabilities of your home theater setup.
System Integration
Throughout the testing process, pay attention to the seamless integration of audio and visual elements, ensuring that they harmonize to create a cohesive and captivating entertainment environment. The synchronization of audio cues with on-screen action, the spatial placement of sound effects, and the immersive impact of visual details should collectively demonstrate the prowess of your Sony home theater system. By validating the integration of audio and visual components, you can confirm that your home theater system operates as a unified entity, delivering a captivating and immersive entertainment experience that transcends traditional viewing and listening experiences.
As you immerse yourself in the testing phase, take the time to appreciate the culmination of your efforts in setting up the Sony home theater system. The captivating audio-visual performance that unfolds before you is a testament to the meticulous setup and fine-tuning, culminating in a home entertainment experience that resonates with the magic of cinema and the thrill of immersive gaming. With the system tested and validated, you are now poised to embark on a journey of endless entertainment possibilities, where each audio-visual experience becomes a captivating adventure within the comfort of your home.
Read more: How To Set Up A Home Theater Projector
Conclusion
In conclusion, the process of setting up a Sony home theater system is not merely a technical endeavor; it is a transformative journey that culminates in the creation of a captivating entertainment space within your home. As you meticulously unpack the components, connect the speakers to the receiver, establish the link between the receiver and the TV, fine-tune the audio and video settings, and validate the seamless integration through testing, you are not just configuring a system – you are crafting an immersive audio-visual environment that resonates with the magic of cinema and the allure of high-fidelity entertainment.
The meticulous attention to detail in speaker placement, the precision in connecting the audio-visual components, and the thoughtful calibration of audio and video settings converge to create a home theater experience that transcends traditional viewing and listening. The carefully positioned speakers, meticulously connected to the receiver, deliver a captivating soundscape that envelops you in a multidimensional audio environment, while the seamless connection between the receiver and the TV ensures that high-definition visuals come to life with vibrant colors and immersive detail.
As the audio and visual elements harmonize, the Sony home theater system becomes a gateway to endless entertainment possibilities, where each movie, music track, or gaming experience unfolds with captivating realism and immersive impact. The culmination of your efforts is not just a setup; it is the creation of a captivating entertainment sanctuary within the comfort of your home, where the boundaries between reality and the on-screen narrative blur, and the power of cinematic storytelling comes to life.
With the Sony home theater system seamlessly integrated into your living space, you are poised to embark on a journey of endless entertainment possibilities. Whether it's a thrilling movie night with friends, a captivating gaming experience with family, or a personal retreat into the world of music and relaxation, your home theater system stands ready to deliver an immersive and captivating experience that resonates with your personal preferences and the allure of high-fidelity entertainment.
In the heart of your home, the Sony home theater system becomes more than a collection of audio-visual components; it becomes a conduit for transformative experiences, where the magic of cinema, the thrill of gaming, and the power of music converge to create moments of captivating immersion and endless enjoyment. As you navigate the world of entertainment within your home, the Sony home theater system stands as a testament to the seamless fusion of technology and art, delivering an experience that transcends the ordinary and invites you into a realm of captivating audio-visual storytelling.
Frequently Asked Questions about How To Hook Up A Sony Home Theater System
Was this page helpful?
At Storables.com, we guarantee accurate and reliable information. Our content, validated by Expert Board Contributors, is crafted following stringent Editorial Policies. We're committed to providing you with well-researched, expert-backed insights for all your informational needs.


0 thoughts on “How To Hook Up A Sony Home Theater System”