Articles
How To Add A Laundry Room
Modified: October 20, 2024
Learn how to add a laundry room to your home with our comprehensive articles. Discover tips, ideas, and expert advice to create the perfect laundry space.
(Many of the links in this article redirect to a specific reviewed product. Your purchase of these products through affiliate links helps to generate commission for Storables.com, at no extra cost. Learn more)
Introduction
Welcome to our comprehensive guide on how to add a laundry room to your home. If you’re tired of hauling your laundry to a communal laundry room or if you simply want to upgrade your existing space, creating a dedicated laundry area in your home can make the chore of doing laundry much more convenient and efficient.
Having a laundry room not only provides a dedicated space for all your laundry needs but also helps to keep your home organized and free of clutter. Whether you have a large or small space, with careful planning and a few creative design ideas, you can create a functional and visually appealing laundry room that suits your needs.
In this guide, we will walk you through ten essential steps to help you add a laundry room to your home. From choosing the perfect location to personalizing the space, you’ll have all the information you need to create a laundry room that will make your daily chores a breeze.
So, let’s get started and turn your vision of a dream laundry room into a reality!
Key Takeaways:
- Transform a basic space into a functional, organized, and visually appealing laundry room by following ten essential steps, from choosing the location to adding personal touches. Enjoy a more efficient and enjoyable laundry routine!
- Seek professional help for plumbing and electrical work to ensure safety and compliance with building codes. Personalize your laundry room with decorative elements to create a welcoming and inspiring space for household chores.
Read more: How To Clean A Laundry Room
Step 1: Choose the Location
The first step in adding a laundry room to your home is to choose the ideal location for it. Consider factors such as accessibility, proximity to water and electricity sources, and available space. Here are a few key considerations when selecting the location:
- Accessibility: It is essential to choose a location that is easily accessible for both you and your family members. Ideally, the laundry room should be on the same floor as the bedrooms or main living areas to minimize the distance you need to travel with laundry loads.
- Proximity to Water and Electricity Sources: To ensure efficient plumbing and electrical connections, select a location that is close to existing water and electrical lines. This will help minimize the cost and complexity of installation.
- Available Space: Measure the available space in your home and evaluate how much area you can allocate for the laundry room. Determine whether you have a dedicated room or if you need to convert an existing space, such as a closet or part of a larger room.
- Noise Considerations: Consider the noise generated by the washer and dryer. If possible, choose a location that is away from bedrooms or living areas to minimize disruption.
Once you have considered these factors, you can begin evaluating potential locations within your home. Common options include:
- A spare room: If you have an unused bedroom or an extra room that can accommodate the laundry appliances, this can be an ideal location for a laundry room.
- A basement or garage: These areas are often already equipped with water and electricity connections, making them convenient choices for a laundry room.
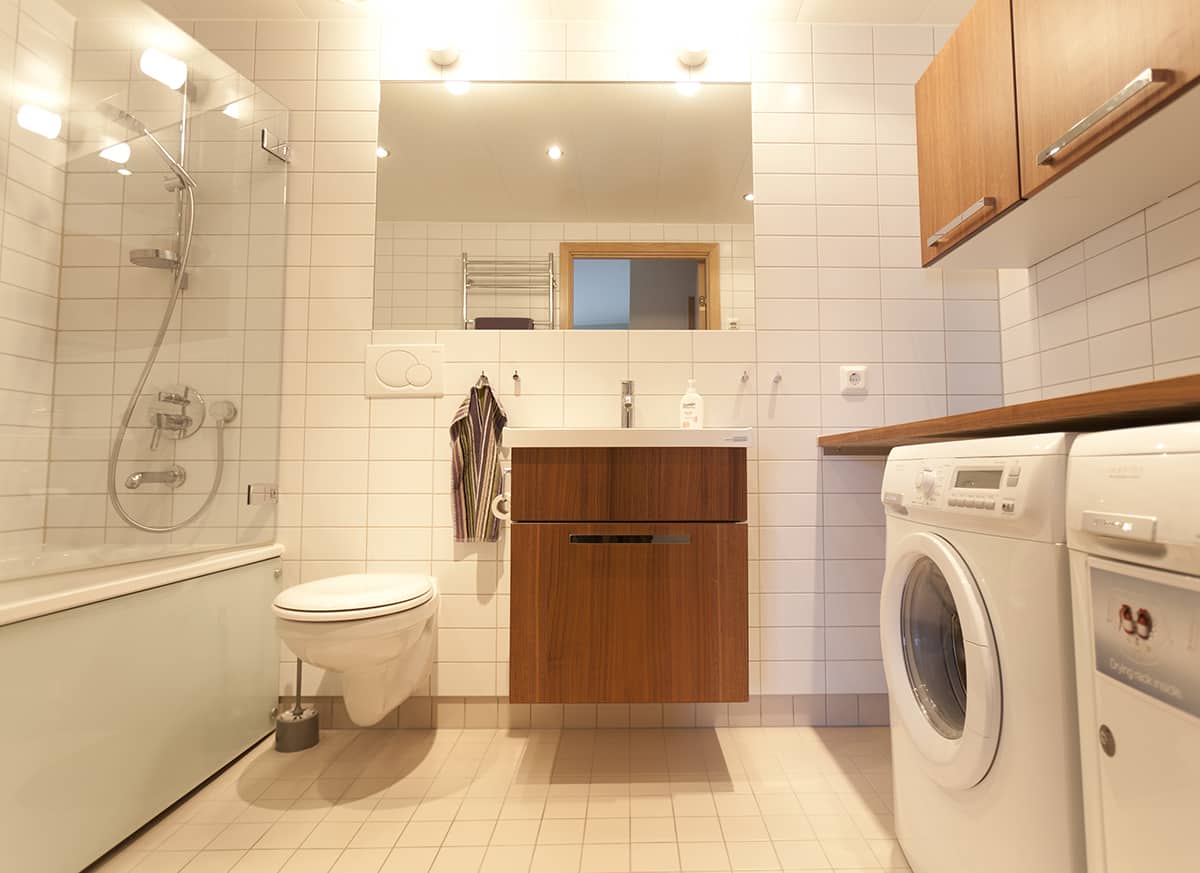
- An existing bathroom or kitchen: If you have limited space, you may consider integrating the laundry facilities into an existing bathroom or kitchen. This can be done by incorporating a hidden laundry area or using a space-saving washer-dryer combo unit.
- A closet or hallway: If you’re working with a small space, converting a closet or utilizing an underutilized hallway can be a practical solution for adding a laundry room.
Remember to take into account any necessary renovations or adjustments that may be required to accommodate the plumbing and electrical connections in your chosen location. Consulting with a professional contractor or plumber can provide valuable insights and guidance.
Once you have determined the best location for your laundry room, you can move on to the next step in the process: assessing the space and layout.
Step 2: Assess the Space and Layout
Once you have chosen the location for your laundry room, it’s time to assess the available space and plan out the layout. Understanding the dimensions and limitations of the space will help you optimize the functionality and efficiency of your laundry room. Here are some key points to consider:
- Measurements: Take accurate measurements of the room to determine the dimensions and available space. Note the height, width, and depth of the area where the appliances, cabinets, and other elements will be placed.
- Doorway and Entry Points: Consider the size of the doorway and any entry points into the laundry room. Ensure that the appliances and other larger items can fit through the doorway without any issues.
- Functionality: Determine how you want your laundry room to function. Consider the workflow and how you want to organize the space. Will you have a designated folding area? Do you need space for sorting and ironing clothes?
- Existing Features: Take note of any existing features like windows, outlets, or vents that may impact the placement of appliances, cabinets, or plumbing fixtures.
- Storage Needs: Assess your storage needs and think about the types of storage solutions you require. Consider whether you prefer open shelving, closed cabinets, or a combination of both.
Once you have evaluated the space and considered these factors, you can begin sketching out a layout for your laundry room. Here are a few layout options to consider:
- Linear Layout: This layout places the washer and dryer side by side, maximizing the use of wall space. It is a simple and efficient layout, ideal for smaller laundry rooms.
- L-Shaped Layout: This layout works well in larger laundry rooms, utilizing two walls to create an L-shaped configuration. It provides ample countertop space for folding and sorting clothes.
- U-Shaped Layout: This layout maximizes storage and workspace by utilizing three walls. It offers plenty of counter space for folding, sorting, and organizing laundry.
- Island Layout: This layout features a freestanding island in the center of the room, providing additional storage and workspace. It is a great option for larger laundry rooms, adding a touch of luxury and functionality.
As you design your layout, be mindful of the placement of appliances, utility connections, and storage options. Allow for sufficient space around the appliances for easy maneuverability. Consider the distance between the washer and dryer and the sink to ensure convenience when transferring laundry between them.
By assessing the available space and planning the layout, you can create a functional and efficient laundry room that makes doing laundry a breeze. In the next step, we will delve into planning the plumbing and electrical work to bring your laundry room to life.
Step 3: Plan the Plumbing and Electrical Work
Now that you have assessed the space and layout of your laundry room, it’s time to plan the plumbing and electrical work. Proper planning in this step is crucial to ensure that your laundry room has all the necessary connections and fixtures for efficient operation. Here are some key considerations:
- Plumbing Connections: Determine the location of the water supply and drainage lines in relation to your chosen laundry room location. Consider the proximity to existing plumbing lines and whether additional plumbing work is required. Plan for hot and cold water connections for your washer and any additional plumbing fixtures like a laundry sink.
- Electrical Connections: Assess the electrical requirements for your laundry room, including the necessary outlets for your washer, dryer, and any other electrical appliances or fixtures you plan to install. Consider if any electrical upgrades or wiring adjustments are needed to accommodate the power demands of the appliances.
- Consult Professionals: If you are unsure about the plumbing or electrical work involved, it is advisable to consult with licensed plumbers and electricians. They can provide expert guidance on the necessary connections, codes, and permits required for a safe and functional laundry room.
- Budget Considerations: Take into account the cost of plumbing and electrical work when planning your laundry room. Factor in any potential additional expenses for rerouting or extending existing lines, as well as any electrical upgrades or installations.
As you plan the plumbing and electrical work, keep in mind the location of the washer, dryer, laundry sink, and other appliances or fixtures. Consider their proximity to the necessary connections and how the routing of pipes and wiring will impact the overall functionality and aesthetics of your laundry room.
Remember to ensure that all plumbing and electrical work is done in compliance with local building codes and regulations. This will help ensure the safety and efficiency of your laundry room and prevent any potential issues down the line.
Once you have carefully planned the plumbing and electrical work, you can proceed to the next step of the process: installing the necessary connections and fixtures to bring your laundry room to life.
Step 4: Install Plumbing and Electrical Connections
With the planning phase complete, it’s time to move on to the installation of the plumbing and electrical connections in your laundry room. This step involves bringing in professionals to handle the necessary installations and ensure that everything is properly connected. Here’s what you need to know:
- Hire Licensed Professionals: It is essential to hire licensed plumbers and electricians to handle the installation of the plumbing and electrical connections. These professionals have the expertise and knowledge to ensure that the work is done correctly and meets all safety standards.
- Plumbing Installation: The plumbers will install the necessary pipes, water supply lines, and drainage systems based on the layout and design of your laundry room. This includes connecting the hot and cold water lines to the washer, as well as installing any additional plumbing fixtures such as a laundry sink.
- Electrical Installation: The electricians will handle the electrical connections for your laundry room. This includes installing the required outlets, wiring, and circuit breakers to accommodate the power needs of your washer, dryer, and other electrical fixtures or appliances.
- Inspect and Test: Once the installation is complete, make sure to have a proper inspection carried out to ensure that everything is in working order and meets the necessary safety standards. Test the plumbing connections for leaks and the electrical connections for proper functionality.
During the installation process, it is crucial to communicate with the professionals about any specific requirements or preferences you have for your laundry room. This includes discussing the placement of outlets, switches, and plumbing fixtures to ensure they are conveniently located and meet your needs.
Remember, safety should always be a top priority when dealing with plumbing and electrical work. Hiring licensed professionals will help ensure that the installations are done correctly and follow all building codes and regulations.
Once the plumbing and electrical connections are installed and properly inspected, you can move on to the next step in creating your laundry room: building or installing cabinets and shelving.
Read more: How To Finish Laundry Room
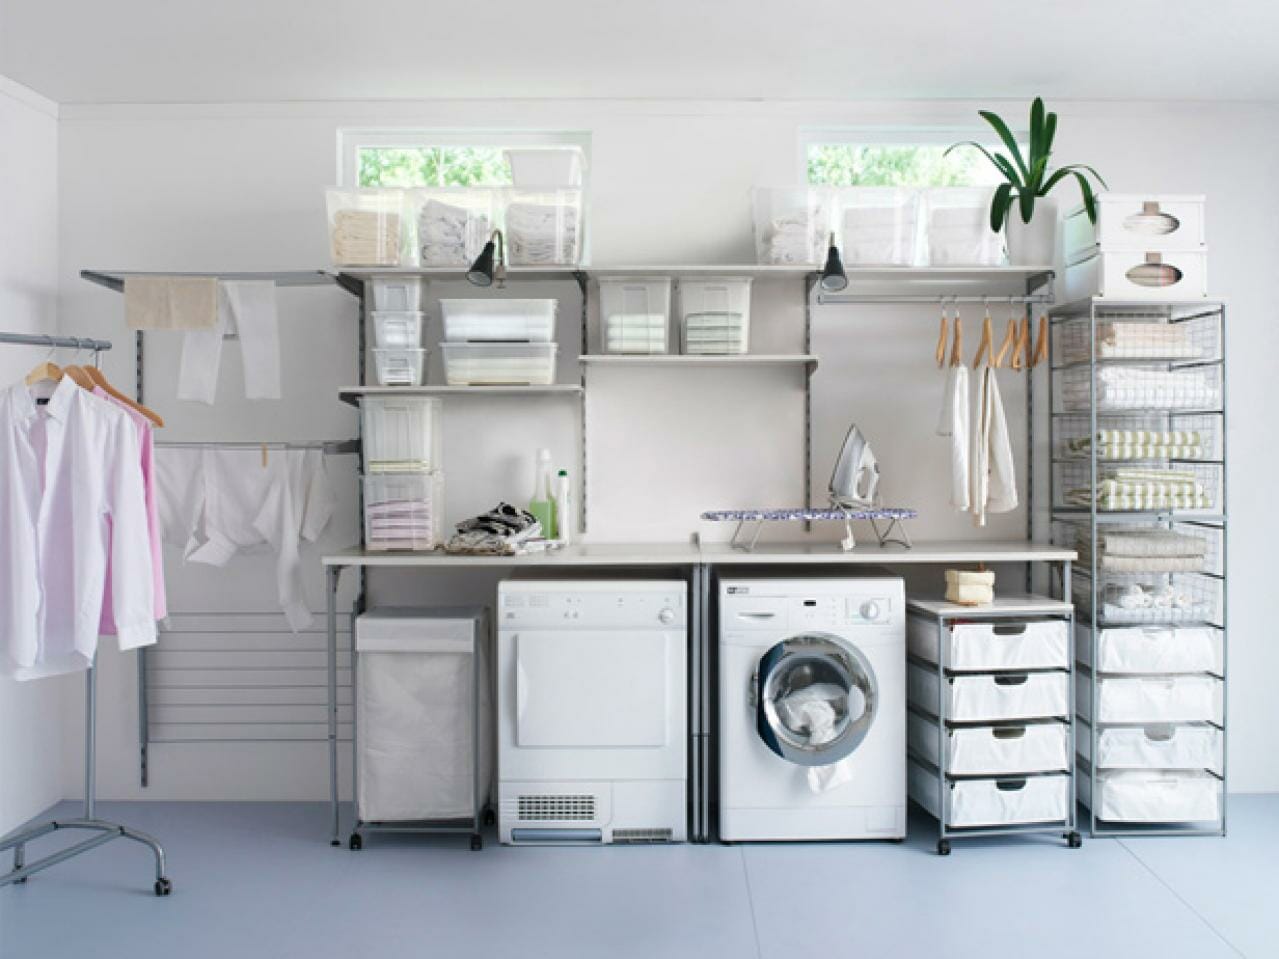
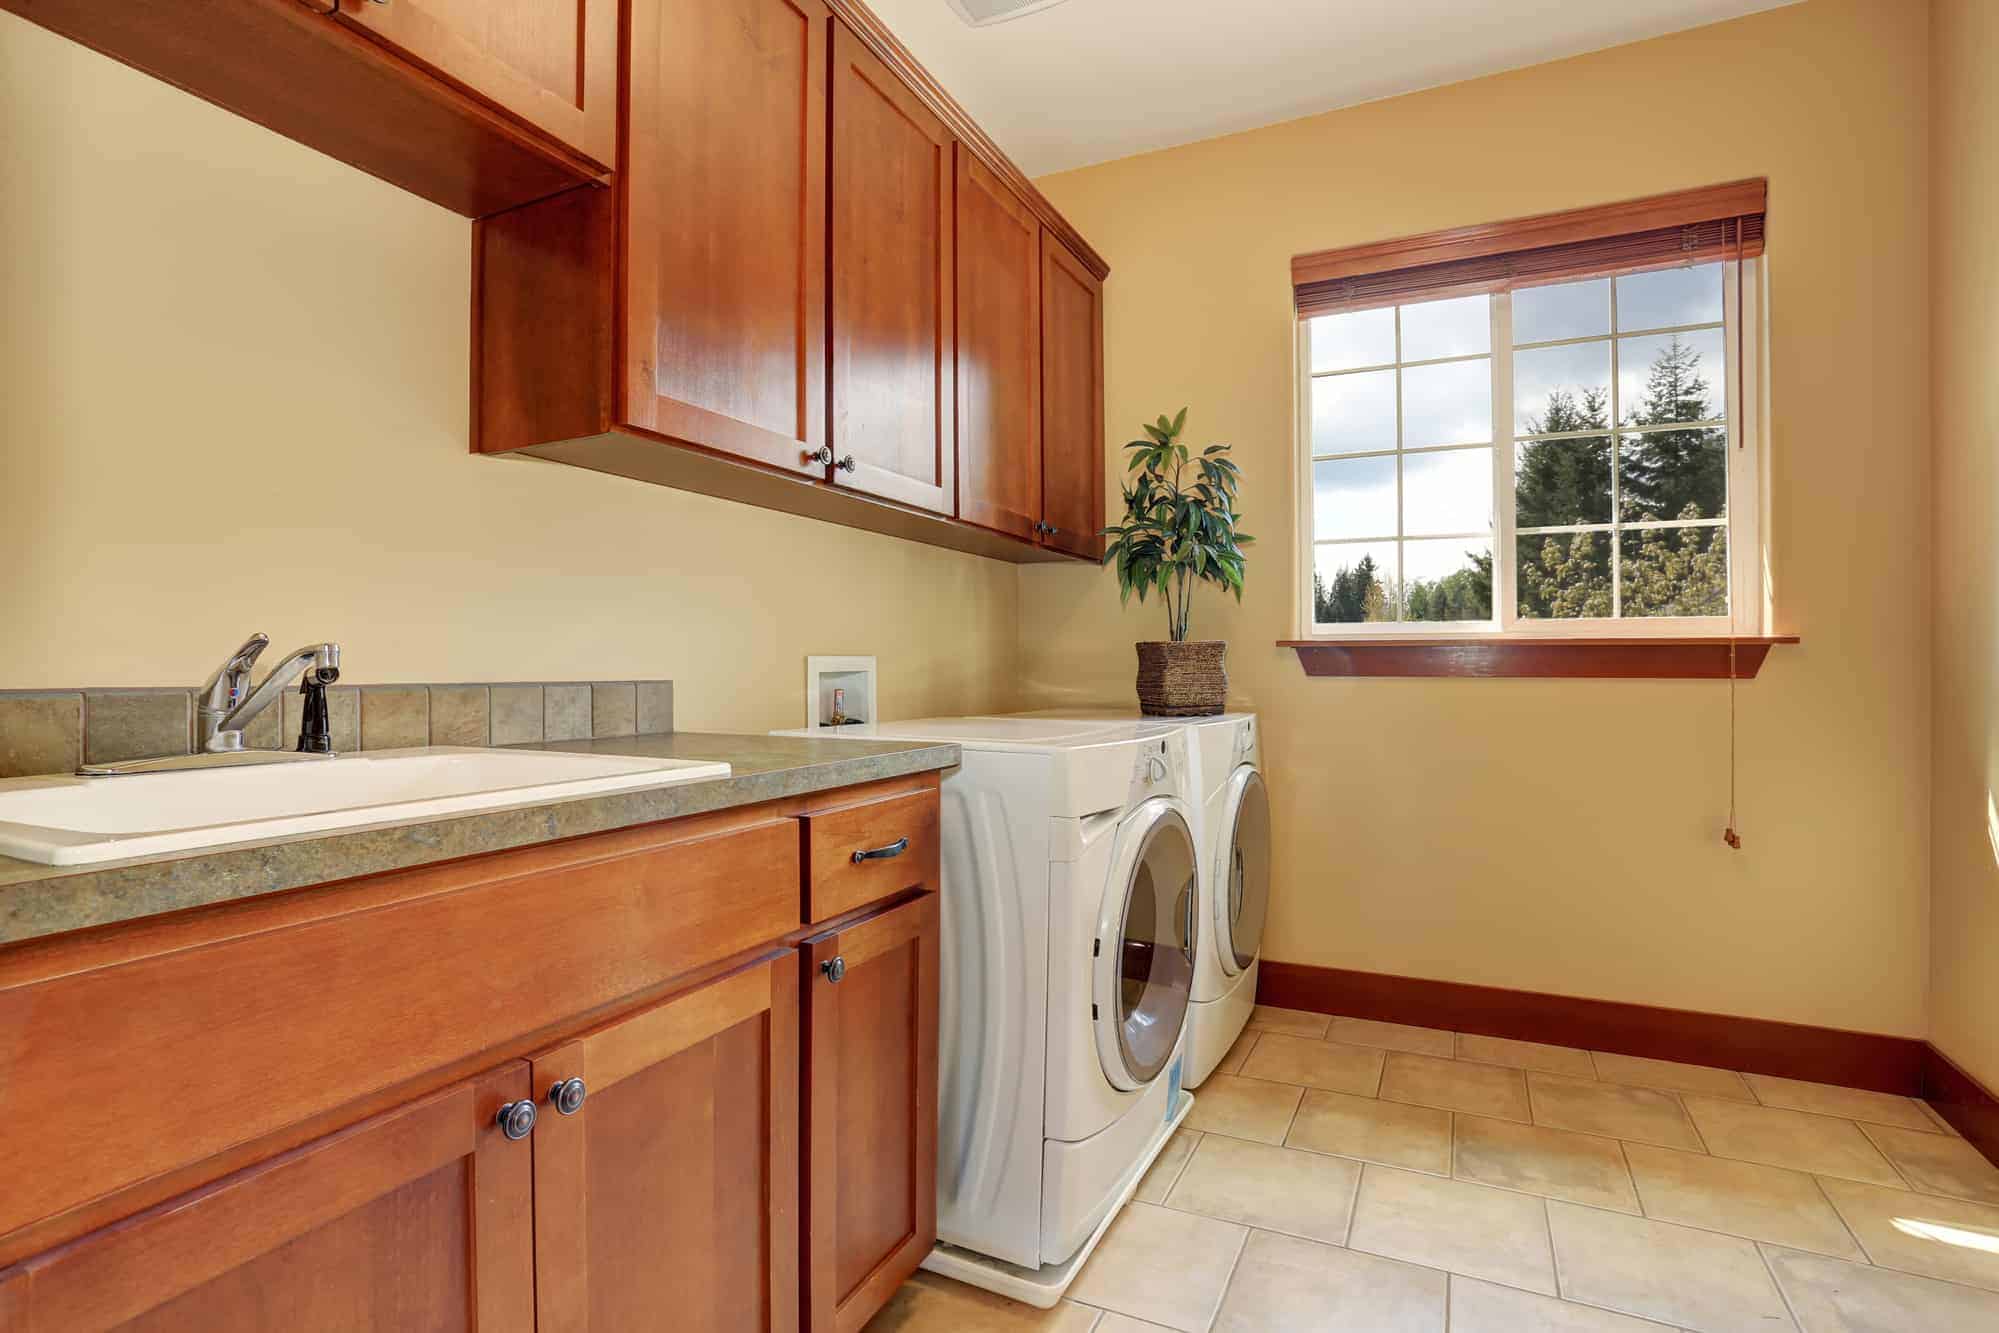
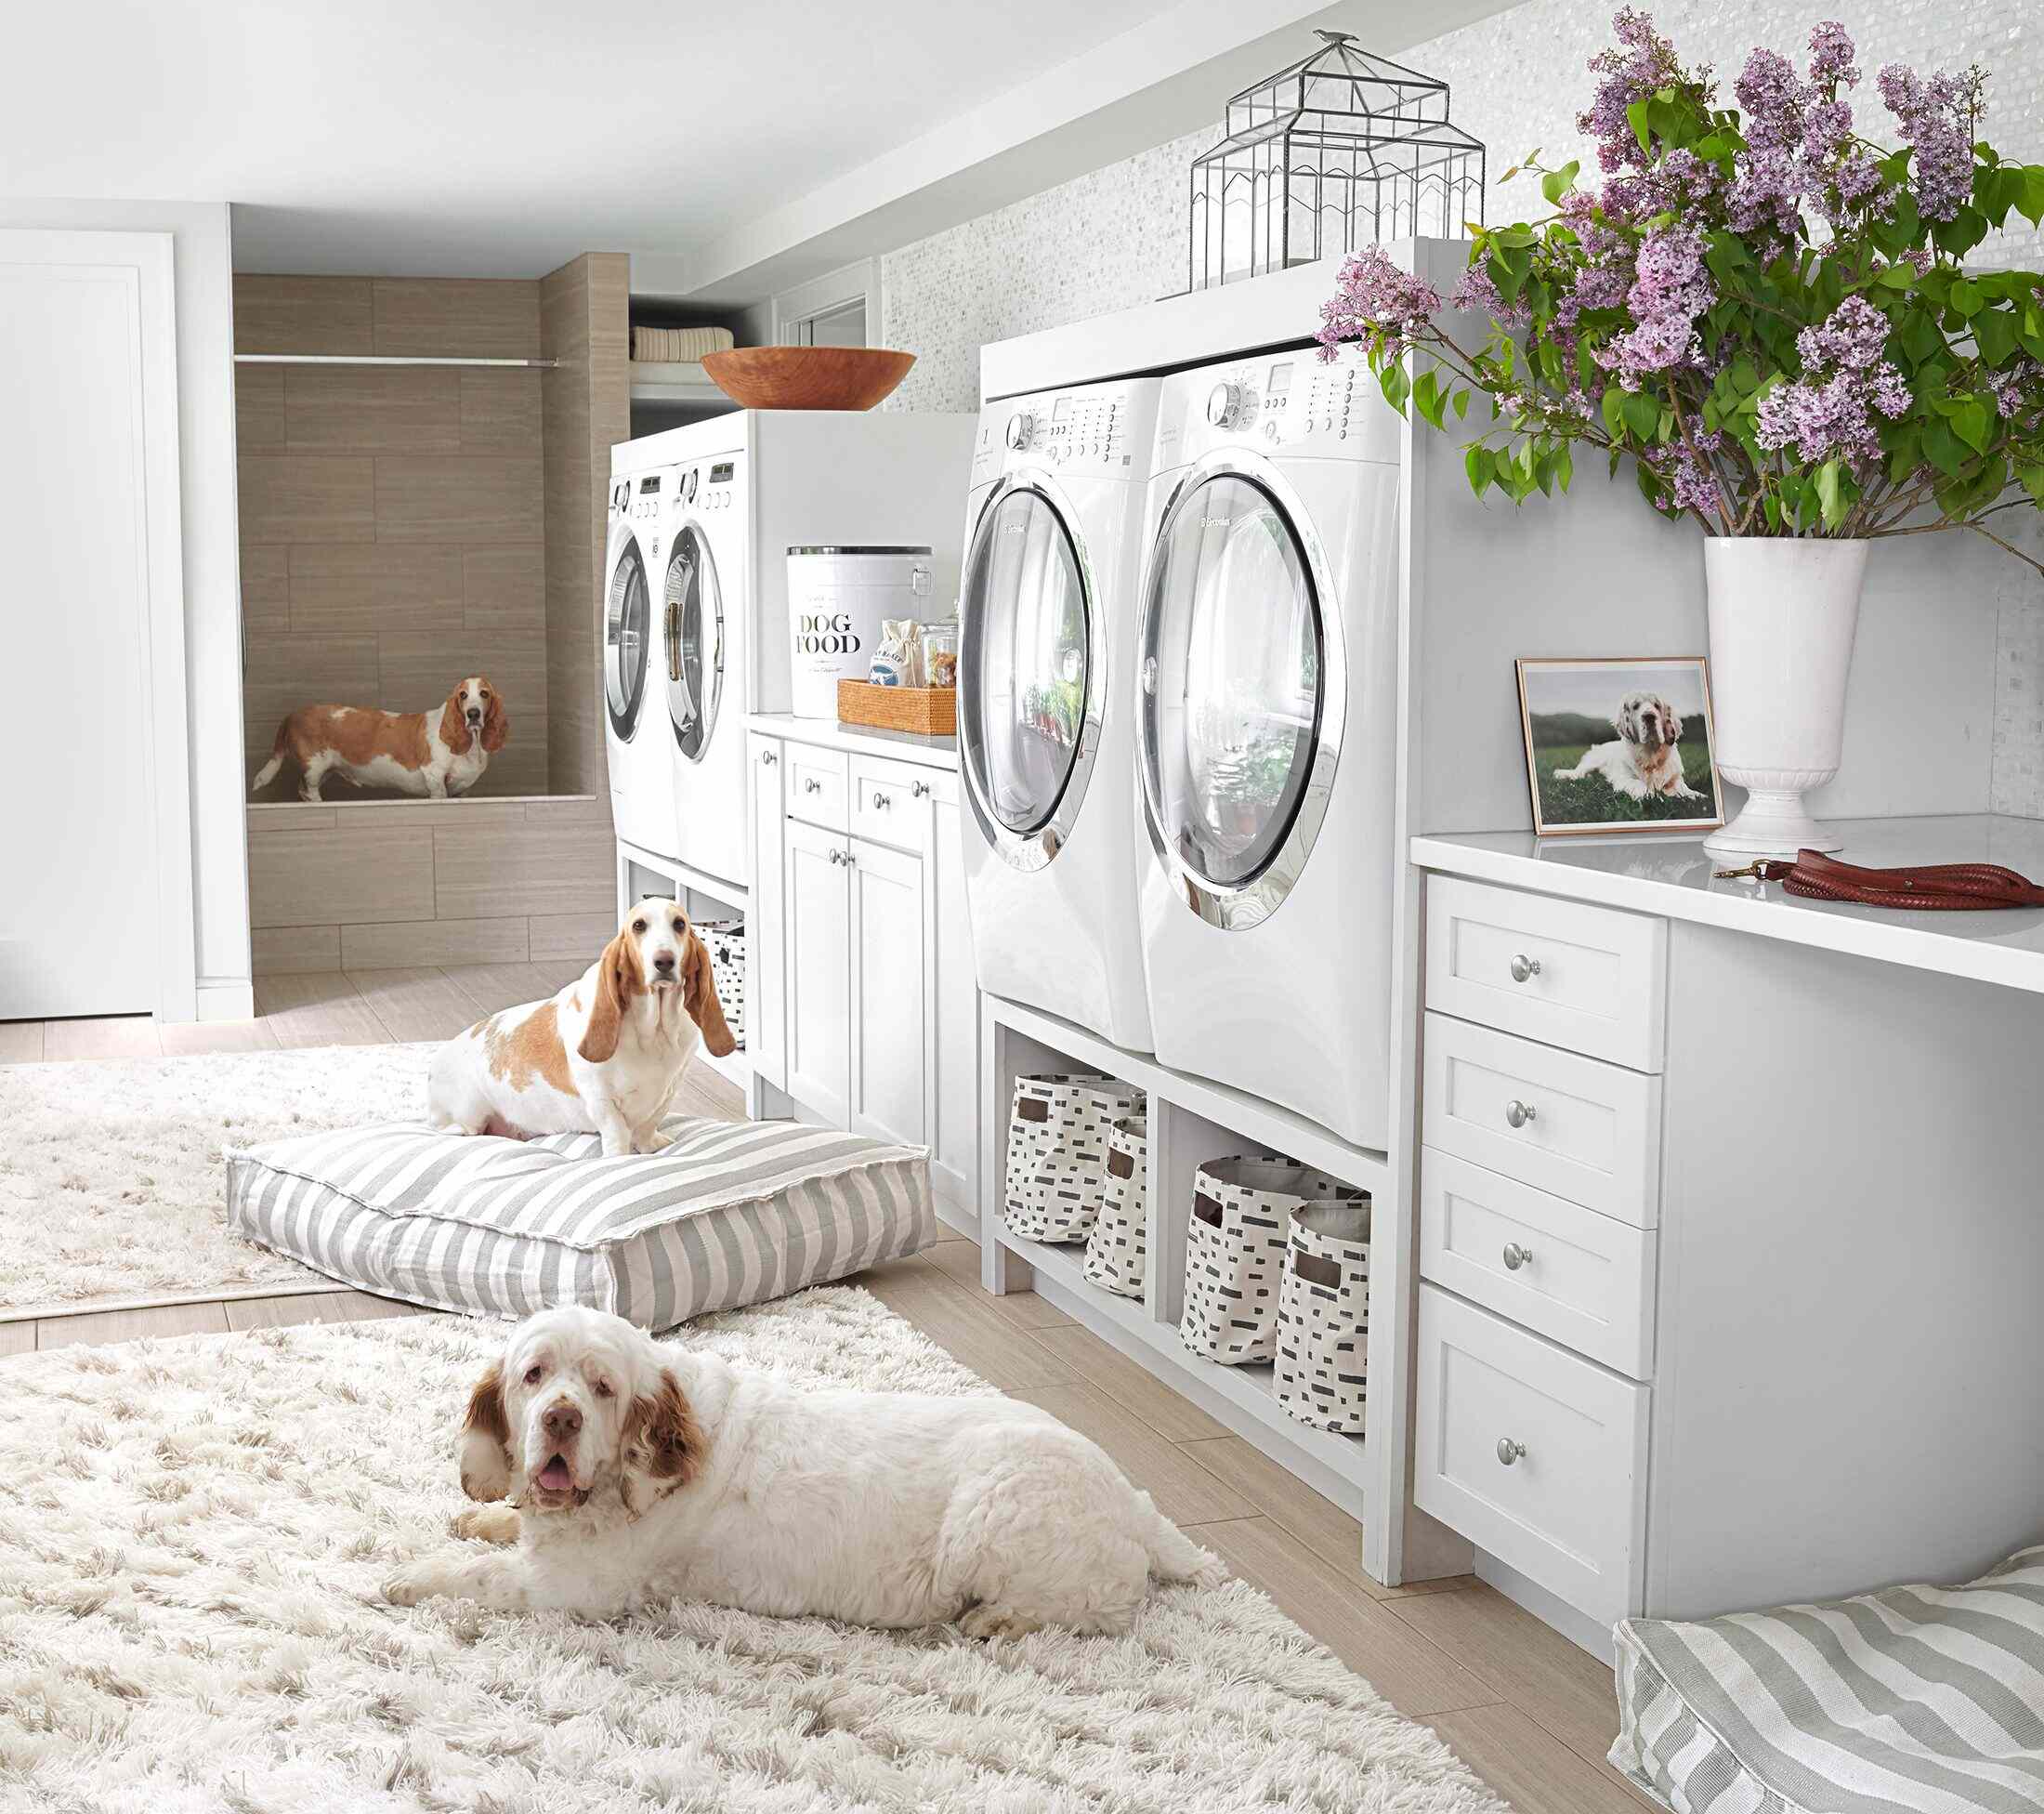
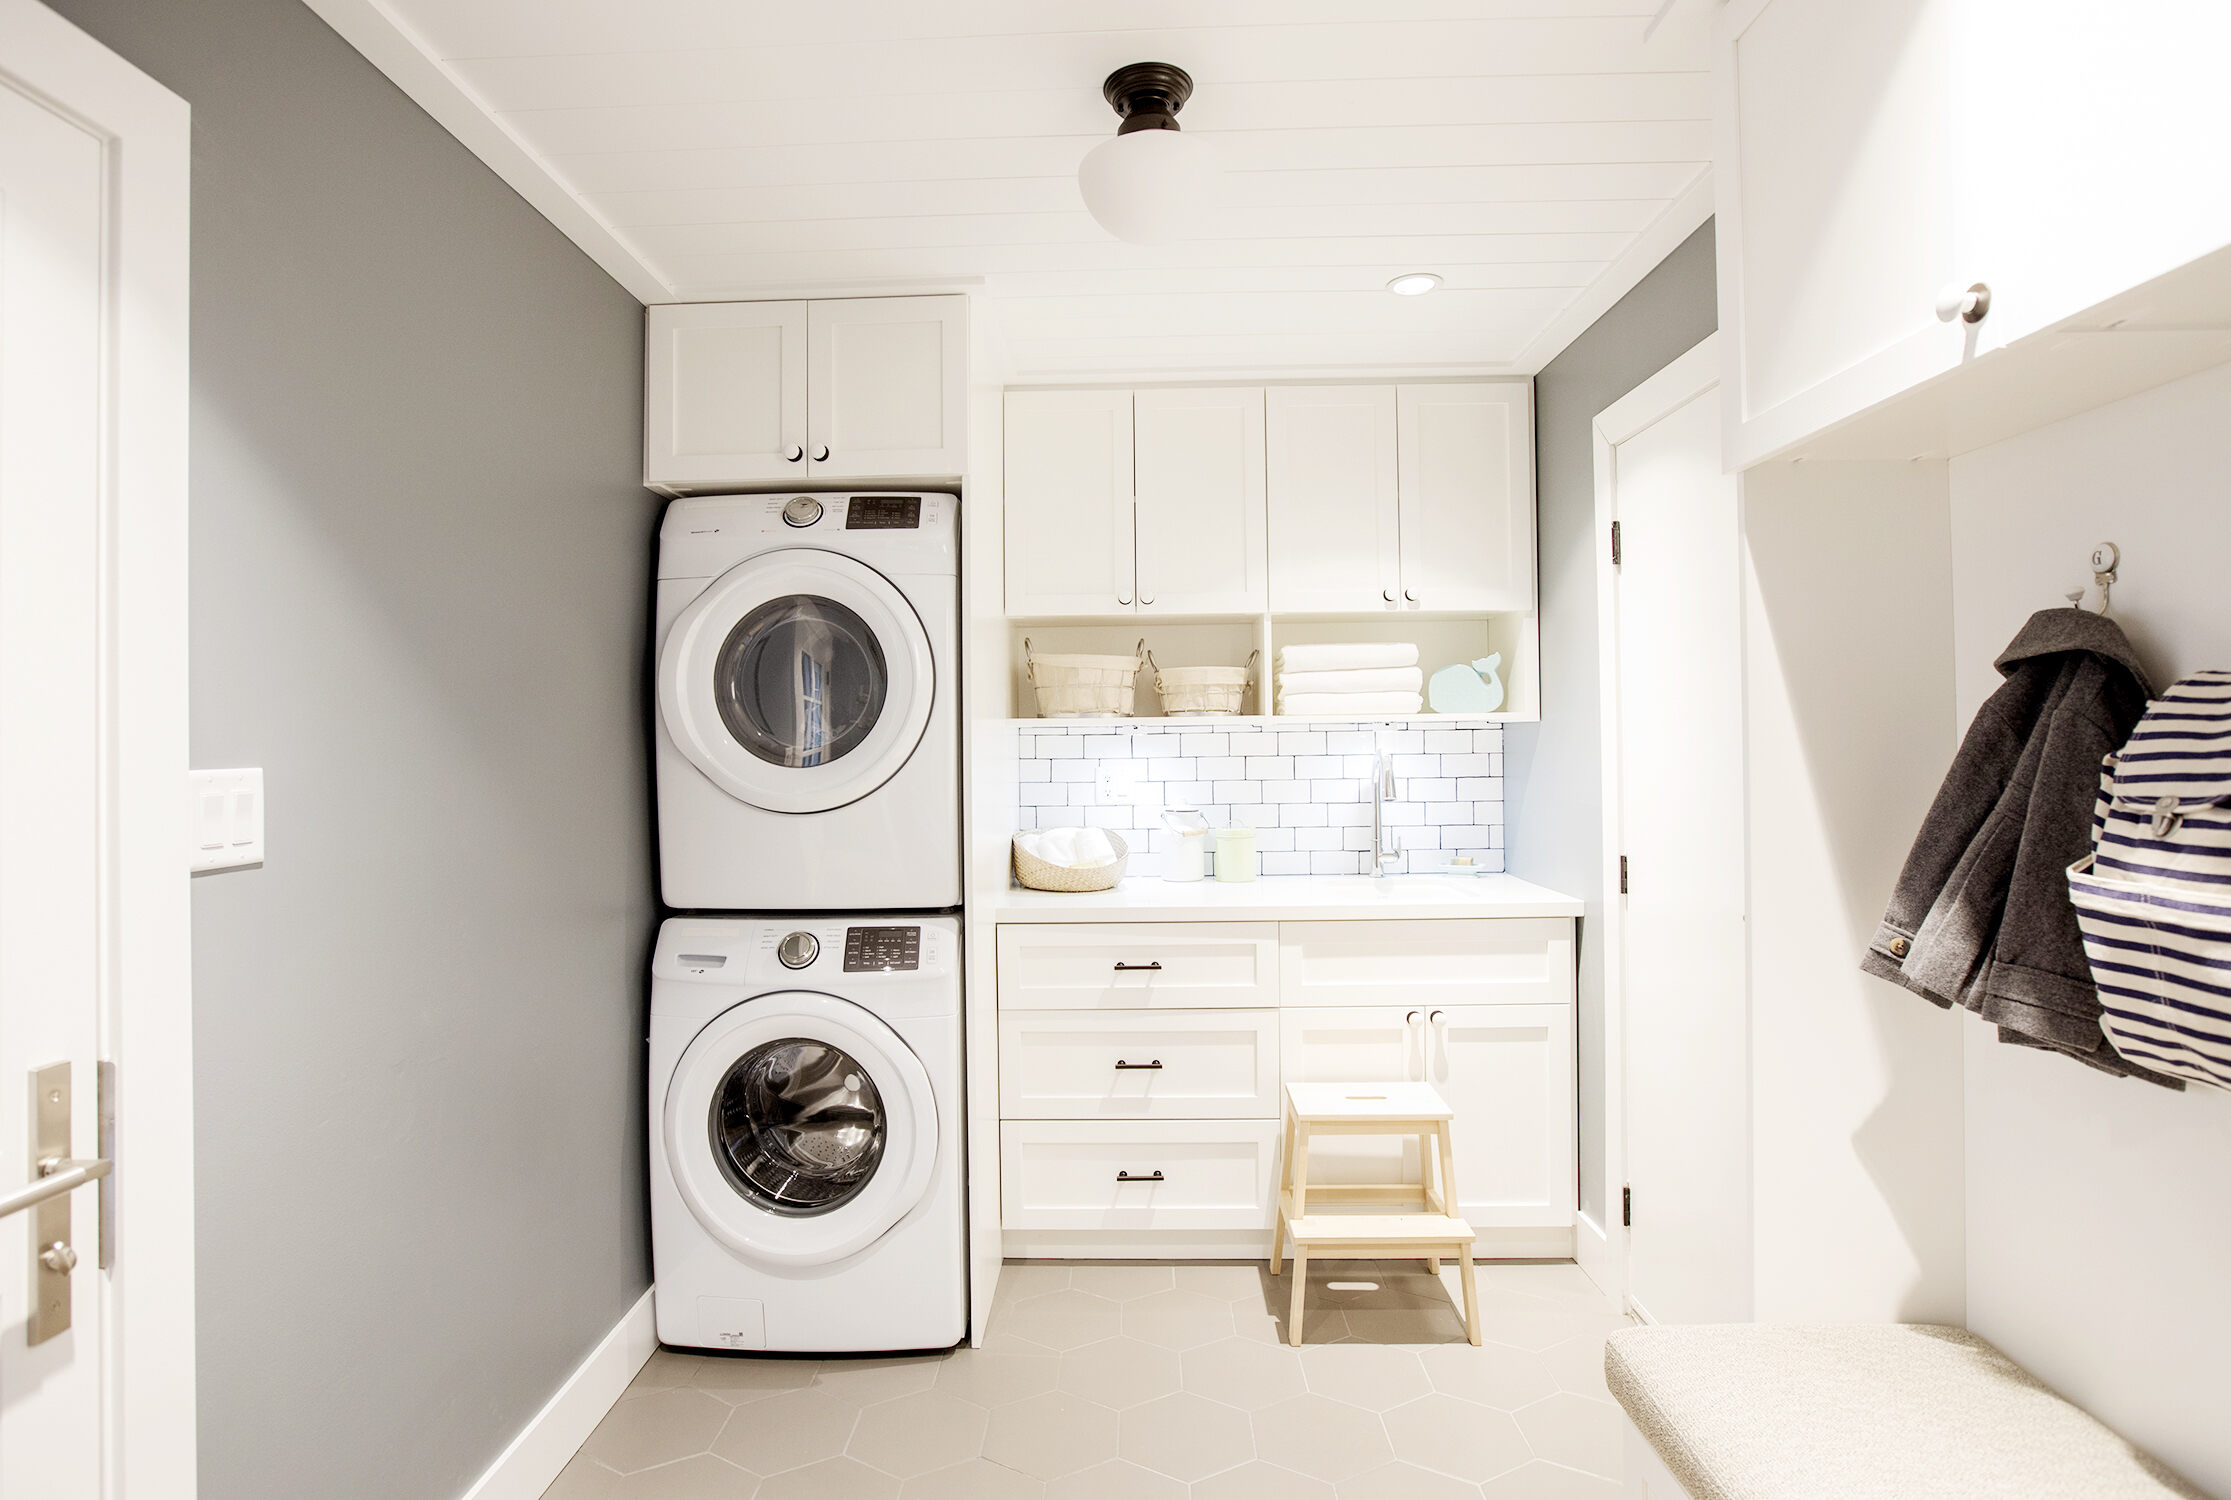
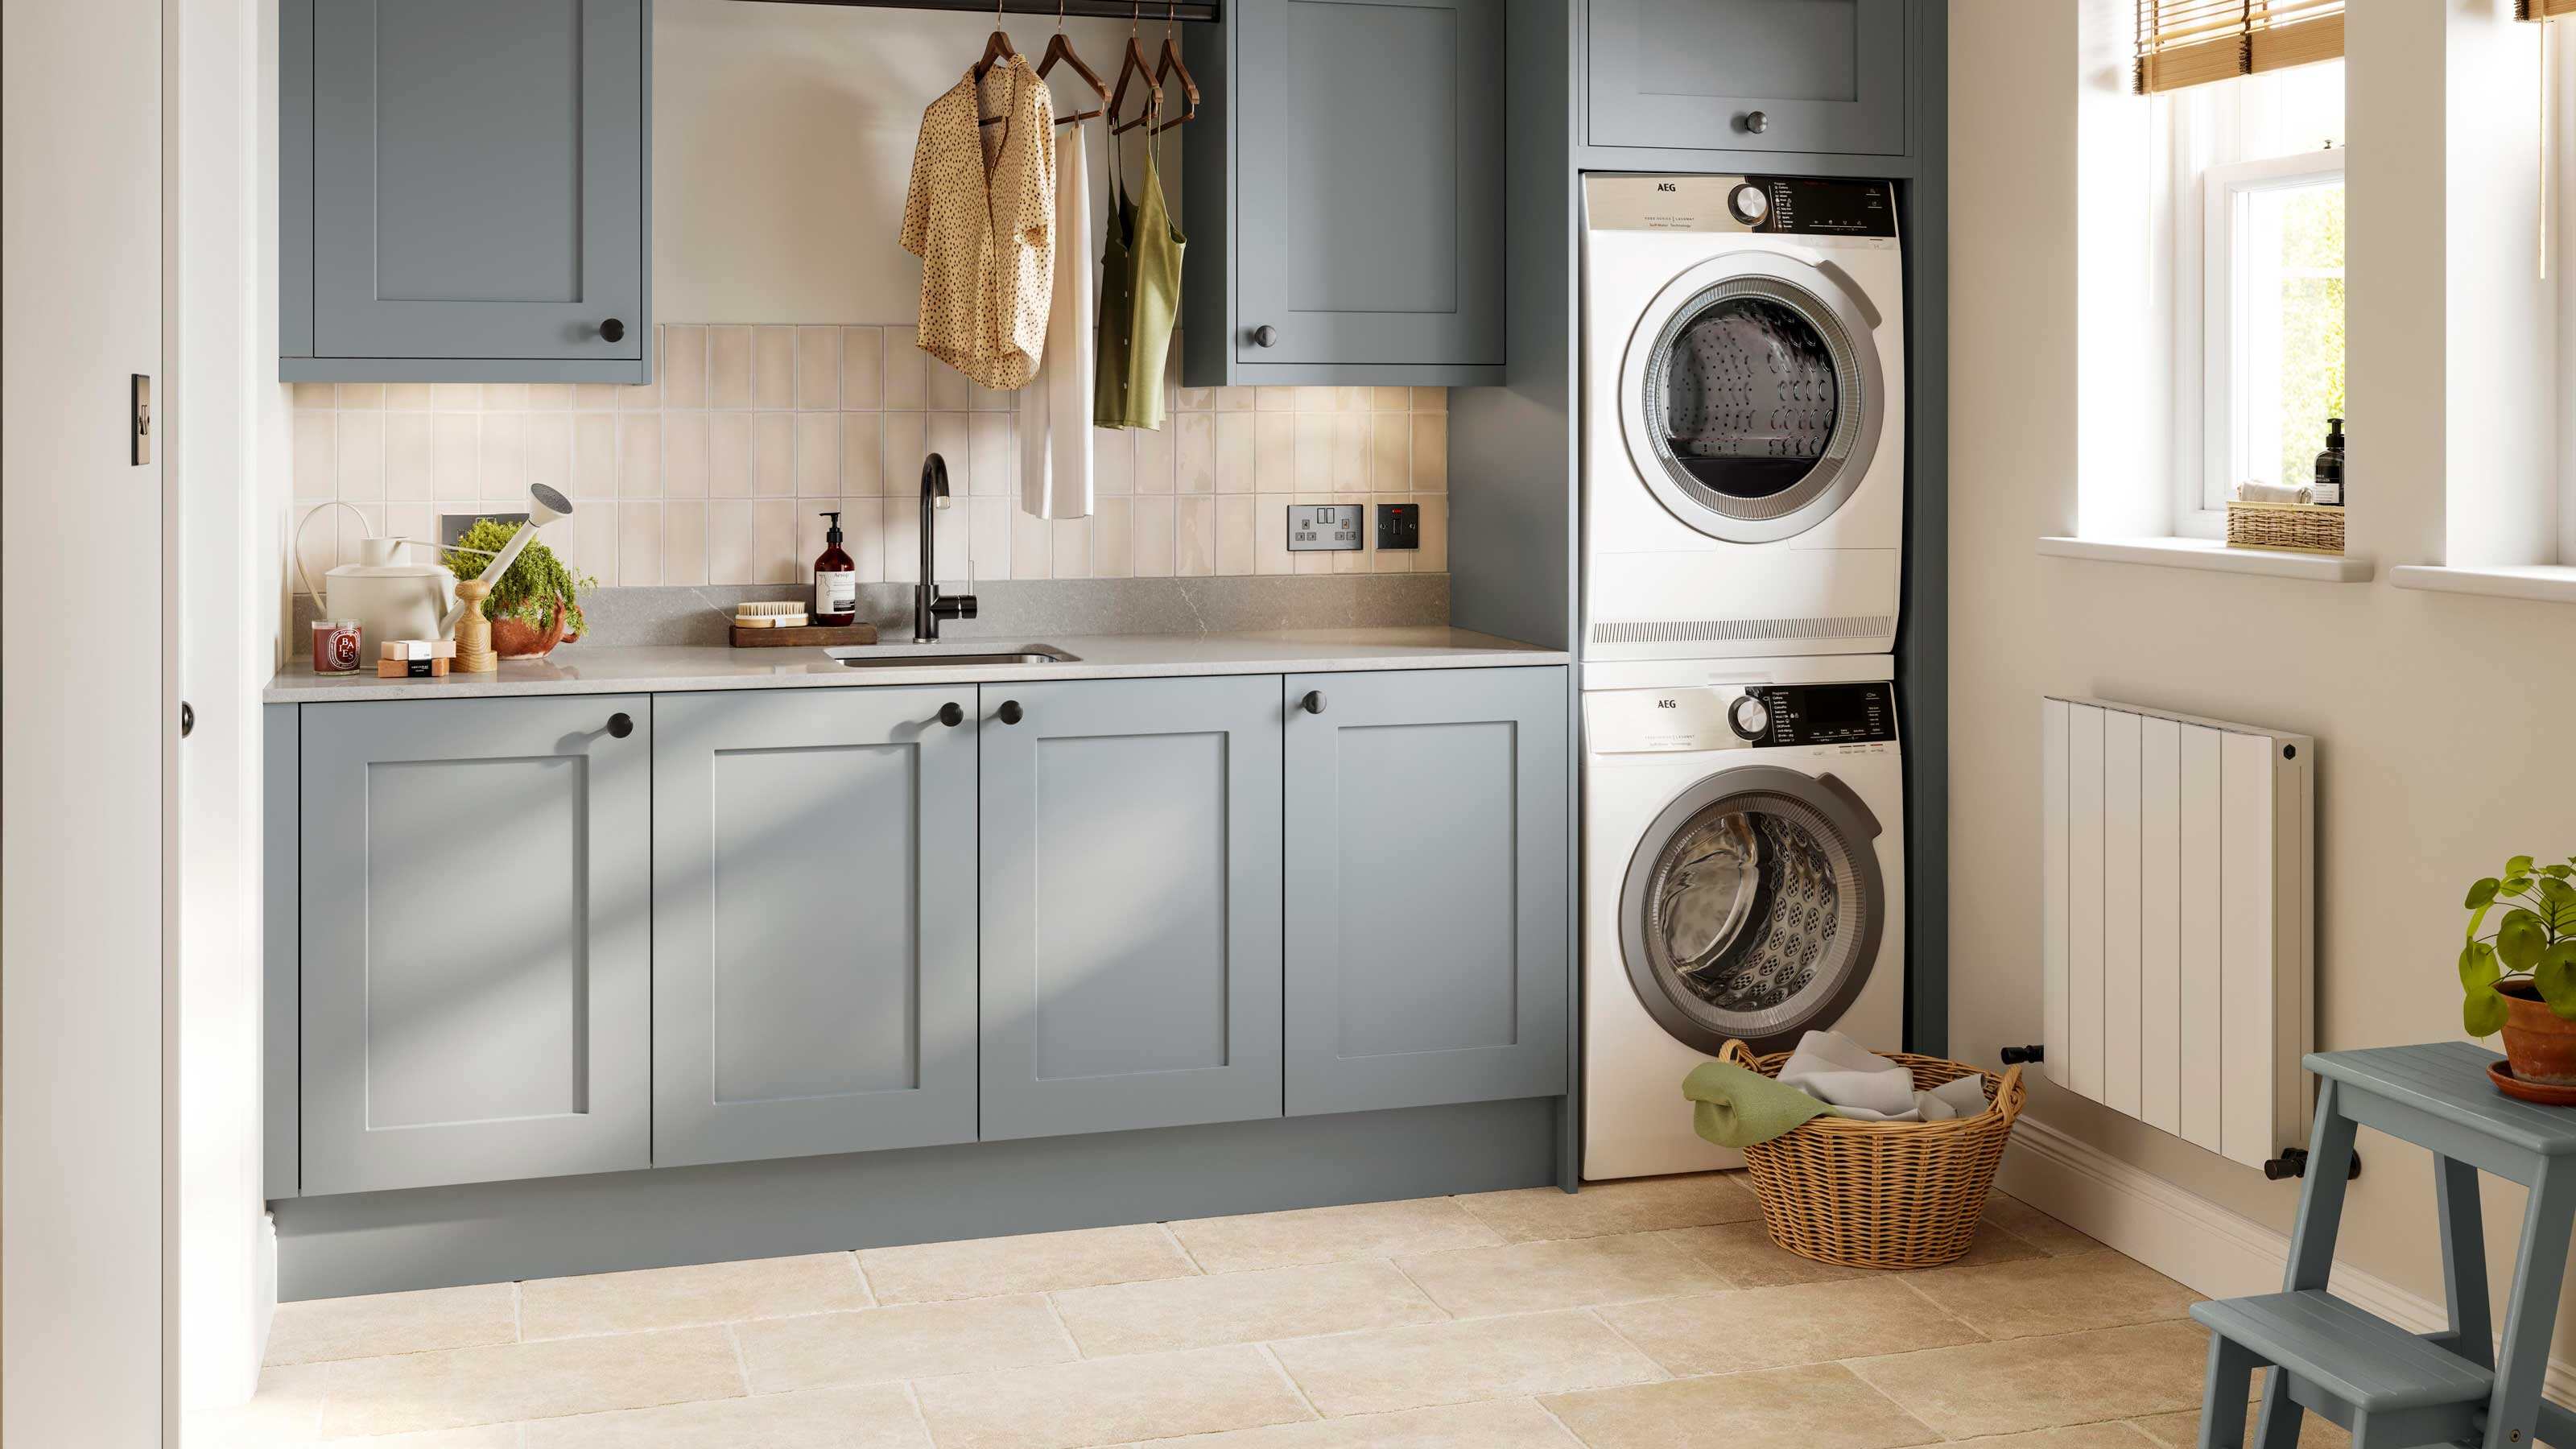
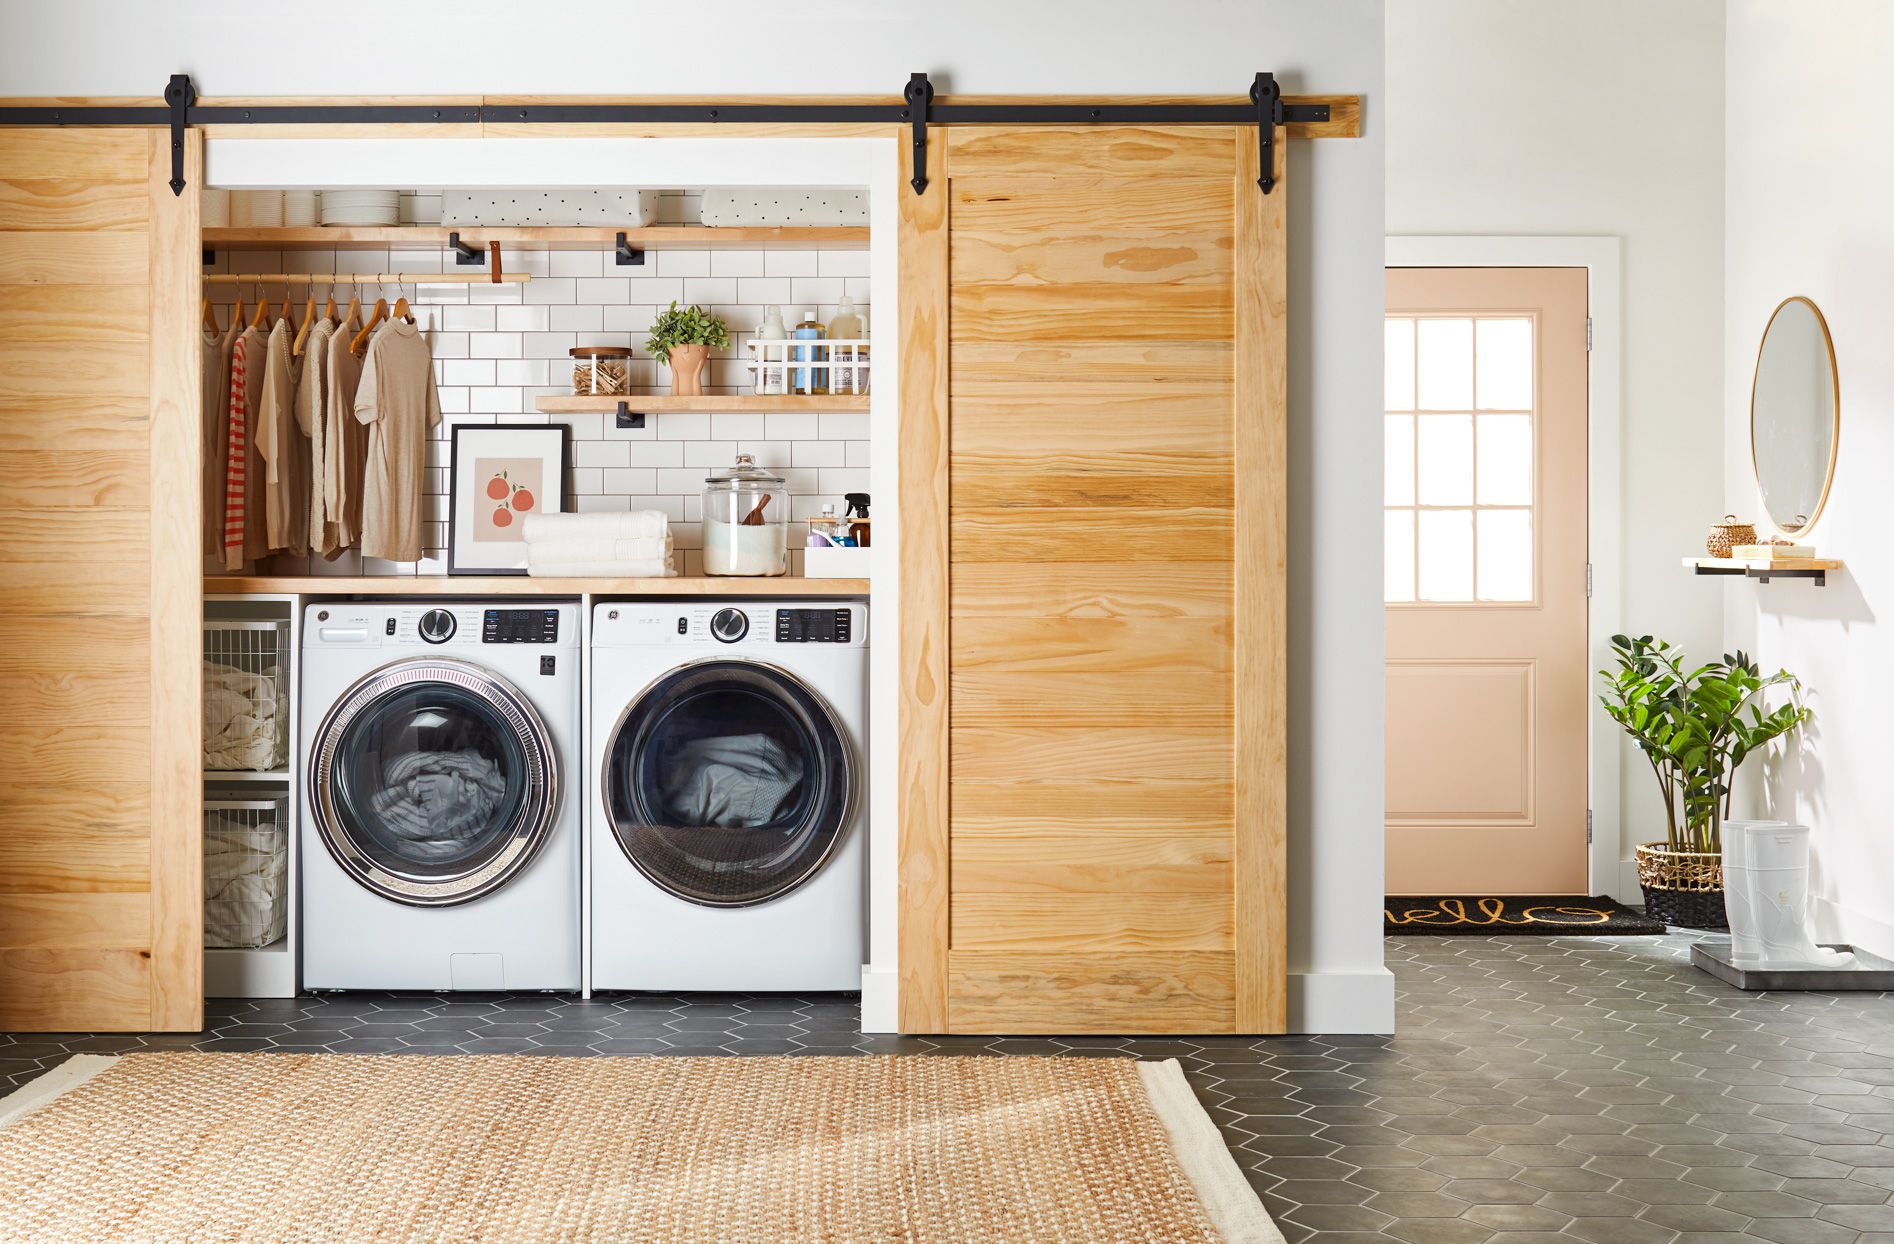
Step 5: Build or Install Cabinets and Shelving
Now that the plumbing and electrical connections are in place, it’s time to focus on creating storage solutions in your laundry room. Building or installing cabinets and shelving will help you maximize the available space and keep your laundry supplies organized. Here’s what you need to consider:
- Determine Your Storage Needs: Assess the items you need to store in your laundry room, such as detergent, fabric softener, cleaning supplies, and laundry accessories. Consider whether you need open shelving for easy access or closed cabinets to keep your supplies hidden.
- Measure the Space: Take accurate measurements of the available wall space and consider the height, width, and depth of the cabinets or shelves you want to install. This will help you determine the size and configuration that will work best in your laundry room.
- Choose the Materials: Decide on the materials you want to use for your cabinets and shelving. Common options include wood, laminate, or metal. Consider durability, functionality, and aesthetics when making your selection.
- Design and Layout: Determine the layout of your cabinets and shelving. Consider the position of the washer, dryer, and utility connections to ensure that the storage units do not obstruct access to these essential components.
- Custom or Pre-made: Decide whether you want to build custom cabinets and shelves or purchase pre-made ones. Building custom units allows for more flexibility in design and customization, while pre-made options are often more convenient and cost-effective.
- Hire Professionals or DIY: Depending on your skill level and available time, you can choose to hire professionals to build and install the cabinets and shelving or take on the project as a DIY endeavor. Consider your abilities and availability when making this decision.
Once you have all the necessary information, proceed with building or installing the cabinets and shelving. Make sure to follow the manufacturer’s instructions or consult with professionals if you are unsure about any installation processes.
When placing the cabinets and shelving, consider the ergonomics and functionality. Install them at a height that is convenient for accessing the items you need without straining. Labeling or organizing bins and baskets can also help keep your supplies organized and easily accessible.
Remember to leave enough space between the cabinets and shelving to maneuver comfortably. Adequate airflow and ventilation in the laundry room are essential to prevent mold and mildew growth, so avoid overcrowding the space.
With the cabinets and shelving installed, your laundry room will not only be functional but also aesthetically pleasing. In the next step, we will guide you through the process of installing laundry appliances in your newly created space.
When adding a laundry room, consider the location in relation to existing plumbing and electrical connections to minimize installation costs.
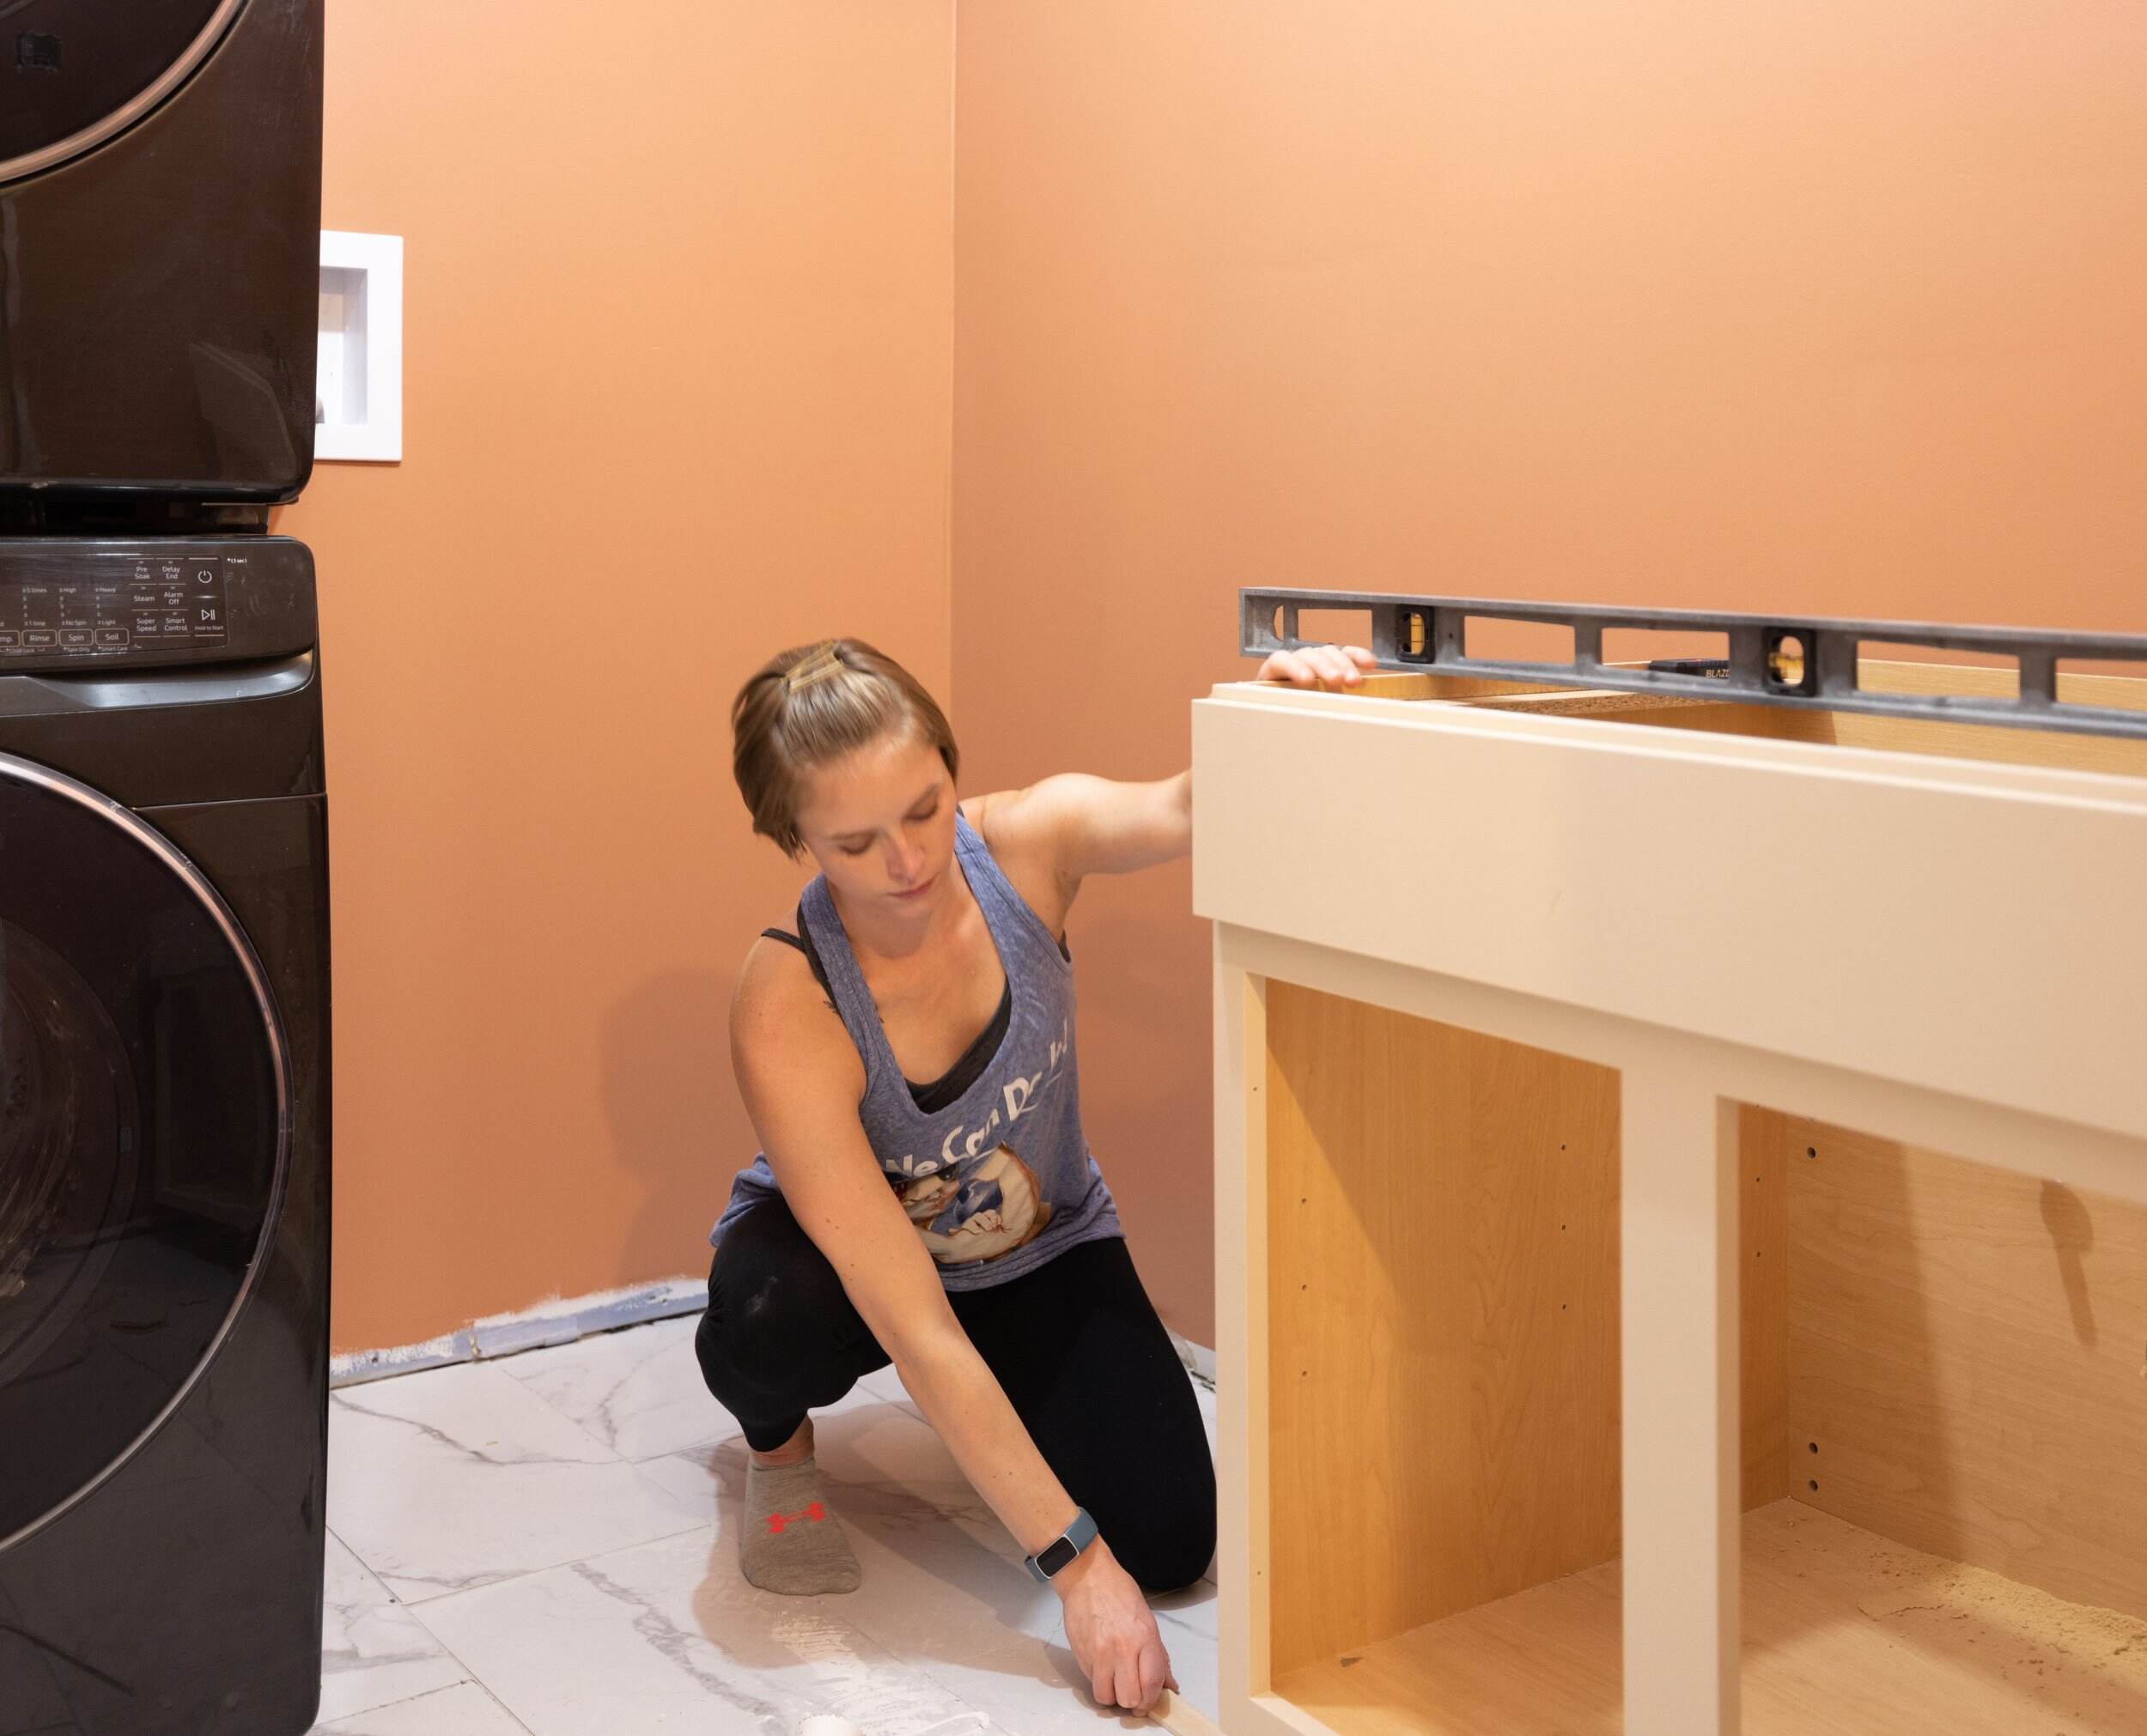
Step 6: Install Laundry Appliances
Now that your laundry room is taking shape with cabinets and shelving in place, it’s time to install your laundry appliances. Installing your washer and dryer properly will ensure that they function efficiently and securely. Consider the following steps:
- Measure the Appliances: Before installation, measure the dimensions of your washer and dryer to ensure they will fit into the designated space. Check for any clearance requirements specified by the manufacturer.
- Prepare the Space: Clear the area where the appliances will be placed and ensure the floor is clean and level. If necessary, use a leveling tool to adjust the surface to ensure proper alignment for the appliances.
- Connect the Water Supply: Attach the water supply hoses to the water faucets, ensuring a secure connection. Make sure to connect the hot and cold water hoses to their corresponding valves on the back of the washer.
- Connect the Drainage Hose: Connect the drainage hose to either a laundry sink, standpipe, or the designated drainage line in your laundry room. Ensure a secure connection to prevent any leaks or drainage issues.
- Electrical Connection: Plug the washer and dryer into their respective electrical outlets. If required, consult an electrician to ensure the electrical connections meet the necessary safety standards and codes.
- Level the Appliances: Use a leveling tool to ensure the washer and dryer are level and stable. Adjust the appliance feet or use leveling pads if needed to achieve a balanced and secure installation.
- Test the Appliances: After installation, run a test cycle on your washer and dryer to ensure they are functioning properly. Check for any leaks, unusual noises, or malfunctions that may require attention from a professional.
Remember to refer to the manufacturer’s instructions for specific installation guidelines and recommendations for your appliances. If you are uncertain or uncomfortable with the installation process, consider hiring a professional to ensure a safe and accurate installation.
Having your washer and dryer set up properly will make doing laundry more efficient and convenient. With the appliances installed and functioning, you can now move on to the next step: setting up a laundry sink in your laundry room.
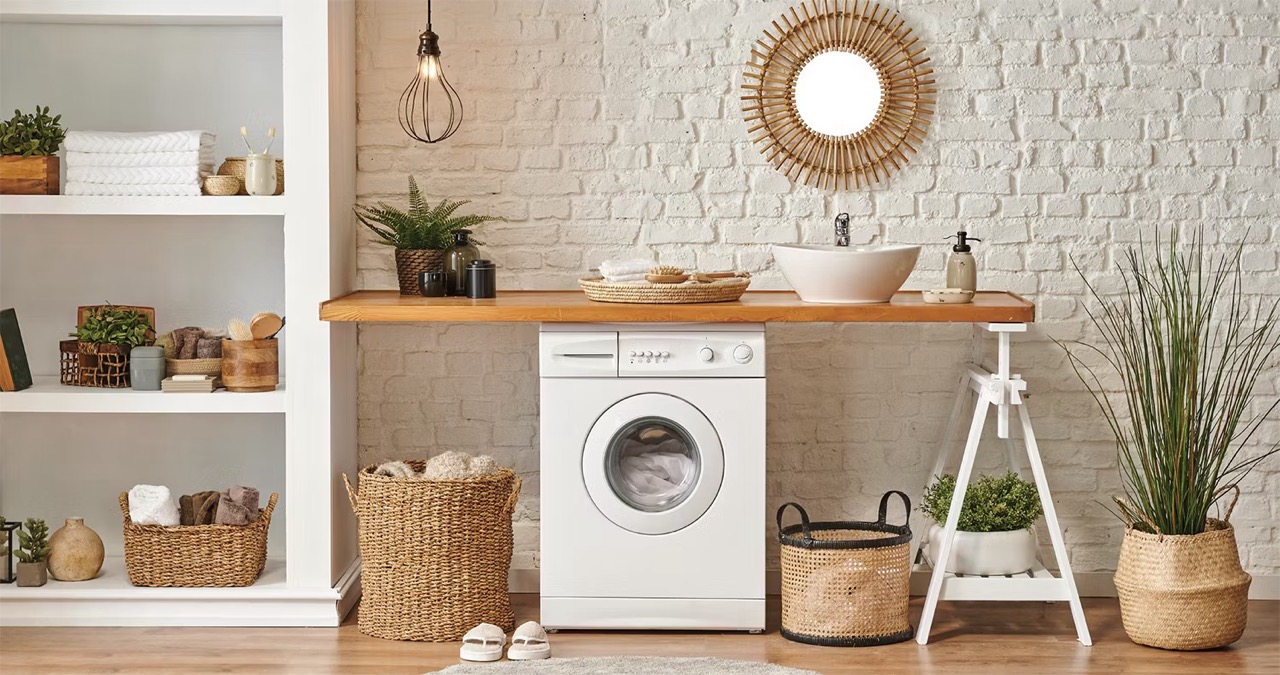
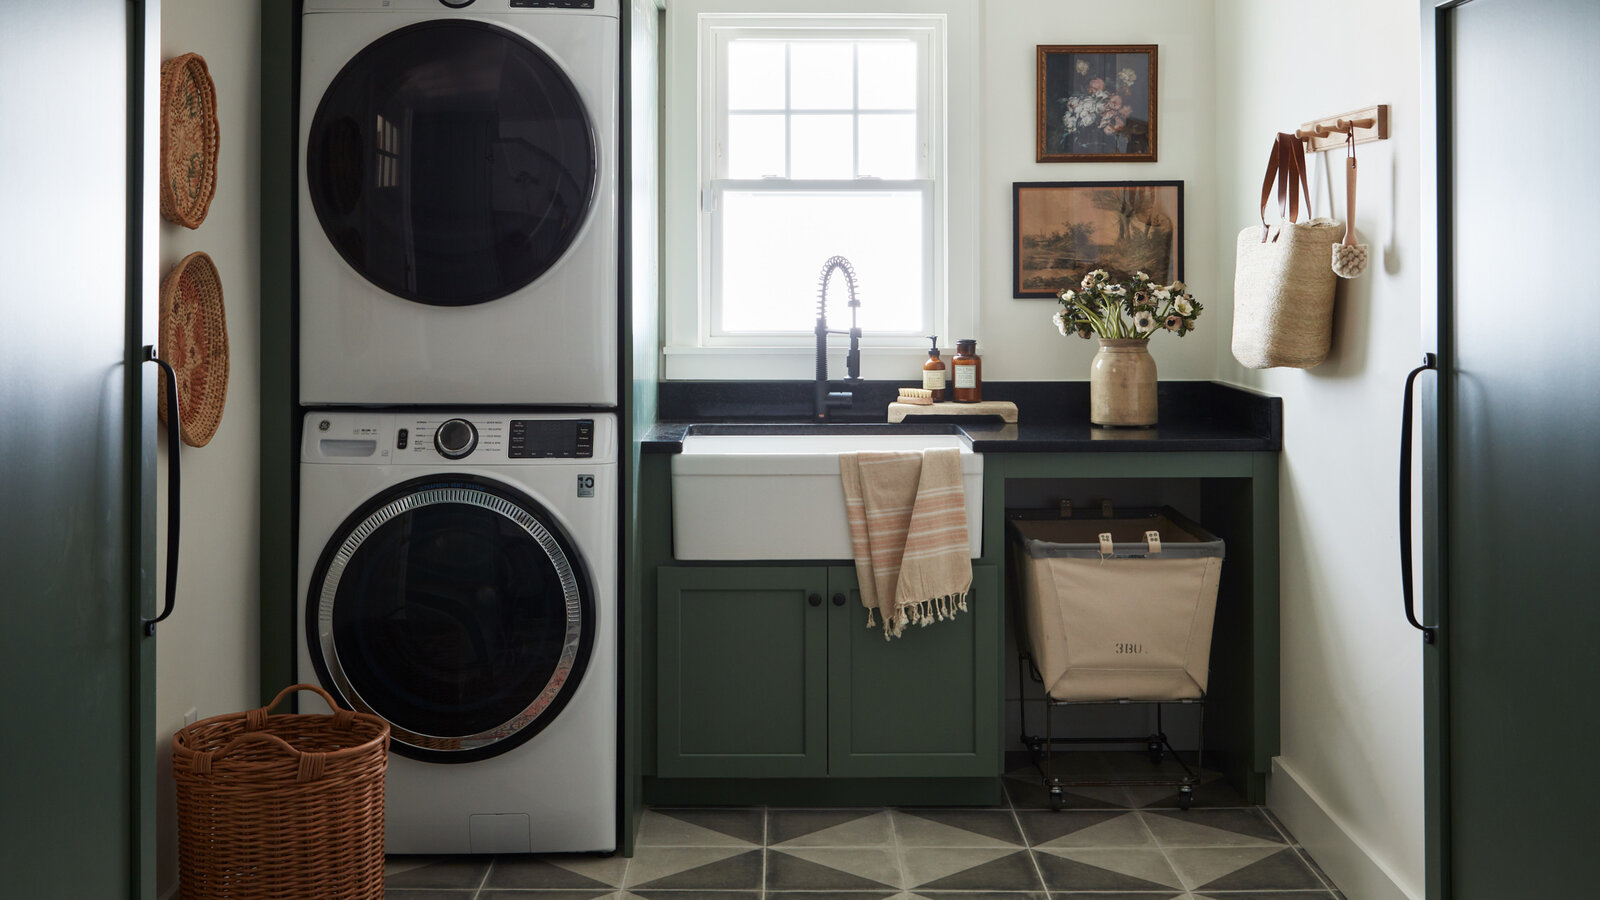
Step 7: Set up a Laundry Sink
Incorporating a laundry sink into your laundry room can provide added functionality and convenience. A laundry sink is useful for various purposes, such as hand-washing delicate items, pre-soaking stained clothes, or performing small cleaning tasks. Here’s how to set up a laundry sink:
- Select the Right Sink: Choose a sink that fits the size and design of your laundry room. Consider the type of material, such as stainless steel or porcelain, and opt for a sink with a deep basin for added versatility.
- Plan the Plumbing: Determine the placement of the laundry sink and plan the necessary plumbing connections. Ensure that hot and cold water lines are properly connected to the sink, similar to those for your washer.
- Install the Sink: Follow the manufacturer’s instructions to install the laundry sink securely. This may involve mounting the sink to the wall or placing it on a countertop or cabinet. Make sure to test the stability of the sink once it is installed.
- Connect the Plumbing: Attach the water supply lines to the faucet of the laundry sink. Use plumber’s tape or thread sealant to ensure secure connections and prevent leaks. Connect the drain pipe or hose to the sink’s drainage system.
- Consider Additional Features: Depending on your needs, you may want to consider additional features for your laundry sink. This could include a faucet with a pull-out sprayer, a built-in soap dispenser, or a sink cover for added workspace.
Setting up a laundry sink can provide a dedicated space for various cleaning tasks in your laundry room. It can also serve as a utility sink for other purposes, such as rinsing off muddy shoes or filling buckets for cleaning chores.
If you are uncertain about the plumbing work or feel uncomfortable with the installation process, it is recommended to consult with a professional plumber. They can ensure that the plumbing connections are installed correctly and in compliance with local building codes.
With the laundry sink set up, you can now move on to the next step: installing lighting fixtures to brighten up your laundry room.
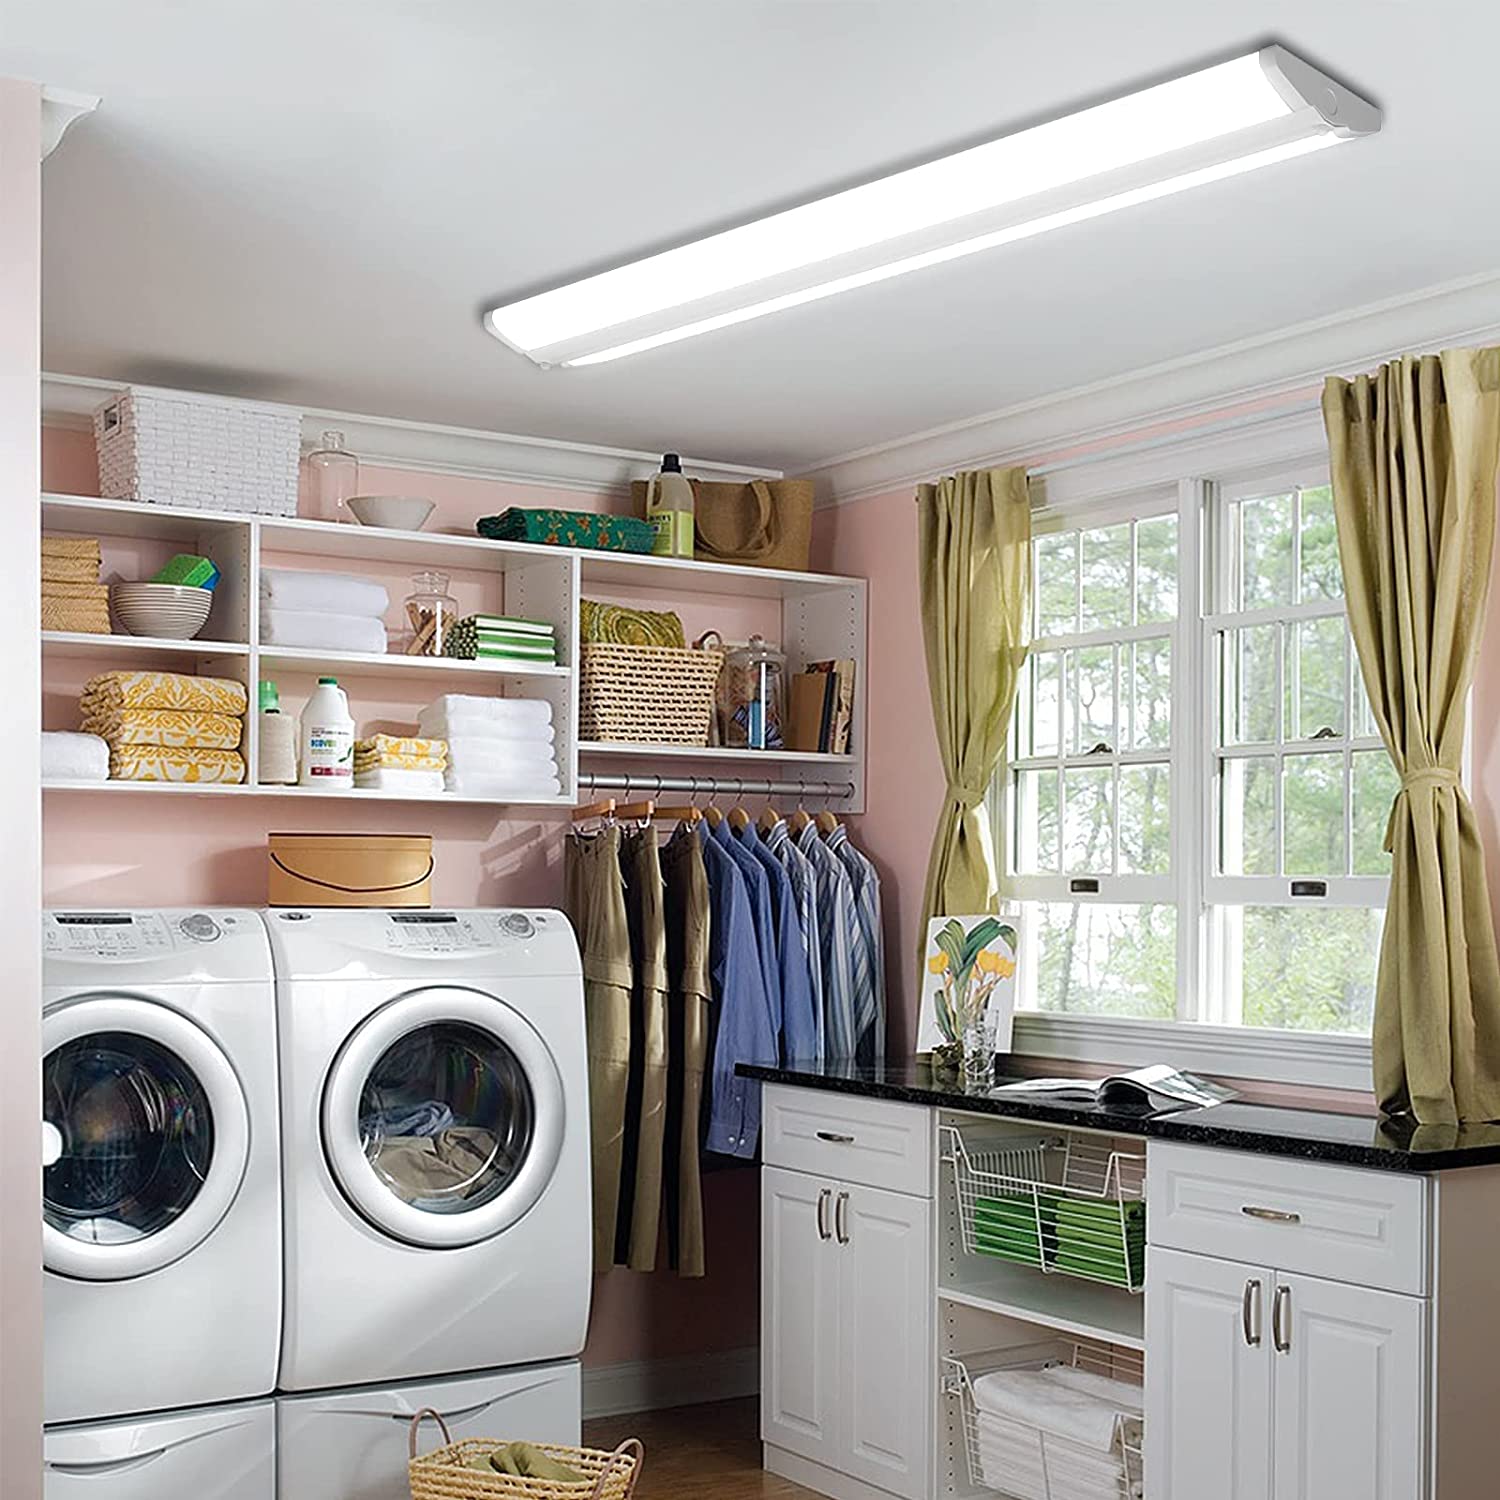
Step 8: Install Lighting Fixtures
Proper lighting is essential in a laundry room to ensure visibility and create a bright and inviting space. Installing the right lighting fixtures can improve functionality and enhance the overall ambiance of the room. Here’s how to install lighting fixtures in your laundry room:
- Assess the Current Lighting: Start by evaluating the existing lighting situation in your laundry room. Determine if you have sufficient lighting or if additional fixtures are needed to brighten up the space.
- Consider Different Types of Lighting: There are three main types of lighting to consider: ambient lighting, task lighting, and accent lighting. Ambient lighting provides overall illumination, task lighting focuses on specific areas for work, and accent lighting adds visual interest and decorative touches.
- Select Suitable Fixtures: Choose lighting fixtures that suit your needs and complement the style of your laundry room. Consider options such as recessed lights, pendant lights, track lighting, or flush mount fixtures. Ensure that the fixtures are rated for use in damp or wet locations.
- Create a Lighting Plan: Determine the placement of the lighting fixtures based on the layout and functionality of your laundry room. Install ambient lighting fixtures to evenly illuminate the space, task lighting fixtures above work areas like the washer and dryer, and accent lighting fixtures to highlight specific features or add a decorative touch.
- Hire an Electrician if Needed: If you are unsure about electrical work or do not have the necessary skills, it is recommended to hire a licensed electrician to install the lighting fixtures safely and in compliance with local electrical codes.
- Test the Lighting Fixtures: Once the installation is complete, test all lighting fixtures to ensure they are functioning correctly. Adjust the positioning of the fixtures if necessary to achieve the desired lighting effect.
Properly installed lighting fixtures can enhance the functionality and aesthetics of your laundry room. They will ensure that you have adequate light for sorting, folding, and carrying out other laundry tasks effectively.
Consider incorporating energy-efficient LED bulbs in your lighting fixtures to reduce energy consumption and lower your utility bills. LED bulbs also have a longer lifespan, reducing the need for frequent bulb replacements.
With the lighting fixtures installed, you can now move on to the next step: adding storage solutions and organization systems in your laundry room.
Read more: What Is A Laundry Room
Step 9: Add Storage Solutions and Organization Systems
Having a well-organized laundry room will make your laundry routine more efficient and enjoyable. Step 9 of creating your laundry room is to add storage solutions and organization systems. This will help you keep your laundry supplies, cleaning products, and other essentials neatly arranged and easily accessible. Here’s what you need to do:
- Assess Your Storage Needs: Consider the items you frequently use in your laundry room, such as detergent, fabric softener, stain removers, and cleaning supplies. Identify the different categories and determine the amount of storage space required for each.
- Choose Suitable Storage Options: Select storage solutions that match your needs and the available space in your laundry room. Options may include open shelves, closed cabinets, baskets, bins, hooks, and wall-mounted organizers.
- Install Shelves and Cabinets: If you haven’t already installed shelves and cabinets in previous steps, now is the time to do so. Place them strategically to maximize storage space and keep frequently used items within easy reach.
- Utilize Baskets and Bins: Use baskets and bins to categorize and store smaller items like socks, cleaning rags, and miscellaneous laundry accessories. Labeling them can help you find what you need quickly.
- Employ Wall-Mounted Organizers: Install hooks, pegboards, or wall-mounted organizers to hang ironing boards, brooms, mops, and other cleaning tools. This saves floor space and keeps everything organized and easily accessible.
- Consider Fold-Down or Pull-Out Features: If space is limited, consider installing fold-down ironing boards or pull-out drying racks to maximize functionality. These can be tucked away when not in use.
- Implement Sorting Systems: Set up laundry hampers or sorting bins to separate whites, colors, delicates, and other specific laundry categories. This makes the sorting process more efficient and simplifies laundry tasks.
- Regularly Declutter and Reorganize: To maintain an organized laundry room, periodically declutter and reorganize. Remove expired products, donate or discard items you no longer use, and ensure everything has its designated place.
By implementing storage solutions and organization systems in your laundry room, you’ll create a clutter-free and functional space that makes your laundry routine more efficient and enjoyable. Keep in mind that customization is key—choose storage options that align with your specific needs and preferences.
With the storage solutions in place, it’s time for the final step: decorating and personalizing your laundry room to make it a space you love.
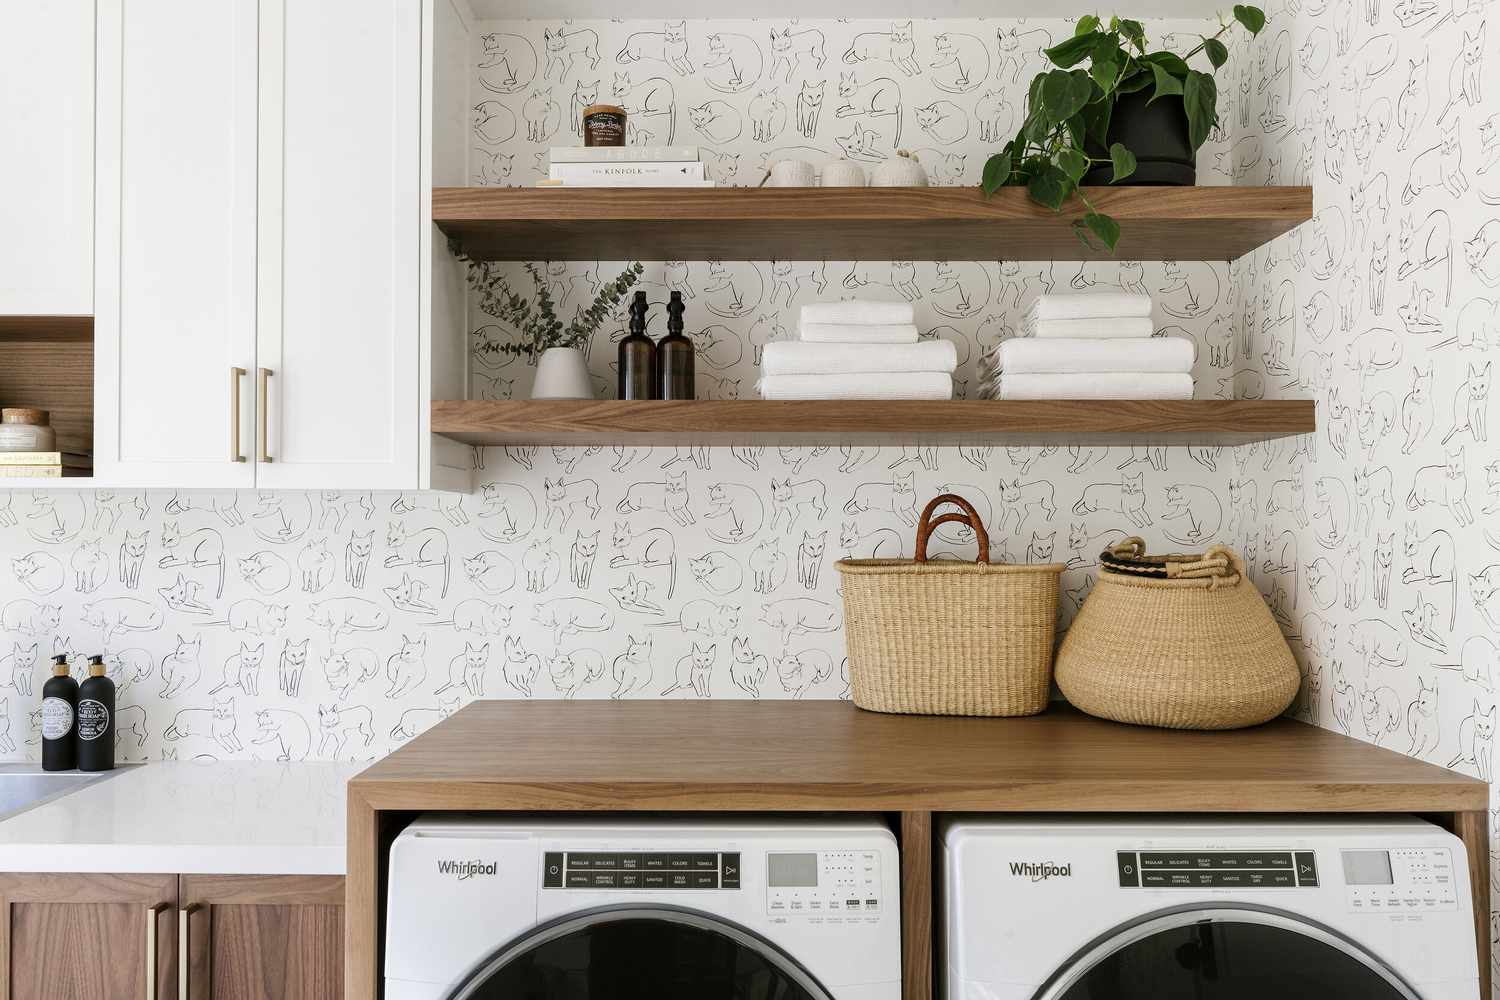
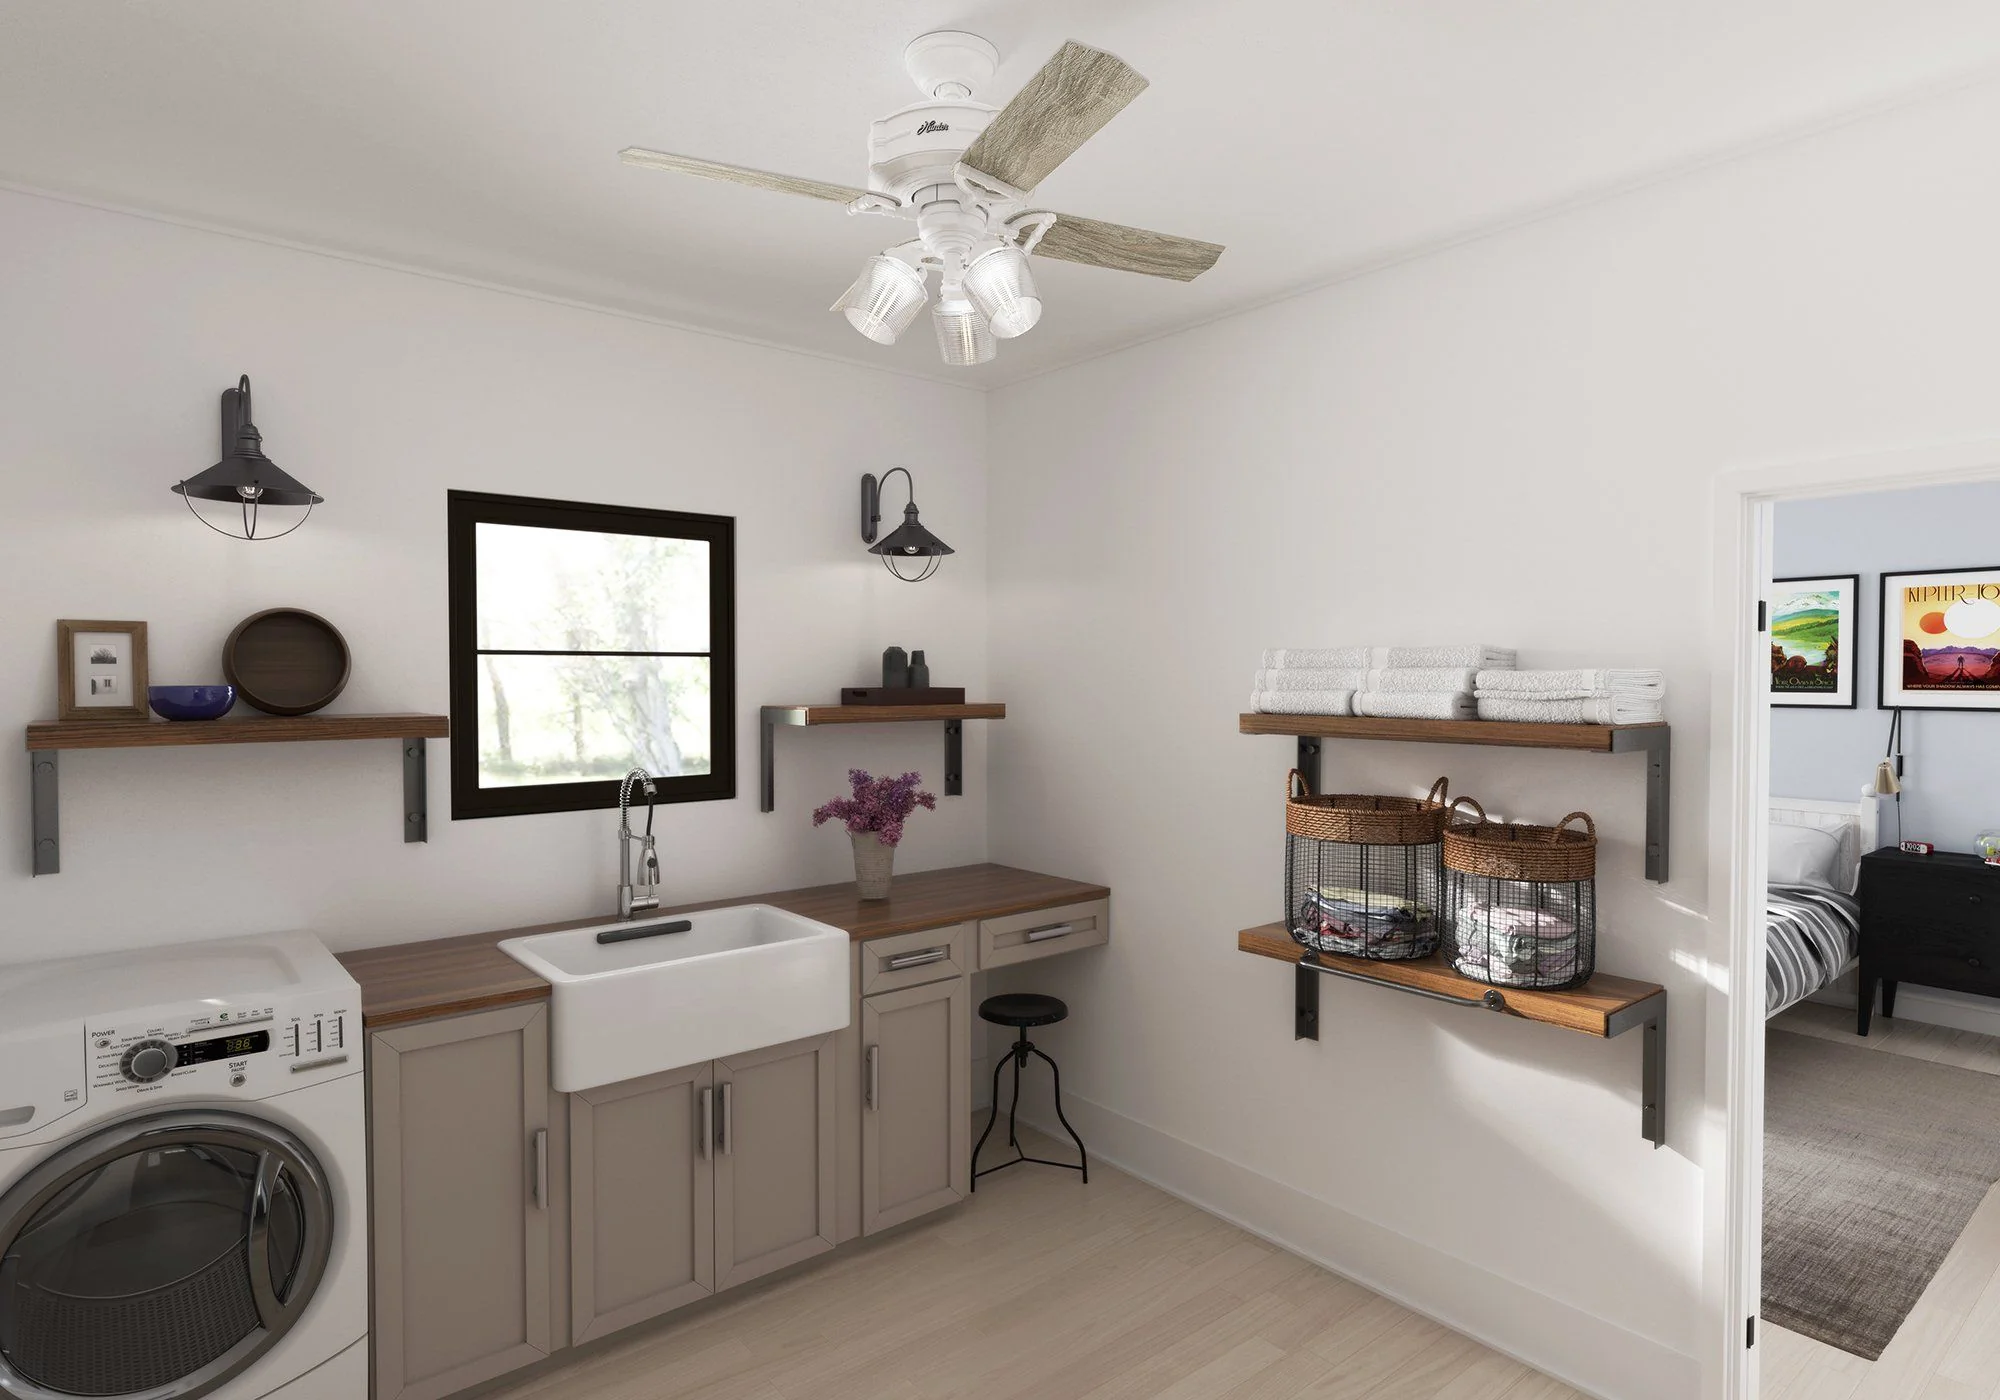
Step 10: Decorate and Personalize the Laundry Room
The final step in creating your dream laundry room is to decorate and personalize the space. Adding aesthetic touches and incorporating your personal style will transform your laundry room into a welcoming and inspiring environment. Here’s how to decorate and personalize your laundry room:
- Choose a Color Scheme: Select a color palette that suits your taste and complements the overall design of your home. Opt for light and soothing colors to create a fresh and invigorating atmosphere.
- Add Art and Decorative Elements: Hang artwork, motivational quotes, or decorative mirrors on the walls to enhance the visual appeal of your laundry room. Consider adding a decorative rug or window treatments to inject personality into the space.
- Include Greenery: Bring life into your laundry room by incorporating indoor plants or fresh flowers. Not only do they add a touch of natural beauty, but they also help purify the air and create a calming environment.
- Install a Backsplash: Consider installing a tile or decorative backsplash behind the sink or above the countertops. This can add a pop of color, protect the wall from splashes, and create a focal point in the room.
- Optimize Lighting: Ensure your laundry room is well-lit by using adequate lighting fixtures. Install task lighting above work areas, such as the folding table or ironing board, and incorporate ambient lighting to create a pleasant and functional space.
- Add Functional Accessories: Include functional accessories that enhance the efficiency of your laundry room, such as a retractable clothesline for air-drying delicate items or a fold-out ironing board for compact storage.
- Utilize Labels and Signage: Label storage bins, shelves, and containers to keep things organized and easily accessible. Use decorative signage or chalkboard labels to add a personal touch.
- Personalize with Photos or Artwork: Display family photos, children’s artwork, or meaningful prints to make the laundry room feel more personal and warm. These personal touches can bring a smile to your face while doing chores.
- Consider Practical Flooring: If you have the opportunity to choose or update the flooring in your laundry room, opt for a durable and easy-to-clean material like vinyl, ceramic tile, or laminate.
- Keep it Clutter-Free: Finally, maintain a clutter-free space by regularly decluttering and organizing. Use organizers and storage solutions to ensure everything has a designated place, and resist the temptation to let items pile up.
Remember, your laundry room should be a reflection of your personal style and preferences. Add decorative elements that make you feel inspired and motivated to tackle your laundry tasks. With a well-decorated and personalized laundry room, you’ll find that doing laundry becomes a more enjoyable and uplifting experience.
Congratulations! You have now completed all ten steps to add a laundry room to your home. By following this comprehensive guide, you have transformed a basic space into a functional, organized, and aesthetically pleasing laundry room that will make your daily chores a breeze. Enjoy your new laundry room!
Conclusion
Creating a laundry room in your home is a practical and rewarding endeavor. By following the ten steps outlined in this comprehensive guide, you can transform a basic space into a functional, organized, and visually appealing laundry room. From choosing the location and assessing the space to installing plumbing and electrical connections, building cabinets and shelving, and adding personal touches, each step plays a crucial role in designing the perfect laundry room for your needs.
With a well-designed laundry room, your laundry routine becomes more efficient and enjoyable. You’ll have a dedicated space to sort, wash, and fold your clothes, while keeping cleaning supplies and accessories neatly organized. Incorporating storage solutions and organization systems ensure that everything has a designated place, making it easier to find and access the items you need.
Don’t forget the importance of aesthetics and personalization in your laundry room. By selecting a color scheme, adding artwork, incorporating greenery, and personalizing the space with decorative elements, you can create a room that reflects your style and brings a sense of joy to your household chores.
Throughout this guide, we have emphasized the importance of seeking professional help when needed, such as for plumbing and electrical work. Hiring licensed plumbers and electricians will ensure that the necessary connections and installations are done safely and in compliance with local building codes.
Now that you have completed all ten steps, you can enjoy the benefits of your new laundry room. Whether it is in a dedicated room, a converted space, or a compact corner, your laundry room will serve as a functional and organized hub for all your laundry needs.
Remember to regularly maintain and update your laundry room as necessary. Regularly declutter, reorganize, and keep the space clean to maximize its functionality and efficiency.
Thank you for following this comprehensive guide. We hope it has provided you with valuable insights and inspiration to create a laundry room that will make your daily laundry tasks a breeze.
Frequently Asked Questions about How To Add A Laundry Room
Was this page helpful?
At Storables.com, we guarantee accurate and reliable information. Our content, validated by Expert Board Contributors, is crafted following stringent Editorial Policies. We're committed to providing you with well-researched, expert-backed insights for all your informational needs.

0 thoughts on “How To Add A Laundry Room”