Articles
How To Install A Shower In A Laundry Room
Modified: October 20, 2024
Learn how to install a shower in your laundry room with our informative articles. Transform your space with these step-by-step guides and expert tips.
(Many of the links in this article redirect to a specific reviewed product. Your purchase of these products through affiliate links helps to generate commission for Storables.com, at no extra cost. Learn more)
Introduction
Installing a shower in a laundry room can be a great addition to any home. It offers convenience and versatility, allowing you to take care of your laundry needs while also having the option to freshen up. Whether you have a large family with a busy laundry schedule or you simply want to make the most of your available space, adding a shower to your laundry room can be a practical and efficient solution.
In this article, we will guide you through the process of installing a shower in your laundry room. We will cover everything you need to consider, from assessing the feasibility of the installation to adding finishing touches. By following this step-by-step guide, you’ll be able to transform your laundry room into a multifunctional space that meets your needs.
Before diving into the installation process, it’s important to note that adding a shower to your laundry room requires some planning and consideration. You’ll need to assess the available space, determine the location for the shower, plan the plumbing and drainage, and make necessary preparations before starting the actual installation. By taking these factors into account, you’ll ensure a smooth and successful project.
Now, let’s get started on the journey to transforming your laundry room into a functional space that allows for both cleaning your clothes and yourself. Get your tools ready, put on your DIY hat, and let’s begin the process of installing a shower in your laundry room!
Key Takeaways:
- Transform your laundry room into a multifunctional space by installing a shower. Assess feasibility, plan plumbing, prepare the room, and add finishing touches for a successful and convenient project.
- Enjoy the convenience and comfort of a newly installed shower in your laundry room. Follow the step-by-step guide, test for leaks, and add personal touches to create a valuable addition to your home.
Read more: How To Install Cabinets In Laundry Room
Assessing the Feasibility of Installing a Shower
Before diving into the process of installing a shower in your laundry room, it’s crucial to assess the feasibility of the project. This involves evaluating the available space, considering the plumbing requirements, and determining if the installation is structurally possible.
First and foremost, measure the size of your laundry room to determine if it has enough space to accommodate a shower. Consider the dimensions required for a comfortable shower experience, including both the shower base and the shower enclosure. Keep in mind that you’ll also need to allocate space for access to the plumbing fixtures, such as the valve controls and drain.
Additionally, take a look at the existing plumbing in the laundry room. Assess whether there are existing water supply lines and a drain that can be easily connected to the shower. If the plumbing infrastructure is not readily available, you may have to consider hiring a professional plumber to extend the necessary lines to your laundry room.
Another important factor to consider is the structural integrity of the room. Evaluate the load-bearing capacity of the floor to ensure it can support the weight of the shower base and occupants. If you have any doubts or concerns about the structural feasibility, consult a structural engineer or contractor before proceeding with the installation.
Lastly, think about the ventilation and moisture control in the laundry room. Showers produce steam and humidity, which can lead to mold and mildew growth if not properly ventilated. Ensure that the room has adequate ventilation, such as a window or exhaust fan, to remove excess moisture and prevent any potential damage.
By thoroughly assessing the feasibility of installing a shower in your laundry room, you’ll avoid any unexpected issues and ensure that the project can be successfully completed. Now that you’ve evaluated the space, plumbing, structure, and ventilation, it’s time to move on to the next step: determining the location for the shower.
Determining the Location for the Shower
After assessing the feasibility of installing a shower in your laundry room, it’s time to determine the optimal location for the shower. Consider the layout of your laundry room and think about the practicality and functionality of different placement options.
Ideally, you’ll want to choose a location that provides easy access to the plumbing lines and fits seamlessly within the existing space. Take into account any obstructions, such as windows, doors, or electrical outlets, that may limit your options. It’s also important to consider the proximity to existing drainage systems to minimize the need for extensive plumbing modifications.
If your laundry room is spacious enough, you can opt for a standalone shower installation in a corner or against a wall. This provides maximum flexibility in terms of design and placement. However, if space is limited, you might need to get creative and consider installing a shower in an unused corner or even converting an existing closet into a shower enclosure.
Keep in mind that the location of the shower should also take privacy into consideration. If possible, try to position the shower away from direct lines of sight and ensure that there are suitable options for privacy, such as a shower curtain or frosted glass panels for the enclosure.
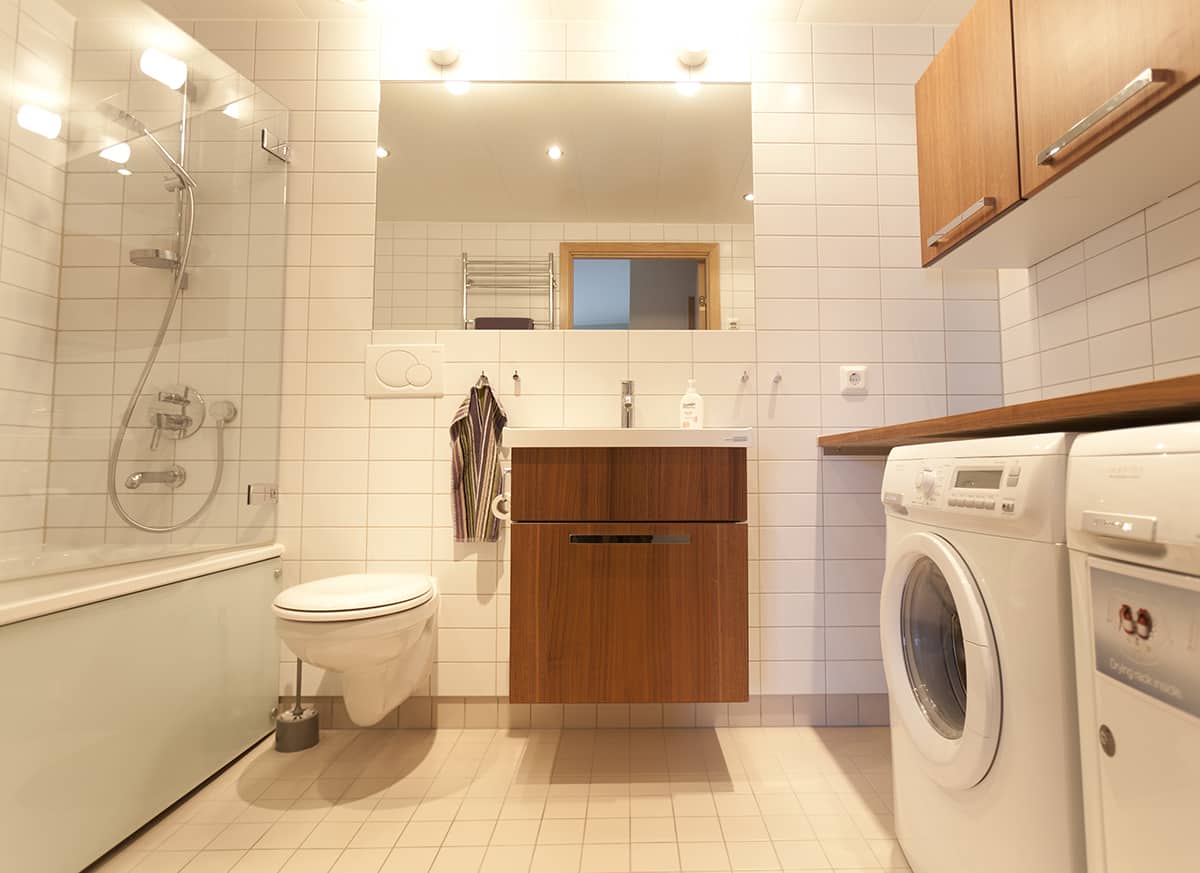
Another factor to consider when determining the location is the proximity to the laundry appliances. Having the shower conveniently located near the washing machine and dryer can make it easier to clean up after working with dirty laundry. You can also consider adding storage space nearby for storing laundry supplies and accessories.
Once you have identified the best location for the shower, mark the area and take precise measurements. This will help you in the next steps of planning the plumbing and preparing the laundry room for installation.
By carefully determining the location for the shower in your laundry room, you’ll ensure that it is both functional and aesthetically pleasing. With the location decided, it’s time to move on to the next step: planning the plumbing and drainage for the shower.
Planning the Plumbing and Drainage
Planning the plumbing and drainage for your shower is a crucial step in the installation process. It involves understanding the necessary fixtures, piping requirements, and ensuring proper drainage to prevent any water damage or leaks.
First, determine the type of shower fixtures you want to install. This includes the showerhead, valve controls, and any additional features like a handheld shower wand or body sprays. Choose fixtures that match your desired water pressure, style, and functionality.
Next, assess the existing plumbing infrastructure in your laundry room. If you’re lucky, you may find that the room already has water supply lines and a drain that can be connected to the shower. In this case, you may only need to make minor adjustments or additions to accommodate the new fixtures.
However, if the plumbing infrastructure is not available or needs to be modified, it’s recommended to hire a professional plumber. They can help extend the necessary water supply lines and install additional valves and connections for the shower fixtures. It’s essential to ensure that the plumbing work is done correctly to prevent any leaks or water damage in the future.
When planning the drainage for your shower, consider the location of the existing drain in your laundry room. If it’s nearby, you can connect the shower drain to the existing drain line. However, if there’s no drain in close proximity, you’ll need to determine the best route for installing a new drain line.
Consult with a plumber or contractor to determine the most efficient and cost-effective way to install the drain line. They can assess the structure of your home and recommend the best approach, whether it involves routing the drain line through the floor or connecting it to an existing plumbing stack.
Additionally, ensure that proper waterproofing measures are taken to protect the surrounding area from water damage. This may include installing a shower pan or membrane beneath the shower base and sealing the joints and corners to prevent water leakage.
By carefully planning the plumbing and drainage for your shower, you’ll ensure that it functions properly and safely. Once the plumbing and drainage details are sorted out, you can move on to the next step: preparing the laundry room for installation.
Preparing the Laundry Room for Installation
Before you begin the actual installation of the shower, it’s essential to prepare the laundry room to ensure a smooth and successful process. This involves clearing the space, making necessary repairs, and considering any additional modifications required for the installation.
Start by removing any items that may obstruct the installation area, including laundry baskets, drying racks, or shelves. Clearing the space will allow you to work more efficiently and provide a clean canvas for the installation.
Next, inspect the walls, floor, and ceiling for any signs of damage or deterioration. Repair any cracks, holes, or water damage to ensure a solid foundation for the shower installation. This might involve patching and repainting the walls or fixing any damaged flooring.
Consider the electrical requirements for the shower, such as providing sufficient power for the lighting or installing a dedicated circuit for any electrical components. If you’re not comfortable working with electrical wiring, it’s crucial to hire a licensed electrician to handle these tasks and ensure compliance with safety regulations.
If you plan to install tile or other wall coverings, now is the time to prepare the surface. Clean the walls and remove any old adhesive or wallpaper. If necessary, apply a suitable primer to ensure proper adhesion of the new materials.
Lastly, consider any additional modifications you may need for the shower installation. This could include adding support studs or bracing for the shower enclosure, adding insulation for soundproofing or temperature control, or even installing a vent fan for improved ventilation. Consult with professionals if you’re unsure about any specific requirements for your project.
By properly preparing the laundry room, you’ll create a solid foundation for the shower installation. Take the time to clear the space, make necessary repairs, and consider any additional modifications needed. Once the laundry room is ready, you can move on to the next step: installing the shower base.
Read more: How To Add A Laundry Room
Installing the Shower Base
Installing the shower base is a crucial step in the process of adding a shower to your laundry room. The shower base serves as the foundation for the shower and provides a waterproof surface for the shower floor. Follow these steps to ensure a proper installation.
1. Begin by ensuring that the subfloor is clean, level, and free from any debris. This will provide a stable surface for the shower base.
2. Position the shower base in the desired location, aligning it with the markings you made during the planning phase. Confirm that it fits properly and feels sturdy.
3. Use a pencil or marker to trace the outline of the shower base on the subfloor. This will serve as a guide for the installation.
4. Apply a layer of thinset mortar within the marked outline, spreading it evenly using a trowel. This will create a stable and level foundation for the shower base.
5. Carefully lift the shower base and place it within the marked outline, pressing it firmly into the mortar. Ensure that it is level and flush with the subfloor.
6. Use a level to double-check that the shower base is perfectly level in all directions. Make any necessary adjustments by adding or removing mortar beneath the base.
7. Secure the shower base to the subfloor using screws or nails, following the manufacturer’s instructions. This will ensure that the base is securely in place.
8. Seal the edges of the shower base with silicone caulk to prevent any water leakage between the base and the subfloor.
9. Allow the mortar and caulk to dry completely before moving on to the next steps of the installation process.
By properly installing the shower base, you’ll create a sturdy and waterproof foundation for your shower. Take your time to ensure that the base is level and securely attached to the subfloor. With the base installed, you can now move on to connecting the plumbing fixtures in the next step.
When installing a shower in a laundry room, make sure to properly waterproof the area to prevent water damage. Use waterproofing materials and seal all seams and corners to ensure a watertight shower enclosure.
Connecting the Plumbing Fixtures
Once the shower base is properly installed, it’s time to connect the plumbing fixtures to complete the functional aspect of your shower in the laundry room. This includes installing the showerhead, valve controls, and any additional fixtures you’ve chosen.
1. Start by connecting the water supply lines to the shower valve. Follow the manufacturer’s instructions for the specific type of valve you’re using. Use plumber’s tape or thread sealant to ensure a tight and leak-free connection.
2. Install the showerhead onto the shower arm, which is attached to the shower valve. Again, refer to the manufacturer’s instructions and use plumber’s tape to prevent any leaks.
3. If you have chosen to install additional fixtures such as a handheld shower wand or body sprays, follow the manufacturer’s instructions to connect them to the appropriate ports on the shower valve. Make sure all connections are secure.
4. Test the water flow to ensure there are no leaks or issues with the plumbing fixtures. Turn on the water supply and inspect each connection for any signs of leakage. Tighten any connections if necessary.
5. If you plan to install a glass shower enclosure, follow the manufacturer’s instructions to attach the door hinges, handles, and other hardware to the shower base and walls. Make sure all screws and brackets are tightened securely.
6. Test the functionality of the plumbing fixtures by turning on the shower and adjusting the temperature and water flow. Check for any leaks, drips, or inconsistencies in the water flow. Make any necessary adjustments or repairs as needed.
Remember to adhere to local plumbing codes and regulations during the installation process. If you’re unsure about any aspect of the plumbing connections, it’s always best to consult with a professional plumber to ensure everything is done correctly and safely.
Once the plumbing fixtures are successfully connected, you’re one step closer to enjoying a refreshing shower in your laundry room. Now, it’s time to move on to the next step: installing the shower enclosure.
Installing the Shower Enclosure
Installing a shower enclosure is an important step in creating a functional and visually appealing shower in your laundry room. The enclosure provides privacy, contains water within the shower area, and adds a finished look to your space. Follow these steps to properly install the shower enclosure.
1. Begin by measuring and marking the desired height for the shower enclosure walls on the walls surrounding the shower base. Use a level to ensure accurate measurements and mark the locations for the wall panels accordingly.
2. If your shower enclosure requires corner posts or support brackets, follow the manufacturer’s instructions to install them securely onto the shower base and walls. Make sure they are level and properly aligned.
3. Install the wall panels of the shower enclosure onto the corner posts or support brackets. Secure the panels in place using screws or other recommended fasteners. Ensure that the panels are properly aligned and level with each other.
4. If your shower enclosure includes a door, follow the manufacturer’s instructions to install the hinges, handle, and any other necessary hardware onto the designated panel. Ensure that the door swings freely and closes properly.
5. Seal the joints and edges of the shower enclosure using silicone caulk to prevent water leakage. Run a continuous bead of caulk along the corners, edges, and where the panels meet the shower base and walls.
6. Allow the caulk to dry completely according to the manufacturer’s instructions before using the shower. This will ensure a watertight seal and prevent any potential leaks.
7. Clean the shower enclosure thoroughly, removing any excess caulk or debris, and ensure that it is ready for use.
Remember to check the manufacturer’s instructions for any specific recommendations or guidelines for installing your specific shower enclosure model. Following these instructions will help ensure a proper and secure installation.
With the shower enclosure installed, you’re almost done with the installation process. Keep reading to learn about the next step: testing and checking for any potential leaks.
Testing and Checking for Leaks
Once you have installed the shower base and enclosure, it’s crucial to test for leaks to ensure that your installation is watertight. Checking for leaks will help you identify and address any potential issues before they lead to water damage or other costly problems. Follow these steps to thoroughly test and check for leaks in your newly installed shower.
1. Close the shower enclosure door or curtain and make sure that all components are properly sealed. This will help contain the water during the testing process.
2. Slowly turn on the water supply and let the shower run for several minutes. Pay close attention to all areas, including the plumbing fixtures, connections, and joints, for any signs of leakage.
3. Inspect the area around the shower base and walls for any water seepage or puddling. Run your hand along the edges of the shower enclosure to feel for any moisture.
4. Check the showerhead, valve controls, and any additional fixtures for leaks. Look for drips or water spraying in unintended directions.
5. If you notice any leaks or drips, tighten any loose connections or fixtures. If the issue persists, consider replacing faulty parts or seeking assistance from a professional plumber.
6. If you have a shower pan or membrane beneath the shower base, inspect it for any signs of water penetration. Look for wet spots or discoloration that may indicate a leak.
7. Open the shower enclosure and thoroughly inspect the walls, floor, and surrounding areas for any signs of water damage or moisture. Look for peeling paint, warped surfaces, or mold growth.
8. If you find any leaks or areas of concern, address them promptly. Repair or replace any damaged components and ensure that all connections are watertight.
Continuously monitor your shower for any signs of future leaks or issues. Regular maintenance and inspection will help prevent water damage and prolong the lifespan of your shower installation.
By thoroughly testing and checking for leaks, you can ensure a watertight and reliable shower in your laundry room. With your shower installation successfully tested, it’s time to move on to the final step: adding the finishing touches to complete the project.
Read more: How To Clean A Laundry Room
Adding Finishing Touches
After successfully installing your shower in the laundry room and ensuring a leak-free and functional space, it’s time to add the finishing touches to complete your project. These final touches will enhance the overall aesthetic appeal and functionality of your shower. Follow these steps to add the finishing touches to your newly installed shower.
1. Choose a shower curtain or door that fits your style and complements the overall design of your laundry room. Install the curtain rod or hang the shower door according to the manufacturer’s instructions.
2. Install a shower caddy or shelving unit to provide convenient storage space for toiletries and bath essentials. Opt for water-resistant materials that can withstand the humid environment of the shower.
3. Consider installing appropriate lighting in the shower area. Ensure that the lighting fixtures are rated for use in moisture-prone areas.
4. Add a mat or non-slip surface inside the shower to prevent slipping and provide additional comfort.
5. Consider installing a vent fan in the laundry room to improve air circulation and reduce humidity. This will help prevent mold and mildew growth and keep the area fresh.
6. Add personal touches such as decorative accents, artwork, or plants to create a more inviting and pleasant showering experience.
7. Keep the area clean and well-maintained by regularly removing any soap scum or buildup. This will help maintain the appearance and functionality of your newly installed shower.
Remember to follow any specific manufacturer’s recommendations for care and maintenance of the shower fixtures and enclosure. Regularly inspect the shower for any signs of wear or damage and address them promptly to ensure a long-lasting and enjoyable shower experience.
With the finishing touches complete, step back and admire your newly installed shower in the laundry room. You have successfully transformed your space into a multifunctional area that caters to both your laundry needs and personal hygiene. Enjoy the convenience and comfort that your new shower brings to your daily routine.
Conclusion
Congratulations on successfully installing a shower in your laundry room! By following the step-by-step guide outlined in this article, you have transformed your laundry room into a versatile space that offers both practicality and convenience. Adding a shower to your laundry room not only allows you to tackle your laundry needs but also provides the option to freshen up and save time.
Throughout the process, you assessed the feasibility of the installation, determined the location for the shower, planned the plumbing and drainage, prepared the laundry room, installed the shower base, connected the plumbing fixtures, installed the shower enclosure, tested for leaks, and added the finishing touches. Each step was crucial in ensuring a successful and functional shower installation.
Remember, safety is paramount during any home improvement project. If you ever feel unsure about a step or encounter any electrical or plumbing issues, it’s always best to seek the assistance of a professional to ensure everything is done correctly and safely.
Now that your shower installation is complete, enjoy the convenience and comfort it brings to your daily life. Whether you’re refreshing after a workout, washing up after a messy project, or simply indulging in a relaxing shower, your laundry room shower will prove to be a valuable addition to your home.
Regular maintenance and inspection will help keep your shower in excellent condition. Be sure to clean it regularly, address any issues promptly, and replace any worn-out components to ensure its longevity.
Thank you for joining us on this journey to install a shower in your laundry room. We hope this guide has provided you with the knowledge and inspiration you need to tackle this project with confidence. Embrace the convenience and multifunctionality that your newly installed shower brings, and enjoy the benefits for years to come!
Now that you've mastered installing a shower in your laundry room, why not tackle more rewarding DIY projects or dive into another handy shower installation guide? Discovering the joys of DIY not only adds personal touches to your home but also boosts your skill set. On the other hand, understanding how to properly install key bathroom fixtures ensures your home improvements are both functional and stylish. Ready for more? Check out our articles on the wonders of do-it-yourself work and detailed steps for fitting a new shower or tub faucet.
Frequently Asked Questions about How To Install A Shower In A Laundry Room
Was this page helpful?
At Storables.com, we guarantee accurate and reliable information. Our content, validated by Expert Board Contributors, is crafted following stringent Editorial Policies. We're committed to providing you with well-researched, expert-backed insights for all your informational needs.


0 thoughts on “How To Install A Shower In A Laundry Room”