Articles
How To Remodel A Laundry Room
Modified: January 19, 2024
Discover expert articles on how to remodel a laundry room and transform it into a functional and stylish space. Explore tips, ideas, and inspiration for your laundry room renovation project.
(Many of the links in this article redirect to a specific reviewed product. Your purchase of these products through affiliate links helps to generate commission for Storables.com, at no extra cost. Learn more)
Introduction
Welcome to a guide on how to remodel a laundry room. The laundry room is an essential space in any home, and a well-designed and organized laundry room can make a world of difference in your daily routine. Whether you have a small laundry closet or a spacious room, this article will provide you with step-by-step instructions on how to transform your laundry space into a functional, efficient, and aesthetically pleasing area.
Remodeling a laundry room may seem like a daunting task, but with careful planning and the right approach, it can be a rewarding project that adds value to your home. From assessing your current laundry room setup to choosing the right materials and appliances, through to the final finishing touches, we will cover everything you need to know to create the laundry room of your dreams.
But before we dive into the remodeling process, it’s important to recognize the significance of the laundry room. It is a space that often gets overlooked when it comes to design and organization, but it plays a crucial role in our daily lives. A well-designed laundry room can streamline your laundry routine, making it more efficient and less time-consuming. Additionally, a well-organized space can improve your overall home cleanliness and minimize clutter.
Remodeling your laundry room also presents an opportunity to incorporate modern features and technologies that can further enhance your laundry experience. From energy-efficient appliances to smart-home integration, you can create a laundry room that not only looks great but also offers convenience and functionality.
Throughout this guide, we will outline the key steps involved in remodeling a laundry room. This will include assessing the current layout, setting a budget, planning the new design, and making decisions about materials and appliances. We will also cover the practical aspects of the remodeling process, such as demolition, electrical and plumbing considerations, and installation of cabinets, countertops, and flooring. Finally, we will discuss the finishing touches and organization techniques that will give your newly remodeled laundry room its final charm.
So, whether you are starting from scratch with a blank canvas or looking to revamp your existing laundry space, let’s embark on this remodeling journey and create a laundry room that is both functional and beautiful.
Key Takeaways:
- Transforming a laundry room involves careful planning, from assessing the current layout to selecting materials and appliances. By following the ten essential steps, you can create a functional, efficient, and aesthetically pleasing space that enhances your daily routine.
- The final touches and organization of the laundry room are crucial for maximizing functionality and creating an inviting atmosphere. By optimizing storage, setting up designated areas, and adding decorative elements, you can enjoy a well-functioning and aesthetically pleasing space for your laundry tasks.
Read more: How To Add A Laundry Room
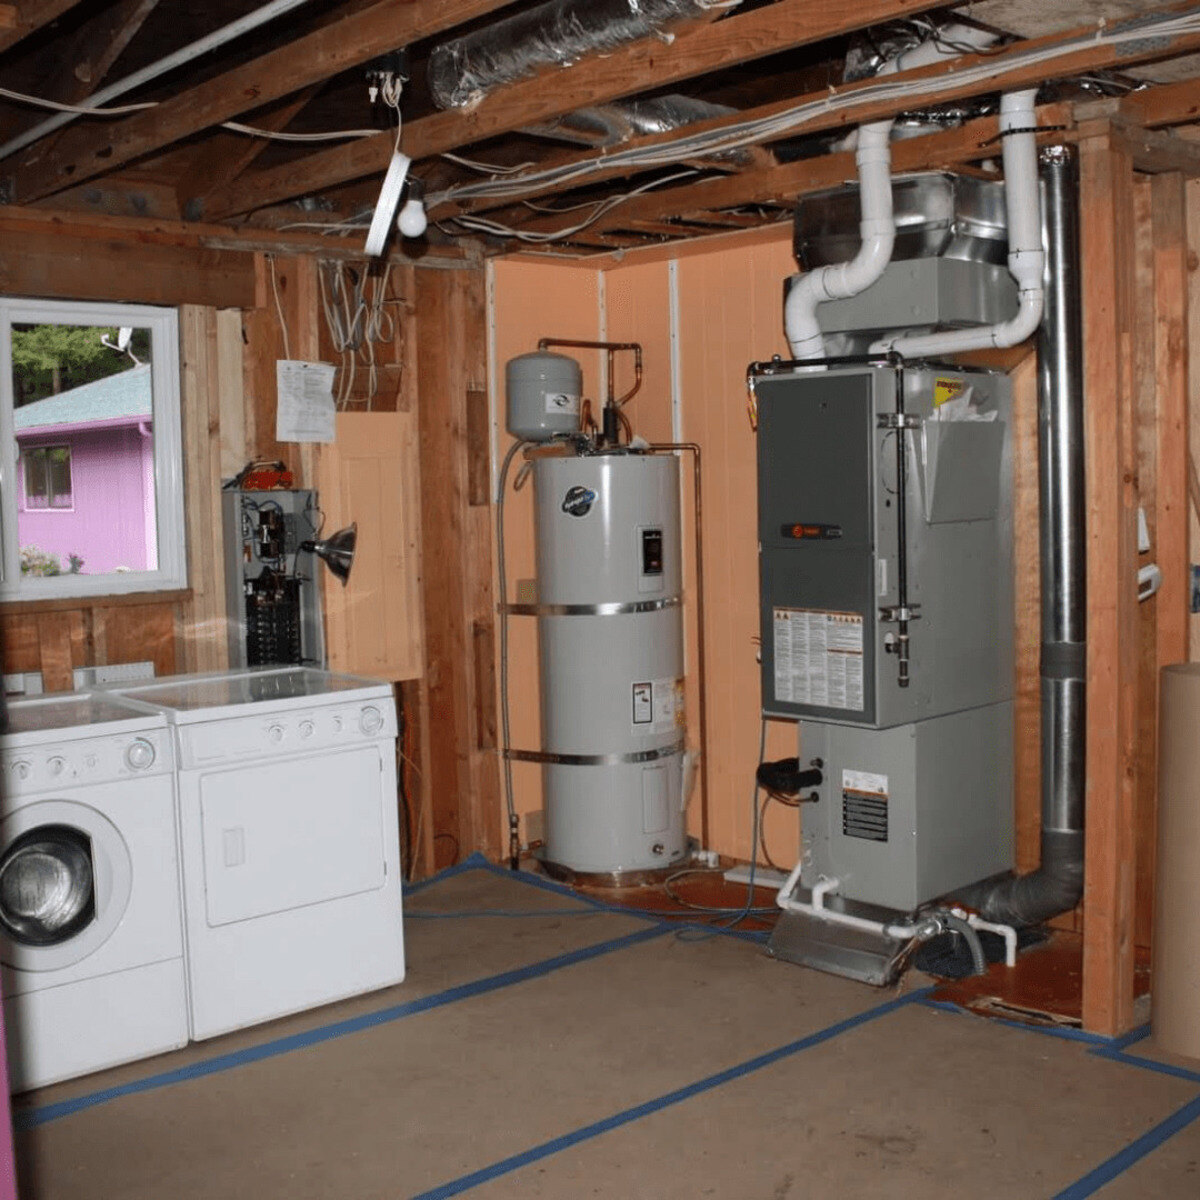
Step 1: Assessing the Current Laundry Room
The first step in remodeling your laundry room is assessing the current space. This involves taking a close look at the layout, functionality, and any existing issues that need to be addressed. By thoroughly assessing your current laundry room, you will have a better understanding of what changes need to be made and how to optimize the space.
Start by measuring the dimensions of your laundry room. This will help you determine the available space and plan the layout for your new laundry room. Take note of any obstacles such as windows, doors, or utility hookups that may impact the design choices.
Next, evaluate the functionality of your current laundry room. Is everything in working order, or are there any repairs or improvements required? Check for any leaks, clogged drains, or faulty electrical outlets. It’s important to address these issues before proceeding with the remodeling process to avoid any potential problems down the line.
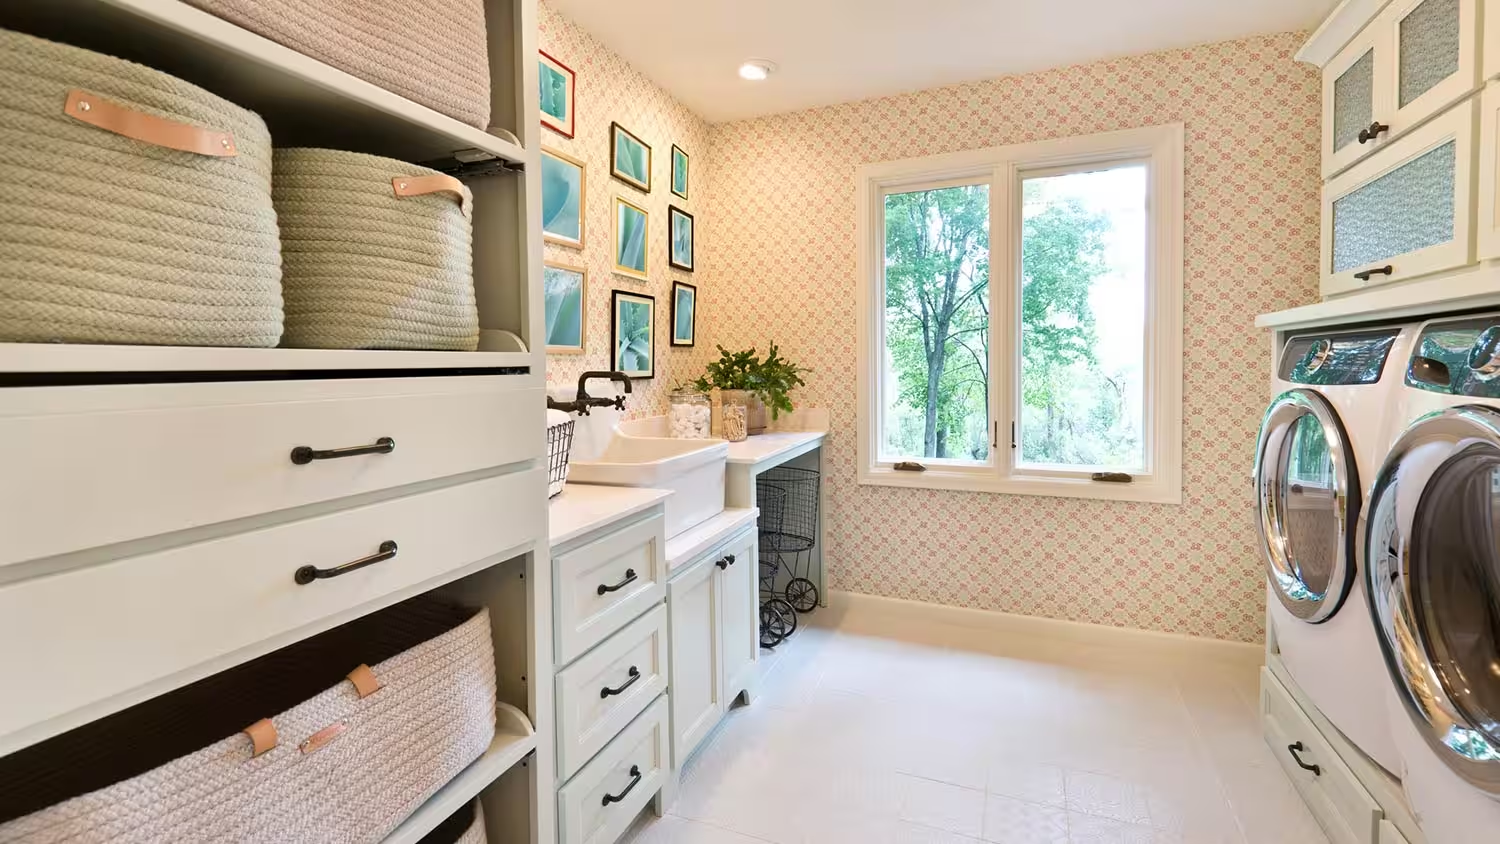
Assess the storage options in your current laundry room. Are there enough cabinets, shelves, or closets to store your laundry supplies, cleaning products, and other items? Consider whether you need to add more storage solutions and how you can maximize the available space.
Take a look at the lighting in your laundry room. Good lighting is crucial for a functional and inviting space. If the lighting is inadequate, consider installing additional fixtures or upgrading to energy-efficient LED lights.
Evaluate the ventilation in your laundry room. Proper ventilation is essential to prevent mold and mildew growth and to remove excess moisture and odors. If your current space lacks proper ventilation, consider adding a vent or exhaust fan to improve airflow.
Lastly, assess the overall aesthetics of your laundry room. Consider the color scheme, flooring, and any existing decor. Determine whether these elements align with your desired style and whether you want to make any changes to achieve a cohesive and visually appealing look.
By thoroughly assessing your current laundry room, you will have a clear idea of its strengths and weaknesses. This information will guide your decision-making process as you move forward with the remodeling project. With a solid understanding of your current space, you can create a plan that addresses the specific needs of your laundry routine and transforms your laundry room into a functional and beautiful space.
Step 2: Setting a Budget
Setting a budget is a crucial step in any remodeling project, including remodeling your laundry room. It helps to establish a financial framework and ensures that you stay on track throughout the renovation process. By defining your budget upfront, you can allocate funds to various aspects of the project and make informed decisions about materials, appliances, and installation.
Start by determining how much you are willing and able to spend on your laundry room remodel. Consider your overall financial situation and how much you are comfortable investing in this particular project. It’s important to set a realistic budget that takes into account not only the materials and labor costs but also any unexpected expenses that may arise.
Once you have established the overall budget, break it down into different categories. Allocate specific amounts for materials, appliances, labor, and any additional expenses such as permits or professional consultations. This will help you prioritize your spending and ensure that the most important aspects of the remodel are adequately funded.
Research the average costs of materials and appliances that you intend to include in your laundry room remodel. This will give you a rough estimate of how much you will need to allocate for these items. It’s important to be thorough in your research and consider various options to find the best quality materials within your budget.
Obtain quotes from contractors or professionals for the labor costs involved in the project. Compare these quotes and consider the level of expertise and quality of work offered by each contractor. Remember to factor in any additional expenses such as demolition or installation fees.
Be prepared for unexpected expenses that may arise during the remodeling process. It’s wise to set aside a contingency fund of around 10-20% of your total budget to account for any unforeseen circumstances, such as hidden damage or necessary changes to the initial plan.
As you work on setting your budget, keep in mind that it’s essential to strike a balance between cost and quality. While it may be tempting to opt for the cheapest materials or labor, investing in higher-quality options can save you money in the long run by ensuring durability and reducing the need for frequent repairs or replacements.
Once you have set a budget for your laundry room remodel, make sure to track your expenses closely throughout the project. Regularly review your spending to ensure that you are staying within your allocated budget and make adjustments as needed.
By setting a well-defined budget for your laundry room remodel, you can make informed decisions, prioritize your spending, and ensure that your project progresses smoothly without any financial surprises. With careful planning, you can create a beautiful and functional laundry room that meets your needs and stays within your desired budget.
Step 3: Planning the Layout
Planning the layout of your laundry room is a crucial step in the remodeling process. A well-designed layout will optimize the functionality and flow of your laundry room, making it easier and more efficient to complete your laundry tasks. To plan the layout effectively, consider the following factors:
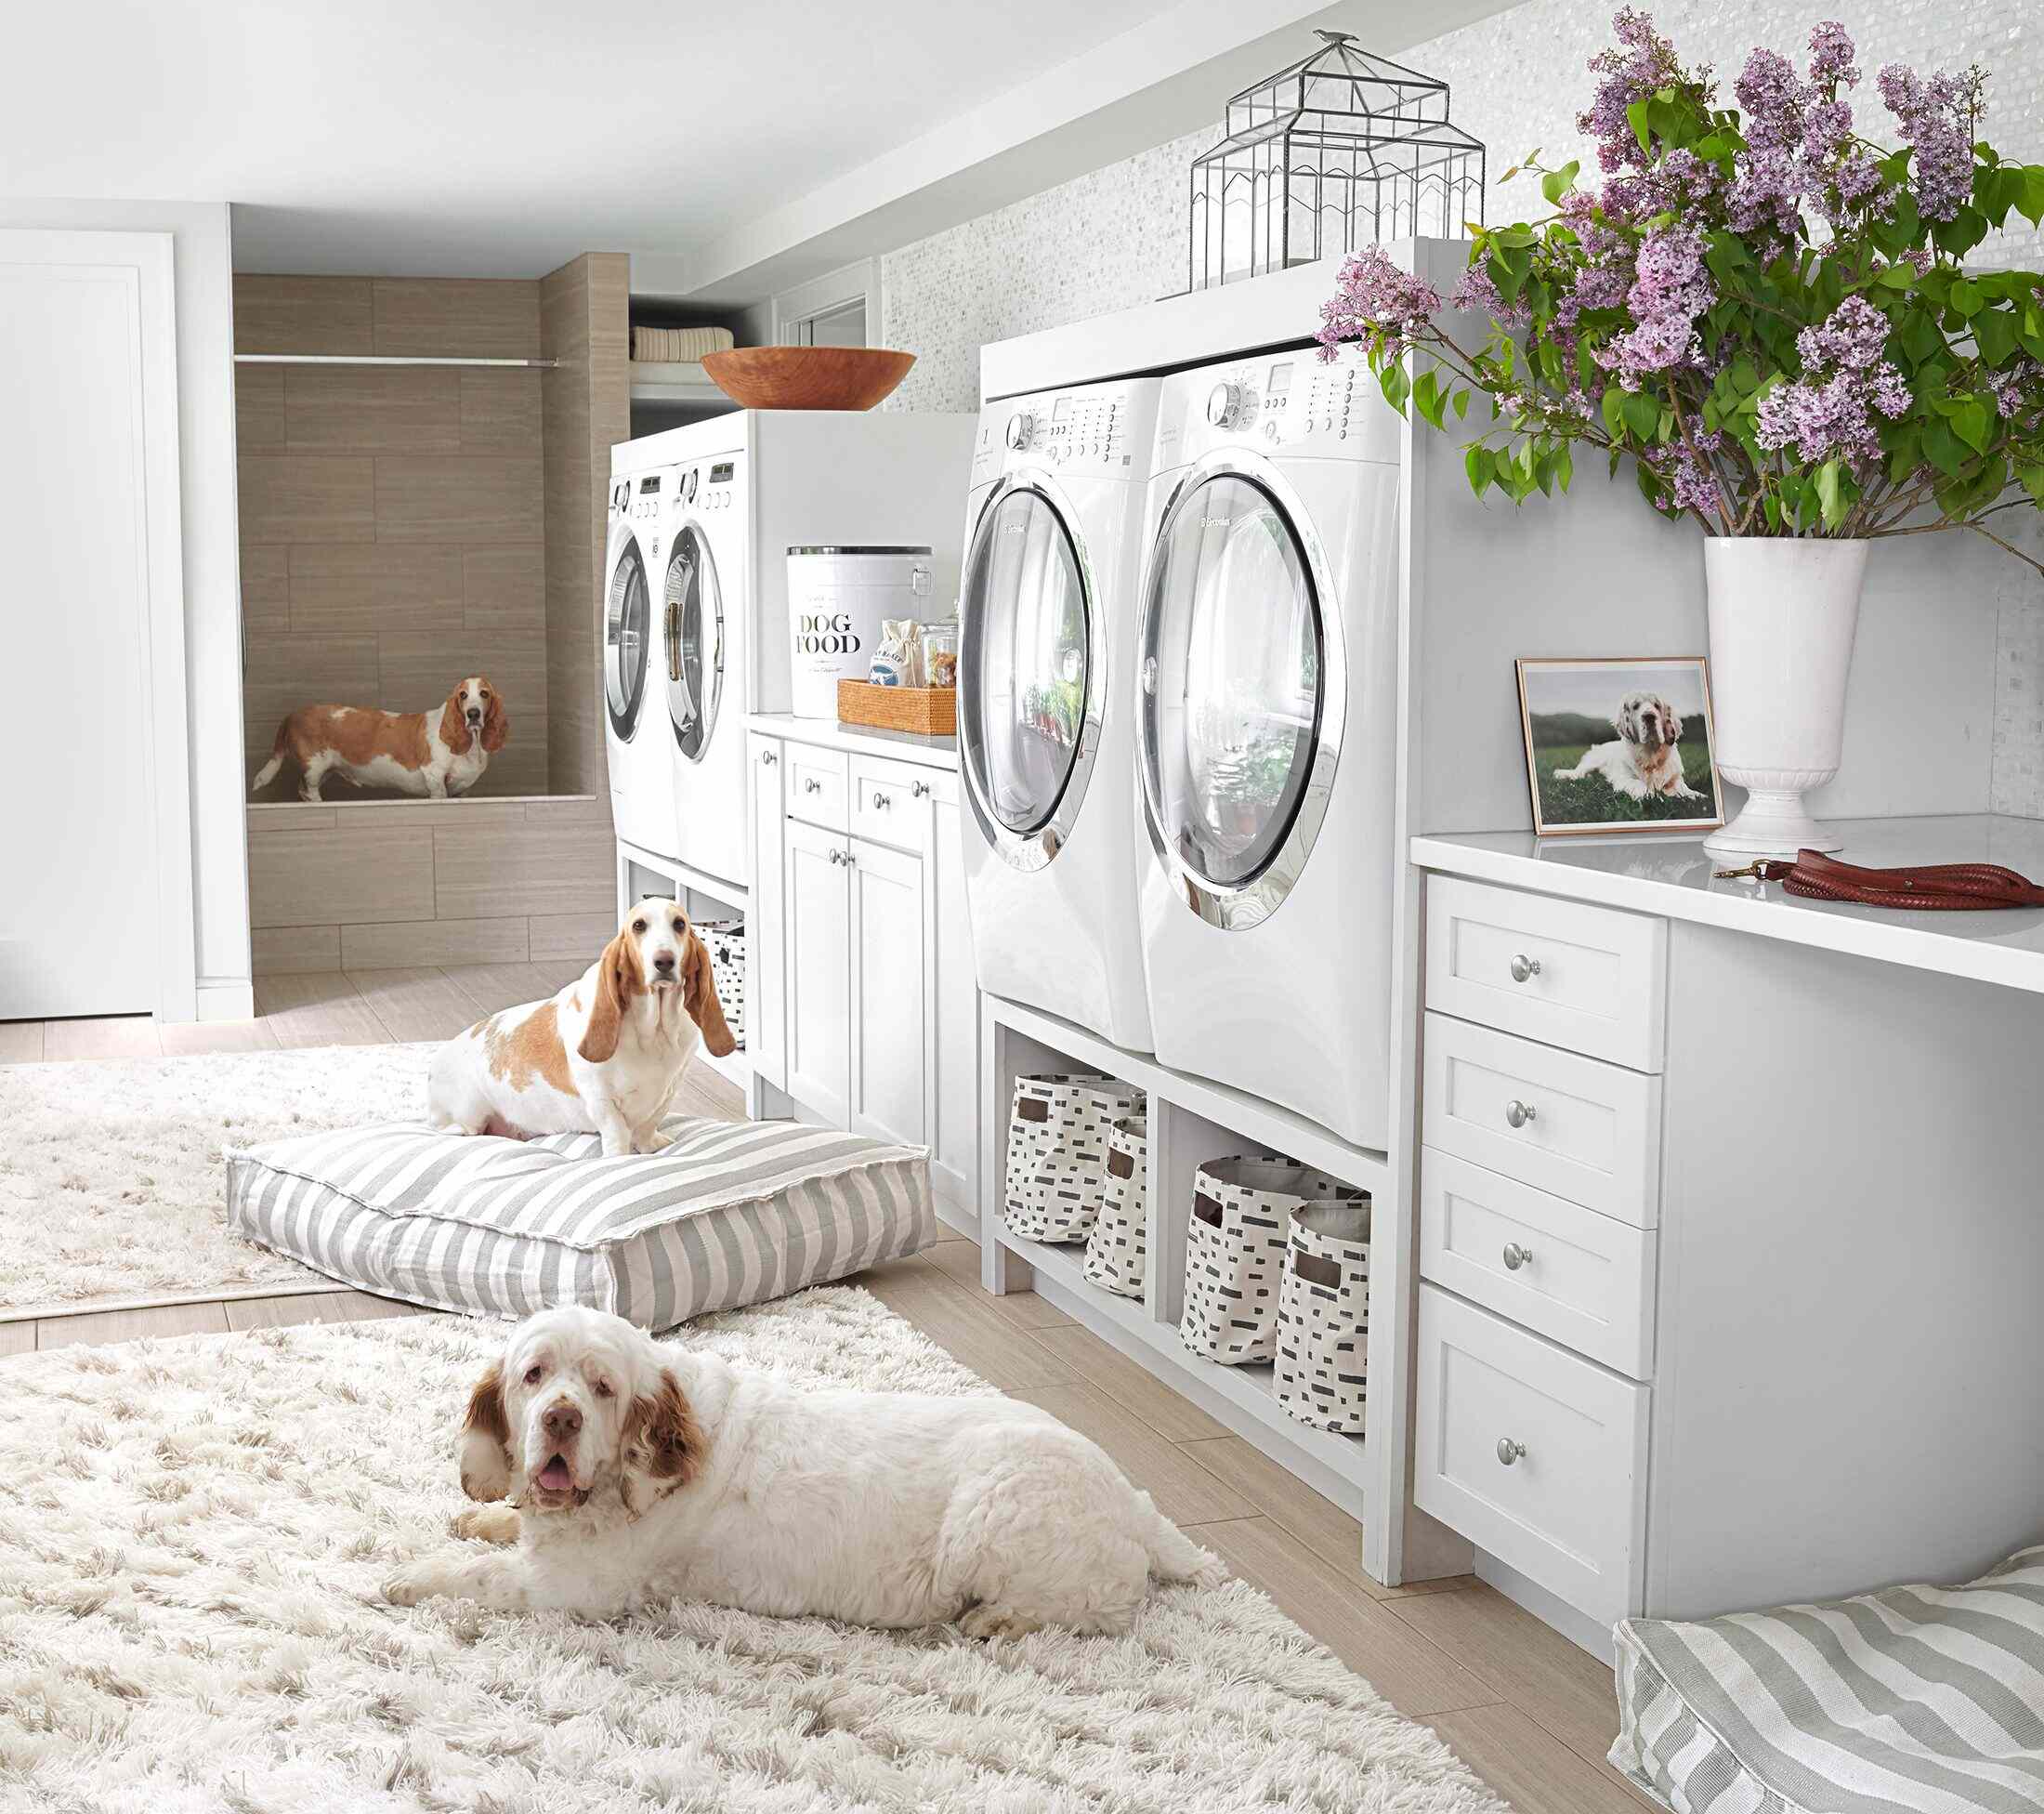
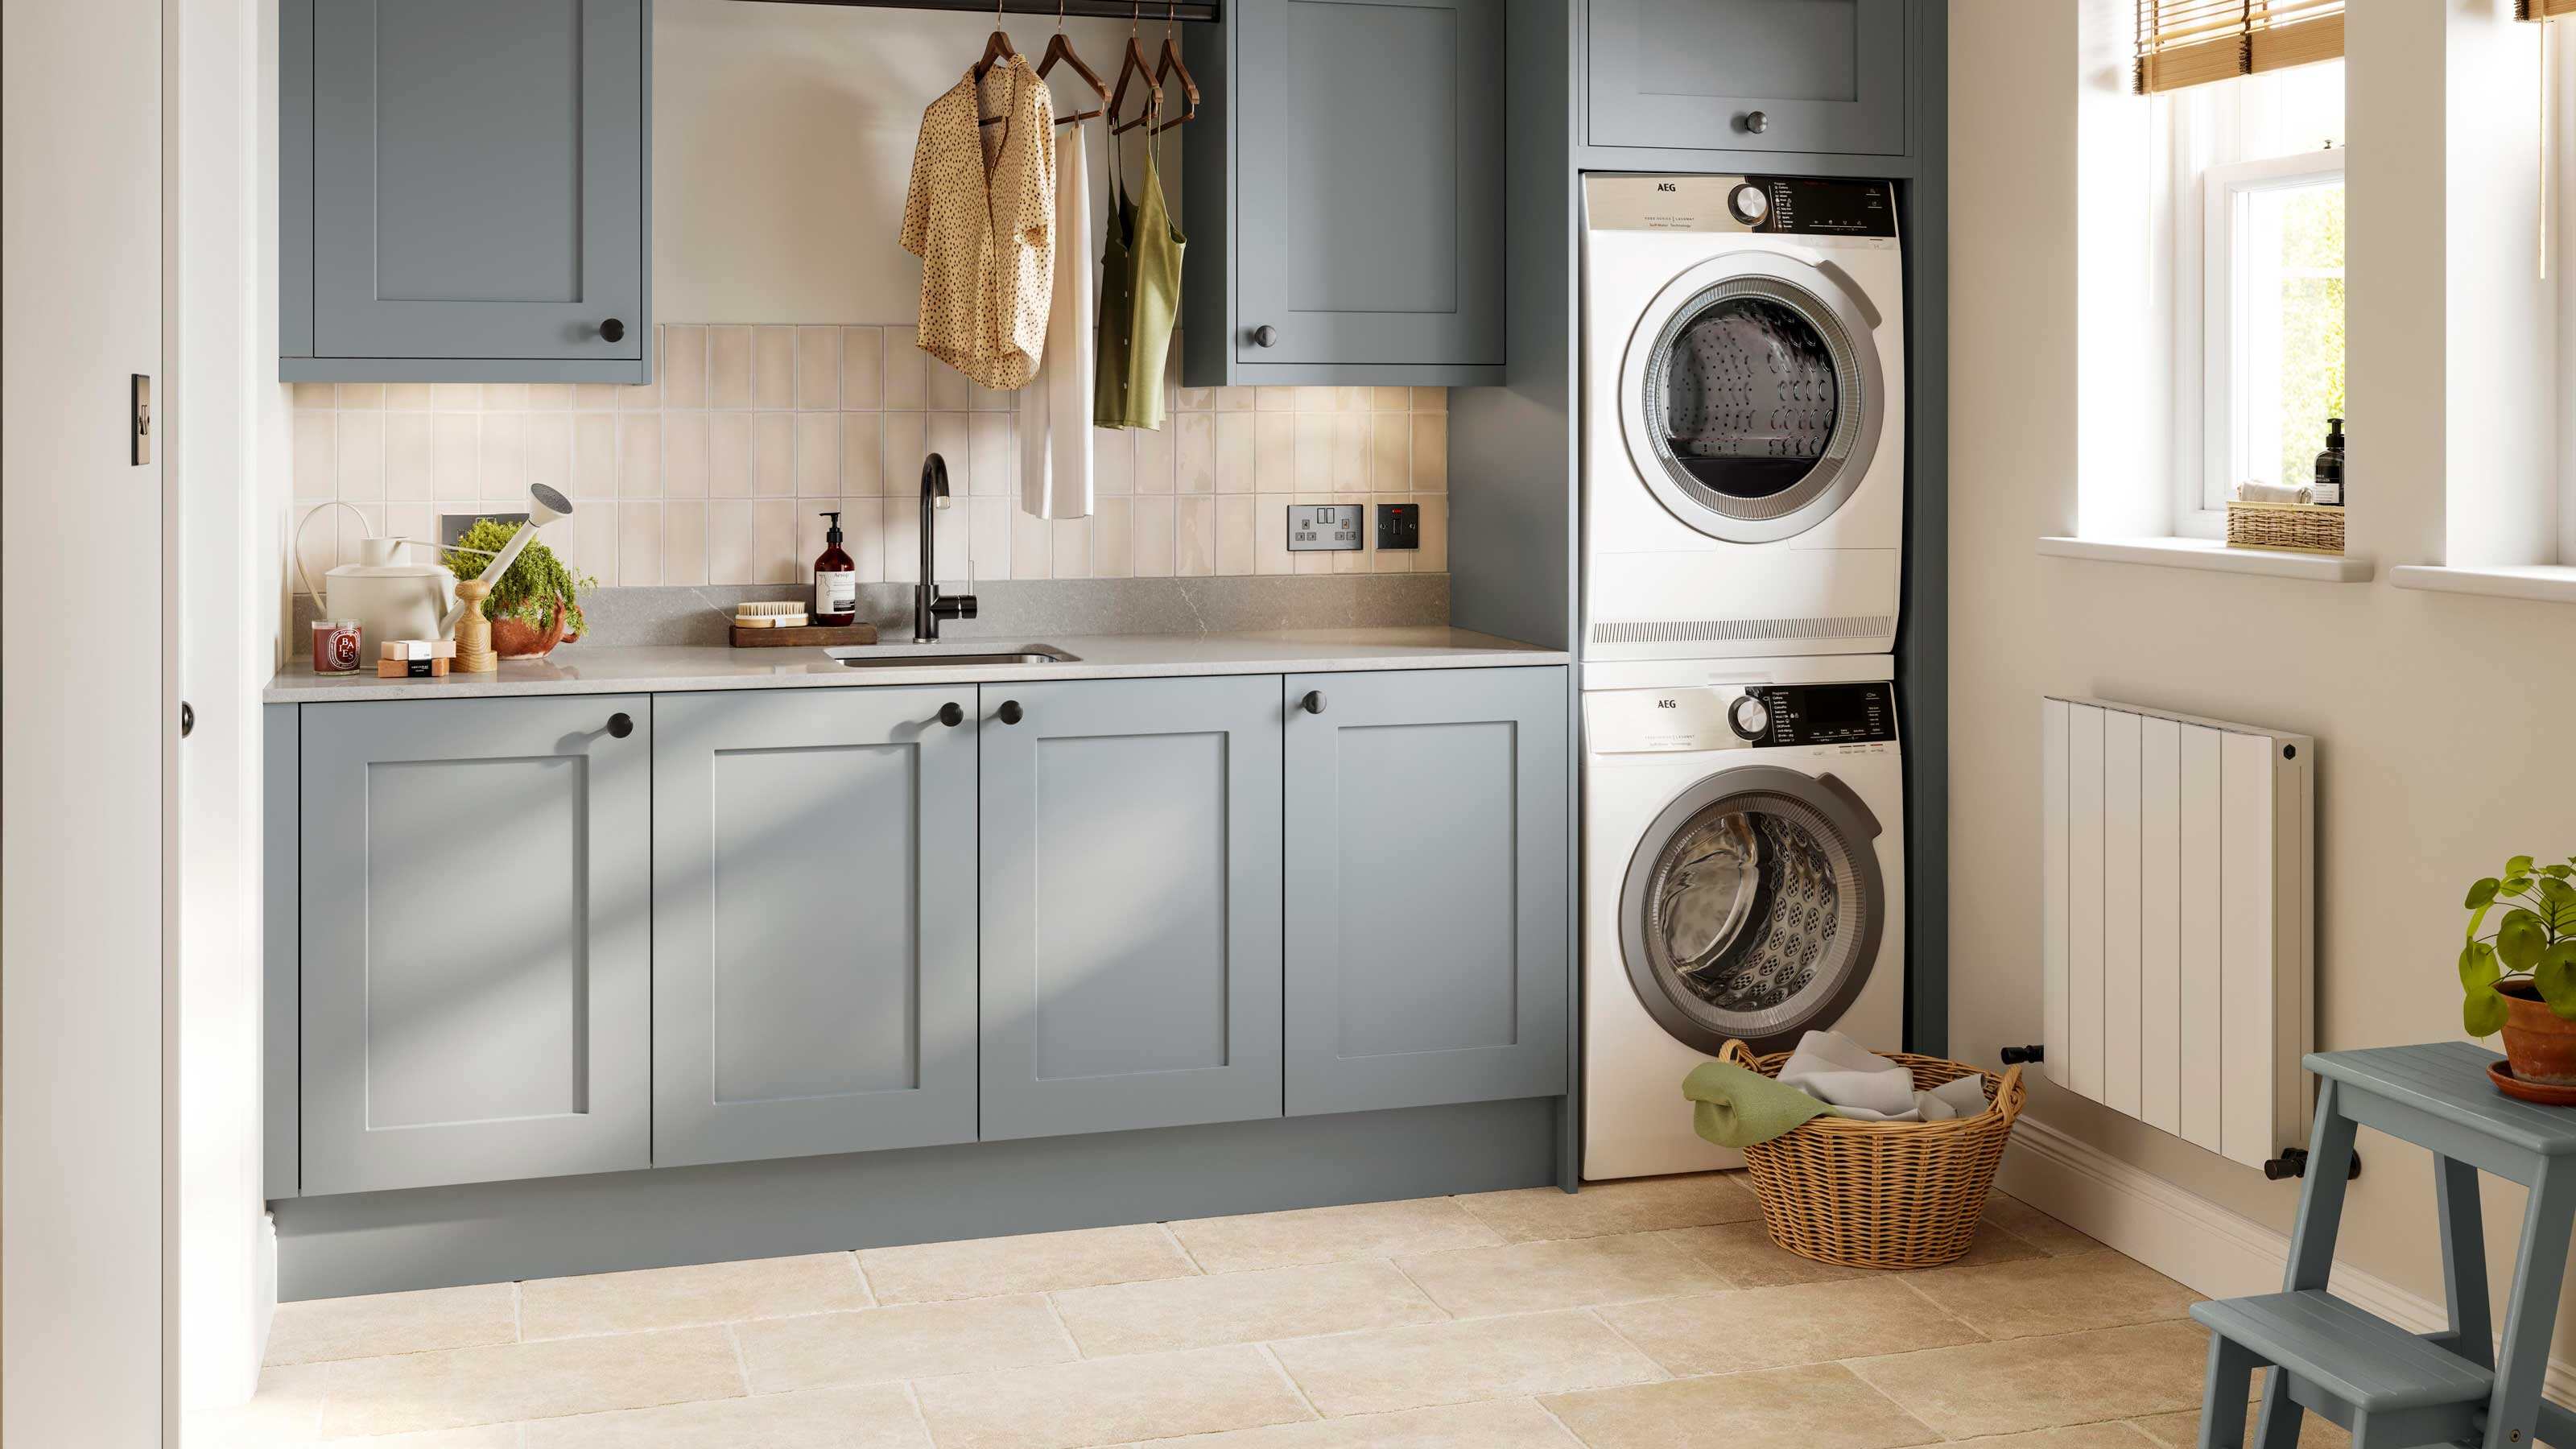
1. Space utilization: Take into account the available square footage in your laundry room and determine how to best utilize the space. Consider the placement of essential elements, such as the washer and dryer, sink, storage cabinets, and countertops. Optimize the layout to ensure that each component is easily accessible and that there is enough room for you to move around comfortably while carrying out your laundry tasks.
2. Workflow: Design the layout of your laundry room based on the workflow of your laundry routine. Consider the logical flow of tasks, from sorting and pre-treating to washing, drying, and folding. Arrange the different areas of your laundry room in a way that allows for a smooth and efficient movement between these tasks.
3. Ergonomics: Prioritize ergonomics in your laundry room layout. Consider the height and positioning of appliances, countertops, and sinks to ensure that they are comfortable to use. Avoid placing items too high or too low, as this can cause strain on your back or arms during repetitive tasks.
4. Storage solutions: Assess your storage needs and plan the layout to incorporate adequate storage options. Determine whether you require overhead cabinets, open shelves, or drawers to store laundry supplies, cleaning products, and other items. Use vertical space efficiently to maximize storage capacity.
5. Utility connections: Take into account the location of existing utility connections, such as water supply and drainage, as well as electrical outlets and venting. Plan the layout to align with these connections to minimize the need for extensive modifications or re-routing during the remodeling process.
6. Consider future needs: Anticipate any potential future needs or changes in your laundry routine. For example, if you plan to upgrade to a larger washer or dryer in the future, ensure that there is enough space to accommodate these appliances. Design the layout in a way that allows for flexibility and adaptability as your needs may evolve over time.
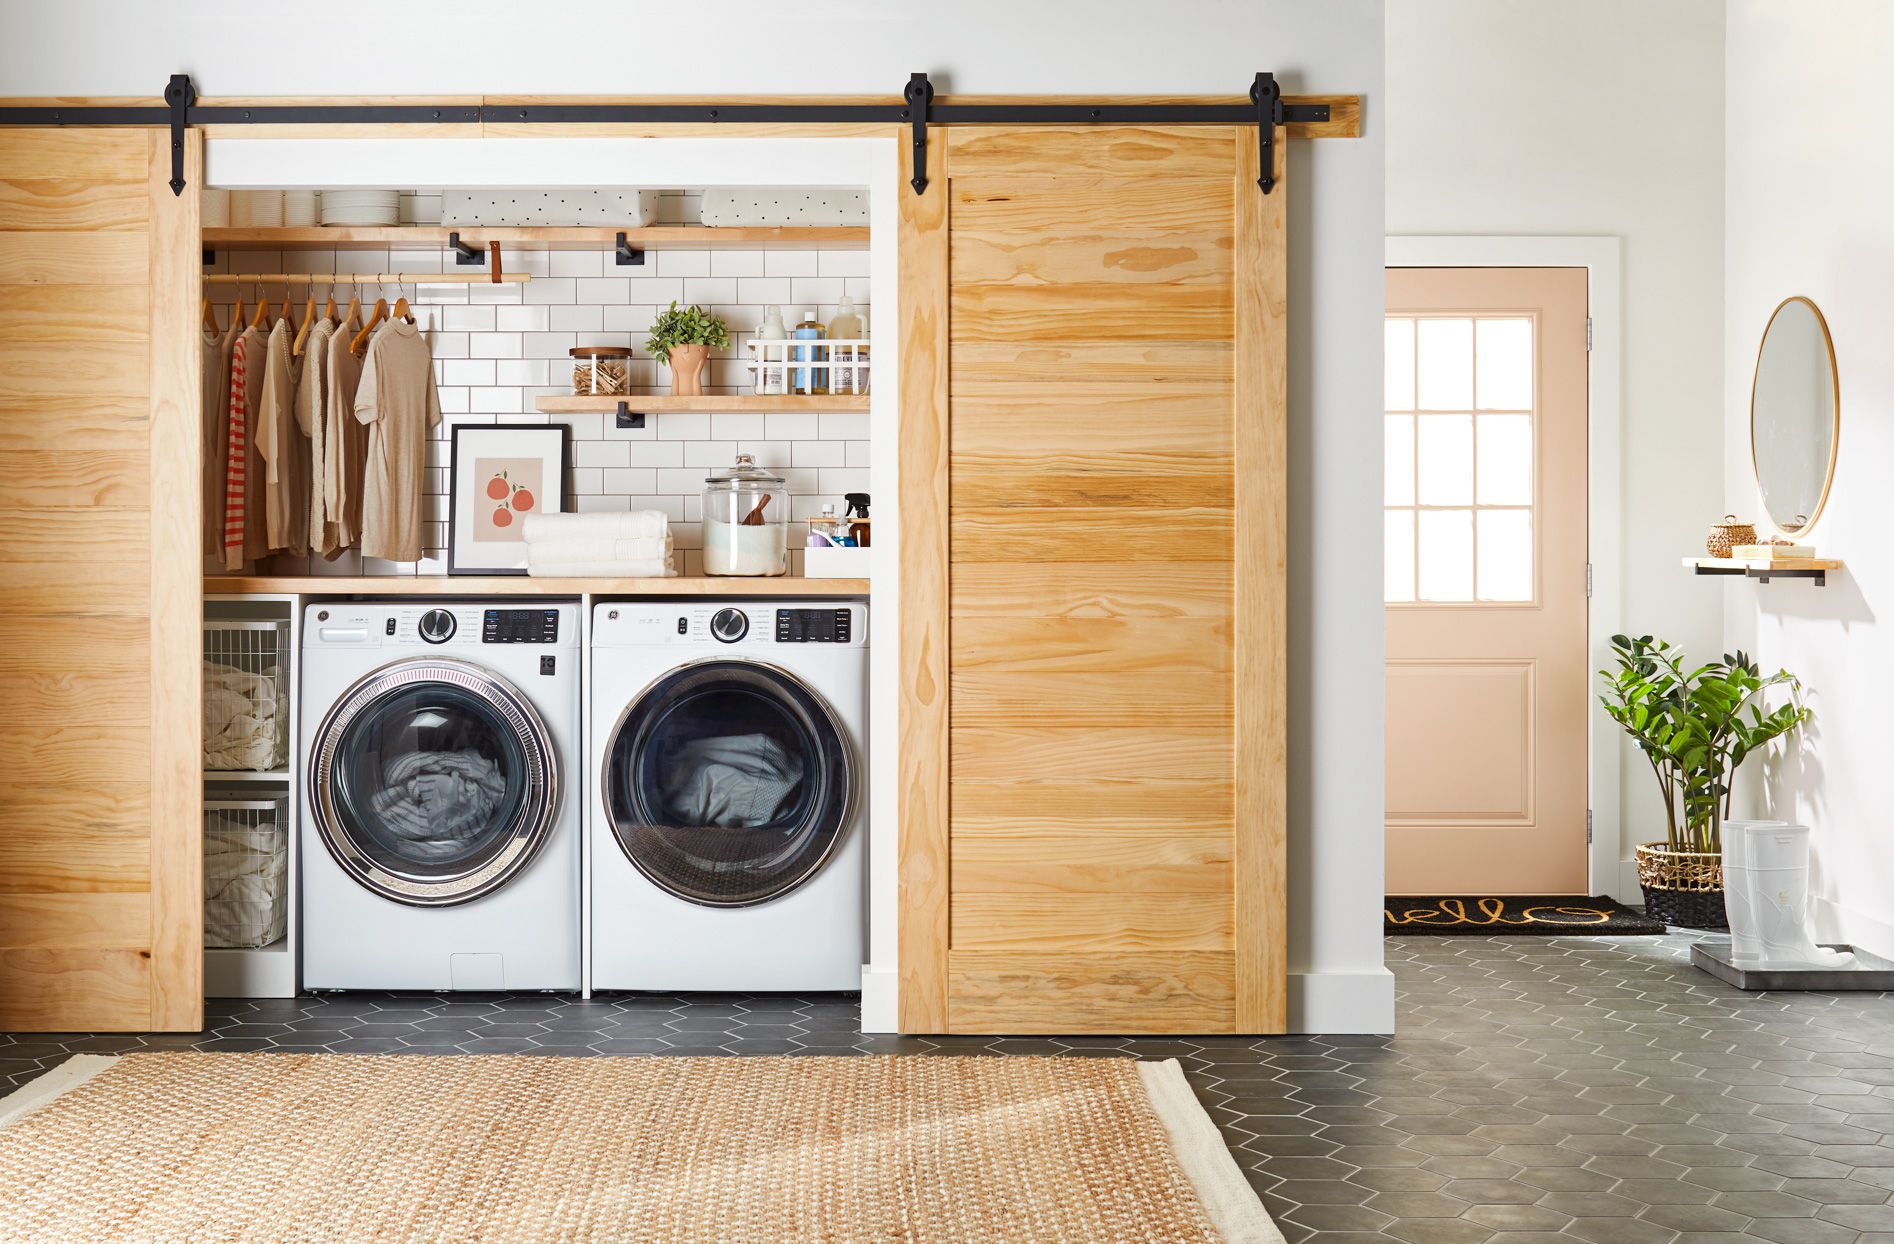
7. Aesthetics: While functionality is paramount, don’t forget to consider the visual appeal of your laundry room. Choose a design and color scheme that complements the overall style of your home and creates a pleasant and inviting atmosphere.
When planning the layout of your laundry room, it can be helpful to create a rough sketch or use online design tools to visualize the space. Experiment with different layouts and configurations until you find one that meets your functional requirements and aesthetic preferences.
By carefully planning the layout of your laundry room, you can optimize the space, improve workflow, and create a well-organized and efficient area that makes doing laundry a breeze.
Step 4: Choosing Materials and Appliances
Choosing the right materials and appliances for your remodeled laundry room is essential to create a functional, durable, and visually appealing space. With a wide range of options available, it’s important to consider factors such as quality, durability, and design. Follow these steps to make informed decisions when selecting materials and appliances:
1. Flooring: Choose a flooring material that is durable and easy to clean, as the laundry room is a high-traffic area prone to spills and stains. Consider options such as ceramic tile, vinyl, or waterproof laminate. Opt for non-slip surfaces to ensure safety, especially if your laundry room often gets wet.
2. Cabinets and Countertops: Select cabinets and countertops that provide ample storage and workspace. Look for sturdy materials that can withstand the wear and tear of daily use. Consider materials like solid wood or laminate for cabinets and quartz or laminate for countertops, as they offer both durability and aesthetic appeal.
3. Appliances: Choose energy-efficient appliances that are suitable for your laundry needs. Consider factors such as capacity, functionality, and energy ratings. Look for features like multiple wash and dry cycles, adjustable settings, quiet operation, and convenient controls. Decide whether you want a top-loading or front-loading washer and dryer, depending on your preference and available space.
4. Sink and Faucet: If your laundry room allows for it, consider installing a utility sink with a durable faucet. A sink can be useful for handwashing delicate items, soaking stained clothes, or other household tasks. Opt for a faucet with a pull-out sprayer or a high arc for added convenience.
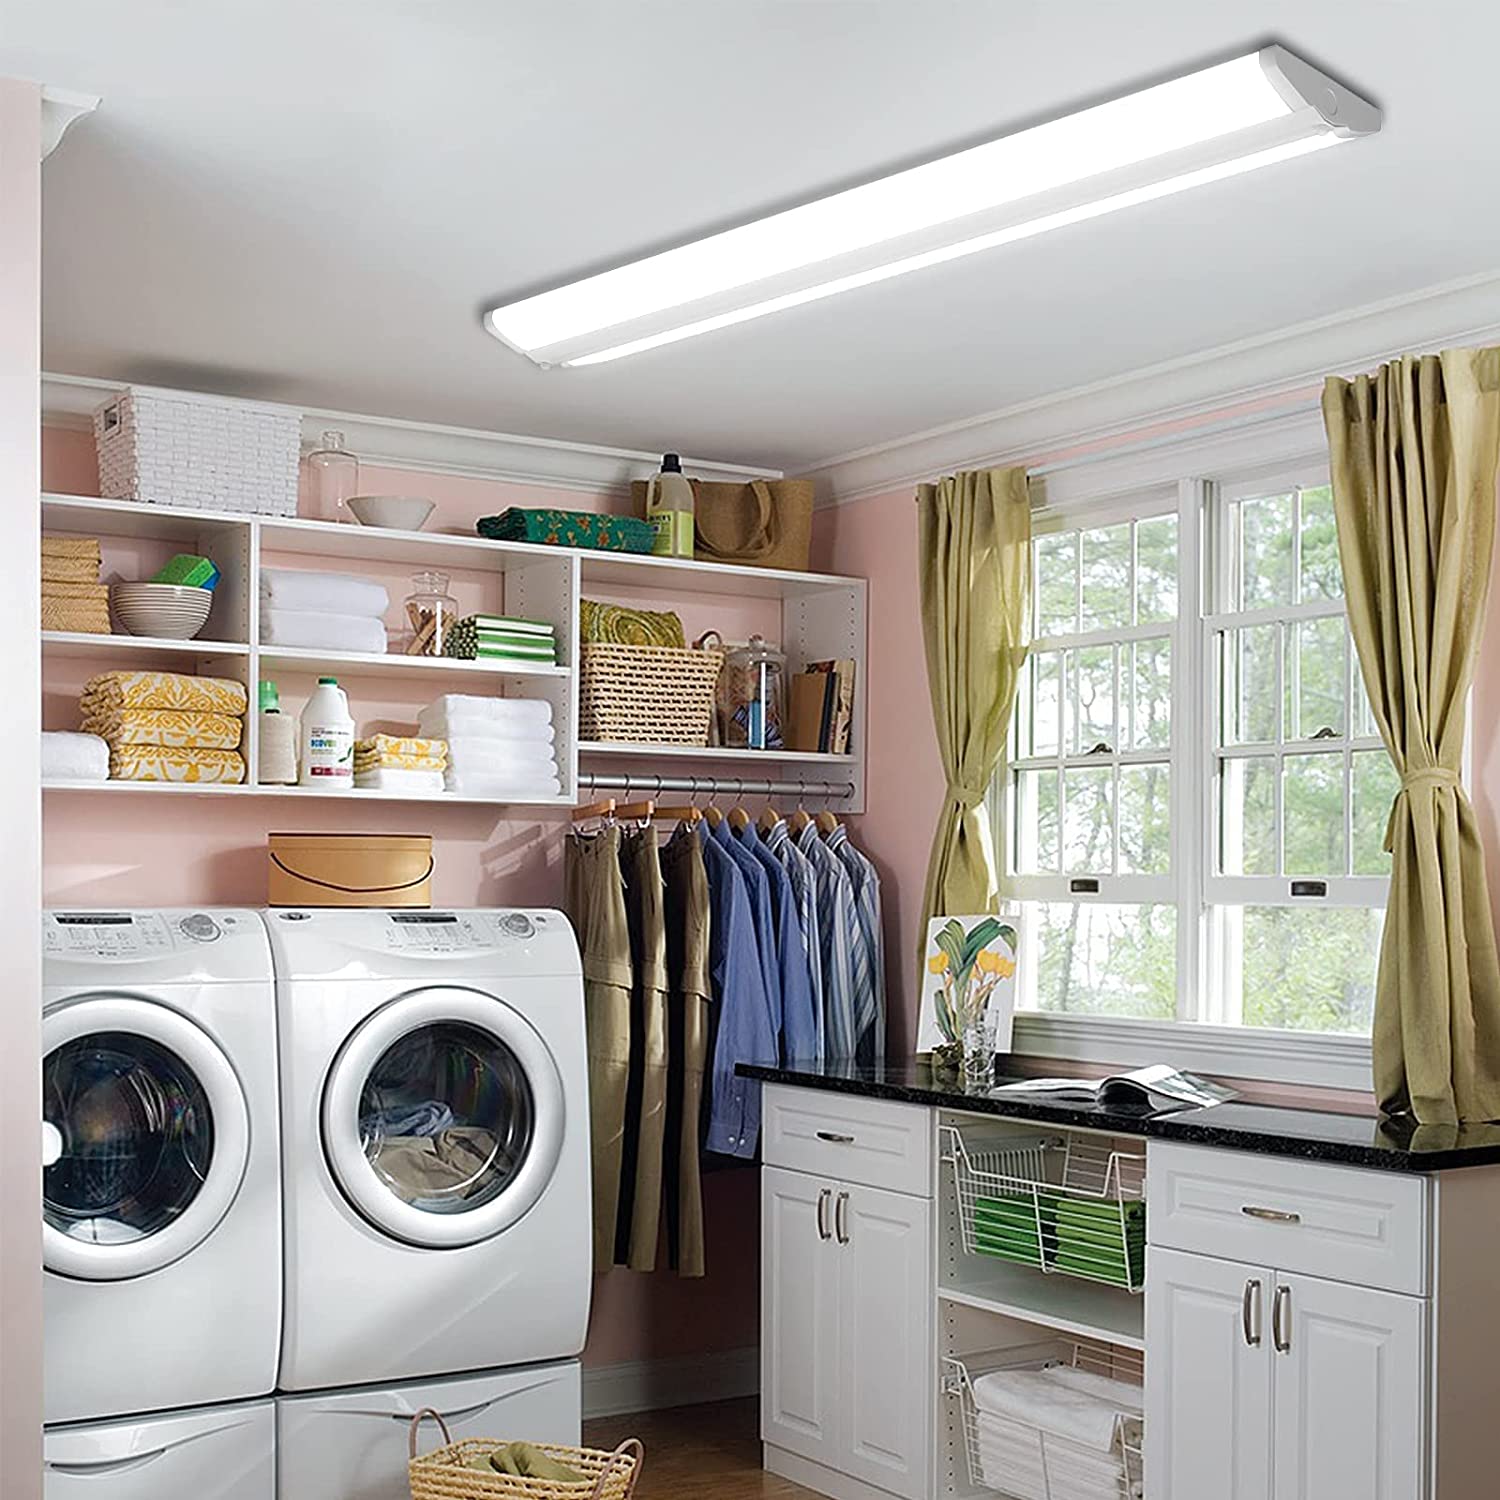
5. Lighting: Choose lighting fixtures that provide adequate illumination in your laundry room. Consider combining ambient, task, and accent lighting to create a well-lit space. LED lights are energy-efficient and have a longer lifespan. Install lighting fixtures strategically to minimize shadows and ensure visibility while working.
6. Backsplash: Add a stylish and practical tile backsplash behind your sink or countertop. Select a material that is easy to clean and can withstand water splashes and humidity. Consider tiles in a color or pattern that complements your overall design scheme and adds a touch of personality.
7. Paint: Select a paint color that matches the overall theme of your laundry room and creates a cohesive look. Opt for a paint finish that is easy to clean, such as semi-gloss or satin, to protect the walls from dirt and moisture.
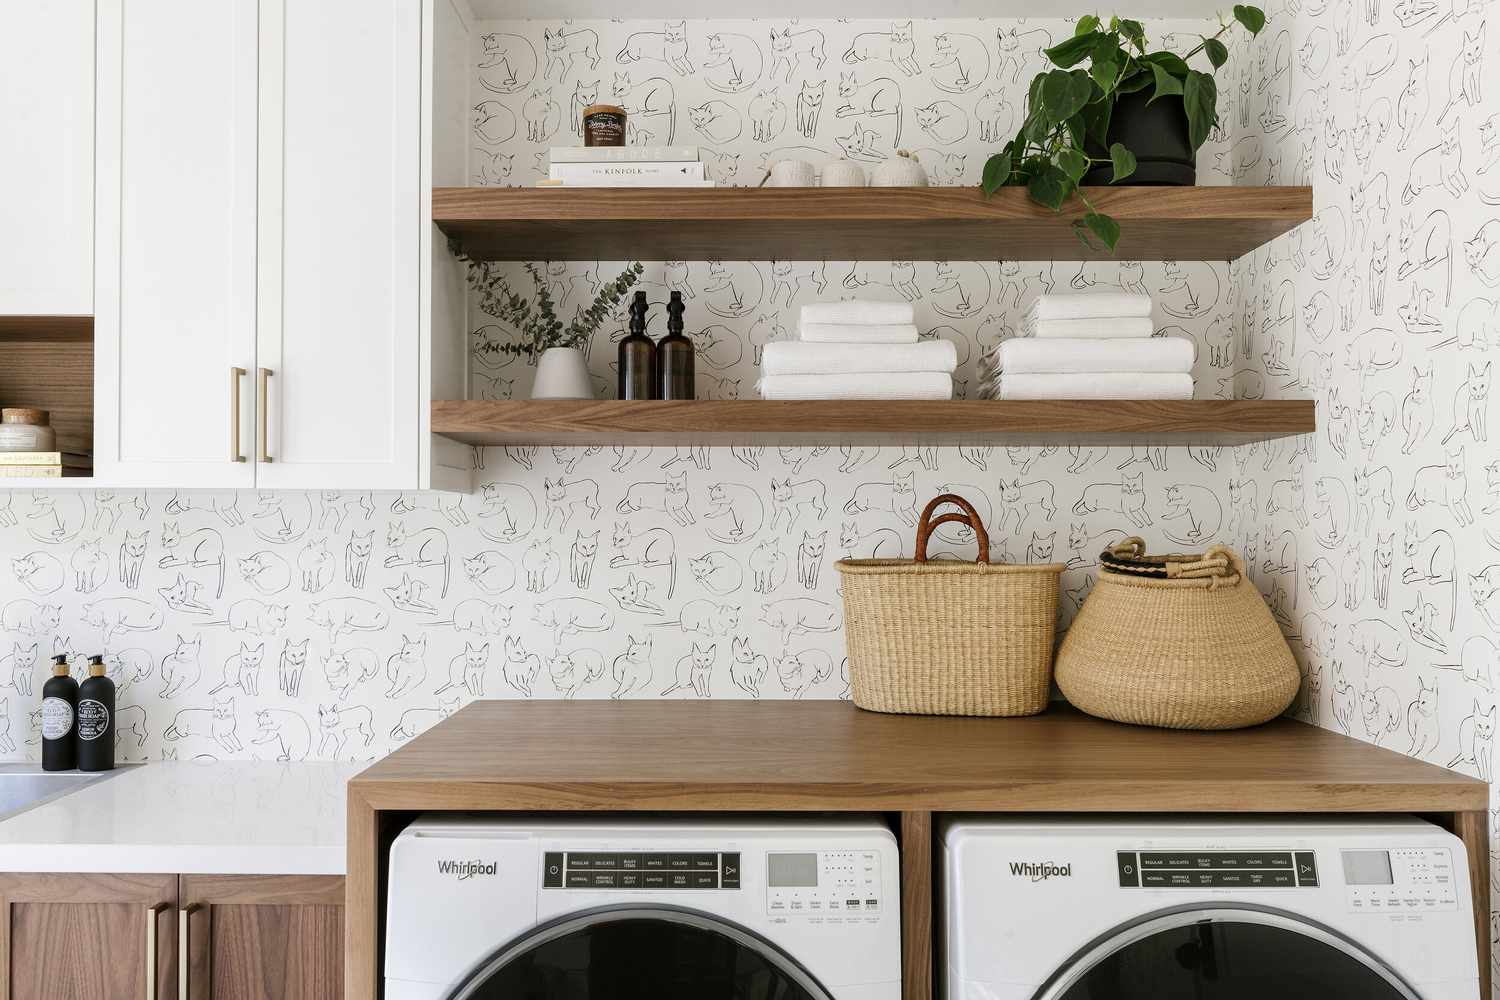
8. Shelving and Organizational Solutions: Consider adding shelves or other organizational solutions to maximize storage space in your laundry room. Install adjustable shelving to accommodate different-sized items and incorporate laundry sorting bins or baskets for easy organization.
When choosing materials and appliances, it’s important to balance style and functionality. Consider your personal preferences, the overall design of your home, and the specific needs of your laundry routine. Research different brands and read customer reviews to ensure quality and reliability.
By selecting the right materials and appliances, you can create a laundry room that is not only efficient and durable but also aesthetically pleasing and tailored to your needs.
Read more: How To Clean A Laundry Room
Step 5: Demolition and Removal
Demolition and removal are integral steps in the process of remodeling a laundry room. This step involves removing any existing fixtures, cabinets, countertops, or flooring that are being replaced or upgraded. Demolition can be a messy and labor-intensive task, so it’s crucial to approach it with caution and follow proper safety procedures. Here’s how to effectively carry out the demolition and removal process:
1. Clear the Space: Before starting the demolition, remove all items from the laundry room to create an empty workspace. Take out appliances, furniture, and any other accessories that are not part of the renovation. This will provide you with a clear area to work in and minimize any potential damage to your belongings.
2. Shut Off Utilities: Turn off the water supply, gas, and electricity connected to the laundry room before starting any demolition work. This ensures safety and prevents accidents or damage to utility lines during the process.
3. Use Protective Gear: Wear personal protective equipment (PPE) during the demolition process. This includes safety goggles, gloves, a dust mask, and closed-toe shoes. These precautions will protect you from flying debris, dust, and potential hazards.
4. Start with Small Fixtures: Begin the demolition process by removing any small fixtures, such as light fixtures, outlet covers, and switch plates. Use a screwdriver or appropriate tools to carefully detach them from the walls or ceiling. Keep these items aside if they are still in good condition and can be reused or donated.
5. Remove Cabinets and Countertops: If you are replacing cabinets and countertops, start by disconnecting any plumbing connections and electrical lines. Use a pry bar or a screwdriver to carefully remove screws or nails that secure the cabinets or countertops to the walls or floor. Take your time to avoid causing unnecessary damage to surrounding areas.
6. Flooring Removal: If you are replacing the flooring, remove the existing flooring material. Depending on the type of flooring, you may need to use a pry bar, scraper, or floor scraper to loosen and remove it. Take caution to avoid damaging the subflooring during the removal process.
7. Dispose of Debris: As you proceed with the demolition, have a plan for disposing of the debris responsibly. Rent a roll-off dumpster or arrange for a waste removal service to ensure proper disposal of materials. Sort and separate materials for recycling, if applicable and feasible.
8. Check for any Structural Issues: While removing fixtures and materials, inspect the walls, subflooring, and any other structural elements for signs of damage or issues that may need to be addressed during the remodeling process. Monitor for any issues such as moisture damage, mold, or pests.
9. Clean and Prep the Area: Once the demolition is complete and debris is removed, clean the area to remove dust and debris. Sweep or vacuum the space thoroughly, and wipe down any surfaces. This will provide a clean slate for the next steps in the remodeling process.
Demolition and removal are critical steps in preparing your laundry room for the remodeling process. By approaching this step carefully and following safety measures, you can efficiently remove existing fixtures and materials and create a clean canvas for the upcoming renovations.
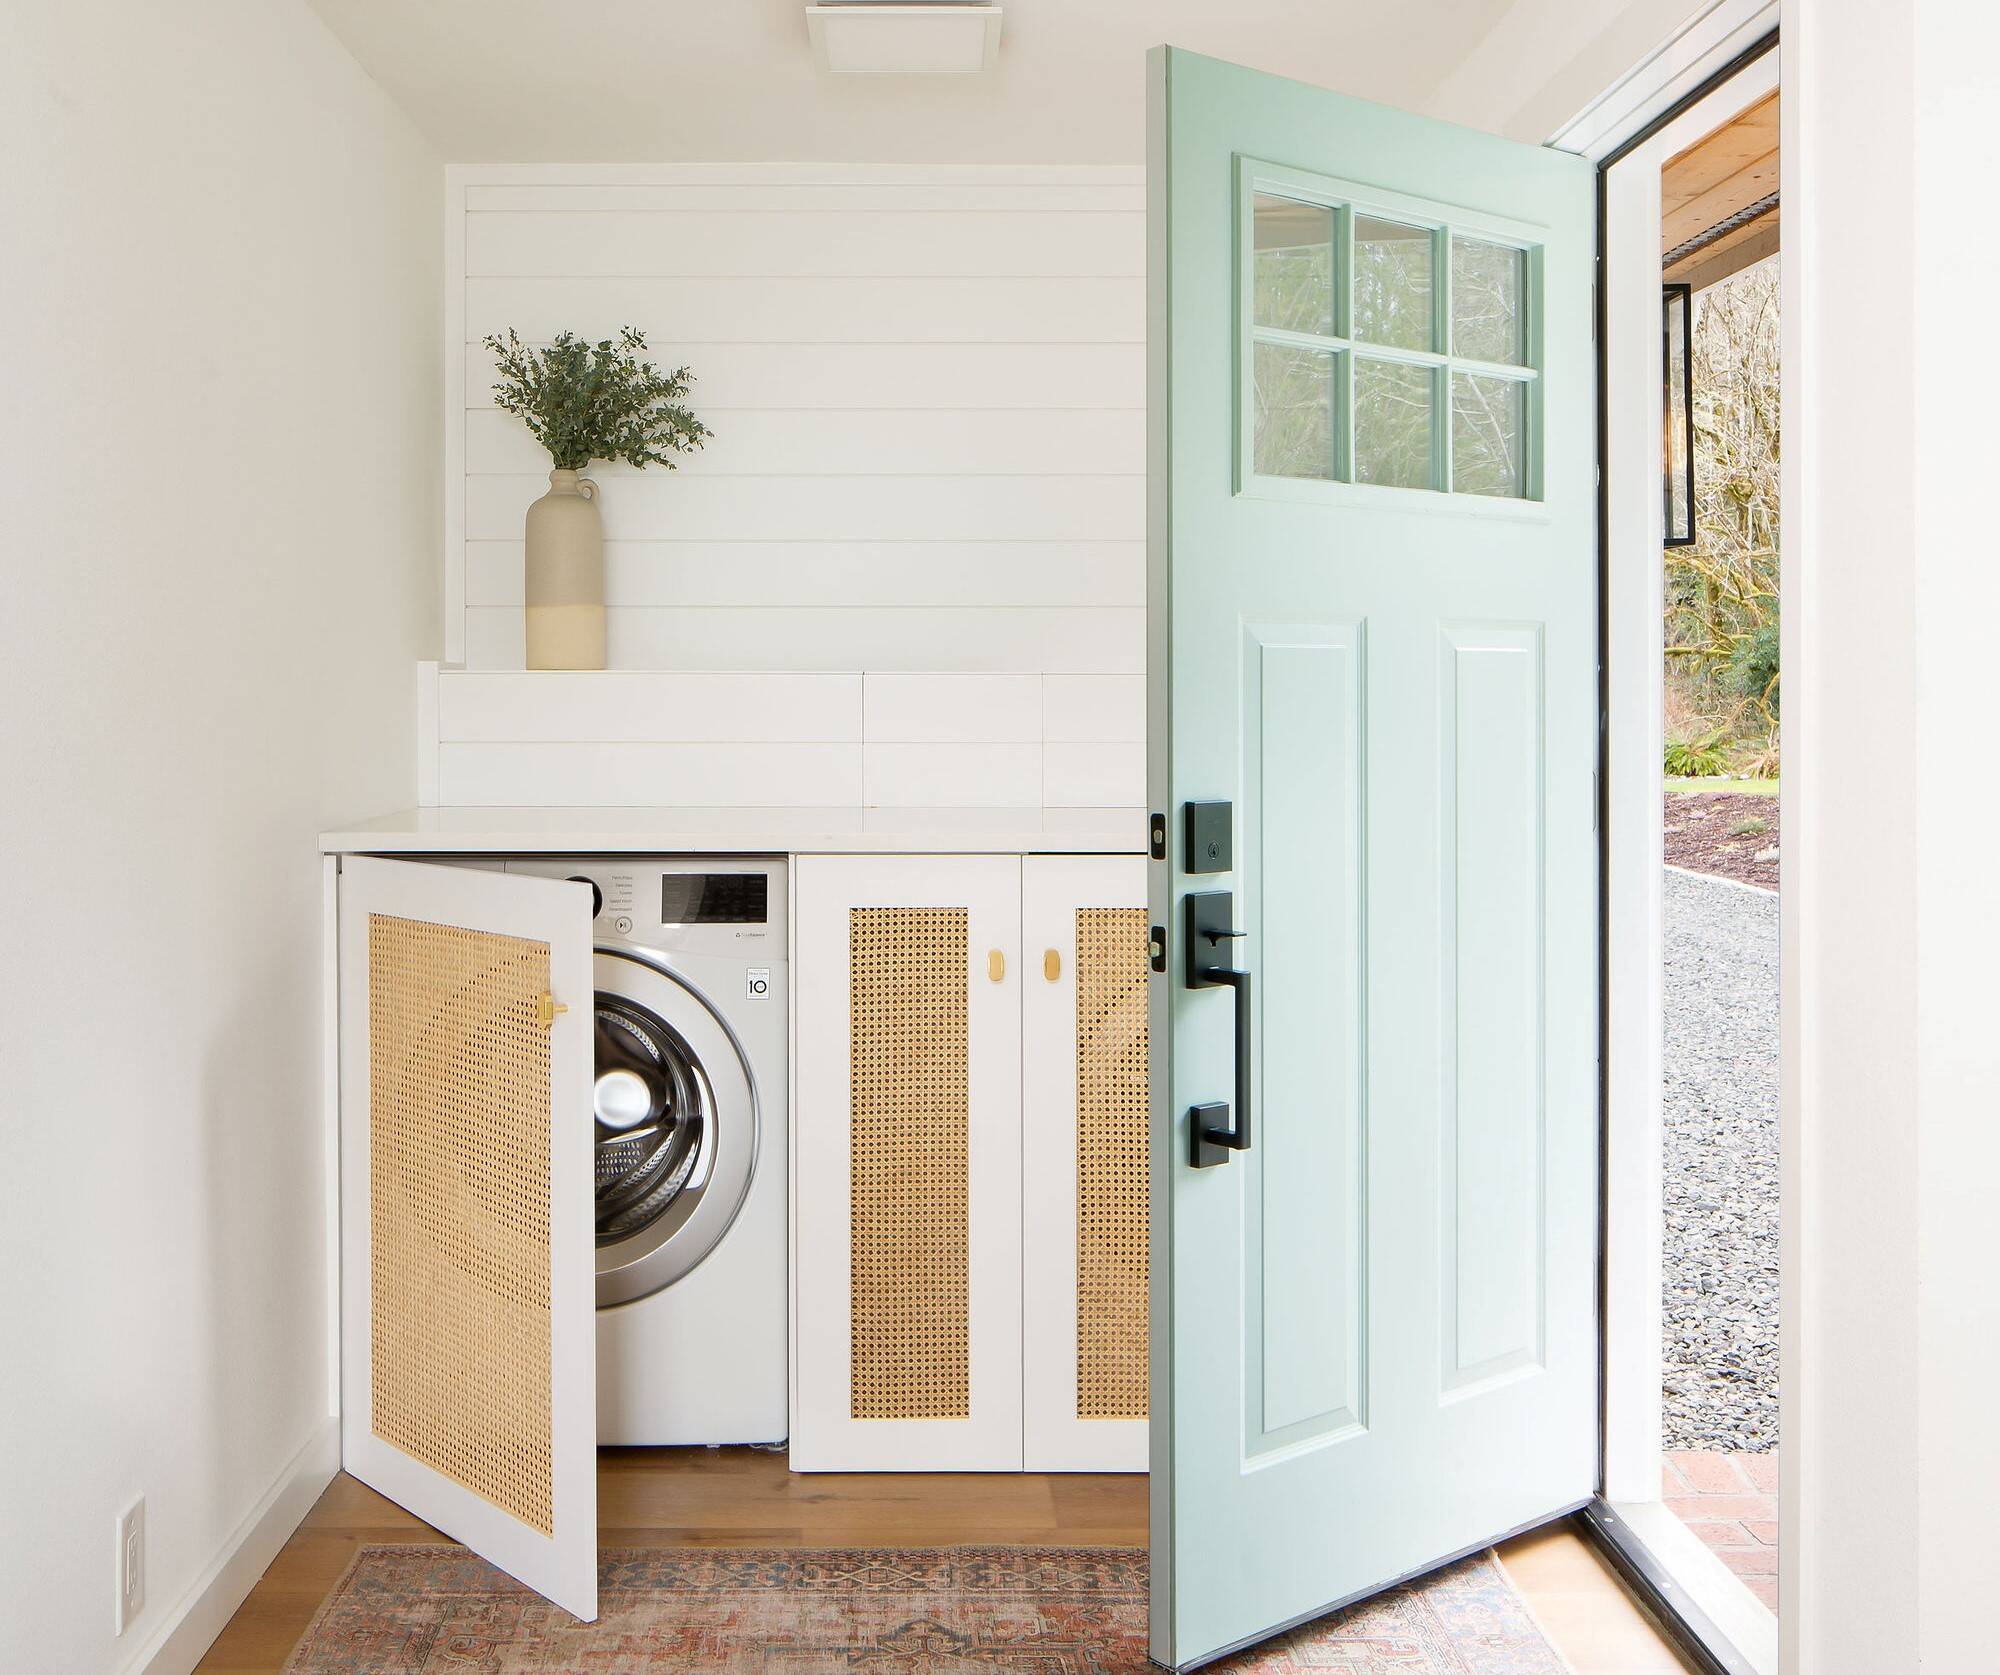
When remodeling a laundry room, consider adding built-in storage solutions to maximize space and keep the room organized. This can include shelves, cabinets, and even pull-out hampers to keep everything tidy and easily accessible.Step 6: Electrical and Plumbing Considerations
Addressing electrical and plumbing considerations is an essential part of remodeling a laundry room. It involves ensuring that the electrical and plumbing systems are up to code, making any necessary updates or modifications, and ensuring the proper functioning of these systems in the newly remodeled space. Here are the key considerations to keep in mind when it comes to electrical and plumbing:
1. Hire a Professional: Unless you are a licensed electrician or plumber yourself, it is recommended to hire professionals for electrical and plumbing work. They have the expertise and knowledge to ensure that the work is done safely and meets all necessary codes and regulations.
2. Evaluate Existing Systems: Assess the current electrical and plumbing systems in your laundry room. Note the placement of electrical outlets, light fixtures, and plumbing connections. Determine whether any updates or modifications are needed to meet your desired layout and appliance requirements.
3. Electrical Wiring: If you are adding new appliances or changing the layout of your laundry room, you may need to add additional electrical outlets or relocate existing ones. Ensure that the electrical system can handle the load of the new appliances and that the wiring is up to code.
4. Plumbing Connections: If you are installing or relocating a sink, washer, or other plumbing fixtures, it is crucial to ensure that the plumbing connections are properly installed and in good working order. Consult with a plumber to make any necessary adjustments or additions to the plumbing system.
5. Ventilation: Adequate ventilation is essential in a laundry room to remove excess moisture, odors, and lint. Evaluate the existing ventilation system and consider adding or upgrading exhaust fans or vents, if needed. Proper ventilation will contribute to a healthier and more comfortable laundry room environment.
6. Safety Considerations: During the remodeling process, take the opportunity to ensure that all electrical systems are properly grounded, outlets are GFCI (Ground Fault Circuit Interrupter) protected, and plumbing connections have shut-off valves. These safety measures are crucial to protect against electrical shock and prevent water damage in case of leaks or emergencies.
7. Lighting: Evaluate the existing lighting system in your laundry room. Consider upgrading to energy-efficient LED light fixtures that provide adequate illumination. Additionally, ensure that light switches are conveniently located and easily accessible from different areas of the laundry room.
8. Appliance Installation: When it comes time to install your new appliances, consult the manufacturer’s instructions and follow all specified electrical and plumbing requirements. If necessary, have a professional electrician or plumber assist with connecting and installing the appliances to ensure proper functioning and safety.
Remember that local building codes may vary, so it’s crucial to consult with professionals who are knowledgeable about the specific requirements in your area. Permits may also be necessary for certain electrical and plumbing work, so check with your local authorities to ensure compliance.
By addressing electrical and plumbing considerations in your laundry room remodel, you can ensure the safety, functionality, and code compliance of these systems. Consulting with professionals and following proper protocols will help you create a laundry room that operates smoothly and efficiently.
Step 7: Installing Cabinets and Countertops
Installing cabinets and countertops is a significant step in the remodeling process of your laundry room. This step involves carefully measuring and selecting the right cabinets and countertops, ensuring proper installation, and creating a functional and organized space. Follow these guidelines to successfully install cabinets and countertops in your laundry room:
1. Measure and Plan: Before purchasing cabinets and countertops, measure the dimensions of your laundry room and consider the layout and design. Determine the placement of cabinets, taking into account the location of appliances, sinks, and available wall space. Plan the height and depth of the cabinets to ensure accessibility and functionality.
2. Select Materials: Choose cabinets and countertops that are suitable for the laundry room environment. Look for materials that are durable, moisture-resistant, and easy to clean. Options such as solid wood, plywood, or laminate for cabinets, and materials like quartz, laminate, or stainless steel for countertops, are popular choices for laundry rooms.
3. Cabinet Installation: Start by installing the upper cabinets first. Ensure they are level and plumb by using a level and shims to make necessary adjustments. Secure them to the wall studs using screws and anchors. Install the base cabinets next, making sure they are level and aligned with the upper cabinets. Connect the cabinets together using screws. Use a carpenter’s square to verify that all corners are square before proceeding.
4. Countertop Installation: If your laundry room includes a countertop, measure and cut it to fit the cabinets. Use a circular saw or a jigsaw to make accurate cuts. Ensure a snug fit and secure it to the cabinets using screws or adhesive, depending on the material. If you are using a pre-made countertop, follow the manufacturer’s instructions for installation.
5. Sink and Faucet Installation: If your laundry room includes a sink, carefully follow the manufacturer’s instructions for installing the sink and faucet. This may involve cutting a hole in the countertop or mounting the sink underneath. Ensure proper sealing and connect the plumbing lines securely. Test for any leaks before proceeding with further installation.
6. Adjustments and Finishing Touches: Once the cabinets and countertops are installed, make any necessary adjustments. Check for alignment, levelness, and proper functioning of doors and drawers. Install hardware such as handles or knobs to complete the look. Consider adding additional organizational solutions, such as drawer dividers or shelving, to maximize storage and functionality.
7. Secure Cabinets to the Wall: To ensure stability and safety, secure the upper cabinets to the wall using brackets or screws into wall studs. This will prevent cabinets from tipping or falling over, especially if they are heavily loaded with items.
8. Seal and Finish: Depending on the material of your cabinets and countertops, consider applying sealant or protective finishes to enhance durability and longevity. This will help protect them from moisture, stains, and scratches, ensuring they maintain their pristine condition over time.
By carefully measuring, selecting, and installing cabinets and countertops, you can transform your laundry room into a well-organized and efficient space. Following proper installation techniques and considering the durability of materials will help create a laundry room that is not only functional but also visually appealing.
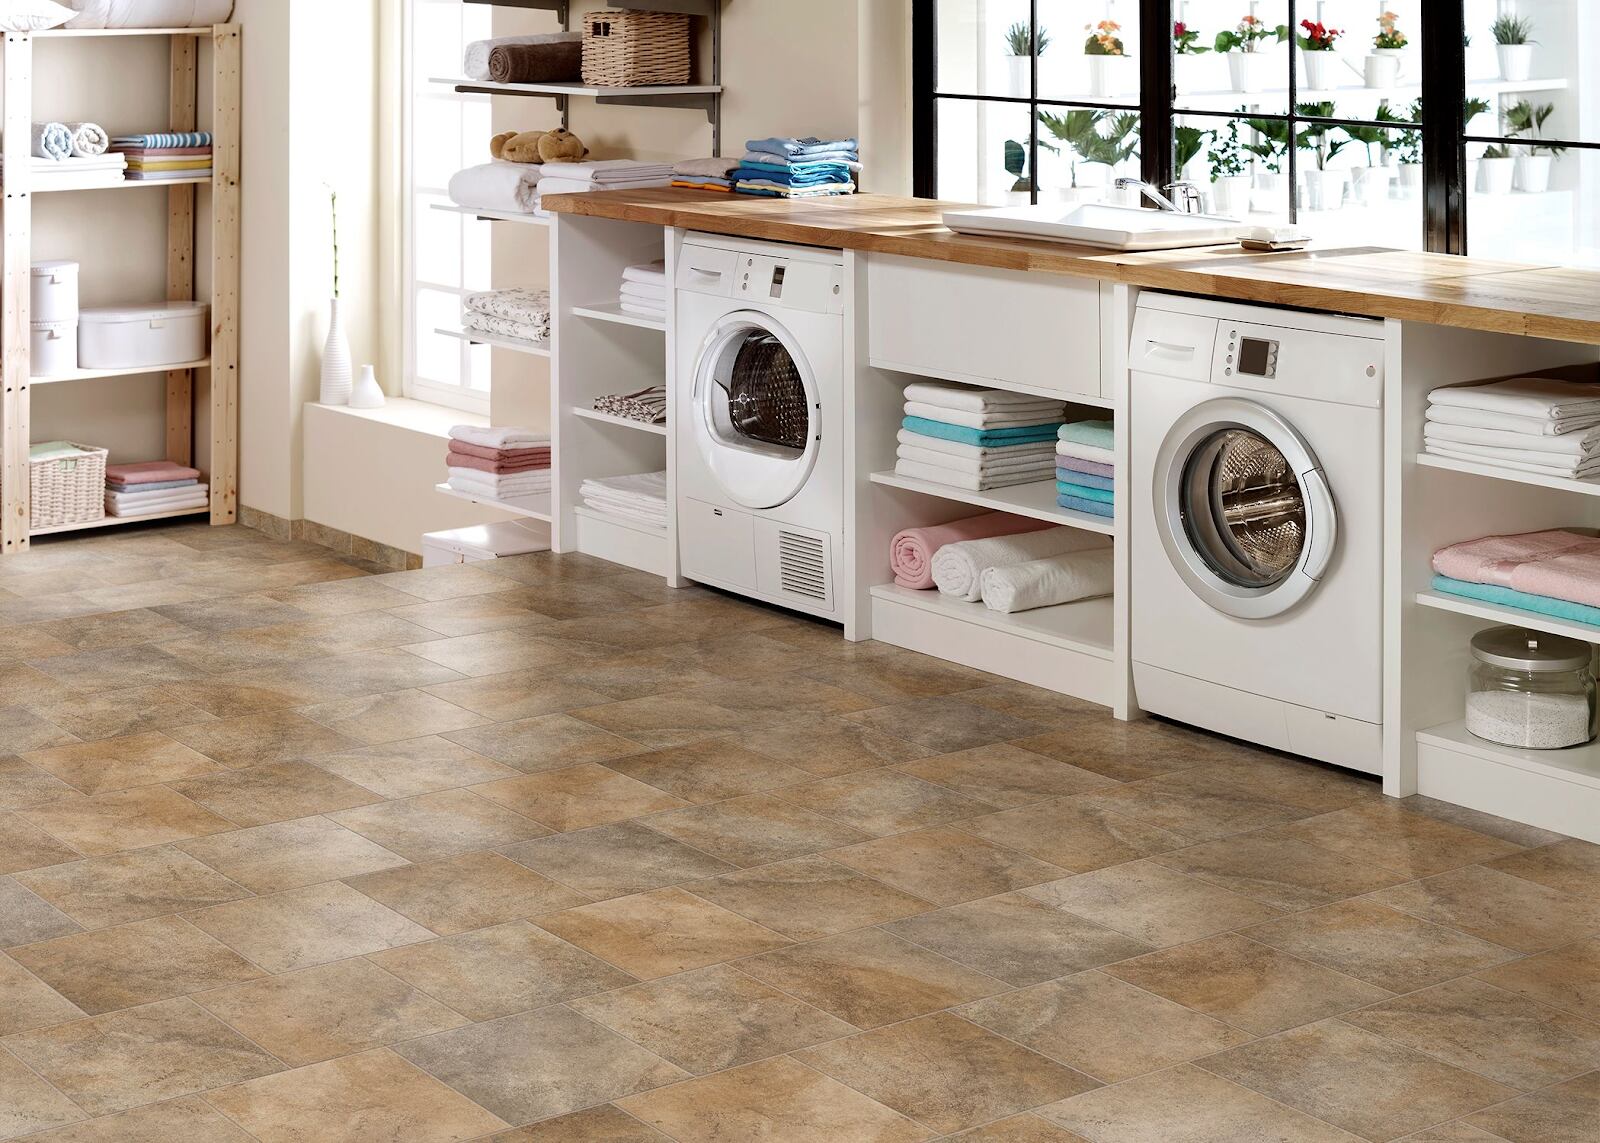
Step 8: Flooring Installation
Installing new flooring is a significant step in the remodeling process of your laundry room. Choosing the right flooring material that is durable, moisture-resistant, and visually appealing is crucial for a functional and aesthetically pleasing space. Follow these guidelines to successfully install flooring in your laundry room:
1. Prepare the Subfloor: Ensure that the subfloor is clean, dry, and level before starting the flooring installation. Remove any existing flooring materials and repair any damage or imperfections in the subfloor. If necessary, use a leveling compound to even out any uneven areas.
2. Select Flooring Material: Consider materials that are suitable for laundry rooms, such as ceramic or porcelain tile, vinyl, or laminate. Each material has its own advantages and aesthetics, so choose the one that best fits your preferences, budget, and maintenance needs.
3. Measure and Cut: Measure the dimensions of the laundry room and plan the layout of the flooring. Decide on the direction in which the flooring should be laid, typically it is recommended to run the flooring parallel to the longest wall in the room. Cut the flooring planks or tiles to fit around corners, doorways, and any obstructions using a saw or appropriate cutting tools.
4. Start Installation: Begin by laying the first row of flooring along one wall of the room. Use spacers to create an expansion gap between the flooring and the wall, allowing for any potential expansion or contraction due to temperature changes. Follow the manufacturer’s instructions for the specific type of flooring you are installing.
5. Adhere or Lock the Flooring: Depending on the type of flooring you have chosen, it may require adhesive, nails, or a click-lock system for installation. Follow the manufacturer’s instructions for proper installation techniques and apply the necessary method to securely lock or adhere the flooring in place.
6. Continue the Installation: Work row by row, interlocking or adhering the flooring planks or tiles together. Use a tapping block and mallet to ensure a snug fit and proper alignment of the flooring. Check periodically with a level to ensure the floor is even and free from any lippage or gaps.
7. Cut and Trim: As you reach the edges of the room or encounter obstacles such as pipes or cabinets, use a saw or appropriate cutting tools to carefully trim and fit the flooring. Ensure that any cuts are precise and clean to maintain a professional finish.
8. Finishing Touches: After the main flooring installation is complete, add any necessary finishing touches. Install baseboards or quarter-round molding along the edges of the room to cover the expansion gap. Use transition strips between different flooring materials or between the laundry room and adjacent rooms for a seamless transition.
9. Clean and Maintain: Once the flooring installation is finished, thoroughly clean the floor to remove any dust or debris. Follow the manufacturer’s instructions for proper maintenance and cleaning techniques to ensure the longevity and beauty of your new flooring.
By following these steps and taking the time to properly install the flooring in your laundry room, you can create a durable, moisture-resistant, and visually appealing space. The right flooring choice will not only enhance the functionality of your laundry room but also contribute to the overall aesthetic of the room.
Read more: How To Finish Laundry Room
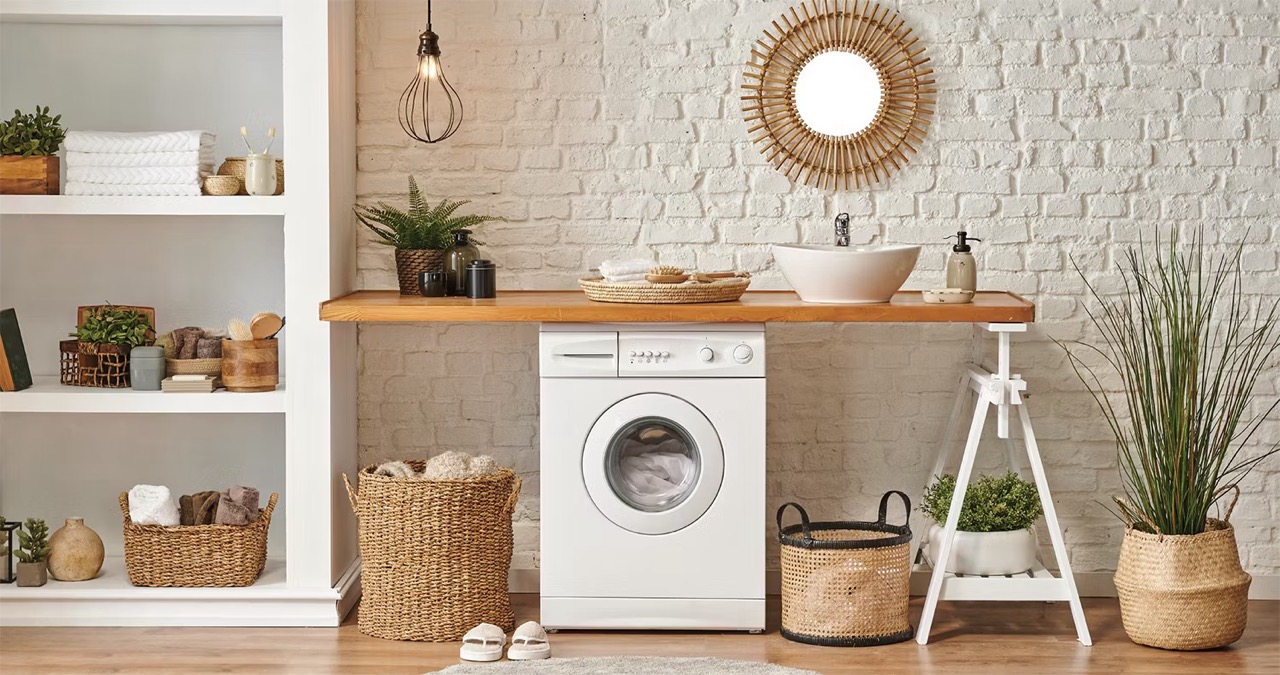
Step 9: Paint and Decorate
The paint and decoration phase of remodeling your laundry room allows you to add the final touches and infuse your personal style into the space. Choosing the right paint colors, adding decorative elements, and incorporating practical storage solutions can transform your laundry room into a beautiful and functional area. Follow these steps to complete the paint and decoration stage:
1. Select Paint Colors: Choose paint colors that complement the overall design and theme of your home. Opt for light and neutral shades to create a clean and fresh feel in the laundry room. Consider using washable and moisture-resistant paint finishes, such as semi-gloss or satin, to protect the walls from stains and make cleaning easier.
2. Prepare the Walls: Before painting, prepare the walls by cleaning them of any dust, dirt, or residues. Repair any imperfections such as cracks, holes, or uneven surfaces. Fill the holes with spackling compound and sand the surface smooth. Ensure the walls are in good condition before proceeding with the paint application.
3. Apply Primer: If needed, apply a coat of primer before painting. Primer helps to create a smooth and uniform surface for the paint to adhere to, especially if you are painting over a darker or unevenly colored surface. Allow the primer to dry completely before proceeding with the paint.
4. Paint the Walls: Use a brush or roller to paint the walls in your chosen colors. Start with the edges and corners using a brush, then move on to the larger surfaces with a roller. Apply multiple coats as needed, allowing each coat to dry thoroughly before applying the next one. Take your time to ensure even coverage and smooth application.
5. Add Decorative Elements: Consider adding decorative elements to enhance the aesthetic appeal of your laundry room. Hang artwork or photographs that reflect your personal style and add a touch of warmth to the space. Install wall-mounted hooks or pegboards for hanging tools, aprons, or laundry bags. Incorporate decorative baskets or bins for storing small items or displaying fresh towels.
6. Install Window Treatments: If your laundry room has windows, consider installing window treatments for privacy and light control. Choose blinds, curtains, or shades that are moisture-resistant and easy to clean. Opt for window treatments that allow natural light to filter in while providing the desired level of privacy.
7. Consider Practical Storage: Think about storage solutions that are both functional and visually appealing. Install shelves, cabinets, or cubbies to keep laundry essentials organized. Utilize wall space for hanging ironing boards, drying racks, or brooms. Choose storage containers or baskets that coordinate with the overall design of the room.
8. Personalize with Accessories: Add finishing touches with accessories that reflect your personal taste. Place colorful rugs or runners on the floor to add warmth and comfort. Display scented candles or diffusers to create a pleasant atmosphere. Don’t forget practical elements such as a laundry hamper or sorting bins that are both stylish and functional.
9. Ensure Adequate Lighting: Proper lighting is crucial in a laundry room, so make sure the space is well-lit. Consider installing overhead lighting fixtures, under-cabinet lighting, or task lighting near the work areas. Use energy-efficient bulbs to save on electricity costs and promote sustainability.
By following these steps, you can transform your laundry room into a visually pleasing and inviting space. Paint colors, decorative elements, and practical storage solutions will come together to create a functional and aesthetically pleasing room that makes doing laundry a more enjoyable experience.
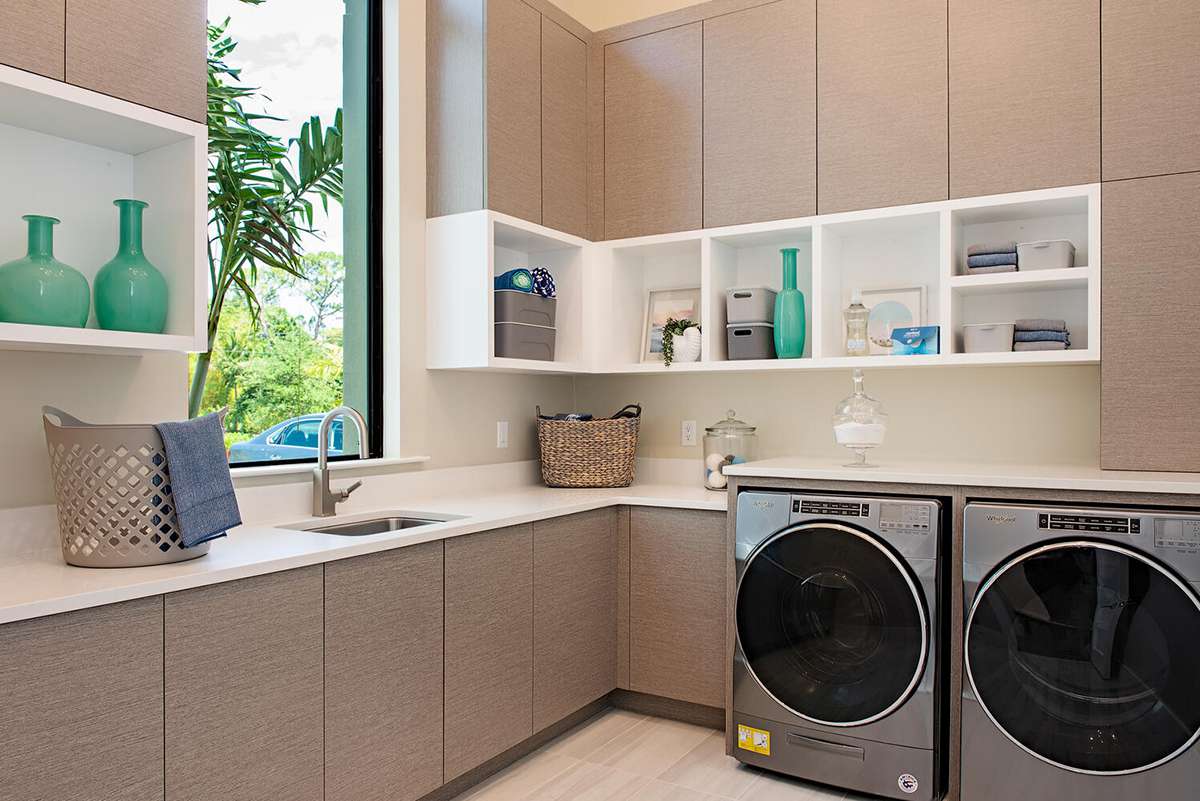
Step 10: Final Touches and Organization
The final step in remodeling your laundry room involves adding the finishing touches and organizing the space to maximize functionality and efficiency. This step focuses on optimizing storage, creating a clutter-free environment, and adding any additional elements that enhance the overall functionality and aesthetics. Follow these steps to complete the final touches and organization:
1. Utilize Storage Solutions: Maximize storage space by incorporating various storage solutions. Install shelves, wall-mounted cabinets, or open shelving units to keep laundry supplies, detergent, and cleaning products neatly organized. Consider using baskets, bins, or labeled containers to categorize and store smaller items. Use hooks or hangers to hang ironing boards, brooms, or mops.
2. Set Up Folding Station: Designate a designated area for folding and sorting laundry. Install a countertop or fold-down table with ample space for folding clothes. If space is limited, consider using a wall-mounted fold-down table or a portable folding station that can be stored away when not in use.
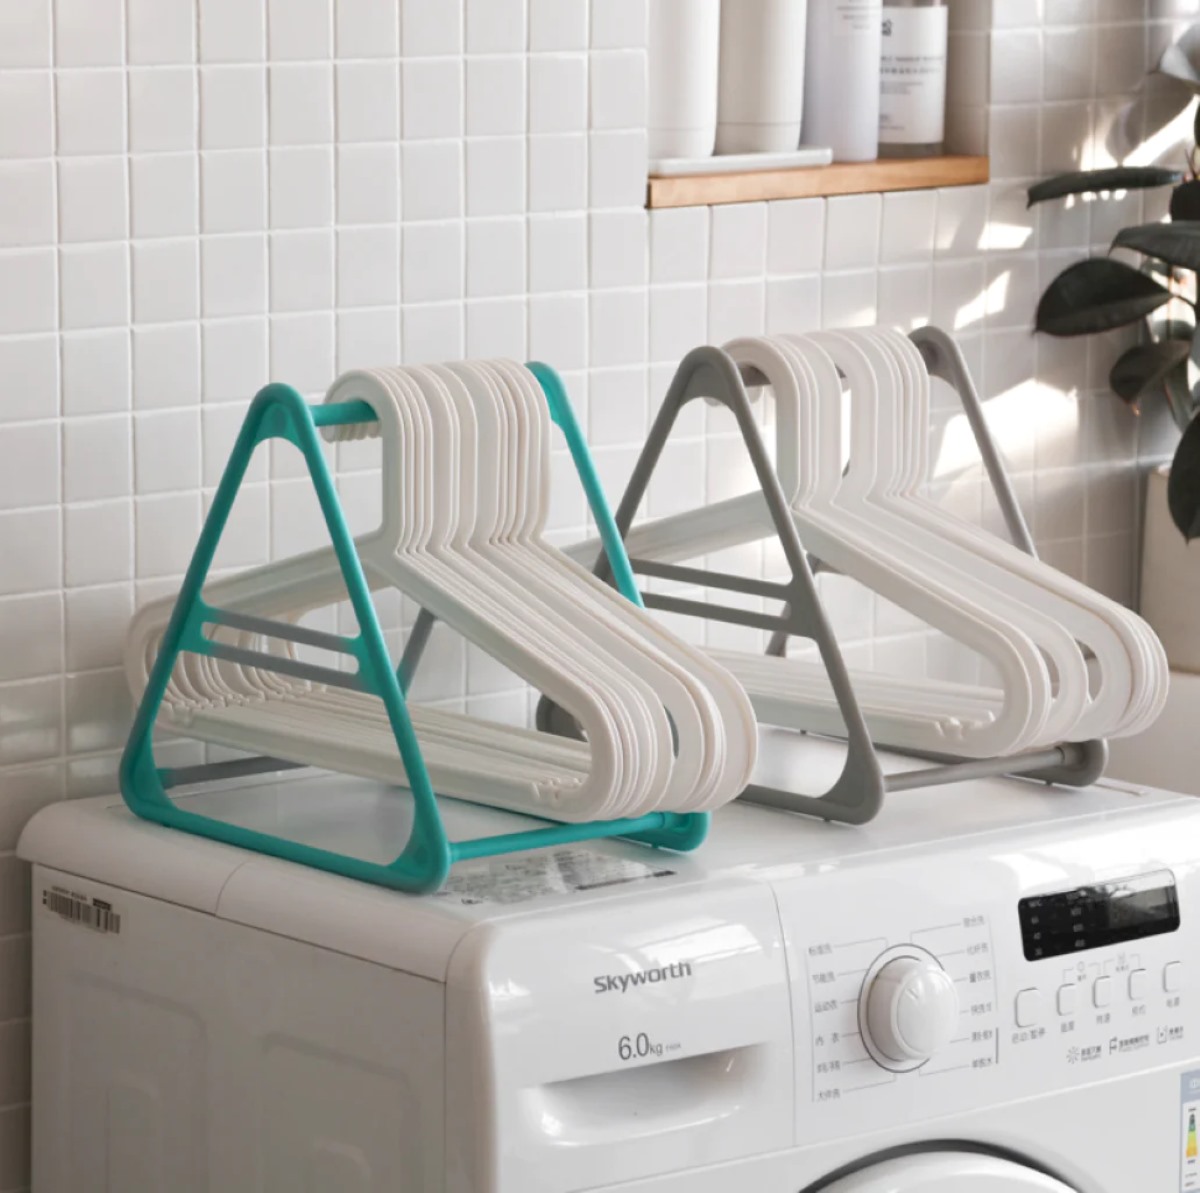
3. Install Drying Racks: If you prefer air-drying clothes, install a wall-mounted or retractable drying rack in your laundry room. This provides a space to hang delicate items or to dry clothes without taking up valuable floor space. Consider a drying rack that can be folded or collapsed when not in use.
4. Label and Sort: Label storage bins or containers to easily identify the contents. Categorize items such as stain removal supplies, laundry accessories, or cleaning products. Create a sorting system for different types of laundry, such as whites, colors, delicates, and linens. This will streamline the laundry process and save time when it comes to washing, drying, and folding.
5. Consider Ironing Station: If you frequently iron clothes, set up a designated ironing station in your laundry room. Install a wall-mounted ironing board or use a fold-down option attached to a nearby wall or door. Ensure the area is well-lit and has easy access to an electrical outlet for the iron.
6. Enhance Lighting: Adequate lighting is crucial for a laundry room. Install bright, energy-efficient bulbs to ensure proper illumination throughout the space. Consider adding task lighting near the folding or ironing stations to provide focused lighting for those specific tasks.
7. Decorative Elements: Add decorative elements that create a pleasant and inviting atmosphere in your laundry room. Hang artwork or family photos that bring a personal touch to the space. Incorporate plants or flowers to add a natural and fresh aesthetic. Choose decorative storage containers or jars that match the overall design concept to store small items.
8. Safety Considerations: Lastly, make sure you consider safety in your laundry room. Install a fire extinguisher and ensure it is easily accessible. Keep a carbon monoxide detector near any gas-powered appliances or water heaters. Install childproof locks or latches on cabinets containing cleaning supplies or potentially hazardous items.
By completing these final touches and organizing your laundry room, you will create a well-functioning and aesthetically pleasing space. Efficient storage solutions, a designated folding and sorting area, and a clutter-free environment will make laundry tasks more manageable and enjoyable.
Conclusion
Congratulations on completing the remodeling journey of your laundry room! Through the ten essential steps outlined in this guide, you have transformed your laundry space into a functional, efficient, and aesthetically pleasing area. By assessing the current layout, setting a budget, planning the layout, choosing materials and appliances, and addressing electrical and plumbing considerations, you laid the foundation for a successful remodel.
You then proceeded to tackle the demolition and removal of old fixtures, carefully installed cabinets and countertops, and upgraded the flooring to a durable and visually appealing option. With the paint and decoration phase, you infused your personal style into the space, added practical storage solutions, and maximized the use of natural and artificial light.
Finally, through the final touches and organization step, you optimized storage, set up designated areas for folding and ironing, and added decorative elements that enhanced the overall functionality and ambiance of the laundry room.
By following these steps and paying attention to every detail, you have successfully transformed your laundry room into an organized and inviting space that makes doing laundry a more enjoyable experience. With careful planning and consideration of your personal needs, you have created a functional layout, selected high-quality materials and appliances, and incorporated storage solutions tailored to your requirements.
Remember to maintain the cleanliness and organization of your laundry room by implementing good habits and routines. Regularly declutter the space, wipe down surfaces, and schedule maintenance checks for electrical and plumbing systems. By doing so, you will ensure the longevity and optimal functioning of your newly remodeled laundry room.
Enjoy the benefits of your beautifully remodeled laundry room, from increased efficiency and convenience to a more pleasant and inviting space. Not only has the value of your home been enhanced, but your overall laundry routine has been improved. Embrace this transformed space and embrace the joy of a well-designed and functional laundry room!
Frequently Asked Questions about How To Remodel A Laundry Room
Was this page helpful?
At Storables.com, we guarantee accurate and reliable information. Our content, validated by Expert Board Contributors, is crafted following stringent Editorial Policies. We're committed to providing you with well-researched, expert-backed insights for all your informational needs.
0 thoughts on “How To Remodel A Laundry Room”