Articles
How To Baste A Quilt With Pins
Modified: August 17, 2024
Learn the proper technique for basting a quilt with pins and ensure your articles stay securely in place throughout the quilting process
(Many of the links in this article redirect to a specific reviewed product. Your purchase of these products through affiliate links helps to generate commission for Storables.com, at no extra cost. Learn more)
Introduction
Welcome to the world of quilting! Whether you are a seasoned quilter or just starting out, basting your quilt is an essential step in the quilting process. Basting involves securing the quilt layers together to prevent shifting and puckering during the quilting process. There are several methods to baste a quilt, but one of the most popular and effective methods is using pins.
In this article, we will guide you through the process of basting a quilt with pins. We will walk you through the supplies you’ll need, the step-by-step process, and provide some helpful tips along the way. So, let’s grab our supplies and get started!
Key Takeaways:
- Basting a quilt with pins is a crucial step in the quilting process, ensuring stable layers and preventing shifting. Prepare your quilt sandwich, baste evenly, and add pins for a smooth quilting journey.
- By following the step-by-step process of basting a quilt with pins, you can create a stable foundation for your quilting project. Take your time, enjoy the process, and let your creativity shine through the stitches.
Read more: How To Use Quilt Basting Spray
Supplies Needed
Before you begin basting your quilt with pins, make sure you have the following supplies handy:
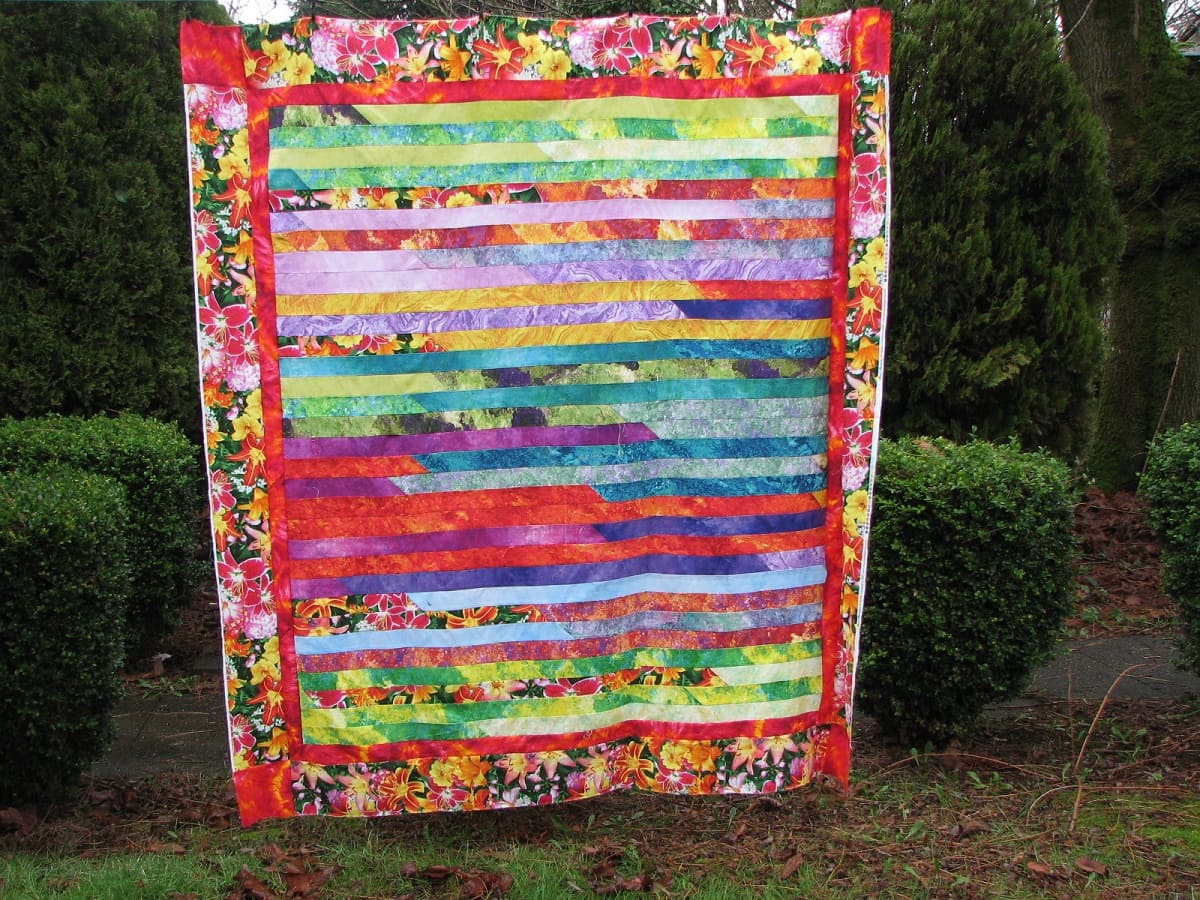
- A quilt top: This is the top layer of your quilt, consisting of pieced or appliquéd fabric blocks.
- Batting: The soft, cushiony layer that provides warmth and loft to your quilt.
- Backing fabric: The fabric that forms the back layer of your quilt.
- Quilting safety pins: These are large, curved pins specifically designed for basting quilts.
- A flat surface: A large table or clean floor space where you can spread out your quilt sandwich.
- Masking tape or quilt basting spray (optional): These can be used to secure the backing fabric to the table or floor, to prevent it from shifting.
- Scissors or rotary cutter: To trim the excess batting and backing fabric.
Make sure to gather all your supplies before starting the basting process to ensure a smooth and uninterrupted workflow. Now that you have everything you need, let’s move on to the next step, preparing the quilt sandwich.
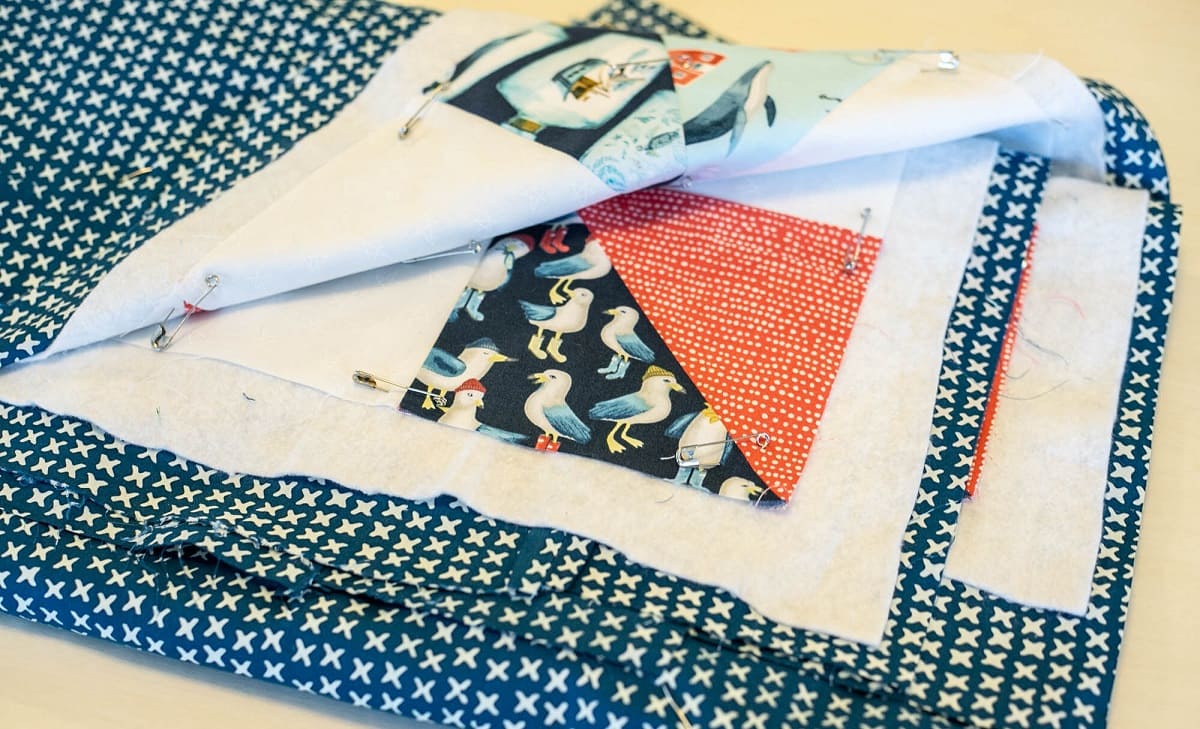
Step 1: Prepare the Quilt Sandwich
Before you can start basting your quilt with pins, you need to prepare what’s known as a “quilt sandwich.” This sandwich consists of the quilt top, batting, and backing fabric layered together in the correct order.
Here’s how to prepare the quilt sandwich:
- Lay your backing fabric on a clean, flat surface, right side down. You can tape or secure the edges of the fabric with masking tape or quilt basting spray to keep it taut and in place.
- Smooth out any wrinkles or creases in the backing fabric to ensure a flat surface.
- Place the batting on top of the backing fabric, ensuring it is centered and extends beyond the edges of the quilt top.
- Finally, lay your quilt top on the batting, right side up.
- Smooth out any wrinkles or creases in the quilt top, making sure it is aligned with the edges of the quilt sandwich.
Take your time during this step to ensure that all layers are properly aligned and smooth. Once you’re satisfied with the placement of the quilt top, batting, and backing fabric, you’re ready to move on to the next step: basting the layers together with pins.
Step 2: Start Basting
Now that you have your quilt sandwich prepared, it’s time to start basting the layers together. Basting will help keep the layers in place and prevent shifting during the quilting process. In this step, we’ll guide you through the process of basting your quilt using pins.
Follow these steps to begin basting your quilt:
- Start in the center: Begin basting in the center of your quilt and work your way out towards the edges. This will help distribute any potential puckering or excess fabric evenly throughout the quilt.
- Pin along the seams: Place a pin along the seams of your quilt blocks or any other areas where fabrics meet. This will help stabilize the layers and prevent them from shifting as you quilt.
- Space the pins evenly: Place pins approximately 4 to 6 inches apart throughout the quilt. Be mindful of any intricate or detailed sections of your quilt where you may need to place pins more closely together to secure the layers.
- Pin around the edges: Make sure to pin along the outer edges of the quilt to prevent the layers from coming apart during the quilting process.
- Smooth out wrinkles: As you go, take a moment to smooth out any wrinkles or puckers that may occur. This will ensure that your quilt is flat and even.
Continue basting in this manner until you have pinned the entire quilt. Take your time during this step to ensure that each pin goes through all the layers of the quilt sandwich – the quilt top, batting, and backing fabric.
Once you’ve completed the basting process, it’s time to move on to the next step: adding the pins.
When basting a quilt with pins, start in the middle and work your way out to avoid puckering. Use curved safety pins to secure all three layers together.
Step 3: Adding the Pins
Now that you’ve basted the layers of your quilt together, it’s time to secure them in place by adding the pins. This step will ensure that the layers stay in alignment and prevent any shifting or puckering during the quilting process.
Follow these steps to add the pins:
- Hold the quilt layers together: Use one hand to hold the quilt layers together, near the area where you want to place a pin.
- Insert the pin: With your other hand, take a quilting safety pin and insert it through all layers of the quilt sandwich, starting from the top.
- Close the pin: Securely close the pin to keep the layers tightly together. Make sure the pin is perpendicular to the surface of the quilt to prevent it from poking through the backing fabric or your hand.
- Continue adding pins: Move to the next area of the quilt and repeat steps 1-3 until you have added pins throughout the entire quilt.
As you add pins, make sure to space them evenly, approximately 4 to 6 inches apart, to ensure that the layers are securely held together. Pay special attention to the outer edges and corners of the quilt, where you may need to add extra pins for added stability.
Take your time during this step to ensure that each pin is securely fastened and that the quilt layers are smooth and aligned. Once you’ve added all the pins, you’re ready to move on to the final step: finishing the basting process.
Read more: How To Hand Baste A Quilt
Step 4: Finishing the Basting
Now that you’ve added all the pins, it’s time to finish the basting process and prepare your quilt for quilting. Here are the final steps to complete the basting:
- Trim excess batting and backing fabric: Use scissors or a rotary cutter to carefully trim any excess batting and backing fabric that extends beyond the edges of the quilt top. This will give your quilt a neat and clean finish.
- Check for any missed spots: Once you’ve trimmed the excess fabric, take a moment to check the quilt for any missed spots. Make sure all areas are securely basted with pins and adjust as needed.
- Inspect the quilt layers: Carefully lift and inspect the quilt layers to ensure they are aligned and there are no wrinkles or puckers. Smooth out any imperfections before moving on.
- Proceed with quilting: With the quilt layers securely basted together, you can now proceed with quilting your project. Whether you choose to hand quilt or use a sewing machine, the basting pins will keep the layers in place as you work.
Remember to remove the pins as you quilt your way through the project. Take your time and enjoy the process of bringing your quilt to life with beautiful stitching and designs!
Once you’ve completed the quilting, you can remove the basting pins and proceed with binding the quilt to finish it off. The basting process ensures that your quilt stays stable and prevents any shifting or distortion during the quilting process.
With these steps, you now have a comprehensive guide on how to baste a quilt with pins. Happy quilting!
Conclusion
Basting a quilt with pins is a crucial step in the quilting process, ensuring that the layers stay in place and preventing shifting or puckering. By following the steps outlined in this article, you can successfully baste your quilt and create a stable foundation for your quilting journey.
Remember, preparation is key. Gather all the necessary supplies, including your quilt top, batting, backing fabric, quilting safety pins, and a flat surface. Take the time to prepare your quilt sandwich by layering the fabrics correctly and smoothing out any wrinkles or creases.
Starting from the center and working your way out, baste the layers together using quilting safety pins. Space the pins evenly and pay attention to areas where fabrics meet or where extra stability is needed. Smooth out any wrinkles or puckers as you go along.
Once all the pins are in place, take a moment to inspect the quilt, trim any excess fabric, and ensure that the layers are aligned and smooth. With the basting complete, you’re now ready to move forward with quilting your project.
Quilting is a labor of love, and the basting process is an essential part of creating a finished masterpiece. With the layers securely held together, you can confidently quilt and bring your design to life. So, take your time, enjoy the process, and let your creativity shine through the stitches.
Thank you for joining us on this basting journey. We hope this guide has provided you with the knowledge and confidence to baste your quilts with pins effectively. Happy quilting!
Frequently Asked Questions about How To Baste A Quilt With Pins
Was this page helpful?
At Storables.com, we guarantee accurate and reliable information. Our content, validated by Expert Board Contributors, is crafted following stringent Editorial Policies. We're committed to providing you with well-researched, expert-backed insights for all your informational needs.


0 thoughts on “How To Baste A Quilt With Pins”