Articles
How To Quilt A Jelly Roll Race Quilt
Modified: August 16, 2024
Learn how to quilt a jelly roll race quilt with this comprehensive articles. Discover tips, techniques, and step-by-step instructions for creating stunning quilts.
(Many of the links in this article redirect to a specific reviewed product. Your purchase of these products through affiliate links helps to generate commission for Storables.com, at no extra cost. Learn more)
Introduction
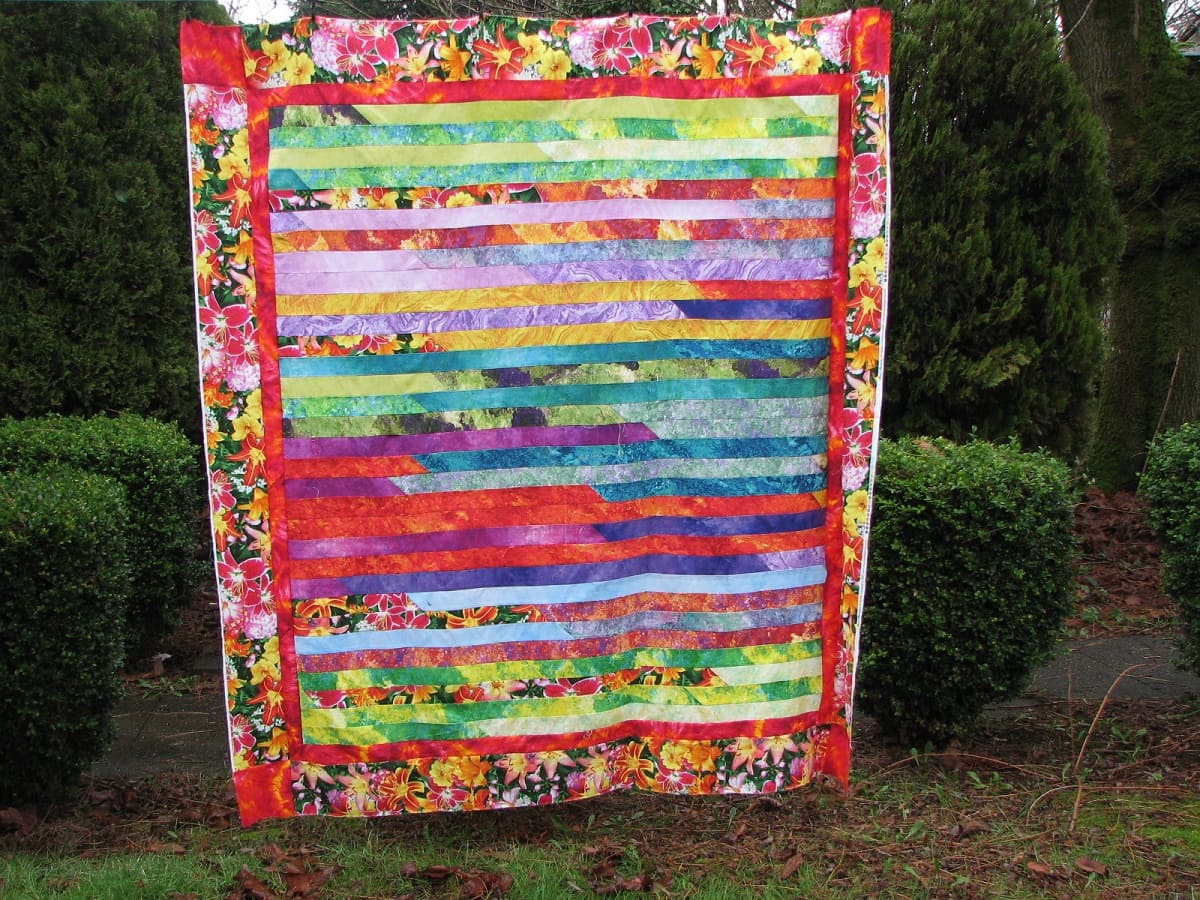
Quilting is a beloved craft that has been passed down through generations, and there are endless techniques and designs to explore. One popular quilting method is the Jelly Roll Race Quilt, which offers a fun and efficient way to create a stunning quilt in no time. If you’re new to quilting or looking for a project that will provide beautiful results without overwhelming complexity, the Jelly Roll Race Quilt is the perfect choice.
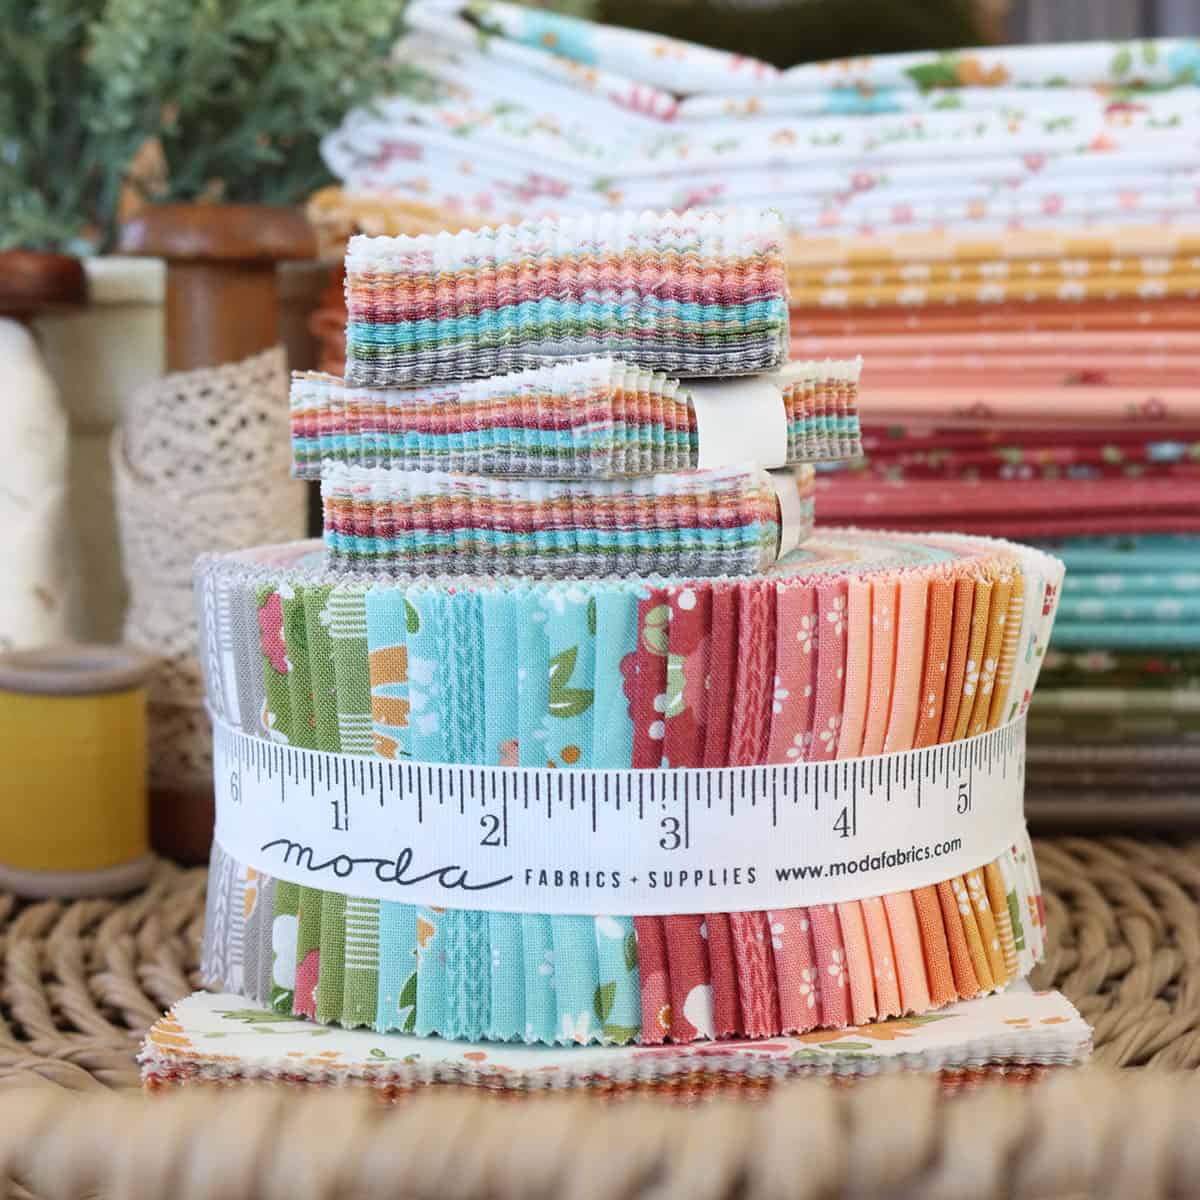
The Jelly Roll Race Quilt is named after the pre-cut fabric strips called jelly rolls that you’ll use to make the quilt top. These jelly rolls typically come in coordinating patterns and colors, making it easy to create a visually appealing quilt. The best part? You don’t have to spend hours cutting fabric or meticulously arranging blocks. The Jelly Roll Race Quilt is all about speed and simplicity, allowing you to focus on the joy of sewing and creating a beautiful finished product.
In this article, we’ll guide you through the step-by-step process of quilting a Jelly Roll Race Quilt. We’ll cover everything from preparing the jelly roll strips to adding borders and finishing touches. So, grab your sewing machine, gather your supplies, and let’s dive into the world of Jelly Roll Race Quilts!
Before we get started, here’s a list of supplies you’ll need for this project:
- Jelly Roll (Pre-cut fabric strips)
- Sewing Machine
- Thread
- Scissors
- Rotary Cutter and Cutting Mat
- Ruler
- Pins
- Iron
- Quilt Batting
- Backing Fabric
- Binding Fabric
- Quilting Needles
Now that you have your supplies ready, let’s move on to the first step: preparing the jelly roll strips.
Key Takeaways:
- Quilting a Jelly Roll Race Quilt offers a fun and efficient way to create a visually stunning quilt with speed and simplicity, making it an ideal project for both beginners and experienced quilters.
- By following the step-by-step process, infusing personal touches, and savoring the creative journey, quilters can transform pre-cut jelly roll strips into cherished, handmade masterpieces that embody warmth, love, and craftsmanship.
Read more: How To Make A Jelly Roll Quilt
Supplies Needed
Before diving into quilting a Jelly Roll Race Quilt, it’s essential to gather all the necessary supplies. Here’s a comprehensive list of items you’ll need to complete this project:
- Jelly Roll: This is the star of the show! A jelly roll is a collection of pre-cut fabric strips that are typically 2.5 inches wide. You can purchase ready-made jelly rolls from fabric stores or create your own by cutting fabric into strips.
- Sewing Machine: A reliable sewing machine is crucial for stitching the quilt top and completing the project with ease. Ensure that your machine is in good working condition and that you have spare bobbins and needles on hand.
- Thread: Choose a high-quality thread that matches or complements the colors in your jelly roll. A 100% cotton thread is recommended for quilting projects.
- Scissors: Sharp scissors are necessary for cutting thread and fabric. It’s a good idea to have a pair of fabric scissors dedicated solely to your quilting projects.
- Rotary Cutter and Cutting Mat: A rotary cutter and self-healing cutting mat make cutting fabric strips quick and precise. These tools are essential for working with jelly rolls.
- Ruler: A clear and accurate ruler is needed for measuring and aligning fabric strips. Look for a ruler that has markings in increments of ¼ inch.
- Pins: Flat-head pins or quilting pins are useful for holding fabric layers together during sewing. Opt for sharp pins that won’t leave noticeable holes in the fabric.
- Iron: An iron is necessary for pressing fabric strips and achieving crisp, wrinkle-free seams. Make sure your iron is clean and in good working condition.
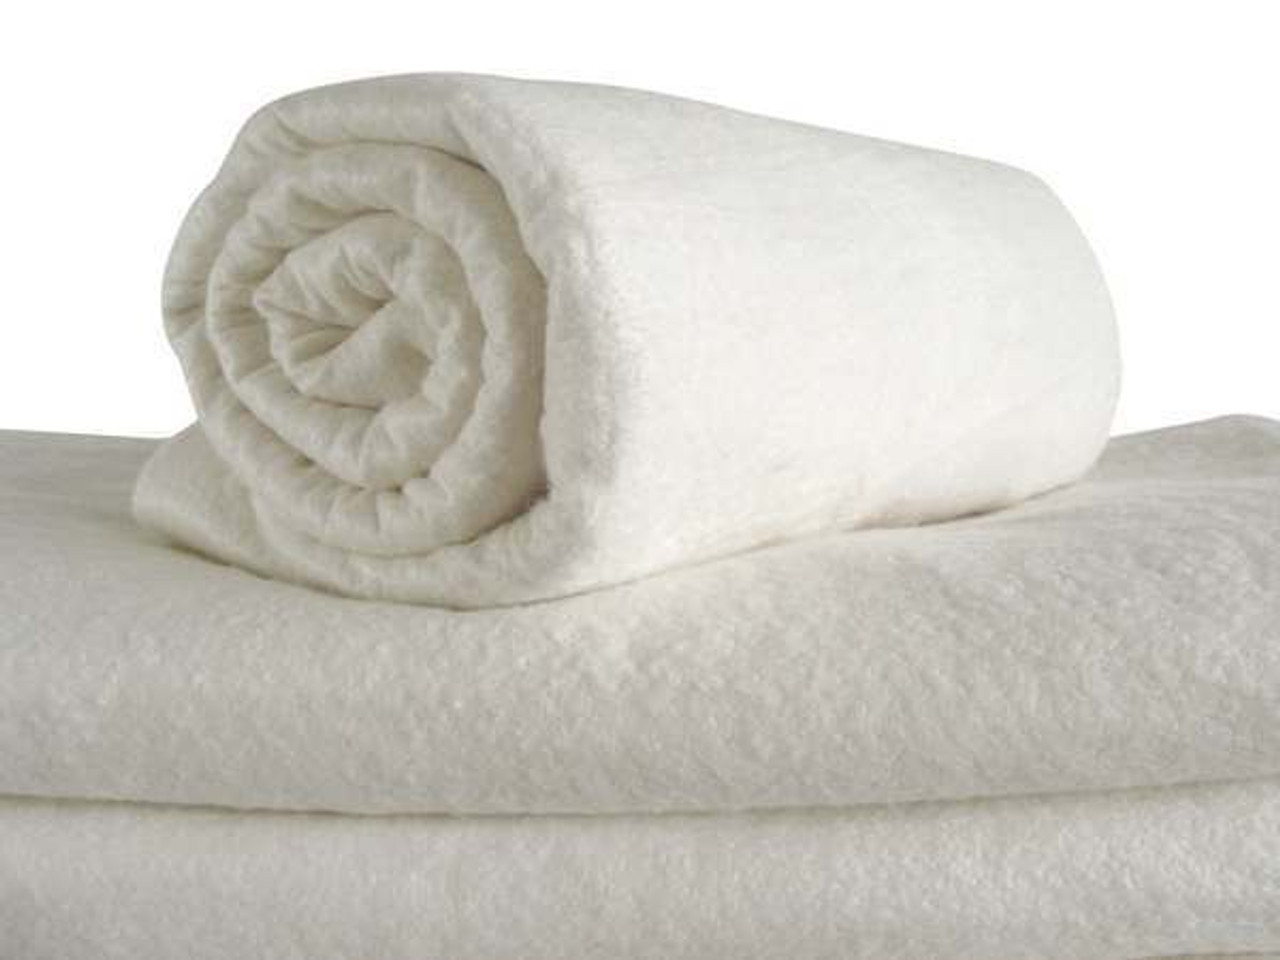
- Quilt Batting: Quilt batting is the soft, fluffy layer sandwiched between the quilt top and backing fabric. Choose a batting that complements the desired finished look and feel of your quilt.
- Backing Fabric: The backing fabric is the foundation of the quilt and should be wide enough to accommodate the quilt top and batting. Select a fabric that complements or contrasts with your jelly roll strips.
- Binding Fabric: Binding is the fabric used to finish the edges of the quilt. You can either purchase pre-made binding or create your own using coordinating fabric.
- Quilting Needles: Quilting needles are designed with a larger eye and a sharp point, making them ideal for stitching through thick quilt layers. Use size 80/12 or 90/14 quilting needles.
Once you have gathered all your supplies, you’re ready to embark on the journey of quilting a Jelly Roll Race Quilt. The next step is to prepare the jelly roll strips, so let’s move on to the exciting part!
Step 1: Preparing the Jelly Roll Strips
Before you begin sewing the jelly roll strips together, it’s important to ensure they are properly prepared. Follow these steps to get your jelly roll strips ready for quilting:
- Unroll and Press: Start by unrolling the jelly roll and laying out the fabric strips. Depending on the manufacturer, the jelly roll may be rolled tightly or loosely. Take the time to unroll and spread out the strips to identify any wrinkles, creases, or folds. Once laid out, use an iron set on a low heat setting to gently press each strip, eliminating any wrinkles or folds. Be careful not to stretch or distort the fabric while pressing.
- Trim the Selvage: Check each end of the jelly roll strips for the selvage. The selvage is the tightly woven edge of the fabric that often contains manufacturer information. Use your scissors or rotary cutter to trim off the selvage from each strip. Trimming the selvage ensures that your quilt top will lay flat and that the seam allowances are consistent.
- Square the Ends: After trimming the selvage, check the ends of each strip to ensure they are straight and even. If any ends are uneven or jagged, use your ruler and rotary cutter to trim them, creating clean and square edges. This step is crucial for accurate seam construction and alignment.
By taking the time to prepare your jelly roll strips properly, you’ll ensure that your quilt top is visually appealing, free from wrinkles, and easy to work with during the sewing process. Once the strips are prepared, you’re ready to move on to the exciting step of sewing them together!
Step 2: Sewing the Strips Together
Now that you have prepared the jelly roll strips, it’s time to start sewing them together to create the quilt top. Follow these steps to seamlessly join the strips:
- Arrange the Strips: Lay out the jelly roll strips in the desired order. You can follow a specific color pattern or arrange them randomly for a more eclectic look. Take the time to experiment with different arrangements until you find one that you love.
- Align and Pin: Once you’re happy with the strip arrangement, take the first two strips and align them right sides together, ensuring that the edges are flush. Pin the strips together along the long edge to hold them in place during sewing. Repeat this step for all the remaining strips.
- Sew the Strips: Using a ¼ inch seam allowance, stitch the pinned strips together using a straight stitch. Backstitch at the beginning and end of each seam to secure the stitches. Continue sewing the strips together one after the other until you reach the end of the last strip.
- Press the Seams: After sewing the strips together, open the seam allowances and press them flat with the iron. First, press the seam as sewn to set the stitches. Then, open the seam and press it to one side, alternating the direction for each strip. This will help distribute the bulk of the seams and create a smooth quilt top.
- Trim the Excess: If any strips extend beyond the length of the others, trim them to match the overall length of the quilt top. Use a ruler and rotary cutter to ensure a straight and even edge.
- Repeat the Sewing Process: Continue sewing strips together following the same steps until the quilt top reaches your desired size. Jelly roll strips are typically long enough to create a lap size or throw size quilt. However, you can add more strips or an additional jelly roll to make a larger quilt.
By sewing the strips together with precision and care, you’ll create a visually stunning quilt top that showcases the beautiful patterns and colors of the jelly roll. Now that your quilt top is taking shape, it’s time to move on to the next step: creating the quilt top.
Step 3: Creating the Quilt Top
With the jelly roll strips sewn together, it’s time to move on to creating the quilt top. Follow these steps to bring your quilt top to life:
- Trim the Quilt Top: Before moving forward, trim the edges of the sewn jelly roll strips to ensure they are straight and even. Use a ruler and rotary cutter to trim excess fabric and create clean edges.
- Add Borders (Optional): If you want to add borders to your quilt top, now is the time to do so. Borders can enhance the design, provide a finished look, and allow you to customize the size of your quilt. Measure the sides of your quilt top and cut fabric strips for borders to match those lengths. Sew the borders to the sides of the quilt top, making sure to pin and align them properly.
- Press the Quilt Top: Once the borders are added (if desired), press the entire quilt top, including the borders, with an iron. Pressing helps to set the stitches, flatten the seams, and create a crisp and professional appearance.
- Square the Quilt Top: Lay the quilt top on a flat surface and use a ruler and rotary cutter to trim the edges, ensuring the quilt top is square and symmetrical. This step will make it easier to align the quilt top with the batting and backing layers.
Creating the quilt top is an important step that determines the overall look and size of your quilt. Whether you choose to add borders or keep it simple, remember to take your time and pay attention to detail. Now that your quilt top is complete, it’s time to move on to the next step: quilting the layers.
When quilting a Jelly Roll Race quilt, consider using a walking foot to help prevent shifting and puckering of the layers as you quilt. This will help ensure a smooth and even finish to your quilt.
Read more: What Size Quilt Does A Jelly Roll Make
Step 4: Adding Borders (Optional)
Adding borders to your quilt can provide a finishing touch and enhance the overall design. If you decide to include borders in your quilt, here’s how you can do it:
- Measure and Cut: Start by measuring the sides of your quilt top. Depending on your preferred border width, cut fabric strips to match the measured lengths. Remember to add an additional ½ inch for seam allowances.
- Align and Pin: Take one fabric strip and align it with one side of the quilt top, right sides facing each other. Pin the border strip along the side, ensuring it is evenly distributed and properly aligned. Repeat this step for the remaining sides of the quilt top.
- Sew the Borders: Using a ¼ inch seam allowance, stitch the pinned borders to the quilt top, using a straight stitch. Backstitch at the beginning and end of each seam to secure the stitches. Repeat this process for all sides of the quilt top.
- Press: After sewing the borders, press the seam allowances towards the border fabric. This will help the border lay flat and create a neater appearance.
- Trim Excess and Square: Once the borders are sewn, trim any excess fabric and square the quilt top using a ruler and rotary cutter. Ensure that the borders are the same length as the sides of the quilt top for a balanced and professional finish.
- Additional Borders (Optional): If you desire to add multiple borders to your quilt, repeat the previous steps with additional fabric strips, varying the widths and colors to create visual interest.
Adding borders is a personal choice and completely optional. It allows you to customize the size and style of your quilt while enhancing its overall appearance. Take your time with this step to ensure that the borders are sewn and aligned accurately. Now that the borders are in place, let’s move on to the exciting step of quilting the layers!
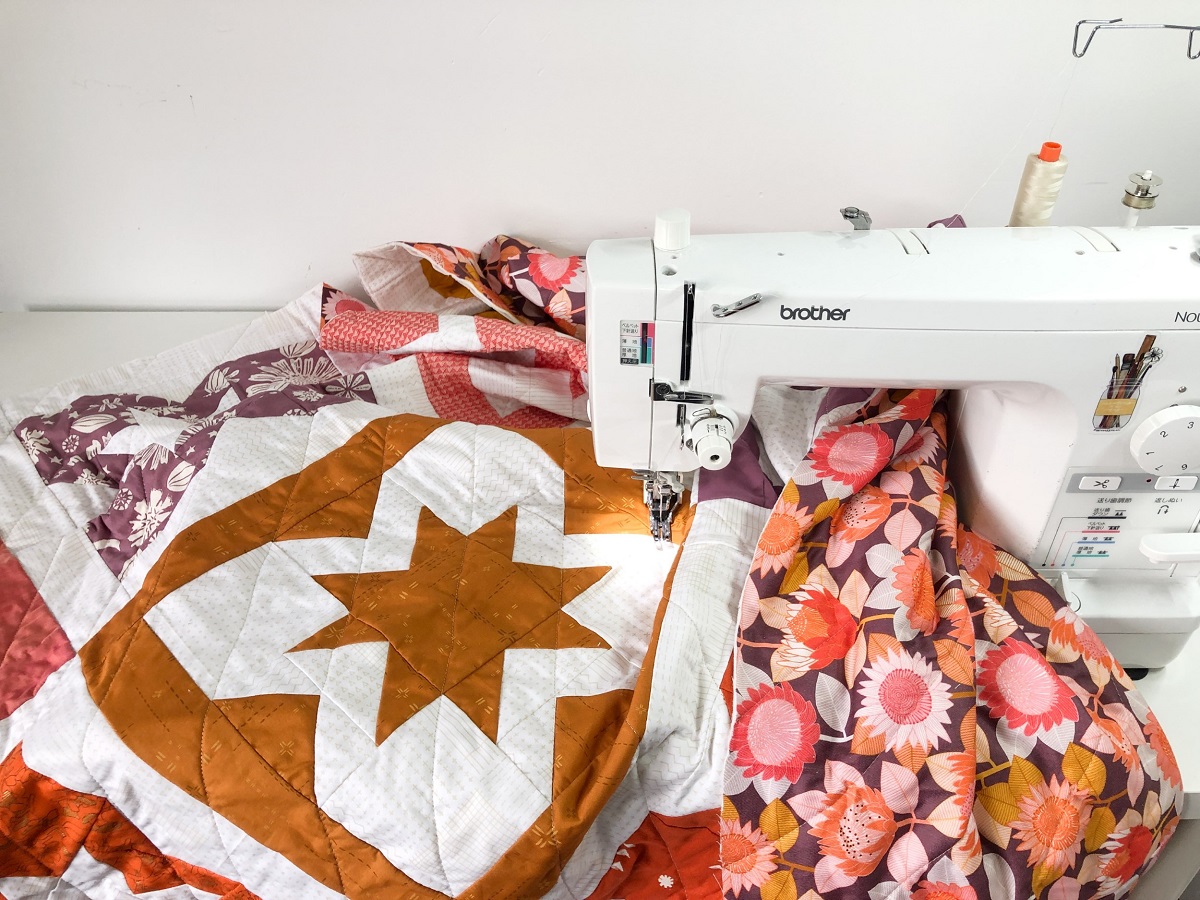
Step 5: Quilting the Layers
Quilting the layers is the process of securing the quilt top, batting, and backing fabric together. It not only adds texture and visual interest to the quilt but also ensures its durability. Follow these steps to quilt your jelly roll race quilt:
- Prepare the Layers: Lay the quilt backing fabric on a flat surface, right side down. Smooth out any wrinkles or bubbles. Next, place the quilt batting on top of the backing fabric, ensuring it aligns properly and covers the entire quilt area. Lastly, position the quilt top over the batting, right side up. Smooth out any wrinkles or shifts in the layers.
- Baste the Layers: To secure the layers together temporarily, you’ll need to baste them. There are several basting methods you can choose from, such as using safety pins or spray basting. If using safety pins, place them throughout the quilt, making sure all layers are smooth and secure. Alternatively, if using spray basting, follow the instructions on the spray adhesive can for application.
- Select a Quilting Design: Decide on a quilting design that complements your quilt. You can choose traditional patterns, free-motion quilting, or even straight-line quilting. Consider the density of your quilting to ensure it will hold up over time.
- Quilt the Layers: Using a walking foot or free-motion quilting foot on your sewing machine, begin quilting your layers. Start from the center of the quilt and work your way outwards. Follow your chosen quilting design, taking your time to make even stitches. Backstitch at the beginning and end of each quilting line to secure the stitches.
- Continue Quilting: Repeat the quilting process until you have quilted the entire quilt top. Take breaks when needed to rest your hands and prevent fatigue. Quilting can take time, so be patient and enjoy the process.
Quilting the layers is a time-consuming but essential step in creating a finished quilt. Choose a quilting design that inspires you and complements your quilt’s overall aesthetic. Once the layers are quilted together, you’re ready for the final step: binding the quilt.
Step 6: Binding the Quilt
The final step in completing your Jelly Roll Race Quilt is binding the edges. Binding not only provides a finished look to the quilt but also helps to secure the layers and add durability. Follow these steps to bind your quilt:
- Prepare the Binding: Cut fabric strips for the binding, making sure they are wide enough to cover the quilt’s edges. The width of the strips can vary, but a common size is 2.5 inches wide. If needed, join multiple strips together using diagonal seams to create one continuous strip.
- Prepare the Quilt Edges: Trim any excess batting or backing fabric, ensuring all the layers are even and aligned. Square the quilt if necessary.
- Attach the Binding: Starting in the middle of one side of the quilt, leaving a tail of 6-8 inches, align the raw edges of the binding strip with the quilt edge. Use pins or clips to hold the binding in place. Sew the binding to the quilt using a ¼ inch seam allowance, stopping about ¼ inch from the corner.
- Miter the Corners: To create neat corners, fold the binding strip up, away from the quilt top, and then fold it back down, aligning the raw edges with the next side of the quilt. This will create a mitered corner. Secure the corner with pins, and continue sewing the binding along the next side, repeating the process at each corner.
- Join the Binding Ends: When you reach the starting point, trim the excess binding, leaving a tail to overlap the beginning. Open up the tails, align the ends right sides together, and sew across the diagonal. Trim the seam allowance and press the binding.
- Complete the Binding: Fold the binding over the quilt edge, ensuring the folded edge covers the stitching line. Use clips or pins to hold it in place all around the quilt. Hand sew the binding in place using a slip stitch or use your sewing machine to stitch in the ditch or do a topstitch for a more decorative finish.
- Finish and Enjoy: After stitching down the binding, give your completed quilt a final press with an iron. Trim any loose threads, and your Jelly Roll Race Quilt is ready to be displayed or enjoyed as a cozy and beautiful masterpiece!
Binding your quilt adds the finishing touch and secures the edges. Take your time and enjoy the process of hand stitching or machine sewing the binding. Once completed, your Jelly Roll Race Quilt is ready to be cherished for years to come.
Congratulations on completing your Jelly Roll Race Quilt! Now, step back and admire your creation, reveling in the satisfaction of turning a simple jelly roll into a beautiful quilt. Happy quilting!
Conclusion
Quilting a Jelly Roll Race Quilt is a fun and rewarding project that allows you to create a stunning quilt with speed and simplicity. From preparing the jelly roll strips to sewing them together, creating the quilt top, quilting the layers, and binding the edges, each step brings you closer to a beautifully finished quilt.
With the help of pre-cut jelly roll strips, you can effortlessly create a visually appealing design that showcases the coordination of colors and patterns. By following the step-by-step instructions provided in this article, you can confidently embark on your quilting journey, even if you’re a beginner.
Remember to take your time, pay attention to details, and infuse your personal touch into your quilt. Whether you choose to add borders, experiment with different quilting designs, or select a unique binding fabric, each decision will add to the character and charm of your finished quilt.
Quilting is not only a creative outlet but also a way to connect with a long-standing tradition and create something that can be treasured for generations. As you quilt your Jelly Roll Race Quilt, savor the process, enjoy the therapeutic rhythm of the sewing machine, and take pride in the artistry of your stitches.
When your quilt is complete, you’ll have a tangible representation of your creativity and dedication. Whether you display it as a cherished keepsake or gift it to a loved one, your Jelly Roll Race Quilt will be a symbol of warmth, love, and craftsmanship.
So gather your supplies, prepare your jelly roll strips, and let the sewing machine hum as you embark on this quilting adventure. With each stitch, you’ll be creating a masterpiece that tells a story and brings comfort and joy to those who wrap themselves in its embrace.
Happy quilting!
Frequently Asked Questions about How To Quilt A Jelly Roll Race Quilt
Was this page helpful?
At Storables.com, we guarantee accurate and reliable information. Our content, validated by Expert Board Contributors, is crafted following stringent Editorial Policies. We're committed to providing you with well-researched, expert-backed insights for all your informational needs.

0 thoughts on “How To Quilt A Jelly Roll Race Quilt”