Articles
How To Build Above Ground Garden
Modified: August 28, 2024
Learn the art of gardening with our step-by-step guide on how to build an above ground garden. Start your gardening journey today!
(Many of the links in this article redirect to a specific reviewed product. Your purchase of these products through affiliate links helps to generate commission for Storables.com, at no extra cost. Learn more)
Introduction
When it comes to gardening, there are various methods to choose from. One popular option is building an above ground garden. Not only does it provide convenience and accessibility, but it also allows you to control the soil quality and drainage better. Whether you have limited space or prefer not to dig into the ground, an above ground garden is a fantastic alternative.
In this article, we will guide you through the process of building an above ground garden step by step. From choosing a suitable location to caring for your plants, we will cover all the essential aspects. So, grab your gardening tools, put on your gardening gloves, and let’s get started!
Key Takeaways:
- Enjoy the convenience and control of an above ground garden by selecting a sunny, accessible location and providing proper care for thriving plants. Embrace the joy of gardening and savor the bountiful harvest!
- Unleash your green thumb with an above ground garden, offering accessibility and better soil control. From building the frame to nurturing your plants, experience the magic of cultivating a thriving outdoor oasis.
Step 1: Choose a Suitable Location
The first step in building an above ground garden is selecting the perfect location for it. Here are a few factors to consider:
- Sunlight: Choose a spot that receives at least 6 hours of direct sunlight per day. Most vegetables and herbs thrive in sunny conditions, so make sure your garden gets enough sun exposure.
- Accessibility: Select a location that is easily accessible for watering, tending, and harvesting your plants. Consider the proximity to a water source and your own convenience in reaching the garden.
- Drainage: Ensure that the area you choose has proper drainage. Avoid low-lying areas or places prone to flooding as excess water can harm your plants.
- Soil quality: Assess the soil quality in the potential spot. If you have poor soil, building an above ground garden allows you to fill it with nutrient-rich soil, ensuring optimal plant growth.
Remember to also take into account the size of your garden and the number of plants you intend to grow. If space is limited, vertical gardening or using raised beds might be a suitable option. Once you have considered these factors, you can move on to preparing the ground for your above ground garden.
Step 2: Prepare the Ground
Before setting up the frame for your above ground garden, it’s important to properly prepare the ground. Follow these steps:
- Clear the area: Remove any grass, weeds, rocks, or debris from the area where you plan to place your garden frame. This will ensure a clean and level surface for your garden.
- Lay a barrier: To prevent weeds from growing up into your garden, consider laying a weed barrier fabric or newspaper over the cleared area. This will help suppress weed growth and keep your garden tidy.
- Create a level base: Use a shovel or rake to level the ground, removing any bumps or unevenness. A level surface is essential for stable garden construction.
- Add organic matter: To improve the soil quality, add a layer of organic matter such as compost or well-rotted manure. This will enrich the soil with nutrients and improve its water-holding capacity.
Once you have prepared the ground, you’re ready to move on to building the frame for your above ground garden. It’s an exciting step that will bring your garden to life!
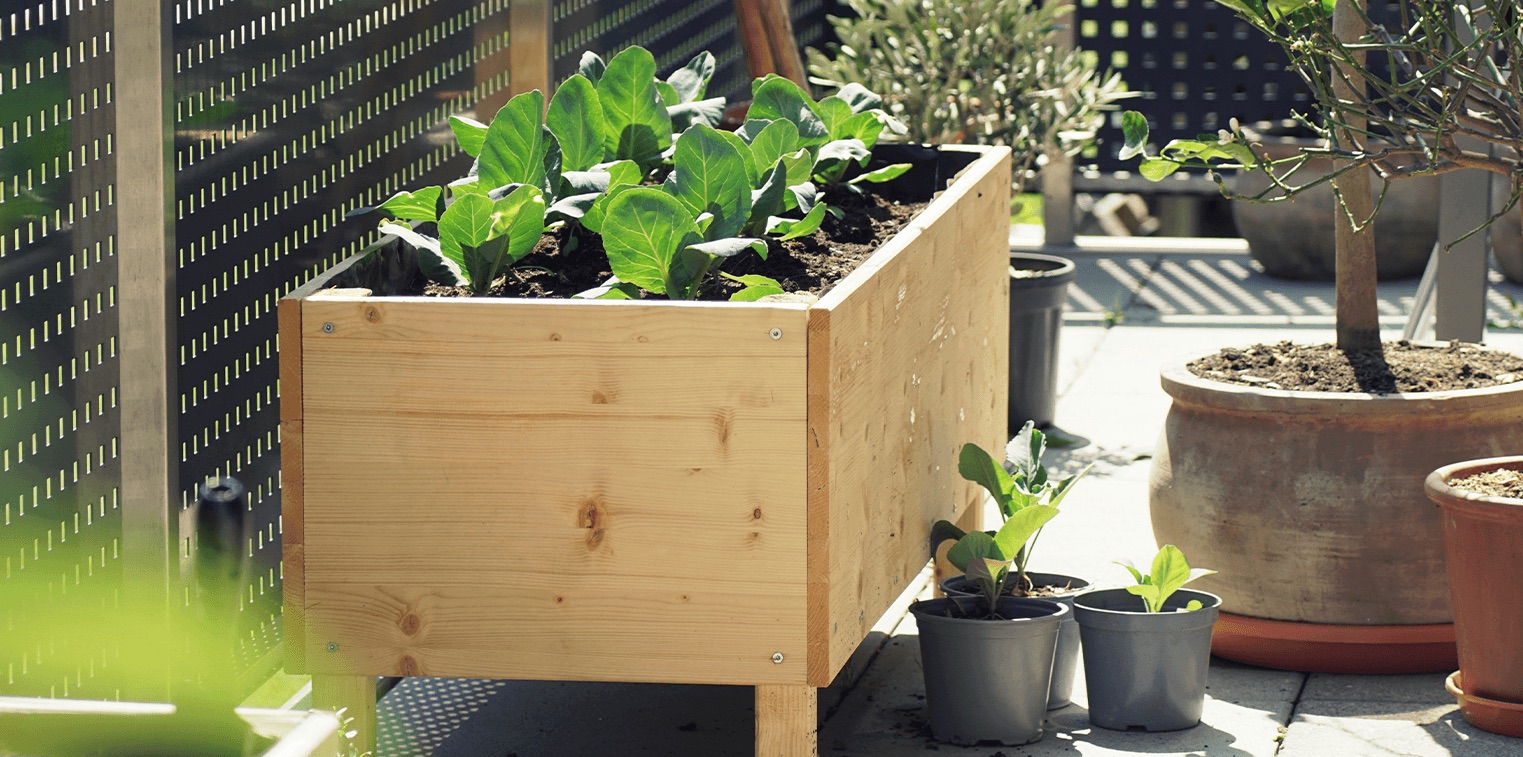
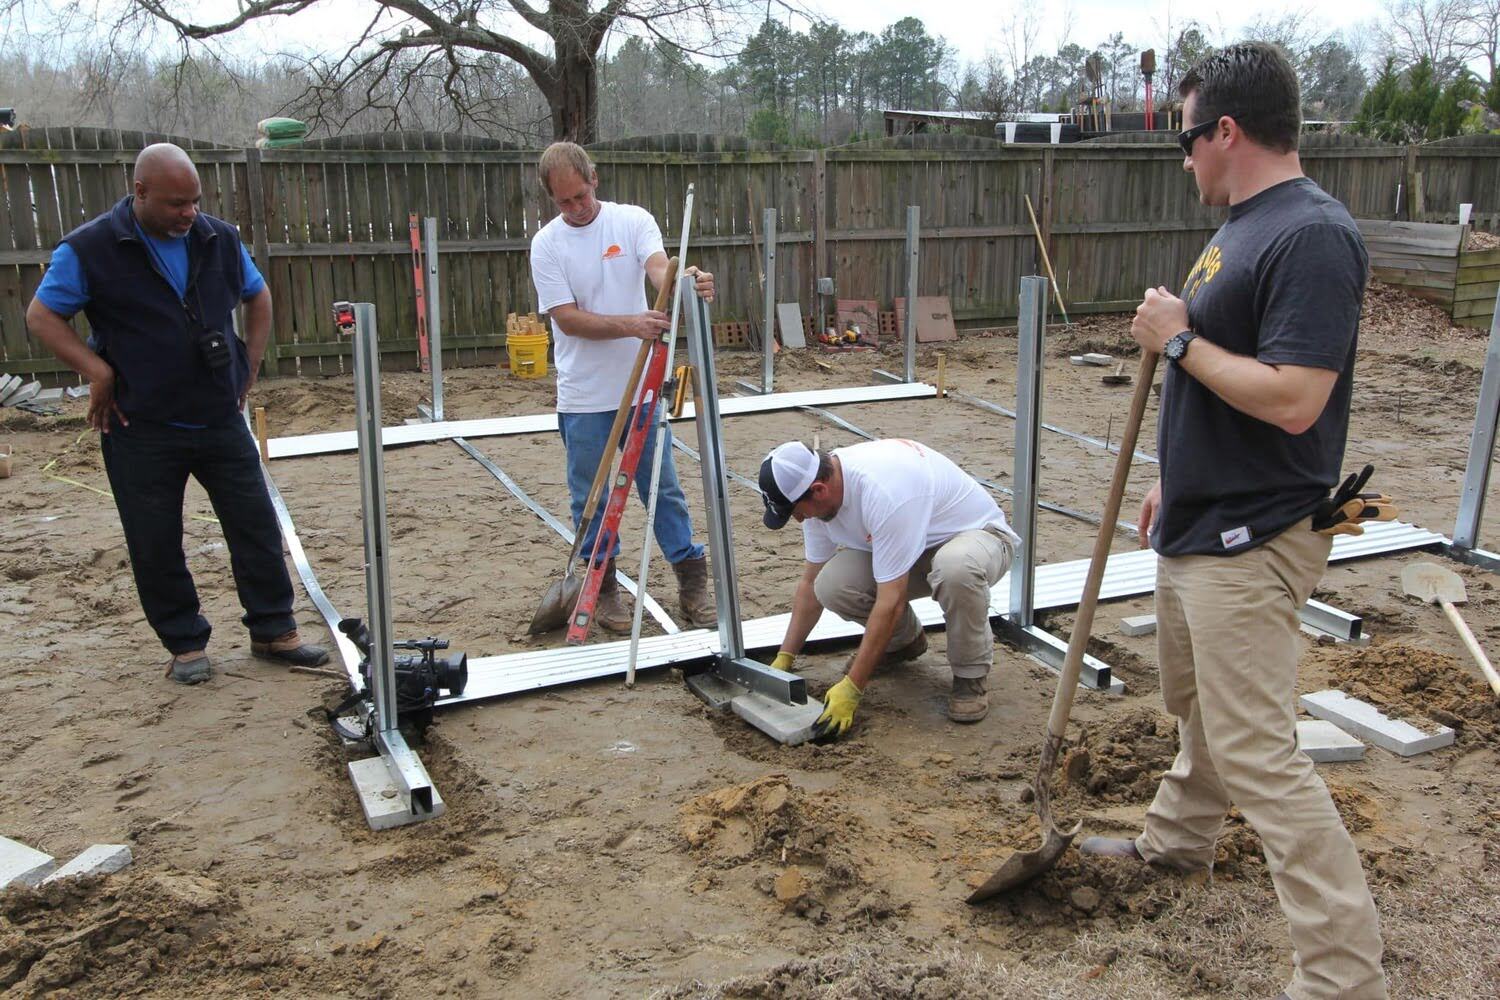
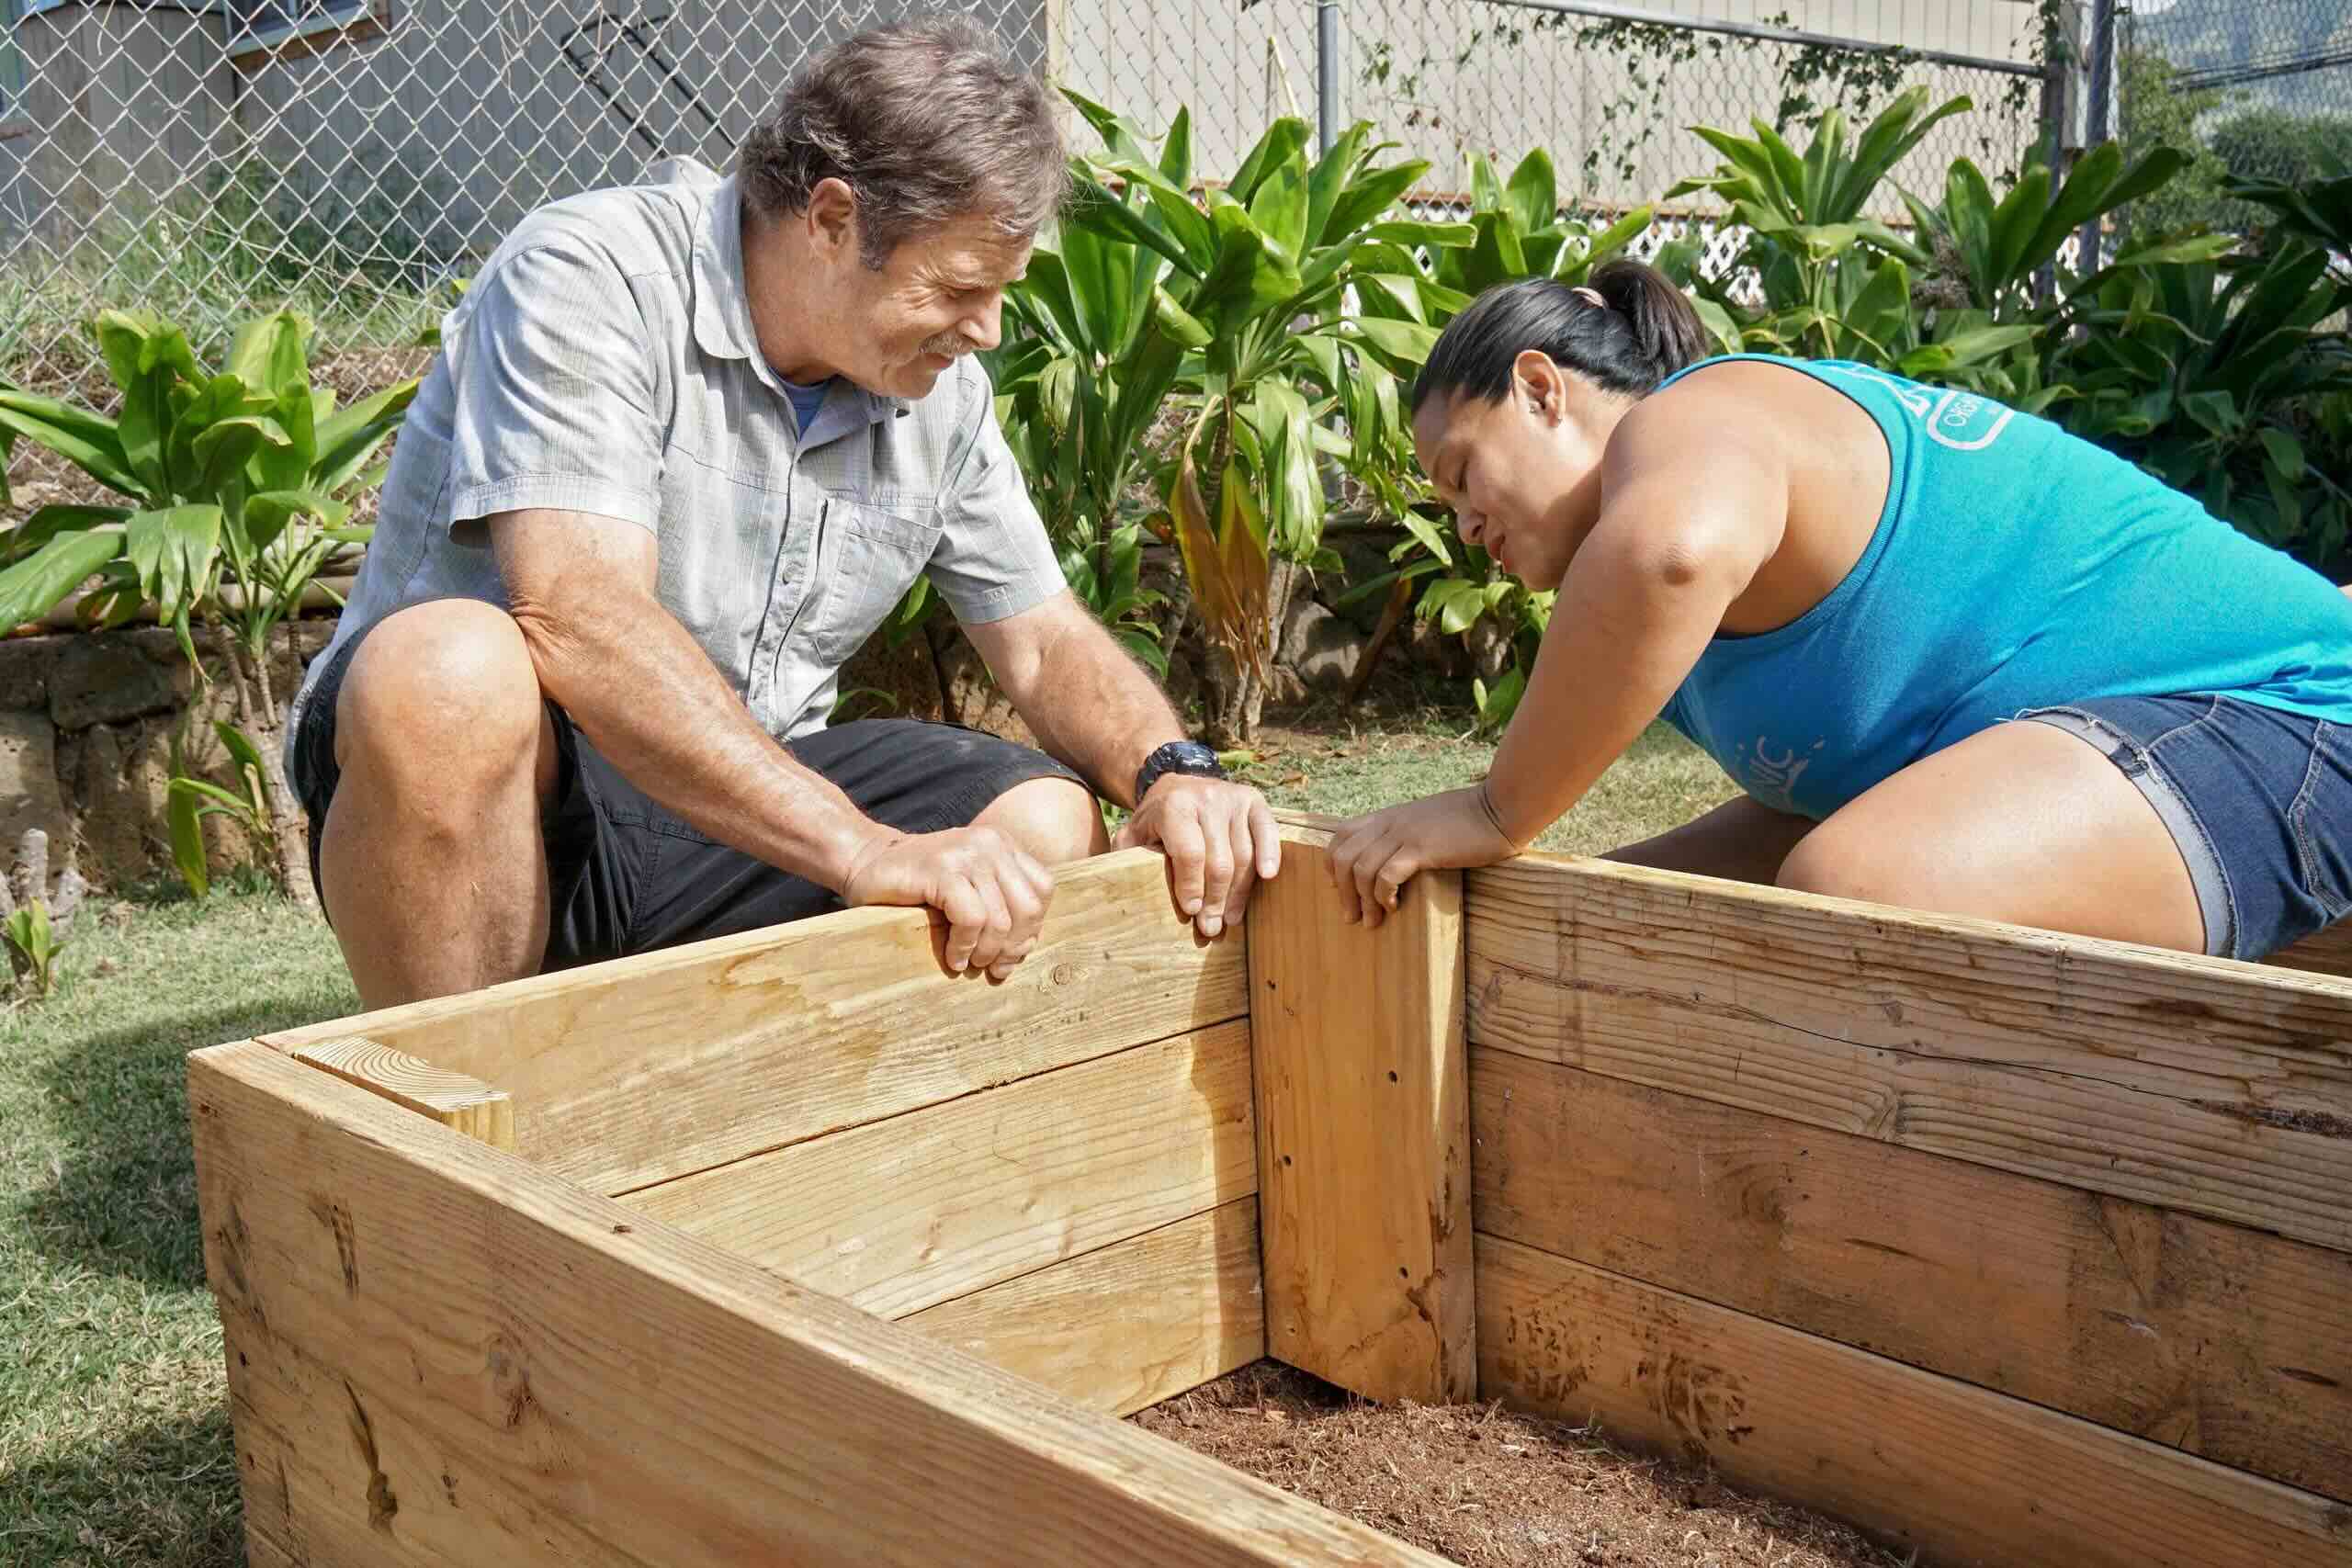
Step 3: Build the Garden Frame
Now that you have prepared the ground, it’s time to build the frame for your above ground garden. The frame will provide structure and support for your garden, as well as hold the soil in place. Follow these steps:
- Select the material: Choose the material for your garden frame. Common options include wood, metal, or composite materials. Consider the look, durability, and cost when making your decision.
- Measure and mark: Measure out the dimensions of your garden and mark the locations for the frame. Use a measuring tape and stakes to ensure accuracy.
- Cut the pieces: Cut the frame pieces according to your measurements using a saw. If using wood, ensure the pieces are properly treated to withstand outdoor conditions.
- Assemble the frame: Use screws, nails, or brackets to securely assemble the frame pieces. Double-check that the corners are square and the frame is level.
- Stabilize the frame: To provide additional stability, consider adding cross beams or diagonal supports to the frame. This will help prevent any shifting or wobbling.
Once you have successfully built the frame, place it on the prepared ground. Ensure it is level and stable before moving on to the next step of filling the garden with soil.
Step 4: Fill the Garden with Soil
With the garden frame in place, it’s time to fill it with soil to provide your plants with the nutrients they need to thrive. Follow these steps to properly fill your above ground garden:
- Choose the right soil: Select a high-quality soil mix specifically formulated for gardening. It should be well-draining, nutrient-rich, and suitable for the types of plants you want to grow.
- Layer the soil: Start by adding a layer of gravel or rocks at the bottom of the garden frame. This will help with drainage and prevent water from pooling at the roots of your plants.
- Add organic matter: Mix in compost, well-rotted manure, or other organic materials to enrich the soil and promote healthy plant growth.
- Fill the frame: Fill the garden frame with soil, leaving about an inch of space at the top. Gently pat down the soil to remove any air pockets.
- Level the soil: Use a rake or your hands to level the soil surface. This will provide a smooth foundation for planting.
Remember to consider the specific needs of your plants, such as pH levels and moisture requirements, when selecting and preparing the soil. Once the garden is filled with soil, you are ready to move on to the next step of planting your desired plants.
When building an above ground garden, be sure to use untreated wood or composite materials to avoid leaching chemicals into your soil. This will help ensure the health of your plants and the safety of your produce.
Read more: How To Drain An Above Ground Swimming Pool
Step 5: Plant Your Desired Plants
Now that your above ground garden is filled with soil, it’s time to bring it to life by planting the plants of your choice. Here’s how to go about it:
- Plan your layout: Consider the specific requirements of each plant, such as their sunlight and spacing needs. This will help you determine the best arrangement for your garden.
- Start with seedlings or seeds: If starting from seedlings, gently remove them from their containers and plant them at the appropriate depth in the soil. If using seeds, follow the instructions on the seed packet for planting depth and spacing.
- Water immediately: After planting, give your newly planted plants a good watering to help them settle into their new environment. Use a gentle spray or watering can to avoid disturbing the soil.
- Maintain spacing: Ensure that you leave enough space between plants to allow for proper air circulation and growth. This will help prevent overcrowding and the spread of diseases.
- Consider companion planting: Take advantage of companion planting by strategically pairing plants that benefit each other. For example, planting marigolds alongside tomatoes can help deter pests.
Be sure to regularly water your plants and monitor their progress. Adjust watering frequency as needed based on the moisture requirements of each plant. Additionally, consider adding mulch around your plants to help retain moisture and suppress weed growth.
Now that your plants are in the ground, it’s time to move on to the next step: caring for your garden to ensure its health and vitality.
Step 6: Water and Care for Your Garden
To maintain the health and growth of your above ground garden, it’s crucial to provide proper care and attention. Follow these steps to ensure your garden thrives:
- Water regularly: Most plants require consistent moisture, so water your garden regularly. Aim to keep the soil evenly moist but not overly saturated. Check the moisture level by inserting your finger into the soil about an inch deep. If it feels dry, it’s time to water.
- Water deeply: When you water, make sure to provide deep irrigation to encourage strong root growth. Water at the base of the plants, avoiding wetting the foliage to prevent disease.
- Fertilize appropriately: Feed your plants with a balanced organic fertilizer or compost to replenish nutrients in the soil. Follow the instructions on the fertilizer package for application rates and frequency.
- Monitor for pests and diseases: Keep a close eye on your garden for any signs of pests or diseases. Inspect the leaves, stems, and soil regularly. If necessary, take prompt action to address the issue and prevent further damage.
- Remove weeds: Regularly weed your garden to prevent unwanted plants from competing with your crops for resources. Pull weeds by hand or use a hoe to remove them from the soil.
- Prune and support plants: Properly prune and support your plants as they grow to maintain their shape, promote airflow, and prevent them from becoming overcrowded. Use stakes, trellises, or cages for taller plants that need support.
Remember to observe and respond to the specific needs of each plant in your garden. Some may require more water, while others may need frequent harvesting or trimming. By providing your garden with the care it needs, you’ll enjoy a bountiful harvest and healthy plants.
Step 7: Maintain and Harvest Your Garden
Maintaining your above ground garden is essential to ensure the continued success of your plants. Follow these steps to properly care for your garden and enjoy a bountiful harvest:
- Monitor and maintain soil moisture: Continue to monitor the moisture level in the soil and water accordingly. Adjust watering frequency as needed based on weather conditions.
- Weed regularly: Keep up with weed control by regularly removing any unwanted plants that compete with your crops. This will help your plants thrive by reducing competition for nutrients and water.
- Support and prune: Provide support to the plants that need it as they grow taller. Use stakes, cages, or trellises to keep the plants upright and prevent them from bending or breaking.
- Fertilize as needed: Continue to fertilize your garden throughout the growing season. Use organic fertilizers to replenish nutrients in the soil and promote healthy plant growth.
- Monitor for pests and diseases: Regularly inspect your plants for any signs of pests or diseases. Take appropriate actions, such as using organic pest control methods, to mitigate any issues and protect your plants.
- Harvest at the right time: Keep track of the maturity time for each plant variety and harvest them when they’re ready. Follow proper harvesting techniques to ensure the best quality and flavor.
- Clean up and prepare for the next season: At the end of the growing season, remove any spent plants, weeds, and debris from your garden. Add compost or organic matter to enrich the soil for the following season.
Remember to enjoy the fruits of your labor by harvesting your garden’s produce. Freshly harvested vegetables and herbs not only taste delicious, but they’re also packed with nutrients. Share your harvest with family and friends, or preserve the surplus by freezing or canning.
By maintaining and harvesting your garden with care, you’ll be rewarded with a thriving and productive above ground garden year after year.
Conclusion
Building an above ground garden is a wonderful way to unleash your green thumb and enjoy the beauty and bounty of nature. By following the steps outlined in this guide, you can create a thriving garden that brings joy and sustenance to your life.
From choosing a suitable location and preparing the ground to building the garden frame, filling it with soil, planting your desired plants, and providing proper care, each step plays a vital role in the success of your garden. Remember to adapt these steps to suit the specific needs of your plants and the local climate.
As you tend to your garden, you’ll develop a deep connection with nature and witness the magic of plants as they grow and bear fruit. The satisfaction of harvesting your own fresh produce and savoring the flavors in your meals is unmatched.
Additionally, an above ground garden offers convenience, accessibility, and better control over soil quality and drainage. It is a fantastic option for those with limited space, physical limitations, or a desire to have full control over their gardening environment.
So, roll up your sleeves, put on your gardening gloves, and let your creativity flourish as you build and nurture your above ground garden. Embrace the joy of gardening and experience the rewards that come from cultivating a thriving and beautiful outdoor oasis. Happy gardening!
Frequently Asked Questions about How To Build Above Ground Garden
Was this page helpful?
At Storables.com, we guarantee accurate and reliable information. Our content, validated by Expert Board Contributors, is crafted following stringent Editorial Policies. We're committed to providing you with well-researched, expert-backed insights for all your informational needs.


0 thoughts on “How To Build Above Ground Garden”