Articles
How To Build Closet Organizer
Modified: September 2, 2024
Learn how to build a stylish and functional bedroom furniture with our step-by-step guide on building a closet organizer. Transform your bedroom into a clutter-free space!
(Many of the links in this article redirect to a specific reviewed product. Your purchase of these products through affiliate links helps to generate commission for Storables.com, at no extra cost. Learn more)
Introduction
Welcome to our guide on how to build a closet organizer. If you find yourself always searching for that missing sock or struggling to keep your clothes and accessories neatly organized, a closet organizer might just be the solution you need. Building a closet organizer allows you to maximize your closet space and create a customized storage system that suits your needs.
Whether you have a small reach-in closet or a spacious walk-in wardrobe, a well-designed organizer can help you make the most of the available space and keep everything in order. In this guide, we will take you through the step-by-step process of building a closet organizer, from assessing your closet space to organizing your items.
We understand that everyone’s needs and preferences vary, so we’ll provide you with the necessary information and tips to help you plan and customize your closet organizer. With a bit of time, effort, and a few basic tools, you can transform your closet into a well-organized oasis where you can easily locate and store your belongings.
Before we jump into the building process, it’s important to note that there are various types of closet organizers available, ranging from simple DIY systems to more complex modular units. The choice of the organizer will depend on your budget, the size of your closet, and the specific items you need to store.
In the upcoming steps, we will guide you through the process of assessing your closet space, measuring and planning, choosing the right organizational system, preparing materials and tools, and installing closet rods, shelves, and drawers. We’ll also cover how to organize your items effectively and add accessories and finishing touches to complete the project.
Now that you have an overview of what’s to come, let’s dive into the exciting world of closet organization and start building your dream closet!
Key Takeaways:
- Create a customized and functional closet organizer by assessing your space, choosing the right system, and adding finishing touches for a stylish and organized wardrobe.
- Maximize your closet space with proper measurements, efficient installation of rods, shelves, and drawers, and strategic organization of items for a clutter-free and visually appealing closet.
Read more: How To Build Bedroom Closet
Step 1: Assess Your Closet Space
The first step in building a closet organizer is to assess your existing closet space. Take a good look at your closet and evaluate its current layout and functionality. This will help you determine the areas that need improvement and guide your decision-making process when it comes to choosing the right organizational system.
Start by emptying your closet completely. Take out all of your clothes, shoes, accessories, and any other items stored in the closet. This will give you a clear view of the available space and allow you to assess its size and dimensions.
Next, examine the layout of your closet. Consider the height, width, and depth of the space. Take note of any challenging areas or limitations, such as sloping ceilings or obstructions. This information will be crucial when it comes to planning and designing your closet organizer.
While assessing your closet, think about how you currently use the space and identify any specific storage needs. Do you need more hanging space for clothes? Are you lacking shelves for folded items? Do you have a collection of shoes that need proper storage? Understanding your requirements will help you create a functional and efficient closet organizer.
It’s also essential to consider any future changes in your wardrobe or storage needs. Think about how your storage requirements might evolve over time. Will you need more space for seasonal clothing? Do you plan on acquiring more shoes or accessories in the future? Planning for potential future needs will ensure that your closet organizer remains useful in the long run.
Lastly, consider the aesthetics and style of your closet. Do you prefer a clean and minimalistic look, or do you want to add some decorative elements to your closet organizer? Determining the aesthetic aspects will help you choose materials, colors, and finishes that complement your personal style and create a visually appealing space.
Once you have thoroughly assessed your closet space and identified your storage needs and preferences, you are ready to move on to the next step: measuring and planning. By taking the time to evaluate your closet space, you’ll be better equipped to design and build an organizer that meets your specific requirements and makes the most of your available space.
Step 2: Measure and Plan
After assessing your closet space, the next crucial step in building a closet organizer is to measure and plan. Accurate measurements are essential to ensure that your organizer fits seamlessly into your closet and maximizes the available space.
Start by measuring the height, width, and depth of your closet. Use a measuring tape to get precise measurements of each dimension. Take multiple measurements to ensure accuracy, especially if there are any irregularities in the shape or layout of your closet.
When measuring the height of your closet, consider both the overall height and the height of any hanging clothes or shelves that you may have. This information will help you determine the appropriate size for your closet rods, shelves, and drawers.
Next, measure the width of your closet. This measurement will help you decide how many rods or shelves you can fit across the space. Remember to take into account any obstructions such as doors, moldings, or light fixtures, as these will affect the available width for your organizer.
Lastly, measure the depth of your closet. This measurement is crucial, especially if you plan on adding shelves or drawers. It will help you determine the depth of the components and ensure that they fit properly within the closet space.
Once you have accurate measurements of your closet, it’s time to start planning the layout of your closet organizer. Consider the storage needs and preferences you identified during the assessment phase and think about how you want to allocate space for different items.
Determine the number of hanging rods you require for your clothes and decide on their placement. If you have long hanging items, make sure there is sufficient clearance between the hanging rod and the shelf or the floor to prevent them from touching the ground.
Decide on the number and configuration of shelves and drawers. Consider whether you need more shelves for folded clothes, storage boxes, or accessories. Plan the placement of these components in a way that allows for easy access and efficient use of space.
Take into account any additional features you want to include, such as shoe racks, hooks, or storage bins. These additions can help optimize your closet’s functionality and make the most of every square inch.
Creating a visual representation of your planned closet organizer can be helpful during this phase. You can sketch it out on paper or use a computer software or online planner to create a digital design. This will give you a clearer idea of how the organizer will look and help you refine your plans.
By measuring accurately and carefully planning the layout of your closet organizer, you’ll be well-prepared to move on to selecting the right organizational system and gathering the necessary materials and tools for construction.
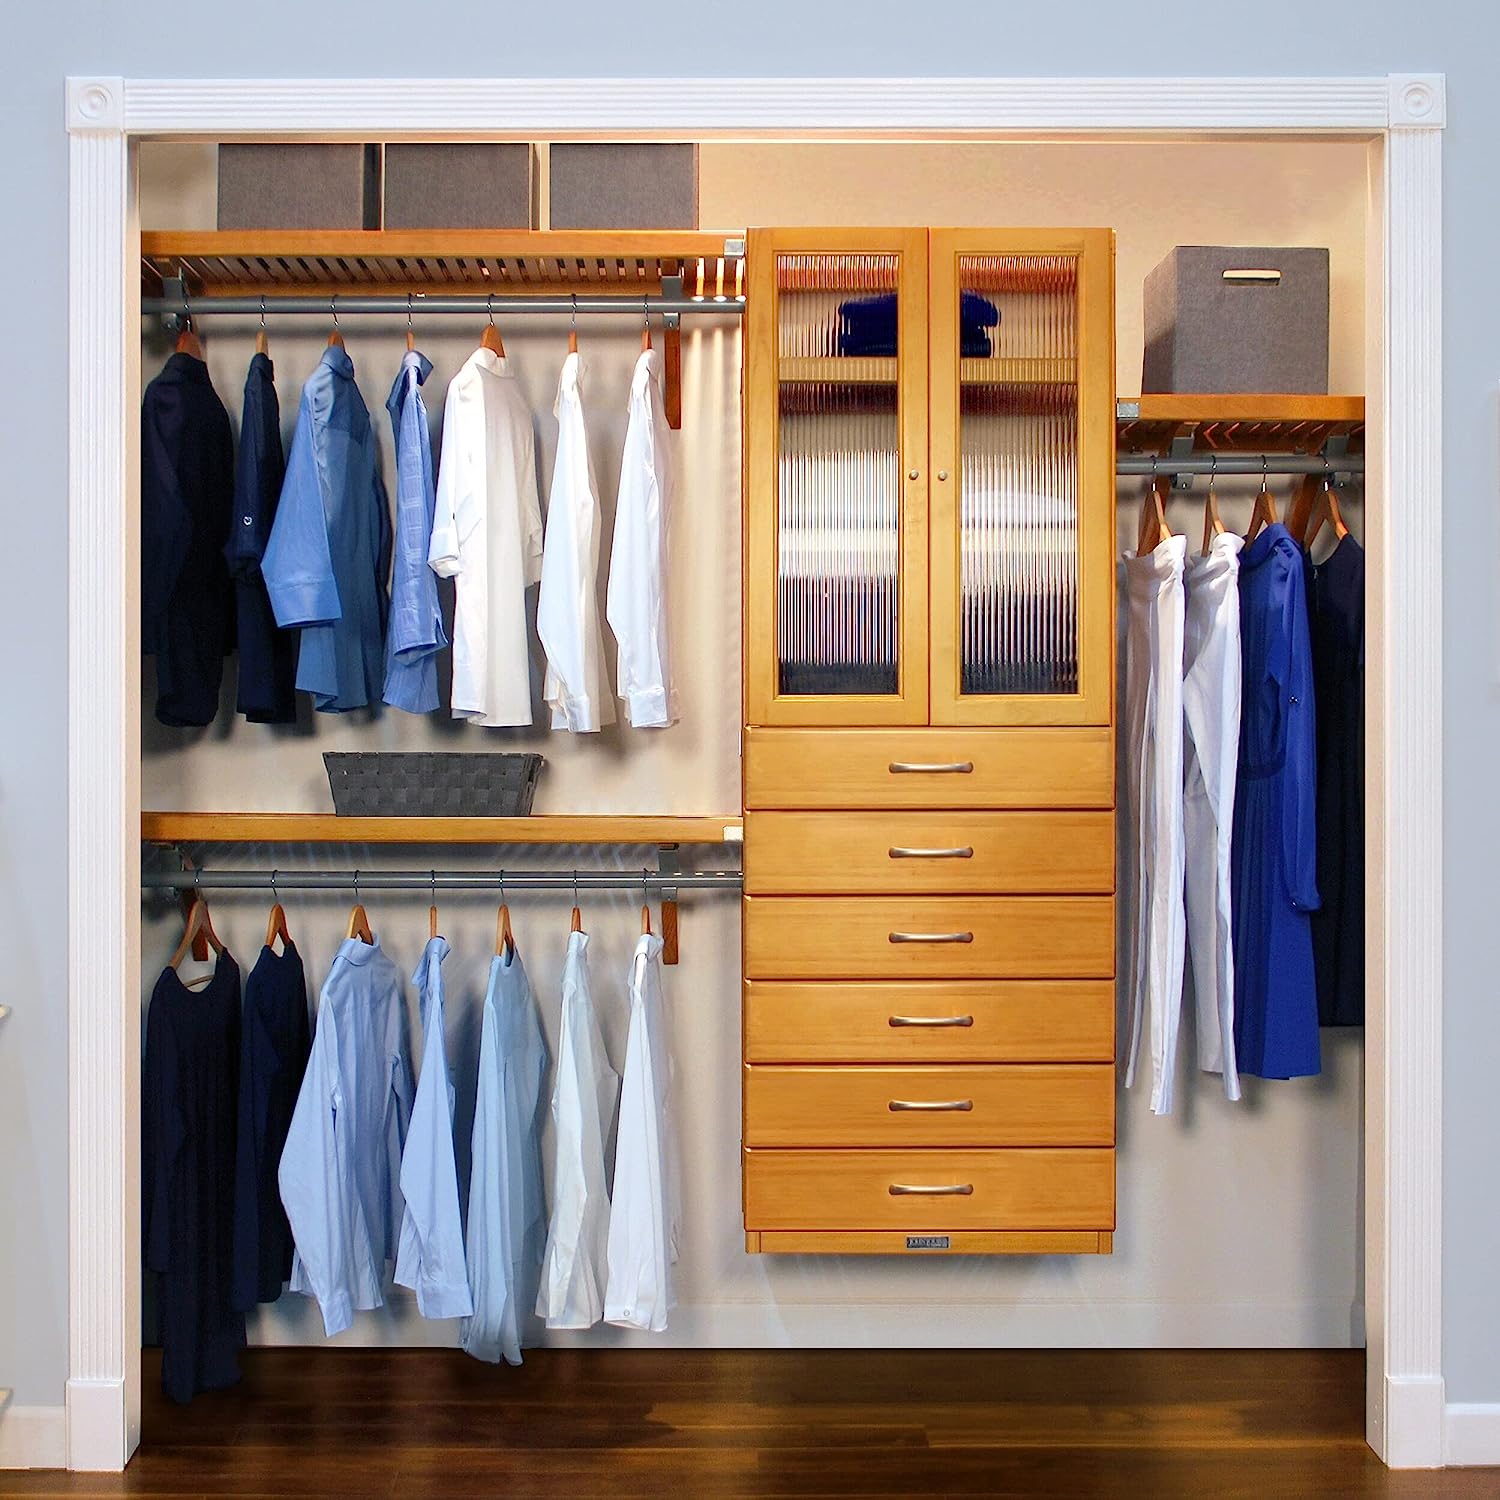
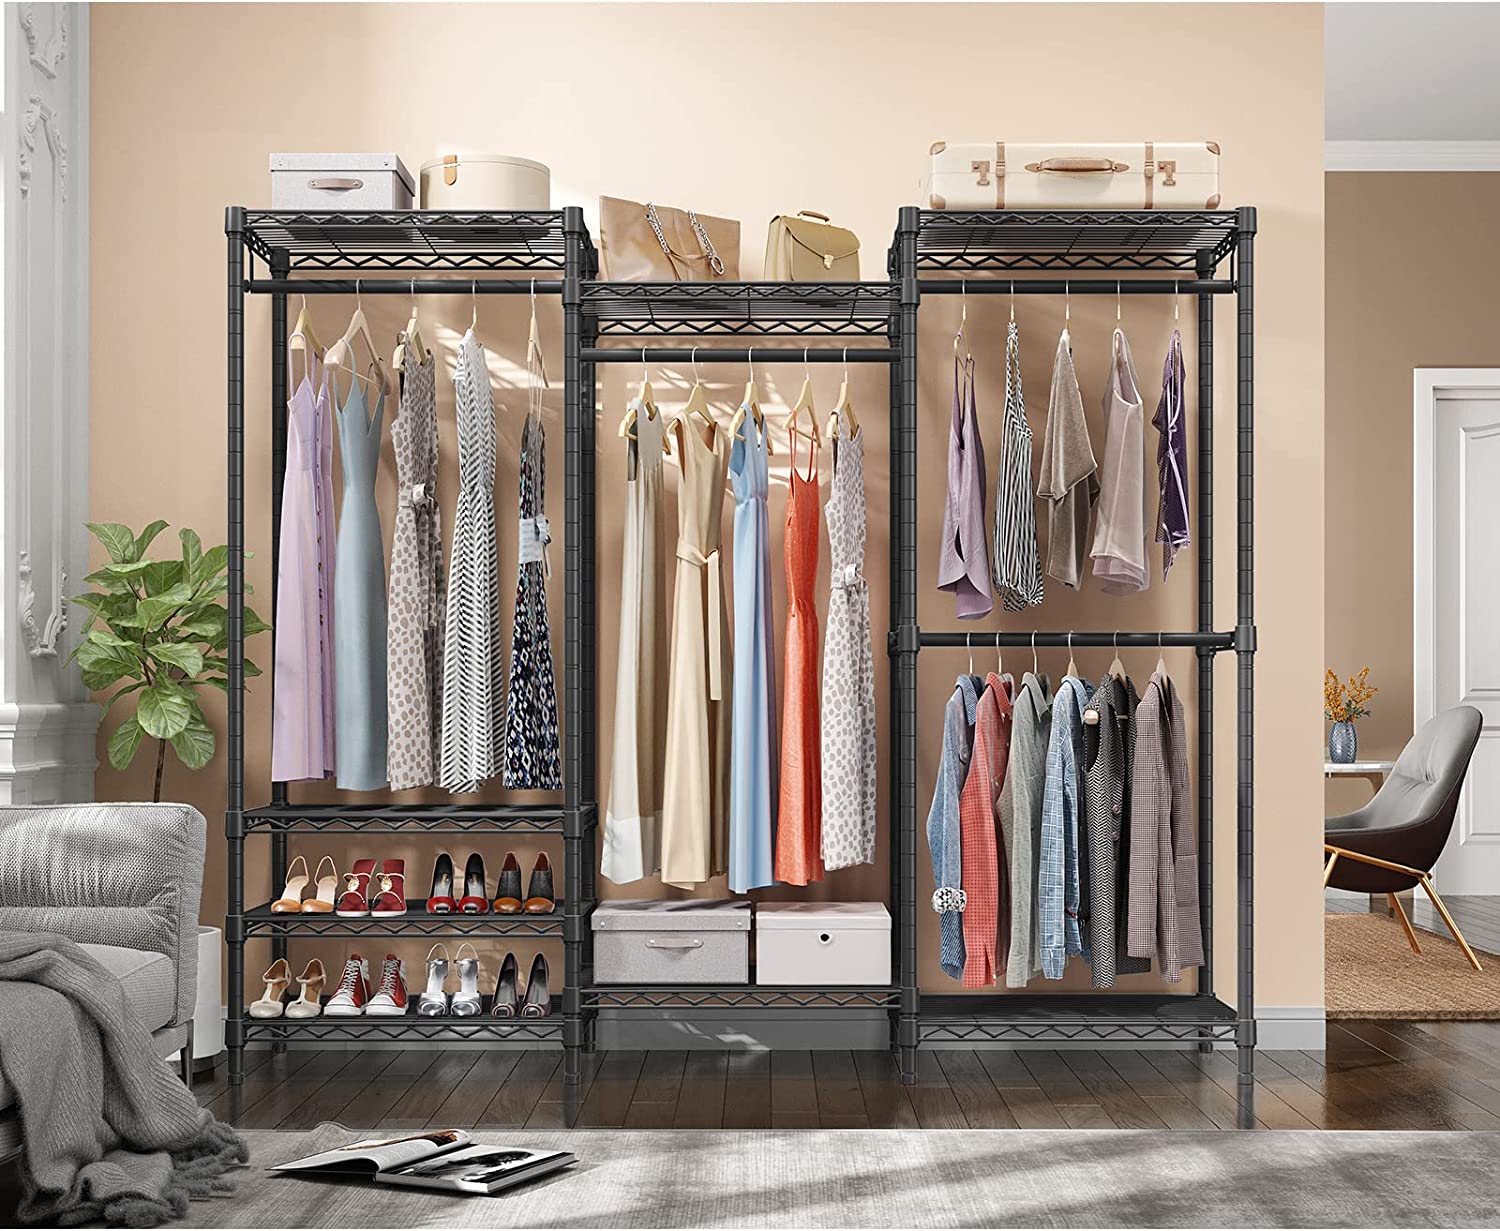
Step 3: Choose the Right Organizational System
Choosing the right organizational system is a crucial step in building a closet organizer. There are various types of systems available, each offering unique features and advantages. Considering your specific needs and the available space in your closet will help you make an informed decision and create a functional storage solution.
When selecting an organizational system, start by assessing your storage requirements. Determine the types of items you need to store and the quantity of each. Consider whether you need more space for hanging clothes, shelves for folded items, or additional accessories storage.
One of the most common organizational systems is the wire shelving system. This system consists of metal wire shelves that can be easily adjusted to accommodate different storage needs. Wire shelving provides excellent visibility and ventilation, making it ideal for storing clothes, shoes, and other regular items.
If you prefer a more customized and flexible solution, you might consider a modular closet system. Modular systems typically feature a combination of shelves, drawers, and hanging rods that can be arranged and adjusted to create a tailored configuration. These systems offer versatility and can be modified as your storage needs evolve.
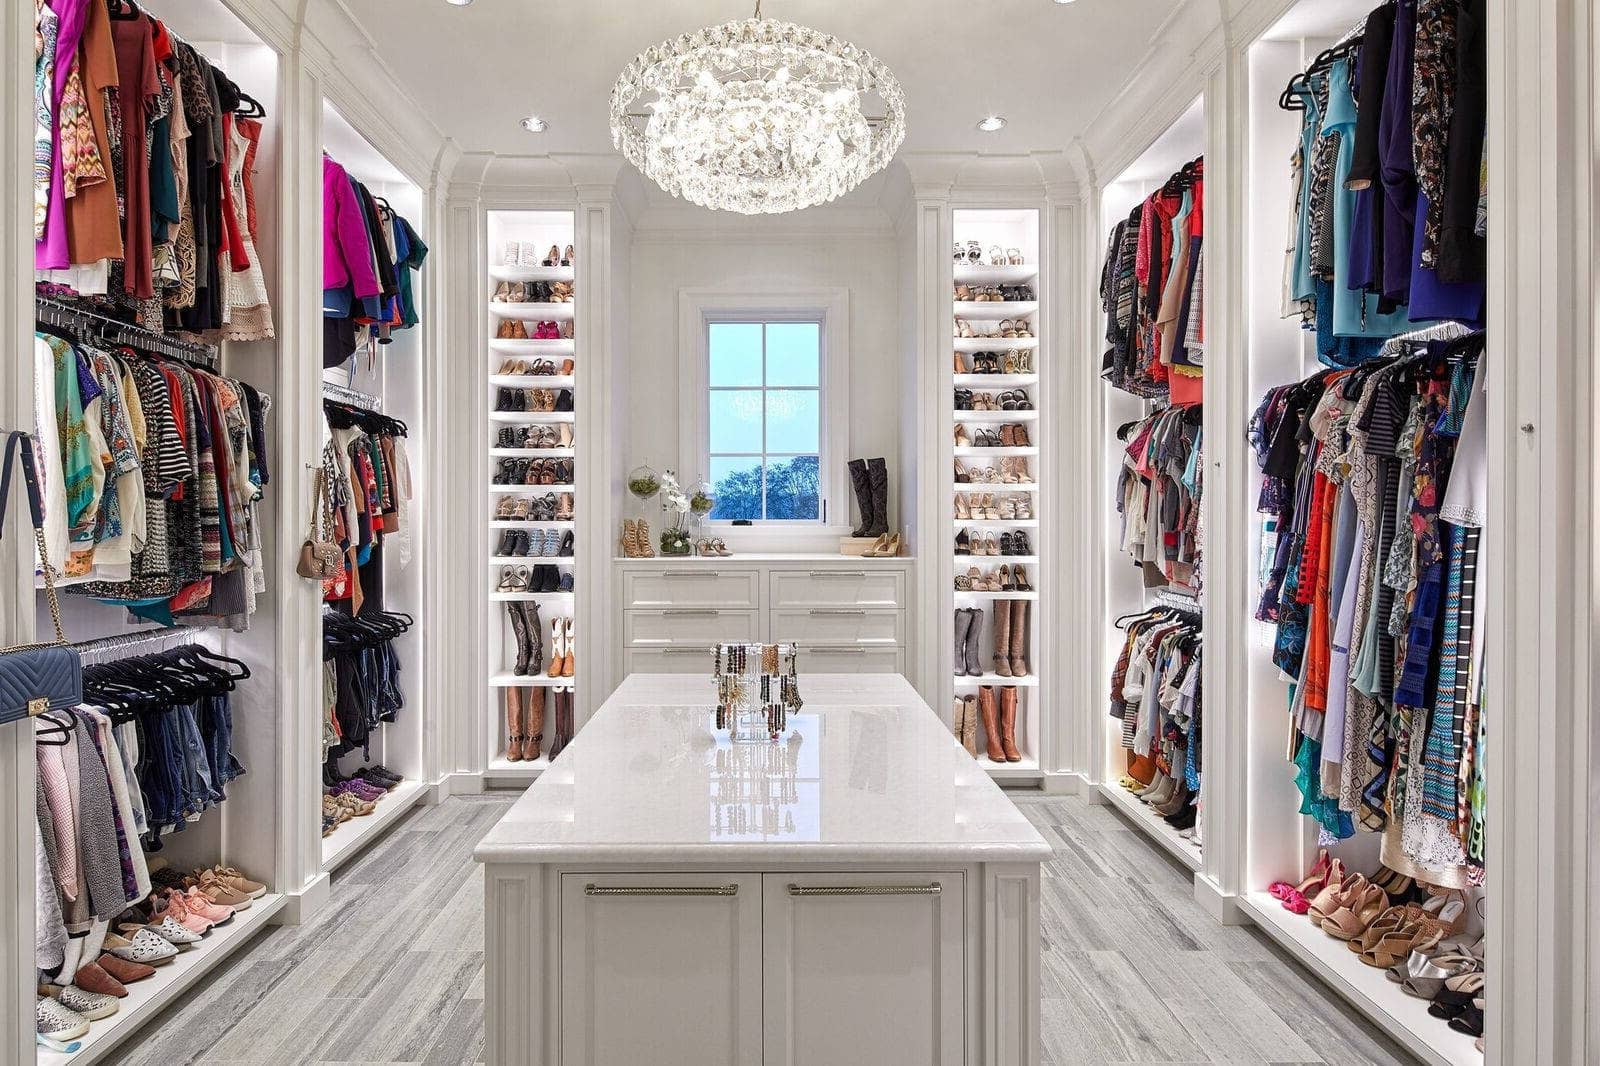
For those with a larger budget and a desire for a luxury closet experience, a built-in or walk-in closet system might be the perfect choice. These systems often feature customized cabinetry, built-in drawers, shoe racks, and other premium storage options. Built-in closet systems provide a seamless and high-end look for your closet.
In addition to the type of organizational system, consider the materials and finishes that will best suit your needs and aesthetic preferences. Common choices include wood, laminate, wire, or a combination of materials. Each has its own advantages in terms of durability, appearance, and maintenance.
If you’re not sure which system is the right fit for your closet, it can be helpful to seek inspiration from home improvement websites, magazines, or even professional organization services. Visualizing different systems in a similar space to yours can give you ideas and help you make an informed decision.
Once you have chosen the appropriate organizational system, make sure to measure your closet space again and compare it to the dimensions and specifications of the system. Ensure that it will fit properly and take into account any adjustments that may be necessary.
By carefully considering your storage needs, available space, and budget, you can select the right organizational system for your closet. This will set the foundation for the next steps of gathering materials and tools and constructing your closet organizer.
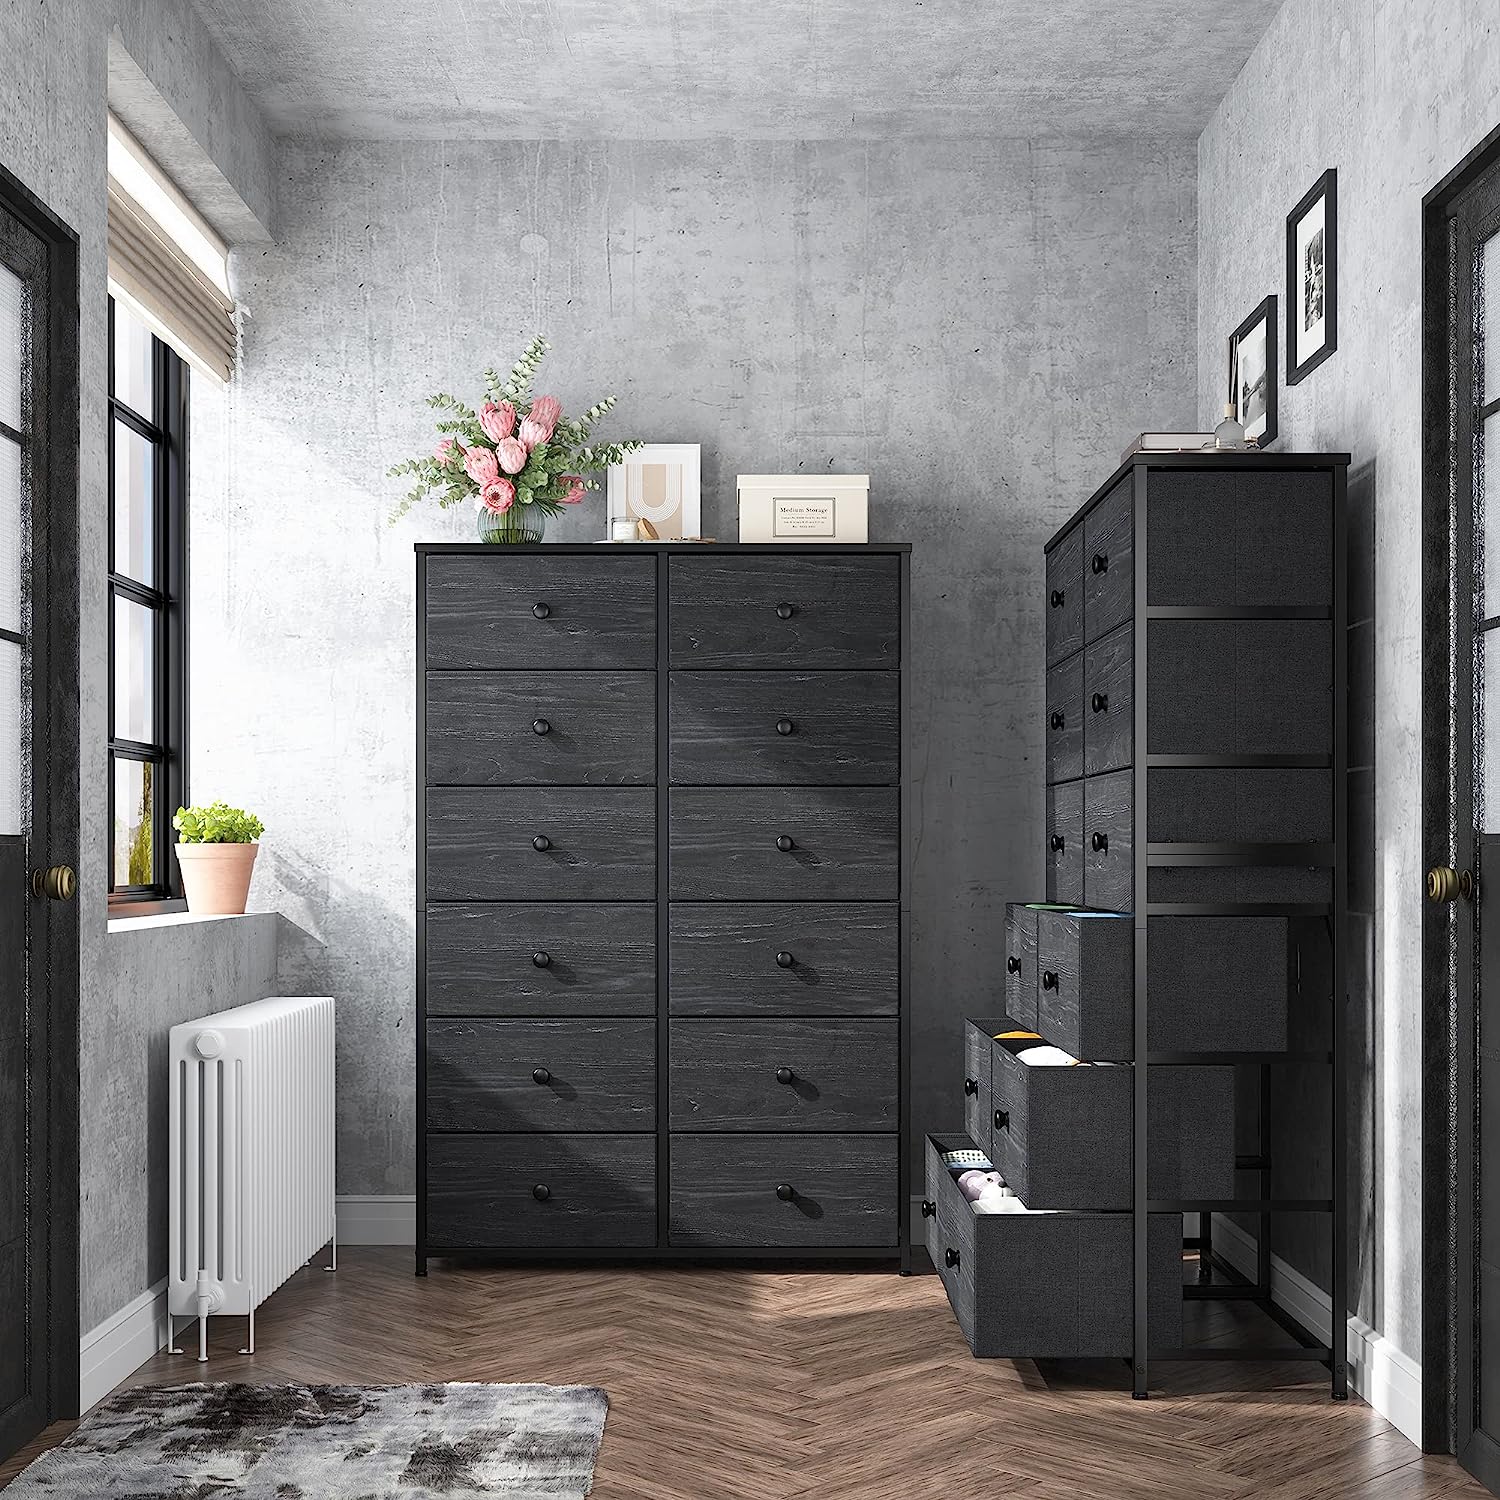
Step 4: Prepare Materials and Tools
Before you start building your closet organizer, it’s important to gather all the necessary materials and tools. Being prepared with the right supplies will ensure a smooth and efficient construction process. Here are some essential items you’ll need:
1. Organizational System Components: Depending on the type of organizational system you have chosen, you will need the corresponding components such as shelves, rods, brackets, connectors, drawer units, and any other system-specific parts. Make sure to purchase these items according to the measurements and configuration you planned in the previous steps.
2. Mounting Hardware: To secure the organizational system components to the walls or closet structure, you will need mounting hardware. This may include screws, anchors, bolts, wall brackets, or other fasteners. Be sure to choose hardware that is suitable for the type of material your walls or closet structures are made of.
3. Tools: To properly install your closet organizer, you will need a variety of tools. Common tools required include a measuring tape, level, screwdriver (or drill with appropriate bits), hammer, stud finder, and a pencil for marking measurements. Additionally, depending on the complexity of the installation, you may need a saw for cutting shelves or rods to size.
4. Safety Equipment: Always prioritize safety when working with tools and materials. It’s important to have safety goggles and gloves to protect your eyes and hands from potential hazards. If you are working with power tools, ensure you are familiar with their safe operation and use appropriate safety precautions.
5. Additional Supplies: Depending on your design and personal preferences, you may need some additional supplies such as wood glue, adhesive tape, corner brackets, paint or stain for finishing touches, and any decorative elements you want to incorporate into your closet organizer.
Before purchasing materials, double-check your measurements and ensure that you have accounted for any adjustments and specific requirements of your chosen organizational system. This will help you avoid any delays or complications during the construction process.
It’s also a good idea to have all your tools and materials organized and easily accessible before you start building. This will save you time and frustration as you won’t have to interrupt your progress to search for items.
Lastly, ensure that you have a clean and clutter-free workspace. Clear out any obstructions and create a suitable area where you can safely and comfortably assemble your closet organizer.
By properly preparing the materials and tools ahead of time, you’ll be ready to move on to the construction phase of building your closet organizer. This will allow for a more efficient and enjoyable building experience.
When building a closet organizer, start by measuring the space and planning the layout. Use sturdy materials and consider adjustable shelves for flexibility. Don’t forget to leave space for hanging items and accessories.
Read more: How To Build A Wardrobe Closet
Step 5: Install Closet Rods
Installing closet rods is an essential part of building a functional closet organizer. These rods will provide a dedicated space for hanging your clothes and keeping them wrinkle-free. Follow these steps to properly install closet rods:
1. Determine Rod Placement: Based on your closet design and storage needs, decide on the placement of your closet rods. Consider the length of your hanging clothes and allow enough space between the rod and other components, such as shelves or the floor, to ensure proper clearance.
2. Measure and Mark: Use a measuring tape to measure the desired distance between the wall and the closet rods. Use a level to ensure that the marks are straight and even. Double-check your measurements before proceeding.
3. Locate Wall Studs: To ensure the sturdiness and stability of the closet rods, it’s important to anchor them into wall studs. Use a stud finder to locate the vertical framing studs behind the walls. Mark the locations of the studs near your measurements for rod placement.
4. Attach Rod Brackets: Use a drill or screwdriver to attach the rod brackets to the wall. Make sure the brackets are aligned with the marked stud locations. For added support, use screws that are long enough to securely attach the brackets to the studs.
5. Cut Rods to Size: Measure the length needed for your closet rods, taking into account any overhang of the brackets. Use a saw designed for cutting metal or a tubing cutter to trim the rods to the appropriate length. Ensure that the cut ends are smooth and free from sharp edges.
6. Insert Rods into Brackets: Place one end of the rod into a bracket and then insert the opposite end into the corresponding bracket on the opposite wall. Make sure the rods are level and securely seated in the brackets.
7. Test Stability: Give the rods a gentle tug to ensure they are firmly anchored and can support the weight of your clothes. If any rods feel loose, reinforce them by adding additional screws or brackets.
8. Adjust Height if Necessary: If you find that the initial height of the rods doesn’t suit your needs, you can adjust them by loosening the brackets and repositioning them higher or lower. Just be sure to secure the brackets tightly after making any adjustments.
9. Repeat for Additional Rods: If your closet requires multiple rods, repeat the above steps for each additional rod. Take into consideration the spacing between the rods to accommodate different types of clothing.
By following these steps, you’ll be able to install closet rods securely and create a functional hanging space for your clothes. With the rods in place, you can move on to the next step of building your closet organizer.
Step 6: Install Shelves and Drawers
Installing shelves and drawers is a crucial step in building a closet organizer, as they provide valuable storage space for folded clothes, accessories, and other items. Follow these steps to properly install shelves and drawers in your closet:
1. Determine Shelf and Drawer Placement: Based on your needs and the layout of your closet, decide on the placement and configuration of your shelves and drawers. Consider the sizes of the items you plan to store and make sure there is enough space for easy access and organization.
2. Measure and Mark: Use a measuring tape and a level to accurately measure and mark the desired positions of your shelves and drawers. Ensure that the marks are straight and align with your planned layout.
3. Install Shelf Brackets: If your closet organizer system uses shelf brackets, follow the manufacturer’s instructions to install them at the marked positions. Use a drill or screwdriver to secure the brackets to the wall or the organizational system components.
4. Measure and Cut Shelf Boards: Measure the desired length for your shelves, taking into account any overhang from the brackets. Use a saw to cut shelf boards to the appropriate size. Make sure to cut the boards accurately and smoothly for a professional finish.
5. Attach Shelf Boards: Place the cut shelf boards onto the installed brackets. Ensure that the boards are level and aligned with the marked positions. Use screws, nails, or appropriate hardware to attach the boards securely to the brackets.
6. Install Drawer Units: If your closet organizer includes drawer units, follow the manufacturer’s instructions to assemble and install them. Use a screwdriver or drill to attach the drawer slides to the sides of the unit and then secure them to the corresponding sections of your organizational system or directly to the closet walls.
7. Test and Adjust: Once the shelves and drawers are installed, test their stability and functionality. Ensure that the shelves can support the weight of items by placing some weight on them. Test the drawers by opening and closing them smoothly. Make any necessary adjustments to ensure proper alignment and functionality.
8. Add Shelf Dividers and Organizers: For enhanced organization, consider adding shelf dividers or organizers to separate different items and keep them neatly arranged. These can be purchased separately and easily installed on the shelves to maximize their efficiency.
9. Consider Finishing Touches: You may choose to add decorative elements, molding, or trim to enhance the appearance of your closet organizer. These finishing touches can add a touch of style and cohesiveness to your finished project.
By following these steps, you can successfully install shelves and drawers in your closet organizer. This will provide you with efficient storage space and help you keep your folded items and accessories neatly organized.
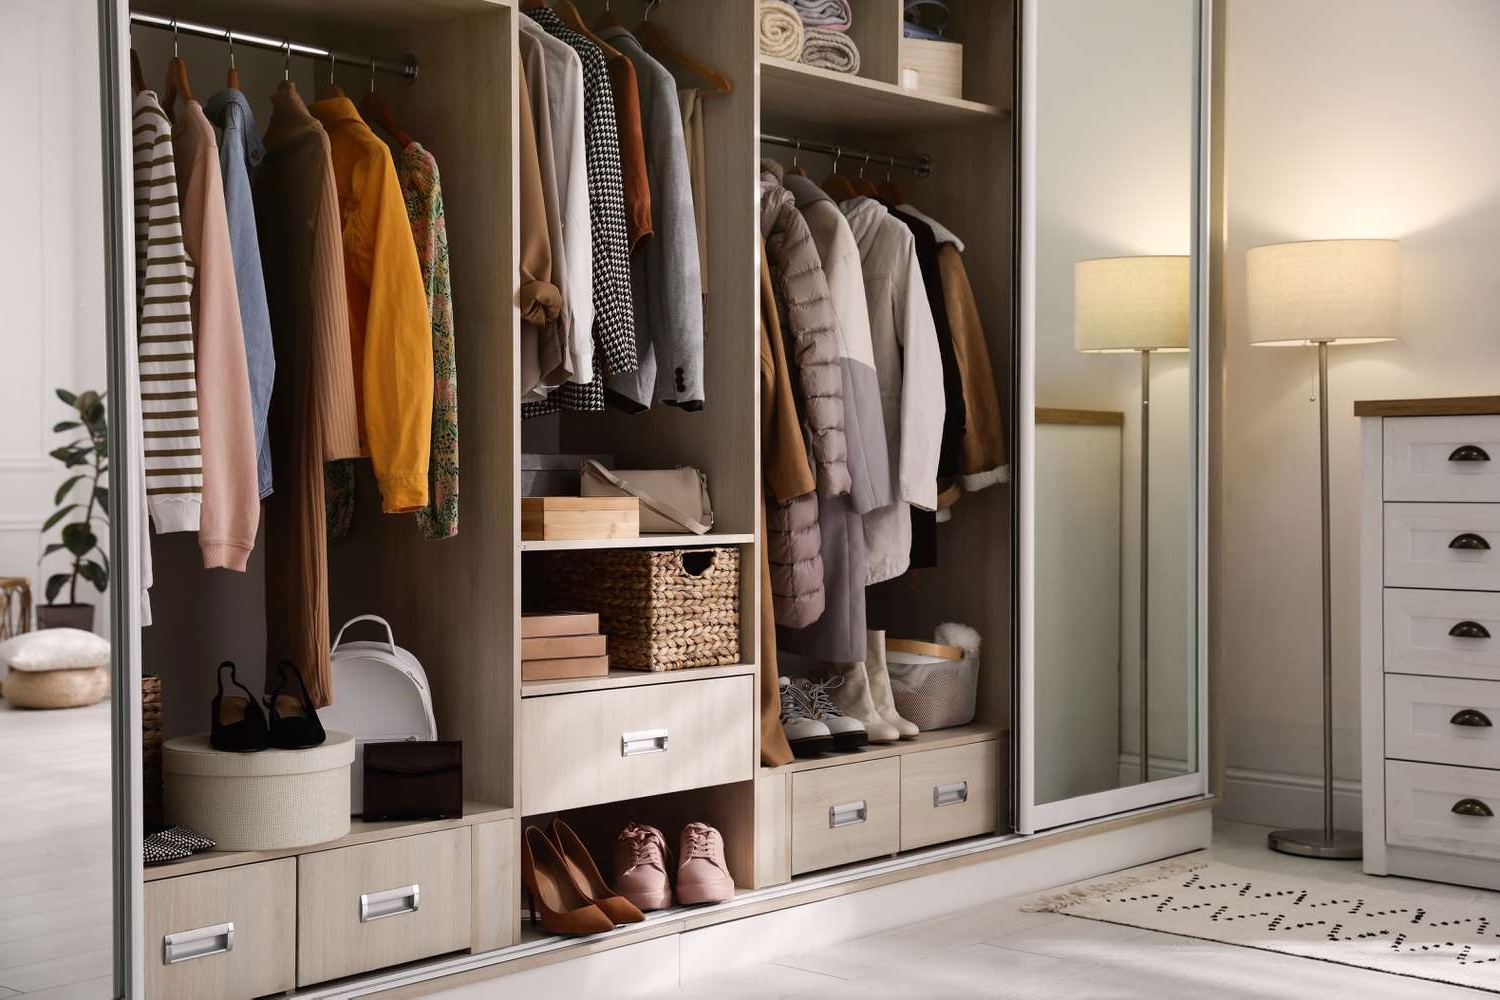
Step 7: Organize Your Items
Once you have installed your closet organizer with shelves, drawers, and hanging rods, it’s time to organize your items in a way that maximizes space and improves accessibility. Follow these steps to efficiently organize your belongings:
1. Sort and Declutter: Start by sorting through your items and decluttering your wardrobe. Donate or discard any clothes, shoes, accessories, or belongings that you no longer use, need, or love. This will help create a more streamlined and organized closet space.
2. Categorize and Group: Categorize your items into groups such as tops, pants, dresses, shoes, bags, and accessories. This will make it easier to locate specific items and maintain order within your closet. Consider your daily routine and the frequency of use for each item to determine the most convenient placement.
3. Arrange by Frequency of Use: Organize your items based on how often you use them. Keep frequently worn or seasonal items within easy reach, while placing less frequently used items in higher or lower shelves or storage compartments. This will make your most-used items readily accessible and save time when getting dressed.
4. Utilize Storage Containers: Utilize storage containers, such as bins or baskets, to group smaller items and keep them organized. Use clear containers to easily identify the contents or label them for further convenience. Drawer dividers can also be used to separate and categorize smaller items within drawers.
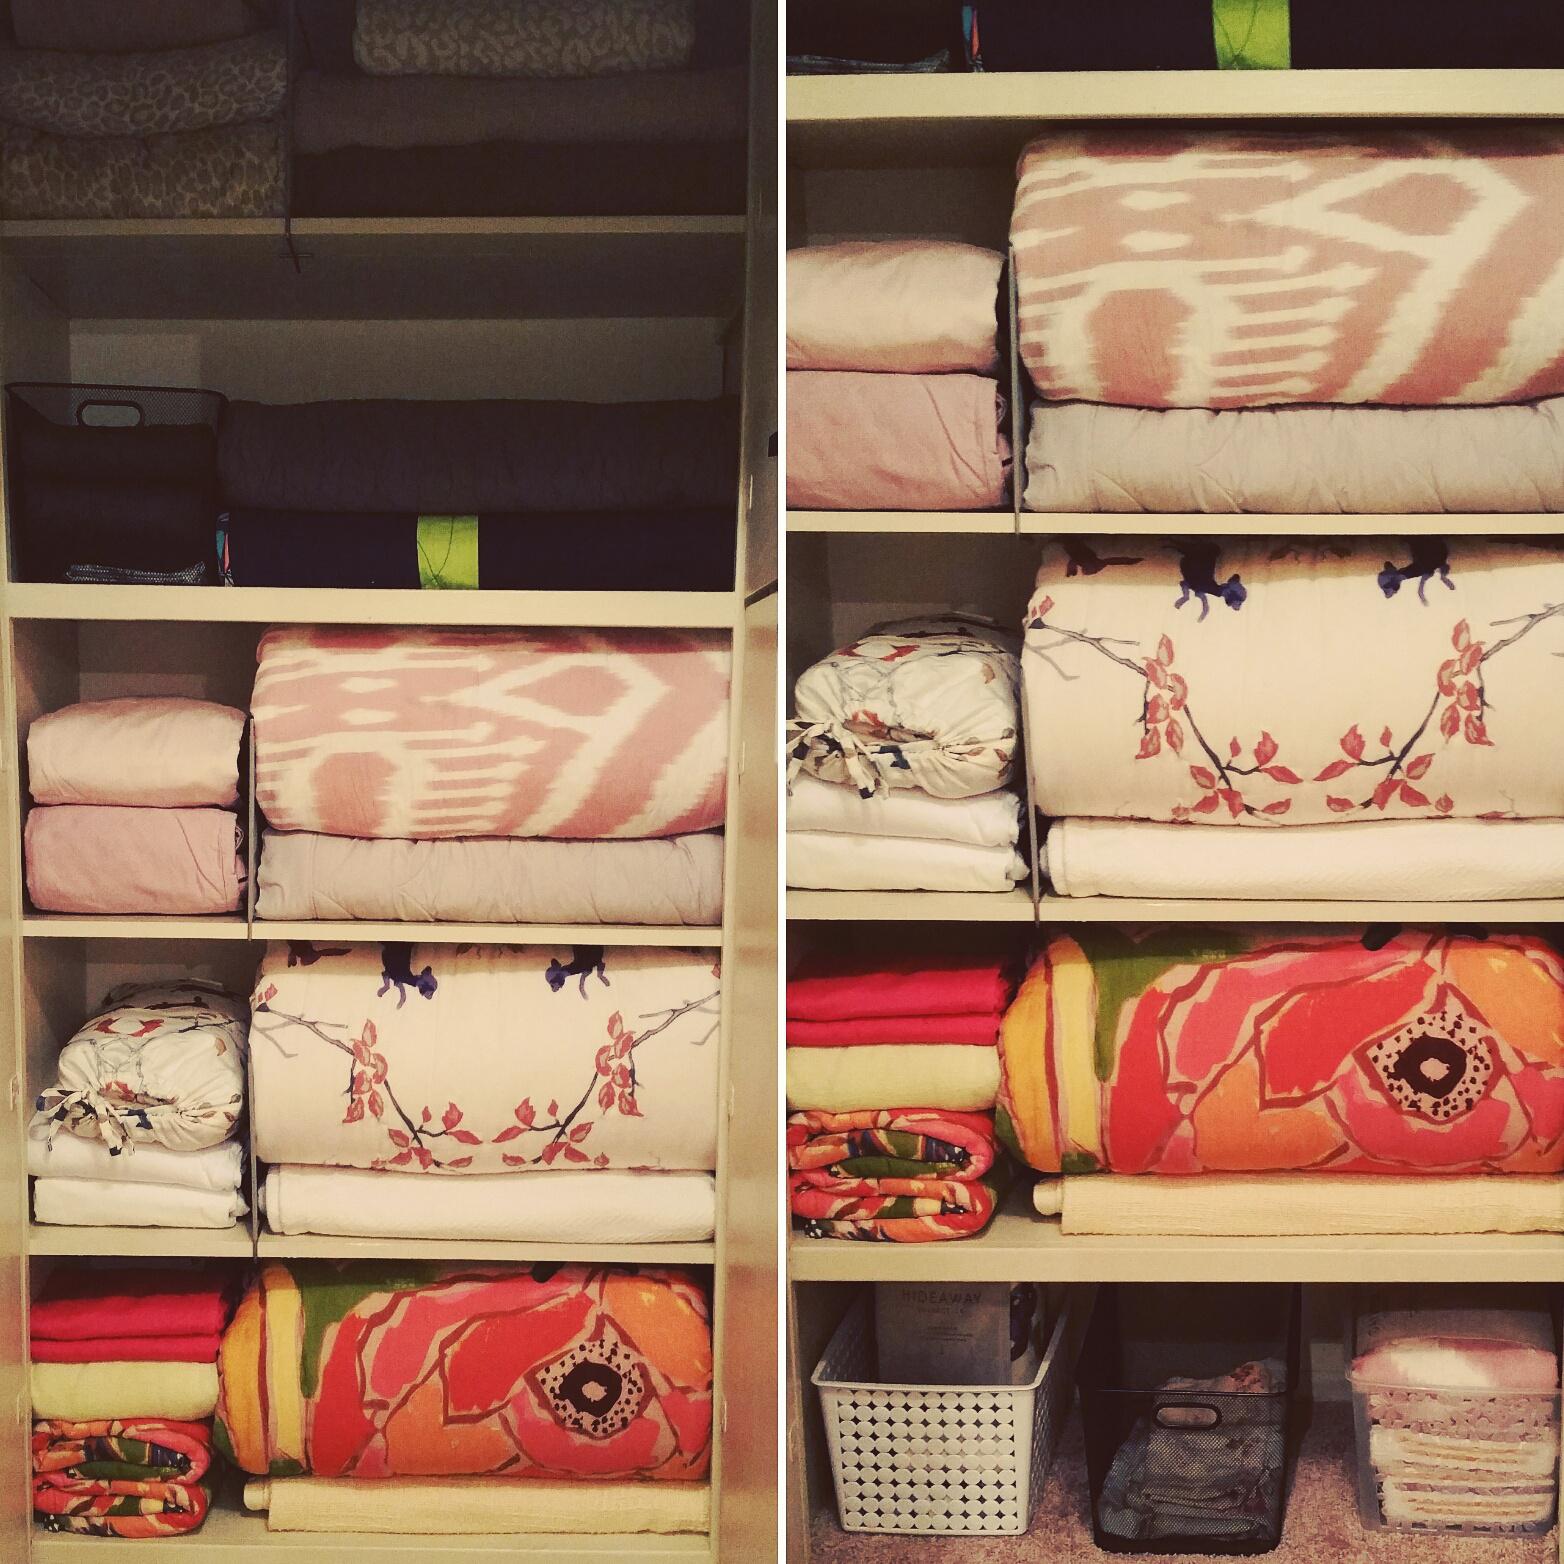
5. Fold and Stack Strategically: Fold clothes, such as sweaters or t-shirts, and stack them vertically within shelves or drawers. This method, known as the KonMari method, saves space and allows you to see all your folded items at a glance. It also prevents clothes from becoming wrinkled or forgotten at the bottom of a stack.
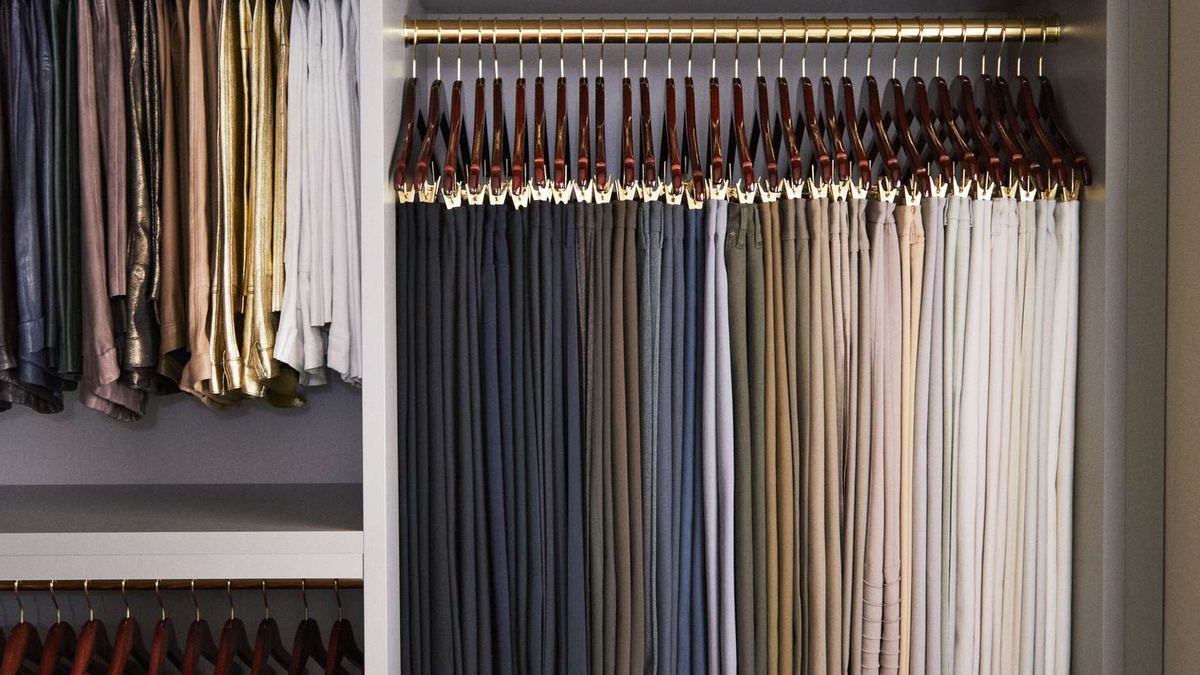
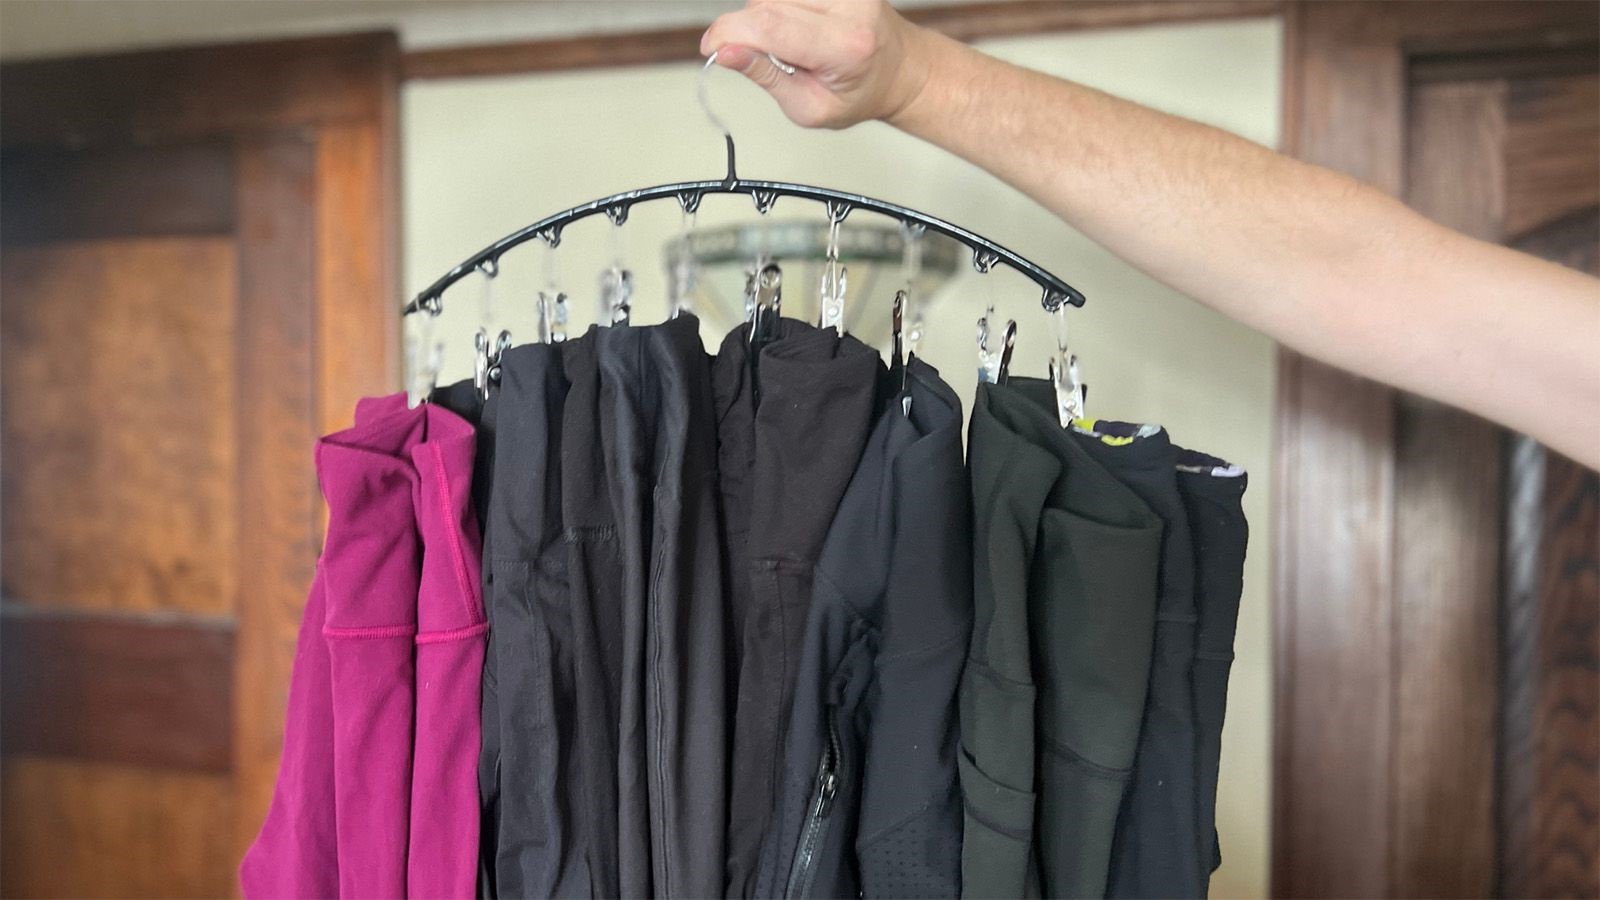
6. Hang with Care: Hang clothes that wrinkle easily, such as dresses or blazers, on the hanging rods. Use matching hangers for a cohesive look. Group similar items together by type or color to create an organized and visually appealing display. Leave enough space between garments to avoid overcrowding and allow them to breathe.
7. Consider Accessibility: Place frequently used items, such as shoes or handbags, within easy reach. Utilize shoe racks, hanging organizers, or shelves with clear dividers to keep shoes visible and accessible. Store accessories like belts, scarves, or jewelry in designated compartments or small containers for easy retrieval.
8. Maintain Regularity: To keep your closet organized, make it a habit to return items to their designated places after each use. Regularly reassess your wardrobe and make adjustments as needed. This will ensure that your closet remains functional and clutter-free over time.
By following these steps and implementing an efficient organization system, you’ll be able to have a neatly arranged and easy-to-navigate closet. Not only will this save you time and frustration when getting ready, but it will also help prolong the lifespan of your clothes and accessories.
Step 8: Add Accessories and Finishing Touches
Now that you have built and organized your closet organizer, it’s time to add those final accessories and finishing touches that will elevate the functionality and aesthetics of your space. Consider the following steps to complete your closet project:
1. Add Lighting: Proper lighting is essential in a well-organized closet. Consider installing LED strip lights or motion sensor lights to illuminate your closet, making it easier to find items and enhancing the overall visibility. Closet lighting can also add a touch of sophistication to your space.
2. Install Mirrors: Mirrors are a practical addition to any closet. They can help you check your outfit, ensure proper styling, and create a sense of depth and space within a smaller closet. Whether you prefer a full-length mirror or a smaller mirror within the closet, make sure it is securely attached to the wall or closet door.
3. Decorative Elements: Incorporate decorative elements that reflect your personal style and enhance the overall aesthetic of your closet. Consider adding wallpaper, a stylish rug, or decorative knobs on drawers or doors to infuse a sense of personality into your space. These small details can make a big impact.
4. Accessory Organizers: To keep accessories like belts, ties, scarves, or jewelry neat and easily accessible, install accessory organizers. These can include hooks, trays, or racks specifically designed for organizing and displaying these items. It not only helps keep your accessories organized but also adds visual appeal to your closet.
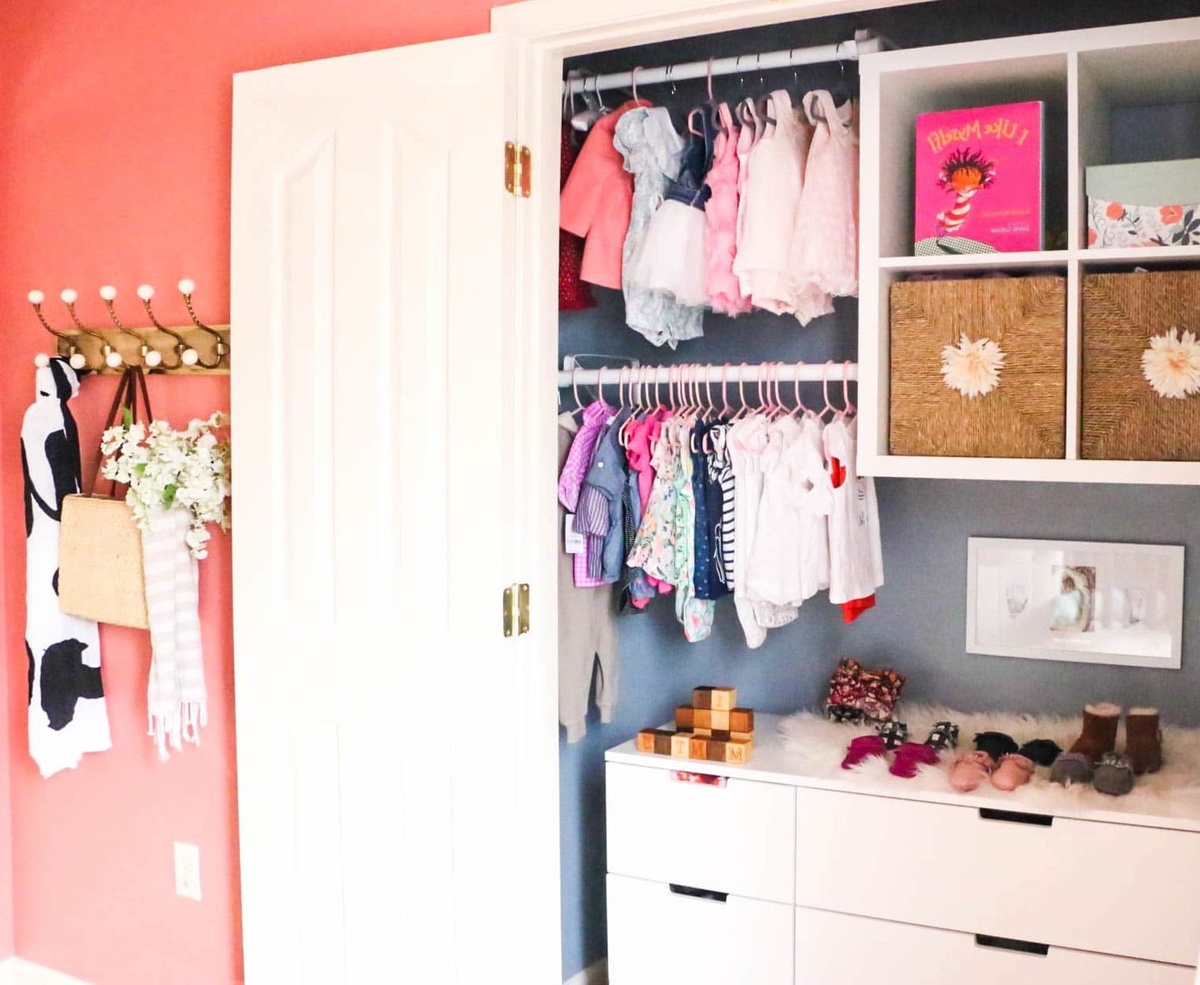
5. Utilize Door Space: Make use of the back of the closet door by installing hooks or over-the-door organizers. This extra space can be handy for hanging frequently used items, such as robes or bags, or storing shoes or accessories. Optimize every inch of your closet for maximum functionality.
6. Customized Containers: Consider using customized containers or storage boxes to store specific items in your closet organizer. Label the containers for easy identification and access. This will not only ensure efficient use of space but also add a neat and uniform look to your shelves or drawers.
7. Seating Area: If space permits, consider adding a small seating area within your closet. This can be a stylish bench or ottoman where you can sit while putting on shoes or going through your wardrobe. A seating area adds a touch of luxury and comfort to your closet experience.
8. Enjoy the Space: Lastly, take a moment to appreciate and enjoy your newfound closet organization. Step back and admire the clean lines, the accessibility, and the overall functionality you have achieved. A well-designed and organized closet can bring a sense of calm and ease to your daily routine.
With these accessories and finishing touches, your closet organizer will not only serve its purpose but also become a stylish and enticing space. Remember to personalize it according to your preferences and create an environment that makes you excited to start and end your day.
Read more: How To Build A Walk In Closet
Conclusion
Congratulations! You have successfully learned how to build a closet organizer from start to finish. By following the step-by-step process, you now have a well-designed and functional space that maximizes the available storage and keeps your belongings organized. Let’s recap the essential steps:
- Assess Your Closet Space: Evaluate the size, layout, and storage needs of your closet to determine the best organizational system for your space.
- Measure and Plan: Take accurate measurements and plan the placement of shelves, rods, and drawers according to your storage requirements.
- Choose the Right Organizational System: Select the appropriate organizational system based on your needs, budget, and the materials that best suit your style.
- Prepare Materials and Tools: Gather all the necessary materials and tools before you start building your closet organizer. This will ensure a smooth construction process.
- Install Closet Rods: Properly install hanging rods to create space for your clothes and maintain their wrinkle-free condition.
- Install Shelves and Drawers: Install shelving units and drawers to provide storage space for folded clothes, accessories, and other items.
- Organize Your Items: Categorize, sort, and arrange your belongings in a way that maximizes space and enhances accessibility.
- Add Accessories and Finishing Touches: Incorporate lighting, mirrors, decorative elements, and customized organizers to personalize and enhance the functionality and aesthetics of your closet.
Remember, building a closet organizer is not only about creating a well-structured space but also about simplifying your daily routine and reducing clutter. Enjoy the satisfaction of having a neat and organized closet that reflects your personal style and makes getting ready a breeze.
With your newly built closet organizer, you’ll have a designated place for each item, making it easier to find what you need and maintain a clutter-free environment. Regularly maintain your organized closet by decluttering and reevaluating your storage needs to adapt to any changes in your wardrobe or lifestyle.
Thank you for following our guide on how to build a closet organizer. We hope it has been informative and helpful in creating a more functional and organized space. Now, go ahead and enjoy the benefits of your beautifully organized closet!
Frequently Asked Questions about How To Build Closet Organizer
Was this page helpful?
At Storables.com, we guarantee accurate and reliable information. Our content, validated by Expert Board Contributors, is crafted following stringent Editorial Policies. We're committed to providing you with well-researched, expert-backed insights for all your informational needs.


0 thoughts on “How To Build Closet Organizer”