Home>Interior Design>How To Build Custom Closet
Interior Design
How To Build Custom Closet
Modified: March 1, 2024
Learn the art of interior design with our step-by-step guide on how to build a custom closet. Create the perfect storage solution for your space.
(Many of the links in this article redirect to a specific reviewed product. Your purchase of these products through affiliate links helps to generate commission for Storables.com, at no extra cost. Learn more)
Introduction
Welcome to the world of custom closet design! If you’re tired of struggling with limited storage space and cluttered closets, then it’s time to take matters into your own hands and create a personalized and functional solution. Building a custom closet is not only a great way to optimize your storage space, but it also allows you to showcase your personal style and design preferences.
Whether you’re a DIY enthusiast or looking to hire professionals, this article will guide you through the step-by-step process of building a custom closet that meets your unique needs and requirements. From measuring and planning to installation and organization, we will cover all the essential aspects to ensure a successful project.
Custom closets offer numerous benefits, including maximizing storage space, improving organization, and enhancing the aesthetics of your home. Instead of settling for generic, one-size-fits-all closet systems, custom closets allow you to tailor every inch of your storage space to suit your specific belongings and lifestyle. Say goodbye to the frustration of rummaging through piled-up clothes or struggling to find that missing pair of shoes.
Building a custom closet may seem like a daunting task, but with careful planning and some creativity, you can easily transform your cluttered space into a functional and stylish oasis. So, are you ready to embark on this exciting journey? Let’s dive into the step-by-step process of building your dream custom closet!
Key Takeaways:
- Building a custom closet involves accurate measurements, thoughtful planning, and choosing the right closet system to create a functional and stylish storage solution tailored to your unique needs and preferences.
- Customizing shelves, adding accessories, and implementing regular maintenance are essential for maximizing the functionality and longevity of your custom closet, ensuring a well-organized and visually pleasing space.
Read more: How To Build A Custom Mailbox
Step 1: Measurements and Planning
The first and most crucial step in building a custom closet is accurate measurements and thorough planning. Taking the time to measure your closet space and understand your storage needs will ensure that you create a closet that fits perfectly and maximizes the available space.
Start by emptying out your current closet and assessing the amount of space you have to work with. Measure the width, height, and depth of the closet using a tape measure. Take note of any irregularities or obstacles, such as vents, electrical outlets, or sloped ceilings. These measurements will serve as the foundation for designing your custom closet.
Next, consider your storage needs. Make a list of the items you plan to store in your closet, such as clothing, shoes, accessories, and other personal belongings. Determine the amount of hanging space, shelving, and drawer space required for each category. Consider any special requirements, such as longer hanging space for dresses or additional shoe racks for a shoe collection.
With your measurements and storage needs in mind, it’s time to start planning the layout of your custom closet. There are several options to consider, including a reach-in closet, a walk-in closet, or a combination of both. Think about how you want to organize your items and how the different components, such as hanging rods, shelves, and drawers, will be arranged.
There are many online tools and software available that can help you visualize and design your custom closet layout. These tools allow you to drag and drop components, adjust dimensions, and experiment with different configurations. Alternatively, you can sketch out your closet design on paper, taking into account any existing architectural features and potential customization options.
Remember to leave enough space for walkways and door clearances. Consider the overall flow and functionality of your closet, ensuring that it meets your daily needs and provides easy access to your belongings. Take into account any future storage needs or changes in your wardrobe.
Once you have finalized your measurements and design, it’s time to move on to the next step: choosing the closet system that best suits your needs and preferences.
Step 2: Choosing the Closet System
Now that you have your measurements and closet design in hand, it’s time to choose the closet system that will bring your custom closet to life. The right closet system will not only provide the necessary structure and support for your storage needs but also enhance the overall functionality and aesthetics of your space.
There are various types of closet systems available, each with its own advantages and features. Here are a few popular options to consider:
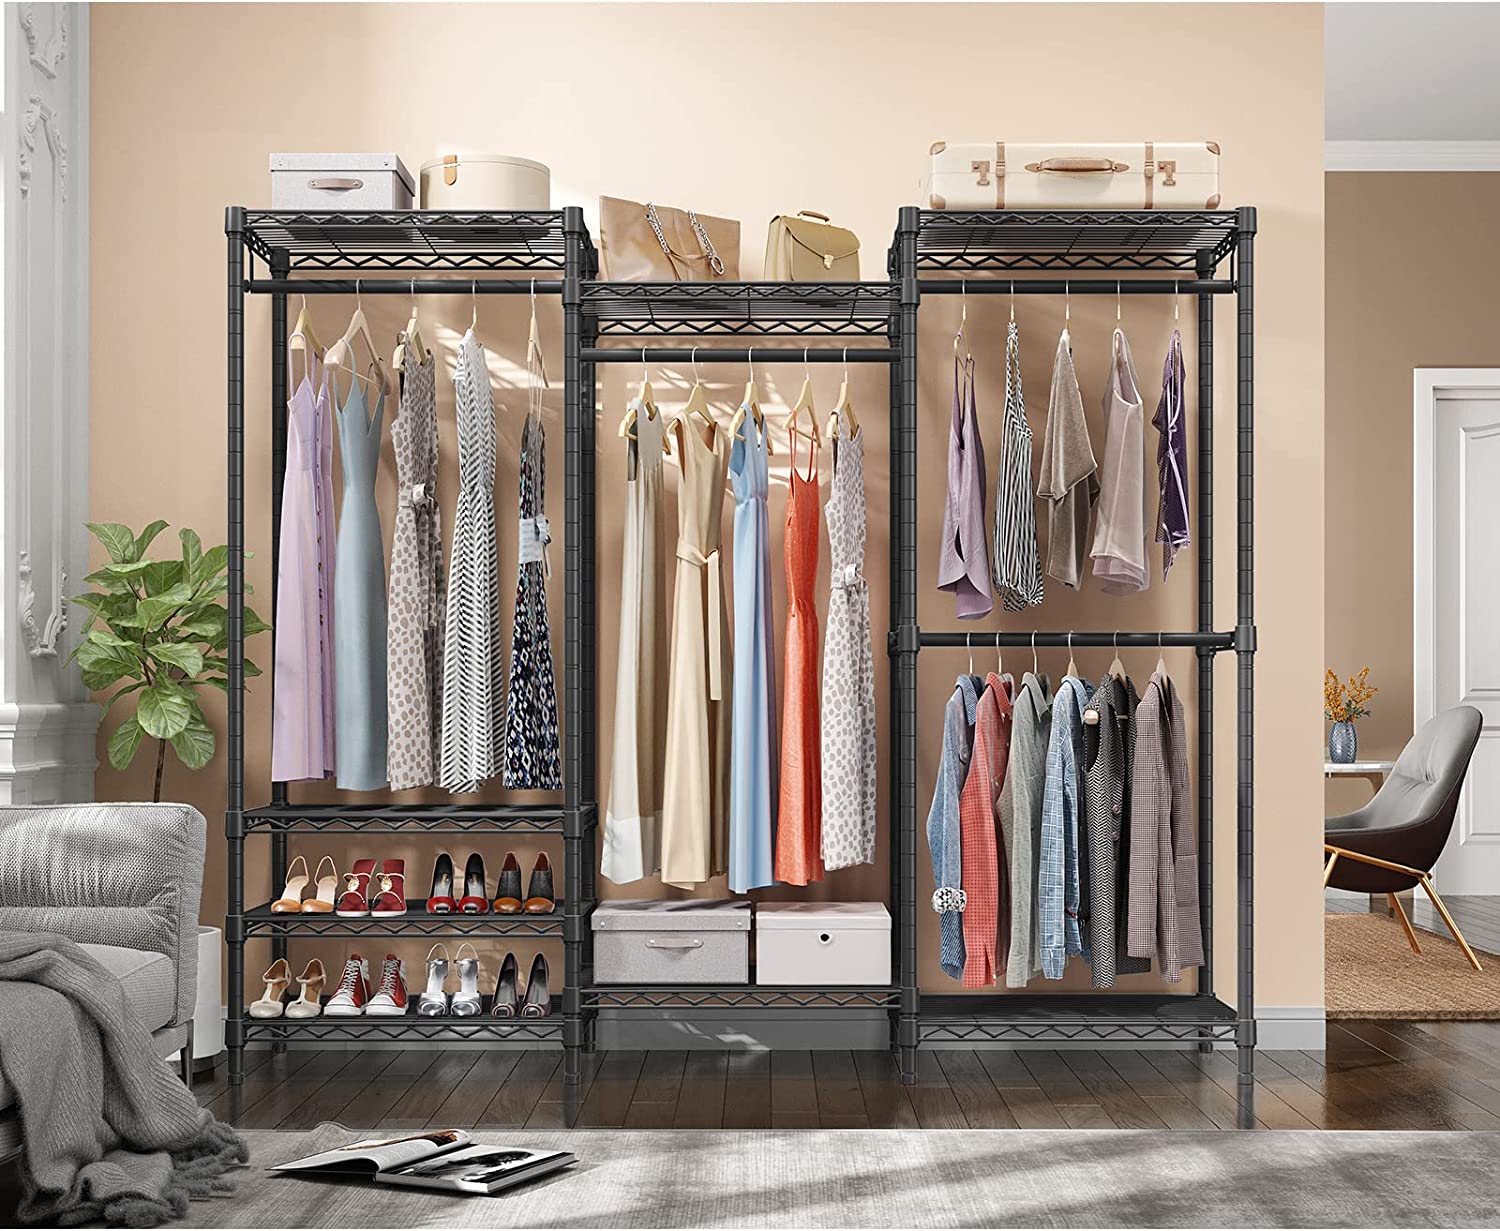
1. Wire Shelving Systems: Wire shelving systems are affordable, easy to install, and versatile. They consist of metal wire shelves and hanging rods. These systems are a great option for those on a budget or looking for a simple and functional storage solution. However, they might not offer as much customization or style options as other systems.
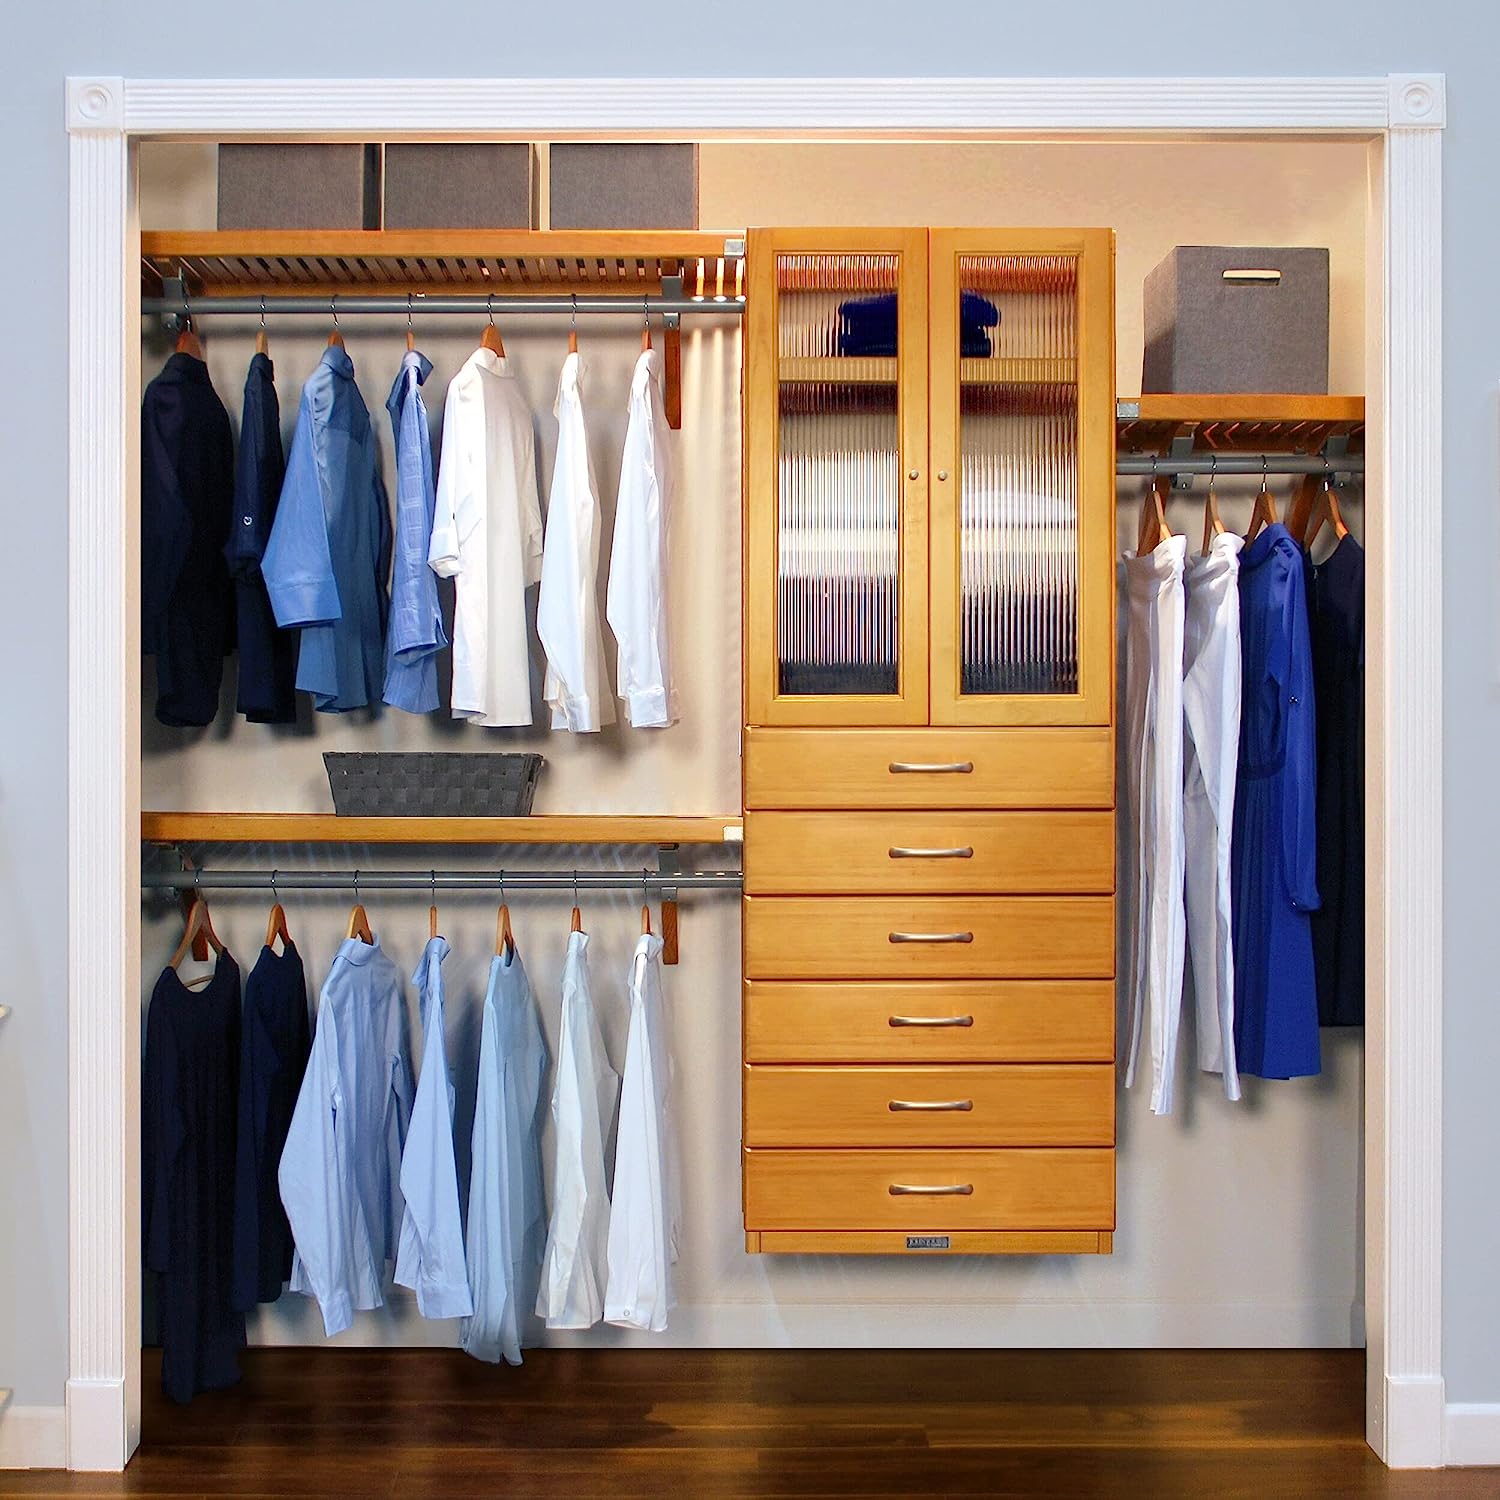
2. Wood Shelving Systems: Wood shelving systems are a classic and timeless choice for custom closets. They provide a more elegant and upscale look compared to wire shelving. Wood systems offer a wide range of customization options, including various finishes and textures. They are sturdy and durable, making them suitable for heavier items. However, wood systems tend to be more expensive and require professional installation.
3. Modular Closet Systems: Modular closet systems are becoming increasingly popular due to their flexibility and easy installation. These systems typically feature pre-designed components that you can mix and match to create your desired configuration. They offer a balance of customization, affordability, and ease of installation. However, they may not provide as much sturdiness or durability as other systems.
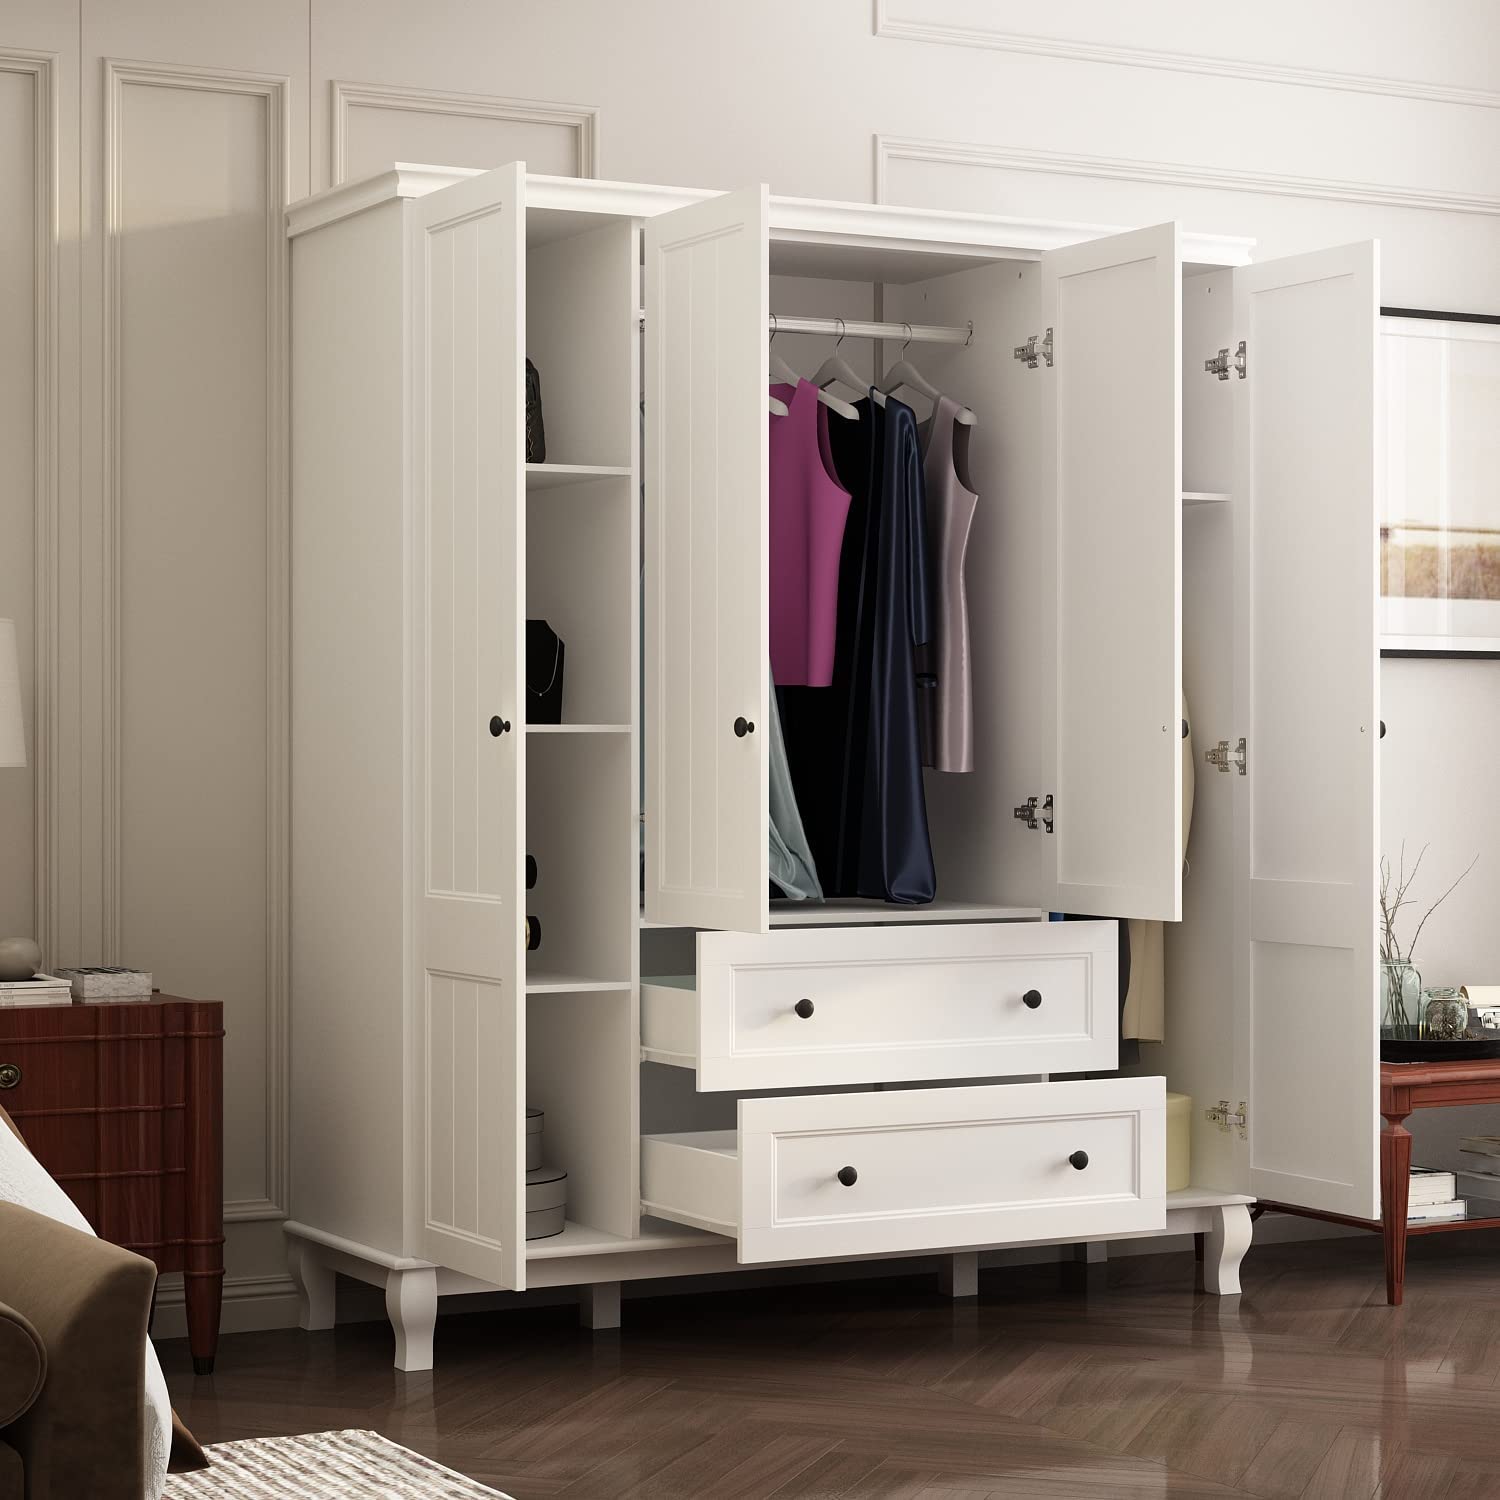
4. Custom-Built Systems: If budget is not a constraint and you want complete control over every aspect of your custom closet, then a custom-built system is the way to go. With a custom-built system, you can choose the materials, finishes, and features that suit your style and storage needs perfectly. These systems offer the highest level of customization and quality but require professional installation and a larger investment.
Consider your budget, design preferences, and storage requirements when selecting the closet system that is right for you. It’s also important to check the reputation of the manufacturer or supplier, read reviews, and ensure that the system is compatible with your closet dimensions.
Once you have chosen the closet system, it’s time to clear out the closet space and prepare it for installation, which leads us to the next step: clearing out the closet space.
Step 3: Clearing Out the Closet Space
Now that you have chosen the perfect closet system, it’s time to clear out the existing clutter and prepare the closet space for installation. This step is crucial for creating a clean and organized foundation for your custom closet.
Start by emptying out your current closet completely. Remove all items, including clothing, accessories, shoes, and any other belongings. This is a great opportunity to declutter and sort through your items. Separate them into categories such as keep, donate, or discard.
As you go through your belongings, ask yourself if you really need each item. Consider its sentimental value, usefulness, and frequency of use. Discard or donate any items that you no longer need or use. This will not only create space for your new custom closet but also reduce clutter and make organizing easier in the long run.
While emptying out the closet, take the opportunity to clean the space thoroughly. Dust the shelves, wipe down the walls, vacuum the floor, and remove any cobwebs or debris. This will ensure a fresh start for your custom closet project and provide a clean environment for your newly organized items.
At this stage, it’s also a good idea to inspect the walls, flooring, and any other surfaces in the closet for any damage or repairs that may be needed. Address any necessary repairs before moving on to the installation of your custom closet system.
Once the closet space is cleared out and cleaned, you are ready to move on to the next step: the installation of the closet system. This step is where your customized design will begin to take shape, so let’s dive into the details of installing your custom closet system in the next step.
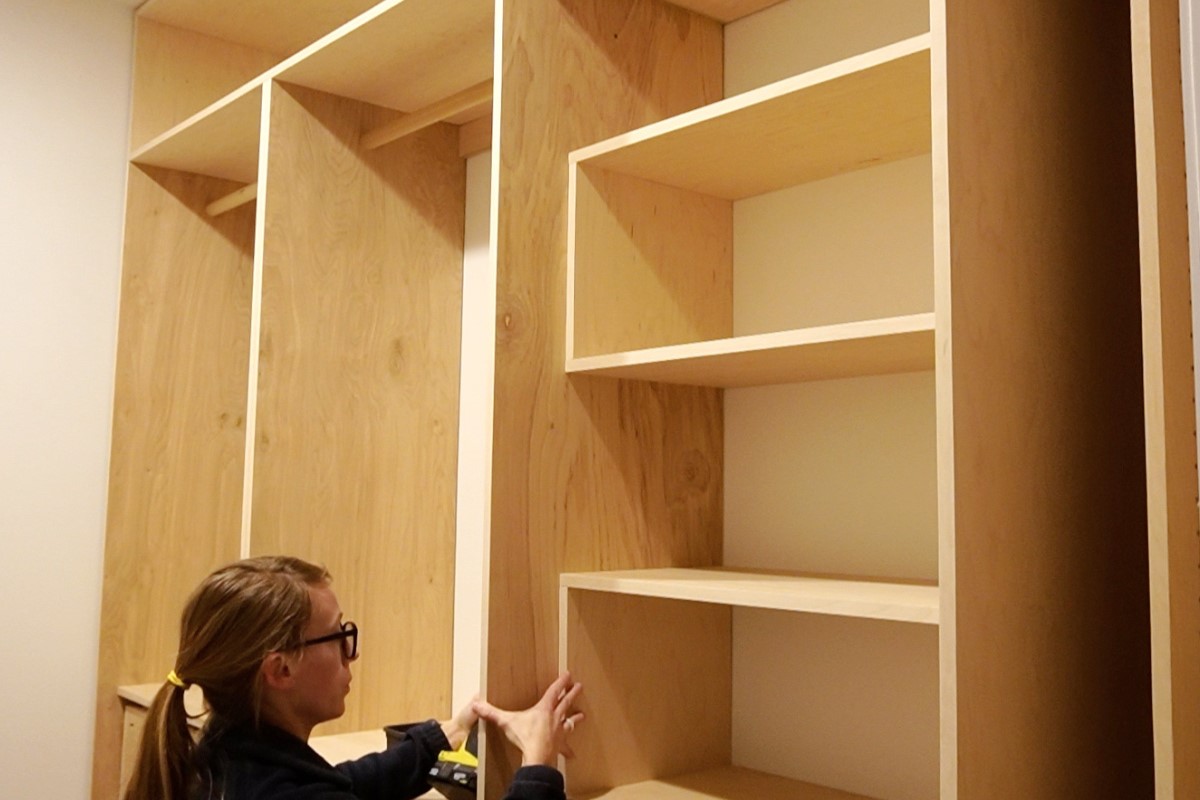
Step 4: Installation of Closet System
With your closet space cleared out and prepped, it’s time to start the exciting process of installing your custom closet system. Installation may vary depending on the type of system you have chosen, so make sure to follow the manufacturer’s instructions and use the appropriate tools for a seamless installation.
Begin by assembling the main framework of the closet system. This typically involves attaching vertical panels or tracks to the walls, ensuring they are level and securely anchored. Use a level and a tape measure to ensure accurate placement and alignment.
Next, install the horizontal components such as shelves, hanging rods, and drawers. Make sure to adjust the height and spacing according to your storage needs and preferences. Use the appropriate brackets, clips, or screws to secure these components to the vertical panels or tracks.
If your custom closet system includes adjustable shelves or hanging rods, take advantage of this feature to easily customize the configuration as needed. This flexibility is especially useful if your storage needs change over time or if you have specific items that require different heights or spacing.
During the installation process, it’s important to periodically check the stability and sturdiness of the closet system. Ensure that all components are securely attached and that there is no wobbling or sagging. Make any necessary adjustments or reinforce the system as needed.
If you are not confident in your DIY skills or prefer professional assistance, consider hiring a contractor or a handyman experienced in closet installations. They can ensure a smooth and precise installation, saving you time and effort.
Once the closet system is installed, take a step back and admire your progress. You have transformed an empty space into a functional and organized custom closet. But we’re not done just yet! In the next step, we will explore how to customize and adjust the shelves to meet your specific storage requirements.
When building a custom closet, make sure to measure the space accurately and consider your storage needs. Use high-quality materials and consider adding adjustable shelves and hanging rods for versatility.
Read more: How To Build Custom Cedar Shutters
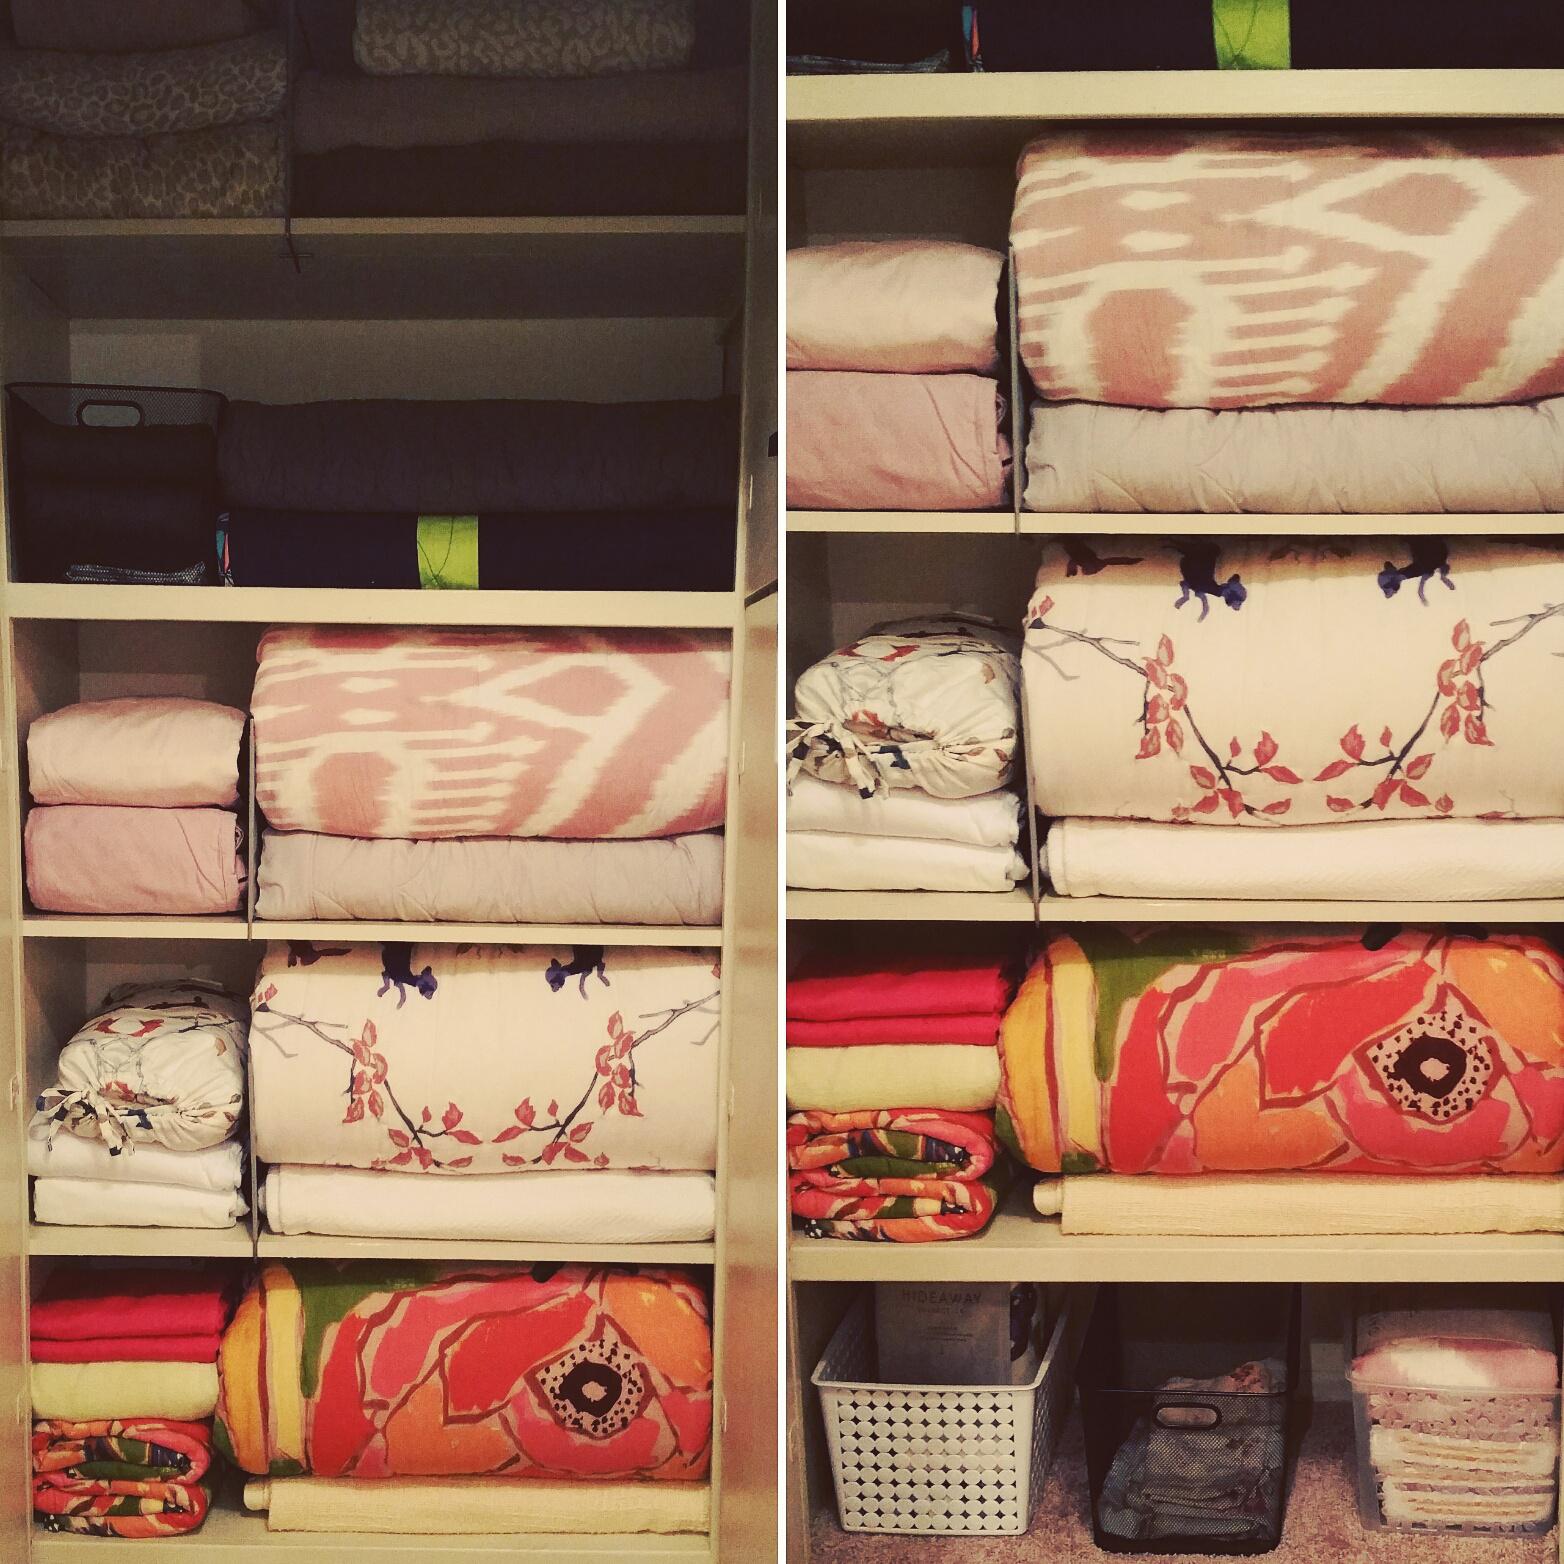
Step 5: Customizing and Adjusting the Shelves
Now that your custom closet system is installed, it’s time to customize and adjust the shelves to fit your specific storage needs. Customizing the shelves will allow you to maximize the space and create efficient storage solutions for different types of items.
Start by assessing the items you plan to store on each shelf. Consider their size, shape, and quantity. This will help you determine the best configuration and spacing for the shelves. For example, if you have a collection of handbags, you may want to allocate more vertical space or add dividers to keep them organized and easily accessible.
Adjust the height of the shelves to accommodate your items. Most custom closet systems offer adjustable shelving options, allowing you to move the shelves up or down as needed. Take advantage of this feature to create custom storage solutions for different categories of items, such as folded clothes, accessories, or bins.
Consider using storage bins or baskets to further organize and compartmentalize items on the shelves. Bins are great for grouping small items, such as socks or scarves, while baskets can hold bulkier items like blankets or pillows. Labeling the bins or baskets will make it easier to locate specific items when needed.
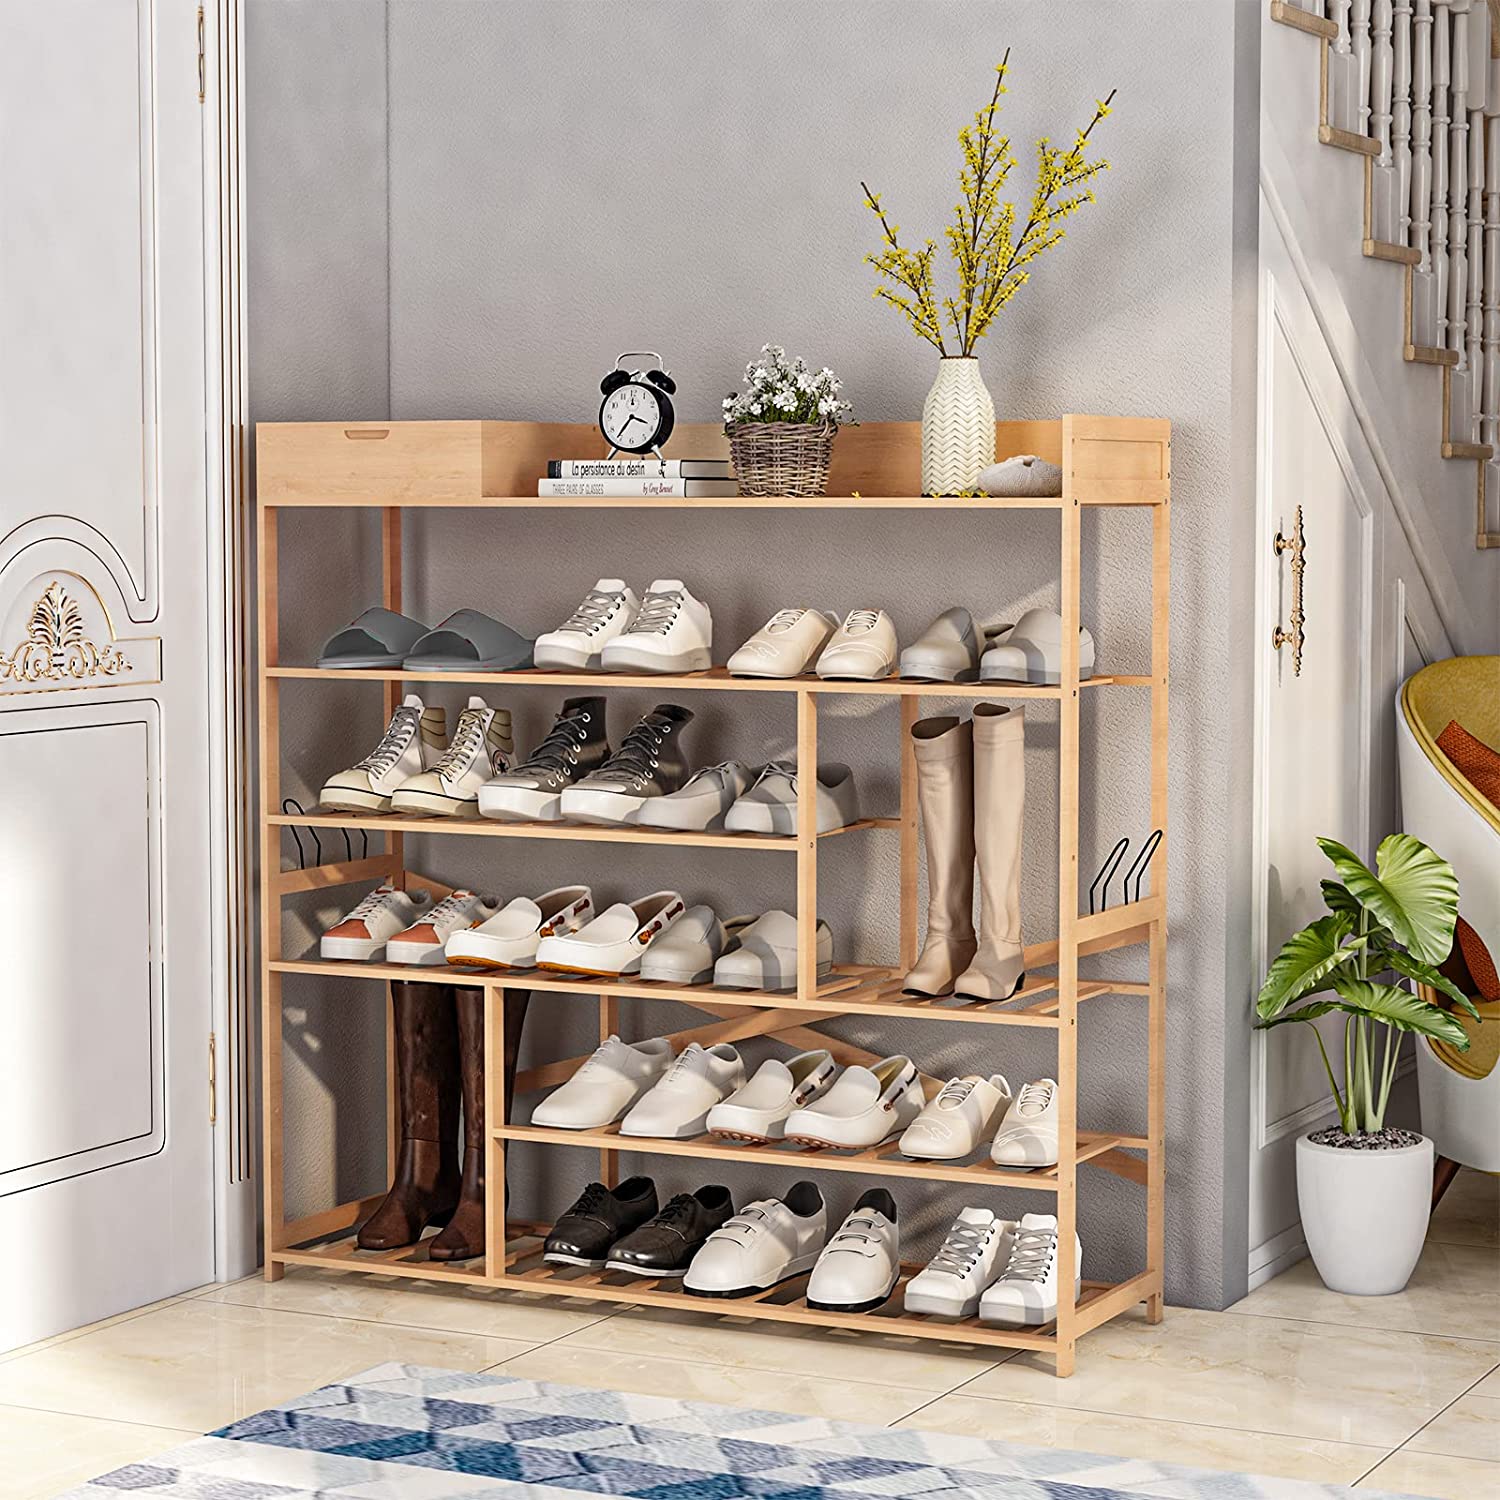
If you have a large collection of shoes, consider adding shoe shelves or racks to your custom closet system. Shoe shelves come in various sizes and styles, allowing you to display and organize your footwear efficiently. Shoe racks can be mounted on the doors or walls to utilize vertical space.
Take into account any special storage needs you have. For example, if you have a valuable jewelry collection, you may want to incorporate a jewelry drawer or a hanging jewelry organizer. These will provide a secure and organized space for your precious items.
Once you have configured and customized the shelves to your liking, take a moment to step back and evaluate the overall functionality and aesthetics of your custom closet. Make any necessary adjustments or additions to ensure that it meets your storage needs and personal style.
With the shelves customized, it’s time to move on to the next step: adding accessories and features to enhance your custom closet even further.
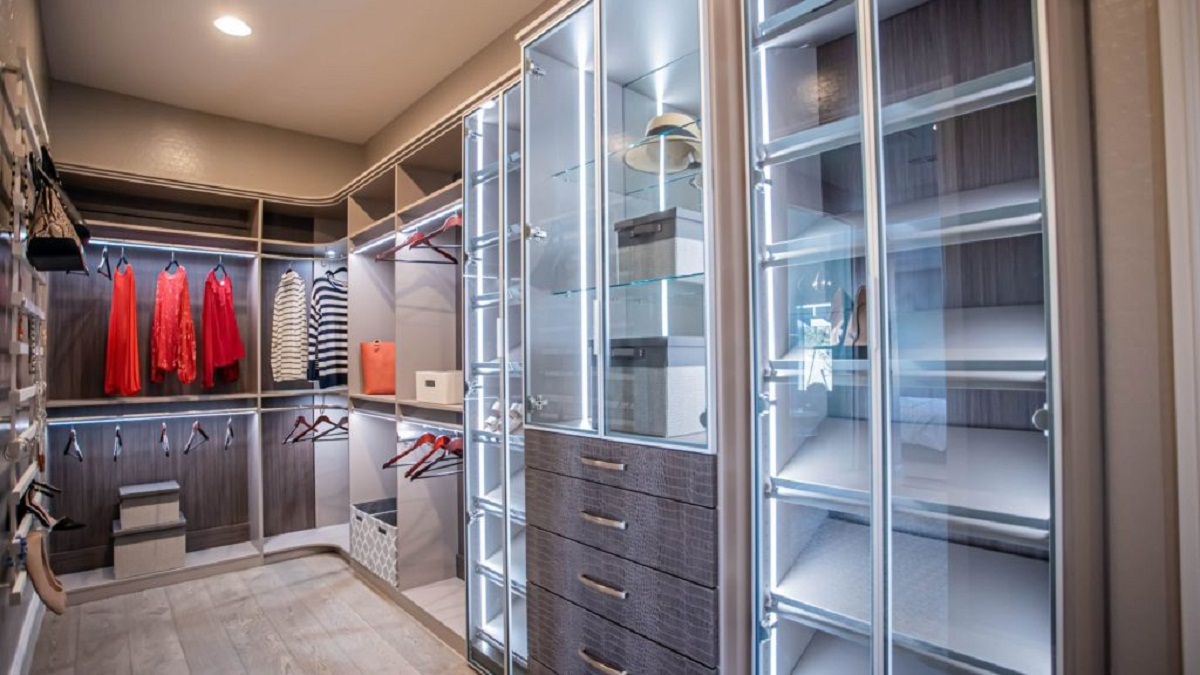
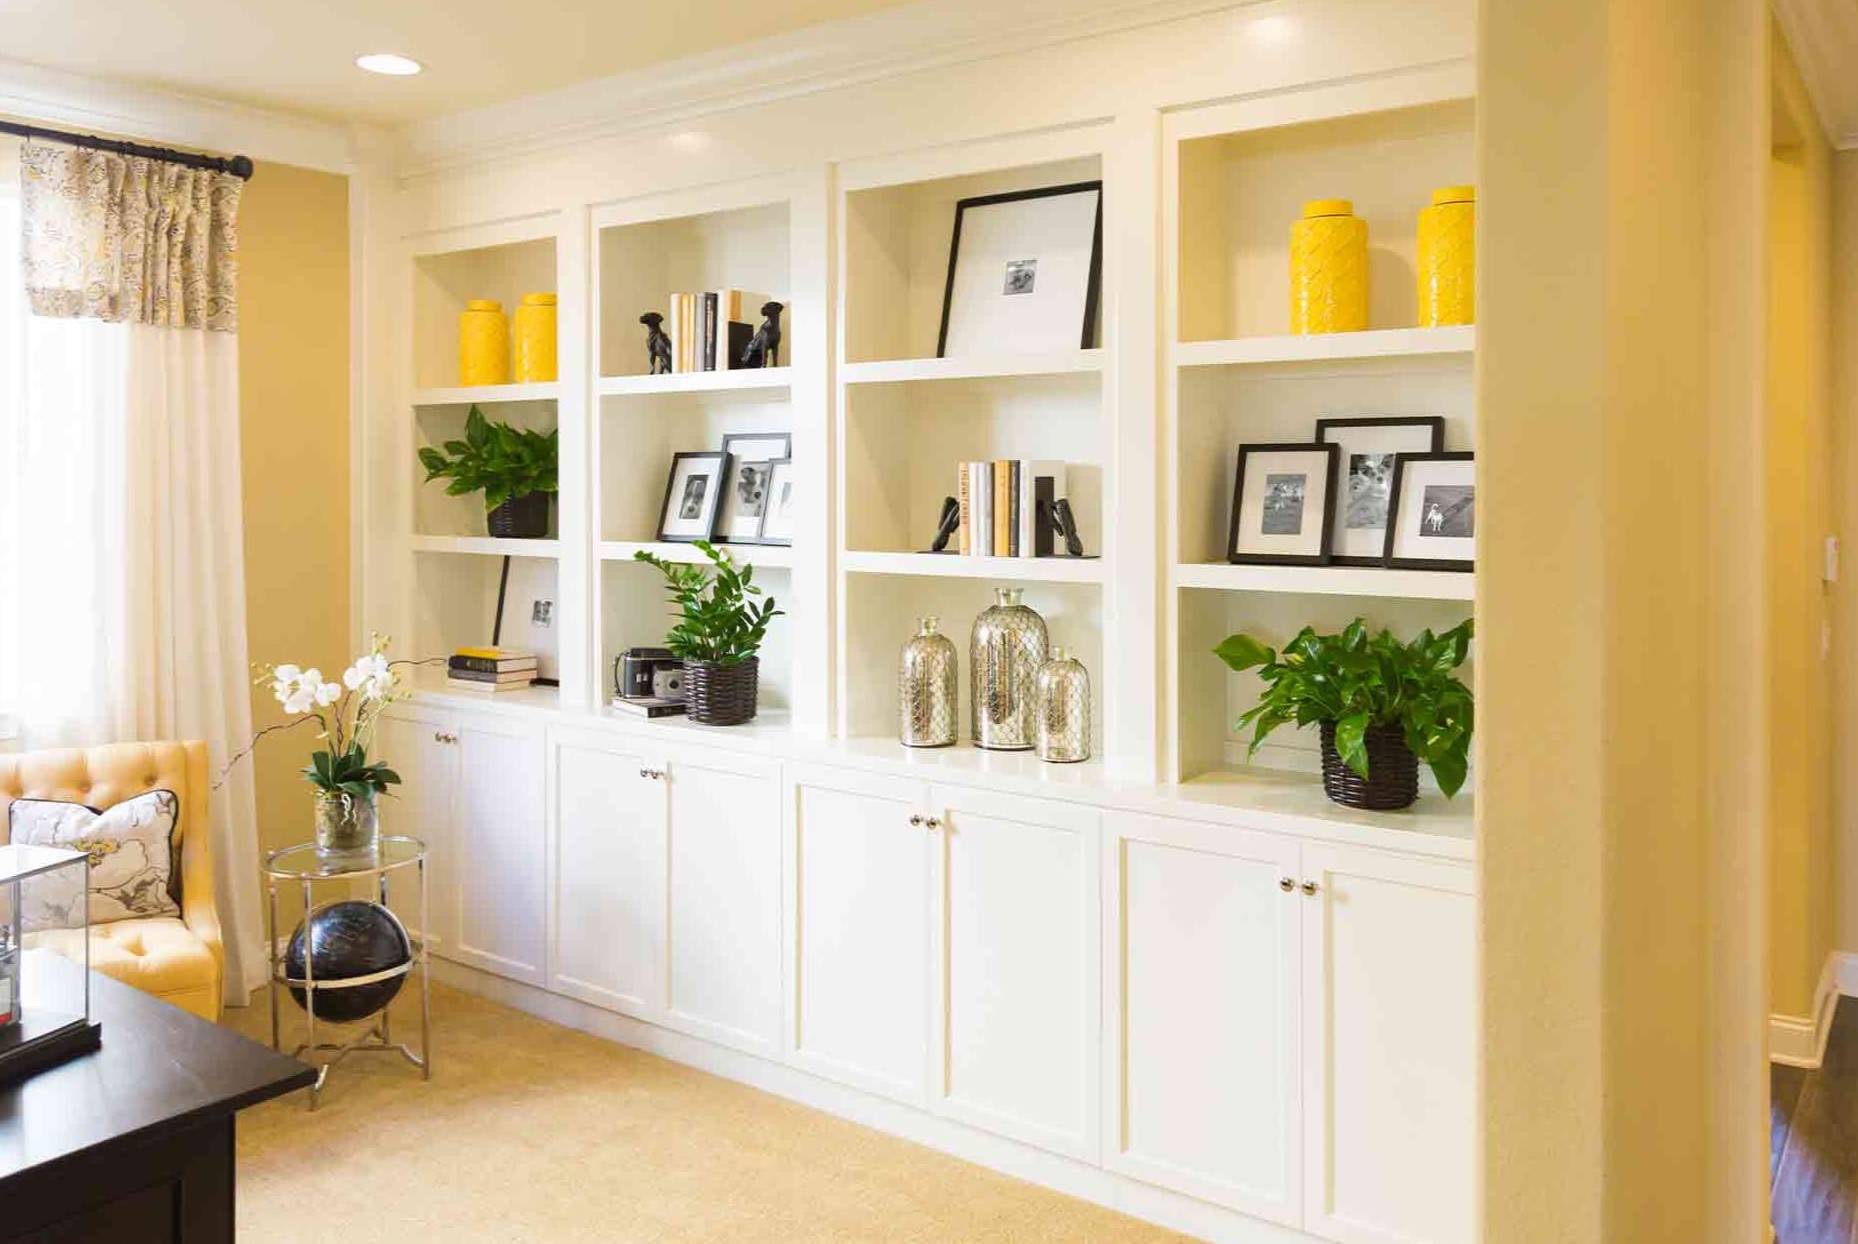
Step 6: Adding Accessories and Features
Now that you have customized and adjusted the shelves in your custom closet, it’s time to take it to the next level by incorporating various accessories and features. These additions will enhance the functionality and organization of your closet, making it even more tailored to your needs.
Here are some accessories and features you may consider adding to your custom closet:
1. Lighting: Proper lighting is essential in any closet. Consider adding LED strip lights or spotlights to illuminate the space and make it easier to see and access your belongings. You can install lighting under shelves, inside drawers, or along the hanging rods for a stylish and practical touch.
2. Mirrors: Incorporating mirrors in your custom closet can serve two purposes. Firstly, they allow you to check your outfit and appearance before stepping out. Secondly, mirrors create an illusion of additional space, making your closet appear bigger and brighter. You can opt for full-length mirrors or smaller mirrors strategically placed within the closet.
3. Hooks and Hangers: Adding hooks and hangers to your custom closet will provide convenient storage options for items like belts, scarves, hats, and handbags. You can install hooks on the walls or on the back of doors to maximize space and keep small items organized and easily accessible.
4. Pull-Out Accessories: Incorporate pull-out accessories such as tie racks, belt racks, or pull-out valet rods. These accessories make it easy to organize and access your accessories while keeping them neatly tucked away when not in use.
5. Drawer Organizers: Install drawer organizers to divide and organize the contents of your drawers. These organizers come in various sizes and configurations to accommodate different items like socks, underwear, jewelry, or office supplies. They will help you keep your drawers tidy and prevent items from getting mixed up.
6. Ironing Board: If space permits, consider installing a fold-down ironing board within your custom closet. This feature will provide a convenient place to touch up your clothes and keep your ironing essentials close at hand.
Remember, the accessories and features you choose should align with your storage needs and personal preferences. They should make your daily routine easier and more efficient. Don’t overlook the small details as they can make a significant difference in the overall functionality and enjoyment of your custom closet.
Once you have added the desired accessories and features, it’s time to move on to the next step: organizing and sorting your items within the customized closet.
Step 7: Organizing and Sorting Items
Now that your custom closet is complete with shelves, accessories, and features, it’s time to tackle the important task of organizing and sorting your items. A well-organized closet makes finding and accessing items a breeze, saving you time and reducing daily frustration.
Here are some tips to help you efficiently organize and sort your items within the custom closet:
1. Categorize Your Items: Start by grouping similar items together. Separate your clothing by type (e.g., tops, bottoms, dresses) or by season. Categorize your accessories, shoes, and other belongings in a way that makes sense to you. This will make it easier to find specific items when you need them.
2. Utilize Storage Containers: Make use of storage containers, bins, or baskets to further organize your items. They are great for grouping smaller items or items that you don’t use frequently. Labeling the containers will make it even easier to locate specific items quickly.
3. Use Vertical Space: Maximize the vertical space in your closet by utilizing hanging rods, shelves, and hooks. Hang clothing that can be vertically stored, such as dresses and coats. Utilize vertical dividers or shelf organizers to stack folded items and utilize every inch of shelf space.
4. Adopt a System: Create a system that works for you and stick to it. Whether it’s organizing your clothes by color, size, or occasion, or arranging your accessories in a specific order, having a consistent system will make it easier to find what you need on a daily basis.
5. Rotate Seasonal Items: If your custom closet has ample space, consider rotating your seasonal clothing and accessories. Store off-season items in storage bins or vacuum-sealed bags to free up space for items you use regularly. This will help keep your closet clutter-free and make it easier to find what you need during each season.
6. Maintain Regular Maintenance: Once you have organized your items within the custom closet, make a habit of regularly maintaining and decluttering. Dedicate some time every few months to go through your belongings, discard items you no longer need, and reorganize if necessary. This will help ensure that your closet remains functional and clutter-free.
Remember, the goal of organizing and sorting items within your custom closet is to create a space that is easy to navigate and allows you to find what you need effortlessly. Stay consistent with your system and make adjustments as needed to suit your changing needs and preferences.
With your items organized and sorted, it’s time to move on to the final step: maintenance and upkeep of your custom closet.
Step 8: Maintenance and Upkeep
Congratulations! You have successfully built and organized your custom closet. However, the journey doesn’t end here. To keep your custom closet in pristine condition and maintain its functionality, it’s important to implement regular maintenance and upkeep practices.
Here are some maintenance tips to help you ensure the longevity and effectiveness of your custom closet:
1. Regular Cleaning: Dedicate time to regularly clean your custom closet. Dust the shelves, wipe down surfaces, and vacuum the floor. Regular cleaning will prevent the accumulation of dirt and keep your belongings in a clean environment.
2. Check for Any Damages: Periodically inspect your custom closet for any damages. Check for loose screws, wobbly shelves, or any signs of wear and tear. Addressing these issues early on will prevent further damage and ensure the stability of your closet system.
3. Fix Any Repairs Promptly: If you notice any damages or issues, such as a broken drawer handle or a sagging shelf, fix them as soon as possible. Ignoring repairs can lead to further complications that may require more extensive repairs down the line.
4. Rotate and Reorganize: Every few months, take the time to rotate and reorganize your items. This will help prevent overcrowding and allow you to assess your storage needs. Adjust shelves, reorganize bins, and consider any changes in your wardrobe or lifestyle that may affect your storage requirements.
5. Declutter Regularly: Clutter tends to accumulate over time, so make it a habit to declutter regularly. Assess your belongings and discard any items you no longer need or use. This will keep your custom closet organized and prevent it from becoming overcrowded.
6. Maintain Lighting and Accessories: If your custom closet includes lighting or accessories, such as jewelry organizers or pull-out racks, make sure to maintain them as well. Replace bulbs as needed and clean the accessories to ensure they continue to function properly.
By implementing these maintenance practices, you can enjoy a well-organized and functional custom closet for years to come. Remember, regular upkeep is key to preserving the efficiency and aesthetics of your custom closet.
Now that you have successfully completed the maintenance and upkeep steps, take a moment to appreciate your hard work and enjoy the benefits of your custom closet. It’s a space that is uniquely tailored to your needs and preferences, providing you with a functional and organized storage solution.
Congratulations once again on building your dream custom closet!
Read more: How To Build A Wardrobe Closet
Conclusion
Building a custom closet is a rewarding and worthwhile project that allows you to optimize your storage space while showcasing your personal style and design preferences. By following the step-by-step process outlined in this article, you can transform a cluttered and disorganized closet into a functional and aesthetically pleasing oasis.
Starting with accurate measurements and thorough planning, you can create a custom closet that perfectly fits your space and accommodates your storage needs. Choosing the right closet system, whether it be wire shelving, wood shelving, modular systems, or custom-built options, is crucial for a successful project.
Clearing out the closet space and installing the selected closet system are essential steps that lay the foundation for your custom closet. Once the system is in place, customizing and adjusting the shelves to fit your specific items and organizing them in a logical manner will enhance the functionality of your closet.
Adding accessories and features, such as lighting, mirrors, hooks, and pull-out accessories, can further elevate the functionality and appearance of your custom closet. These additions provide convenience and help maximize your storage space.
With your custom closet complete, ongoing maintenance and upkeep are key to preserving its functionality and organization. Regular cleaning, checking for damages, and decluttering will ensure that your custom closet remains in top condition for years to come.
In conclusion, building a custom closet is a creative and practical way to enhance your home’s organization and aesthetics. It allows you to create a space that is tailored to your individual storage needs and personal style. Follow the steps outlined in this article, and you’ll be well on your way to enjoying a well-organized and visually pleasing custom closet.
So, don’t settle for a generic closet. Take control of your storage space and create a custom closet that reflects your unique preferences and makes your daily routine more enjoyable. It’s time to transform your cluttered chaos into a perfectly organized haven.
Frequently Asked Questions about How To Build Custom Closet
Was this page helpful?
At Storables.com, we guarantee accurate and reliable information. Our content, validated by Expert Board Contributors, is crafted following stringent Editorial Policies. We're committed to providing you with well-researched, expert-backed insights for all your informational needs.


0 thoughts on “How To Build Custom Closet”