Articles
How To Change A Garage Door Lock
Modified: October 19, 2024
Learn how to change a garage door lock with this helpful articles. Secure your garage and protect your belongings with step-by-step instructions.
(Many of the links in this article redirect to a specific reviewed product. Your purchase of these products through affiliate links helps to generate commission for Storables.com, at no extra cost. Learn more)
Introduction
Changing a garage door lock is an important step in ensuring the security of your garage and its contents. Whether you have recently moved into a new property, lost your keys, or simply want to upgrade your lock for enhanced protection, knowing how to change a garage door lock is a valuable skill.
In this comprehensive guide, we will walk you through the step-by-step process of changing a garage door lock. From assessing the existing lock to installing a new one, we will cover everything you need to know to successfully complete the task.
Before we dive into the specifics of changing a garage door lock, it’s important to understand the significance of having a secure locking mechanism. Your garage is often a storage space for valuable items such as vehicles, tools, and equipment, making it a prime target for potential burglars. By ensuring that your garage door lock is in optimal condition, you can help protect your belongings and gain peace of mind.
Additionally, changing a garage door lock can be necessary if you’ve recently moved into a new property. It’s crucial to change the locks as a precautionary measure to prevent any previous occupants from accessing your garage. This is especially important if the garage is connected to your house, as a compromised lock could provide intruders with easy access to your home.
Now that we understand the importance of changing a garage door lock, let’s delve into the step-by-step process of assessing the existing lock and installing a new one. By following these instructions, you’ll be well-equipped to enhance the security of your garage and protect your valued possessions.
Key Takeaways:
- Assess the existing lock thoroughly to choose the right replacement. Consider security features, dimensions, and compatibility to ensure a smooth and secure installation process.
- Prioritize safety and gather essential tools before removing the old lock and installing the new one. Test the functionality to ensure optimal security for your garage.
Read more: How To Lock A Garage Door
Assessing the Existing Lock
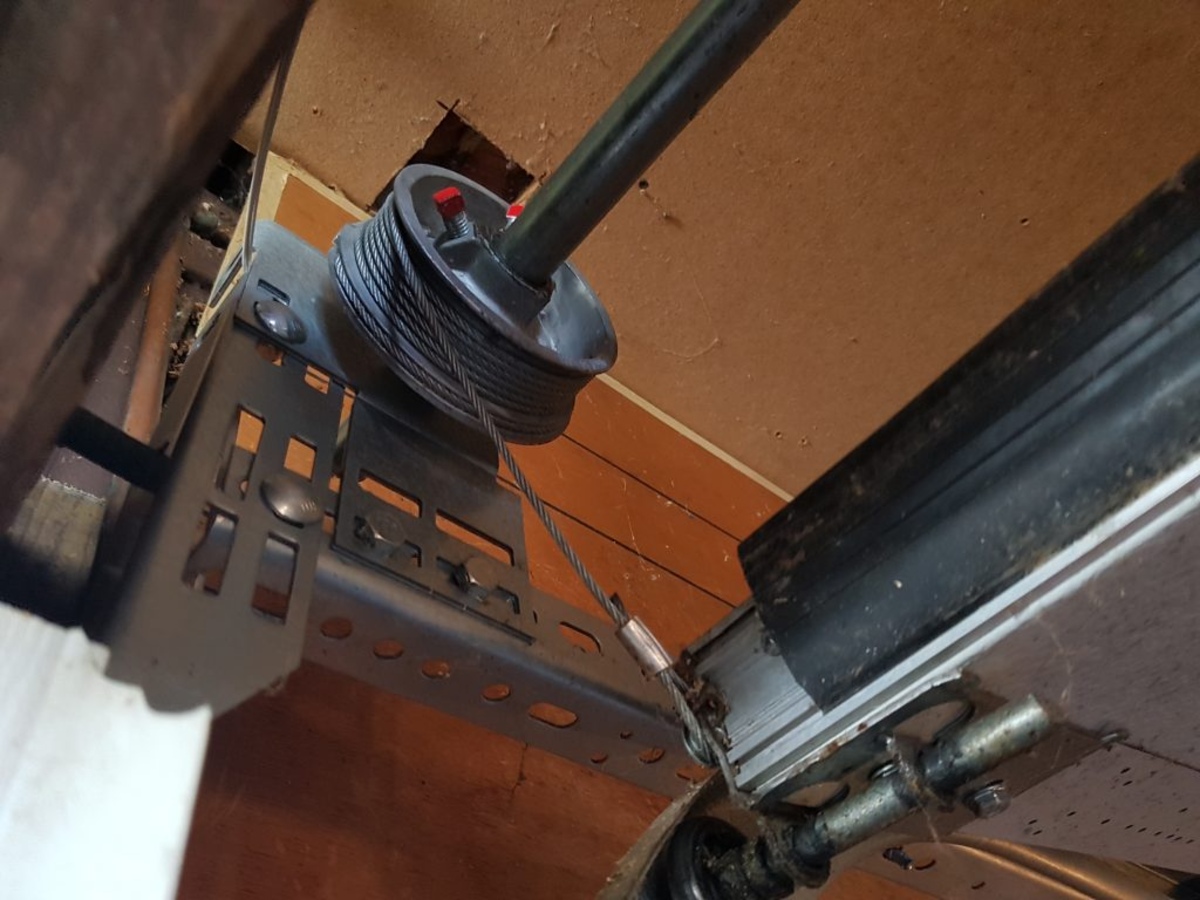
Before you begin the process of changing a garage door lock, it’s important to assess the existing lock to determine the type and condition. Different types of garage door locks require different approaches and tools for replacement. Here’s how you can assess the existing lock:
- Inspect the lock: Start by examining the lock on your garage door. Look for any signs of damage, such as rust, loose parts, or signs of tampering.
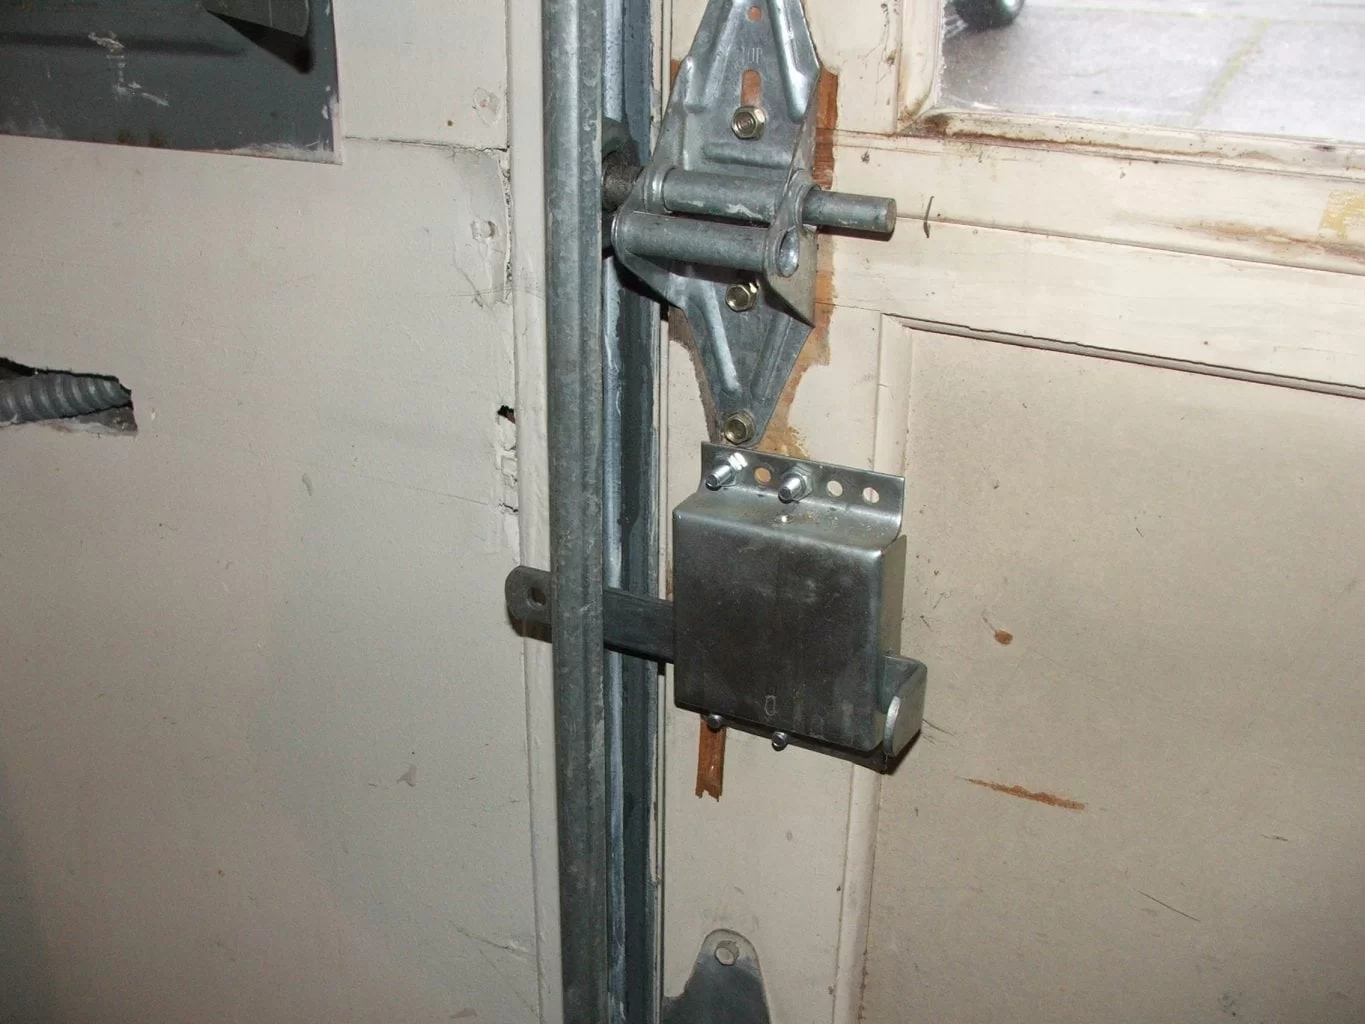
- Determine the lock type: Garage door locks come in various types, including slide locks, deadbolt locks, and t-handle locks. Identify the type of lock you have as this will help you find the right replacement.
- Measure the lock dimensions: Use a measuring tape to determine the dimensions of the existing lock. This is crucial for finding a suitable replacement lock that fits precisely in the same spot.
- Check compatibility: Ensure that the replacement lock you choose is compatible with your garage door make and model. Consult the manufacturer’s specifications or seek professional advice if you’re unsure.
- Consider security features: If your existing lock lacks security features or is outdated, this is an opportunity to upgrade to a high-security lock. Look for locks that offer enhanced features like anti-drill, anti-pick, and anti-bump mechanisms to improve the security of your garage.
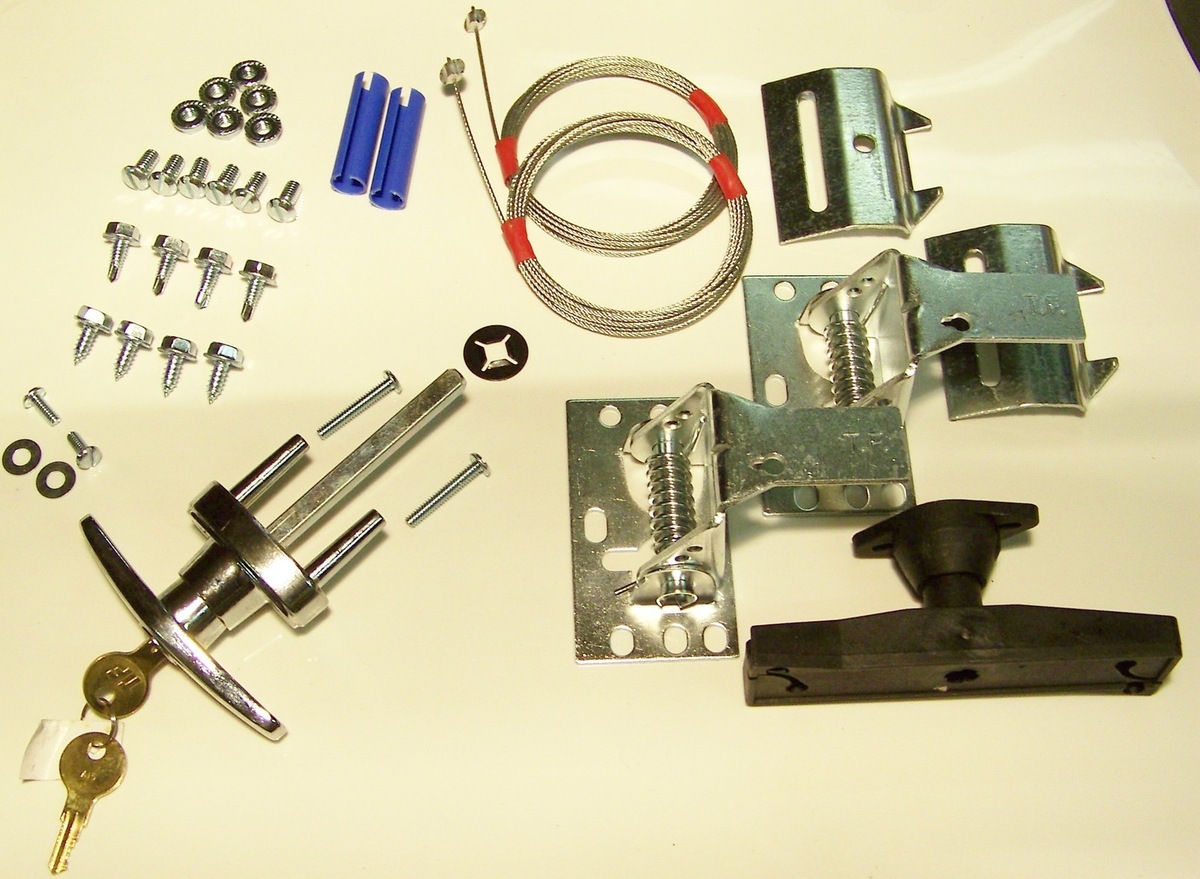
- Take note of additional hardware: Some locks may require additional locking bars or latches for proper installation. Make a note of any additional hardware that may be needed.
- Assess the overall condition: If the lock is severely damaged or worn out, it may be necessary to replace it entirely rather than attempting to repair it.
By thoroughly assessing the existing lock, you will be equipped with the necessary information to choose the right replacement lock and ensure a smooth installation process. It’s important to take your time during this step to avoid any compatibility or measurement issues later on.
Gathering Necessary Tools
Before you can proceed with changing a garage door lock, it’s important to gather the necessary tools and equipment. Having the right tools on hand will help you complete the task efficiently and minimize any potential frustration along the way. Here are the essential tools you’ll need:
- Screwdriver: You will need a screwdriver to remove the screws that hold the existing lock in place. The type of screwdriver required will depend on the screw heads, so it’s a good idea to have a set of different types and sizes available.
- Measuring tape: A measuring tape will be useful for measuring the dimensions of the existing lock, ensuring compatibility with the replacement lock, and taking accurate measurements for any additional hardware required.
- Pliers: Pliers can come in handy for gripping and holding small parts during the lock removal and installation process.
- Replacement lock: Depending on the type and specifications of your existing lock, you’ll need to purchase a suitable replacement lock. Ensure that the replacement lock matches the dimensions and security features required for your garage door.
- Lockset installation kit: If the replacement lock requires new holes to be drilled, a lockset installation kit will provide you with the necessary drill bits and templates for accurate installation.
- Lubricating oil: It’s a good idea to have some lubricating oil on hand to ensure smooth operation of the new lock and prevent any potential rust or friction issues.
- Safety equipment: Lastly, always prioritize safety when working on any home improvement project. Wear safety goggles to protect your eyes from any flying debris, and consider wearing work gloves to safeguard your hands during the lock removal and installation process.
By gathering these essential tools and equipment beforehand, you will be well-prepared for changing a garage door lock without any unnecessary interruptions or delays. It’s worth noting that the specific tools required may vary depending on the type of lock and the manufacturer’s recommendations, so always refer to the lock’s installation instructions for any additional tools or equipment needed.
Removing the Old Lock
Once you have assessed the existing lock and gathered the necessary tools, it’s time to move on to removing the old lock. Here’s a step-by-step guide to help you through the process:
- Disconnect the power: Before starting any work on your garage door, it’s crucial to disconnect power to prevent any accidents. Locate the circuit breaker or power source for your garage door opener and turn it off.
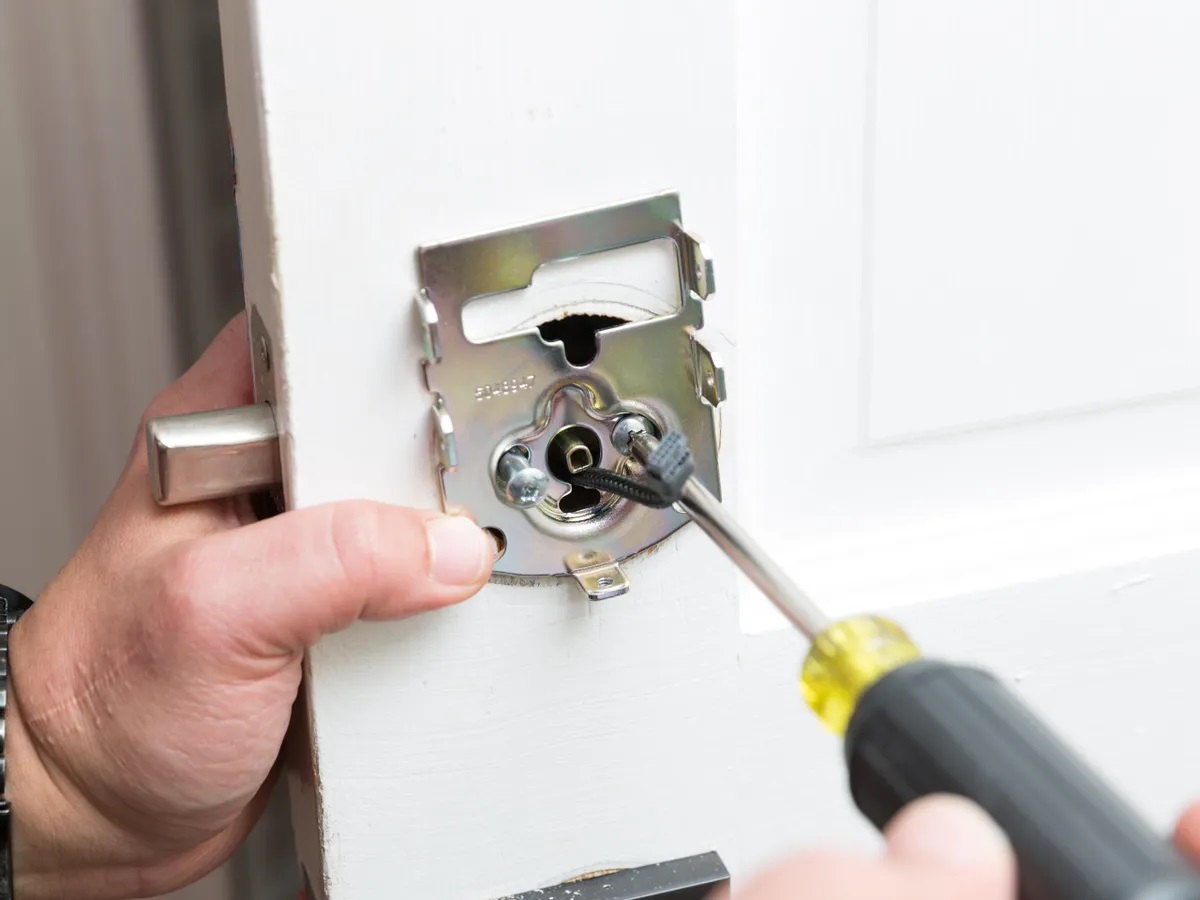
- Locate the mounting screws: Look for the mounting screws that hold the lock in place on the interior side of the garage door. These screws are typically located on the interior handle or plate.
- Remove the interior lock handle: Use a screwdriver to remove the mounting screws and detach the interior lock handle from the door. Set the screws aside for later use.
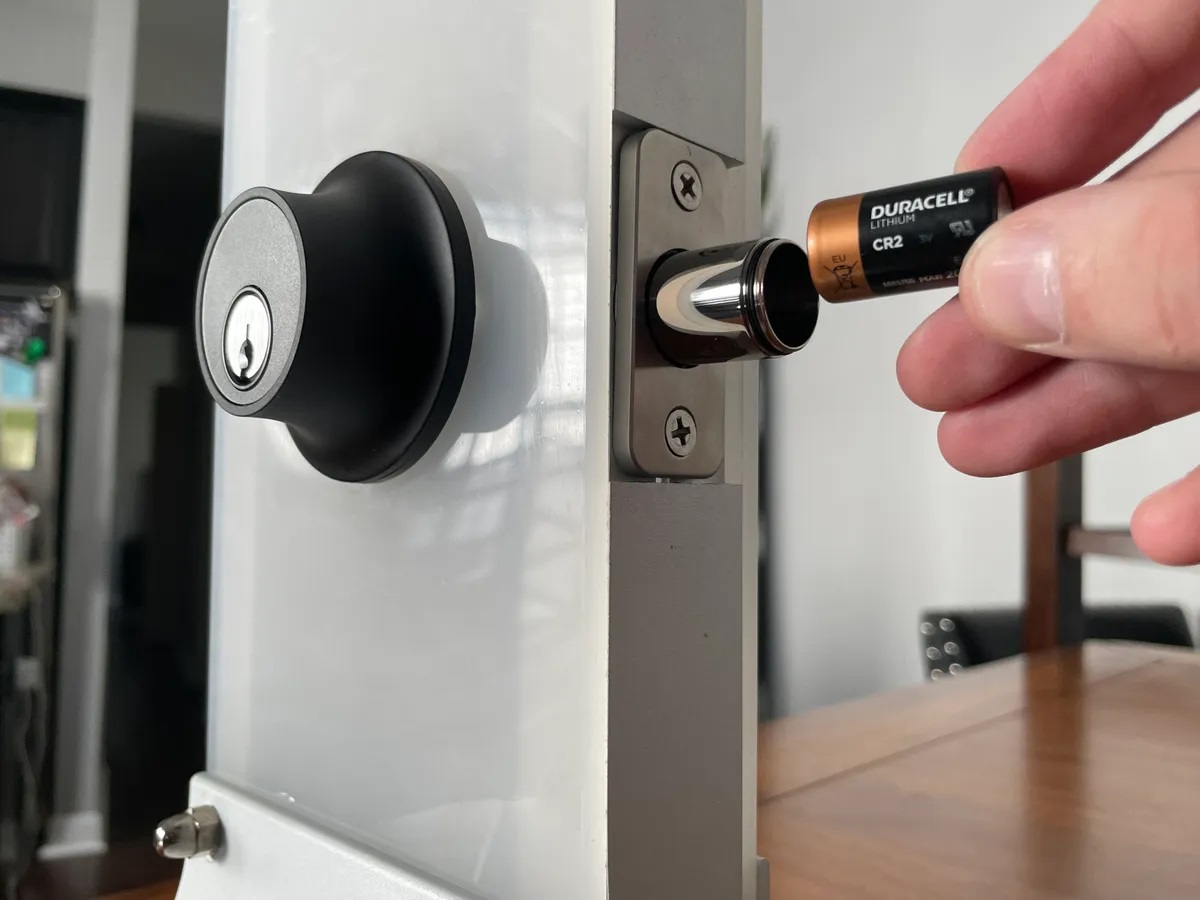
- Remove the exterior lock cylinder: On the exterior side of the garage door, locate the retaining screw that holds the lock cylinder in place. Use a screwdriver to remove this retaining screw.
- Slide out the lock cylinder: Once the retaining screw is removed, you can slide out the lock cylinder from the exterior side of the door. Take care not to damage any parts or wiring connected to the lock.
- Disconnect any wires: If your garage door lock has any electrical or wired components, disconnect them carefully by removing any wire connectors or screws.
- Remove any additional hardware: If there are any additional locking bars, latches, or components attached to the lock, remove them as well.
- Inspect and clean the door: With the old lock removed, take the opportunity to inspect the door for any damage or wear. Clean the surrounding areas to ensure a smooth installation for the new lock.
By following these steps, you can successfully remove the old lock from your garage door. Remember to handle the lock and its components with care to avoid any damage or accidents. Keep the mounting screws and other parts in a safe place, as you may need them when installing the new lock. With the old lock removed, you’re now ready to move on to the next step: installing the new lock.
When changing a garage door lock, make sure to choose a high-quality replacement lock that is compatible with your existing door. It’s also important to follow the manufacturer’s instructions carefully to ensure proper installation and security.
Installing the New Lock
Now that you’ve successfully removed the old lock, it’s time to install the new lock on your garage door. Follow these step-by-step instructions to ensure a smooth installation process:
- Refer to the manufacturer’s instructions: Before proceeding with the installation, carefully read the manufacturer’s instructions that came with your new lock. Familiarize yourself with any specific installation guidelines or requirements.
- Prepare the lock assembly: If your new lock requires any assembly, follow the manufacturer’s instructions to put the lock components together.
- Position the lock on the interior side: Place the lock assembly on the interior side of the garage door, aligning it with the mounting holes left by the old lock. Ensure that the lock is positioned correctly and level.
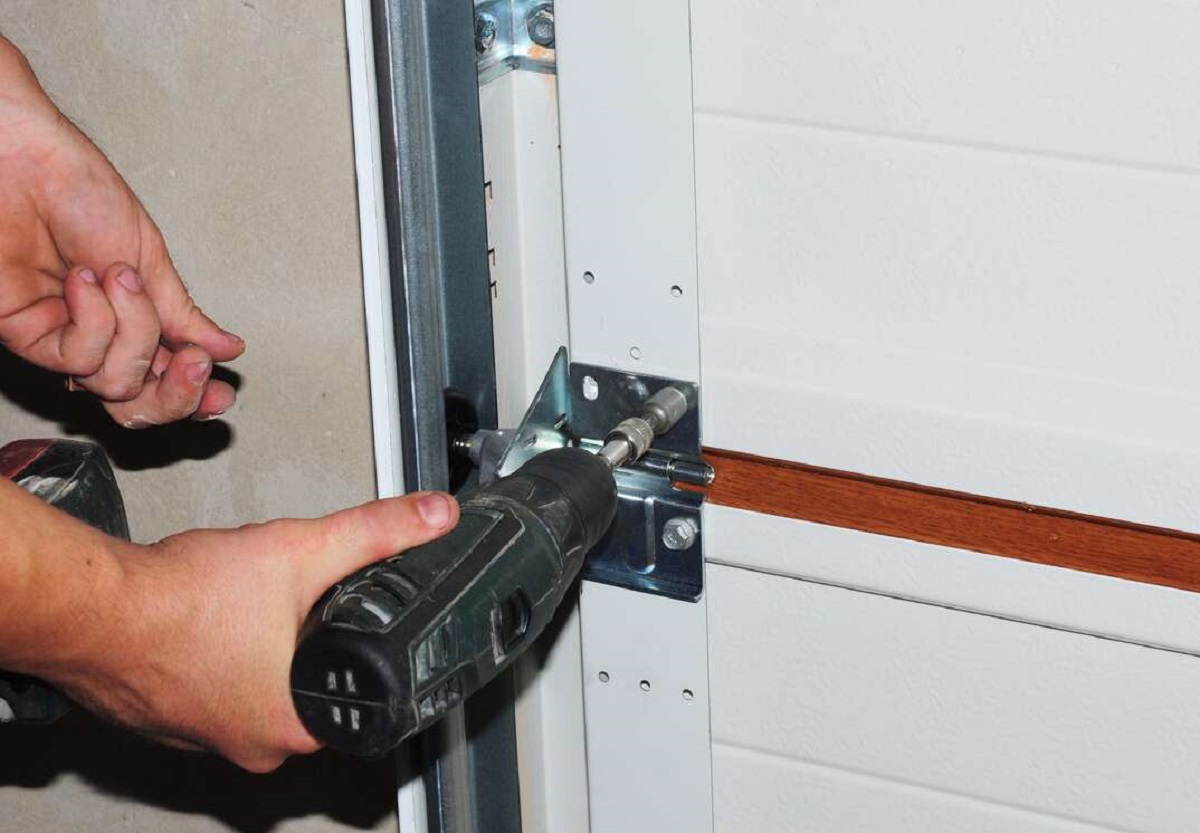
- Insert the mounting screws: Use the screws that were removed during the removal process to secure the lock in place. Tighten the screws with a screwdriver, ensuring that the lock is securely fastened to the door.
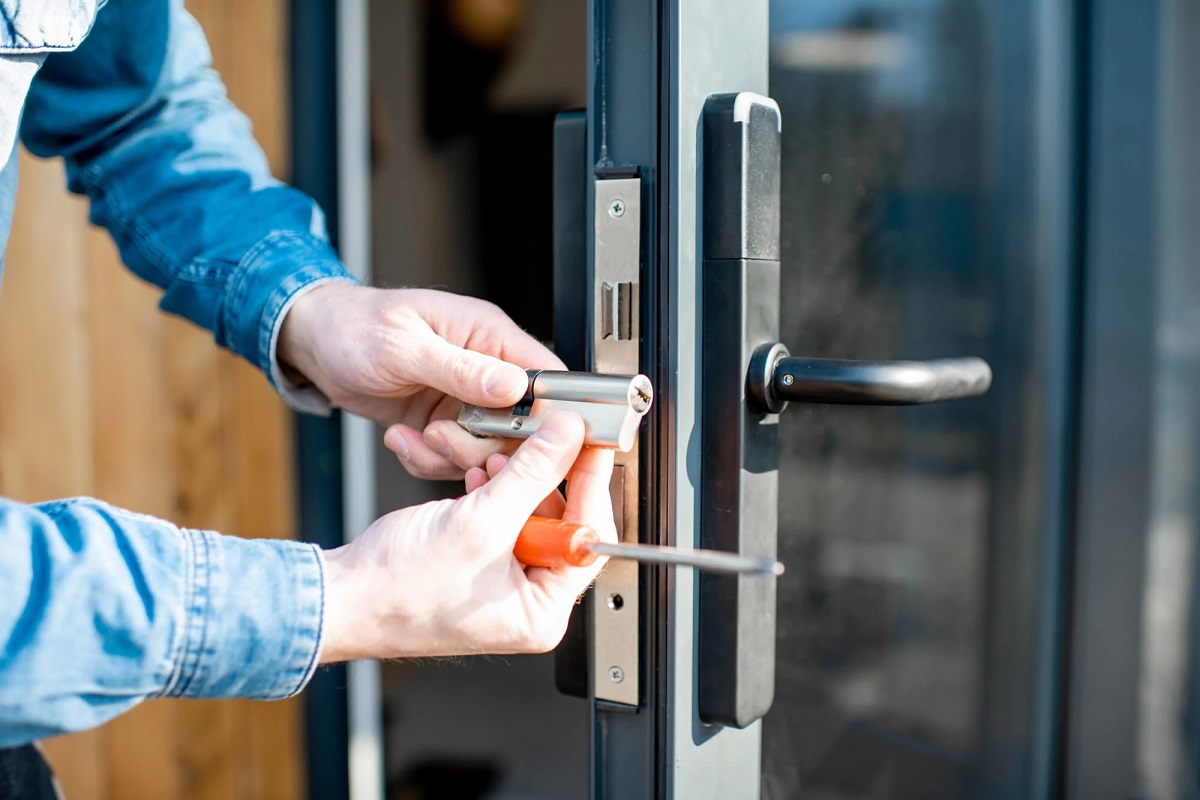
- Install the exterior lock cylinder: Take the exterior lock cylinder and slide it into the corresponding slot on the exterior side of the garage door. Align it properly and insert the retaining screw to secure it in place.
- Connect any electrical or wired components: If your new lock has any electrical or wired components, connect them according to the manufacturer’s instructions. Use wire connectors or screws to ensure a secure connection.
- Install any additional hardware: If your new lock requires additional locking bars or latches, follow the manufacturer’s instructions to install them properly.
- Test the lock: Once everything is securely installed, test the functionality of the new lock. Ensure that the key turns smoothly, the lock mechanism operates correctly, and the door can be securely locked and unlocked.
It’s important to follow the manufacturer’s instructions throughout the installation process to ensure a proper and secure lock installation. Take your time to align and position the lock accurately, as any misalignment may result in difficulties with the lock’s functionality. Keep in mind that the specific installation steps may vary depending on the type and brand of the lock, so always refer to the manufacturer’s instructions for any specific guidance.
With the new lock securely installed, you’re ready to move on to the final step: testing the functionality of the lock.
Read more: How To Change A Door Lock
Testing the Functionality
After successfully installing the new lock on your garage door, it’s important to test its functionality to ensure that it is working correctly. Follow these steps to test the lock:
- Check the key operation: Insert the key into the lock and turn it in both directions to ensure that it operates smoothly and without any resistance. Ensure that the key can be inserted and removed easily.
- Test the lock mechanism: Lock and unlock the door using the new lock to ensure that the mechanism engages and disengages smoothly. Make sure that the lock securely latches onto the door frame when locked.
- Check for any misalignment: While testing the lock, carefully observe if there are any signs of misalignment or difficulty in operating the lock. If you notice any issues, double-check the installation and make any necessary adjustments.
- Test from both inside and outside: Ensure that the lock can be operated from both the interior and exterior sides of the garage door. This is especially important if you have multiple entrances to your garage.
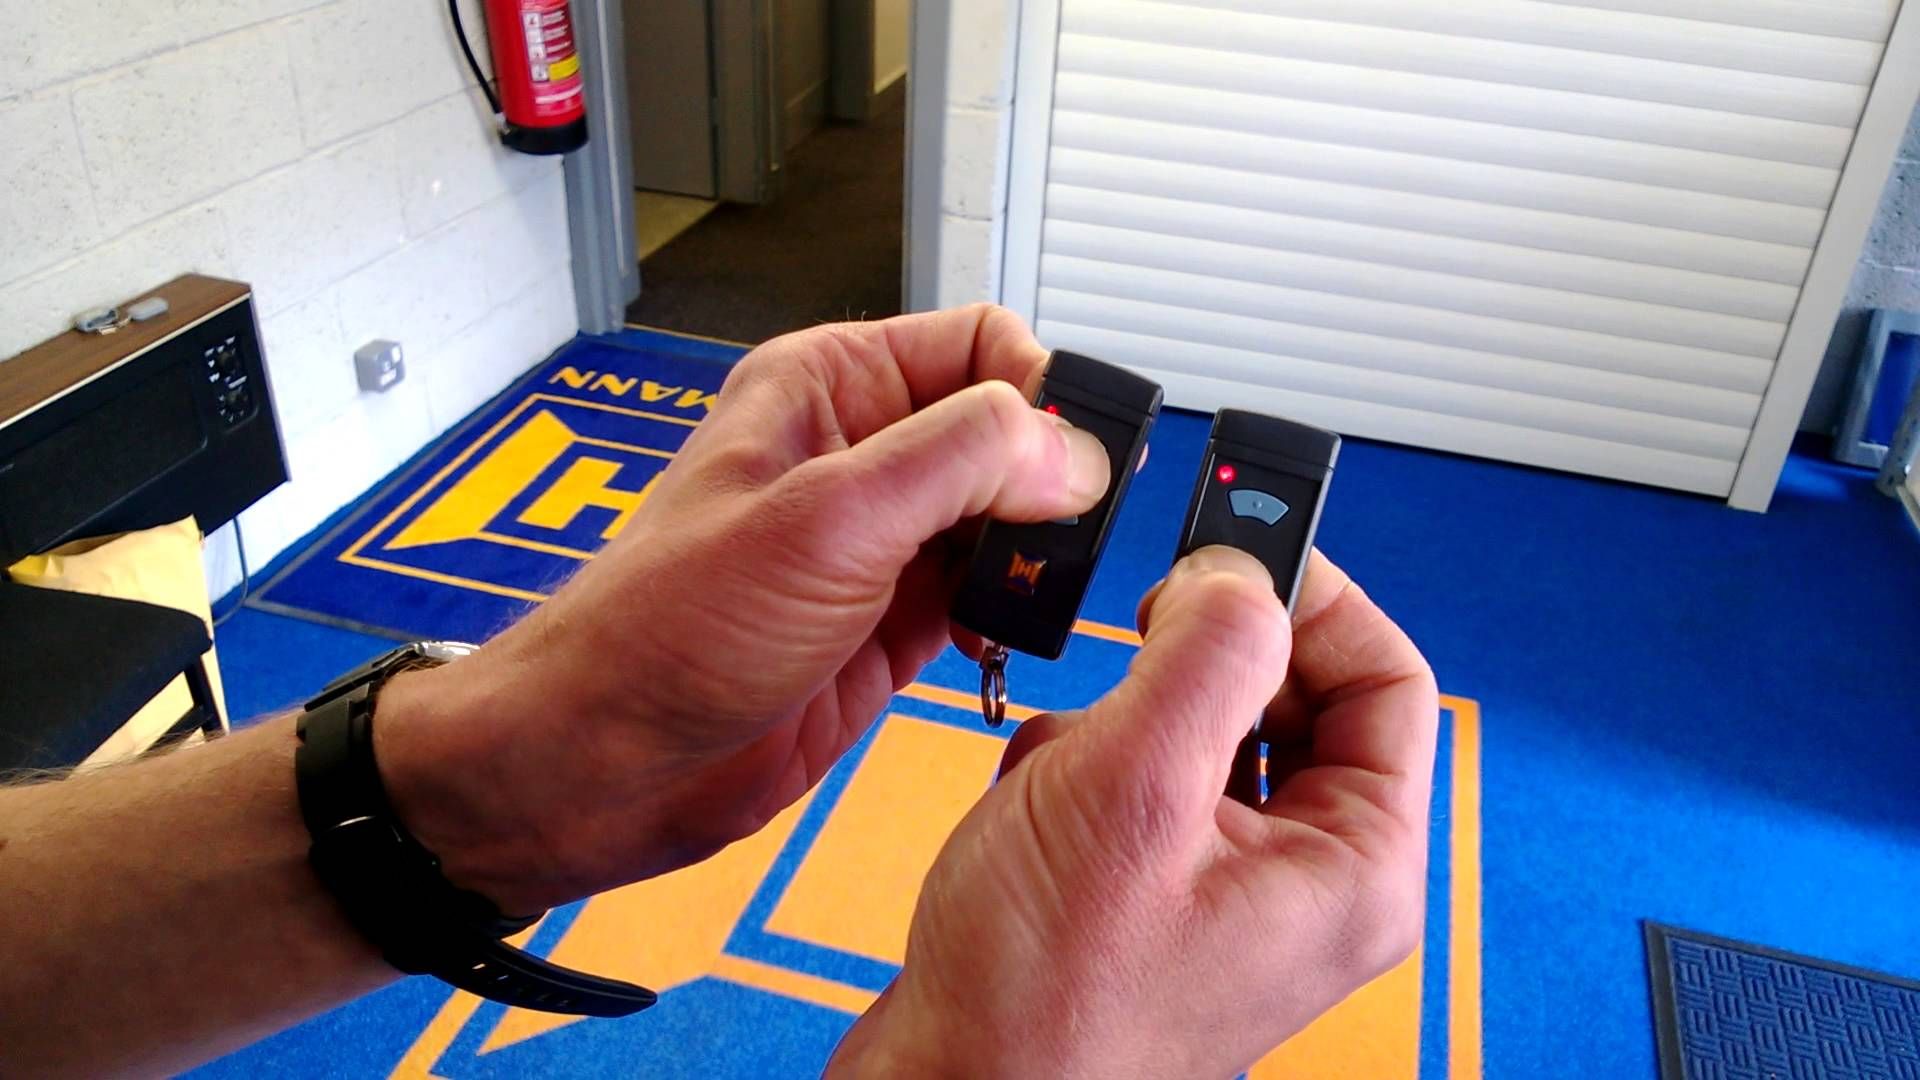
- Verify compatibility with your garage door opener: If your garage door is equipped with an automatic opener, test the lock’s compatibility by activating the opener while the door is locked. Make sure that the lock doesn’t interfere with the functioning of the opener.
- Test the security features: If you opted for a high-security lock with additional features, such as anti-drill or anti-pick mechanisms, test them to ensure that they function as expected.
By thoroughly testing the functionality of your new lock, you can ensure that it provides the desired level of security for your garage. If you encounter any issues during the testing process, consider consulting the lock manufacturer’s support or seeking professional assistance.
Remember to keep your keys in a secure location and avoid sharing them with unauthorized individuals to maintain the security of your garage and its contents. Regularly inspect your lock for any signs of wear or damage and address any issues promptly to ensure its continued effectiveness.
With the lock successfully installed and tested, you can now enjoy the improved security and peace of mind that comes with a properly functioning garage door lock.
Conclusion
Changing a garage door lock is a crucial step in ensuring the security of your garage and protecting your valuable belongings. By following the step-by-step process outlined in this guide, you can successfully assess the existing lock, gather the necessary tools, remove the old lock, install the new lock, and test its functionality.
The process begins with assessing the existing lock, determining its type, dimensions, and condition. This allows you to choose a suitable replacement lock that matches your garage door and meets your security needs. Gathering the necessary tools, such as screwdrivers, pliers, and a measuring tape, ensures that you have everything you need for a smooth installation process.
Removing the old lock involves disconnecting power, removing the interior lock handle and exterior lock cylinder, disconnecting any electrical components, and inspecting the door for any damage or wear. With the old lock removed and the door prepared, you can proceed to install the new lock. Positioning the lock assembly correctly, inserting the mounting screws, and installing the exterior lock cylinder are key steps in this process.
Once the new lock is installed, it’s important to test its functionality. Check the key operation, test the lock mechanism, ensure compatibility with your garage door opener, and verify any additional security features. By thoroughly testing the lock from both the interior and exterior sides of the door, you can ensure that it provides the desired level of security.
In conclusion, changing a garage door lock is a task that should not be overlooked when it comes to ensuring the safety and security of your garage and its contents. By following the steps outlined in this guide, you can confidently change a garage door lock and enjoy the peace of mind that comes with a secure and properly functioning lock.
Remember to always prioritize safety, refer to the manufacturer’s instructions, and seek professional assistance if needed. With your new lock in place, you can take comfort in knowing that your garage is well-protected against potential intruders.
Frequently Asked Questions about How To Change A Garage Door Lock
Was this page helpful?
At Storables.com, we guarantee accurate and reliable information. Our content, validated by Expert Board Contributors, is crafted following stringent Editorial Policies. We're committed to providing you with well-researched, expert-backed insights for all your informational needs.


0 thoughts on “How To Change A Garage Door Lock”