Articles
How To Change A Garage Door Cable
Modified: October 28, 2024
Learn how to change a garage door cable with step-by-step instructions and expert tips in this informative articles. Get started today!
(Many of the links in this article redirect to a specific reviewed product. Your purchase of these products through affiliate links helps to generate commission for Storables.com, at no extra cost. Learn more)
Introduction
Changing a garage door cable is an important maintenance task that every homeowner should be familiar with. The garage door cable plays a crucial role in balancing and supporting the weight of the door, ensuring smooth and safe operation. Over time, cables can become worn out or damaged due to constant use and exposure to the elements. When this happens, it is essential to replace them promptly to avoid potential accidents or further damage to your garage door system.
In this article, we will provide a comprehensive guide on how to change a garage door cable. We will walk you through each step of the process, from preparation and safety measures to testing and adjusting the cable tension. By following these steps and taking the necessary precautions, you can successfully replace the garage door cable and maintain the optimal functioning of your garage door.
Key Takeaways:
- Prioritize safety and preparation when changing a garage door cable. Wear protective gear, secure the door, and disconnect the opener to avoid accidents and ensure a smooth process.
- Understanding the role and structure of garage door cables is crucial for maintaining optimal functioning. Regular inspection and prompt replacement of worn-out or damaged cables contribute to the longevity of your garage door system and prevent potential accidents.
Read more: How To Change A Garage Door Lock
Understanding Garage Door Cables
Before we dive into the process of changing a garage door cable, it is essential to understand the role and structure of these cables. Garage door cables are made of sturdy steel that is twisted together to create a strong, flexible rope-like structure. They are responsible for lifting and lowering the garage door while providing support and balance.
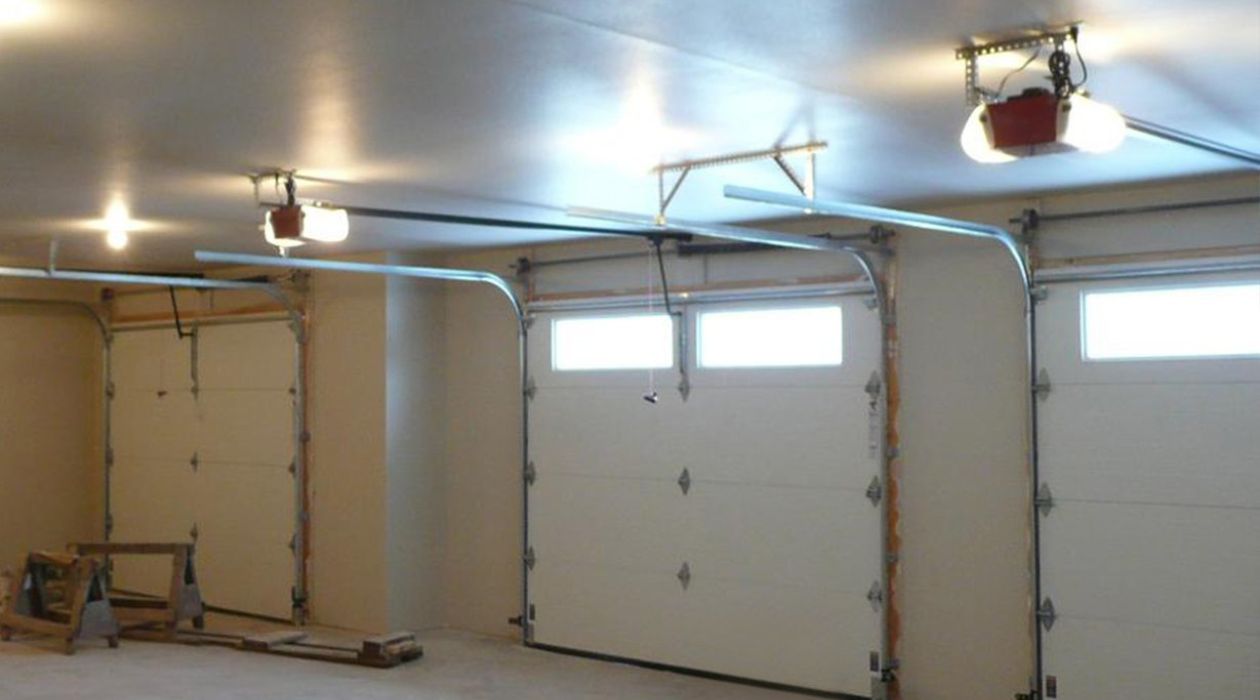
Garage door cables generally come in two types: torsion cables and extension cables. Torsion cables are commonly found in sectional garage doors and are attached to the torsion spring system. Extension cables are typically used in one-piece or tilt-up garage doors and are connected to extension springs.
Tools and Materials Needed
Before you begin changing the garage door cable, make sure you have the necessary tools and materials on hand. Here is a list of items you will need for this task:
- Safety glasses
- Work gloves
- Adjustable wrench
- Locking pliers
- Cable clamps
- Replacement garage door cable
- Step ladder
Having these tools and materials ready will ensure a smooth and efficient cable replacement process.
Key Takeaways:
- Prioritize safety and preparation when changing a garage door cable. Wear protective gear, secure the door, and disconnect the opener to avoid accidents and ensure a smooth process.
- Understanding the role and structure of garage door cables is crucial for maintaining optimal functioning. Regular inspection and prompt replacement of worn-out or damaged cables contribute to the longevity of your garage door system and prevent potential accidents.
Read more: How To Change A Garage Door Lock
Understanding Garage Door Cables
Garage door cables are an essential component of the garage door system. They play a crucial role in balancing and supporting the weight of the door, allowing it to open and close smoothly. Understanding the structure and function of garage door cables will help you grasp the importance of maintaining and replacing them when necessary.
Garage door cables are typically made of strong, durable steel. They are tightly twisted together to form a robust, flexible rope-like structure. These cables are designed to withstand the heavy load and tension created by the garage door.
There are two main types of garage door cables: torsion cables and extension cables. Torsion cables are commonly found in sectional garage doors, which consist of horizontal sections that roll up when the door is opened. These cables are attached to the torsion spring system, which provides the lifting force for the door. Torsion cables are responsible for transferring the force from the springs to the door, allowing it to open and close smoothly.
Extension cables are typically used in one-piece or tilt-up garage doors. These doors pivot on a hinge mechanism and swing outwards when opened. Extension cables are connected to extension springs, which stretch and contract to lift and lower the door. These cables help to distribute the weight evenly and ensure proper movement of the door.
Garage door cables undergo a significant amount of stress and tension during operation. Over time, they can become worn out, frayed, or damaged due to constant use, exposure to the elements, or accidents. When cables start to deteriorate, they can pose serious safety hazards and compromise the functionality of the garage door system.
Regular inspection and maintenance of garage door cables are essential to ensure their proper functioning. Signs of cable wear or damage include frayed strands, rust, visible signs of strain, or cables jumping off the drum or pulley. If you notice any of these issues, it is important to address them promptly to avoid potential accidents.
Replacing garage door cables should be done by a trained professional if you are not confident in your skills and knowledge. However, if you have experience with garage door maintenance and repair, you can attempt to change the cables yourself by following the proper procedures and safety precautions.
Understanding the purpose and structure of garage door cables is the first step towards maintaining a safe and efficient garage door system. By regularly inspecting and replacing worn out cables, you can ensure the smooth operation of your garage door and minimize the risk of accidents or damage.
Tools and Materials Needed
To successfully change a garage door cable, it is essential to have the right tools and materials at your disposal. These items will help you complete the task efficiently and safely. Before starting the project, gather the following tools and materials:
- Safety glasses: Protect your eyes from any flying debris or particles that may be generated during the cable replacement process.
- Work gloves: Wear sturdy work gloves to protect your hands from sharp edges and potential injuries.
- Adjustable wrench: An adjustable wrench will come in handy for loosening and tightening bolts and nuts.
- Locking pliers: Locking pliers will help you hold the door cables securely in place while you work on them.
- Cable clamps: Cable clamps are essential for securing the new cable to the pulley and drum. Select clamps that are appropriate for the size of your cable.
- Replacement garage door cable: Make sure to have a suitable replacement cable on hand. Measure the length and diameter of the old cable to ensure you get the correct size.
- Step ladder: Depending on your garage door’s height, you may need a step ladder to reach the areas where the cables are located.
Having these tools and materials ready before you start the cable replacement will save you time and ensure a smoother process. It is essential to work with the right equipment to avoid any unnecessary accidents or damage.
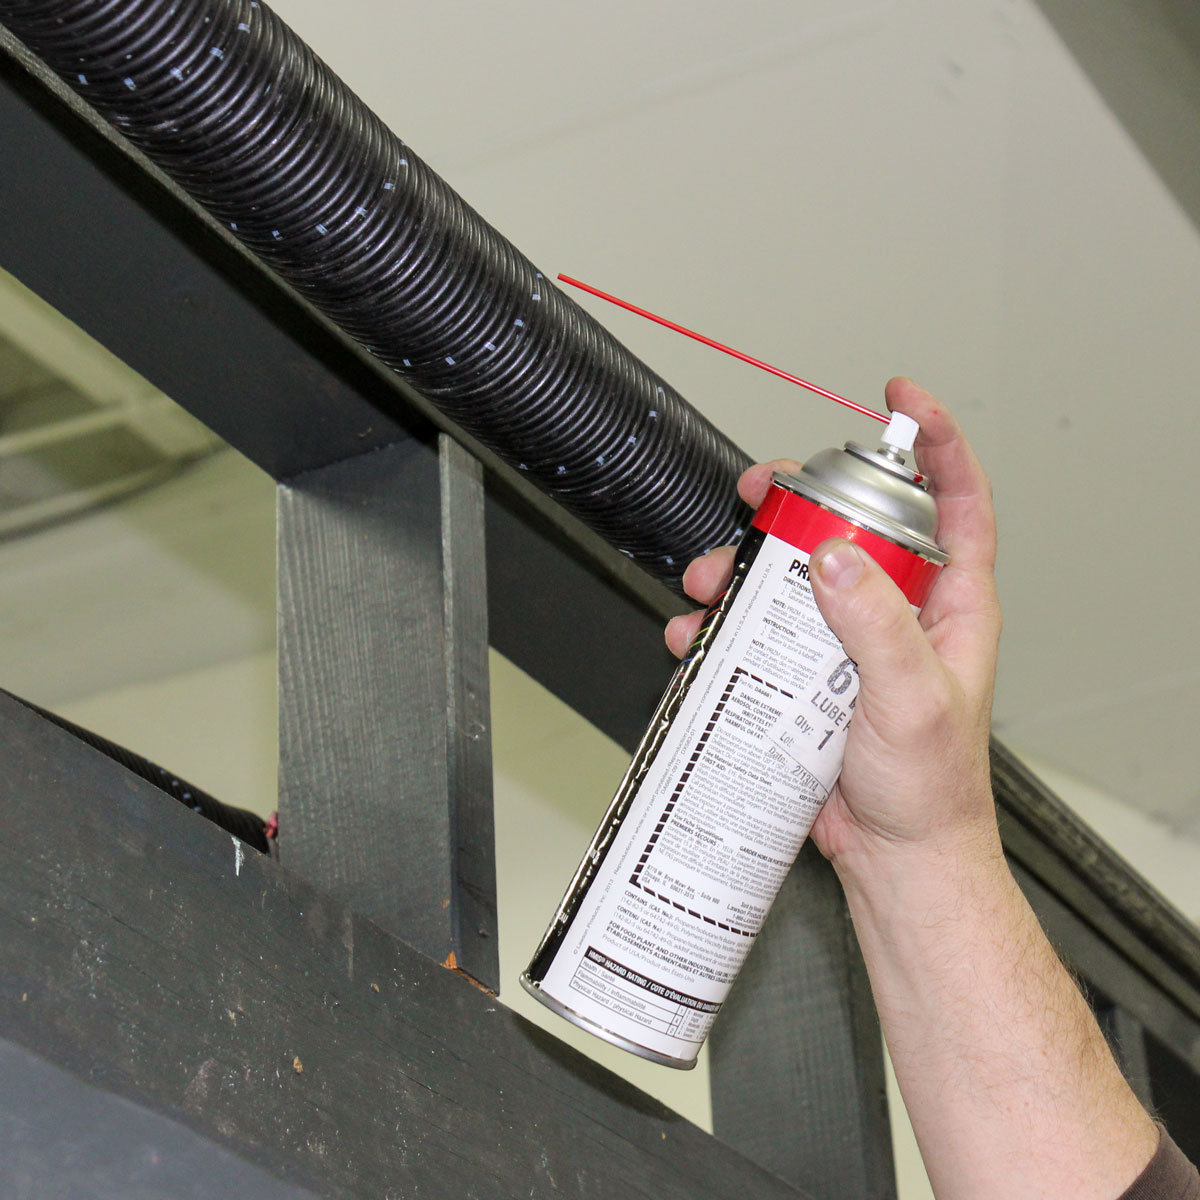
Remember, safety should always be a top priority when working on any home improvement project. Wear appropriate protective gear, work in a well-lit area, and follow proper safety guidelines throughout the process. If you feel uncomfortable or unsure about any part of the cable replacement, it is best to seek professional assistance or consult a garage door expert.
Read more: How To Change Garage Door Frequency
Step 1: Preparation and Safety Measures
Before you begin changing the garage door cable, it is crucial to take the necessary preparation steps and ensure your safety. Following proper safety measures will help prevent accidents and injuries during the process. Here are the essential steps to prepare and stay safe:
- Disconnect the power: Start by disconnecting the power to the garage door opener. This precautionary measure will prevent any accidental activation of the door while you are working on it. Locate the power source for your garage door opener and unplug it or switch it off.
- Clear the area: Make sure the area around the garage door is clear of any obstructions or items that may interfere with your work. Remove any vehicles, tools, or debris that could potentially get in the way.
- Put on safety gear: Wear safety glasses to protect your eyes from debris, and work gloves to safeguard your hands. These protective items will minimize the risk of injury during the cable replacement process.
- Secure the door: To prevent the garage door from accidentally opening or closing while you are changing the cable, secure it in a fully raised position. You can use locking pliers or C-clamps to hold the door securely in place.
- Inspect the door: Before proceeding, visually inspect the garage door for any signs of damage or issues. Check the rollers, tracks, and springs for wear or any noticeable problems. Address any issues you find before continuing with the cable replacement.
- Read the manufacturer”s instructions: Familiarize yourself with the manufacturer’s instructions provided with the replacement cable. These instructions may contain specific details or guidelines that are important to follow for your particular garage door model.
By taking the time to prepare the area, wear the appropriate safety gear, and follow the necessary safety precautions, you can minimize the risks associated with changing a garage door cable. Remember, if you have any concerns or doubts about the process, it is always best to seek professional assistance or consult a knowledgeable garage door technician.
Step 2: Disconnecting the Garage Door Opener
Once you have completed the preparation and safety measures, the next step is to disconnect the garage door opener. This step ensures that the door remains stationary and prevents any unintended movement during the cable replacement process. Follow these steps to disconnect the garage door opener:
- Locate the emergency release handle: Look for the emergency release handle on the garage door opener mechanism. It is usually a red cord or handle hanging down from the opener rail.
- Pull the emergency release handle: Firmly pull the emergency release handle downward. This action disengages the garage door opener from the door system, allowing you to operate the door manually.
- Manually move the garage door: With the garage door opener disconnected, you can now move the door manually. Carefully lift the door to the fully open position and secure it in place with locking pliers or C-clamps. This prevents the door from accidentally closing while you work on the cables.
- Test the garage door: Once the door is secured, test its movement by gently pushing it up and down. It should move smoothly and without any resistance. Ensure that the door remains securely in place in the fully open position.
By following these steps, you effectively disconnect the garage door opener and ensure that the door remains stationary throughout the cable replacement process. This allows you to work on the cables safely and avoids any potential accidents or damage. Remember, if you are unsure about any aspect of disconnecting the opener or encounter any difficulties, consult the manufacturer’s instructions or seek professional assistance.
When changing a garage door cable, always disconnect the power to the garage door opener to prevent any accidents. It’s important to follow the manufacturer’s instructions and use the proper tools for the job.
Step 3: Aligning the New Cable
After disconnecting the garage door opener, the next step in changing the garage door cable is aligning the new cable. Proper alignment ensures that the cable functions smoothly and engages with the pulley and drum correctly. Follow these steps to align the new cable:
- Position yourself below the garage door: Stand directly below the garage door so that you have a clear view of the cable drum and pulley system.
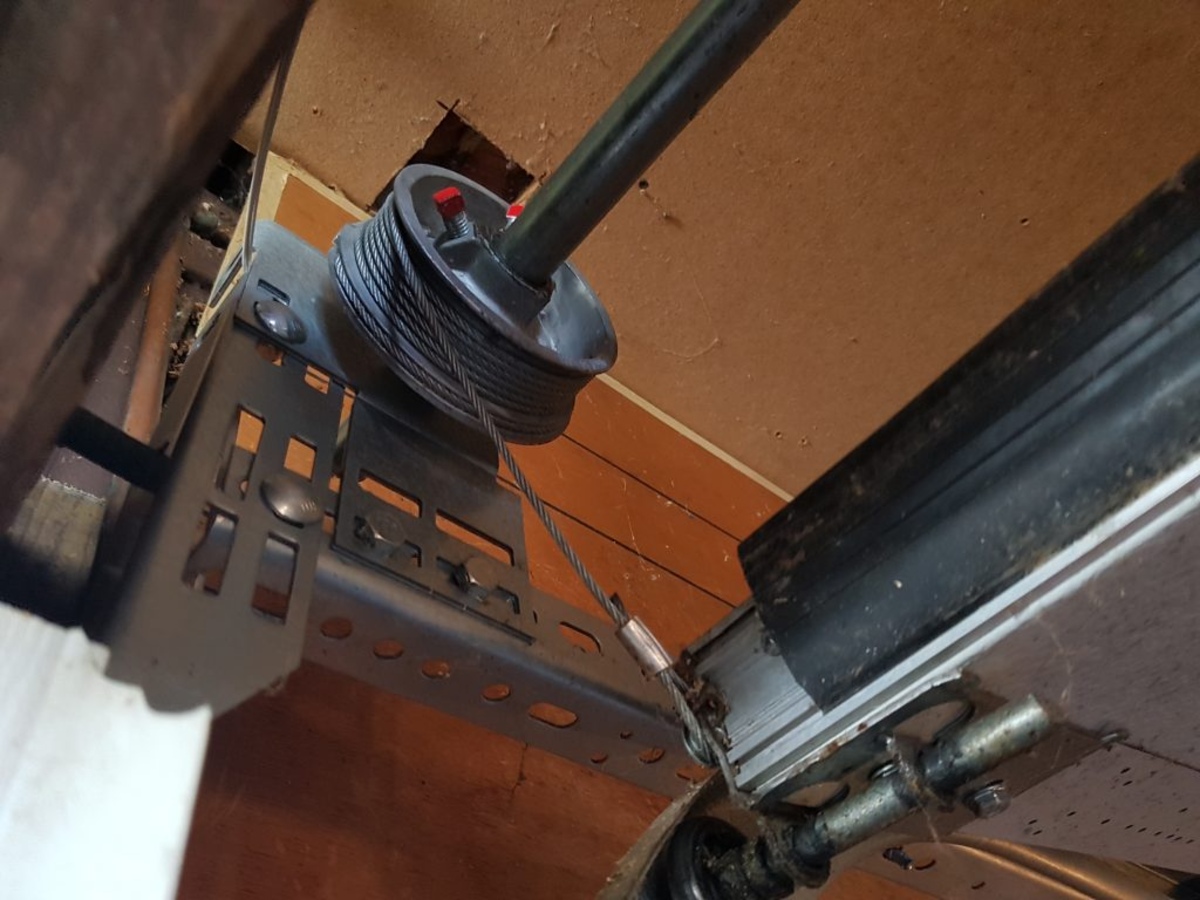
- Locate the cable drum: Identify the cable drum, which is a circular, grooved wheel attached to the torsion spring shaft. This drum will have notches or slots where the cable fits into.
- Feed the new cable through the drum: Take the replacement garage door cable and feed one end through the slot on the cable drum. Ensure that the cable is aligned properly within the groove of the drum.
- Attach the cable to the pulley: With the cable fed through the drum, locate the pulley system. The pulley is a small wheel with a groove designed to guide the cable. Attach the end of the cable to the pulley, making sure it fits securely within the groove.
- Ensure proper tension: Once the cable is attached to both the drum and pulley, check the tension in the cable. It should be neither too loose nor too tight. A properly tensioned cable should be firm and have a slight amount of give when pressed.
It is important to align the new cable correctly to ensure its smooth operation and prevent any issues during the garage door’s movement. Take your time to feed the cable through the drum and attach it securely to the pulley, ensuring that it is aligned properly within both components. Checking the tension in the cable is also crucial, as an improper tension can affect the door’s balance and performance.
If you are unsure about aligning the new cable or encounter any difficulties, refer to the manufacturer’s instructions or consult a professional for assistance. Proper alignment is essential for the safe and efficient functioning of your garage door.
Step 4: Removing the Old Cable
Once the new cable has been aligned, the next step in changing the garage door cable is to remove the old cable. Removing the old cable safely and efficiently prepares the system for the installation of the new cable. Follow these steps to remove the old cable:
- Secure the cable: Before removing the old cable, secure it using locking pliers or C-clamps. This prevents the cable from unwinding and causing any sudden movements or accidents.
- Identify the cable drum: Locate the cable drum where the old cable is wrapped around. The drum is a circular, grooved wheel attached to the torsion spring shaft.
- Unwind the cable: Use an adjustable wrench to loosen the set screws on the cable drum. Once the screws are loose, start unwinding the old cable from the drum. Be cautious as you unwind the cable to prevent it from snapping or causing injury.
- Remove the cable from the pulley: After unwinding the cable from the drum, detach it from the pulley system. Ensure that the cable is free from any obstructions and can be removed without difficulty.
- Inspect the cable for damage: Take a moment to examine the old cable for any signs of wear, fraying, or damage. If the cable shows significant wear or damage, it is crucial to replace it with the new cable.
- Properly dispose of the old cable: Dispose of the old cable safely and responsibly. Consider recycling options if available in your area.
Removing the old cable requires careful attention to avoid accidents or damage to the door system. Remember to secure the old cable, unwind it from the drum, and detach it from the pulley cautiously. Take the opportunity to inspect the old cable for any signs of damage, as this will help prevent future issues with your garage door.
If you are uncertain about removing the old cable or encounter any difficulties, seek the guidance of a professional or refer to the manufacturer’s instructions. Properly removing the old cable sets the stage for the successful installation of the new cable.
Step 5: Installing the New Cable
After removing the old cable, it’s time to install the new cable in your garage door system. Proper installation ensures that the new cable functions effectively and safely. Here are the steps to follow when installing the new garage door cable:
- Thread the new cable through the pulley: Begin by threading one end of the new cable through the pulley system. Make sure the cable is properly aligned within the groove of the pulley to ensure smooth operation.
- Wrap the new cable around the drum: Starting with the end of the cable threaded through the pulley, wrap the new cable around the drum in a smooth and even manner. Ensure that the cable wraps neatly within the grooves of the drum without overlapping or crossing over itself.
- Secure the cable to the drum: Once the new cable is wrapped around the drum, use an adjustable wrench to tighten the set screws on the drum. Ensure that the screws are securely fastened, holding the cable in place.
- Tension the cable: With the new cable installed and secured, you need to adjust the tension. Gradually release the locking pliers or C-clamps holding the cable and check the tension. The cable should have a slight amount of tension and not be too loose or too tight. Adjust the tension by loosening or tightening the set screws on the drum as needed.
- Test the cable function: Once the cable tension is properly adjusted, test the function of the new cable by manually operating the garage door. Open and close the door several times to ensure that the cable is working smoothly and the door remains balanced.
Properly installing the new garage door cable is essential to maintain the functionality and safety of your garage door system. Take your time to thread the cable through the pulley, wrap it securely around the drum, and adjust the tension to ensure optimal performance.
If you are unsure about installing the new cable or encounter any difficulties, consult the manufacturer’s instructions or seek professional assistance. Installing the new cable accurately is vital for the smooth and safe operation of your garage door.
Step 6: Reconnecting the Garage Door Opener
After installing the new garage door cable, the next step is to reconnect the garage door opener. Reconnecting the opener allows you to restore the automatic functionality of your garage door system. Follow these steps to reconnect the garage door opener:
- Make sure the garage door is in the fully open position: Ensure that the garage door is fully open and secured in place with locking pliers or C-clamps.
- Locate the emergency release handle: Find the emergency release handle, which you previously pulled to disconnect the garage door opener.
- Engage the emergency release handle: Pull the emergency release handle upward to engage it back into the open position. This action reconnects the garage door opener to the door system.
- Test the garage door opener: Once the emergency release handle is engaged, test the garage door opener by pressing the remote or wall button. Observe the movement of the door and make sure it operates smoothly and without any issues.
- Check the automatic safety features: Test the automatic safety features of the opener, such as the photo-eye sensors. These sensors detect obstructions and prevent the door from closing if something is in its path. Ensure that these safety features are functioning correctly.
- Perform a final test: Open and close the garage door several times using the remote or wall button to ensure that the opener and the new cable are working together properly.
Reconnecting the garage door opener restores the convenience and automation to your garage door system. By following these steps and testing the functionality, you can ensure that the door properly responds to the opener’s commands and performs as expected.
If you encounter any difficulties during the reconnection process or if the door doesn’t function correctly, consult the garage door opener’s manual or consider seeking professional assistance.
Step 7: Testing and Adjusting the Cable Tension
After repositioning and reconnecting the garage door opener, the final step in changing the garage door cable is to test and adjust the cable tension. Proper cable tension is crucial for the safe and efficient operation of the door. Follow these steps to test and adjust the cable tension:
- Ensure that the garage door is in the closed position: Close the garage door fully before testing and adjusting the cable tension.
- Disconnect the garage door opener: To prevent accidental activation, disconnect the garage door opener by pulling the emergency release handle downward.
- Test the balance of the garage door: Lift the garage door manually to the halfway point. Release the door, allowing it to stay in its position. A well-balanced door should remain at the halfway point without rising or falling.
- Adjust the cable tension: If the door raises or lowers on its own, the cable tension may need adjustment. Begin by identifying the torsion spring system located above the garage door. Consult the manufacturer’s instructions or seek professional assistance for specific instructions on adjusting the cable tension.
- Gradually adjust the tension: Using a winding bar and following the correct procedure, make minor adjustments to the cable tension. Always adjust the tension in small increments and test the door balance after each adjustment.
- Test the door balance: After making adjustments to the cable tension, retest the balance of the garage door by manually lifting it to the halfway point and releasing it. Continue adjusting the tension until the door remains balanced at the halfway position.
- Secure the cable drum: Once the correct cable tension is achieved and the door remains balanced, tighten the set screws on the cable drum to secure the cable in place.
Testing and adjusting the cable tension is a critical step in ensuring the safe and smooth operation of your garage door. A well-balanced door and proper tension in the cables contribute to the longevity of the door and prevent potential malfunctions or accidents.
If you are unsure about testing and adjusting the cable tension or encounter any difficulties, it is recommended to consult a professional garage door technician. They have the experience and expertise to properly assess and adjust the cable tension for optimal performance.
Conclusion
Changing a garage door cable is a maintenance task that should be approached with care and attention to detail. By following the steps outlined in this guide, you can successfully replace a garage door cable and ensure the smooth and safe operation of your garage door system.
Throughout the process, it is crucial to prioritize safety. Take the necessary precautions, such as wearing safety glasses and work gloves, and following the manufacturer’s instructions. If you are unsure about any step or encounter difficulties, it is advisable to seek professional assistance rather than risking damage or injury.
Understanding the role and structure of garage door cables is key to maintaining their optimal functioning. Regular inspections and prompt replacement of worn-out or damaged cables contribute to the longevity of your garage door system and prevent potential accidents.
Remember, proper alignment, installation, and tensioning of the new cable are essential. Take the time to align the cable, secure it to the drum and pulley, and adjust the tension to ensure optimal performance. Testing the garage door and verifying its balance after the cable replacement process ensures that the door functions smoothly and safely.
By following the step-by-step instructions outlined in this guide, you can confidently change your garage door cable and maintain the efficiency and safety of your garage door system. However, if you are uncertain about any aspect of the process or have limited experience with garage door maintenance, it is recommended to consult a professional garage door technician to ensure the job is done correctly.
With proper care and maintenance, your garage door will continue to serve you reliably for years to come. Regularly inspecting and replacing worn-out components, such as the garage door cables, is an investment in the longevity and functionality of your garage door system.
Frequently Asked Questions about How To Change A Garage Door Cable
Was this page helpful?
At Storables.com, we guarantee accurate and reliable information. Our content, validated by Expert Board Contributors, is crafted following stringent Editorial Policies. We're committed to providing you with well-researched, expert-backed insights for all your informational needs.


0 thoughts on “How To Change A Garage Door Cable”