
Articles
11 Best California Duster for 2025
Modified: June 10, 2025
Discover the top 11 California dusters for 2025 and keep your car spotless. Find the perfect duster to remove dust, dirt, and debris effortlessly.
(Many of the links in this article redirect to a specific reviewed product. Your purchase of these products through affiliate links helps to generate commission for Storables.com, at no extra cost. Learn more)
Introducing the "11 Best California Duster for 2025" – your ultimate guide to finding the perfect duster to keep your vehicle looking pristine. With a wide array of options available on the market, it can be overwhelming to choose the right one. But fear not, as our team of experts has extensively researched and tested the top-rated California dusters for the upcoming year. Whether you want to eliminate dust, dirt, or pollen from your car's surface, our comprehensive list will help you make an informed decision. Stay tuned to discover the finest California dusters that are set to revolutionize car maintenance in 2025.

Overall Score: 9/10
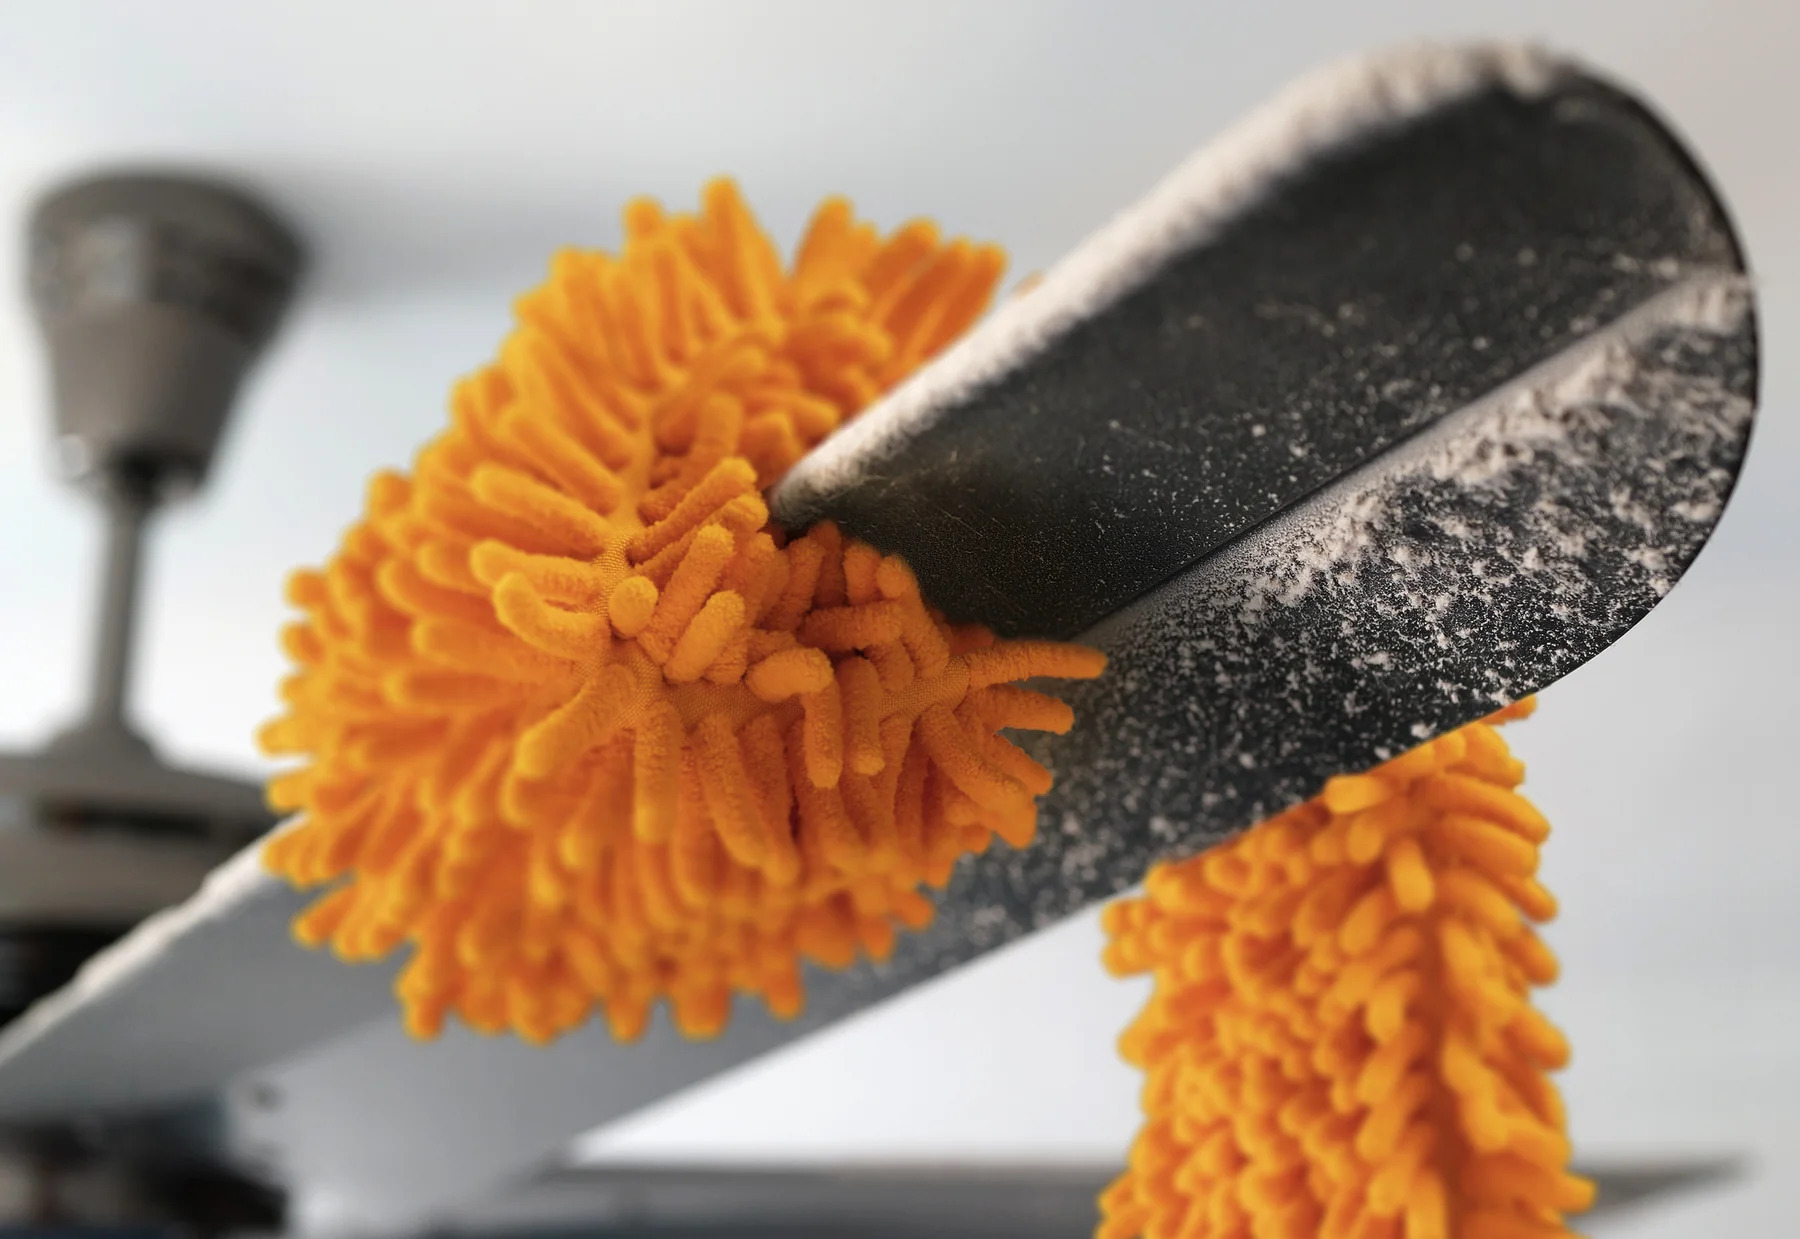
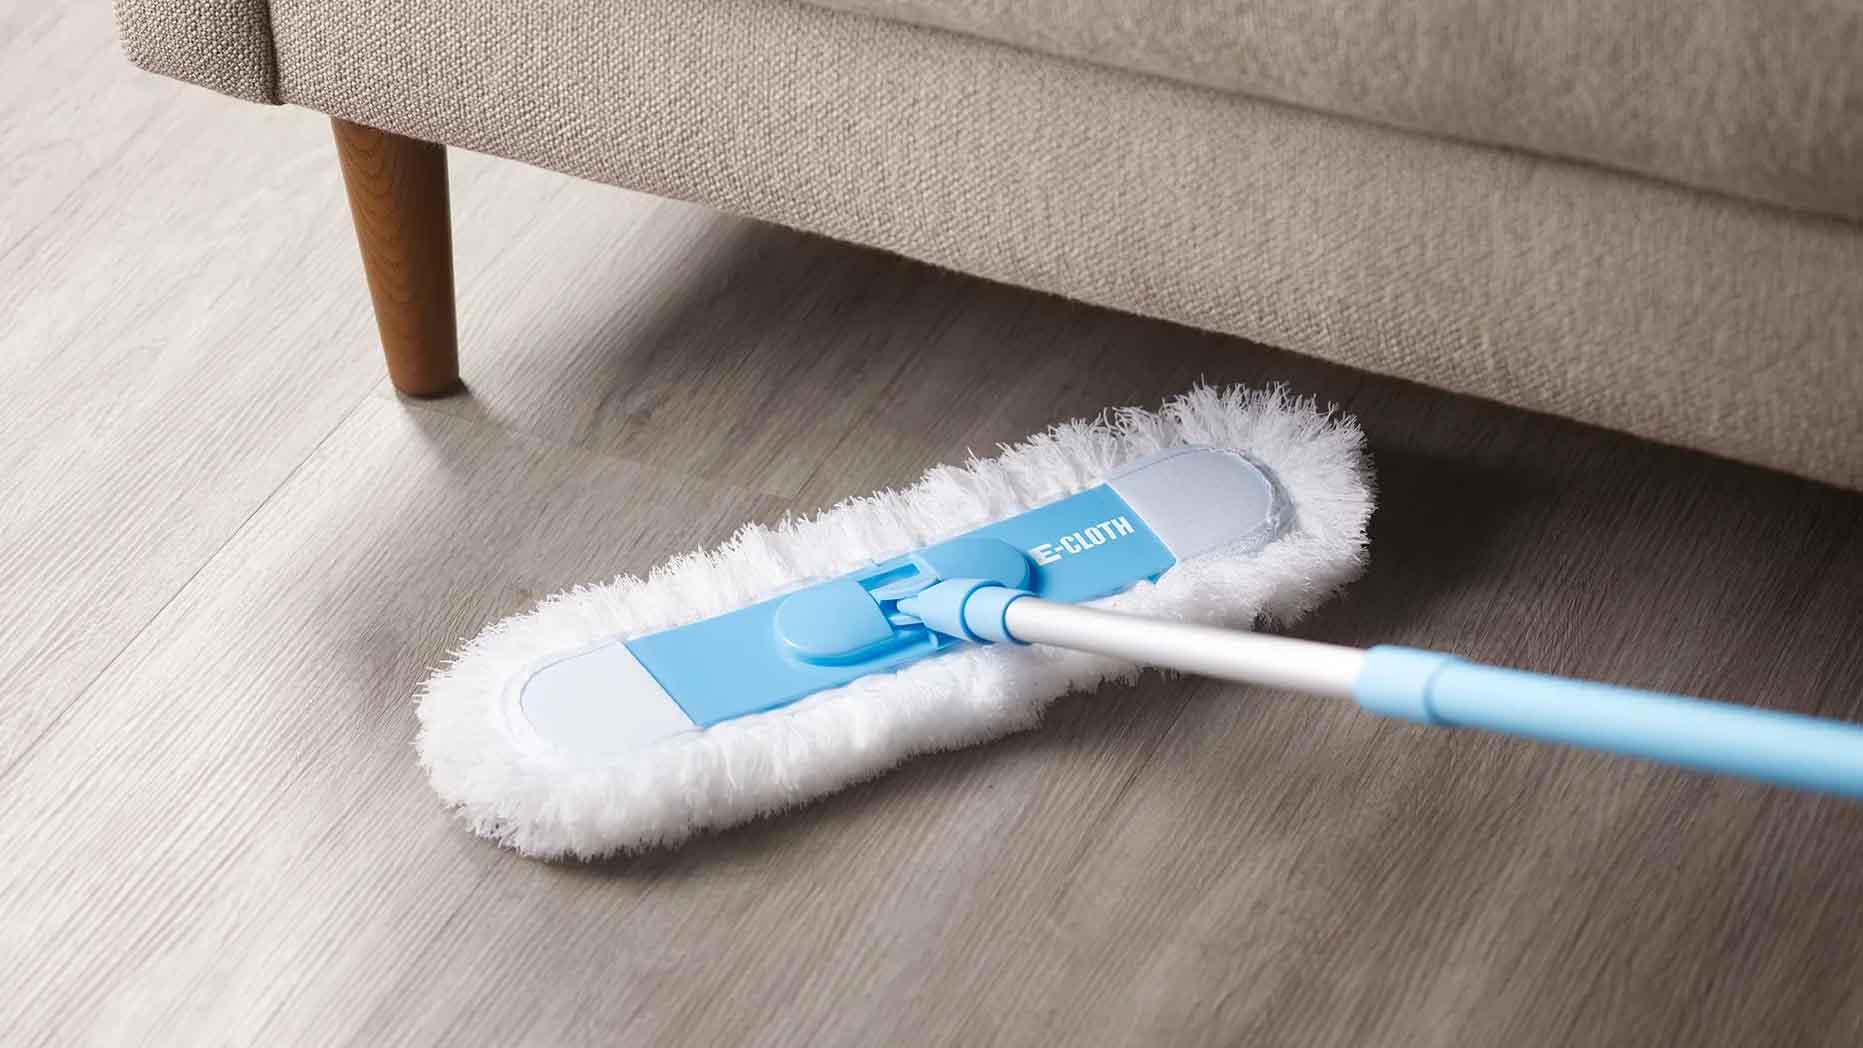
The California Car Duster 62447-8B Mini Duster is a handy and versatile tool for dusting various surfaces. With its wax-treated fibers, it quickly and effectively collects dust without scratching. It can be used on mini blinds, shutters, appliances, and more, making it useful for both home and auto. This mini duster is safe and non-toxic, providing peace of mind while cleaning. Customers have praised its performance on car interiors and even computer screens. It is considered a must-have for maintaining a clean and polished look in between washes. With a customer rating of 4.6 out of 5, it has received positive reviews for its quality and effectiveness.
Key Features
- Dusts surfaces quickly and effectively
- Use on mini blinds, shutters, appliances and more
- Wax-treated fibers easily collect dust but won't scratch
- Safe and non-toxic
- Useful for both home and auto
Specifications
- N/A
Pros
- Quick and effective dusting
- Safe and non-toxic
- Versatile use for home and auto
- Wax-treated fibers prevent scratching
Cons
- No specifications provided
- May not be worth the price for some
The California Car Duster 62447-8B Mini Duster is a reliable and effective tool for hassle-free dusting. Its wax-treated fibers ensure both efficiency and safety, making it suitable for various surfaces. Whether you need to clean your car interior, mini blinds, or computer screens, this mini duster is up to the task. Customers have praised its performance and consider it a must-have for maintaining a polished appearance. However, the lack of provided specifications and the slightly higher price point may be a drawback for some. Overall, if you’re looking for a compact and reliable duster, the California Car Duster 62447-8B Mini Duster is worth considering.

Overall Score: 8.5/10
The Original California Car Duster 62443 is a must-have product for car owners looking to keep their vehicles clean and dust-free. This car duster works like magic, removing dust quickly without scratching the paint. It features a special wax-treated 100% cotton mop that lifts dust instead of just moving it around. The duster comes with a plastic lighter weight handle and includes a convenient carrying case for easy storage. With its red color and 25-inch size, this California Car Duster is both functional and stylish. Countless satisfied customers have praised its effectiveness in keeping their treasured vehicles dust-free. Overall, the California Car Duster 62443 is a high-quality product that delivers excellent results.
Key Features
- Removes dust quickly, without scratching paint
- Special wax treated 100% cotton mop
- Plastic lighter weight handle
- Includes a carrying case/storage bag
Specifications
- Color: Red
- Dimension: 25.00Lx7.00Wx3.00H
- Size: 25 Inch
Pros
- Effectively removes dust from vehicles
- Does not scratch the paint
- Convenient carrying case for storage
Cons
- Newer version has lower quality
- Some users experienced wax streaks
The Original California Car Duster 62443 is a reliable and efficient solution for keeping your car dust-free. It effortlessly removes dust from the surface without causing any damage to the paint. The special wax-treated cotton mop grabs the dust particles and prevents them from spreading. The plastic handle offers a lighter weight option, making it easy to handle. The included carrying case adds to the convenience of storing and transporting the duster. While there have been some concerns about the newer version’s quality and occasional wax streaks, the majority of customers have praised its performance. Overall, this California Car Duster is an excellent investment for car enthusiasts who want to maintain a clean and polished appearance.

Overall Score: 8/10
The Original California Car Duster California Car Duster 62448 Dash Duster is a must-have storage product that effectively removes dust from various surfaces. This compact and easy-to-use duster saves time, money, and water by extending the time between car and motorcycle washes. With its special wax treated 100% cotton mop, it lifts dust without scratching your paint, furniture, or other appliances. The duster is available in a vibrant red color and comes with dimensions of 14.00Lx8.00Wx3.00H. Its efficient performance has earned it a customer rating of 4.6/5 based on positive reviews.
Key Features
- Removes dust quickly, without scratching
- Extends time between washes
- Saves time, money, and water
- Wax treated 100% cotton mop
- Compact and easy to store
Specifications
- Color: Red
- Dimension: 14.00Lx8.00Wx3.00H
Pros
- Efficiently removes dust without scratching
- Compact and easy to store
- Saves time, money, and water
Cons
- Does not come with a cover
- Ordered quantity discrepancy
The Original California Car Duster California Car Duster 62448 Dash Duster is a reliable and effective product for dust removal. Its special wax treated cotton mop ensures gentle cleaning without causing any scratches. This duster is not only great for cars and motorcycles but also handy for cleaning around the house. The compact size makes it easy to store, and its efficiency in saving time, money, and water makes it an excellent investment. However, it’s worth noting that some customers mentioned the absence of a cover and discrepancies in ordered quantity. Overall, the Dash Duster delivers on its promises and is highly recommended for maintaining a dust-free environment.

Overall Score: 8.5/10
The Original California Car Duster Detailing Kit is a great tool for maintaining your car's cleanliness between washes. It includes both the popular Standard Edition California Car Duster and a smaller Mini Dash Duster. The cotton mops are treated with the signature California Car Duster wax, allowing them to quickly and effectively remove light dust from your automobile without scratching the surface. The Standard Car Duster is designed for use on most cars, trucks, and SUVs, while the Mini Dash Duster is perfect for dusting the vehicle's interior, motorcycles, and household surfaces. With its durable plastic handle and high-quality design, this detailing kit is a must-have for any car enthusiast or regular car owner.
Key Features
- Car Duster Kit Includes The Popular Standard Edition California Car Duster And Smaller Mini Dash Duster
- Cotton Mops Are Treated With The Signature California Car Duster Wax
- Removes Light Dust From Your Automobile Without Scratching
- Great For Maintaining Most Cars, Trucks And SUVs
- Can Also Be Used to Dust the Vehicle's Interior, Motorcycles, and Household Surfaces
Specifications
- Color: Red
- Dimension: 25.50Lx4.25Wx4.25H
Pros
- Two different-sized dusters included
- Quickly and effectively removes light dust
- Durable and well-made
- Useful for both interior and exterior cleaning
Cons
- Newer version has less dense mop than previous models
- May scratch surfaces due to lack of density
The Original California Car Duster Detailing Kit is a reliable and effective way to keep your vehicle clean and dust-free between washes. The kit’s two different-sized dusters provide versatility, allowing you to clean both the exterior and interior of your car. The cotton mops, treated with the signature California Car Duster wax, ensure that dust is effortlessly lifted and removed without scratching the surface. With a durable plastic handle and well-made design, this detailing kit is built to last. The only minor drawback is that the newer version of the duster may have a less dense mop, which could potentially lead to scratching. However, with careful use, this can be easily mitigated. Overall, the California Car Duster Detailing Kit is a reliable and convenient tool for maintaining the cleanliness and appearance of your vehicle.

Overall Score: 9/10
The Original California Car Duster Combo Kit is a must-have for any car owner looking to keep their vehicle clean and dust-free. This kit includes the popular Standard Edition California Car Duster and a smaller Mini Dash Duster, both of which are treated with the signature California Car Duster wax. The standard car duster is perfect for maintaining cars, trucks, and SUVs in between washes, while the mini dash duster is great for dusting the vehicle's interior, motorcycles, and household surfaces. The kit also comes with a convenient carrying case to store both dusters. With its excellent performance and versatility, the Original California Car Duster Combo Kit is the ideal choice for keeping your vehicle looking its best.
Key Features
- Includes Standard Edition California Car Duster and Mini Dash Duster
- Treated with signature California Car Duster wax
- Perfect for maintaining cars, trucks, and SUVs
- Great for dusting vehicle interiors and household surfaces
- Convenient carrying case included
Specifications
- Color: Red
- Dimension: 26.00Lx4.30Wx4.30H
Pros
- Effective at removing dust without scratching
- Versatile for use on various surfaces
- Comes with a convenient carrying case
Cons
- Handle of the standard car duster could have better grip
The Original California Car Duster Combo Kit is a top-notch product in the world of car dusters. Its performance in removing dust without scratching the surfaces is exceptional, making it a reliable tool for maintaining the cleanliness of your vehicle. The versatility of the Mini Dash Duster, which can be used for interior dusting and cleaning household surfaces, adds to its value and practicality. The inclusion of a carrying case ensures that both dusters are easily stored and kept together. While the handle of the standard car duster could be improved for better grip, this minor drawback is overshadowed by the overall effectiveness and quality of the product. If you want a reliable and efficient solution for keeping your car dust-free, the Original California Car Duster Combo Kit is a must-have.

Overall Score: 8/10
The California Car Duster 62442 Standard Car Duster is a must-have for any car owner looking for an efficient way to clean their vehicles. This duster effectively removes dust, without scratching the car's finish. With just one pass, it lifts dust and leaves the car looking clean and shiny. The duster is safe and non-toxic, eliminating the need for spray waxes or other chemicals. The wooden handle provides a comfortable grip, making it easy to use. Measuring 25.50 inches in length and available in a vibrant red color, this duster not only does its job well, but also adds a touch of style to your cleaning routine.
Key Features
- Won't scratch finish
- Don't just move dust–remove it
- No need to use spray waxes, etc
- Effectively "lifts" dust with one pass
- Safe and non-toxic
Specifications
- Color: Red
- Dimension: 25.50Lx4.25Wx4.25H
Pros
- Effectively removes dust without scratching
- Safe and non-toxic
- No need for additional sprays or chemicals
- Convenient wooden handle for easy grip
Cons
- Leaves behind some red pieces
- Lint may shed initially
- May leave oil and streaks on the vehicle
The California Car Duster 62442 Standard Car Duster is a reliable and effective tool for keeping your car clean and dust-free. It efficiently removes dust without causing any damage to the car’s finish. The duster is easy to use and requires no additional cleaning products, making it a convenient and cost-effective solution. While it may leave behind some red pieces initially, this is a minor drawback compared to its overall performance. With a solid customer rating of 4.7/5, this duster is highly recommended for those looking to maintain the cleanliness and shine of their vehicles.

Overall Score: 8/10
The California Car Cover Co. 96629 California Car Duster Triple Threat Duster with Extension Handle is a versatile cleaning tool that removes dust quickly and efficiently without scratching your paint or household finishes. Its larger size makes it perfect for use on SUVs, motorhomes, and hard-to-reach areas in your home or garage. The duster extends the time between car, truck, SUV, trailer, and RV washes, saving you time and effort. Made with a special wax-treated 100% cotton mop, it lifts dust effectively without simply moving it around. The duster comes with a carrying case and storage bag for convenient storage and portability. Keep your vehicles and living spaces dust-free with the California Car Duster Triple Threat Duster.
Key Features
- Removes dust quickly, without scratching your paint and household finishes
- Larger duster is great for use on SUV's, motorhomes and hard to reach areas in the home or garage
- Extends time between car/truck/SUV/trailer/RV washes
- Special wax treated 100% cotton mop lifts dust and does not move it around
- Includes a carrying case/storage bag
Specifications
- Color: Red
- Dimension: 30.50Lx5.00Wx4.00H
Pros
- Removes dust efficiently without scratching
- Large duster ideal for SUV's and hard-to-reach areas
- Extends time between washes
- Special wax-treated cotton mop lifts dust effectively
- Comes with a carrying case/storage bag
Cons
- May leave hairline scratches on clear coat
- Non-delivery issues reported
- May not be suitable for use on vehicles
The California Car Cover Co. 96629 California Car Duster Triple Threat Duster with Extension Handle is a reliable and effective cleaning tool. With its ability to remove dust quickly and without scratches, it is suitable for both vehicles and household use. The larger size and extension handle make it versatile and convenient for reaching difficult areas. While there have been reports of potential scratching on clear coats and non-delivery issues, overall, this duster provides excellent performance. With a score of 8 out of 10, it is a recommended choice for anyone looking for an efficient dusting solution.

Overall Score: 8/10
The RIDE KINGS Car Duster Exterior Scratch Free is a highly efficient and versatile car duster that helps you keep your vehicle looking clean and dust-free. With its telescopic rod, you can easily reach difficult areas without straining your back. The duster head and pole can rotate and lock at multiple angles, allowing for versatile and flexible cleaning. The paraffin wax-treated cotton strands effectively remove dust and pollen without the need for water, making it a great option for those living in desert or coastal areas. The soft, natural cotton fibers are gentle on various surfaces and won't scratch the finish. With its portable storage cover, you can conveniently carry the duster in your car trunk. Overall, the RIDE KINGS Car Duster Exterior Scratch Free is a reliable and effective tool for maintaining a clean car.
Key Features
- Telescopic rod for reaching hard-to-reach areas
- Rotation and lock at multiple angles for cleaning versatility
- Paraffin wax-treated cotton strands effectively remove dust and pollen
- Soft, natural cotton fibers gentle on surfaces
- Portable storage cover for easy carrying and storage
Specifications
- Color: Red
- Dimension: 27.00Lx5.00Wx0.10H
- Size: 29 inches
Pros
- Telescopic handle for easy reach
- Versatile and flexible cleaning
- Effective dust and pollen removal
- Gentle on surfaces
- Portable and easy to store
Cons
- Duster head is less full compared to similar products
The RIDE KINGS Car Duster Exterior Scratch Free is a great investment for car owners who prioritize keeping their vehicles clean. Its telescopic handle, versatile cleaning capabilities, and gentle yet effective dust removal make it a top choice. While some users have noted that the duster head is less full than expected, the overall performance and convenience of this product outweigh this minor downside. It is portable, easy to store, and offers excellent value for the price. Whether you live in a dusty environment or simply want to keep your car in pristine condition, this car duster is a must-have accessory. Say goodbye to expensive car washes and enjoy a scratch-free, dust-free ride with the RIDE KINGS Car Duster Exterior Scratch Free.

Overall Score: 8.5/10
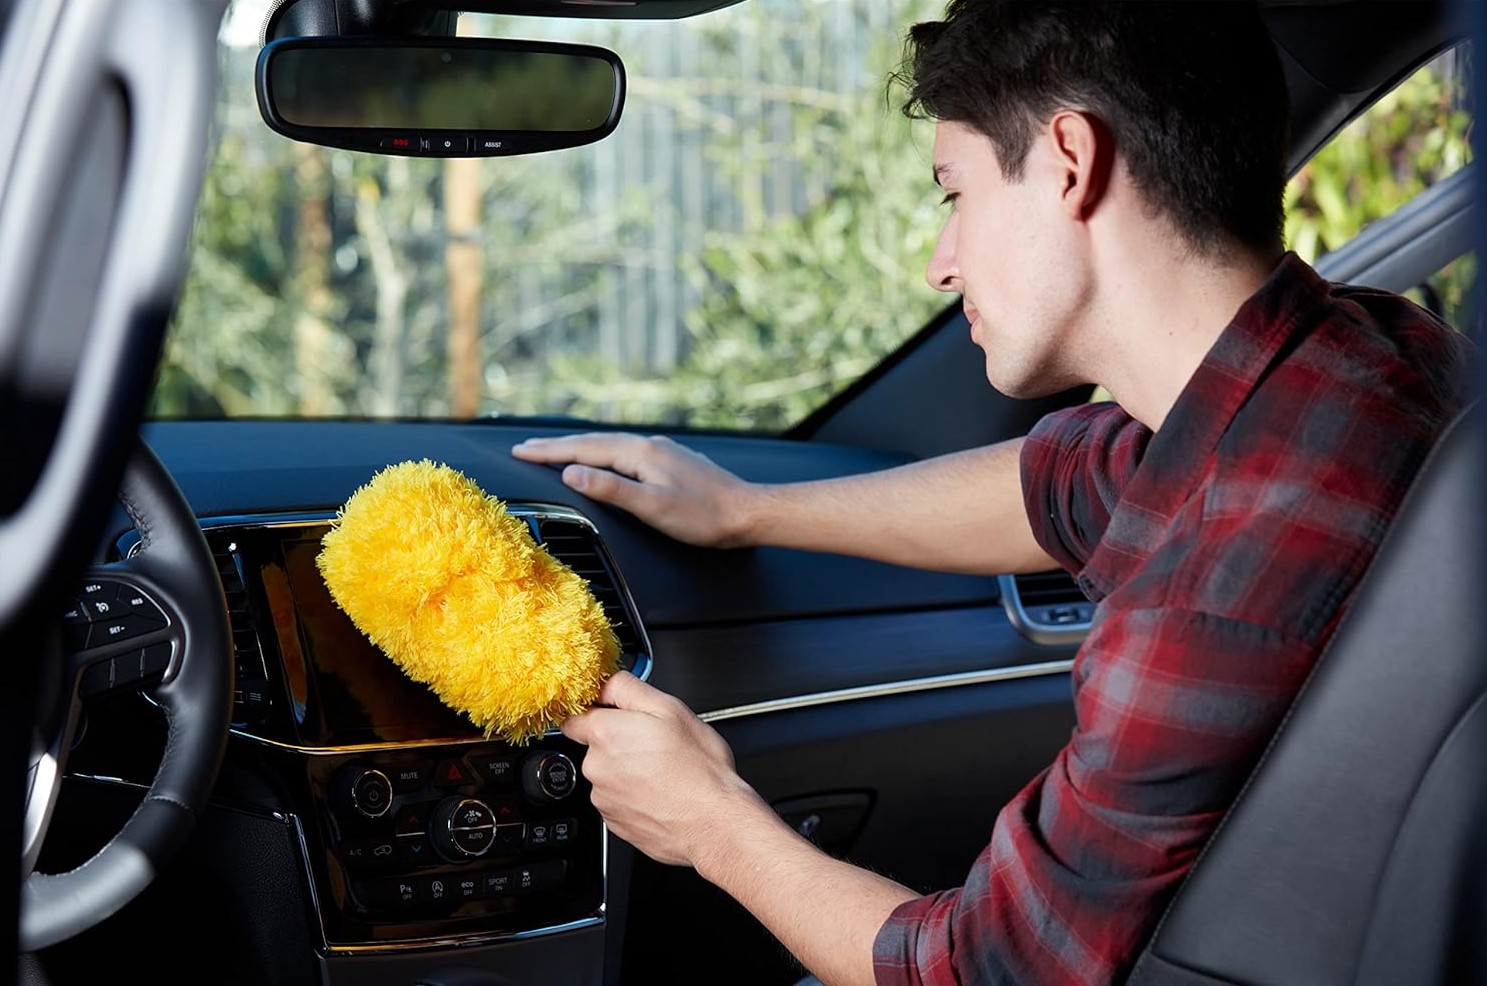
The California Car Duster 62447 Dash Duster is a convenient and reliable tool for keeping your car's interior dust-free. It has received great reviews from customers who have used it for years, praising its quality and performance. This duster is not limited to just cars, as it is also effective for dusting in the house. The dimension of the duster is 15.00Lx7.50Wx2.00H, making it easy to use and store. With its high customer rating of 4.6/5, this dash duster is highly recommended by users. It is a versatile and durable product that will keep your car, and even your high gloss piano, clean and dust-free.
Key Features
- Convenient and reliable tool for dusting car interiors
- Also effective for dusting in the house
- Dimension: 15.00Lx7.50Wx2.00H
- Comes with a storage case
- Great for cleaning high gloss pianos
Specifications
- Dimension: 15.00Lx7.50Wx2.00H
Pros
- Reliable and durable
- Easy to use and store
- Effective for dusting various surfaces
- Comes with a storage case
Cons
- Some users prefer a longer handle
- Not as densely made as the original version
The California Car Duster 62447 Dash Duster is a must-have for car enthusiasts and anyone who wants to keep their car’s interior clean and free from dust. Its versatility allows it to be used not only for cars but also for dusting in the house. Users have praised its reliability and durability, with many stating that they have been using this duster for decades. The added storage case is a convenient feature that protects the duster when not in use. Although some users have mentioned a preference for a longer handle, overall, this dash duster is highly recommended. Give your car and high gloss piano the cleaning they deserve with the California Car Duster!

Overall Score: 8.5/10
Introducing the Original California Car Duster Super Duster in Red. This innovative car duster is designed to make maintaining large vehicles like trucks, SUVs, and RVs a breeze. With its 360-degree cotton mophead and extended 31-inch handle, the Super Duster ensures efficient dust removal from even the highest and hardest-to-reach places. It features the safe and non-toxic California Duster wax treatment, effectively removing light dust from your vehicle without scratching the surface. Shake it out in between uses and store it in the included carrying case to prolong its lifespan. Keep your car looking its best between washes with the Super Duster!
Key Features
- 360-degree cotton mophead
- Extra-long handle for easy reach
- Safe and non-toxic wax treatment
- Shake out and store in carrying case
- Ideal for large trucks, SUVs, and RVs
Specifications
- Color: Red
Pros
- Efficiently removes light dust without scratching
- Suitable for high and hard-to-reach places
- Comes with a carrying case for convenient storage
Cons
- Slightly heavy to handle
- Handle made of heavy material
The Original California Car Duster Super Duster is a highly recommended tool for car enthusiasts and owners of large vehicles. Its 360-degree cotton mophead and extended handle make dusting even the highest and hardest-to-reach places effortless. The safe and non-toxic wax treatment ensures that your vehicle remains scratch-free while effectively removing light dust. With the added convenience of a carrying case, this duster is a must-have for anyone looking to keep their car looking its best in between washes. Although it may feel slightly heavy to handle, the Super Duster’s performance and quality make up for it. Say goodbye to dust and hello to a shiny, clean car with the California Car Duster Super Duster!

Overall Score: 8.5/10
The Original California Car Duster Plastic Handle Duster is a must-have for car owners who want to keep their vehicles clean and dust-free. This duster features a soft, cotton mop with a safe and non-toxic wax treatment, allowing it to quickly remove light dust without scratching the paint. The durable plastic handle makes the duster lighter and easier to handle, while the included carrying case helps to extend its life by keeping it clean between uses. With just a light swipe, the California Car Duster effectively removes light dust from cars, trucks, and SUVs, helping to extend the time in between washes and detailing. Overall, it's a great tool for maintaining the cleanliness of your vehicle.
Key Features
- Soft, cotton mop with non-toxic wax treatment
- Durable plastic handle for easy handling
- Removes light dust without scratching
- Comes with a carrying case for storage
- Extends time between car washes and detailing
Specifications
- Color: Red
Pros
- Effectively removes light dust without scratching
- Lightweight and easy to handle
- Comes with a carrying case for convenience
- Extends time between car washes and detailing
Cons
The Original California Car Duster Plastic Handle Duster is a reliable and effective tool for keeping your car dust-free. With its soft cotton mop and non-toxic wax treatment, it safely removes light dust without damaging the paint. The durable plastic handle makes it easy to maneuver, while the included carrying case ensures its longevity. By extending the time between car washes and detailing, this duster saves you time and effort. Overall, it’s a highly recommended product for car owners who want to maintain the cleanliness and appearance of their vehicles.
Buyer's Guide: California DusterUL
- What is a California Duster?
A California Duster is a specialized cleaning tool designed to safely remove light dust and debris from the surface of your car without scratching the paint. It consists of a head made of cotton fibers, a wooden handle, and is available in various sizes.UL
- Why should I consider using a California Duster?
Using a California Duster can be a convenient and effective way to quickly clean your car without the need for water or traditional cleaning products. It is especially helpful in dry climates where dust accumulates frequently, helping to maintain the appearance of your vehicle between washes.UL
- How does a California Duster work?
The cotton fibers of a California Duster are treated with a special wax-based formula that creates a static charge when rubbed against the surface. This static charge attracts and holds onto dust particles, preventing them from scratching your car as you gently glide the duster over the exterior.UL
- When should I use a California Duster?
A California Duster is best used on dry surfaces and for light dusting, making it suitable for regular maintenance between car washes. It is not recommended for use on wet surfaces or for heavy dirt and grime. Avoid using it on sandy or gritty surfaces, as it can potentially cause scratches.UL
- How do I use a California Duster?
- Before using the duster, inspect the car's surface for any visible debris or dirt that may scratch the paint.
- Gently shake the duster to ensure the cotton fibers are loose and ready to capture dust.
- Start at the top of your vehicle and work your way down in straight, sweeping motions.
- Apply minimal pressure to avoid scratching the surface and avoid rubbing in circular motions.
- If the duster becomes too dirty, you can clean it by gently tapping it against a hard surface or using compressed air.
UL
- How do I care for my California Duster?
Proper care will help prolong the life and effectiveness of your California Duster. Here are some tips for maintenance:
- Avoid excessive moisture or soaking the duster.
- Store the duster in a clean and dry place to prevent the accumulation of dust or debris.
- Periodically inspect the cotton fibers for any signs of wear or damage and replace if necessary.
- Avoid exposing the duster to extreme temperatures, as it may affect its performance.
UL
- Can I use a California Duster on other surfaces?
While the California Duster is primarily designed for automotive use, it can also be safely used on other surfaces such as motorcycles, boats, RVs, and household furniture. However, it is recommended to have a dedicated duster for each specific purpose to avoid cross-contamination and potential scratching.
Frequently Asked Questions about 11 Best California Duster For 2025
No, it is not recommended to wash your California Duster as it may remove the wax-based formula that enhances its dust-attracting properties. Tapping or blowing off the loose dust is the preferred method of cleaning.
No, it is important to only use the California Duster on dry surfaces. Using it on wet surfaces may cause smearing or scratching of the paint.
Yes, the California Duster is generally safe to use on all types of paint finishes, including clear coats. However, it is always recommended to perform a spot test in an inconspicuous area to ensure compatibility with the specific type of paint on your vehicle.
No, the California Duster is primarily designed for light dusting and is not intended to remove scratches from your car’s surface. It is always best to consult a professional for scratch removal or repair.
The lifespan of a California Duster can vary depending on frequency of use and maintenance. Inspect the duster regularly for signs of wear or damage, and consider replacing it if the cotton fibers become matted or significantly worn, as this may impact its effectiveness.
Was this page helpful?
Trust Storables.com for unbiased and honest product reviews. Our reviews are rigorously assessed by our Expert Board Contributors and adhere to strict Editorial Standards. We ensure that each review is transparent and trustworthy, helping you make informed purchasing decisions.

0 thoughts on “11 Best California Duster for 2025”