Articles
12 Amazing Microfiber Duster for 2025
Modified: June 10, 2025
Discover the best microfiber duster for 2025. Experience a new level of dusting efficiency with these amazing options.
(Many of the links in this article redirect to a specific reviewed product. Your purchase of these products through affiliate links helps to generate commission for Storables.com, at no extra cost. Learn more)
Introducing the perfect solution for effortless and efficient dusting in 2025 – the 12 Amazing Microfiber Duster. With its superior quality and innovative design, this collection of dusters is set to revolutionize the way you clean. These dusters are crafted from ultra-fine microfibers that attract and capture dust particles effectively, ensuring a thorough and streak-free clean every time. Their ergonomic handles and lightweight construction make them easy to maneuver, allowing you to reach even the most challenging corners and crevices effortlessly. Say goodbye to traditional dusting methods and embrace the future of cleaning with the 12 Amazing Microfiber Duster for 2025.

Overall Score: 9.2/10
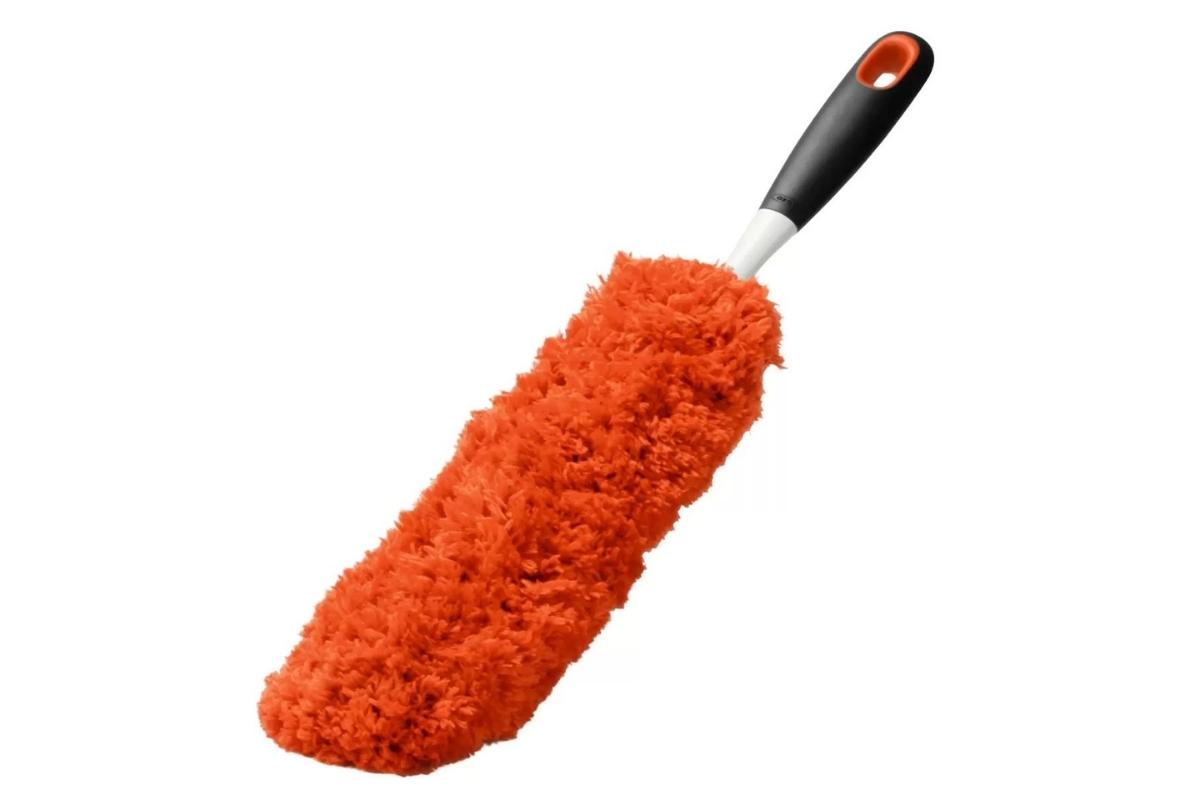
The OXO Good Grips Microfiber Delicate Duster is a light, fluffy, and effective duster for cleaning delicate items. With its fine microfiber strands, it easily traps and holds dust without the need for cleaning chemicals. The duster is designed to be gentle on sensitive surfaces like picture frames and knick-knacks, allowing you to dust without moving them. The soft, comfortable handle ensures a non-slip grip, and the duster head can be easily removed and machine washed. Its compact size and convenient hanging hole make for easy storage. Overall, this duster is a well-designed cleaning tool that makes dusting more efficient and hassle-free.
Key Features
- Light, fluffy, microfiber head
- Fine microfiber strands trap and hold dust
- Head pops off with the squeeze of the buttons
- Soft, comfortable, non-slip handle
- Hanging hole for convenient storage
- Replacement head available
Specifications
- Color: Orange
- Dimension: 6.00Lx6.00Wx12.75H
- Size: Delicate Duster
Pros
- Effectively traps and holds dust
- Gentle on delicate and sensitive items
- Easy to remove and machine wash the duster head
- Comfortable non-slip handle
- Convenient hanging hole for storage
Cons
- Can get easily caught in delicate items
- May feel slightly flimsy
The OXO Good Grips Microfiber Delicate Duster is a highly effective and convenient tool for dusting delicate and sensitive items. Its microfiber head does an excellent job of trapping and holding dust without the need for cleaning chemicals. The duster’s design allows you to dust without moving knick-knacks or picture frames, making the cleaning process more efficient. While it may get caught in delicate items at times, its overall performance and ease of use make it a valuable addition to your cleaning routine. With its comfortable handle, easy cleaning, and convenient storage, this duster is a great investment for keeping your home dust-free.

Overall Score: 8.7/10
The Tukuos Microfiber Duster for Cleaning is a versatile and convenient cleaning tool. With soft microfiber material, this mini duster can be used wet or dry and is machine or hand washable. The extendable pole allows for easy cleaning of hard-to-reach corners, and the 2 pack of replaceable microfiber heads saves time and effort. This duster is suitable for use in cars, offices, computers, and other household appliances, making it perfect for a variety of cleaning tasks. The bright orange color adds a touch of fun to your cleaning routine. Overall, the Tukuos Microfiber Duster for Cleaning is a practical and efficient choice that will leave your surfaces dust-free.
Key Features
- Wet or Dry Use
- Telescoping Pole
- 2 Pack Replacement Heads
- Multi-use Household Cleaning Tool
Specifications
- Color: Bright Orange
- Dimension: 11.00Lx2.40Wx2.40H
- Size: 29 inch
Pros
- Suitable for wet or dry use
- Extendable pole for reaching different heights
- Comes with 2 replaceable microfiber heads
- Can be used to clean various household surfaces
Cons
- Limited rotation of the microfiber cleaner
- May shed some bits of material
The Tukuos Microfiber Duster for Cleaning is a reliable and effective tool for keeping your home or office dust-free. Its versatile design allows for wet or dry use, and the extendable pole makes it easy to clean hard-to-reach areas. The 2 pack of replacement heads saves time and ensures that you always have a clean duster on hand. While there are some minor drawbacks, such as limited rotation and occasional shedding, these issues are outweighed by the duster’s overall performance. Whether you need to clean your car, office, or furniture, this duster is up to the task. Say goodbye to dust with the Tukuos Microfiber Duster for Cleaning!

Overall Score: 8/10
The Microfiber Duster with 3 pcs Replaceable Microfiber Head is a convenient cleaning tool suitable for various surfaces such as office, car, window, furniture, and ceiling fan. The duster comes with three detachable microfiber heads, allowing easy replacement without interrupting your cleaning. Its extendable pole can reach a length of 10 to 30 inches, making it effortless to clean high corners and hidden areas. Made of soft microfiber, the duster can be used wet or dry and is machine or hand washable. The microfiber head is designed to prevent dust from falling off and has strong static adsorption properties. With its versatile applications and reliable performance, this microfiber duster is an essential cleaning supply for any household or workspace.
Key Features
- 3 Detachable Heads
- 10" to 30" Extendable Pole
- Wet or Dry Use
- Soft Microfiber Head
- Broad Application
- Includes 2 Replacement Duster Heads
Specifications
- Color: Orange
- Dimension: 10.00Lx1.00Wx1.00H
Pros
- Convenient and time-saving with replaceable heads
- Extends to reach high corners and hidden areas
- Can be used wet or dry
- Microfiber head prevents dust from falling off
- Versatile for various cleaning tasks
- Includes extra replacement duster heads
Cons
- Some reviewers reported durability issues
- May not be suitable for heavy-duty cleaning
The Microfiber Duster with 3 pcs Replaceable Microfiber Head offers a practical solution for keeping your home or office clean. With its extendable pole and replaceable heads, you can easily reach and clean those hard-to-reach areas. The wet or dry use capability and machine washable microfiber head ensure efficient and hygienic cleaning. While there were a few durability concerns mentioned by some reviewers, the overall feedback for this duster has been positive. It is a versatile tool that can effectively clean dust from various surfaces, making it a valuable addition to your cleaning supplies.

Overall Score: 8/10
The OXO Good Grips Microfiber Extendable Duster is a versatile cleaning tool that traps and holds dust without the need for cleaning chemicals. With an extendable handle up to 53 inches and the ability to rotate the microfiber head 270 degrees and lock in multiple angles, it provides dusting versatility. The lightweight, aluminum poles make it easy to handle, and the microfiber head is detachable for convenient machine washing. The duster collapses to 24 inches for compact storage. It comes in a multicolor design and has dimensions of 1.65Lx4.15Wx24.25H inches. Customers have rated it 4.5 out of 5, praising its convenience and effectiveness.
Key Features
- Traps and holds dust without need for cleaning chemicals
- Extends up to 53” with a quick twist and retracts to 24” for compact storage
- Microfiber head can rotate 270 degrees and lock in multiple angles
- Lightweight, aluminum poles
- Microfiber unsnaps from handle for convenient machine washing
- Soft, comfortable non-slip grip
- Replacement head available (#1334680)
Specifications
- Color: Multicolor
- Dimension: 1.65Lx4.15Wx24.25H
- Size: 24" collapsed, 52" extended
Pros
- Convenient extendable design
- Effective for cleaning hard-to-reach areas
- Easy to clean in the washing machine
Cons
- Plastic hinges may wear out over time
- Some users find it a bit heavy
- Twisting handle to tighten can be frustrating
Overall, the OXO Good Grips Microfiber Extendable Duster is a reliable and versatile cleaning tool. Its extendable design and rotating head make it easy to clean hard-to-reach areas, and the microfiber material effectively traps dust. The lightweight construction and comfortable grip enhance usability. However, the plastic hinges may wear out over time, and some users find it a bit heavy. Despite these minor drawbacks, this duster offers convenience and cleaning efficiency. It is a highly recommended choice for those who want a durable and effective cleaning tool.

Overall Score: 9/10
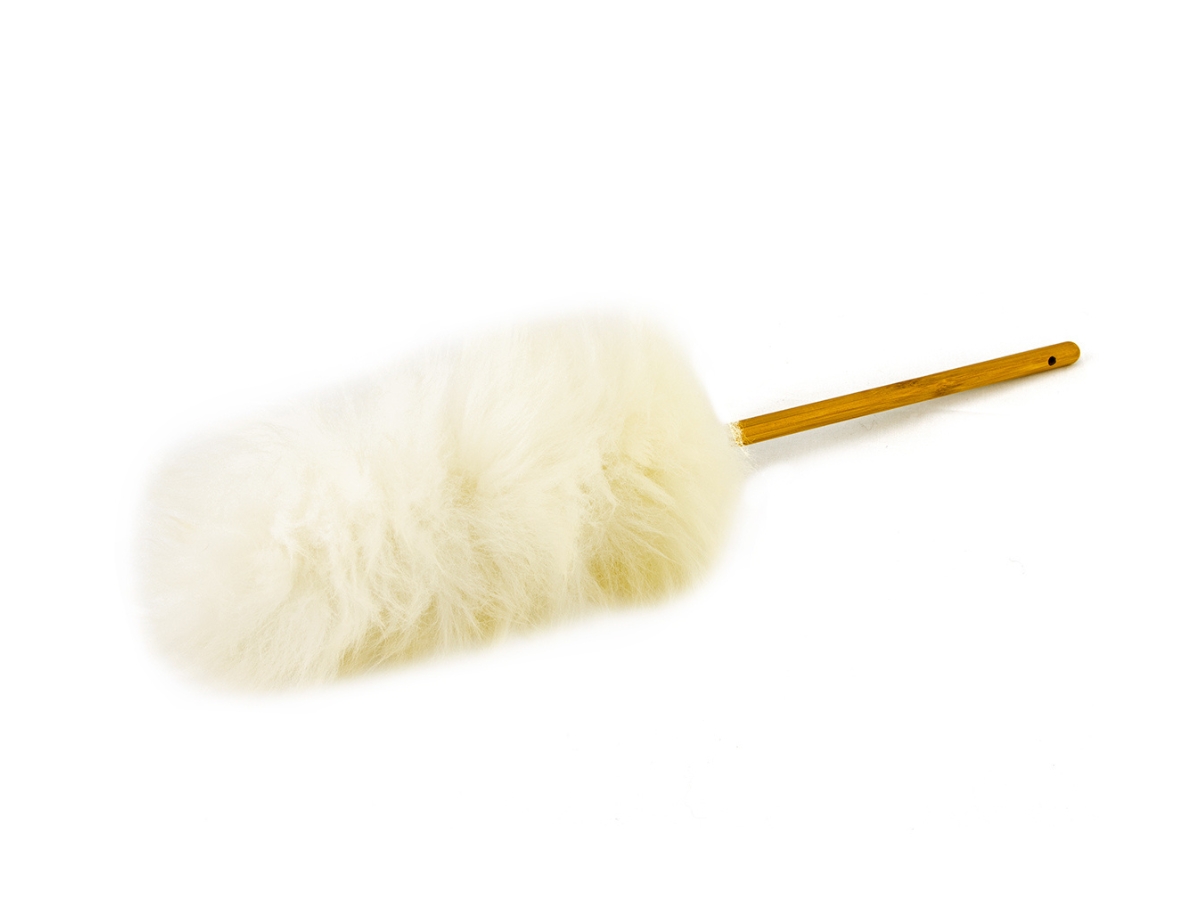
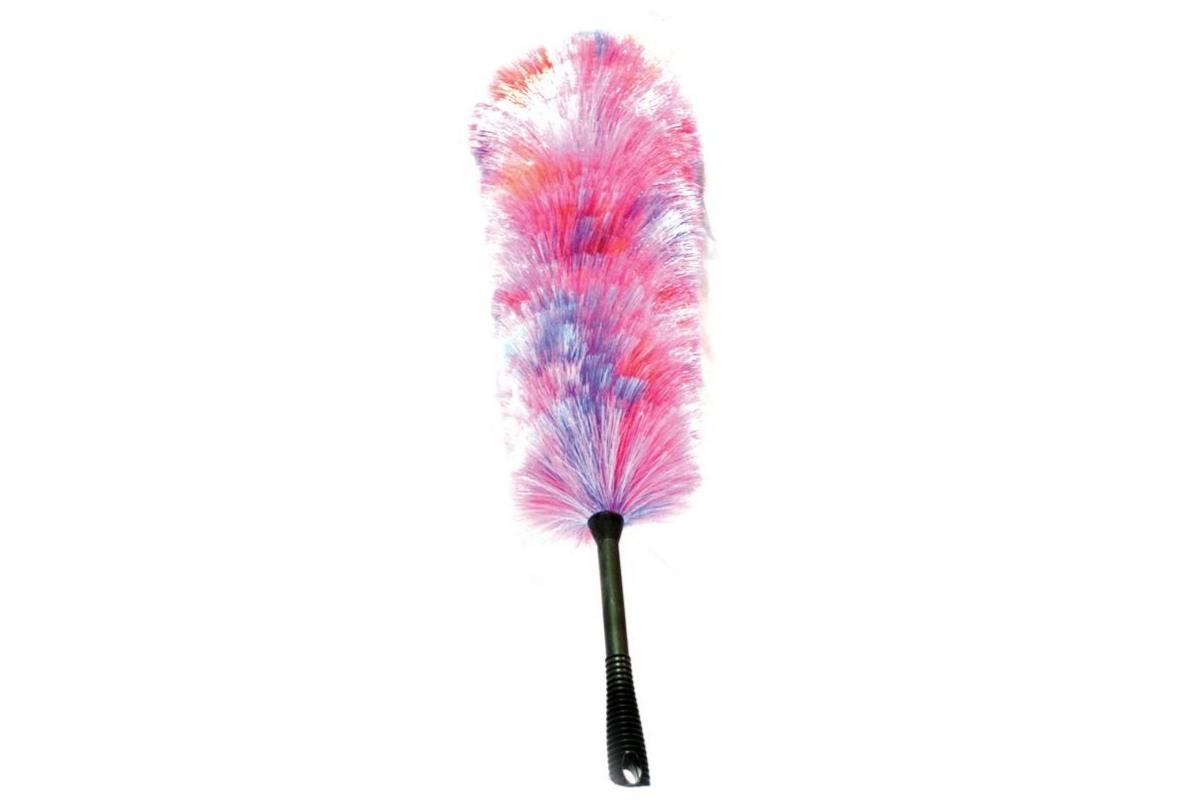
The 13 Inch Microfiber Feather Duster is an efficient and eco-friendly cleaning tool. It comes with four detachable and washable dusting heads, making it a cost-effective choice. The ergonomic design allows for easy use, even in hard-to-reach areas. This duster saves both time and effort, perfect for those with a busy schedule who want quick and effective cleaning. With its soft and versatile duster head, it is suitable for cleaning windows, tables, cars, furniture, walls, fans, and screens. The different colored duster heads allow for easy distinction and application in different cleaning areas.
Key Features
- Detachable and Washable Heads
- Easy to Use
- Saves Time and Effort
- 4 Different Color Duster Heads
- Multipurpose
Specifications
- Dimension: 10.00Lx1.00Wx1.00H
Pros
- Eco-friendly and cost-effective
- Suitable for both left and right-handed individuals
- Soft and versatile duster head
- Covers various cleaning areas
Cons
The 13 Inch Microfiber Feather Duster is a highly practical and efficient cleaning tool. With its washable heads, it offers long-term use and cost savings. The ergonomic and user-friendly design makes cleaning a breeze, even in hard-to-reach areas. It is an excellent choice for those who value their time and want to maintain clean living spaces without much effort. Its multipurpose nature is a bonus, allowing for cleaning various surfaces with ease. Overall, this microfiber feather duster is a valuable addition to any cleaning routine.

Overall Score: 7/10
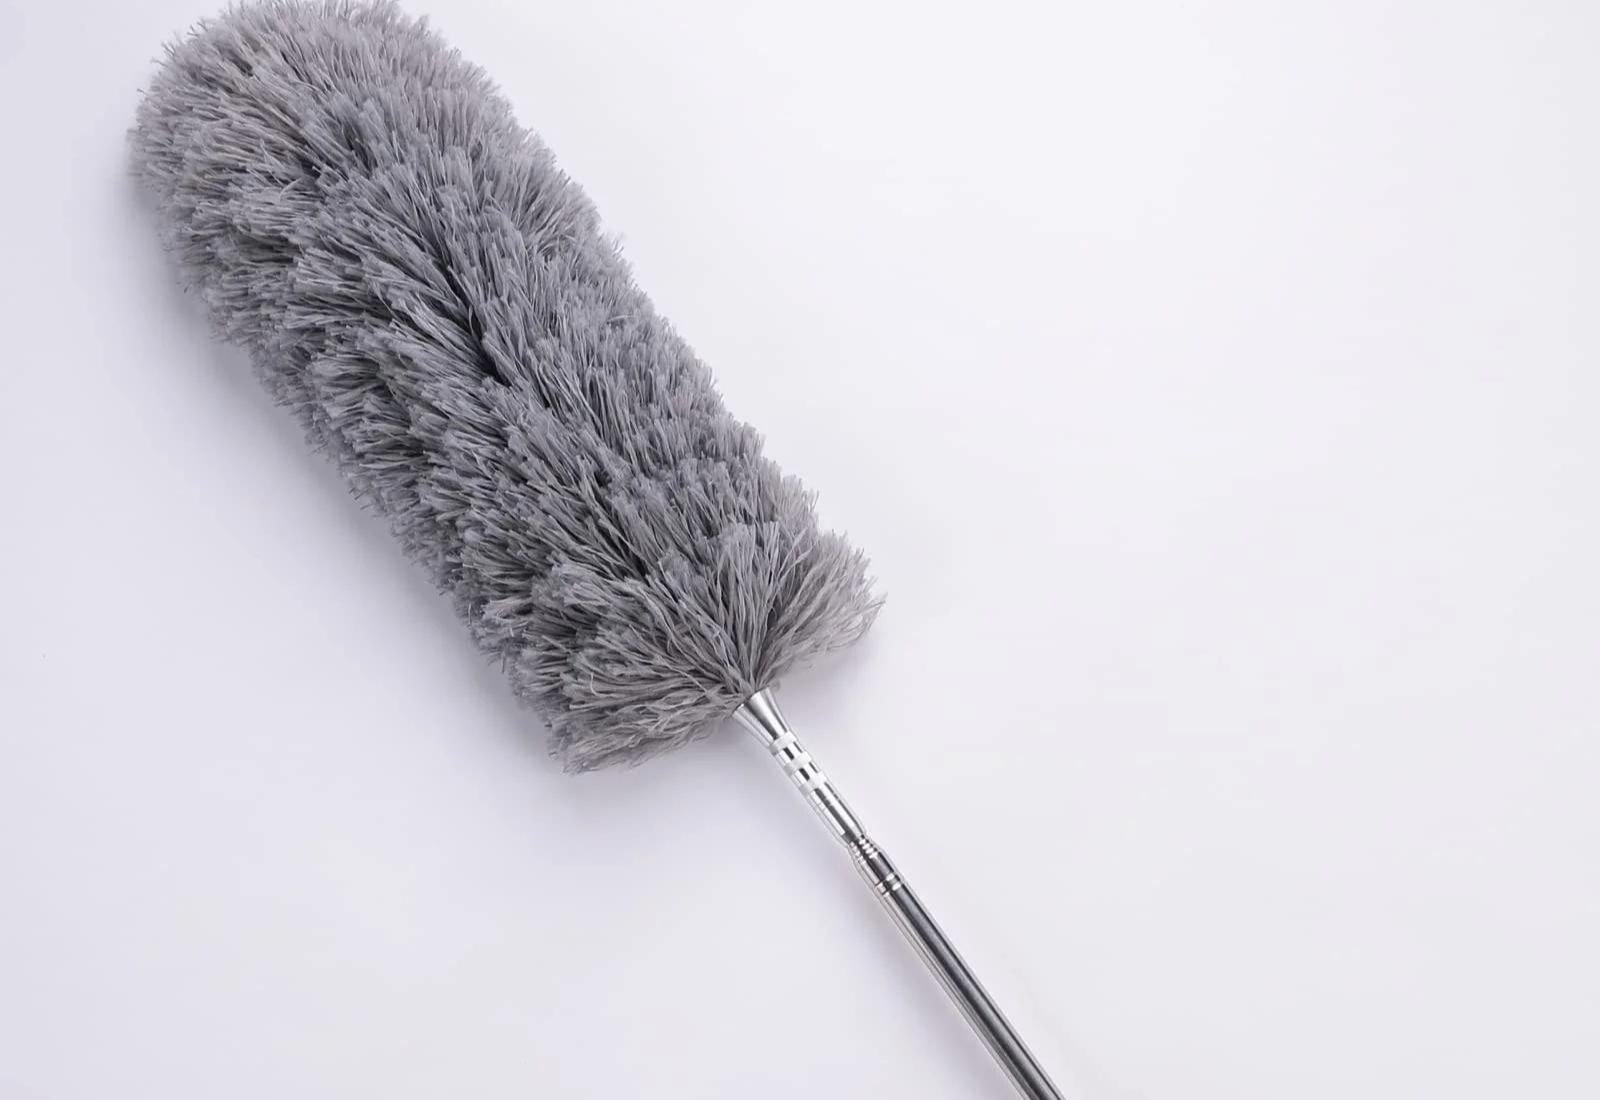
Introducing the SetSail Dusters for Cleaning, a versatile and efficient tool for keeping your home spotless. With its 100-inch extendable pole, this duster allows you to easily reach high ceilings and furniture. The ergonomic design ensures a comfortable grip, making cleaning a breeze. With bendable microfiber heads, this duster easily captures and absorbs fine dust and hair from various surfaces. Plus, it is washable, ensuring easy maintenance. We also offer excellent customer service, ready to assist you with any issues you may encounter. Fall in love with cleaning with the SetSail Dusters for Cleaning!
Key Features
- Telescoping duster extends up to 100 inches
- Ergonomic design for comfortable grip
- Bendable microfiber head captures dust and hair
- Duster is washable for easy cleaning
- Excellent customer service and guarantee
Specifications
- Color: Gray
Pros
- Long reach for high ceilings and furniture
- Comfortable and non-slip grip
- Flexible duster head for capturing fine dust
- Washable for easy maintenance
- Great customer service
Cons
- Thin and cheap pole material
The SetSail Dusters for Cleaning is a versatile and reliable cleaning tool that will make your cleaning tasks a breeze. With its extendable pole and bendable microfiber head, it can effectively clean high ceilings, furniture, and various surfaces. The comfortable grip and washable design add to its convenience. However, the pole material may not be the most durable. Overall, this duster offers great value for its price and is a must-have for anyone who wants to keep their home clean and dust-free.

Overall Score: 7.5/10
The BOOMJOY Microfiber Feather Duster with Extendable Pole is a versatile cleaning tool designed to make dusting easier. With its 100-inch telescoping pole, this duster can reach high ceilings, ceiling fans, lamps, and cobwebs. The microfiber head is effective at static adsorbing dust, preventing dust from falling off. Its bendable head allows for easy cleaning in hard-to-reach corners and angles. This duster can be used to clean various surfaces including ceilings, walls, furniture, and cars. The duster head is washable, ensuring it remains fluffy after each use. With a brown color, this duster blends well with any decor. Overall, it offers convenience, flexibility, and efficiency in dusting.
Key Features
- Extra long pole for extended reach
- Microfiber head prevents dust from falling off
- Bendable head for convenient cleaning in any angle
- Broad application for cleaning various surfaces
- Washable duster head for easy maintenance
Specifications
- Color: Brown
Pros
- Long pole reaches high ceilings and fans
- Microfiber head effectively traps dust
- Bendable head for easy corner cleaning
- Versatile for use on various surfaces
- Washable for long-lasting performance
Cons
- Not ideal for recessed lights and ceiling-wall joints
- Does not bend into angles
- Could be sturdier in construction
The BOOMJOY Microfiber Feather Duster with Extendable Pole proves to be a convenient and efficient tool for dusting. Its long reach, microfiber head, and bendable design make it suitable for various cleaning needs, including ceilings, furniture, and cars. The washable duster head ensures it remains in top condition, maintaining its effectiveness. However, it may not be the best choice for recessed lights or reaching into tight angles, and some users mention durability concerns. Overall, this duster offers great value for the price and delivers satisfactory cleaning performance.

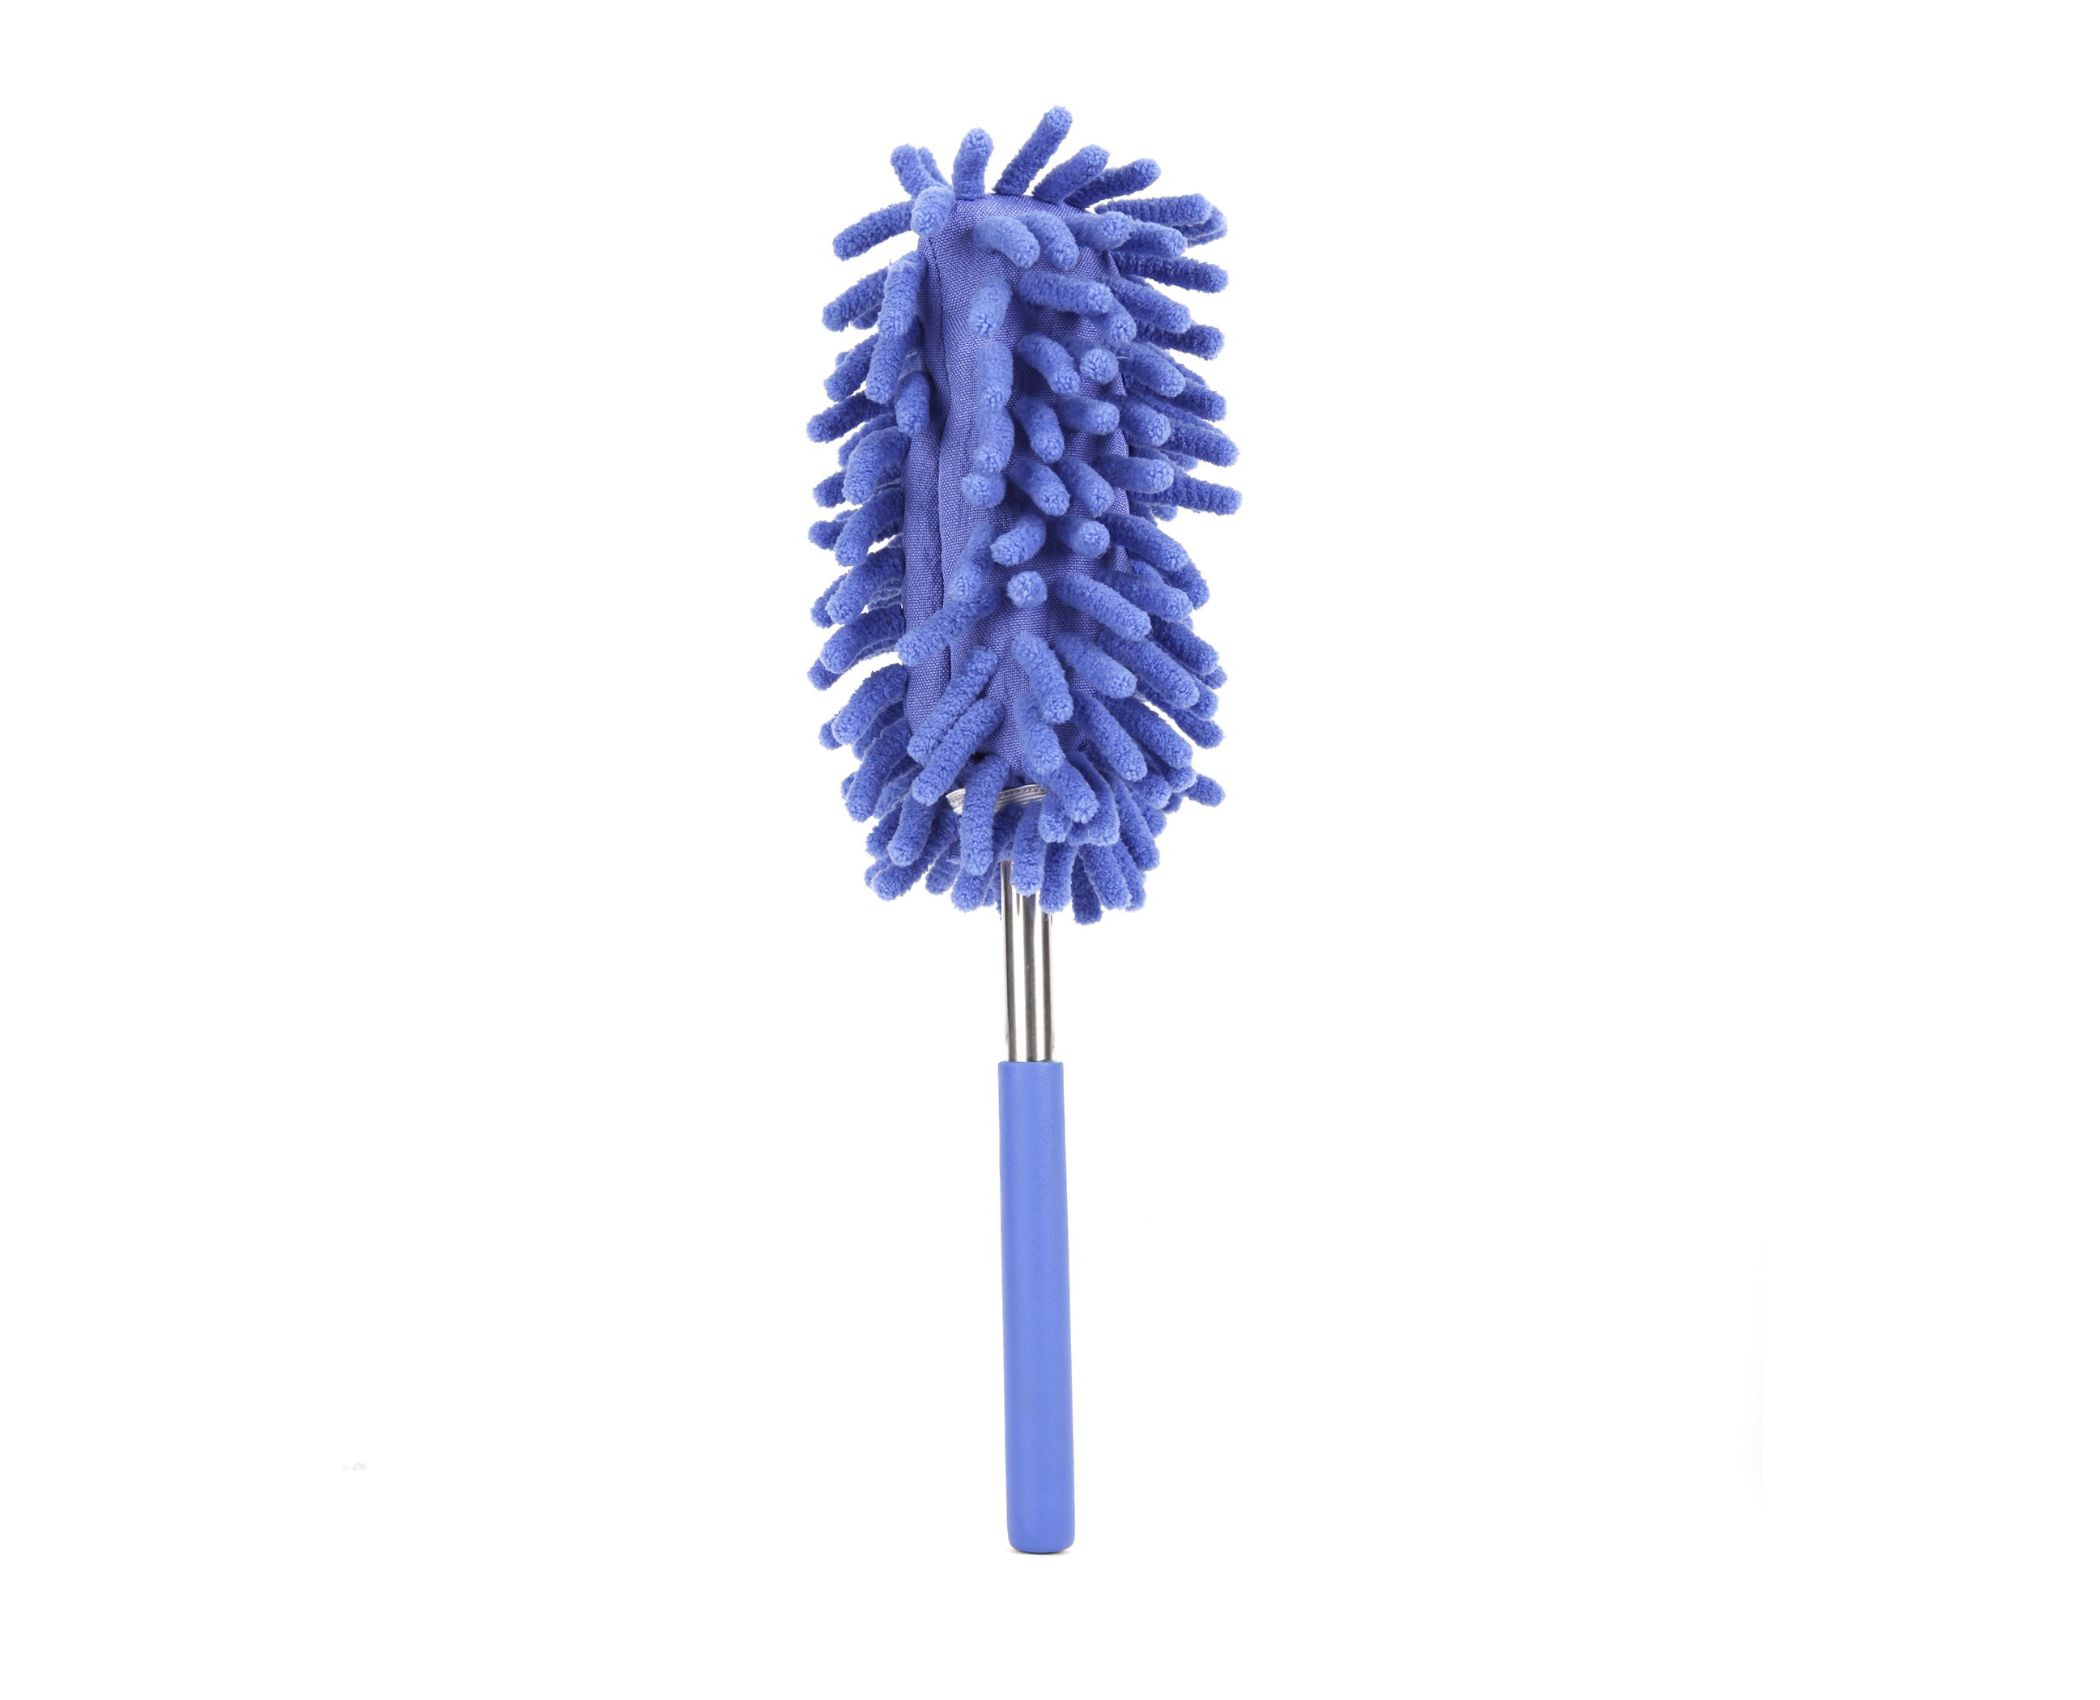
Overall Score: 7/10
The TIMIVO Microfiber Duster is a versatile cleaning tool that comes in a set of two retractable brushes in grey and blue. With an adjustable length of 10-30 inches, this duster can clean hard-to-reach areas effortlessly. The microfiber material is soft, washable, and durable, while the stainless steel rod ensures longevity. This duster is perfect for removing dust and is anti-static and non-scratchy, making it safe for delicate surfaces. Its compact size allows for easy storage in small drawers. Customers have praised its effectiveness and value for money. However, some have found it to be flimsy and have mentioned the need for a locking feature. Overall, the TIMIVO Microfiber Duster is a handy cleaning tool suitable for various tasks.
Key Features
- Package includes 2 retractable brushes in grey and blue
- Adjustable length of 10-30 inches for easy cleaning
- Made of washable and durable microfiber material
- Stainless steel rod for durability and stability
- Anti-static and non-scratchy design for delicate surfaces
Specifications
- Color: Blue and Grey
- Dimension: 30.00Lx2.00Wx0.10H
- Size: 2 Count (Pack of 1)
Pros
- Effective for removing dust
- Compact size for easy storage
- Value for money
Cons
- Flimsy construction
- Lacks a locking feature
The TIMIVO Microfiber Duster is a practical cleaning tool suitable for various surfaces. Its adjustable length and washable microfiber material make it a convenient option. While it may have some durability issues and lack a locking feature, its effectiveness and compact size make it worth considering for everyday cleaning tasks.

Overall Score: 8.5/10
The MR.SIGA Lint Free Microfiber Duster is a must-have for household cleaning. Its fluffy microfiber head covers a large cleaning surface, effectively trapping and holding dust like a magnet rather than pushing it around. The TPR rubber covered handle provides a secure and comfortable grip, ensuring a convenient cleaning experience. This duster also offers easy maintenance as you can simply unsnap the microfiber head from the durable handle and machine wash it. It is perfect for dusting a variety of surfaces such as window blinds, furniture, bookshelves, ceiling fan blades, computers, and keyboards. With its mission to make housework easier and the world cleaner, MR.SIGA provides excellent after-sales support and advice.
Key Features
- Fluffy microfiber head traps and holds dust like a magnet
- TPR rubber covered handle for secure and comfortable grip
- Machine washable microfiber head for easy maintenance
- Ideal for dusting various surfaces
- Excellent after-sales support
Specifications
- Color: Gray
- Dimension: 17.90Lx4.30Wx0.10H
Pros
- Effectively traps and holds dust
- Comfortable and secure grip
- Machine washable for easy maintenance
- Versatile for various surfaces
- Excellent after-sales support
Cons
- May move dust instead of picking up all of it
The MR.SIGA Lint Free Microfiber Duster is a game-changer for dusting. It offers efficient dust trapping and convenient cleaning with its fluffy microfiber head and machine washable design. The comfortable grip ensures a pleasant cleaning experience. Although it may not pick up all the dust on certain surfaces, its overall performance is impressive. MR.SIGA’s commitment to customer support adds value to this product. Say goodbye to sneezing and headaches caused by dusting, and embrace a cleaner home with the MR.SIGA Lint Free Microfiber Duster.

Overall Score: 8/10
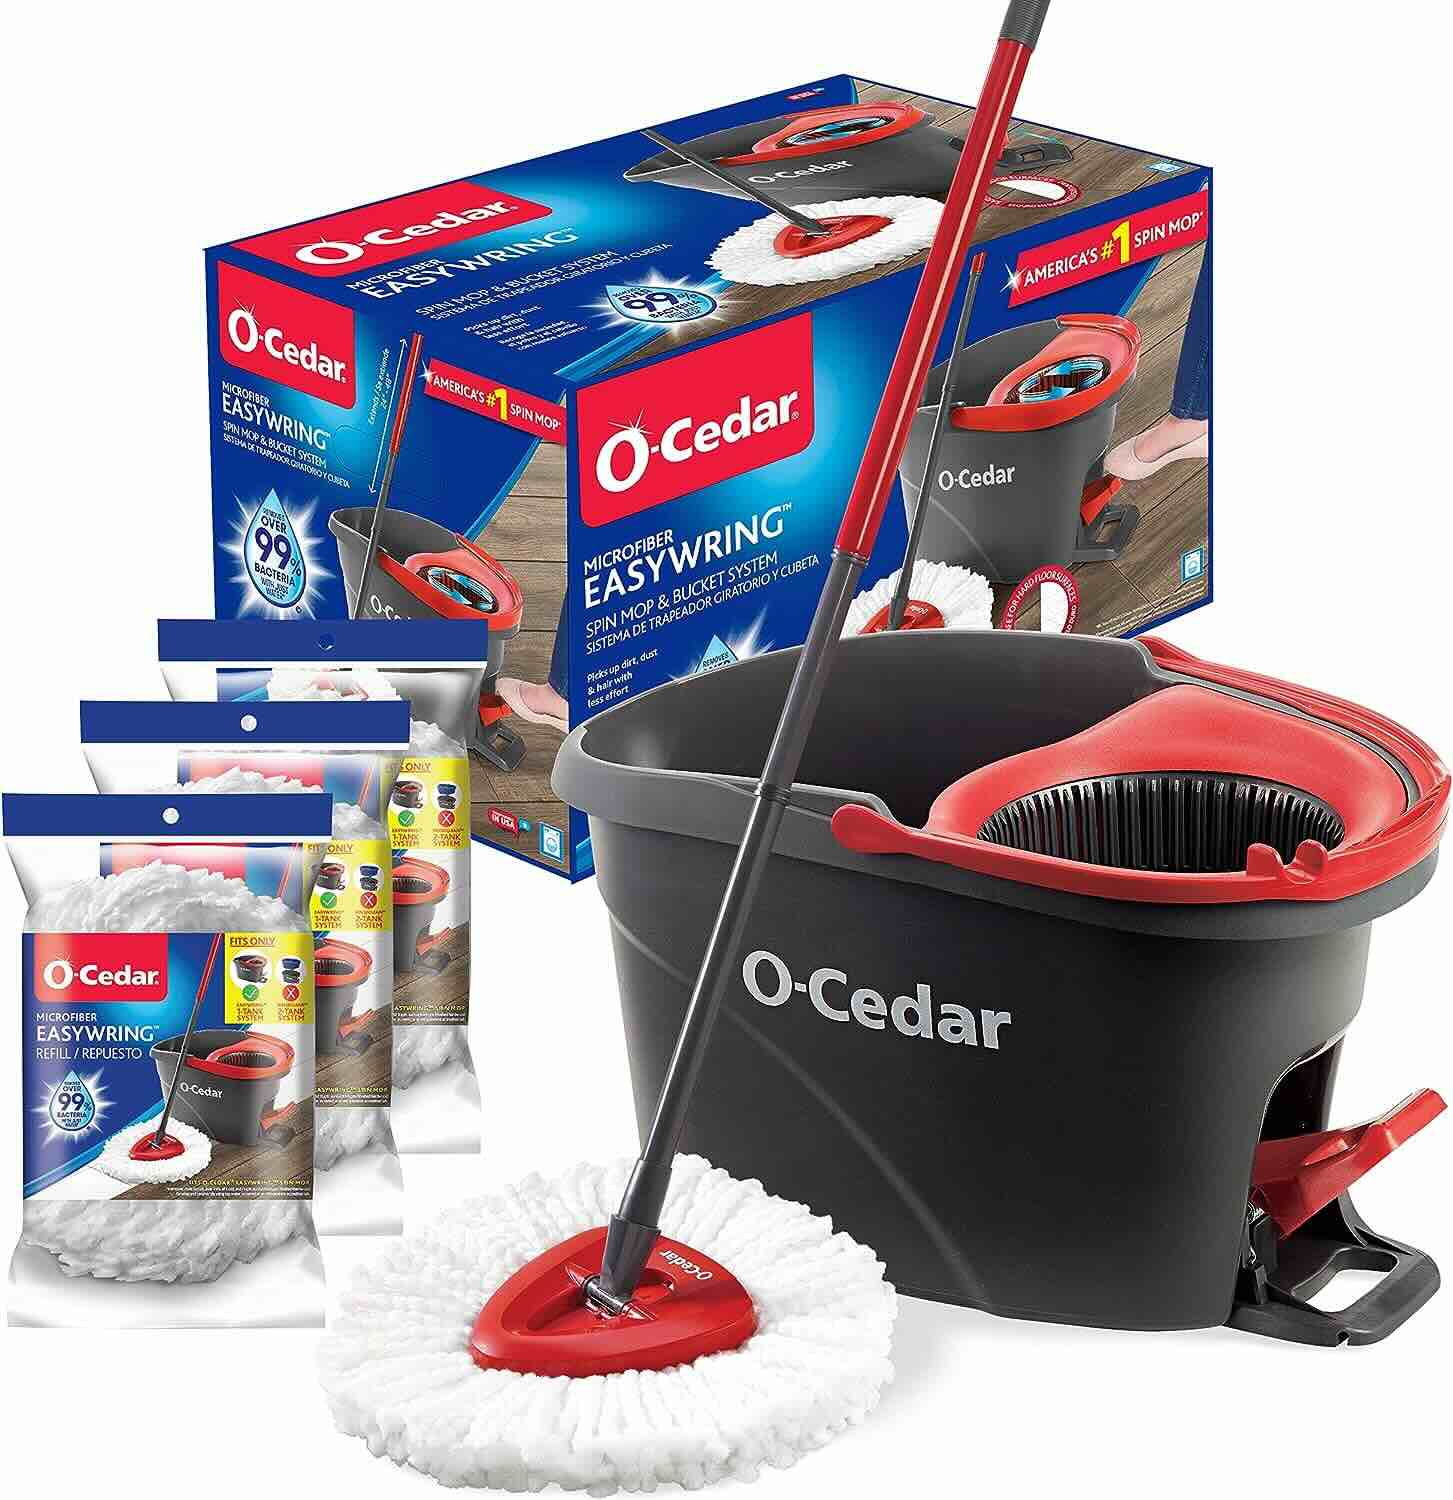
The O-Cedar Dual-Action Dusting Set is a complete duster set that includes a fluffy microfiber hand duster for dry dusting and a dual-sided, flexible chenille and microfiber duster for deep cleaning. The set is designed to clean better with microfiber, as the microfiber head uses millions of microscopic fibers to grab and hold dirt, dust, and moisture. The duster set features a long, adjustable handle that extends from 24" to 49" to reach high ceilings and other hard-to-reach places. It is also reusable and machine-wash friendly, making it eco-friendly compared to disposable hand dusters. The set comes with a white fluffy microfiber duster, a blue chenille and microfiber duster, and a telescopic handle. *Note: This is a summary only. Please refer to the link for more information.
Key Features
- Complete duster set
- Clean better with microfiber
- Long, adjustable handle
- Reusable & machine-wash friendly
- Dust cobwebs
Specifications
- Color: White, Blue
- Dimension: 25.51Lx15.27Wx12.24H
- Size: 3 Piece Set
Pros
- Fluffy microfiber duster for easy cleaning
- Bendable chenille and microfiber duster for deep cleaning
- Telescopic handle for reaching high places
- Eco-friendly and machine-washable
- Designed to dust cobwebs
Cons
- The dark blue attachment is not as useful
- The bendable portion of the duster may bend unintentionally
- The attachment connector may not fit properly
The O-Cedar Dual-Action Microfiber Duster Set is a versatile and effective cleaning tool. With its fluffy microfiber duster and bendable chenille and microfiber duster, it enables easy and efficient cleaning of various surfaces. The long, adjustable handle allows for reaching high places with ease, and the eco-friendly, machine-washable design makes it a sustainable option compared to disposable dusters. While there are some minor drawbacks, such as the limited usefulness of the dark blue attachment and the bendable portion being too flexible, overall, this set provides excellent cleaning performance. Whether you need to remove dust, dirt, or cobwebs, the O-Cedar Dual-Action Microfiber Duster Set is a reliable choice.

Overall Score: 8/10
The Microfiber Duster for Cleaning, DELUX Feather Duster Extendable Duster is a versatile and efficient cleaning tool. With its extendable pole, replaceable brush heads, and split fiber technology, it makes housework easier and more effective. Whether you need to clean office spaces, cars, furniture, or even ceiling fans, this duster has got you covered. The high-quality stainless steel telescopic pole can reach different heights, and the soft microfiber heads can be easily replaced. The duster is also machine or hand washable, ensuring long-lasting use. Its anti-slip rubber grip provides a secure hold, allowing you to clean with less effort. Overall, this duster is a reliable and convenient cleaning companion.
Key Features
- Duster with Extension Pole
- 2 Pack in 1
- Multifunctional Household Cleaning Tools
- Make Housework Easier
- After-sales Service
Specifications
- Color: Blue
Pros
- Extendable pole for reaching different heights
- Replaceable brush heads for convenience
- Machine or hand washable
- Anti-slip rubber grip for better control
Cons
- Initial lint shedding
- Challenging head attachment/detachment
The Microfiber Duster for Cleaning, DELUX Feather Duster Extendable Duster is a great addition to any cleaning routine. It offers versatility, efficiency, and convenience with its extendable pole and replaceable brush heads. The split fiber technology helps to easily remove dust, while the anti-slip rubber grip ensures a comfortable cleaning experience. Although it may have some minor drawbacks, such as initial lint shedding and challenging head attachment, the overall performance and quality of this duster make it a worthwhile purchase. Say goodbye to dust and dirt with this reliable and effective cleaning tool.

Overall Score: 8/10
The Tonmp Microfiber Hand Dusters are a versatile and convenient cleaning tool. With an extendable handle from 13 to 31 inches, these dusters can easily clean hard-to-reach spots. The fine microfiber strands trap and hold dust without the need for cleaning chemicals. The light and fluffy microfiber head is perfect for dusting delicate items such as picture frames and knick-knacks. The dusters are suitable for cleaning a variety of surfaces including cars, computers, air conditioners, TVs, and household appliances. They are available in four colors and have a soft, comfortable, non-slip handle. The dusters also have a convenient hanging hole for storage.
Key Features
- Extendable handle from 13 to 31 inches
- Fine microfiber strands trap and hold dust
- Light and fluffy microfiber head
- Suitable for a variety of surfaces
- Available in four colors
- Soft, comfortable, non-slip handle
- Convenient hanging hole for storage
Specifications
- Color: Blue
- Dimension: 13.00Lx2.00Wx0.10H
- Size: 4 Count (Pack of 1)
Pros
- Extendable handle for reaching difficult spots
- Microfiber material traps dust effectively
- Gentle on delicate items
- Versatile for cleaning various surfaces
- Comes in four colorful options
- Comfortable and non-slip handle
- Convenient storage with hanging hole
Cons
- Handle may fall apart over time
- Duster head can be difficult to clean
The Tonmp Microfiber Hand Dusters are a reliable and effective tool for keeping your space clean. With their extendable handles and fine microfiber strands, they can efficiently clean hard-to-reach spots and trap dust without the need for chemicals. The dusters are versatile and suitable for a variety of surfaces, making them a valuable addition to your cleaning arsenal. However, it’s worth noting that the handles may have durability issues over time and the duster heads can be tricky to clean. Overall, these dusters offer convenience and functionality for everyday cleaning tasks.
Buyer's Guide: Microfiber Duster
ULTRA-EFFICIENT CLEANING SOLUTIONS FOR EVERYDAY DUSTING!When it comes to keeping your home or workspace clean, a microfiber duster is an essential tool in your cleaning arsenal. With its superior dust-attracting abilities and ability to reach into tight spaces, a microfiber duster ensures that no dust particle is left behind. To guide you in your quest for the perfect microfiber duster, we have compiled a comprehensive buyer's guide with all the information you need before making your purchase.Without further ado, let's dive into the world of microfiber dusters and discover the key factors to consider:
Read also: 12 Best Duster Refills for 2025
Key Features to Look for:
- Material Matters: Opt for a microfiber duster made from high-quality microfiber fabric. This ensures excellent dust-trapping abilities and a longer lifespan for your duster.
- Telescopic Handle: Look for a duster with an extendable handle. This feature allows you to reach high ceilings, ceiling fans, light fixtures, and other out-of-reach areas without the need for step stools or ladders.
- Flexible Design: A duster with a flexible head or bendable fibers is an excellent choice for cleaning intricate surfaces such as blinds, vents, or delicate objects. It allows you to easily maneuver around corners and capture dust in hard-to-reach places.
- Removable/Washable Head: To maintain optimal cleaning performance, choose a duster with a detachable or washable head. This feature enables you to keep your duster clean and hygienic, ready for the next dusting session.
- Anti-Static Properties: Seek out a microfiber duster with anti-static properties. Not only does this reduce dust resettlement, but it also ensures that the duster doesn't cling to the surface, making your cleaning experience frustration-free.
- Ergonomic Grip: Look for a duster with an ergonomic handle design. This allows for a comfortable grip and reduces hand fatigue during extended cleaning sessions.
- Multi-purpose Functionality: Some dusters come with additional features like extension poles, swivel heads, or attachments for specific cleaning needs. Consider these extras if you require versatility or specialized cleaning tasks.
- Durability: Ensure that the microfiber duster you choose is durable and built to withstand frequent use. A sturdy construction will guarantee a longer lifespan and save you from constantly purchasing new dusters.
- Budget-Friendly: Microfiber dusters come in various price ranges. Consider your budget while selecting a duster, but remember that investing in a high-quality duster ultimately saves you money in the long run.
Frequently Asked Questions about 12 Amazing Microfiber Duster For 2025
It is recommended to dust your surfaces at least once a week or whenever you notice a visible layer of dust settling. Regular dusting prevents allergens from accumulating and keeps your space clean and tidy.
Absolutely! Microfiber dusters are gentle and safe to use on delicate surfaces. However, ensure that your duster is free of rough particles or any abrasive substances that could potentially scratch or damage the surfaces.
Most microfiber dusters can be hand-washed or machine-washed. Follow the manufacturer’s instructions for the best cleaning method. Make sure to air-dry or tumble-dry your duster on low heat to maintain its effectiveness.
While microfiber is known for its exceptional cleaning abilities, using a microfiber duster wet is not recommended. Wetting the duster could reduce its electrostatic charge and diminish its dust-attracting performance. Stick to dry dusting with a microfiber duster for optimal results.
The lifespan of a microfiber duster depends on its quality, frequency of use, and maintenance. A well-maintained microfiber duster can last anywhere from six months to a couple of years. Regularly washing and removing trapped dust from the duster will ensure its longevity.
Was this page helpful?
Trust Storables.com for unbiased and honest product reviews. Our reviews are rigorously assessed by our Expert Board Contributors and adhere to strict Editorial Standards. We ensure that each review is transparent and trustworthy, helping you make informed purchasing decisions.

0 thoughts on “12 Amazing Microfiber Duster for 2025”