Articles
How To Clean A Pod Coffee Machine
Modified: February 20, 2024
Learn how to clean your pod coffee machine efficiently with our helpful articles. Keep your machine in top condition for delicious coffee every time.
(Many of the links in this article redirect to a specific reviewed product. Your purchase of these products through affiliate links helps to generate commission for Storables.com, at no extra cost. Learn more)
Introduction
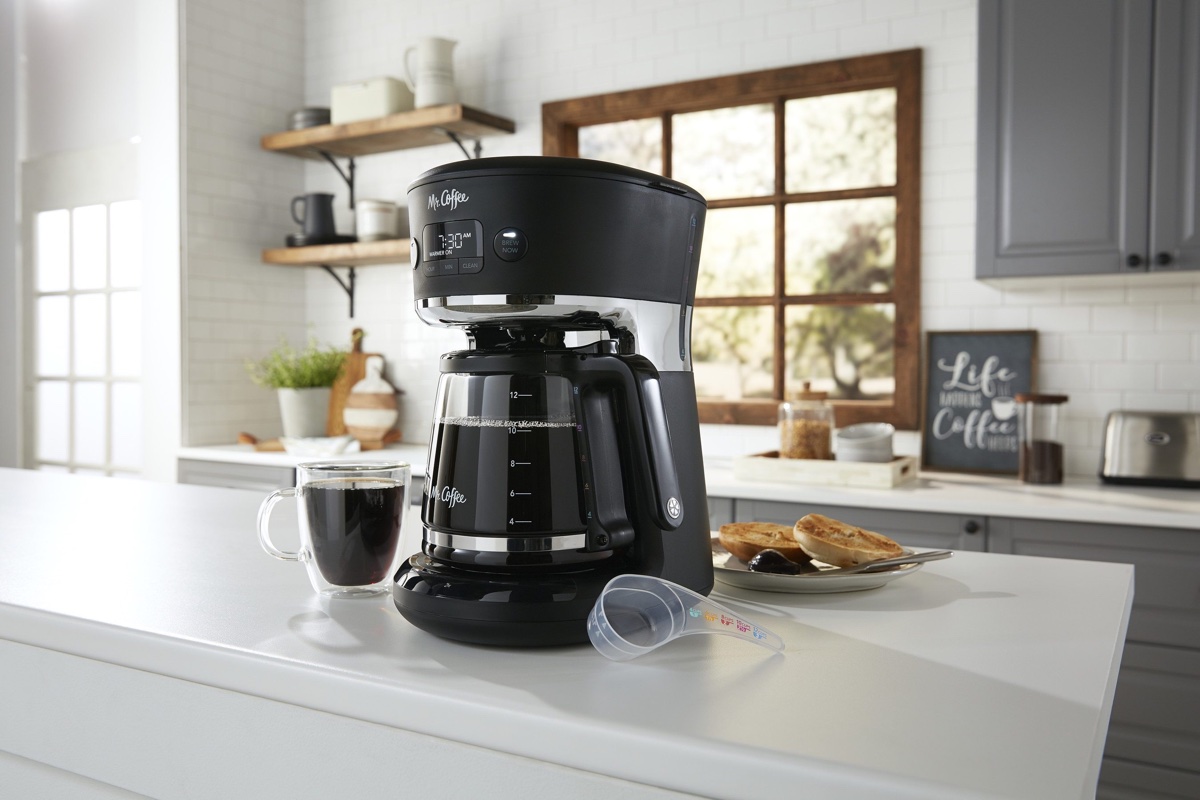
Pod coffee machines have gained immense popularity in recent years. Their convenience and ability to brew a quick cup of coffee at the touch of a button make them a favorite among coffee lovers. However, like any other appliance, regular cleaning and maintenance are essential to keep these machines functioning optimally and ensure the best-tasting coffee.
Without proper cleaning, residue and mineral buildup can accumulate over time, affecting the flavor of your coffee and even causing clogs in the machine. In this article, we will guide you on how to clean a pod coffee machine, step by step. By following these easy and effective cleaning methods, you can keep your machine in top shape, prolong its lifespan, and enjoy a consistently great cup of coffee.
Before we dive into the cleaning process, it’s important to understand the various components of a pod coffee machine that require regular maintenance. These include the reservoir, drip tray, brewing chamber, and pod holder. Additionally, descaling the machine at regular intervals removes mineral deposits that can affect the machine’s performance.
So, let’s gather the necessary supplies and get started with the cleaning process!
Key Takeaways:
- Regular cleaning and descaling of your pod coffee machine is essential to maintain its performance, longevity, and the quality of your coffee. Follow the step-by-step guide to ensure consistently great-tasting coffee.
- Understanding the cleaning process, gathering necessary supplies, and following manufacturer’s instructions are crucial for keeping your pod coffee machine in top shape. Regular cleaning ensures a fresh and satisfying brew every day.
Read more: How To Use Coffee Machine With Pods
Understanding the Cleaning Process
Before we start cleaning our pod coffee machine, it’s important to understand the different steps involved in the process. This will ensure that we cover all the necessary areas and effectively remove any buildup or residue that may have accumulated over time.
The cleaning process for a pod coffee machine typically involves the following steps:
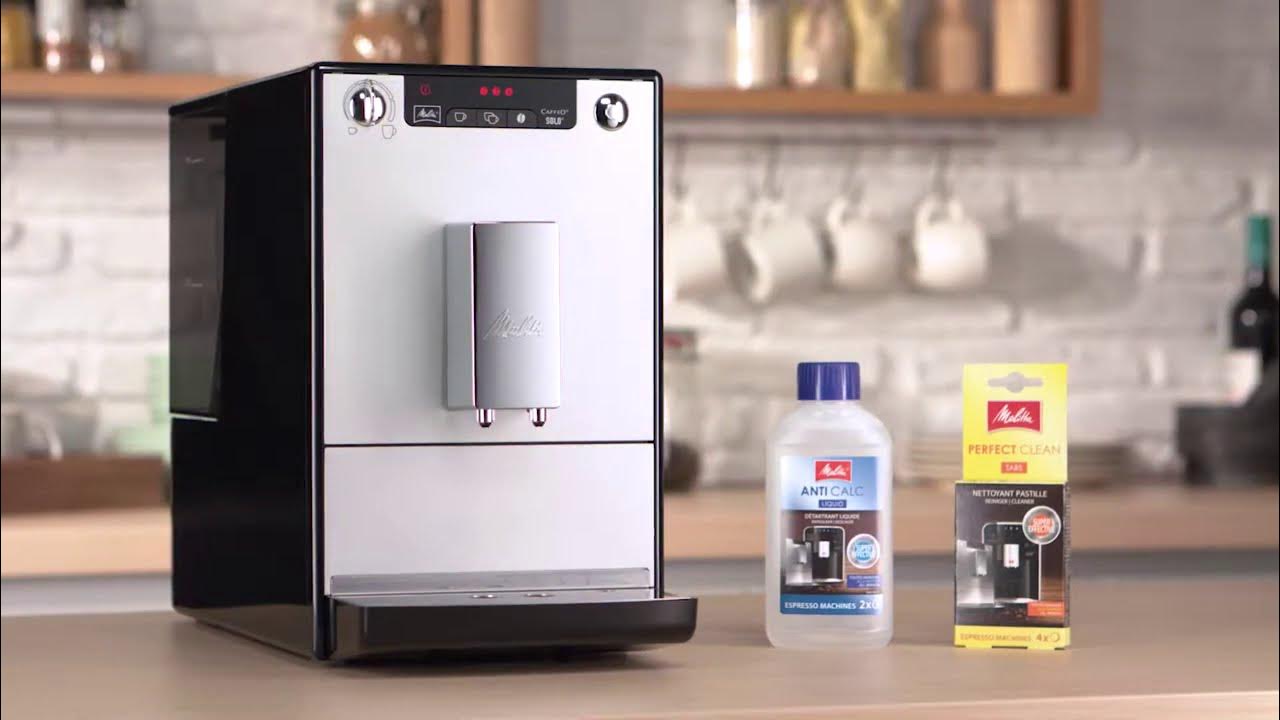
- Gathering Supplies: Before beginning the cleaning process, make sure you have all the necessary supplies at hand. This includes vinegar, water, a clean cloth or sponge, and any specific cleaning solutions recommended by the manufacturer.
- Emptying the Reservoir and Discarding Used Pods: Start by emptying the water reservoir and discarding any used pods or capsules. This will ensure that you start with a clean slate while cleaning the machine.
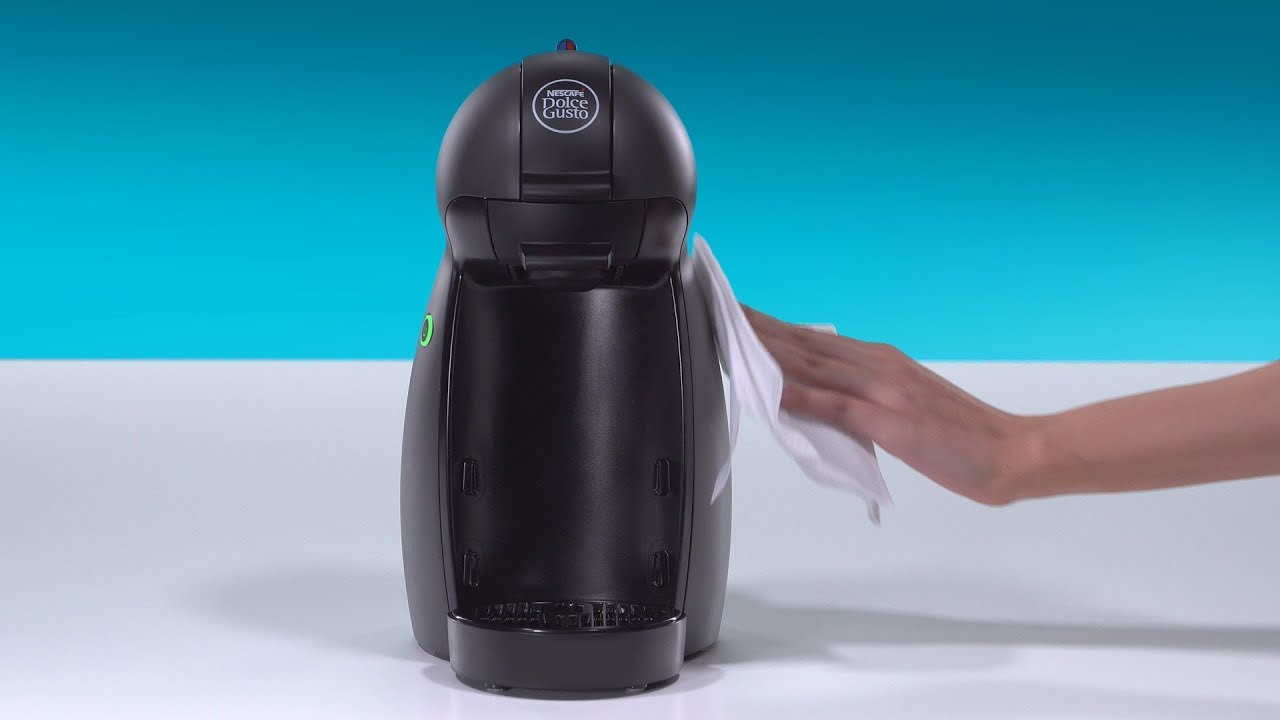
- Cleaning the Exterior: Next, wipe down the exterior surfaces of the machine using a clean cloth or sponge dampened with a solution of water and mild dish soap. Make sure to remove any stains or spills to keep the machine looking pristine.
- Descaling the Machine: Descaling is an essential part of maintaining a pod coffee machine. Over time, mineral deposits can accumulate inside the machine, affecting the taste and performance of your coffee. Follow the manufacturer’s instructions to descale the machine using a descaling solution and running a descale cycle.
- Cleaning the Drip Tray and Pod Holder: The drip tray and pod holder are prone to collecting residue and leftover coffee. Remove them from the machine and clean them thoroughly using warm, soapy water. Rinse and dry them before placing them back in the machine.
- Cleaning the Brewing Chamber: The brewing chamber is where the magic happens, and it’s essential to keep it clean. Use a damp cloth or sponge to wipe away any coffee grounds or residue from the chamber. Avoid using abrasive cleaners or tools that could damage the machine.
- Rinsing and Deodorizing: After completing all the above steps, run a few cycles of plain water through the machine to rinse away any remaining cleaning solution or residue. This will help eliminate any lingering odors and ensure the machine is ready for brewing your next delicious cup of coffee.
Now that we have a clear understanding of the cleaning process, let’s move on to the detailed steps involved in cleaning a pod coffee machine.
Step 1: Gathering Supplies
Before you begin cleaning your pod coffee machine, it’s crucial to gather all the necessary supplies. Having everything prepared and within reach will make the cleaning process more efficient. Here are the supplies you’ll need:
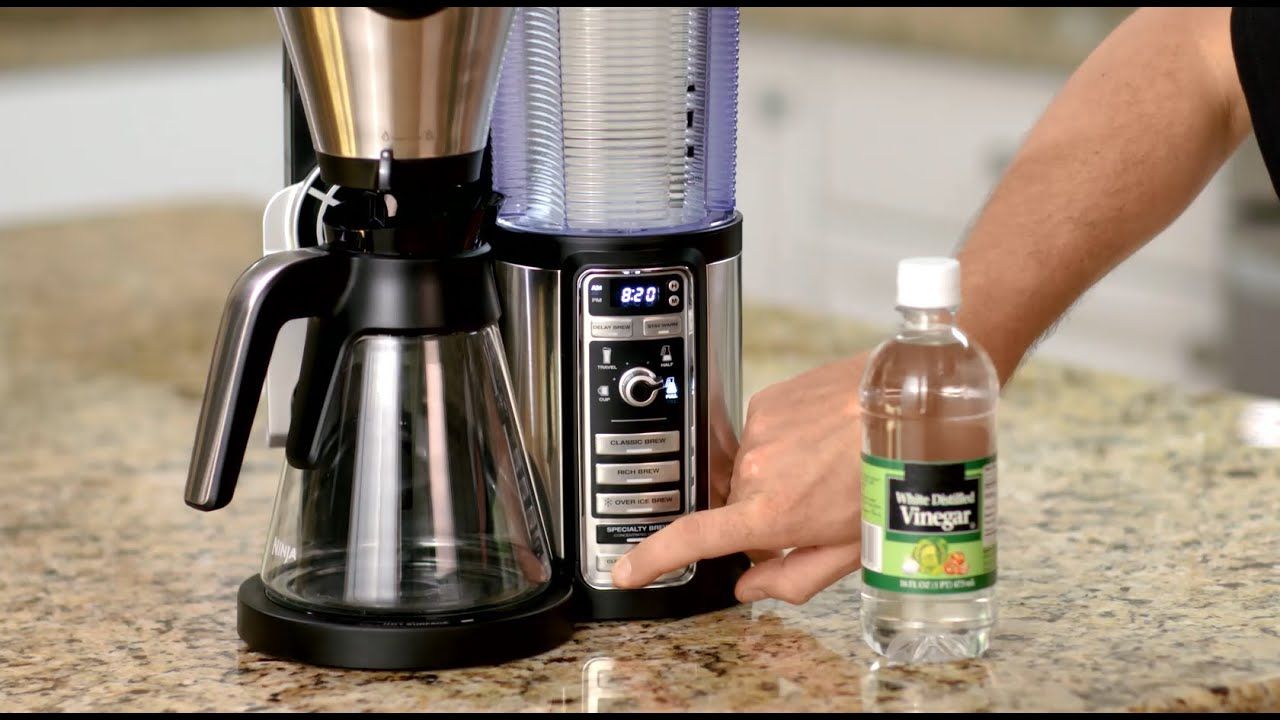
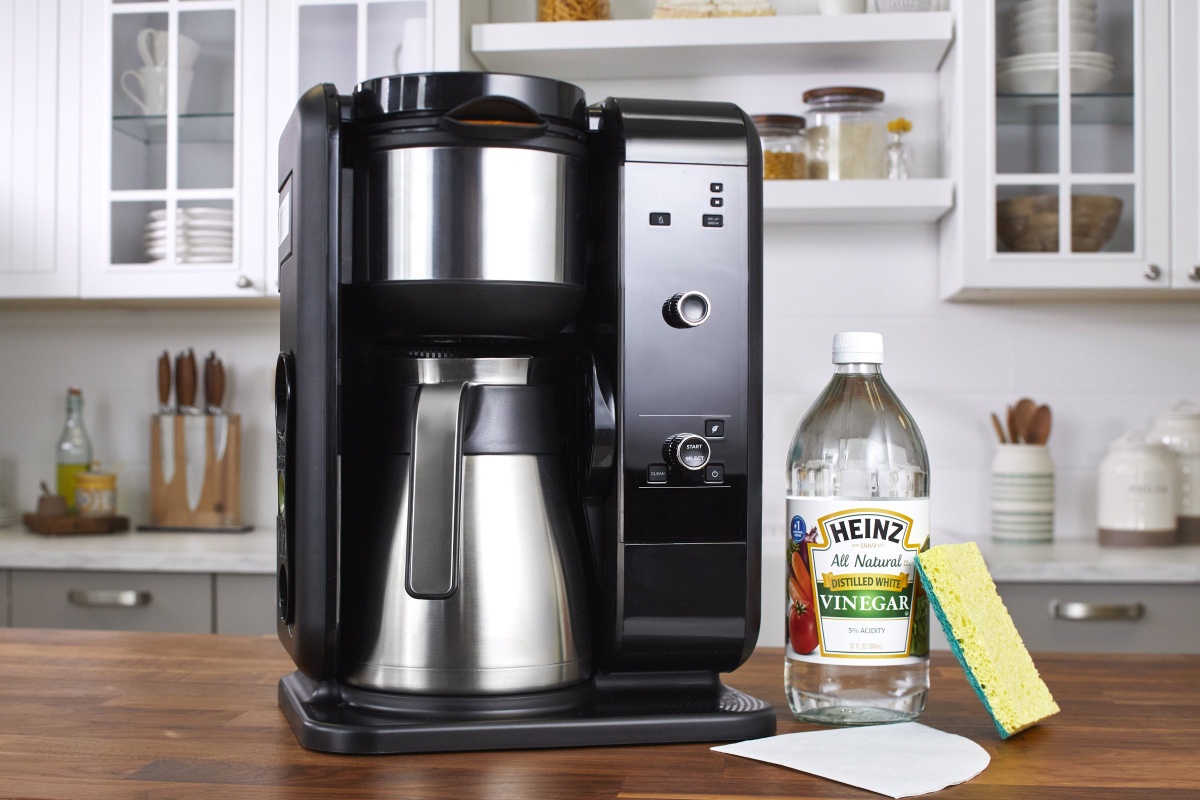
- Vinegar: Vinegar is a versatile and cost-effective cleaning agent that can effectively remove mineral deposits and residue from the machine. White vinegar is commonly used for cleaning coffee machines.
- Water: You’ll need clean water to rinse the machine and remove any cleaning solution or residue. Ensure that the water is fresh and free from contaminants.
- Clean cloth or sponge: A soft, clean cloth or sponge will be useful for wiping down the exterior of the machine and cleaning the brewing chamber. Avoid using abrasive materials that could scratch or damage the machine’s surfaces.
Additionally, some manufacturers may recommend specific cleaning solutions or descaling agents for their machines. If your machine requires a specific cleaning solution, make sure to have it on hand.
Once you have gathered all the necessary supplies, you are ready to move on to the next steps in the cleaning process. Having everything prepared will make the process smoother and more efficient, ensuring that your pod coffee machine receives a thorough cleaning.
Vinegar
Vinegar is a versatile and effective cleaning agent that can be used to clean various household appliances, including pod coffee machines. Its acidic properties help break down and dissolve mineral deposits and residue that can accumulate in the machine over time.
When using vinegar to clean your pod coffee machine, it’s important to use white vinegar, as it is mild and leaves no staining or odor behind. Here’s how to effectively use vinegar as a cleaning agent:
- Vinegar-Water Solution: To create a vinegar cleaning solution, mix equal parts of white vinegar and water. For example, if you use 1 cup of vinegar, mix it with 1 cup of water. This mixture will effectively clean and descale your machine.
- Descaling the Machine: If your machine requires descaling, pour the vinegar-water solution into the water reservoir. Follow your machine’s manual to initiate the descaling cycle. The vinegar solution will flow through the machine, breaking down any mineral deposits and removing stubborn buildup.
- Wiping Exterior Surfaces: Vinegar can also be used to clean the exterior surfaces of the machine. Dampen a clean cloth or sponge with the vinegar solution and gently wipe down the machine to remove any stains or spills. Vinegar is effective in removing coffee stains and restoring the shine of the machine.
After using vinegar to clean your pod coffee machine, it’s important to rinse the machine thoroughly. Run a cycle of clean water through the machine to flush out any vinegar residue. This will ensure that your next cup of coffee is not affected by any lingering vinegar taste or odor.
Vinegar is an affordable and eco-friendly cleaning option that can be used regularly to maintain the cleanliness and performance of your pod coffee machine. It is a versatile cleaning agent that can effectively tackle mineral buildup and keep your machine running smoothly.
Now that you know how to use vinegar as a cleaning agent, let’s move on to the next step in the cleaning process.
Water
Water is a crucial component in cleaning your pod coffee machine. It is used for various purposes throughout the cleaning process, including rinsing and flushing out any residue or cleaning solutions.
When it comes to using water for cleaning your machine, there are a few important considerations to keep in mind:
- Quality of Water: It’s recommended to use clean, filtered water for the best results. Hard water, which contains a high concentration of minerals, can contribute to the buildup of limescale in the machine. If you live in an area with hard water, it may be beneficial to install a water softener or use filtered water to minimize mineral deposits.
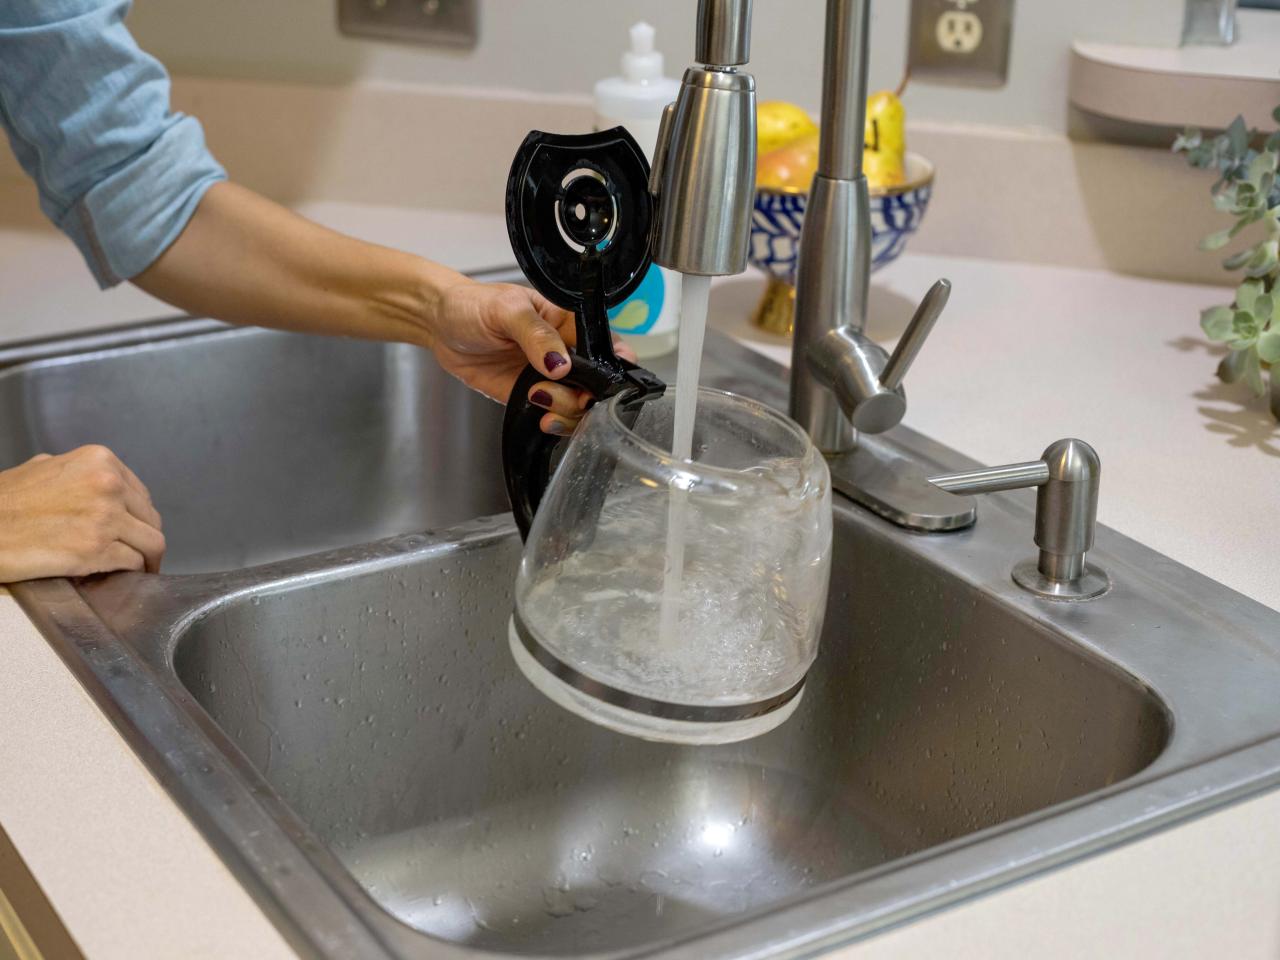
- Rinsing the Machine: Throughout the cleaning process, water is used to rinse the machine and remove any residue or cleaning solution. After descaling or using any cleaning solution, it’s essential to run several cycles of clean water through the machine to ensure that no residue or cleaning agents are left behind.
- Regular Water Changes: To keep your machine in optimal condition, it’s essential to regularly change the water in the reservoir. Stagnant water can become a breeding ground for bacteria and affect the taste and quality of your coffee. It’s a good practice to change the water daily, especially if you do not use the machine frequently.
By using clean and filtered water throughout the cleaning process, you can effectively remove any residue and ensure a fresh and enjoyable brewing experience. Remember to follow the manufacturer’s instructions regarding water quality and maintenance recommendations.
Now that we understand the importance of water in cleaning our pod coffee machine, let’s move on to the next step in the cleaning process.
Read more: Which Pod Coffee Machine Is Best
Clean Cloth or Sponge
A clean cloth or sponge is an invaluable tool when it comes to cleaning your pod coffee machine. It allows you to effectively wipe down the exterior surfaces of the machine and clean the brewing chamber, ensuring that your machine is spotless and ready to brew the perfect cup of coffee.
Here are some tips for using a clean cloth or sponge to clean your pod coffee machine:
- Choose a Soft Cloth or Sponge: It’s essential to select a cloth or sponge that is soft and non-abrasive to prevent scratching or damaging the surfaces of your machine. Microfiber cloths or non-scratch sponges are often ideal for this purpose.
- Dampen the Cloth or Sponge: Before using the cloth or sponge, dampen it with water or a mild soapy solution. Avoid using excessive water or soaking the cloth, as this can lead to water damage. A slightly damp cloth or sponge is sufficient for effective cleaning.
- Wipe Down the Exterior Surfaces: Use the damp cloth or sponge to gently wipe down the exterior surfaces of the machine. Pay special attention to areas that may have spills or stains, such as the water reservoir, control panel, and drip tray. This will help keep your machine looking clean and well-maintained.
- Clean the Brewing Chamber: To clean the brewing chamber, dampen the cloth or sponge and gently wipe away any coffee grounds or residue. Be careful when cleaning around the delicate components of the brewing chamber to avoid causing any damage.
- Dry Thoroughly: After cleaning, make sure to dry the surfaces of your machine thoroughly. Leaving any moisture on the machine can promote the growth of mold or bacteria. Use a clean, dry cloth to wipe away any remaining moisture.
By using a clean cloth or sponge to wipe down the exterior and clean the brewing chamber of your pod coffee machine, you can ensure that it stays in excellent condition and prolong its lifespan. Remember to follow the manufacturer’s recommendations regarding cleaning and maintenance.
Now that we have discussed the importance of a clean cloth or sponge, we are ready to move on to the next step in the cleaning process.
Step 2: Emptying the Reservoir and Discarding Used Pods
Before you begin the cleaning process, it’s important to empty the water reservoir of your pod coffee machine and discard any used pods or capsules. This step ensures that you start with a clean reservoir and eliminates any stale water or remnants of previous brewing cycles.
Follow these steps to effectively empty the reservoir and discard used pods:
- Unplug the Machine: Before any maintenance or cleaning tasks, always make sure your pod coffee machine is unplugged to avoid any potential accidents or electrical hazards.
- Remove the Water Reservoir: Check your machine’s manual for specific instructions on how to remove the water reservoir. In most cases, it can be easily lifted or detached from the machine. Take care when handling the reservoir as it may contain hot or warm water.
- Empty the Reservoir: Pour out the water from the reservoir into a sink or drain. Be cautious of the temperature of the water to prevent any accidental burns or splashes. If there are any visible debris or residue in the reservoir, rinse it with clean water.
- Dispose of Used Pods: After emptying the reservoir, remove and dispose of any used pods or capsules. Follow the manufacturer’s recommendations for proper disposal, as some pods may be recyclable or require specific handling.
Once you have emptied the reservoir and discarded the used pods, you’re ready to move on to the next steps in the cleaning process. This ensures that you start with a clean slate and prepares your machine for a thorough cleaning.
Properly emptying the reservoir and discarding used pods is a simple yet crucial step to maintain cleanliness and ensure the quality of your coffee. Let’s proceed to the next step to continue cleaning your pod coffee machine.
Step 3: Cleaning the Exterior
Keeping the exterior of your pod coffee machine clean not only enhances its appearance but also helps to maintain its overall hygiene. Regularly wiping down the exterior surfaces prevents the buildup of dust, dirt, and stains, ensuring a visually appealing and well-maintained machine.
Follow these steps to effectively clean the exterior of your pod coffee machine:
- Unplug the Machine: Before you start cleaning, always make sure your pod coffee machine is unplugged to ensure safety.
- Prepare a Cleaning Solution: Create a mild cleaning solution using warm water and a small amount of dish soap. Avoid using abrasive or harsh chemicals that may damage the machine’s surfaces.
- Dampen a Clean Cloth or Sponge: Dip a clean cloth or sponge into the cleaning solution, ensuring it is not soaked or dripping with water. Wring out any excess moisture.
- Wipe Down the Exterior Surfaces: Gently wipe down the exterior surfaces of the machine using the damp cloth or sponge. Pay special attention to areas that may have spills, stains, or fingerprints. Be thorough but gentle to avoid scratching or damaging the machine’s surfaces.
- Clean Buttons, Dials, and Control Panels: Use a soft-bristled toothbrush or a damp cloth to clean the buttons, dials, and control panels. Take care not to get them excessively wet, as this can cause damage to the electrical components.
- Dry Thoroughly: After cleaning, use a clean, dry cloth to wipe away any remaining moisture and ensure that the exterior surfaces are completely dry.
By regularly cleaning the exterior of your pod coffee machine, you not only maintain its aesthetic appeal but also prevent the accumulation of dirt and grime that can potentially affect the machine’s performance over time.
Now that we have cleaned the exterior surfaces, it’s time to move on to the next step in the cleaning process: descaling the machine. This step is crucial to remove mineral deposits and ensure the optimal performance of your pod coffee machine.
To clean a pod coffee machine, regularly descale it with a mixture of water and vinegar to remove mineral buildup and run a water-only cycle to rinse. Wipe the exterior with a damp cloth and clean the pod holder and drip tray with warm, soapy water.
Step 4: Descaling the Machine
Descaling your pod coffee machine is a vital maintenance step that helps remove mineral deposits and limescale buildup. Over time, these deposits can affect the flavor of your coffee and hamper the machine’s performance. Descaling your machine regularly will ensure that it continues to deliver quality coffee and prolong its lifespan.
Follow these steps to effectively descale your pod coffee machine:
- Refer to the Manufacturer’s Instructions: Different coffee machine models may have specific instructions for the descaling process. Before you begin, consult the manufacturer’s manual for guidance on descaling your machine.
- Preparing the Descale Solution: Most descaling solutions are made by mixing a descaling agent with water. Follow the instructions on the descaling solution packaging to achieve the correct dilution ratio. If you prefer a natural descaling agent, you can also use a mixture of equal parts white vinegar and water.
- Running the Descale Cycle: Fill the water reservoir with the descale solution, as per the manufacturer’s instructions. Start the descale cycle according to the machine’s settings. This cycle will circulate the descale solution through the internal components, effectively removing mineral deposits and limescale buildup.
- Repeat the Rinse Cycle: After the descale cycle is complete, run plain water through the machine several times to rinse out any remaining descaling solution or residue. This step is crucial to ensure that no traces of the descaler are left behind.
It’s important to follow the manufacturer’s instructions for the descaling process to prevent any damage to your machine. Some machines may have specific descaling modes or prompts that guide you through the process.
Regular descaling, typically recommended every three to six months, will keep your machine in optimal condition and ensure the best-tasting coffee. The frequency of descaling may also depend on the hardness of the water in your area, as harder water tends to produce more mineral deposits.
Now that we have successfully descaled the machine, let’s proceed to the next step in the cleaning process: cleaning the drip tray and pod holder.
Preparing the Descale Solution
Preparing the descale solution is an essential step in effectively removing mineral deposits and limescale buildup from your pod coffee machine. The descaling solution is a key component in the descaling process, and it helps restore your machine’s performance and maintain the quality of your coffee.
There are different options available for preparing a descale solution, depending on your preference and the recommendations provided by the manufacturer. Here are two common methods for preparing a descale solution:
- Using Descale Solution: Follow the instructions provided by the manufacturer of your coffee machine. They may recommend a specific descaling solution designed for your machine. These solutions are typically sold in pre-measured packets or bottles. You can simply mix the recommended amount with water as instructed.
- Using White Vinegar: If you prefer a natural alternative, you can use white vinegar to create a descale solution. Mix equal parts of white vinegar and water to create a vinegar-water solution. For example, if you use 1 cup of vinegar, mix it with 1 cup of water.
Both options effectively break down mineral deposits and limescale buildup, restoring the performance of your machine. However, it’s important to note that some machines may recommend using a specific descaling solution to avoid any potential damage or interference with the machine’s components.
Once you have prepared the descale solution, carefully pour it into the water reservoir as instructed by the manufacturer. Ensure that the descale solution is properly mixed and evenly distributed within the reservoir.
Now that we have a descale solution ready, we can proceed to the next step in the descaling process: running the descale cycle. This process will effectively remove mineral deposits and limescale buildup, ensuring the optimal performance of your pod coffee machine.
Running the Descale Cycle
Running the descale cycle is a crucial step in the descaling process of your pod coffee machine. This cycle allows the descale solution to flow through the internal components of the machine, effectively breaking down and removing mineral deposits and limescale buildup.
Follow these steps to run the descale cycle on your pod coffee machine:
- Start with a Clean Machine: Ensure that your machine is free from any used pods or capsules, and the water reservoir is filled with the descale solution prepared in the correct dilution ratio.
- Select the Descale Mode or Program: Check the instruction manual of your coffee machine for specific descale mode instructions. Some machines have a dedicated descale mode or program, while others may have prompts that guide you through the process.
- Activate the Descale Cycle: Depending on your machine, you may need to press a specific button or follow a series of prompts to activate the descale cycle. Follow the manufacturer’s instructions carefully to ensure a successful descaling process.
- Let the Machine Run the Cycle: Allow the machine to complete the descale cycle, ensuring that the descale solution flows through all the internal components. The duration of the descale cycle may vary depending on the machine model.
- Empty and Rinse the Reservoir: Once the descale cycle is complete, carefully empty the water reservoir. Rinse it thoroughly with clean water to remove any traces of the descale solution and potential residue.
It’s important to note that during the descale cycle, the machine may dispense the descale solution through the brew head, similar to a regular brewing cycle. This process helps clean the internal components and ensure the removal of mineral deposits and limescale buildup.
Remember to always follow the manufacturer’s instructions for the descale cycle and pay attention to any specific prompts or recommendations.
Now that the descale cycle is complete, we can proceed to the next step in the cleaning process: cleaning the drip tray and pod holder.
Step 5: Cleaning the Drip Tray and Pod Holder
As you continue to clean your pod coffee machine, it’s important to give attention to the drip tray and pod holder. These components can collect residue, coffee grounds, and moisture over time, which can lead to a buildup of bacteria or affect the flavor of your coffee. Cleaning these parts regularly ensures optimal cleanliness and performance of your machine.
Follow these steps to effectively clean the drip tray and pod holder:
- Remove the Drip Tray and Pod Holder: Most machines have removable drip trays and pod holders. Carefully remove these components from the machine, being cautious of any liquid that may have accumulated.
- Empty and Discard the Contents: Dispose of any liquid in the drip tray and remove any used coffee pods or capsules in the pod holder. Discard the pods according to the manufacturer’s instructions.
- Wash with Warm, Soapy Water: Fill your sink or a basin with warm water and mild dish soap. Submerge the drip tray and pod holder in the soapy water and clean them using a sponge or cloth. Pay attention to any stains, residue, or coffee grounds that may have accumulated and gently scrub to remove them.
- Rinse and Dry: After cleaning, rinse both the drip tray and pod holder with clean water to remove any traces of soap. Dry them thoroughly using a clean towel or let them air dry before placing them back into the machine.
Regularly cleaning the drip tray and pod holder not only maintains the cleanliness of your machine but also prevents any potential contamination or undesired flavors in your coffee. It ensures that these components are free from any residue or moisture that can affect the performance and quality of your brews.
Now that the drip tray and pod holder are clean, we can move on to the next step in the cleaning process: cleaning the brewing chamber.
Step 6: Cleaning the Brewing Chamber
The brewing chamber of your pod coffee machine is where the magic happens. It’s where the water and coffee come together to create your perfect cup of java. Cleaning the brewing chamber is crucial to maintain the taste, quality, and performance of your machine.
Follow these steps to effectively clean the brewing chamber of your pod coffee machine:
- Unplug the Machine: Before you start cleaning the brewing chamber, make sure your pod coffee machine is unplugged to ensure safety.
- Remove the Used Pod: Ensure there are no pods or capsules present in the brewing chamber. Discard any used pods according to the manufacturer’s instructions.
- Dampen a Clean Cloth or Sponge: Dampen a clean cloth or sponge with warm water. Make sure it is not soaking wet, as excessive moisture can damage the machine.
- Clean the Brewing Chamber: Gently wipe the interior surfaces of the brewing chamber using the damp cloth or sponge. Pay attention to any coffee grounds or residue that may be present. Be careful around the delicate components to avoid causing any damage.
- Remove Stubborn Stains or Buildup: For any stubborn stains or buildup, you can use a soft-bristled brush, such as a toothbrush, to gently scrub the affected areas. Use a circular motion to loosen the residue. Avoid using harsh cleaning agents or rough brushes that may damage the surfaces.
- Wipe Down the Exterior: After cleaning the brewing chamber, wipe down the exterior surfaces of the machine, ensuring that no moisture or residue remains.
Cleaning the brewing chamber regularly removes any leftover coffee grounds, oils, or residue that can accumulate and affect the taste of your coffee. It also helps prevent clogs and ensures the smooth operation of your machine.
Now that the brewing chamber is clean, we can move on to the final step in the cleaning process: rinsing and deodorizing the machine.
Step 7: Rinsing and Deodorizing
After completing the cleaning process for your pod coffee machine, it’s important to perform a final rinse to remove any remaining cleaning solutions or residue. Additionally, deodorizing the machine helps eliminate any lingering smells and maintain a fresh and pleasant brewing environment.
Follow these steps to effectively rinse and deodorize your pod coffee machine:
- Unplug the Machine: Ensure that your pod coffee machine is unplugged before you begin rinsing and deodorizing.
- Fill the Water Reservoir: Fill the water reservoir with fresh, clean water. Make sure not to overfill and follow the maximum fill line indicated on the reservoir.
- Run Multiple Rinsing Cycles: Run several cycles of water through the machine to thoroughly rinse away any remaining cleaning solution or residue. This ensures that your coffee will not be affected by any traces of cleaning agents.
- Deodorize with Lemon or Baking Soda: For deodorizing, you can use natural agents such as lemon or baking soda. Cut a fresh lemon into slices or mix baking soda with water to create a paste. Rub the lemon slices or apply the baking soda paste on the surfaces of the machine, including the brewing chamber, exterior, and any removable parts. This helps neutralize odors and leaves a fresh scent.
- Wipe and Dry: After deodorizing, use a clean, damp cloth to wipe away any residue from the lemon or baking soda. Follow it up with a dry cloth to ensure that all surfaces are completely dry.
Rinsing and deodorizing your pod coffee machine at the end of the cleaning process ensures that it is free from any cleaning agents and maintains a fresh aroma for the best coffee experience.
Now that you have completed all the steps in the cleaning process, your pod coffee machine is clean, refreshed, and ready to brew your next delicious cup of coffee!
Remember to refer to the manufacturer’s instructions for specific cleaning recommendations and maintenance schedules to keep your machine in optimal condition.
Conclusion
Cleaning your pod coffee machine is an essential task that ensures the longevity, performance, and quality of your machine. By following the step-by-step guide outlined in this article, you can effectively clean and maintain your pod coffee machine to enjoy consistently great-tasting coffee.
Understanding the cleaning process and gathering the necessary supplies are the first steps in keeping your machine in top shape. Emptying the reservoir and discarding used pods sets the foundation for a thorough cleaning. Cleaning the exterior surfaces, descaling the machine, and cleaning the drip tray and pod holder help remove residue, mineral deposits, and coffee grounds.
Taking the time to clean the brewing chamber ensures that every cup of coffee is brewed with freshness and without any lingering residues. Finally, rinsing and deodorizing the machine provide the finishing touch, leaving your machine clean, refreshed, and ready to brew the perfect cup of coffee.
Regular cleaning of your pod coffee machine, especially descaling, helps maintain the performance and longevity of the machine. It ensures that your coffee is flavorful and free from any unwanted tastes or odors caused by buildup or residue.
Remember to consult your machine’s manufacturer instructions for specific cleaning recommendations and schedules. Each machine may have slight variations in the cleaning process, and it’s important to follow the guidelines provided by the manufacturer to avoid any potential damage.
By incorporating regular cleaning into your coffee routine, you can enjoy a consistently great cup of coffee, extend the lifespan of your pod coffee machine, and start each day with a refreshing and satisfying brew.
Frequently Asked Questions about How To Clean A Pod Coffee Machine
Was this page helpful?
At Storables.com, we guarantee accurate and reliable information. Our content, validated by Expert Board Contributors, is crafted following stringent Editorial Policies. We're committed to providing you with well-researched, expert-backed insights for all your informational needs.


0 thoughts on “How To Clean A Pod Coffee Machine”