Articles
How To Compost On A Balcony
Modified: October 20, 2024
Discover the best tips and tricks for composting on your balcony with our informative articles. Start reducing waste and growing your own plants today!
(Many of the links in this article redirect to a specific reviewed product. Your purchase of these products through affiliate links helps to generate commission for Storables.com, at no extra cost. Learn more)
Introduction
Welcome to the world of balcony composting! Composting is a sustainable practice that helps reduce waste, enrich the soil, and promote a healthier planet. But what if you don’t have a backyard or large outdoor space? Don’t worry – you can still compost on your balcony!
Balcony composting is a great solution for urban dwellers, apartment dwellers, or anyone with limited outdoor space. It allows you to turn your kitchen scraps and organic waste into nutrient-rich compost, right from the comfort of your balcony.
Composting on a balcony is not only practical but also a rewarding experience. You can witness the transformation of your food scraps into black gold – a valuable soil amendment that improves plant growth and nourishes your garden.
In this article, we will explore the benefits of composting on a balcony, discuss various composting methods suitable for small spaces, guide you through the process of setting up a composting bin on your balcony, and provide tips for managing and troubleshooting your composting system.
Whether you are an experienced gardener looking to optimize your space or a beginner eager to embark on a sustainable journey, balcony composting is a fantastic option that allows you to contribute to a greener future while reaping the benefits of nutrient-rich soil.
So, let’s roll up our sleeves, don our gardening gloves, and dive into the wonderful world of composting on a balcony!
Key Takeaways:
- Balcony composting offers urban dwellers a sustainable solution to reduce waste, enrich soil, and promote plant growth, contributing to a greener future and healthier planet.
- By embracing balcony composting, you can transform kitchen scraps into nutrient-rich compost, save money on store-bought fertilizers, and actively contribute to a more balanced and harmonious ecosystem.
Read more: How To Grow Tomatoes On Balcony
Benefits of Composting on a Balcony
Composting on a balcony offers numerous benefits, making it a practical and sustainable solution for those with limited outdoor space. Here are some of the key advantages of balcony composting:
- Reduced Waste: Balcony composting allows you to divert organic waste from the landfill. By composting your kitchen scraps and other organic materials, you can significantly reduce the amount of waste that ends up in the trash. This not only helps the environment but also reduces your carbon footprint.
- Nutrient-Rich Soil Amendment: Composting transforms your food scraps into nutrient-rich compost, often referred to as “black gold.” This compost is a valuable soil amendment that provides essential nutrients to plants, improving their growth and overall health. By composting on your balcony, you can create a sustainable source of organic fertilizer for your potted plants and garden.
- Improved Soil Structure: The addition of compost to the soil helps improve its structure. It adds organic matter, which enhances the soil’s ability to hold moisture, increases drainage, and promotes aeration. This, in turn, creates a healthier growing environment for your plants.
- Enriched Plant Growth: When you use compost in your balcony garden, you’ll notice improved plant growth and productivity. The nutrients present in compost are released slowly, providing a steady supply of nourishment to your plants. This leads to healthier foliage, stronger root systems, and higher yields.
- Cost Savings: By composting on your balcony, you can save money on store-bought fertilizers and soil amendments. Instead of purchasing these products, you can create your own high-quality compost using kitchen scraps and other organic materials that would otherwise be discarded.
- Environmental Benefits: Composting is an eco-friendly practice that helps reduce greenhouse gas emissions. When organic waste breaks down in landfills, it produces methane, a potent greenhouse gas. However, by composting your organic waste, you can mitigate these emissions and contribute to a healthier environment.
As you can see, balcony composting has numerous benefits that go beyond simply reducing waste. From enriching soil fertility to saving money and helping the environment, composting on a balcony is a win-win situation for both you and the planet.
Choosing the Right Composting Method
When it comes to balcony composting, there are several methods you can choose from. Each method has its own advantages and considerations, so it’s important to select the one that best suits your space, lifestyle, and preferences. Here are a few popular composting methods for balconies:
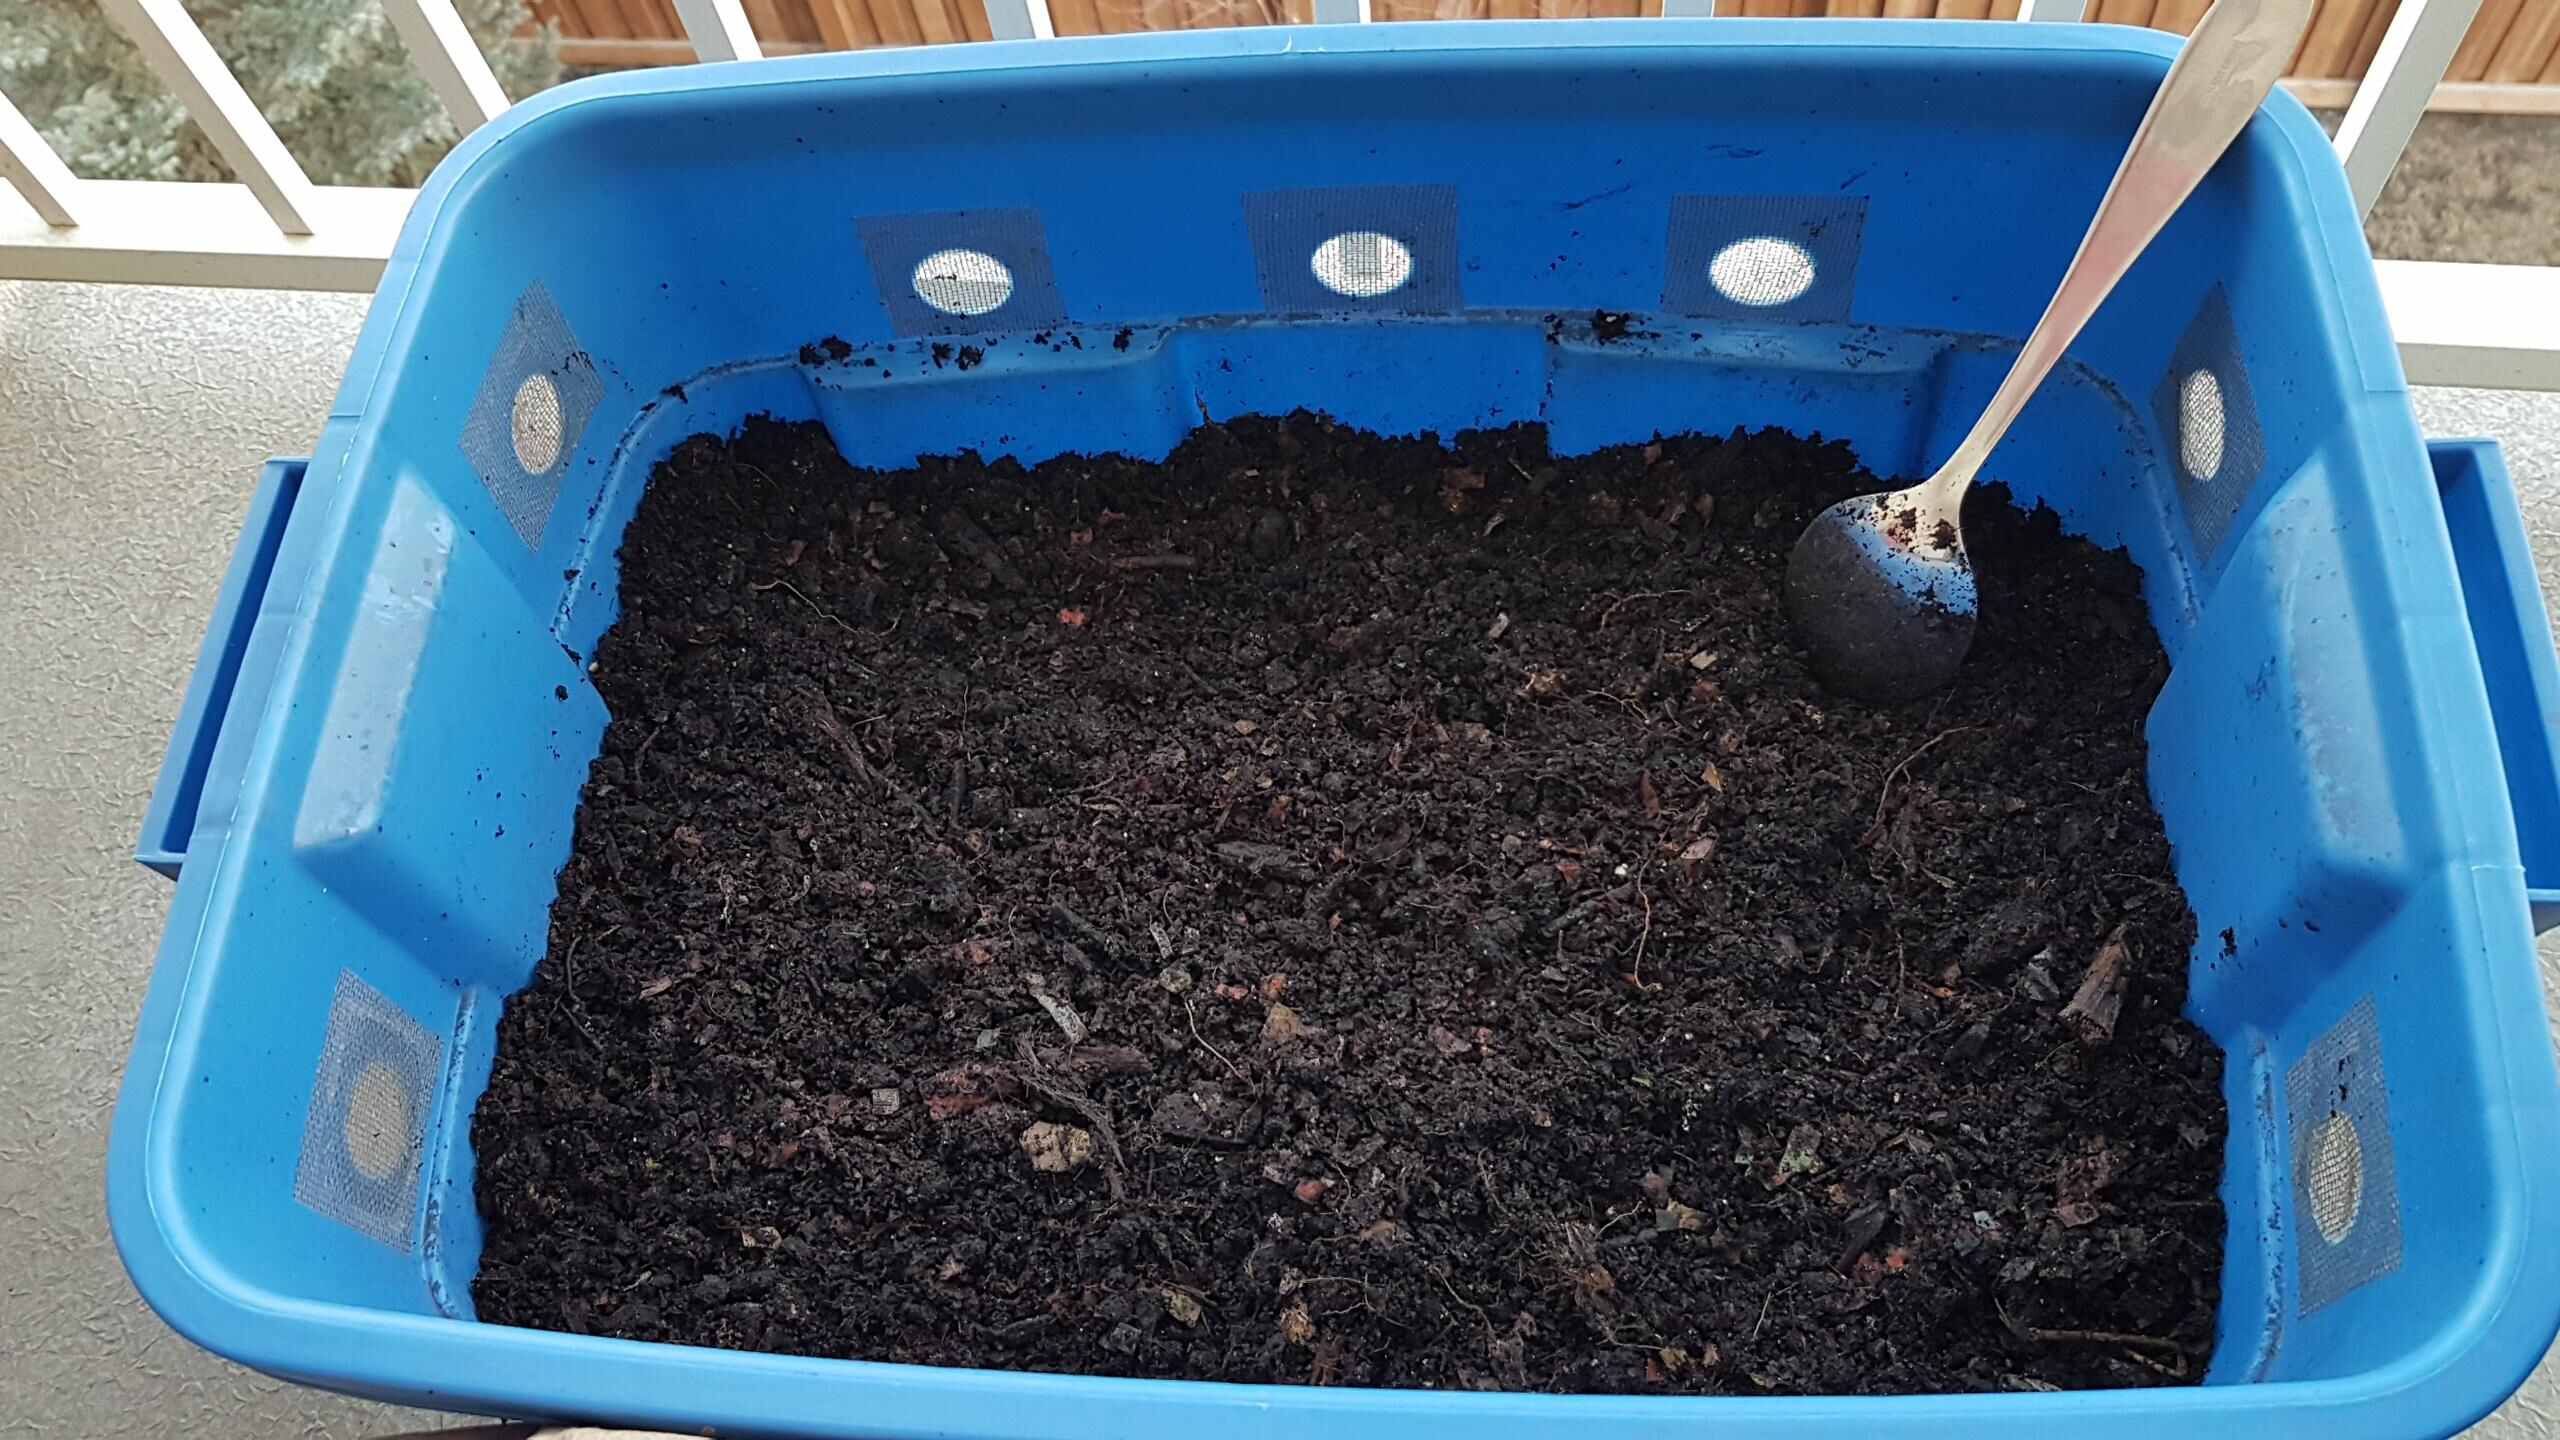
- Bin or Tumbler Composting: This method involves using a composting bin or tumbler specifically designed for small spaces. These containers are compact, usually made of plastic or metal, and have a lid to keep pests out. In bin composting, you add your kitchen scraps and organic materials to the bin, mix them occasionally, and wait for the composting process to occur. Tumblers provide the added convenience of easy turning, which speeds up the decomposition process.
- Vermicomposting: Vermicomposting is the process of using worms, typically red wigglers, to break down organic waste into nutrient-rich compost. A small worm bin can be easily accommodated on a balcony. The worms consume the kitchen scraps and the resulting worm castings, or vermicompost, make excellent fertilizer for plants.
- Bokashi Composting: Bokashi composting is a fermentation process that utilizes beneficial microorganisms to break down organic matter. It involves layering kitchen scraps with a bokashi bran mixture in an airtight container. This method is especially suitable for those who want to compost meat, dairy, and cooked food waste, which may not be suitable for other composting methods. Once the fermentation process is complete, the material can be buried in the soil or added to a traditional compost pile to complete the decomposition.
- Composting with Worms and Microbes: This method combines vermiculture (using worms) and aerobic microbial composting. By creating a dual-composting system, with a worm bin and a separate compost bin or pile, you can compost a wider range of materials and accelerate the decomposition process. The worms help break down organic matter, while the microbial composting in the traditional bin or pile provides additional decomposition.
When choosing the right composting method for your balcony, consider factors such as space availability, desired composting speed, maintenance requirements, and the types of organic waste you generate. Each method has its own set of pros and cons, so take the time to research and select the method that aligns with your needs and preferences.
Remember, regardless of the method you choose, proper moisture and aeration are crucial for successful composting. Turning or mixing your compost regularly, adding a balance of green and brown materials, and monitoring moisture levels will help ensure a healthy and productive composting system.
Now that you have a better understanding of the different composting methods available, you can determine which one suits your balcony and lifestyle. Next, let’s explore the materials you’ll need to get started with balcony composting.
Materials Needed for Balcony Composting
Before diving into balcony composting, it’s essential to gather the necessary materials. Having the right tools and supplies ensures a more efficient and successful composting process. Here are the key materials you’ll need for balcony composting:
- Composting Bin or Tumbler: Depending on the method you choose, you’ll need a composting bin or tumbler. Look for a container specifically designed for small spaces, such as a compact plastic bin or a tumbler with a rotating mechanism. Ensure it has a lid to keep pests out and allow for proper aeration.
- Composting Worms (for vermicomposting): If you opt for vermicomposting, you’ll need to purchase composting worms. The most common species used for vermicomposting is the red wiggler (Eisenia fetida). These worms are highly efficient at breaking down organic waste and can be purchased online or at local garden centers.
- Brown Materials: Brown materials, also known as carbon-rich materials, are essential for balancing the carbon-to-nitrogen ratio in your compost. Gather materials such as dried leaves, shredded newspaper, cardboard, or straw. These brown materials provide structure, absorb moisture, and prevent the compost from becoming too wet or smelly.
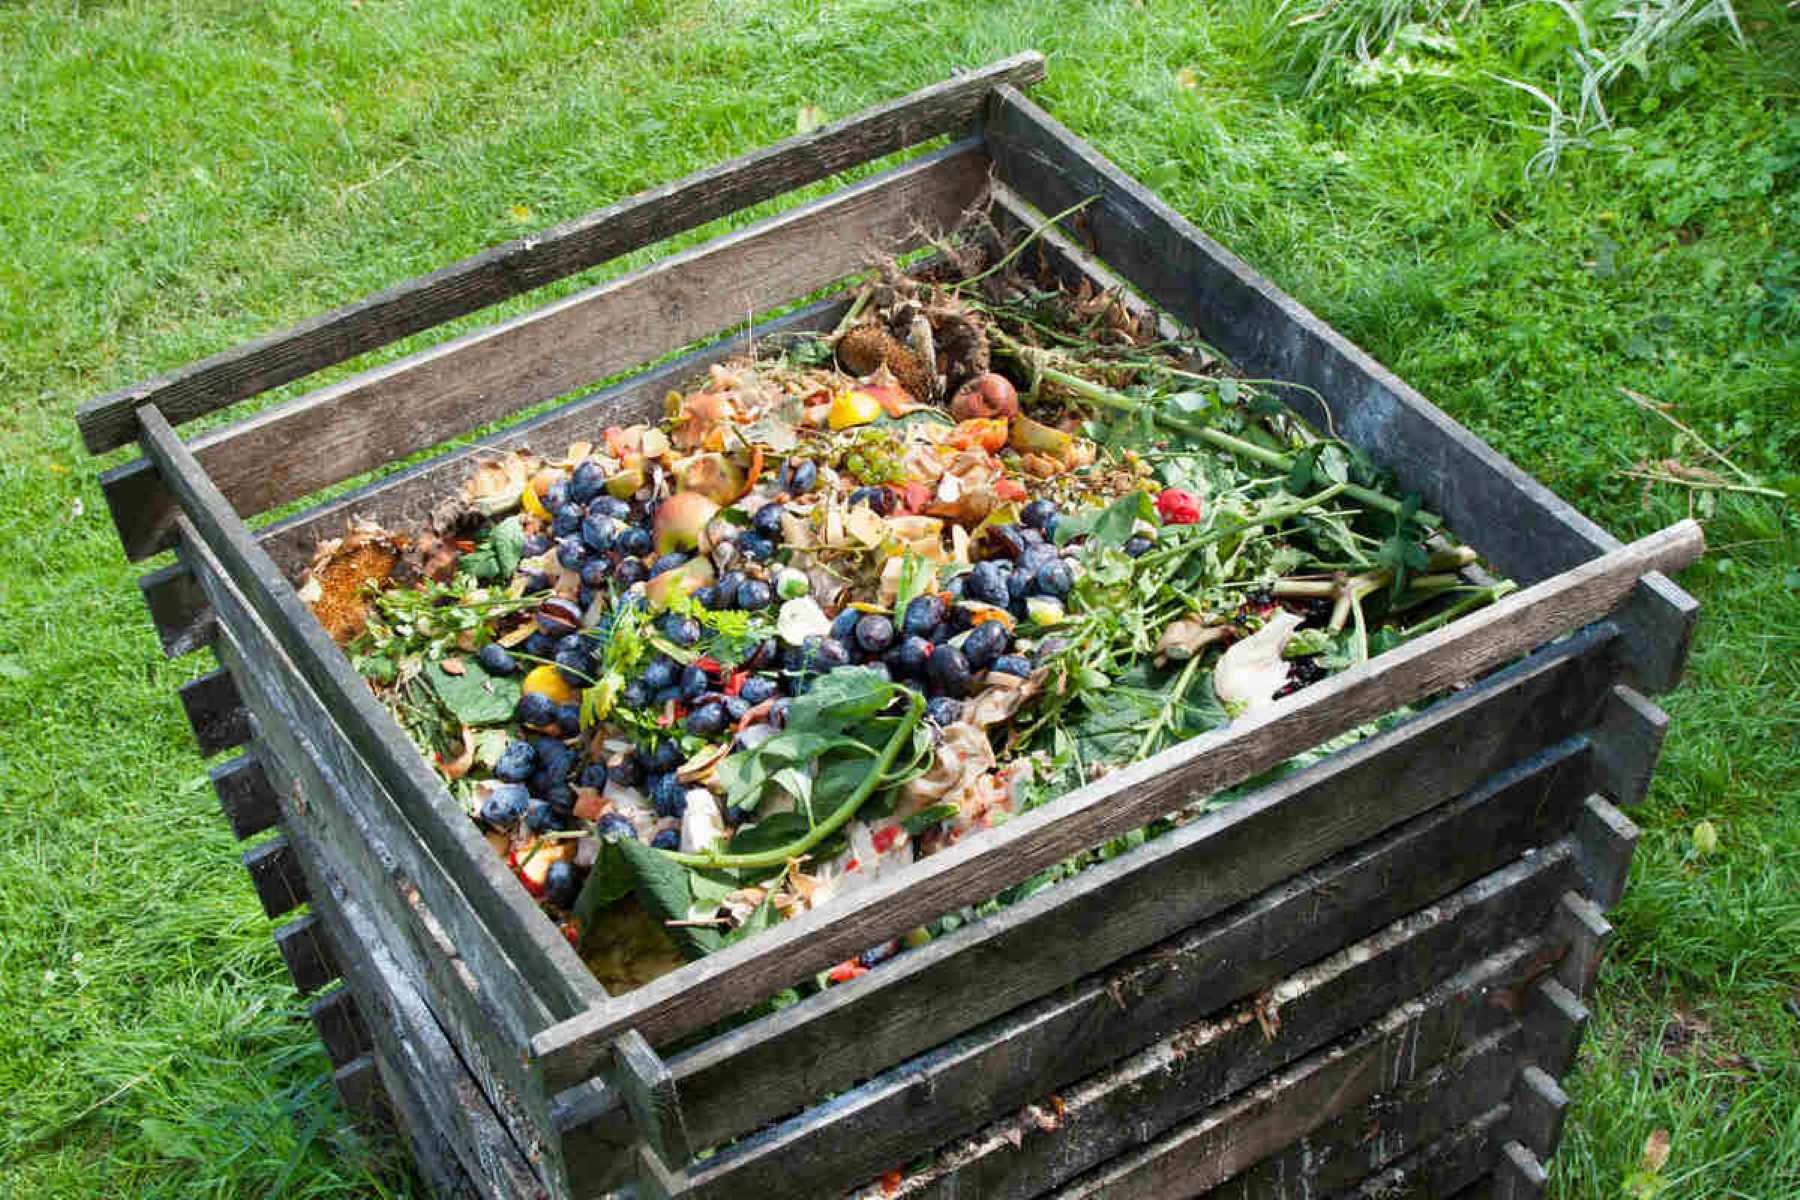
- Green Materials: Green materials, rich in nitrogen, include vegetable scraps, fruit peels, coffee grounds, tea bags, and grass clippings. These materials provide essential nutrients for the composting process. It’s important to chop or shred larger green materials to facilitate faster decomposition.
- Air Holes: Ensure the composting bin or tumbler has sufficient air holes or ventilation to allow for proper aeration. This helps the composting process and prevents unpleasant odors. If necessary, you can drill additional holes in the container to improve airflow.
- Moisture Control: Composting requires the right amount of moisture to support decomposition. Keep a spray bottle or watering can handy to moisten the compost as needed. Aim for a moist, but not overly wet, compost pile. A moisture level similar to a wrung-out sponge is ideal.
- Kitchen Compost Bucket or Pail: To collect kitchen scraps conveniently, use a small compost bucket or pail with a lid. This will help prevent odors and fruit fly infestations. Empty the contents of this container into your balcony composting bin regularly.
- Gloves and Composting Tools: It’s helpful to have a pair of gardening gloves to protect your hands while handling compost materials. Additionally, having a composting fork, shovel, or trowel can make turning the compost easier and more efficient.
- Composting Guide or Resource: It can be beneficial to have a composting guide or resource handy, especially if you’re new to composting. This can be in the form of a book, online resource, or a trusted gardening website that provides detailed instructions and troubleshooting tips.
Gathering these materials before starting your balcony composting journey will make the process smoother and more enjoyable. With everything in place, you’re ready to set up your composting bin on your balcony, which we’ll explore in the next section.
Setting up a Composting Bin on a Balcony
Setting up a composting bin on your balcony is a simple and rewarding process. With the right setup, you can efficiently transform your organic waste into nutrient-rich compost. Follow these steps to get started:
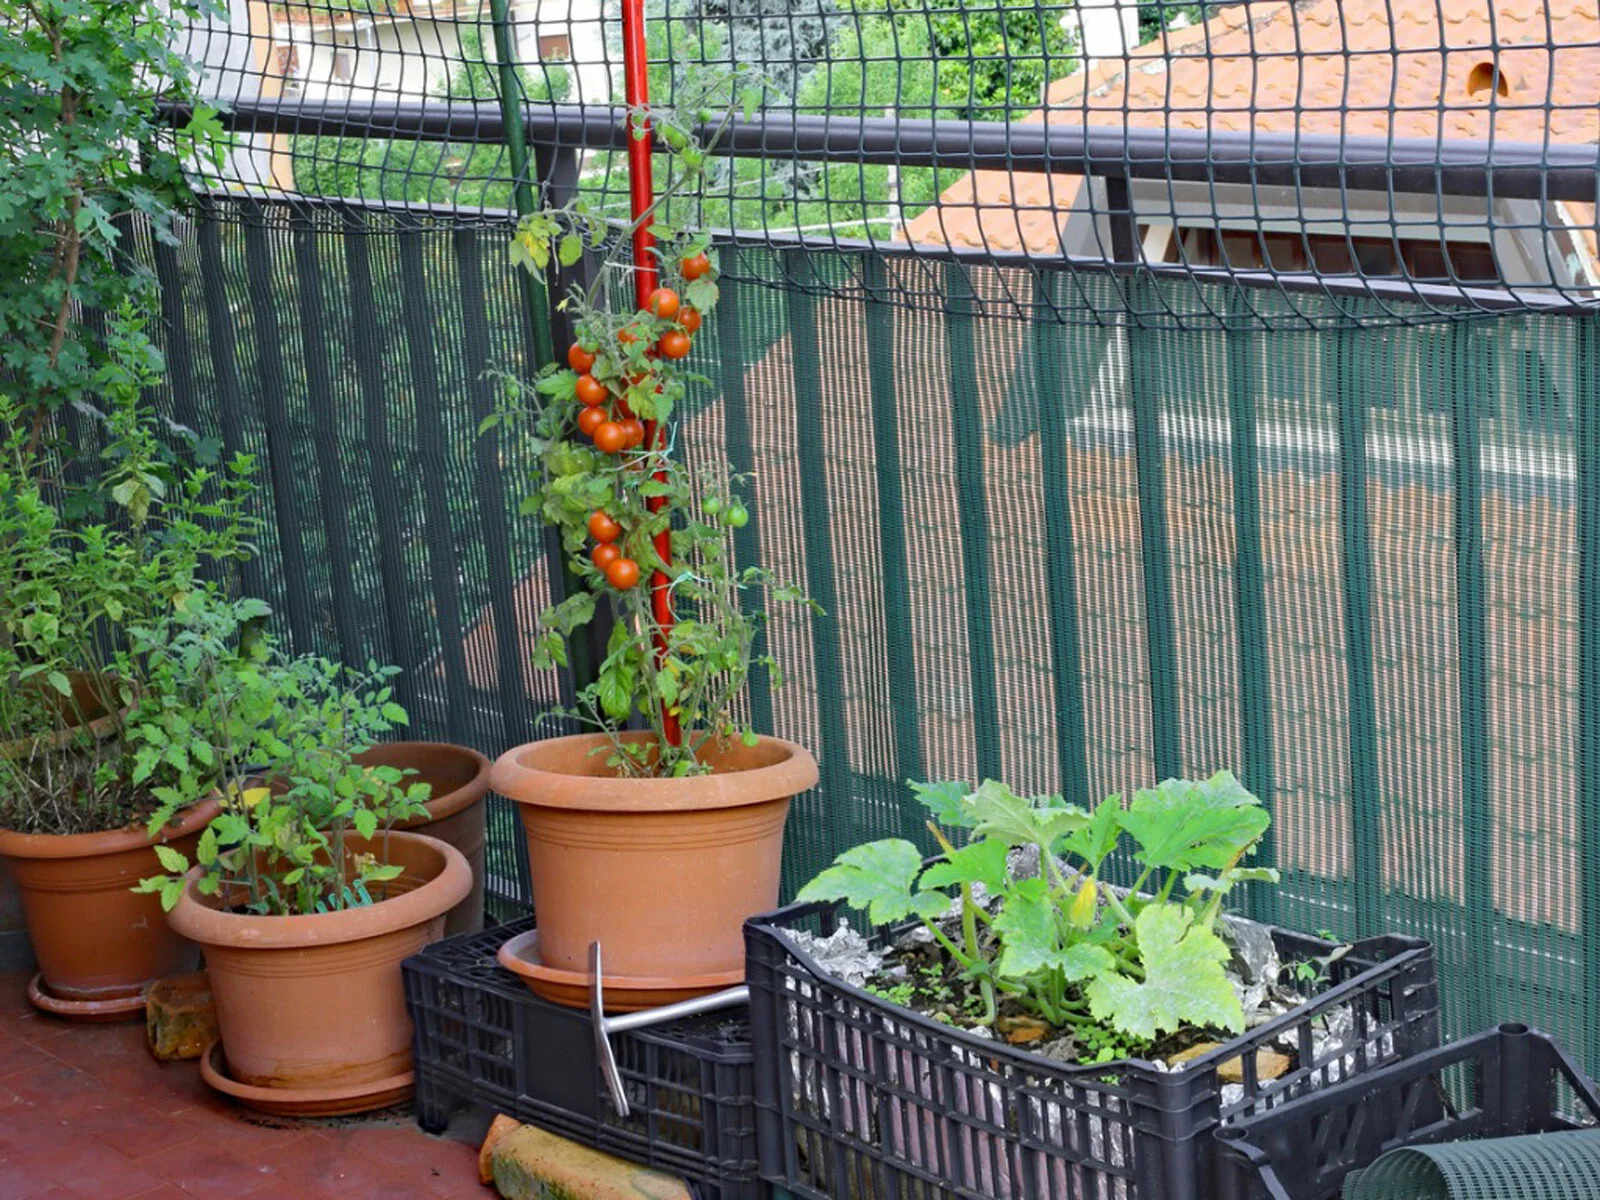
- Choose the Right Location: Select a suitable location on your balcony for the composting bin. Ensure it is easily accessible and away from direct sunlight or extreme weather conditions. A shady area is ideal, as it helps maintain optimal moisture levels in the compost.
- Set Up the Bin: If using a composting bin, assemble it according to the manufacturer’s instructions. Ensure the bin has a sturdy base and a lid that can be securely closed to keep pests out.
- Add Drainage Materials: To prevent excess moisture buildup, add a layer of drainage materials at the bottom of the composting bin. This can be small rocks, gravel, or a layer of twigs. This layer will help facilitate proper drainage and prevent waterlogged compost.
- Add Brown Materials: Begin layering your compost bin with a thick layer of brown materials. This provides structure, promotes aeration, and helps balance the carbon-to-nitrogen ratio. Aim for a layer that is about 4-6 inches in depth.
- Add Green Materials: On top of the brown materials, add a layer of green materials such as vegetable scraps, fruit peels, and coffee grounds. Be sure to chop or break up larger green materials to facilitate faster decomposition.
- Moisten the Layers: Sprinkle water over the layers as you add them. Aim for a moist, but not soggy, consistency. The materials should be damp, similar to a wrung-out sponge. This will provide the ideal environment for compost microorganisms to thrive.
- Continue Layering: Alternate between brown and green materials, ensuring you maintain the right balance. Add more layers until the bin is full or until you have run out of materials.
- Cover and Monitor: Once the bin is full, cover it with a lid to retain moisture and heat. Regularly monitor the compost for moisture levels and, if necessary, adjust by adding water or more brown materials.
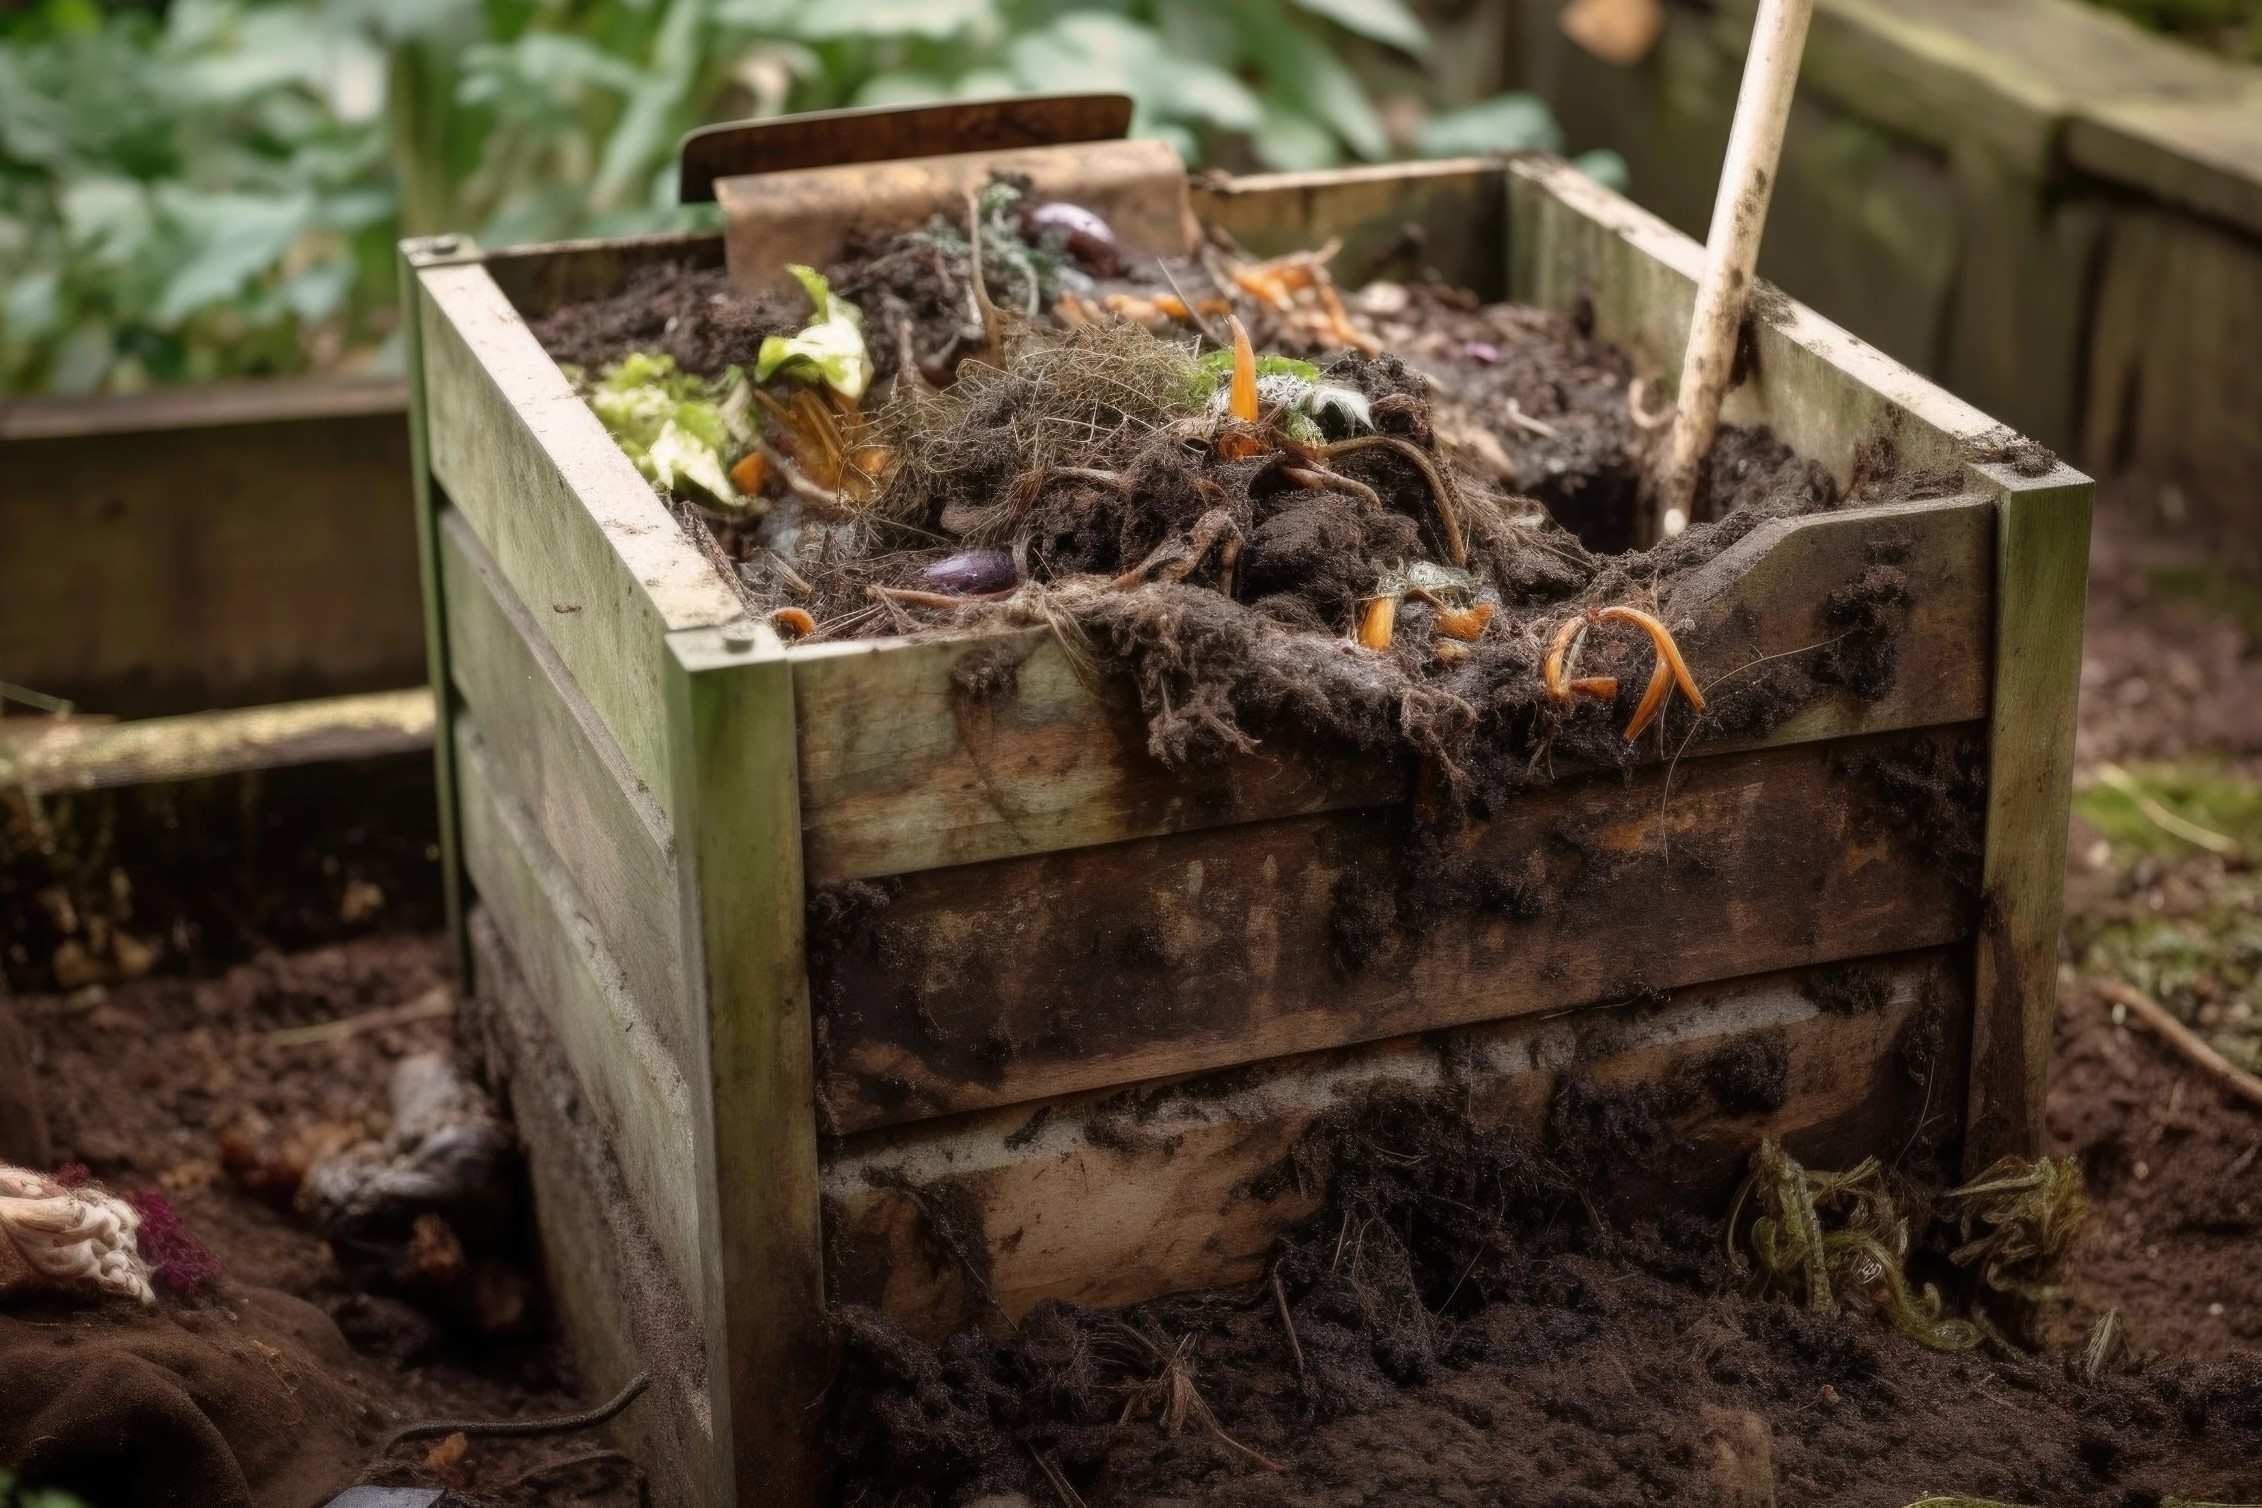
- Turn the Compost: After a few weeks, use a composting fork or shovel to turn the compost. This helps aerate the pile, promotes decomposition, and prevents the formation of odors. Aim to turn the compost every few weeks to expedite the composting process.
- Patience and Time: Composting is a process that takes time, typically several months to a year, depending on the methods used and environmental factors. Be patient and allow nature to do its work. As time passes, you’ll start to see the transformation of your organic waste into nutrient-rich compost.
By following these steps, you can successfully set up a composting bin on your balcony. Remember to regularly monitor and tend to your compost, adjusting moisture levels and turning it as needed. With a little dedication and patience, you will soon have a rich and fertile compost to use in your garden.
Next, let’s explore how to effectively manage the composting process on your balcony.
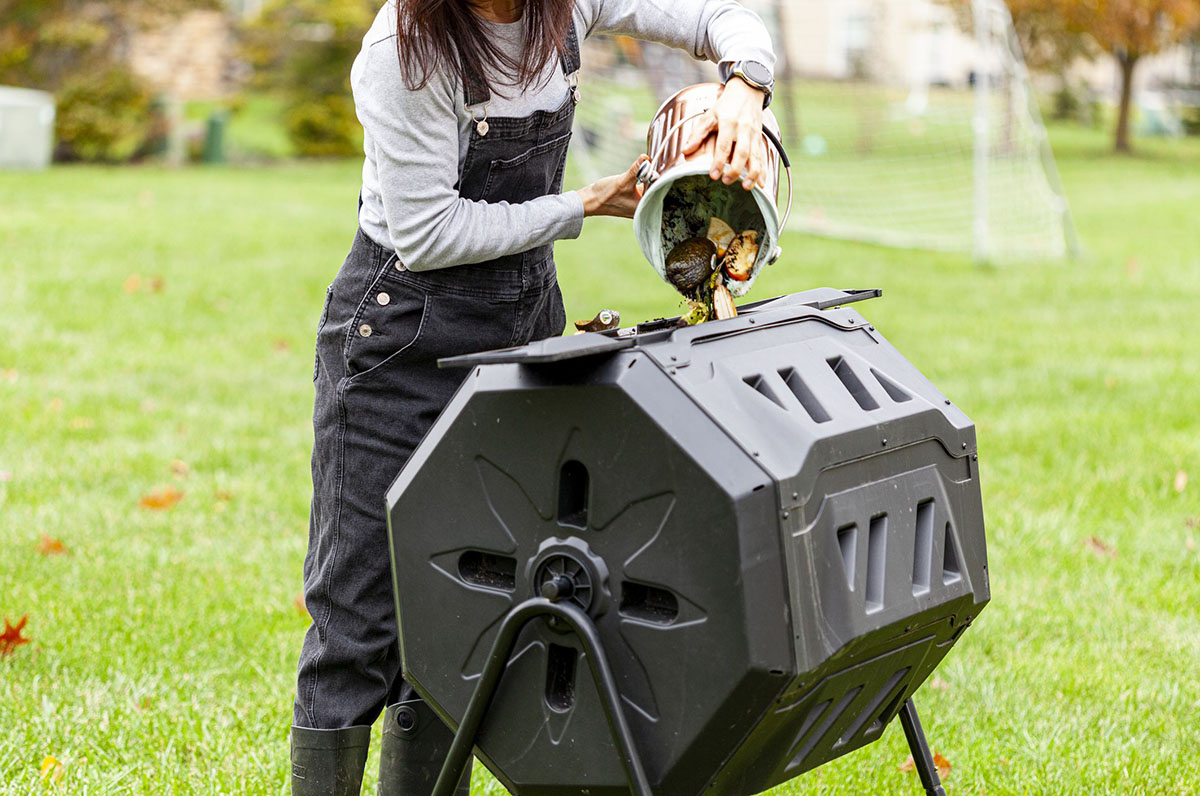
Use a small, lidded bin to collect kitchen scraps like fruit and vegetable peels. Layer with dry materials like shredded paper or leaves. Turn the compost regularly to aerate.
Read more: How To Have A Garden On A Balcony
Managing the Composting Process
Managing the composting process is crucial for successful balcony composting. With proper care and attention, you can ensure that your compost breaks down efficiently and transforms into nutrient-rich humus. Here are some tips to help you effectively manage your compost:
- Monitor Moisture Levels: Regularly check the moisture content of your compost. It should be moist, similar to a wrung-out sponge, but not overly wet or dry. Adjust the moisture levels by adding water if it’s too dry or incorporating dry brown materials if it’s too wet.
- Mix and Turn the Compost: Turn your compost pile or give it a good mix to promote aeration and decomposition. This helps distribute heat, oxygen, and beneficial microorganisms throughout the pile. Turning the compost every few weeks will expedite the process and discourage the formation of odors.
- Balance Green and Brown Materials: Achieve a balanced carbon-to-nitrogen ratio by maintaining a good mix of green and brown materials. Greens provide nitrogen, while browns provide carbon. Aim for roughly equal volumes of each to ensure optimal decomposition. If your compost smells unpleasant, add more brown materials to balance it out.
- Avoid Non-Compostable Items: Remember to exclude any non-compostable items from your balcony compost. This includes meat, dairy, oils, fats, pet waste, and heavily processed or treated materials. These items can attract pests, produce odors, and disrupt the composting process.
- Chop or Shred Large Materials: Breaking down larger organic materials into smaller pieces helps speed up the composting process. Chop or shred large kitchen scraps and garden clippings to facilitate quicker decomposition and prevent the formation of clumps in your compost pile.
- Minimize Pest Issues: To deter pests from your compost, avoid adding food items with strong odors that could attract unwanted animals or insects. Ensure that your compost bin has a secure lid to keep pests out. If you notice pest activity, consider burying food scraps deeper into the compost pile.
- Patience and Time: Composting is a natural process that takes time. Be patient and allow the microorganisms to work their magic. Depending on the composting method and environmental conditions, it can take several months to a year for your compost to fully mature.
- Harvesting Finished Compost: Once your compost has fully decomposed and resembles dark, crumbly soil, it’s time to harvest it. Use a compost screener or sift the compost through a mesh screen to remove any large particles and obtain a fine, finished product. The harvested compost is ready to be used in your balcony garden or potted plants.
By following these management tips, you can ensure that your composting process runs smoothly and produces high-quality compost. Remember that composting is a continual process, so keep adding materials, maintaining moisture levels, and turning the compost to achieve a steady supply of nutrient-rich compost.
Next, let’s address some common issues that may arise during the balcony composting process and how to troubleshoot them.
Troubleshooting Common Issues
While balcony composting can be a rewarding experience, it’s not uncommon to encounter some challenges along the way. Here are some common issues that may arise during the composting process and how to troubleshoot them:
- Odors: If your compost pile starts to emit unpleasant odors, it may be a sign of too much moisture, improper aeration, or an imbalance of green and brown materials. To fix this issue, check the moisture levels and adjust by adding dry brown materials if it’s too wet. Ensure proper aeration by turning the compost regularly to provide oxygen to the microorganisms. If the imbalance persists, increase the amount of brown materials in the compost.
- Pests: It’s important to keep pests, such as flies or rodents, away from your compost. To deter pests, avoid adding food scraps with strong odors and make sure the compost bin is securely closed. If pests persist, consider burying food scraps deeper into the compost pile or using a pest-resistant composting method, such as bokashi composting.
- Slow Decomposition: If your compost is taking longer than expected to decompose, it may be due to inadequate moisture, lack of aeration, or an imbalance of green and brown materials. Check the moisture levels and adjust as necessary by adding water or dry materials. Ensure sufficient aeration by turning the compost regularly to provide oxygen. If the compost is too dense, add more brown materials to create a balanced carbon-to-nitrogen ratio.
- Poor Drainage: If excess moisture is causing poor drainage in your compost, it may lead to an unpleasant smell or soggy compost. To improve drainage, make sure there is a layer of drainage materials, such as rocks or twigs, at the bottom of your compost bin. You can also add more dry brown materials to absorb excess moisture.
- Unwanted Plant Growth: Sometimes, you may notice unexpected plants growing in your compost, such as weeds or seeds from discarded kitchen scraps. To prevent this, avoid adding mature weeds or plants with seeds to your compost. If weed growth persists, ensure that the compost reaches sufficiently high temperatures during the decomposition process, as this can help kill weed seeds and prevent germination.
- Insufficient Space: If your compost bin is running out of space on your balcony, consider transferring some of the compost to a larger bin or move it to a designated composting area if available. You can also use finished compost in your garden to make room for new materials in the bin.
Remember that composting is a learning process, and it may take some trial and error to find the right balance for your balcony composting system. Don’t be discouraged by setbacks or challenges; use them as opportunities to refine your composting practices and improve your overall composting experience.
Now that you’re familiar with troubleshooting common issues, let’s move on to the next step: harvesting and utilizing your balcony compost.
Harvesting and Using Balcony Compost
Harvesting your balcony compost is an exciting moment as you get to witness the transformation of your organic waste into nutrient-rich humus. Here are the steps to harvest and effectively use your balcony compost:
- Identify Maturity: Look for signs that your compost is fully decomposed and ready for harvest. The compost should have a dark, crumbly texture and an earthy smell. It should resemble rich, fertile soil and no longer bear any resemblance to the original materials you added to the bin.
- Prepare Harvesting Area: Set up a designated area for harvesting your compost. This can be a tarp or a large container to collect the compost as you sift or screen it.
- Sift or Screen the Compost: Use a compost screener or create a simple mesh screen to sift out any larger particles or unfinished materials from the compost. Pass the compost through the screen, breaking apart any clumps to ensure a fine, finished product. The sifted compost will be ready for use in your balcony garden.
- Store Unused Compost: If you have excess compost that you won’t be using immediately, store it in a dry, covered container or bag. Keep it in a cool and dark area until you’re ready to use it. Properly stored compost can remain effective and usable for a long time.
- Utilize Compost as Soil Amendment: Incorporate your harvested compost into your balcony garden or potted plants as a valuable soil amendment. Mix the compost into the existing soil in your pots, window boxes, or raised beds to improve fertility, structure, and nutrient availability. The compost will enhance plant growth, root development, and overall plant health.
- Top Dressing and Mulching: Use compost as a top dressing or mulch around the base of your plants. This helps conserve moisture, suppress weed growth, and provide a slow-release source of nutrients. Spread a thin layer of compost on the soil surface, taking care not to mound it against plant stems to avoid rot or disease issues.
- Compost Tea: Create compost tea by steeping a handful of compost in a bucket of water for a few days. Strain the liquid and use it as a natural, nutrient-rich liquid fertilizer for your plants. Dilute the compost tea with water before applying it to your plants to avoid burning the roots.
- Repeat the Composting Cycle: Once you’ve harvested your compost, you can start the composting cycle anew by preparing a fresh batch of brown and green materials. With a continuous composting process, you’ll have a steady supply of compost for your balcony garden.
By harvesting and effectively using your balcony compost, you are closing the loop of sustainable living. You’re transforming waste into a valuable resource that nourishes your plants and promotes a thriving balcony garden.
Remember, composting is an ever-evolving process, and each harvest brings new knowledge and insights. As you gain experience, fine-tune your composting practices to maximize the benefits and continue to contribute to a greener, more sustainable future.
Now that you’re equipped with the knowledge to successfully compost on your balcony, it’s time to embark on your composting journey and make a positive impact on both your immediate environment and the planet at large.
Conclusion
Congratulations on completing this journey into the world of balcony composting! You’ve learned about the benefits of composting on a balcony, the various composting methods suitable for small spaces, the materials needed, and how to set up and manage a composting bin on your balcony. You’ve also gained insights into troubleshooting common issues and harvesting and using your balcony compost effectively.
Composting on a balcony is a fantastic way to reduce waste, enrich the soil, and contribute to a greener and more sustainable lifestyle. It enables you to transform your kitchen scraps and organic waste into nutrient-rich compost that can be used to nourish your potted plants and balcony garden.
By composting on your balcony, you not only minimize your environmental impact but also save money on fertilizer and contribute to the overall health and productivity of your plants. Composting is a valuable practice that reconnects us to the cycles of nature and helps create a more balanced and harmonious ecosystem, even in the middle of a bustling urban environment.
Throughout this journey, remember to be patient and allow the composting process to naturally unfold. Adjust and fine-tune your composting practices as necessary, focusing on proper moisture, aeration, and the right balance of green and brown materials. With attention and care, you will successfully turn your organic waste into nutrient-rich black gold.
Now that you’re armed with the knowledge and confidence to compost on your balcony, don your gardening gloves, grab your composting materials, and get started. Embrace the magic of composting and watch as your kitchen scraps and organic waste transform into the lifeblood of your flourishing balcony garden.
Thank you for taking this sustainability journey with us. Together, let’s continue making a positive impact on the environment, one compost pile at a time.
Frequently Asked Questions about How To Compost On A Balcony
Was this page helpful?
At Storables.com, we guarantee accurate and reliable information. Our content, validated by Expert Board Contributors, is crafted following stringent Editorial Policies. We're committed to providing you with well-researched, expert-backed insights for all your informational needs.


0 thoughts on “How To Compost On A Balcony”