
Articles
How To Tile A Balcony
Modified: October 20, 2024
Learn how to tile your balcony with our informative articles. Expert tips and step-by-step guides to achieve a beautiful and durable balcony floor.
(Many of the links in this article redirect to a specific reviewed product. Your purchase of these products through affiliate links helps to generate commission for Storables.com, at no extra cost. Learn more)
Introduction
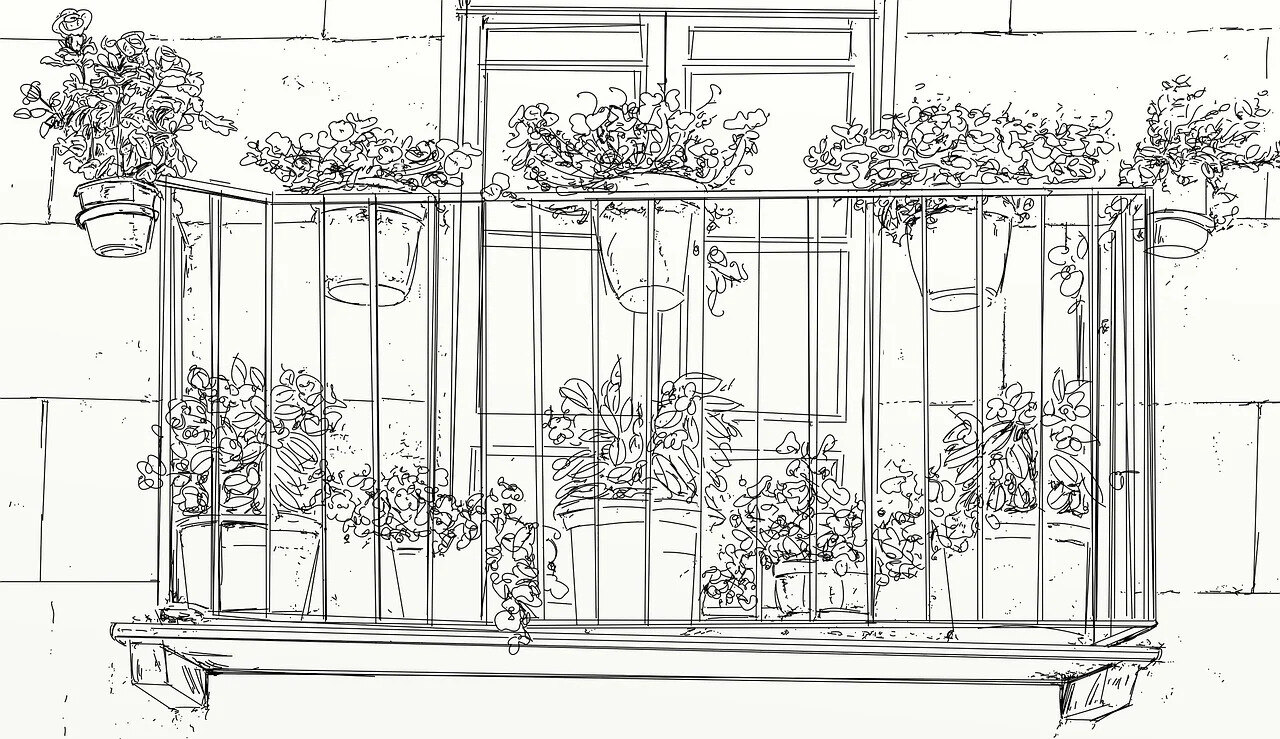
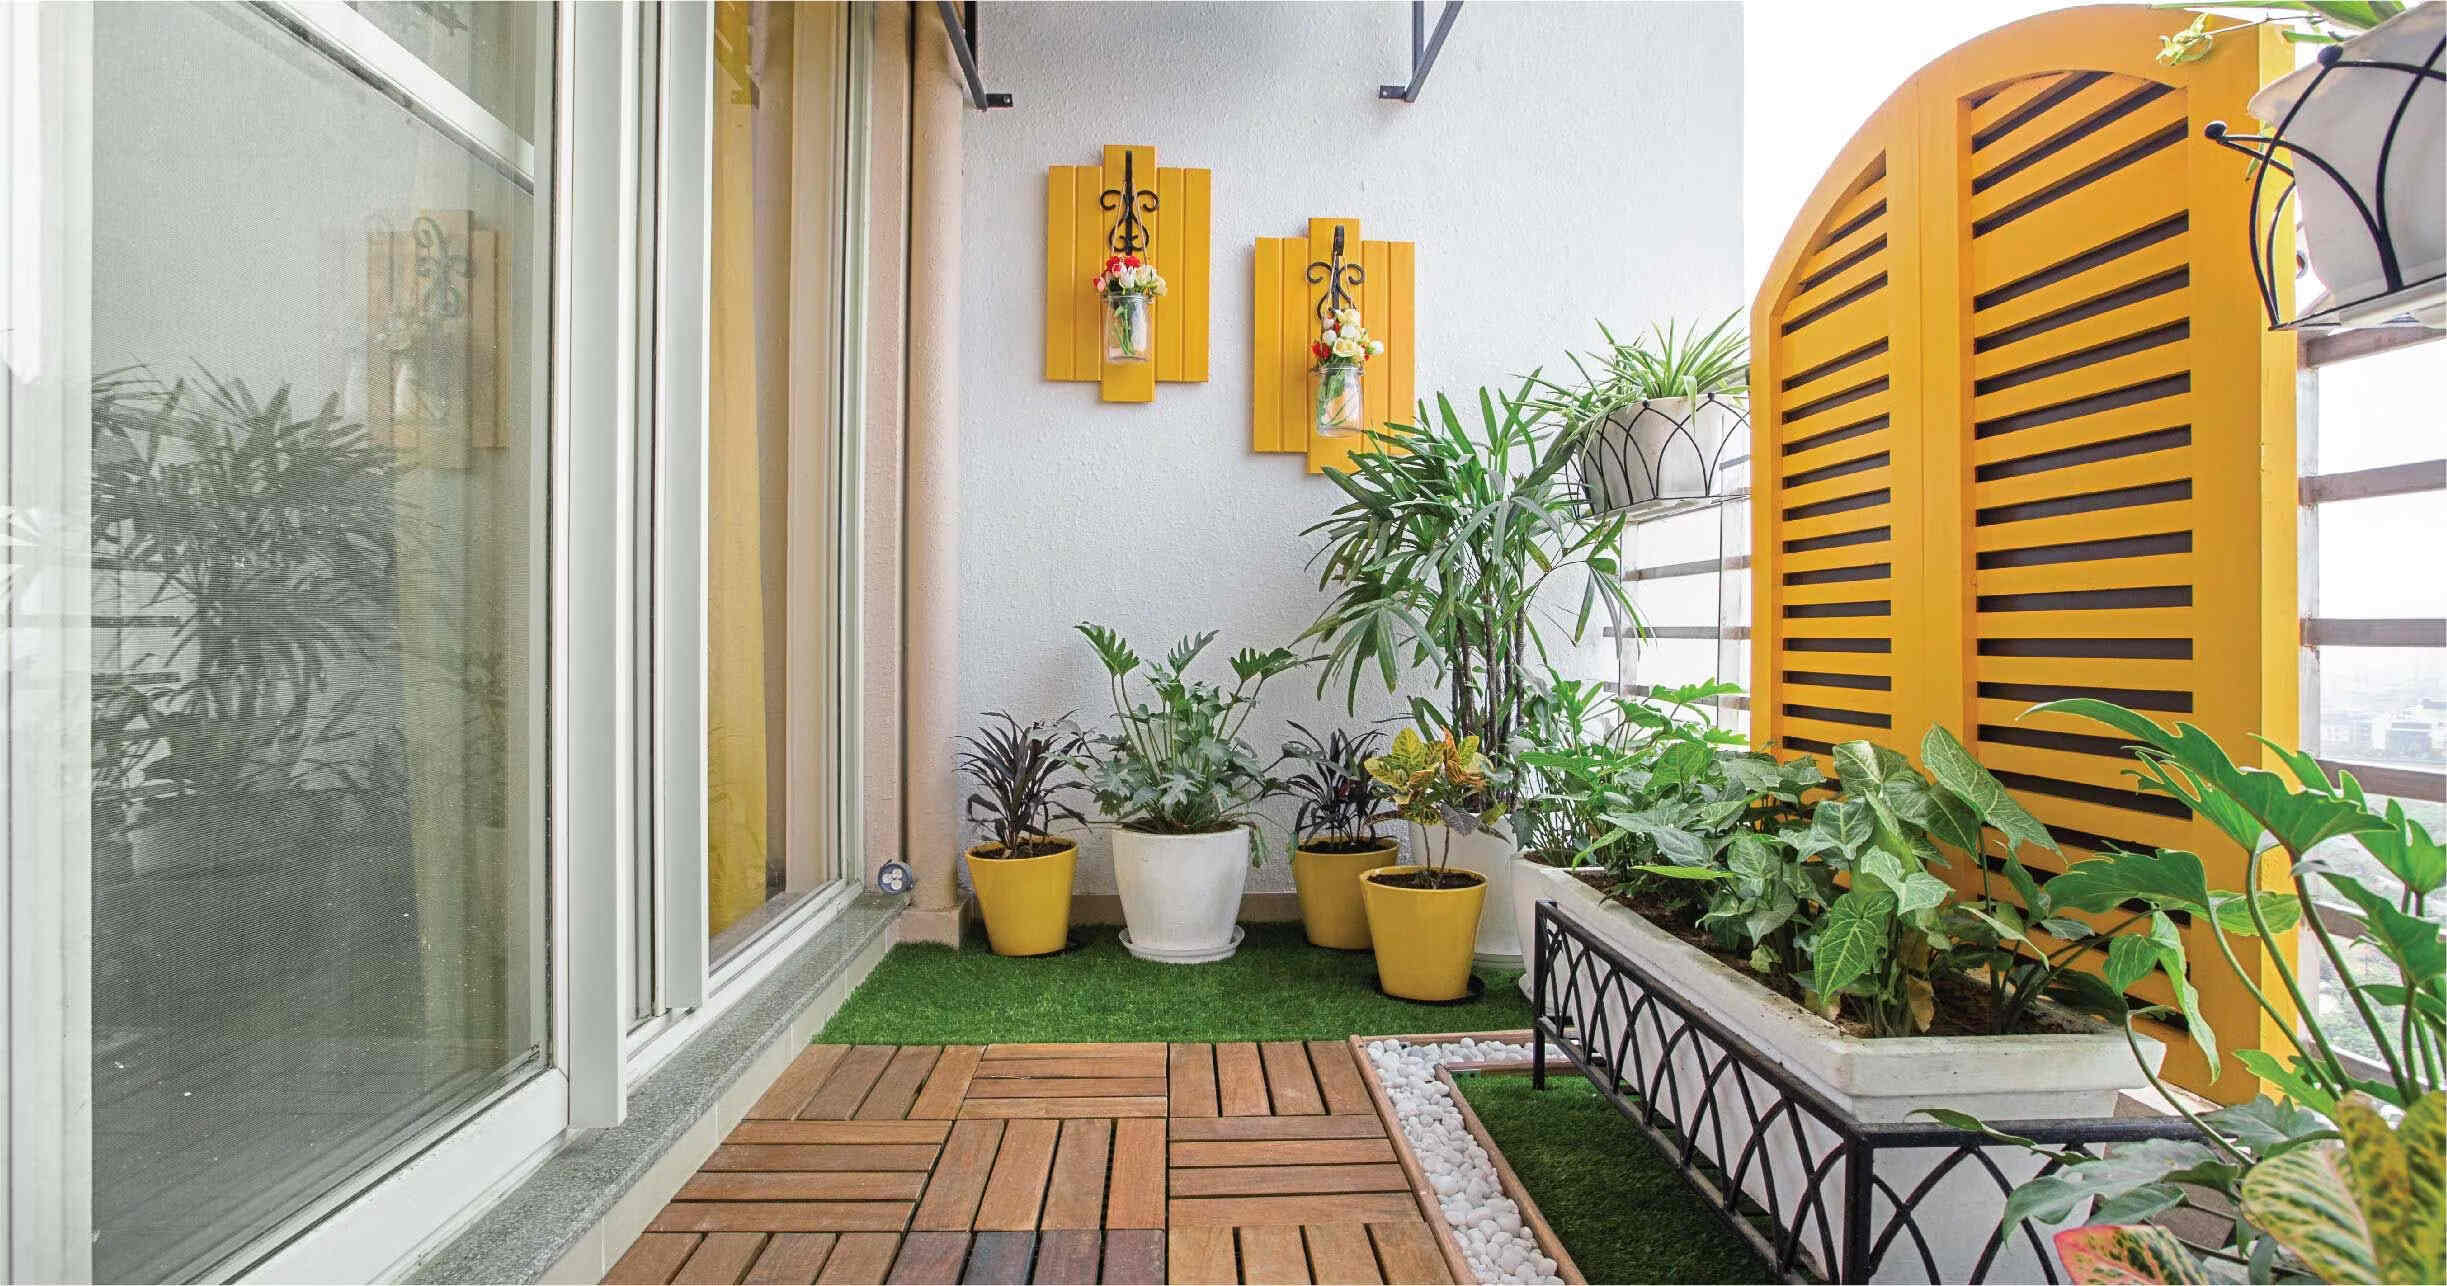
Tiling a balcony can transform it into a beautiful and functional space that adds value to your home. Whether you want to create a cozy outdoor retreat or simply upgrade the existing flooring, tiling is a practical and aesthetically pleasing solution. In this article, we will guide you through the process of tiling a balcony, covering everything from preparation to finishing touches.
Before you begin the tiling process, it’s important to determine your balcony’s condition and suitability for tiling. Assess the structural integrity of the balcony and ensure it is free from any major cracks or damage. It’s also crucial to check the balcony’s waterproofing, as proper waterproofing is essential to prevent water damage and leakage.
Once you have confirmed that your balcony is suitable for tiling, the next step is to choose the right tiles. Consider the style of your home and the overall design aesthetic you wish to achieve. There are various tile options available, including ceramic, porcelain, natural stone, and even composite materials that mimic the look of wood or other natural materials. Selecting a durable and weather-resistant tile is important, as the balcony is exposed to the elements.
Before you start the tiling process, gather all the necessary tools and materials. These may include a trowel, tile cutter, spacers, grout float, sponge, level, and safety equipment such as gloves and goggles. Having everything at hand will ensure a smooth and efficient tiling process.
Begin by cleaning the balcony surface thoroughly. Remove any debris, dirt, or old flooring materials. Sweep or vacuum the balcony to ensure a clean and even surface for tiling. If necessary, use a power washer or mild detergent to remove stubborn stains or dirt.
If your balcony surface requires a primer, apply it according to the manufacturer’s instructions. The primer helps with adhesion and improves the overall durability of the tile installation. Make sure to allow sufficient drying time before proceeding to the next step.
Once the surface is clean and primed (if required), it’s time to plan the tile layout. Measure the balcony area and determine the best starting point for your tile installation. Consider the placement of any fixtures or furniture that you wish to keep on the balcony and make adjustments accordingly.
Apply a layer of mortar onto the balcony surface using a trowel. Ensure an even and consistent layer of mortar, as this acts as the adhesive for the tiles. The thickness of the mortar layer will depend on the size and type of tiles you are using.
Begin setting the tiles, starting from one corner and working your way outwards. Use tile spacers to maintain consistent spacing between tiles for a professional finish. Check the level and alignment of each tile as you go to ensure a flat and even surface.
Inevitably, there will be tiles that need to be cut to fit the edges or irregular spaces of your balcony. Use a tile cutter or wet saw to make precise cuts. Remember to wear safety goggles and follow the manufacturer’s instructions when operating the cutting tool.
Once all the tiles are set in place, it’s time to grout the gaps between them. Mix the grout according to the manufacturer’s instructions and apply it with a grout float. Work the grout into the joints, ensuring they are fully filled. Wipe away any excess grout with a damp sponge, being careful not to disturb the freshly laid tiles.
After the grout has cured, it’s important to seal the tiles to protect them from moisture and staining. Select a suitable sealant for your tile material and apply it according to the manufacturer’s instructions. Regularly maintain and reseal the tiles to ensure their longevity and appearance.
Finally, reinstall any fixtures or furniture that may have been removed during the tiling process. Clean the tiled surface and enjoy your newly transformed balcony space.
By following these steps and investing time in careful planning and execution, you can successfully tile your balcony and create a stunning outdoor space that enhances the beauty and functionality of your home.
Key Takeaways:
- Transform your balcony into a stunning outdoor retreat by following the step-by-step guide to tiling. From preparation to finishing touches, create a beautiful and functional space that enhances your home’s appeal.
- Ensure a successful and long-lasting tile installation by carefully planning, executing, and maintaining your balcony tiling project. From choosing the right tiles to sealing and reassembling, create a visually appealing and durable outdoor space.
Read more: How To Soundproof A Balcony
Preparing the Balcony
Before you begin tiling your balcony, it is essential to properly prepare the surface to ensure a successful and long-lasting tile installation. Preparing the balcony involves assessing its condition, addressing any structural issues, and ensuring proper waterproofing.
The first step in preparing the balcony is to assess its structural integrity. Inspect the balcony for any signs of cracks, damage, or instability. It is crucial to fix any structural issues before proceeding with the tiling process. Consult a professional if you are unsure about the integrity of your balcony’s structure.
Next, check the balcony’s waterproofing. Proper waterproofing is crucial to prevent water damage and leakage, especially in outdoor areas exposed to the elements. Inspect the balcony for any signs of water penetration or inadequate waterproofing. If you notice any issues, it is recommended to consult a waterproofing specialist to ensure that the balcony is properly sealed.
If your balcony does not have a waterproofing membrane or if the existing membrane is damaged, it is important to install a proper waterproofing system before tiling. There are various waterproofing products available on the market, such as liquid waterproofing membranes or sheet membranes. Follow the manufacturer’s instructions and apply the waterproofing product according to their guidelines.
In addition to waterproofing, it is important to ensure that the balcony surface is clean and free from any debris, dirt, or old flooring materials. Remove any loose or damaged tiles, sweep or vacuum the surface to remove dust and dirt, and thoroughly clean the area. Use a mild detergent and a scrub brush if necessary to remove stubborn stains.
Inspect the balcony for any protrusions, such as screws or nails, and remove them or ensure that they are properly hammered down. These protrusions can interfere with the tile installation and result in uneven tiles or damage to the tiles.
If there is any residual adhesive or grout from previous flooring, you may need to use a suitable adhesive remover or a scraping tool to clean the surface. Ensure that you follow the manufacturer’s instructions when using any chemicals or tools to remove adhesive or grout.
Finally, check the balcony surface for any uneven areas or low spots. If you notice any unevenness, you may need to level the surface using a self-leveling compound. Again, follow the manufacturer’s instructions when applying the self-leveling compound to ensure proper adhesion and a level surface.
Taking the time to properly prepare your balcony surface before tiling is essential for a successful and long-lasting tile installation. By addressing any structural issues, ensuring proper waterproofing, and thoroughly cleaning and leveling the surface, you will create an optimal foundation for your balcony tiling project.
Choosing the Right Tiles
When it comes to tiling your balcony, selecting the right tiles is a crucial step. Not only do they play a significant role in determining the overall aesthetic of your balcony, but they also need to be durable and weather-resistant to withstand outdoor conditions. Here are some factors to consider when choosing the right tiles for your balcony:
1. Material: There are various tile materials available, and each has its own unique characteristics and maintenance requirements. Some popular options for outdoor tiles include ceramic, porcelain, natural stone (such as slate or travertine), and composite materials that mimic the appearance of wood or other natural materials. Consider the pros and cons of each material, such as durability, slip resistance, and resistance to fading or staining, in relation to your balcony’s specific needs.
2. Style: Choose tiles that complement the style of your home and create the desired ambiance for your balcony. Whether you prefer a modern, minimalist look or a rustic, natural aesthetic, there are tiles available in various colors, patterns, and textures to suit your preferences. Consider the architectural style of your home and the overall design theme you want to achieve.
3. Size and Shape: Consider the size and shape of the tiles in relation to your balcony’s dimensions. Larger tiles can create a more seamless and spacious look, while smaller tiles with intricate patterns can add visual interest. Square or rectangular tiles are the most common choices, but there are also hexagon and mosaic options available for a unique and personalized touch.
4. Slip Resistance: Since your balcony will be exposed to outdoor elements, it is important to choose tiles with slip-resistant surfaces, especially if you live in an area prone to rain or humidity. Look for tiles with textured or matte finishes that provide traction to prevent slips and falls.
5. Maintenance: Consider the maintenance requirements of the tiles you choose. Some materials may require regular sealing or specialized cleaning products, while others are more low-maintenance. Take into account the time and effort you are willing to invest in maintaining the tiles.
6. Budget: Set a budget for your balcony tiling project and choose tiles that fit within your budget constraints. Remember to factor in the cost of the tiles themselves, as well as any additional materials needed for installation.
7. Research and Samples: Before making a final decision, do some research and gather samples of the tiles you are considering. This will allow you to see how the tiles look in your balcony’s lighting conditions and how they feel underfoot. It also gives you the opportunity to test their durability and water resistance.
Ultimately, choosing the right tiles for your balcony is a balance between aesthetics and practicality. Consider your personal style preferences, the climate of your area, and the specific needs of your balcony to make an informed decision. By selecting high-quality, weather-resistant tiles that match your desired style, you can create a beautiful and durable outdoor space that will enhance the overall appeal and value of your home.
Gathering the Necessary Tools and Materials
Before you start tiling your balcony, it’s essential to gather all the necessary tools and materials to ensure a smooth and efficient tiling process. Having everything at hand will save you time and prevent interruptions during the installation. Here are the essential tools and materials you will need:
1. Tiles: Choose the desired type, style, and quantity of tiles for your balcony. Consider factors such as size, material, and slip resistance that were mentioned earlier in the article. Measure the area to determine the amount of tiles needed and add a few extras for cutting and breakage.
2. Trowel: A trowel is used to apply the mortar or adhesive to the balcony surface. Select a trowel that is appropriate for the size of your tiles. The size of the notches on the trowel will depend on the thickness of the mortar layer you need.
3. Tile Cutter: A tile cutter or wet saw is essential for cutting tiles to fit around edges, corners, or any irregular spaces on your balcony. Choose a tile cutter that is suitable for the type and thickness of tiles you are using. Ensure that the cutter has a straight edge and a scoring wheel for clean, precise cuts.
4. Spacers: Tile spacers are small plastic or rubber wedges used to maintain consistent spacing between tiles. The size of the spacers will depend on the desired grout joint width. Spacers ensure that the tiles are evenly spaced and create a professional-looking finish.
5. Grout Float: A grout float is a rubber tool used to apply grout to the gaps between the tiles. It helps spread the grout evenly and press it into the joints. Look for a grout float with a comfortable handle and a flat, rubber surface for smooth application.
6. Sponge: A sponge is essential for wiping away excess grout or cleaning the tiles after grouting. Choose a high-quality, dense sponge that will not leave behind any residue or lint on the tiles. Wet the sponge before use and squeeze out excess water to prevent saturating the grout.
7. Level: A level is used to ensure that the tiles are installed evenly and create a flat surface. It helps you avoid any unevenness or slopes that may cause issues with the tiles’ alignment. Choose a sturdy level with both horizontal and vertical bubble indicators.
8. Safety Equipment: It is important to prioritize safety during the tiling process. Wear gloves and safety goggles to protect your hands and eyes from any potential injuries. Tiling can involve sharp tools and materials, so safety equipment is essential.
9. Other Materials: In addition to the tools, you will need materials such as mortar or adhesive, grout, and sealant. Select the appropriate products for the type of tiles you are using and follow the manufacturer’s instructions for mixing and application.
Make a checklist of the tools and materials needed and ensure that you have everything before you begin tiling your balcony. This will save you time and prevent any unnecessary delays during the installation process. Having all the necessary tools and materials at hand will facilitate a smooth, efficient, and successful tiling experience.
Cleaning the Balcony Surface
Before you can start tiling your balcony, it is crucial to clean the surface thoroughly. Proper cleaning ensures that the tiles adhere well to the balcony surface and improves the overall longevity of the tile installation. Here are the steps to clean your balcony surface:
1. Remove debris: Start by removing any loose debris, such as leaves, dirt, or twigs, from the balcony surface. Sweep or use a vacuum to clear the area. Pay special attention to the corners and edges where debris tends to accumulate.
2. Clear any furniture or fixtures: If you have any furniture or fixtures on your balcony, clear them off to access the entire surface. Move them to a safe and clean area to prevent them from getting dirty or damaged during the cleaning process.
3. Sweep or use a broom: Use a broom or a stiff-bristled brush to dislodge any stubborn dirt or debris that is stuck on the balcony surface. Start from one corner and work your way towards the other, ensuring that you sweep the entire area. Pay attention to areas that may have accumulated dirt, such as crevices or corners.
4. Check for stains or marks: Inspect the balcony for any stains or marks that may require additional cleaning. Common stains can include oil or grease stains, mildew, or rust. Identify the type of stain and select the appropriate cleaning method or cleaning agent based on the material of your balcony surface.
5. Use a mild detergent: Prepare a solution of warm water and a mild detergent. Dip a sponge or a soft cloth into the soapy water and gently scrub the balcony surface. Be sure to cover the entire balcony area, paying attention to any stains or marked areas. Avoid using harsh chemical cleaners as they may damage the balcony surface or affect the adhesion of the tiles.
6. Power washing (if necessary): If your balcony has stubborn stains or accumulated dirt that cannot be easily removed with a sponge or detergent, consider using a power washer. A power washer can effectively remove dirt and grime, but be cautious not to use excessive pressure that may damage the surface or disrupt any existing waterproofing.
7. Rinse the surface: After cleaning, thoroughly rinse the balcony surface with clean water to remove any remaining detergent or dirt residue. Use a hose or a bucket of water to rinse the entire area. Ensure that all the cleaning solution is removed from the surface.
8. Allow the surface to dry: Before proceeding with the tiling process, it is essential to allow the balcony surface to dry completely. Moisture can affect the adhesion of the mortar or adhesive and may lead to issues with the tile installation. Depending on the climate and weather conditions, it may take several hours or even a few days for the surface to fully dry.
Cleaning the balcony surface is a crucial step before tiling. By removing debris, dirt, and stains, you create a clean and suitable surface for the tile installation. Take your time during the cleaning process to ensure that the balcony is properly prepared, leading to a successful and long-lasting tile installation.
Read more: How To Childproof A Balcony
Applying a Primer (If Necessary)
Before tiling your balcony, it is important to consider whether applying a primer is necessary. While not every balcony surface requires a primer, it can provide several benefits, including improved adhesion and durability of the tile installation. Here’s what you need to know about applying a primer to your balcony surface:
1. Assess the condition of the surface: Start by assessing the condition of your balcony surface. Check for any existing coatings, sealants, or residues that may affect the adhesion of the tiles. If the surface is smooth, clean, and free from any contaminants or remnants of previous coatings, a primer may not be necessary.
2. Determine the type of primer: If you decide that a primer is needed, the next step is to determine the type of primer suitable for your specific balcony surface. There are different types of primers available, such as acrylic-based, epoxy-based, or penetrating primers. Consult with a professional or the manufacturer’s guidelines to select the appropriate primer for your balcony surface.
3. Prepare the surface: Clean and prepare the balcony surface before applying the primer. Remove any debris, dirt, or loose materials. Use a broom or a vacuum to ensure that the surface is free from any contaminants that might interfere with the primer’s adhesion. If there are any stains or marks, treat them separately before applying the primer.
4. Follow manufacturer’s instructions: Read and follow the manufacturer’s instructions provided with the primer. Different primers have varying application methods and drying times, so it’s vital to follow the specific guidelines for your chosen product. Wear appropriate protective gear, such as gloves and goggles, when working with the primer.
5. Apply the primer: Using a brush or roller, apply the primer evenly and with proper coverage to the entire balcony surface. Pay attention to corners, edges, and any uneven areas. Apply multiple coats if recommended by the manufacturer, ensuring proper drying time between each coat. Allow the primer to fully cure according to the instructions before proceeding with the tile installation.
6. Assess the condition after priming: Once the primer has cured, assess the condition of the balcony surface. The primer should create a smooth and slightly tacky surface, enhancing the adhesion of the mortar or adhesive. If the primer is uneven or there are any issues, consult a professional or the manufacturer for guidance on the next steps.
7. Proceed with tiling: After the primer has been applied and cured, you can proceed with the tiling process. Follow the recommended steps for applying the mortar or adhesive and setting the tiles, ensuring that you work within the appropriate time frame specified by the manufacturer to maintain optimal adhesion.
While applying a primer to your balcony surface may not always be necessary, it can provide additional benefits such as improved adhesion and durability of the tile installation. Consider the condition of your balcony surface and choose the appropriate primer based on the manufacturer’s guidelines. By properly applying a primer (if necessary), you can enhance the success and longevity of your balcony tiling project.
Planning the Tile Layout
Planning the tile layout is a crucial step in tiling your balcony. A well-thought-out layout ensures an aesthetically pleasing and balanced appearance, as well as proper alignment and spacing of the tiles. Here are the key considerations when planning the tile layout for your balcony:
1. Measure and mark: Measure the dimensions of your balcony to determine the amount of tile you will need. Take accurate measurements and mark reference points on the balcony surface using a pencil or chalk. This will help you visualize the tile placement and make adjustments as needed.
2. Choose the starting point: Select a starting point for your tile installation. Typically, it is best to start from a prominent or central area of the balcony, such as the main entrance or centerline. Starting from the center and working your way outwards can help create a balanced and symmetrical layout.
3. Consider the tile orientation: Decide whether you want to install the tiles in a horizontal or vertical orientation. This decision may depend on the overall design and shape of your balcony, as well as personal preference. Experiment with different orientations to determine which one best enhances the visual appeal of the space.
4. Create a dry layout: Before applying any adhesive or mortar, lay out the tiles in their intended positions without actually fixing them. This dry layout allows you to visualize the final design, make adjustments as necessary, and ensure that the tiles fit well within the available space. Use tile spacers to maintain consistent spacing between the tiles.
5. Assess tile cuts and edges: During the dry layout, identify any tiles that need to be cut to fit edges, corners, or irregular areas of your balcony. Measure and mark these tiles accordingly. Consider utilizing a tile cutter or wet saw to achieve precise cuts. The goal is to have nicely fit tiles and minimize visible cuts.
6. Check for visual balance: Step back and assess the overall visual balance of the tile layout. Look for symmetrical patterns, ensure that any focal points are aligned, and avoid thin or narrow cut tiles that can detract from the overall appearance. Make adjustments as needed to achieve the desired balance and visual harmony.
7. Consider expansion joints: Depending on the size and layout of your balcony, you may need to include expansion joints to account for natural movement and prevent cracks in the tile installation. Consult with a professional or refer to building codes to determine the appropriate placement and spacing for expansion joints in your balcony.
8. Take note of drainage: Consider your balcony’s drainage system and ensure that the tile layout allows for proper water flow. Plan the tile placement in such a way that it does not hinder the natural drainage or cause water pooling on the surface.
9. Seek inspiration: If you are unsure about the layout, seek inspiration from design magazines, online resources, or consult with a professional. This can provide you with fresh ideas and help you envision different tile patterns and configurations that suit your balcony style and personal taste.
By carefully planning the tile layout for your balcony, you can achieve a visually appealing and cohesive design that enhances the overall look and feel of the space. Take the time to consider measurements, tile orientation, cuts, and visual balance to create a tile layout that brings your balcony to life.
When tiling a balcony, make sure to use outdoor-rated tiles and a waterproof membrane to prevent water damage. Properly prepare the surface and use a high-quality grout to ensure durability.
Applying the Mortar
Applying the mortar is a critical step in tiling your balcony. The mortar acts as an adhesive that ensures the tiles stay firmly in place on the balcony surface. Here is a step-by-step guide on how to apply mortar for your tile installation:
1. Prepare the mortar: Read the manufacturer’s instructions and prepare the mortar according to their guidelines. Most mortars come in powdered form and need to be mixed with water to achieve the right consistency. Use a bucket and a mixing paddle to combine the mortar and water, following the recommended water-to-mortar ratio.
2. Mix the mortar: Mix the mortar thoroughly until you achieve a smooth and consistent paste-like mixture. Make sure there are no lumps or dry spots in the mixture. Use a trowel or a mixing tool to blend the mortar properly.
3. Begin at the starting point: Start applying the mortar at your chosen starting point, which is typically the center or a prominent area of the balcony. Using the flat side of the trowel, spread a layer of mortar onto the balcony surface. The thickness of the mortar layer will depend on the size and type of tiles you are using; refer to the manufacturer’s guidelines for specific recommendations.
4. Create even coverage: Work in small sections to ensure the mortar doesn’t dry out before you start setting the tiles. Use the notched edge of the trowel to create ridges in the mortar. This helps improve adhesion and provides a consistent thickness for the tile installation. Maintain even coverage by spreading the mortar at a 45-degree angle to the surface, combing it in one direction with the notched edge of the trowel.
5. Work systematically: Place the tiles into the mortar, starting from the first section where you applied the mortar. Press each tile firmly into the mortar, using a slight twisting motion to help secure good contact with the adhesive. Make sure the tiles are level and aligned with the reference lines you marked during the planning stage. Periodically check that the tiles are level and adjust as necessary.
6. Use tile spacers: As you set each tile, insert tile spacers on all sides to maintain consistent spacing between the tiles. This ensures a professional finish and allows room for grout later. Adjust the tiles as needed to ensure uniform spacing and alignment.
7. Clean as you go: Use a damp sponge or cloth to wipe away any excess mortar that may have squeezed up between the tiles. It’s important to clean as you go to prevent the mortar from drying on the surface of the tiles, as it can be challenging to remove once it hardens.
8. Continue tiling: Repeat the process of applying mortar, combing it with a notched trowel, and setting the tiles section by section until the entire balcony surface is tiled. Work in manageable areas to ensure that the mortar retains its adhesive properties and doesn’t dry out before you can set the tiles.
9. Allow the mortar to cure: After completing the tiling process, allow the mortar to cure according to the manufacturer’s instructions. This typically involves waiting for a specific period, during which the mortar reaches its maximum strength and adhesive properties. Avoid walking on the tiles or putting any heavy objects on them during the curing process.
By following these steps and applying the mortar correctly, you will ensure a strong and durable bond between the tiles and the balcony surface. Take your time during this step to ensure even coverage and proper alignment, as it lays the foundation for a successful and visually pleasing tile installation.
Setting the Tiles
Setting the tiles is a crucial step in tiling your balcony. This is where you physically place each tile onto the mortar, ensuring proper alignment, spacing, and bond. Here’s a step-by-step guide on how to set the tiles for your balcony:
1. Begin at the starting point: Start setting the tiles from the pre-determined starting point, which is typically the center or a prominent area of the balcony. This allows for a balanced and visually appealing layout. Use a level to ensure the first tile is perfectly horizontal or vertical, depending on your desired orientation.
2. Apply adhesive to the tile: With a notched trowel, spread a thin layer of adhesive onto the back of the first tile. The adhesive helps create a strong bond between the tile and the mortar. Ensure that the adhesive covers the entire backside of the tile and has a consistent thickness.
3. Press the tile onto the mortar: Carefully place the adhesive-covered tile onto the mortar, aligning it with the reference lines or adjacent tiles. Apply even pressure, pressing the tile firmly into the mortar. Use a slight twisting motion to ensure good contact and to help eliminate any air pockets under the tile.
4. Add tile spacers: Place tile spacers at the corners of the first tile to maintain consistent spacing. The size of the spacers will depend on the desired grout line width. Insert spacers on all sides of the tile to ensure uniform spacing between tiles and a professional finish.
5. Continue setting tiles: Repeat the process of applying adhesive, pressing the tile onto the mortar, and adding spacers as you proceed to set subsequent tiles. Work in sections, applying adhesive to a small area at a time to ensure it doesn’t dry out before you can set the tiles. Use a level to check the alignment of each tile and adjust as necessary.
6. Check for consistency: Periodically check for consistency in tile height and spacing. Use a level or straight edge to ensure the tiles are level and aligned with one another. Adjust the tiles as needed to maintain a uniform and visually appealing appearance. Take your time during this step to achieve a professional result.
7. Trim tiles as necessary: As you near the edges of the balcony or encounter obstacles such as columns or fixtures, you may need to trim tiles to fit the available space. Use a tile cutter or wet saw to make precise cuts. Measure carefully and mark the tile before cutting to ensure a clean and accurate fit.
8. Clean off excess adhesive: Use a damp sponge or cloth to clean off any excess adhesive that may have squeezed up between the tiles. It’s important to remove the adhesive before it dries, as it becomes increasingly difficult to remove once hardened.
9. Allow the tiles to set: After setting all the tiles, allow them to set and adhere to the mortar according to the adhesive manufacturer’s instructions. This period can range from a few hours to a day depending on the adhesive used. Avoid walking on the tiles or putting any heavy objects on them until they have fully set.
By following these steps, you can ensure that your tiles are securely set onto the balcony surface. Take your time and pay attention to details, ensuring proper alignment, spacing, and adherence. Properly setting the tiles lays the foundation for a beautiful and long-lasting balcony tile installation.
Read more: How To Build A Balcony
Cutting and Fitting Tiles
Cutting and fitting tiles is a necessary step in tiling your balcony, especially when you encounter edges, corners, or irregular spaces. This process ensures that the tiles fit perfectly to create a seamless and professional-looking installation. Here’s a step-by-step guide on how to cut and fit tiles for your balcony:
1. Measure and mark: Begin by measuring the area where the tile needs to be cut. Use a measuring tape and a pencil to mark the measurements directly on the tile’s surface. Double-check the measurements to ensure accuracy.
2. Score the tile: Use a tile cutter or wet saw to score a shallow line along the marked measurement on the surface of the tile. Make sure the tile is secured firmly in place before scoring to prevent it from slipping.
3. Snap or cut the tile: For straight cuts, gently press down on the tile on either side of the scored line to snap it along the line. If using a wet saw, carefully guide the tile through the saw, following the scored line, to make the cut. Be sure to wear safety goggles and follow the manufacturer’s instructions when using a wet saw.
4. Shape corners and curves: In some cases, you may need to cut tiles to fit around corners or curves. To do this, make multiple straight cuts along the curved or cornered edge of the tile, creating a series of smaller sections. Carefully remove the excess pieces to achieve the desired shape.
5. Check the fit: After making the necessary cuts, place the tile in its designated area to check the fit. Ensure that it aligns properly with the adjacent tiles and leaves a consistent spacing. Make any adjustments as needed to achieve a proper fit.
6. Smooth the edges: Use a tile file or sandpaper to smooth any rough edges or sharp corners that may have resulted from the cutting process. This will help prevent injuries and ensure a clean and polished appearance.
7. Repeat for other tiles: If you need to cut multiple tiles, repeat the measuring, marking, cutting, and fitting process for each individual tile. Take your time and be precise to ensure a uniform and professional-looking installation.
8. Account for expansion joints: If your balcony requires expansion joints, remember to account for them when cutting and fitting the tiles. Leave sufficient space in the layout to accommodate the expansion joint material and ensure the construction’s integrity.
9. Clean and prepare the cut tiles: Once the tiles are cut and fit, clean them to remove any debris or dust resulting from the cutting process. Wipe them down with a damp cloth or sponge and allow them to dry before proceeding with the tile installation.
By following these steps, you can confidently cut and fit tiles to create a precise and professional-looking installation on your balcony. Take your time, exercise caution when using cutting tools, and be meticulous in achieving proper fits and alignments. This attention to detail will result in a visually appealing and seamless tile installation.
Grouting the Tiles
Grouting the tiles is a crucial step in tiling your balcony, as it not only fills the gaps between the tiles but also adds stability, prevents water infiltration, and enhances the overall appearance of the installation. Here’s a step-by-step guide on how to grout the tiles on your balcony:
1. Gather the materials: Before you begin, gather all the necessary materials for grouting. This includes grout powder, a grout float, a sponge, a bucket, and clean water. Ensure that you have the correct type of grout for your tile material and the desired grout joint width.
2. Prepare the grout: Read the manufacturer’s instructions and prepare the grout mixture accordingly. Typically, this involves slowly adding water to the grout powder while stirring until you achieve a smooth, lump-free consistency. Allow the grout mixture to sit for a few minutes to activate and blend properly.
3. Apply the grout: Using a grout float, scoop a generous amount of grout onto the float’s edge. Hold the float at a 45-degree angle and force the grout into the gaps between the tiles, using a diagonal sweeping motion to work the grout into the joints. Make sure to completely fill the joints without leaving any voids or gaps.
4. Remove excess grout: After applying the grout, use the edge of the grout float to scrape off the excess grout from the surface of the tiles at a 45-degree angle. This helps create a smooth and level grout line. Collect the excess grout from the float and return it to the bucket to maintain a clean working surface.
5. Clean the tiles: Once you have removed the excess grout, dampen a sponge with clean water and lightly wipe it over the tiles at a 45-degree angle. Be gentle to avoid disturbing the freshly applied grout from the joints. Rinse the sponge frequently and continue wiping until the tile surface is clean and the grout lines are defined.
6. Shape and finish the grout lines: Use a grout shaping tool or a rounded stick to refine and shape the grout lines. Gently run the tool along the grout lines, smoothing and compacting the grout while creating an aesthetically pleasing appearance. This step helps achieve a professional finish and ensures that the grout lines are even and consistent.
7. Allow the grout to cure: Leave the grout to cure for the recommended time specified by the manufacturer. This typically ranges from 24 to 72 hours, but it’s crucial to follow the specific instructions provided. During this time, avoid walking on the tiles or disturbing the grout to allow for proper drying and hardening of the grout.
8. Clean the tiles again: After the grout has fully cured, use a clean, damp sponge to gently wipe away any haze or residue on the tile surface. Rinse the sponge regularly and continue until the tiles are clean and the grout lines are clear and well-defined. Avoid using excessive water, as it may weaken the grout lines.
9. Apply grout sealer: If recommended for your particular grout type, consider applying a grout sealer to protect the grout from staining and water penetration. Follow the manufacturer’s instructions for the sealer application process and allow sufficient drying time before using the balcony.
By following these steps, you can successfully grout the tiles on your balcony, achieving a clean, durable, and visually appealing finish. Take your time, work diligently, and be thorough in your grouting process to ensure that the tiles are properly sealed and the grout lines are well-executed.
Sealing the Tiles
Sealing the tiles on your balcony is an essential step in protecting them from moisture, stains, and wear. Properly sealed tiles not only maintain their appearance but also increase their longevity and durability. Here’s a step-by-step guide on how to seal the tiles on your balcony:
1. Choose the appropriate sealer: Determine the type of sealer that is suitable for your specific tile material. Different types of tiles, such as ceramic, porcelain, or natural stone, may require different sealers. Read the manufacturer’s recommendations or consult with a professional to select the appropriate sealer.
2. Prepare the tiles: Before sealing, ensure that the tiles are clean and free from any debris, dust, or grout residue. Use a gentle cleaner or mild detergent, along with a soft brush or sponge, to clean the surface. Rinse the tiles thoroughly and allow them to dry completely before proceeding with the sealing process.
3. Test the sealer: It is always a good idea to perform a small test patch with the sealer on an inconspicuous area of your balcony tiles. This allows you to assess the sealer’s effectiveness, compatibility with the tile material, and the desired outcome. Follow the manufacturer’s instructions for conducting the test patch and observe the results.
4. Apply the sealer: Using a paintbrush or a sprayer, apply the sealer evenly over the entire surface of the tiles. Ensure that the sealer is applied in a thin, uniform coat. Work in small sections, maintaining a wet edge to prevent overlapping or streaking. Avoid pooling or excessive application, as this can lead to an uneven appearance or issues with adhesion.
5. Allow drying time: After applying the sealer, allow sufficient drying time as per the manufacturer’s instructions. The drying time can vary depending on the type of sealer and environmental conditions. It is important to refrain from walking on the newly sealed tiles or exposing them to moisture until the sealer has fully cured.
6. Apply additional coats (if necessary): Depending on the porosity of the tiles and the recommendation of the sealer manufacturer, you may need to apply multiple coats of sealer. This helps to enhance the protective barrier and improve the longevity of the tiles. Follow the instructions regarding the drying time between each coat.
7. Wipe off any excess sealer: After the sealer has dried, gently wipe the tiles with a clean, dry cloth to remove any excess sealer that may have pooled or left streaks. Removing excess sealer ensures a uniform and smooth finish on the tile surface.
8. Repeat the sealing process (if needed): Depending on the level of protection desired and the manufacturer’s recommendations, it may be necessary to repeat the sealing process periodically. Regularly check the condition of the tiles, especially in high-traffic areas, and reapply the sealer as required to maintain optimal protection.
9. Follow proper maintenance practices: Sealing the tiles is an important step, but it is equally important to follow proper maintenance practices to prolong the effects of the sealer. Clean the tiles regularly using appropriate cleaning solutions and methods that are compatible with the sealed surface. Avoid using harsh chemicals or abrasive materials that may damage the sealer or the tiles.
By following these steps and properly sealing the tiles on your balcony, you can protect them from moisture, stains, and wear. Regularly monitor the condition of the sealed tiles and reapply the sealer as needed to ensure their longevity and maintain their visual appeal.
Reinstalling Any Fixtures or Furniture
Once you have completed the tiling process on your balcony, the final step is to reinstall any fixtures or furniture that were temporarily removed. Reassembling your balcony with the right fixtures and furniture not only enhances its functionality but also adds the finishing touch to your newly tiled space. Here’s a step-by-step guide on how to reinstall fixtures and furniture on your balcony:
1. Assess the condition of fixtures and furniture: Before reinstalling, carefully inspect the condition of the fixtures and furniture that were removed. Check for any damage or wear, and address any issues before putting them back in place. P artially damaged items may need to be repaired or replaced.
2. Clean the fixtures and furniture: Thoroughly clean the fixtures and furniture to remove any dust, dirt, or debris that may have accumulated. Use appropriate cleaning solutions and methods depending on the material of the fixtures and furniture. This will ensure that they look their best once reinstalled.
3. Position the fixtures: Determine the desired location for each fixture, such as lights, fans, or mounted shelves, and mark their positions on the balcony surface. Use appropriate tools and hardware to securely attach the fixtures in their designated spots. Follow the manufacturer’s instructions for proper installation.
4. Assemble furniture: If your balcony has furniture, start by assembling any pieces that were disassembled for the tiling process. Refer to the manufacturer’s instructions for proper assembly. Ensure that all necessary components are included and properly fitted to ensure stability and safety.
5. Place the furniture: Once assembled, carefully place the furniture back onto the balcony surface in their designated locations. Take your time to ensure that the furniture is properly aligned and positioned, creating an optimal layout that maximizes space and functionality. Be mindful of any floor protectors or pads to prevent damage to the tiles.
6. Secure loose items: If there are any loose items such as decorative pieces or hanging plants, secure them in their designated spots using appropriate fixtures or hooks. Ensure that they are properly fastened to prevent accidental falls or damage to the newly tiled surface.
7. Consider additional enhancements: This is also an opportunity to consider additional enhancements to your balcony, such as adding outdoor cushions or decorative elements. Choose items that complement the overall design and ambiance of the space, creating a visually appealing and inviting outdoor area.
8. Test functionality: Once everything is in place, test the functionality of the fixtures and furniture. Check that lights work as intended, fans provide the desired airflow, and any other fixtures or features operate smoothly. Make any necessary adjustments or repairs to ensure everything is fully functional.
9. Enjoy your revitalized balcony: With all fixtures and furniture reinstalled, take a moment to appreciate your newly tiled balcony. Step back and enjoy the transformed space, whether it’s for relaxation, entertaining guests, or simply taking in the beauty of the outdoors from the comfort of your own home.
By following these steps and taking the time to reinstall fixtures and furniture, you can complete the transformation of your balcony. Reassembling the space with careful attention to detail ensures functionality, comfort, and an aesthetically pleasing environment for you to fully enjoy.
Frequently Asked Questions about How To Tile A Balcony
Was this page helpful?
At Storables.com, we guarantee accurate and reliable information. Our content, validated by Expert Board Contributors, is crafted following stringent Editorial Policies. We're committed to providing you with well-researched, expert-backed insights for all your informational needs.


0 thoughts on “How To Tile A Balcony”