Articles
How To Do A Brick Driveway
Modified: October 18, 2024
Learn the step-by-step process of creating a beautiful brick driveway with our informative articles. Find expert tips and tricks for a flawless installation.
(Many of the links in this article redirect to a specific reviewed product. Your purchase of these products through affiliate links helps to generate commission for Storables.com, at no extra cost. Learn more)
Introduction
Welcome to the ultimate guide on how to create a stunning brick driveway. A well-designed and properly installed brick driveway can greatly enhance the curb appeal of your home, improve its value, and provide a durable and long-lasting surface for vehicles to drive on. Whether you’re looking to upgrade your current driveway or starting from scratch, this article will walk you through each step of the process to ensure a successful and professional-looking result.
Brick driveways have been a popular choice for homeowners for many years due to their classic appearance and ability to withstand heavy traffic. Not only do they add a touch of elegance to any property, but they also offer excellent durability and require minimal maintenance compared to other types of driveways. With the right tools, materials, and guidance, you can turn your driveway into a masterpiece that will impress both visitors and passersby.
Before we dive into the step-by-step process of creating a brick driveway, there are a few things you should consider. Firstly, take a moment to evaluate the size and layout of your driveway. This will help you determine the amount of materials you’ll need and the time it will take to complete the project. Additionally, check with your local building codes and regulations to ensure compliance with any guidelines or permits required for driveway construction.
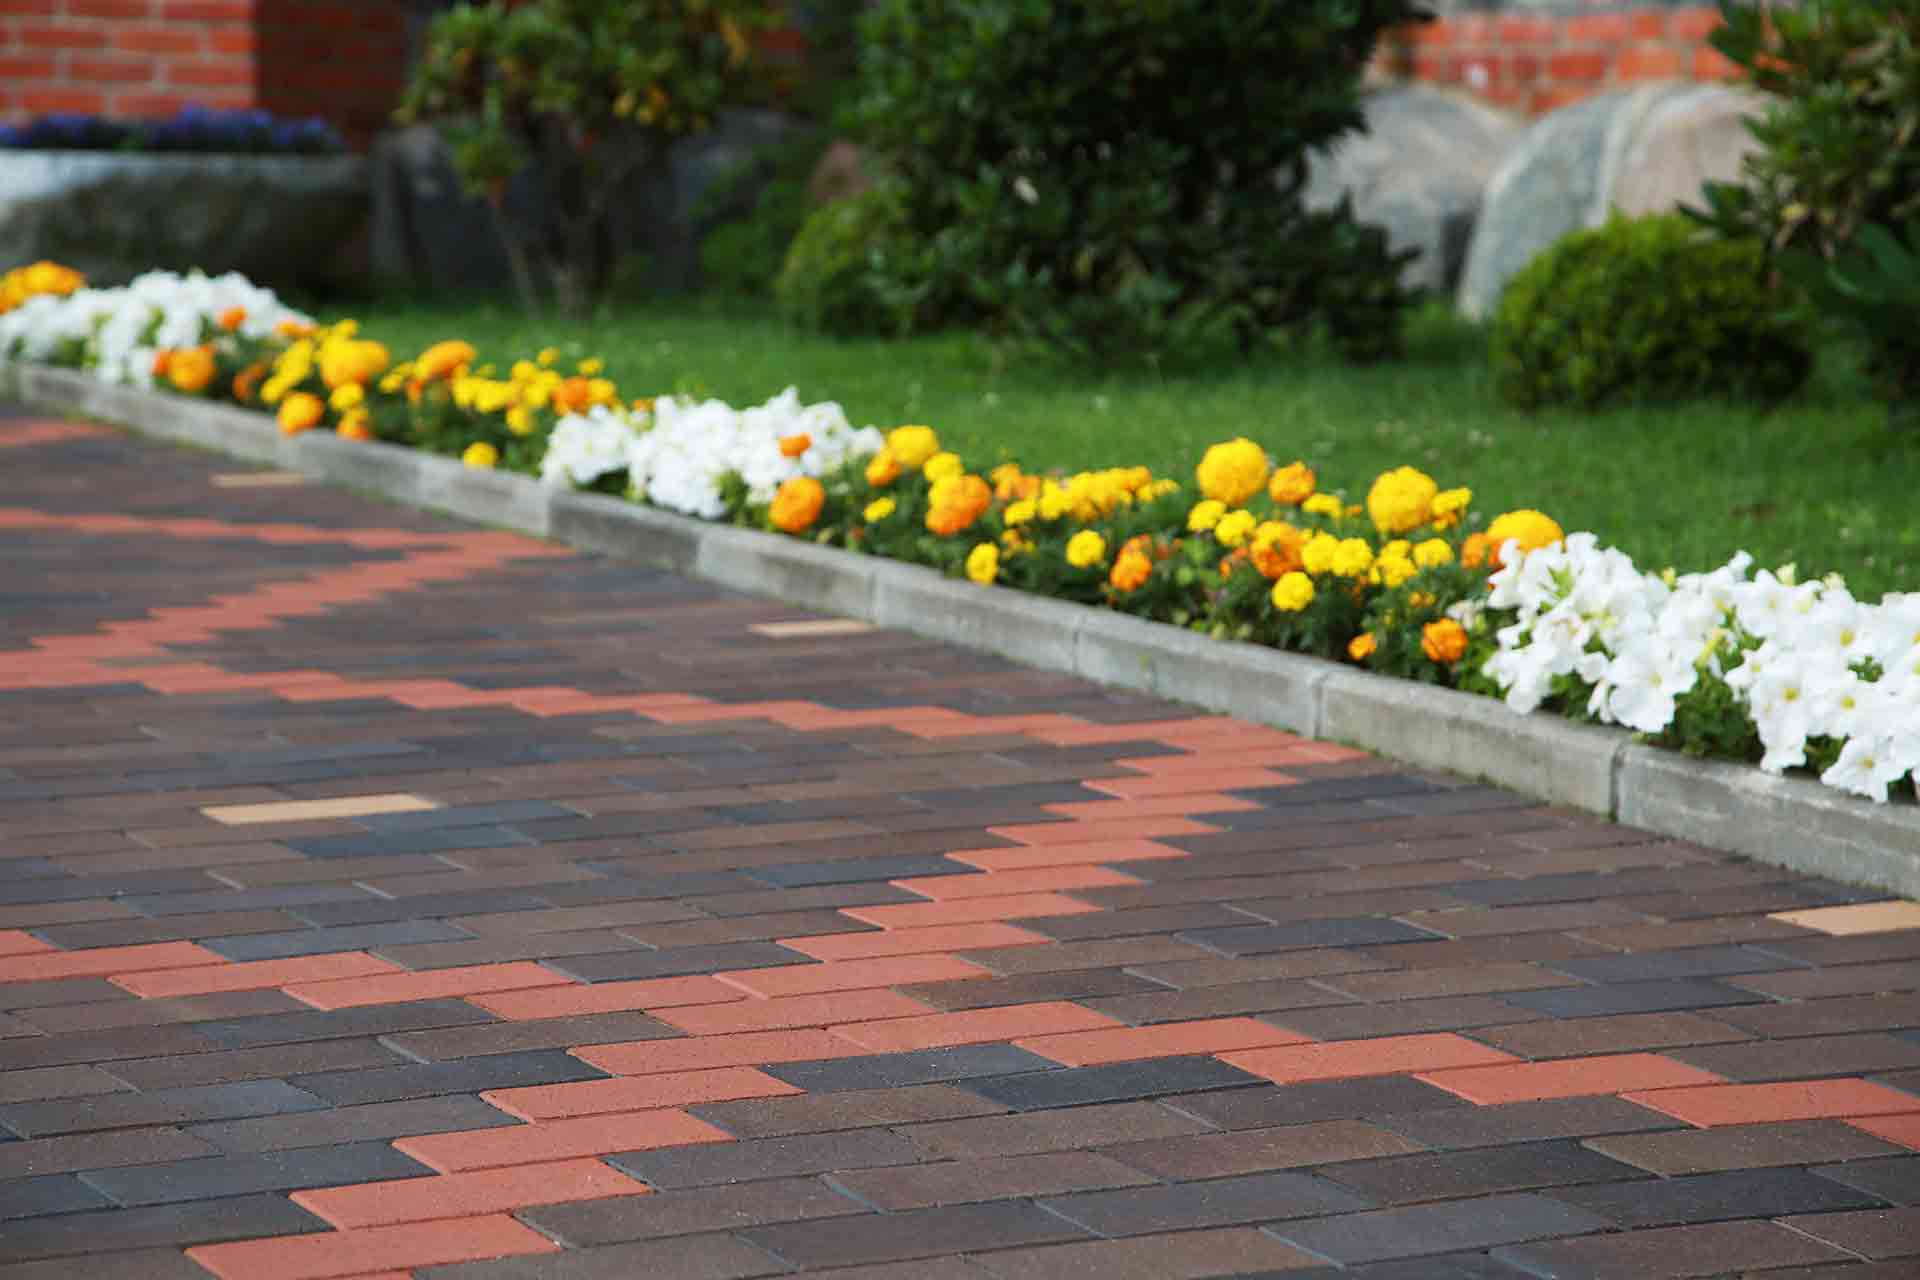
Next, think about the style and design you envision for your brick driveway. There are various patterns and arrangements you can choose from, such as herringbone, running bond, basketweave, or diamond patterns. Take inspiration from existing structures on your property or neighboring homes to maintain a cohesive look. Additionally, consider adding decorative elements like border accents or medallions to add a personalized touch to your driveway.
Lastly, assess your budget and determine how much you’re willing to invest in your brick driveway project. While brick driveways can be more expensive initially, they offer long-term savings in terms of durability and low maintenance. Remember to account for all the necessary materials, tools, and labor costs when setting a budget.
With these considerations in mind, you’re ready to embark on the journey of creating your own beautiful brick driveway. Let’s get started with the first step: planning and preparation.
Key Takeaways:
- Create a stunning and durable brick driveway by carefully planning, preparing, and executing each step with attention to detail and precision. The end result will enhance your property’s curb appeal and value.
- Achieve a professional and visually appealing brick driveway by following the step-by-step guide, from clearing and leveling the area to sealing the surface. Your investment will result in a functional, impressive, and long-lasting entrance for your home.
Read more: How To Do A Heated Driveway
Step 1: Planning and Preparation
Before you begin any construction project, it’s crucial to have a well-thought-out plan in place. This is particularly important for creating a brick driveway, as proper planning will ensure that the end result is both functional and aesthetically pleasing. Here are the key steps to follow during the planning and preparation phase:
- Evaluate the area: Start by measuring the dimensions of your driveway and assessing its slope and grade. This will help you determine the amount of materials needed and identify any potential problems or challenges you may encounter during the installation process.
- Consider drainage: Proper drainage is essential for a long-lasting driveway. Take note of the natural water flow on your property and make sure your driveway design allows for efficient water runoff. Installing a gravel or French drain system can help redirect excess water and prevent damage to the bricks.
- Obtain necessary permits: Check with your local authorities to determine if you need any permits or approvals for constructing your driveway. This will ensure that you comply with any building codes and regulations in your area.
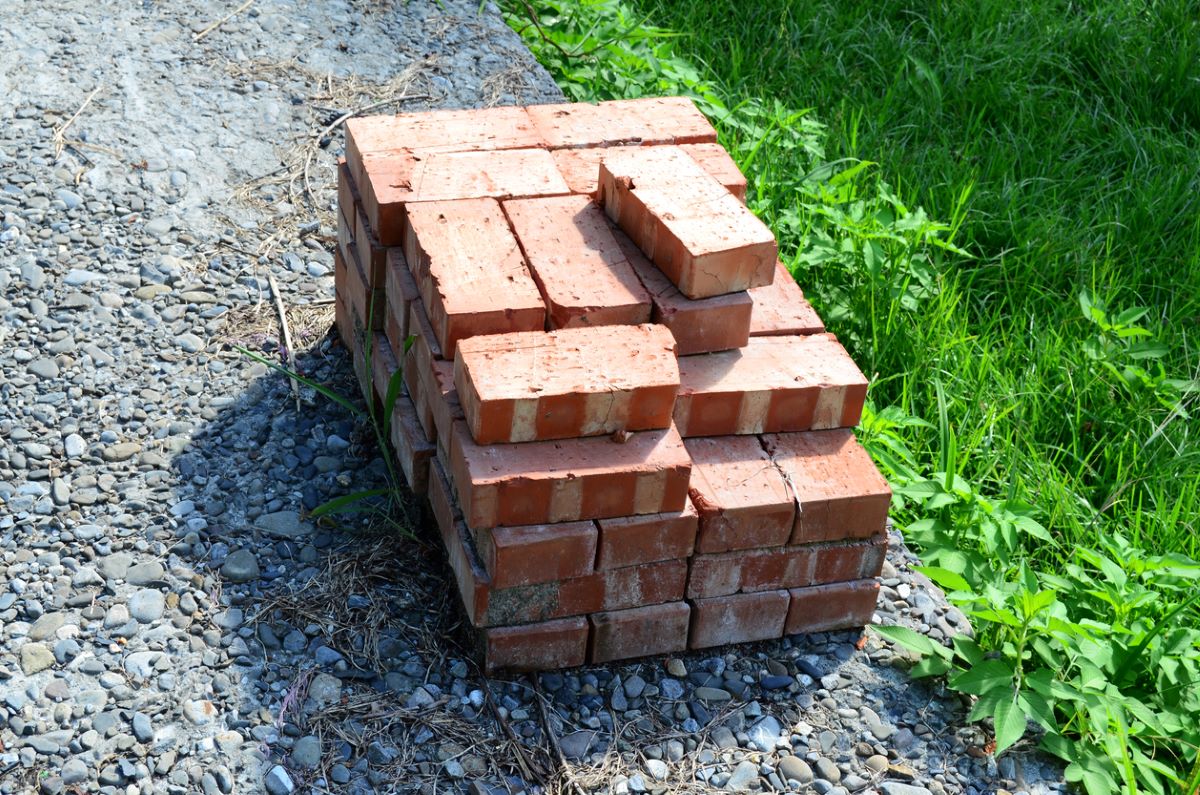
- Choose the brick type: There are various types of bricks available, each with its own unique characteristics and appearance. Consider factors such as color, texture, and durability when selecting the bricks for your driveway. Clay bricks are commonly used for driveways due to their strength and resistance to fading.
- Create a layout plan: Use graph paper or a digital design tool to create a detailed layout plan for your driveway. This will help you visualize the final result and determine the quantity and arrangement of bricks needed. Consider factors such as the pattern, border details, and any additional design elements.
- Prepare the site: Clear the area of any obstructions, such as rocks, vegetation, or existing pavement. Mark the boundaries of the driveway using stakes and string to ensure accurate installation.
- Consider utility lines: Before digging, contact your local utility companies to locate any underground utility lines. This will help prevent accidental damage and ensure your safety during construction.
- Gather the necessary tools and materials: Make a list of all the tools and materials you’ll need for the project, such as shovels, rakes, a compactor, bricks, sand, gravel, and edging materials. This will ensure that you have everything on hand when you begin construction.
By carefully planning and preparing for your brick driveway project, you’ll set yourself up for success and minimize potential setbacks. Take the time to evaluate the area, consider drainage, obtain permits if necessary, choose the right brick type, create a layout plan, prepare the site, locate utility lines, and gather all the required tools and materials. Once you’ve completed these initial steps, you’re ready to move on to the next phase: clearing and leveling the area.
Step 2: Clearing and Leveling the Area
Now that you’ve completed the planning and preparation phase, it’s time to move on to clearing and leveling the area where your brick driveway will be installed. This step is crucial to ensure a smooth and even surface for laying the bricks. Follow these steps to clear and level the area:
- Remove existing materials: If you have an existing driveway or pavement, start by removing it. Use a jackhammer or a rented concrete saw to break up and remove the existing surface. This will allow you to start with a clean slate.
- Clear vegetation and debris: Clear any vegetation, such as grass or weeds, from the area where your driveway will be located. Use a shovel or a garden rake to remove any debris, rocks, or roots that may interfere with the installation process.
- Excavate the area: Use a shovel or a rented excavator to dig out the soil to the desired depth. The depth will depend on the thickness of your base materials and the height of the bricks. Typically, a depth of 8-10 inches is sufficient for a residential driveway.
- Check for proper slope: Ensure that the excavated area has a slight slope for proper water drainage. A slope of 1/8 inch per foot is recommended. Use a level and a long board to check the slope and make adjustments as necessary.
- Compact the soil: Use a plate compactor or a hand tamper to compact the soil in the excavated area. This will provide a stable and solid base for the driveway. Pay special attention to compacting the edges to prevent future settling or shifting of the bricks.
- Install landscape fabric: To prevent weed growth and improve the longevity of your driveway, consider installing a layer of landscape fabric over the compacted soil. This will act as a barrier and help maintain the integrity of the base materials.
- Add a layer of gravel: Pour a layer of crushed stone or gravel over the landscape fabric. This will act as a sub-base and provide additional stability and drainage. Compact the gravel layer using a plate compactor to create a solid foundation for your brick driveway.
- Check for proper compaction and level: After compacting the gravel layer, check for any uneven areas or low spots. Use a level and a straight board to ensure that the surface is level and smooth. Make any necessary adjustments by adding or removing gravel.
Clearing and leveling the area is the crucial first step in creating a brick driveway. By removing existing materials, clearing vegetation and debris, excavating to the correct depth, checking for proper slope, compacting the soil, installing landscape fabric, adding a layer of gravel, and ensuring proper compaction and levelness, you’ll lay a solid foundation for your driveway. With the area cleared and leveled, you’re now ready to move on to the next step: creating a solid base for your brick driveway.
Step 3: Creating a Solid Base
Now that you have cleared and leveled the area for your brick driveway, it’s time to create a solid base. The base is a crucial component of any driveway construction, as it provides stability, prevents sinking or shifting, and ensures the longevity of the bricks. Follow these steps to create a solid base for your brick driveway:
- Mark the height of the base: Using stakes and string, mark the desired height of the base. This will ensure uniformity throughout the driveway and help you determine the necessary depth of the base materials.
- Add the base materials: Start by adding a layer of coarse gravel or crushed stone over the compacted soil. This layer should be about 4-6 inches thick. Spread the gravel evenly and use a rake to level the surface.
- Compact the base: Use a plate compactor to compact the base materials. This helps to ensure a stable and solid foundation. Start from the edges and work your way towards the center, making multiple passes to achieve proper compaction.
- Add a layer of finer gravel: After compacting the coarse gravel, add a layer of finer gravel or crushed stone on top. This layer should be about 2-3 inches thick. Again, use a rake to level the surface.
- Compact the base again: Repeat the compaction process with the plate compactor to fully compact the finer gravel layer. This will further enhance the stability and durability of the base.
- Check for proper slope and level: Use a level and a straight board to check for any uneven areas or low spots in the base. Make any necessary adjustments by adding or removing base materials and re-compacting.
- Moisten the base: Before laying the bricks, lightly mist the base with water. This helps to settle the base materials and create a stronger bond.
- Allow for proper curing: After creating the solid base, allow it to cure for at least 24-48 hours. This allows the base materials to settle and harden, providing a sturdy foundation for the brick driveway.
Creating a solid base is vital for the success and longevity of your brick driveway. By marking the height of the base, adding the base materials in layers, compacting the base, checking for proper slope and level, moistening the base, and allowing for proper curing, you’ll ensure a stable and durable foundation. With the solid base in place, you’re now ready to move on to the next step: installing edging to define the borders of your driveway.
Step 4: Installing Edging
Installing edging is an important step in creating a well-defined and visually appealing brick driveway. Edging serves multiple purposes, including providing structural support, containing the bricks, preventing shifting or spreading, and adding a finishing touch to the overall design. Follow these steps to properly install edging for your brick driveway:
- Select the appropriate edging material: There are various options for driveway edging, such as concrete pavers, plastic or metal landscape edging, or even natural materials like large stones or bricks. Consider the style of your home and driveway when choosing the edging material.
- Prepare the edges: Use a spade or an edging tool to create a clean and straight edge along the perimeter of your driveway. This will ensure proper placement and alignment of the edging material.
- Excavate along the perimeter: Dig a trench along the marked edge of the driveway, making sure it is about the same depth as the bricks and edging material you will be using.
- Add a layer of sand: Pour a thin layer of sand into the trench to provide a smooth and even surface for the edging to rest on. Use a rake or a hand tamper to level the sand.
- Place the edging material: Carefully place the edging material into the trench, making sure it is flush with the top of the driveway surface. Use a rubber mallet or a hammer to gently tap the edging into place.
- Secure the edging: Depending on the type of edging material, you may need to secure it further to ensure stability. This can be done by adding stakes or screws to hold the edging in place.
- Check for levelness: Use a level to ensure that the edging is straight and level along the entire length of the driveway. Make any necessary adjustments by adding or removing sand underneath the edging material.
- Backfill the trench: Once the edging is properly placed and secured, backfill the trench with soil or gravel, ensuring that the edging is held firmly in position.
- Compact the edging: Use a compacting tool or a tamper to compact the soil or gravel around the edging, providing additional support and stability.
Installing edging is an essential step to give your brick driveway a polished and well-defined appearance. By selecting the appropriate edging material, preparing the edges, excavating along the perimeter, adding a layer of sand, placing and securing the edging, checking for levelness, backfilling the trench, and compacting the edging, you’ll ensure that your driveway is structurally sound and visually appealing. With the edging in place, you’re now ready to proceed to the next step: laying the bricks.
When installing a brick driveway, make sure to properly prepare the base by excavating and compacting the soil, adding a layer of gravel, and then sand before laying the bricks. This will ensure a stable and durable driveway.
Read more: How Much Do Driveway Gates Cost
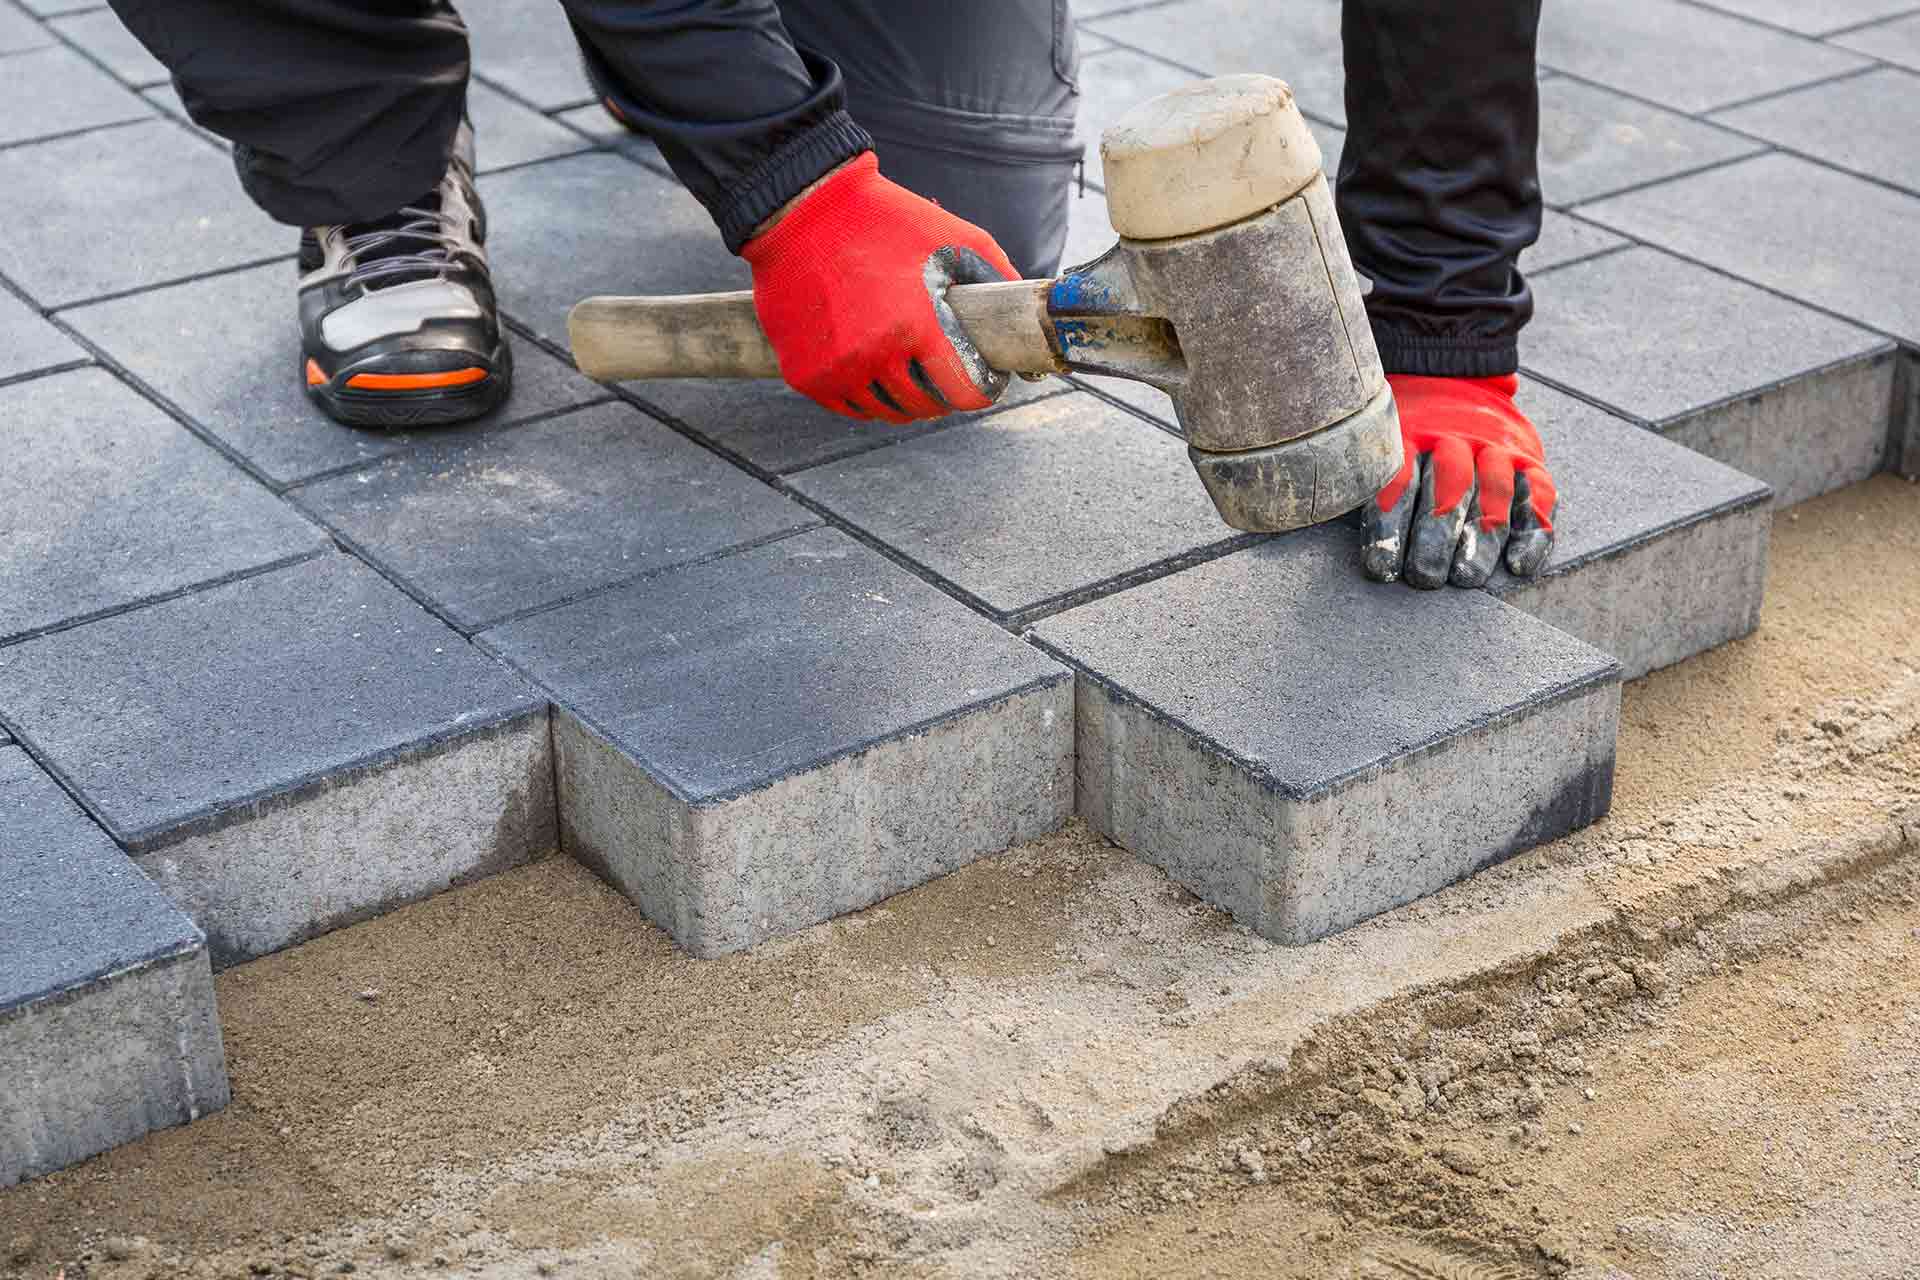
Step 5: Laying the Bricks
Now comes the exciting part – laying the bricks for your beautiful brick driveway. This step requires careful attention to detail and precision to ensure a professional and visually appealing result. Follow these steps to effectively lay the bricks:
- Prepare the layout: Start by dry laying the bricks without mortar to determine the pattern and arrangement that you want. This will help you visualize the final design and make any necessary adjustments before permanently setting the bricks.
- Begin at one corner: Start laying the bricks at one corner of the driveway. You can use a string or a chalk line as a guide to ensure a straight and even starting point.
- Apply mortar: Spread a layer of mortar onto the prepared base using a trowel. Make sure the layer is even and not too thick, as excess mortar can cause the bricks to shift or become uneven.
- Place the bricks: Carefully lay the first brick onto the mortar, pressing it firmly into place. Use a rubber mallet or a wooden block to tap the brick gently and ensure it sits flush with the edging and neighboring bricks.
- Add spacers: Place plastic spacers or wooden dowels between the bricks to create consistent gaps and allow room for jointing material. These spacers will ensure even spacing and provide a neat finish.
- Continue the pattern: Repeat the process of applying mortar, placing bricks, and adding spacers to continue laying the bricks in the desired pattern. Maintain a consistent gap between the bricks and periodically check for levelness.
- Cut bricks if necessary: Use a brick saw or a chisel and mallet to cut bricks to fit along the edges or corners of the driveway. Take measurements carefully and wear protective equipment when cutting the bricks.
- Check for levelness and alignment: Use a level, straightedge, or string line to ensure that the bricks are level and aligned properly throughout the installation. Make any necessary adjustments by tapping the bricks or adding/removing mortar.
- Clean off excess mortar: As you lay the bricks, periodically clean off any excess mortar from the surface using a trowel or a brush. This will prevent it from hardening and marring the appearance of the driveway.
- Allow the mortar to set: Once all the bricks are laid, allow the mortar to set for the recommended time specified by the manufacturer. This typically takes 24-48 hours.
Laying the bricks is a critical step in creating the structure and visual appeal of your brick driveway. By preparing the layout, beginning at one corner, applying mortar, placing the bricks with spacers, continuing the pattern, cutting bricks if necessary, checking for levelness and alignment, cleaning off excess mortar, and allowing the mortar to set, you’ll achieve a professionally installed brick driveway. With the bricks in place, you can proceed to the next step: filling the joints.
Step 6: Cutting Bricks (if necessary)
Creating a perfectly fitted brick driveway often requires cutting bricks to fit along the edges or corners. This step allows you to achieve a seamless and professional finish. Follow these steps to cut bricks for your driveway:
- Measure and mark: Take precise measurements of the space where a brick needs to be cut, considering any curves or angles. Use a pencil or chalk to mark the cutting line on the surface of the brick.
- Choose the right tool: There are several options for cutting bricks, including a brick saw, angle grinder with a masonry blade, or a chisel and hammer. Select the appropriate tool based on your preference and the complexity of the cuts.
- Wear safety gear: Before cutting the brick, ensure you are wearing safety gear, including safety glasses, a dust mask, and work gloves to protect yourself from flying debris and dust.
- Set up the cutting area: Find a sturdy work surface or place the brick securely on a stable cutting platform. Make sure the area is clear of any obstructions and create a clear cutting path for the tool.
- Make the cut: If using a brick saw or angle grinder, carefully follow the marked cutting line and slowly guide the tool through the brick. If using a chisel and hammer, score the brick along the cutting line and then strike it firmly with the hammer to break it along the scored line.
- Smooth the edges: Once the brick has been cut, use a file or sandpaper to smooth out any rough edges or uneven surfaces. This will ensure a seamless fit when placing the cut brick in the driveway.
- Check the fit: After cutting and smoothing the brick, place it in the designated area and check for proper fit and alignment. Make any necessary adjustments or recuts as needed.
- Continue laying the bricks: Once the cut bricks are properly fitted, continue with the overall brick laying process, ensuring the cut bricks seamlessly integrate with the rest of the driveway.
Cutting bricks allows you to achieve the perfect fit for your brick driveway. By measuring and marking the bricks, choosing the right cutting tool, wearing appropriate safety gear, setting up a cutting area, making the cut accurately, smoothing the edges, checking the fit, and continuing with the overall brick laying process, you’ll create a well-fitted and visually appealing driveway. With the bricks cut and placed, you’re ready to move on to the next step: filling the joints.
Step 7: Filling the Joints
With the bricks laid in place, it’s time to fill in the joints between them. Filling the joints not only enhances the overall aesthetics of your brick driveway but also helps stabilize the bricks and prevent weed growth. Here are the steps to fill the joints effectively:
- Select the jointing material: Choose a jointing material that suits your preferences and desired look. This can include sand, polymeric sand, or mortar. Consider factors such as durability, ease of application, and compatibility with the surrounding environment.
- Clean the bricks: Before filling the joints, ensure that the bricks are clean and free from any debris or excess mortar. Use a brush or a leaf blower to remove any loose particles from the surface.
- Wet the bricks: Lightly mist the bricks with water. This will prevent the jointing material from sticking to the bricks and make the application process smoother.
- Fill the joints: Spread the selected jointing material over the surface of the bricks, focusing on the gaps between them. Use a broom, a trowel, or a pointing tool to firmly press the material into the joints and ensure even distribution.
- Pack the joints: Once the joints are filled, use a stiff broom to brush diagonally across the joints, ensuring that the jointing material is packed tightly. This will help eliminate any air pockets and create a solid bond.
- Compact the joints: If using polymeric sand, lightly mist the surface with water to activate the sand’s binding properties. Follow the manufacturer’s instructions on compaction to ensure proper adhesion.
- Clean off excess material: After compacting the joints, sweep away any excess jointing material from the surface of the bricks. Pay attention to the edges and corners, ensuring a clean and polished appearance.
- Allow for curing time: Depending on the jointing material used, allow sufficient time for it to cure or set. Follow the manufacturer’s instructions for specific curing times and avoid any foot or vehicle traffic during this period.
- Inspect and make touch-ups: Once the jointing material has fully cured, inspect the joints for any gaps, cracks, or inconsistencies. Make any necessary touch-ups or repairs to ensure a seamless and visually appealing finish.
Filling the joints is a crucial step in completing your brick driveway. By selecting the appropriate jointing material, cleaning the bricks, wetting the surface, filling the joints, packing and compacting the material, cleaning off excess material, allowing for proper curing time, and inspecting and making any necessary touch-ups, you’ll achieve strong and visually pleasing joints. With the joints filled, your brick driveway is almost complete. The final step is to seal the surface.
Step 8: Sealing the Surface
The final step in creating a stunning and long-lasting brick driveway is sealing the surface. Sealing not only enhances the color and appearance of the bricks but also provides protection against stains, moisture, and UV damage. Follow these steps to effectively seal your brick driveway:
- Clean the surface: Before applying any sealant, thoroughly clean the surface of the bricks. Remove any dirt, debris, or stains using a pressure washer or a stiff-bristle brush. Allow the surface to dry completely before proceeding.
- Select the right sealant: Choose a penetrating or film-forming sealer that is specifically designed for brick driveways. Consider factors such as durability, breathability, and compatibility with the brick material.
- Apply the sealant: Follow the manufacturer’s instructions for the application of the sealant. Most sealants can be applied using a roller or a sprayer. Ensure even coverage and avoid pooling or streaking.
- Work in small sections: Divide your driveway into manageable sections and apply the sealant one section at a time. This will prevent the sealant from drying too quickly and ensure thorough coverage.
- Allow for proper drying and curing: After applying the sealant, allow it to dry and cure according to the manufacturer’s instructions. This typically takes a few hours to a full day, depending on the product and weather conditions.
- Apply a second coat (optional): Depending on the desired level of protection and appearance, you may choose to apply a second coat of sealant. Follow the same application process as the first coat.
- Maintain the sealed surface: Once the sealant has fully cured, maintain the sealed surface by regularly cleaning it with a mild detergent and water. Avoid using harsh chemicals or abrasive cleaners that could damage the sealant.
- Monitor and reseal as needed: Over time, the sealant may wear down due to weather exposure and traffic. Monitor the condition of your driveway and reseal it as needed to maintain its protection and appearance.
Sealing the surface of your brick driveway is the final touch that enhances its beauty and extends its lifespan. By cleaning the surface, selecting the right sealant, applying the sealant in small sections, allowing for proper drying and curing, considering a second coat if desired, maintaining the sealed surface, and monitoring and resealing as needed, you’ll ensure that your brick driveway remains in optimal condition for years to come.
With the sealing process complete, you can now step back and admire your newly created brick driveway. Its elegant appearance, durability, and low maintenance will not only enhance the overall aesthetic of your property but also provide a functional and impressive entrance for your home. Congratulations on completing this project!
Read more: How Do Brick Ties Work
Conclusion
Creating a brick driveway is a fulfilling project that can significantly enhance the curb appeal and value of your property. By following the step-by-step guide outlined in this article, you now have the knowledge and tools to successfully create a stunning and durable brick driveway.
Remember, careful planning and preparation are key to a successful project. Take the time to evaluate your space, consider drainage and regulations, choose the right bricks and pattern, and set a budget. Clearing and leveling the area, creating a solid base, installing edging, and laying the bricks require attention to detail and precision for the best results.
Don’t forget the importance of cutting bricks if necessary to achieve a perfect fit, filling the joints to provide stability and prevent weed growth, and sealing the surface to enhance its appearance and protect against damage. Regular maintenance, including cleaning and resealing as needed, will ensure your brick driveway remains in top condition for years to come.
A beautifully designed and professionally installed brick driveway adds functionality and character to your property. It not only provides an inviting entrance but also showcases your attention to detail and commitment to quality. Whether you’re revamping an existing driveway or starting from scratch, the end result will be worth the effort and investment.
Now that you have the knowledge and guidance, it’s time to embark on your brick driveway project. Enjoy the process of creating a masterpiece that will impress both guests and passersby, and take pride in the lasting beauty and functionality of your new brick driveway.
Frequently Asked Questions about How To Do A Brick Driveway
Was this page helpful?
At Storables.com, we guarantee accurate and reliable information. Our content, validated by Expert Board Contributors, is crafted following stringent Editorial Policies. We're committed to providing you with well-researched, expert-backed insights for all your informational needs.


0 thoughts on “How To Do A Brick Driveway”