
Articles
How To Get Lint Out Of A Blanket
Modified: October 20, 2024
Learn effective methods to remove lint from your blanket with these informative articles. Keep your blanket looking fresh and lint-free!
(Many of the links in this article redirect to a specific reviewed product. Your purchase of these products through affiliate links helps to generate commission for Storables.com, at no extra cost. Learn more)
Introduction
There’s nothing quite as cozy as cuddling up with a soft, warm blanket on a chilly evening. However, over time, blankets can accumulate lint, making them look worn out and less inviting. Lint, those tiny fibers that come from fabrics, can cling to blankets and make them appear dirty or unkempt. But fear not! Getting lint out of a blanket is a relatively simple process that can restore its softness and beauty.
In this article, we will guide you through the steps to effectively remove lint from your beloved blanket. We’ll also provide tips on preventing lint build-up to keep your blankets in pristine condition for longer.
Before we dive in, let’s take a moment to understand why getting rid of lint is important for maintaining the quality and appearance of your blankets.
Key Takeaways:
- Say goodbye to lint! Restore your blanket’s appearance, softness, and durability with simple steps like shaking, rolling, vacuuming, and washing. Keep it cozy and lint-free for a healthier, cleaner environment.
- Prevent lint build-up and maintain your blankets’ pristine condition by washing similar fabrics separately, using gentle cycles, and storing them properly. Regular maintenance ensures long-lasting coziness and cleanliness.
Read more: How To Get Stains Out Of A Blanket
Why Getting Lint Out of a Blanket is Important
Lint may seem like a minor issue, but it can have a significant impact on the overall look and feel of your blankets. Here’s why it’s important to remove lint:
- Restores Appearance: Over time, lint can accumulate on the surface of a blanket, making it look fuzzy and worn out. By removing lint, you can restore the blanket’s original appearance, making it look fresh and inviting once again.
- Enhances Softness: Lint can make a blanket feel rough and less comfortable. By removing lint, you can bring back the softness and plushness of the fabric, making it more enjoyable to use.
- Improves Durability: Lint can weaken the fibers of a blanket, causing them to break and fray over time. By regularly removing lint, you can help prolong the lifespan of your blanket and prevent premature damage.
- Reduces Allergens: Lint can harbor allergens such as dust mites, pet dander, and pollen. By removing lint, you can reduce the presence of these allergens, creating a cleaner and healthier environment for you and your family.
- Preserves Color and Pattern: Lint on a blanket can make colors appear dull and obscure patterns. By eliminating lint, you can restore the vibrancy of colors and highlight intricate designs, allowing the blanket to showcase its true beauty.
Overall, getting lint out of a blanket is essential for maintaining its visual appeal, comfort, and longevity. It not only restores the aesthetic value of the blanket but also contributes to a cleaner and healthier living space.
Tools and Materials Needed
Before you begin the process of removing lint from your blanket, gather the following tools and materials:
- Lint Roller: A lint roller is a handheld tool covered in sticky sheets that can effectively pick up lint from fabric surfaces.
- Vacuum Cleaner: A vacuum cleaner with a brush attachment can be used to remove loose lint and debris from the blanket.
- Fabric Shaver: A fabric shaver is a device that gently shaves off lint and pills from fabrics without causing damage.
- Lint Brush: A lint brush contains bristles or a sticky surface that can be used to brush off lint from the blanket.
- Mild Detergent: You will need a gentle and mild detergent suitable for washing the type of fabric your blanket is made of.
- Washing Machine and Dryer: Depending on the care instructions of your blanket, you may need a washing machine and dryer to clean and dry it.
These tools and materials are readily available in most household supplies stores. Ensure that you have them on hand before you start the process of removing lint from your blanket.
Now that you’re equipped with the necessary tools, let’s move on to the step-by-step process of getting lint out of your blanket.
Step 1: Shake Out the Blanket
The first step in removing lint from your blanket is to give it a good shake. Find an open area, preferably outdoors, where you can freely shake the blanket without causing a mess. Here’s how to do it:
- Choose a Suitable Location: Take the blanket to a well-ventilated space, such as a porch or balcony, or lay it out on a clean surface.
- Hold the Blanket Firmly: Grasp one end of the blanket firmly, preferably with both hands.
- Give it a Vigorous Shake: Shake the blanket vigorously, moving your arms up and down in a fast and controlled motion.
- Repeat on All Sides: Rotate the blanket and repeat the shaking process on all sides to dislodge any loose lint and debris.
By giving the blanket a good shake, you’ll be able to remove some of the loose lint and surface debris. This step is particularly effective for blankets made of lighter fabrics or fleece materials. However, for blankets with stubborn or embedded lint, additional methods will be required.
Now that you’ve shaken out the blanket, it’s time to move on to the next step: using a lint roller to remove any remaining lint.
Step 2: Use a Lint Roller
After shaking out the blanket to remove loose lint, it’s time to tackle the remaining lint using a lint roller. A lint roller is a handy tool that uses adhesive sheets to pick up lint from fabric surfaces. Here’s how to effectively use a lint roller:
- Prepare the Lint Roller: Start by removing the protective cover from the lint roller, exposing the adhesive sheet.
- Roll the Lint Roller: Starting from one end of the blanket, roll the lint roller firmly and evenly over the surface, applying slight pressure.
- Change the Adhesive Sheet: As the adhesive sheet becomes full of lint, peel it off and discard it. If your lint roller has multiple adhesive sheets, simply tear off the used sheet to reveal a fresh one.
- Continue Rolling: Repeat the rolling process on different sections of the blanket and continue until all visible lint has been removed.
Lint rollers work effectively on most types of fabrics, including wool, cotton, and synthetic materials. They are particularly useful for removing loose lint and pet hair from blankets. However, keep in mind that lint rollers may not be as effective on blankets with deep-seated or stubborn lint. In such cases, additional methods will be needed.
By using a lint roller, you’ll be able to quickly and easily remove lint from your blanket, leaving it looking cleaner and more presentable. Once you’ve finished using a lint roller, it’s time to move on to step 3: vacuuming the blanket.
Read more: How To Get Slime Out Of A Blanket
Step 3: Vacuum the Blanket
Once you have used a lint roller to remove the majority of the lint from your blanket, it’s time to tackle any remaining stubborn lint and debris by using a vacuum cleaner. A vacuum cleaner with a brush attachment will help remove lint, dust, and other particles from the fabric. Here’s how to vacuum your blanket:
- Attach the Brush Attachment: Start by attaching the brush attachment to your vacuum cleaner. This attachment is designed to gently agitate the fabric, allowing the vacuum to effectively suction away lint.
- Set the Vacuum to a Low Suction Level: Adjust the suction level of your vacuum to a lower setting. This will prevent any excessive force that could damage the blanket.
- Start Vacuuming: Begin by slowly and gently running the vacuum cleaner’s brush attachment over the surface of the blanket. Be sure to cover all areas, including corners and edges.
- Work in Sections: To ensure thorough cleaning, work in small sections at a time, moving the vacuum cleaner in overlapping rows. This will help remove any remaining lint and ensure a more effective cleaning process.
- Pay Attention to Seams and Borders: Pay special attention to seams, borders, and other areas where lint may accumulate. Use the brush attachment to gently lift any trapped lint, guiding the vacuum cleaner to remove it.
- Repeat if Necessary: Depending on the level of lint accumulation, you may need to repeat the vacuuming process on the blanket to ensure all lint is removed.
Vacuuming your blanket helps to remove embedded lint, dust, and other particles, leaving it fresh and clean. However, it’s important to note that not all blankets are suitable for vacuuming. Delicate or loosely woven blankets may be more prone to damage. In such cases, it’s best to use alternative methods to remove lint.
Now that you’ve vacuumed your blanket, it’s time to move on to step 4: using a fabric shaver to eliminate any remaining lint or pilling.
Use a lint roller or tape to remove lint from a blanket. Simply roll the lint roller over the blanket or press the tape onto the fabric and lift it up to remove the lint.
Step 4: Use a Fabric Shaver
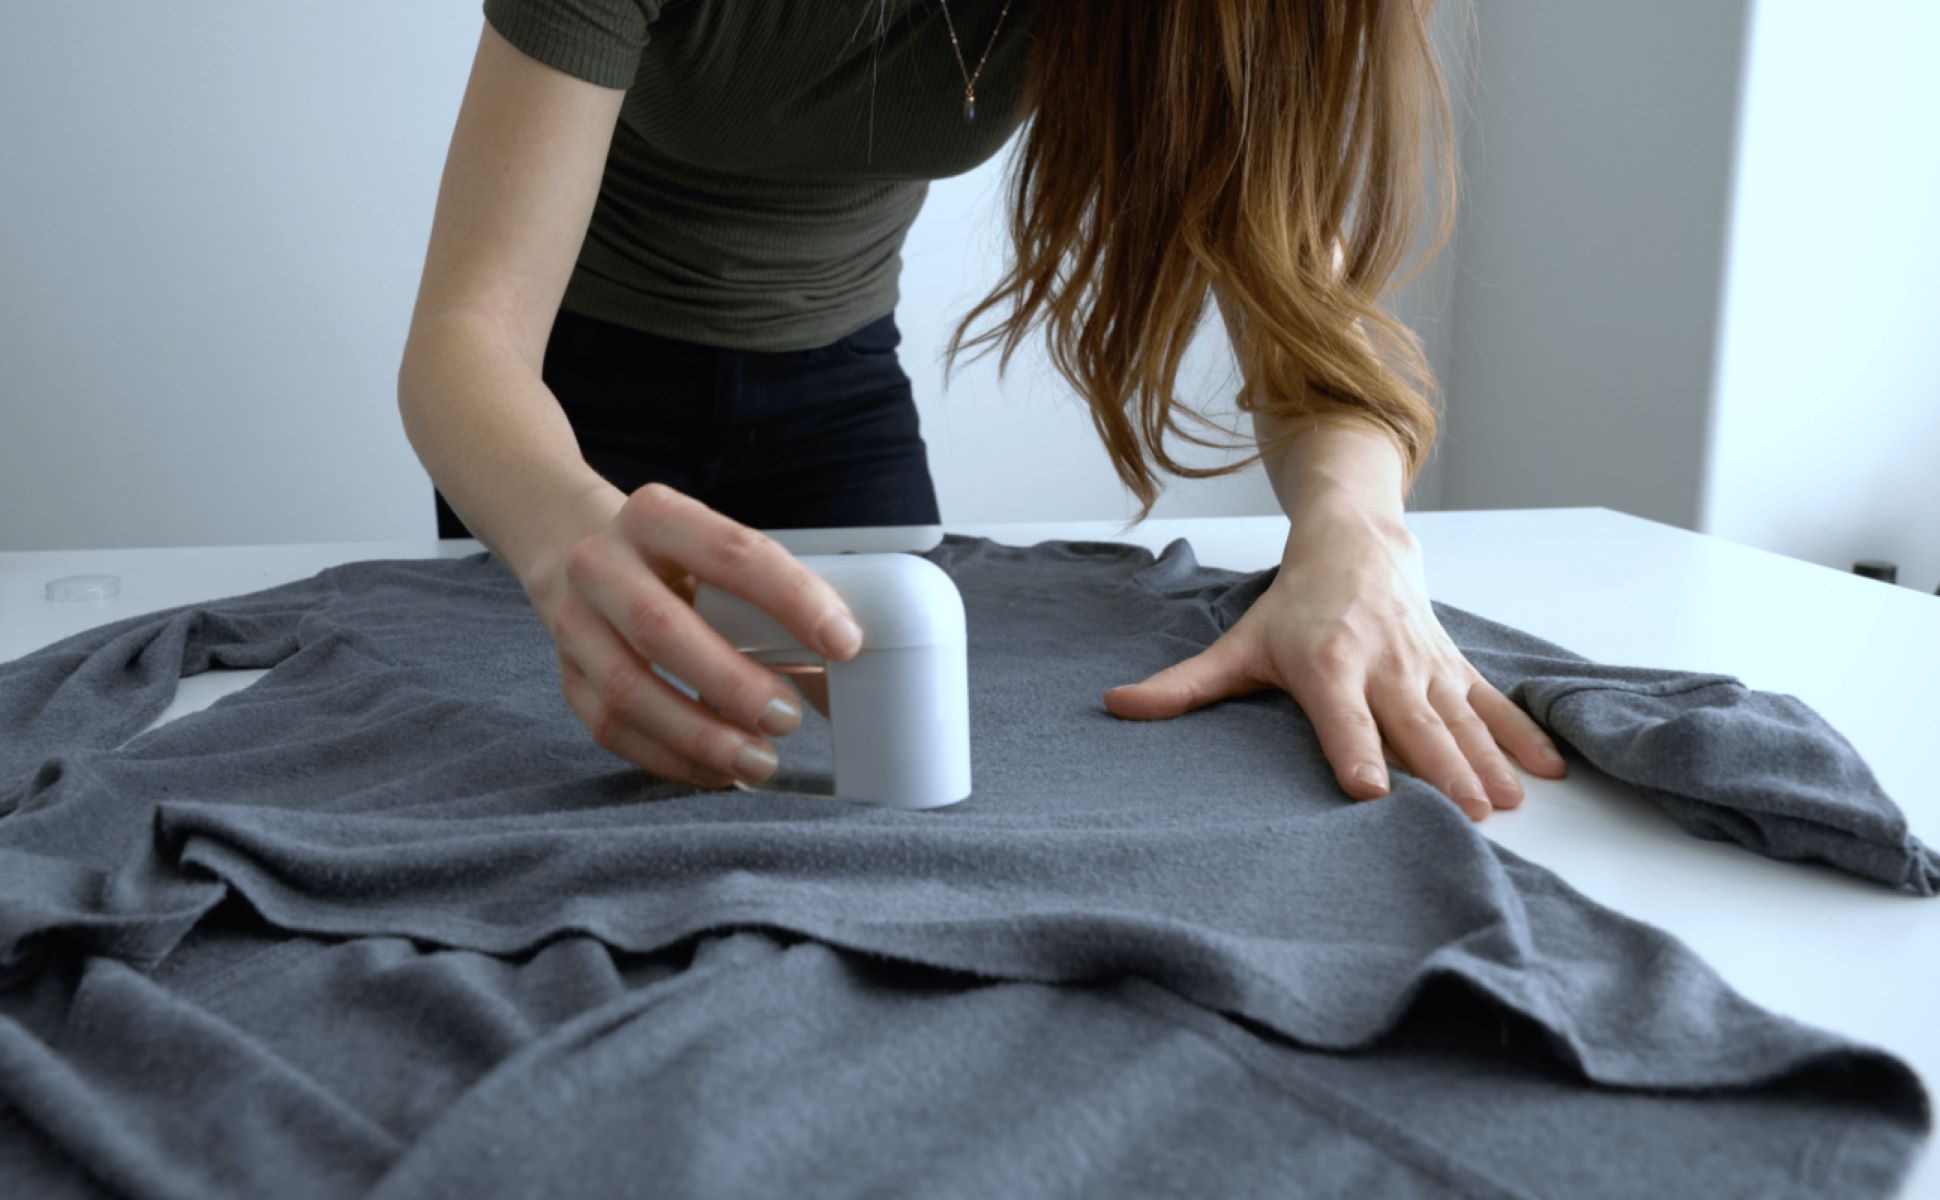
If your blanket still has stubborn lint or pilling after using a lint roller and vacuuming, a fabric shaver is an effective tool to further remove these imperfections. A fabric shaver, also known as a lint remover or fuzz remover, gently shaves off lint, fuzz, and pills from the surface of the fabric without causing damage. Here’s how to use a fabric shaver:
- Prepare the Fabric Shaver: Ensure the fabric shaver is clean and ready for use. If necessary, charge it or insert new batteries.
- Lay the Blanket Flat: Place the blanket on a flat, clean surface, ensuring it is taut and without any creases.
- Hold the Fabric Shaver: Hold the fabric shaver at a 90-degree angle and position it gently on the surface of the blanket.
- Gently Glide the Shaver: Move the fabric shaver across the blanket in a steady, straight motion. Avoid applying too much pressure to prevent damaging the fabric.
- Focus on Problem Areas: Pay extra attention to areas with visible lint or pilling, such as high-friction areas or where the blanket comes into contact with rough surfaces.
- Empty the Shaver’s Collector: As you shave off lint and fuzz, the fabric shaver’s collector will fill up. Pause periodically to empty the collector, ensuring the shaver remains effective.
- Continue Shaving: Repeat the gliding motion with the fabric shaver until you have removed all the lint and pills from the surface of the blanket.
A fabric shaver is an excellent tool for rejuvenating the appearance of your blanket by removing unsightly lint and pilling. It is particularly effective for blankets made of wool, acrylic, or other natural fibers. However, exercise caution when using a fabric shaver on delicate or loosely woven blankets to avoid any damage.
Now that you’ve used a fabric shaver to remove lint and pills, it’s time to move on to step 5: washing and drying the blanket to ensure a thorough clean.
Step 5: Wash and Dry the Blanket
Washing and drying your blanket is an essential step in the process of removing lint and maintaining its freshness. This step helps remove any remaining lint, dust, and odors, leaving your blanket clean and ready for use. Follow these steps to wash and dry your blanket:
- Check the Care Instructions: Before proceeding, check the care label on your blanket for specific washing instructions. Different fabrics may require different water temperatures and washing methods.
- Pre-treat Stains: If there are any stains on your blanket, pre-treat them using a mild detergent or a stain remover according to the product instructions.
- Choose a Gentle Cycle: Set your washing machine to a gentle or delicate cycle to prevent excessive agitation that could damage the fabric. Use cold or lukewarm water as specified by the care instructions.
- Add a Mild Detergent: Add a gentle, mild detergent specifically designed for the type of fabric your blanket is made of. Avoid using bleach or harsh chemicals that could cause damage.
- Place the Blanket in the Machine: Carefully place your blanket into the washing machine, making sure it is evenly distributed. Avoid overloading the machine to allow for proper cleaning and rinsing.
- Start the Wash Cycle: Start the washing cycle and let the machine complete the designated wash cycle based on the care instructions.
- Remove the Blanket: Once the wash cycle is complete, remove the blanket from the machine promptly to prevent wrinkling or musty odors.
- Dry According to Instructions: Follow the care instructions to determine whether the blanket can be tumble dried or if it needs to be air-dried. If tumble drying, use a low heat setting to prevent shrinking or heat damage to the fabric. Air-dry the blanket thoroughly if required.
Washing and drying your blanket after removing lint helps ensure that it is thoroughly clean and free from any remaining debris. It also helps restore the softness and plushness of the fabric. Remember to follow the specific care instructions for your blanket to maintain its quality and prolong its lifespan.
Now that your blanket is clean and dry, it’s time to move on to step 6: using a lint brush to remove any final traces of lint.
Step 6: Use a Lint Brush
After washing and drying your blanket, there may still be a few stubborn lint fibers clinging to its surface. To remove these final traces of lint, a lint brush can be extremely helpful. A lint brush is designed with bristles or a sticky surface that effectively captures and removes lint from fabrics. Here’s how to use a lint brush:
- Prepare the Lint Brush: Ensure that your lint brush is clean and free of any debris or previous lint. If the brush has a removable sticky surface, make sure it is fresh.
- Hold the Blanket Taught: Lay the blanket on a flat surface and hold it taught to create tension and allow the lint brush to glide smoothly over the fabric.
- Brush in One Direction: With the lint brush in hand, brush the fabric in one direction, applying gentle pressure. Start from one end of the blanket and work your way to the other end.
- Pay Attention to Problem Areas: Focus on areas where lint tends to accumulate, such as corners, seams, or textured patterns. Use the lint brush to thoroughly brush these specific areas.
- Repeat if Necessary: Continue brushing the entire surface of the blanket, going over any areas where lint remains until the fabric appears clean and lint-free.
- Clean the Lint Brush: Check the lint brush periodically to see if it has collected a significant amount of lint. Remove the collected lint by either gently tapping it against a waste bin or following the instructions if the brush has a removable sticky surface.
A lint brush is a practical tool for a final touch-up, ensuring that your blanket is completely free from lint. It can be particularly effective on blankets with a shorter pile or tighter weave. However, exercise caution to avoid excessive brushing, as it may cause friction and damage certain delicate fabrics.
Now that you’ve used a lint brush to remove any remaining lint, it’s time to move on to step 7: prevent future lint build-up to keep your blanket looking fresh and lint-free for longer.
Read more: How To Get Wax Out Of A Blanket
Step 7: Preventing Lint Build-Up
To keep your blanket looking fresh and lint-free for longer, it’s important to take preventive measures to reduce lint build-up. Here are some tips to help you prevent lint from accumulating on your blankets:
- Wash Similar Fabrics Together: Sort your laundry and wash fabrics that shed lint, such as towels or fuzzy garments, separately from your blankets. This will minimize the transfer of lint onto your blankets.
- Zip or Button Up Items: Before washing or drying your blankets, ensure that any items with zippers, hooks, or buttons are securely fastened. Loose hardware can cause friction and result in lint and pilling.
- Avoid Overloading the Washing Machine: Overloading the washing machine can create friction between fabrics, leading to lint production. Follow the manufacturer’s guidelines for proper load size to prevent excessive wear and tear.
- Choose Gentle Washing Cycles: When washing your blankets, opt for gentle or delicate cycles to minimize agitation. This helps preserve the fabric’s integrity and reduces lint production.
- Avoid Excessive Heat: High temperatures can cause the fabric to weaken and shed lint. Use low-heat settings when drying your blankets, or consider air-drying them to reduce the risk of lint accumulation.
- Store Blankets Properly: When not in use, store your blankets in a clean, dry space away from excessive dust or dirt. Fold them neatly, or consider using storage bags or containers to protect them from lint and other debris.
- Regularly Remove Lint: Make it a habit to remove lint from your blankets using methods like the lint roller or lint brush that we discussed earlier. Regular maintenance can prevent lint build-up before it becomes more challenging to remove.
By following these preventive measures, you can significantly reduce the accumulation of lint on your blankets, helping to keep them in pristine condition for longer.
Now that you have completed all the steps, your blanket should be free from lint and looking fresh and inviting once again. By incorporating these practices into your routine, you can maintain the quality and appearance of your blankets for years to come.
Remember, giving your blanket some extra attention and care will ensure it remains a cozy and lint-free companion for many cozy nights ahead.
Conclusion
Lint accumulation on blankets can be frustrating, but with the right tools and techniques, you can easily get rid of it and restore your blankets to their former glory. Removing lint not only improves the appearance of your blankets but also helps maintain their softness, durability, and overall quality.
In this article, we outlined a step-by-step process to effectively remove lint from your blankets. From shaking out the blanket and using a lint roller to vacuuming, using a fabric shaver, and washing and drying the blanket, each step plays a crucial role in achieving a lint-free result.
We also discussed the importance of preventing lint build-up by washing similar fabrics separately, avoiding overloading the washing machine, using gentle cycles, and properly storing your blankets. Regularly removing lint and implementing preventive measures will help prolong the lifespan of your blankets and keep them looking fresh and well-maintained.
Remember, the key to successfully removing lint from blankets is to be mindful of the fabric’s delicacy and to use gentle techniques. It’s important to follow the care instructions specific to each blanket to avoid any damage or shrinkage.
With these tips and a little extra care, you can enjoy your cozy blankets without the annoyance of lint. So next time you cuddle up on the couch or prepare your bed for a restful night’s sleep, your blankets will be clean, lint-free, and ready to provide you with the comfort you deserve.
Frequently Asked Questions about How To Get Lint Out Of A Blanket
Was this page helpful?
At Storables.com, we guarantee accurate and reliable information. Our content, validated by Expert Board Contributors, is crafted following stringent Editorial Policies. We're committed to providing you with well-researched, expert-backed insights for all your informational needs.

