
Articles
How To Hollow Log With Hand Tools
Modified: May 6, 2024
Looking for articles on how to hollow a log with hand tools? Check out this comprehensive guide for step-by-step instructions and expert tips.
(Many of the links in this article redirect to a specific reviewed product. Your purchase of these products through affiliate links helps to generate commission for Storables.com, at no extra cost. Learn more)
Introduction
Have you ever wanted to create a unique and functional piece of decor or furniture? Hollowing out a log with hand tools is a great way to unleash your creativity and craft a one-of-a-kind piece. Whether you are making a decorative planter, a rustic candle holder, or a functional stool, hollow logs can add a touch of nature and charm to any space.
In this article, we will guide you through the process of hollowing out a log using only hand tools. We will provide you with tips on choosing the right log, safety precautions to follow, and a step-by-step guide to help you create your masterpiece.
So, grab your tools, put on your creative hat, and let’s get started on this exciting journey of transforming a plain log into a stunning hollow masterpiece.
Key Takeaways:
- Embrace your creativity and transform a simple log into a stunning masterpiece with the right tools, safety precautions, and meticulous hollowing and finishing techniques.
- From choosing the perfect log to adding finishing touches, enjoy the journey of crafting a unique and functional hollow log that adds rustic charm to any space.
Read more: How To Build Log Cabin With Hand Tools
Choosing the Right Hollow Log
When it comes to selecting the right log for your project, there are a few key factors to consider. Here are some tips to help you make the best choice:
- Size: Determine the size of the hollow log based on your project requirements. Consider the dimensions and the space you have available for the final piece.
- Type of Wood: Different wood species have distinct characteristics and properties. Choose a log that matches the aesthetic you want to achieve and consider the durability and stability of the wood.
- Condition: Inspect the log for any signs of rot, cracks, or infestations. Avoid logs with extensive damage, as it may compromise the structural integrity of your project.
- Shape: Consider the shape of the log and how it will work for your desired design. Logs with unique curves or interesting knots can add visual interest to your finished piece.
- Sourcing: Look for logs that have been sustainably sourced or obtained legally. Avoid using logs from protected or endangered species.
Remember, the right log can greatly impact the final result of your project. Take your time to find the perfect log that meets your criteria and aligns with your creative vision.
Safety Precautions
Working with hand tools and a log can be a fulfilling and enjoyable experience, but it’s important to prioritize safety throughout the process. Here are some safety precautions to keep in mind:
- Protective Gear: Wear safety goggles, gloves, and a dust mask to protect yourself from flying particles, wood chips, and dust.
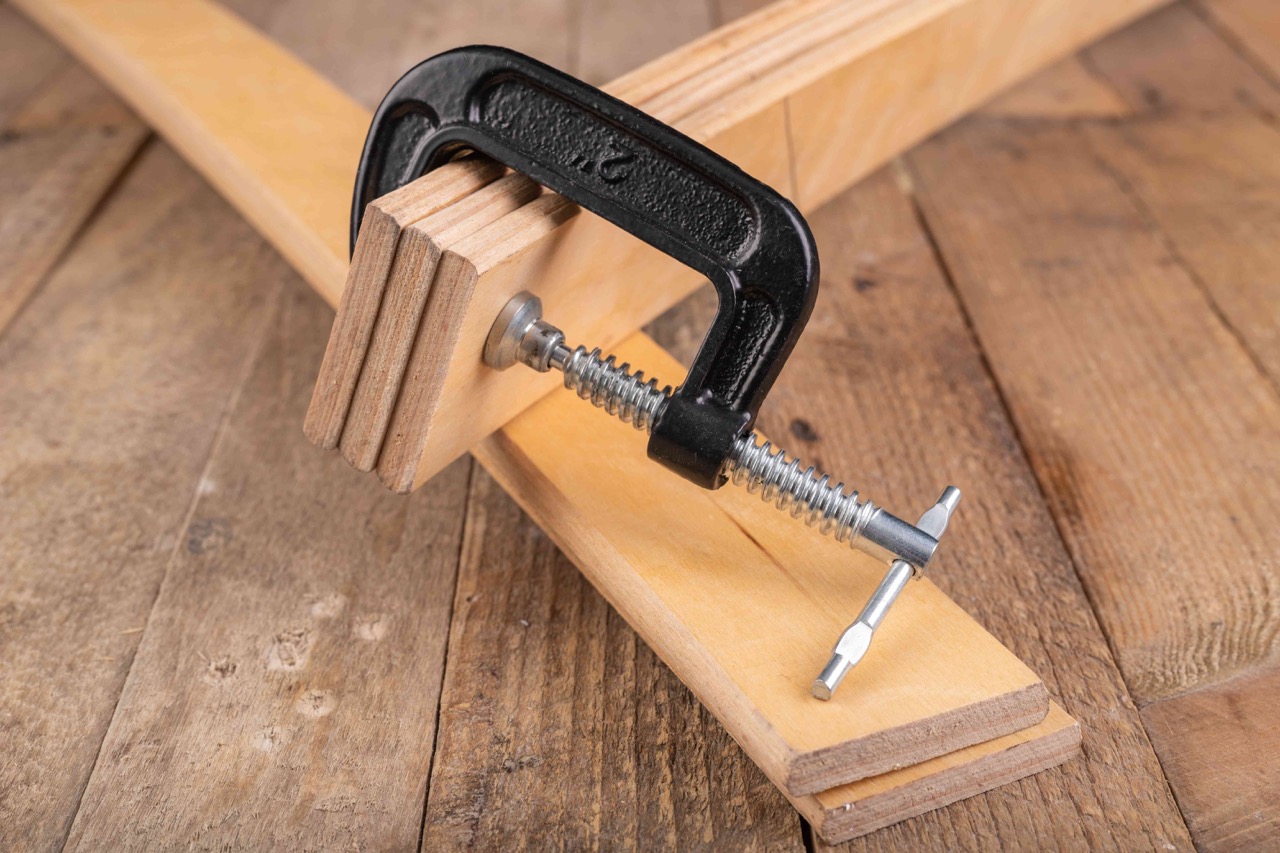
- Stable Work Surface: Ensure that your work surface is stable and secure. Use clamps or supports to prevent the log from slipping or moving during the cutting and hollowing process.
- Sharp Tools: Keep your hand tools, such as chisels and gouges, sharp and in good condition. Dull tools can lead to slips or require excessive force, increasing the risk of accidents.
- Proper Technique: Follow proper cutting and carving techniques to minimize the risk of injuries. Always cut away from your body and keep your fingers away from the cutting edges of the tools.
- Work in a Well-Ventilated Area: If you are working indoors, make sure the area is well-ventilated to minimize exposure to dust and fumes.
- Take Breaks: Working with hand tools can be physically demanding. Take regular breaks to rest and avoid overexertion.
- Clear the Surrounding Area: Remove any tripping hazards and ensure there is enough space around you to move freely while working.
- First Aid Kit: Have a first aid kit readily available in case of any minor injuries. It’s better to be prepared.
- Proceed with Caution: Take your time and work at a comfortable pace. Rushing can lead to mistakes and increase the risk of accidents.
By following these safety precautions, you can create your hollow log masterpiece with confidence and peace of mind. Remember, safety should always be your top priority when working with hand tools and wood.
Required Tools
To hollow out a log with hand tools, you will need the following tools:
- Chisels: A set of chisels in various sizes will be essential for carving and shaping the log. Choose chisels with sturdy blades and comfortable handles.
- Gouges: Gouges are similar to chisels but have curved cutting edges. They are ideal for creating smooth and concave surfaces inside the log.
- Mallet: A mallet will help you strike the chisels and gouges with precision and force. Look for a mallet made of sturdy material, such as rubber or wood.
- Saw: A saw will be necessary to cut the opening of the log. Choose a handsaw or a coping saw with fine teeth for clean and controlled cuts.
- Drill: A drill with various drill bits will come in handy for removing material from the log and creating holes for drainage, if needed.
- Sandpaper: Sandpaper of various grits will be essential for smoothing and refining the surfaces of the log.
- Clamps: Clamps will help secure the log in place during the cutting and hollowing process, ensuring stability and safety.
- Dust Mask and Safety Goggles: These protective gears will safeguard you from flying wood particles and dust.
Remember, the quality and durability of your tools will greatly impact the outcome of your project. Invest in reliable tools that are suitable for carving and woodworking to ensure optimal results.
Step 1: Assess the Log
Before you begin the process of hollowing out the log, it is important to assess its condition and plan your approach. Here are the key steps to follow when assessing the log:
- Inspect for Stability: Examine the log for any signs of instability, such as rot or decay. Avoid using a log that is structurally unsound or too soft to work with.
- Clean the Surface: Remove any loose bark, dirt, or debris from the log. This will give you a clear view of the wood and make it easier to mark and cut.
- Measure and Plan: Measure the dimensions of the log and determine the size and shape of the opening you want to create. Use a measuring tape and a pencil to mark the desired area on the log.
- Consider the Log’s Natural Features: Take a closer look at the log’s natural features, such as knots, branches, or unique patterns. These can either be incorporated into your design or avoided depending on your preferences.
- Visualize the Final Product: Envision how the finished hollow log will look and consider how it will be used or displayed. This will help you make informed decisions throughout the process.
By thoroughly assessing the log, you will have a better understanding of its characteristics and be able to plan your approach accordingly. This will set you up for success as you move forward with the hollowing process.
When hollowing out a log with hand tools, start by removing the bark and then use a combination of chisels, gouges, and adzes to gradually carve out the inside, working from both ends to meet in the middle. Keep the tools sharp for easier and more precise carving.
Read more: How Do You Split A Log With Hand Tools
Step 2: Marking the Log
Once you have assessed the log and determined the desired size and shape of the opening, it’s time to mark the log accordingly. The markings will serve as a guide during the cutting and hollowing process. Here’s how to mark the log:
- Measurements: Use a measuring tape or ruler to mark the dimensions of the opening on the log. Take accurate measurements and ensure they are evenly spaced and aligned.
- Pencil or Marker: Choose a pencil or marker that will contrast with the color of the log, making the markings clearly visible. Avoid using permanent markers that may leave difficult-to-remove stains.
- Shape: Use the measurements and your creative vision to draw the shape of the opening. It can be circular, rectangular, or any other shape that suits your design.
- Depth: Mark the desired depth of the hollowed-out section on the log. Take into consideration the functionality of your project and how much material you need to remove.
- Guidelines: If necessary, draw additional guidelines or reference points on the log to help you stay on track during the cutting and hollowing process.
By marking the log accurately and clearly, you will have a visual guide to follow and ensure that your hollowing process stays on track. Take your time during this step to ensure precision and accuracy in your markings.
Step 3: Cutting the Opening
With the log marked and ready, it’s time to begin cutting the opening. This step will create the entry point for hollowing out the log. Follow these steps to cut the opening:
- Secure the Log: Use clamps or other securing methods to hold the log firmly in place. This will prevent the log from moving or slipping during the cutting process.
- Select the Right Saw: Choose a handsaw or coping saw with fine teeth for precise and controlled cuts. Ensure that the saw blade is sharp and in good condition.
- Align the Saw: Position the saw blade along the marked lines of the opening. Take your time to ensure that the blade is aligned properly and perpendicular to the log.
- Start Cutting: Begin sawing along the marked lines, applying consistent pressure and using long, smooth strokes. Take breaks as needed to rest your hand and maintain control.
- Work in Stages: Cut along the outer perimeter of the opening first, gradually working your way towards the center. This helps prevent the wood from splitting or cracking.
- Inspect and Adjust: Periodically stop and check the progress of the cut. Make any necessary adjustments to ensure that the opening remains aligned and consistent in shape.
Remember to take your time and work carefully when cutting the opening. Patience and precision will result in a clean and well-defined opening that sets the stage for the hollowing process.
Step 4: Hollowing the Log
Now that you have successfully cut the opening, it’s time to start hollowing out the log. This step involves removing the excess wood to create the desired cavity. Follow these steps to hollow the log:
- Start with Shallow Cuts: Begin by making shallow cuts into the wood inside the log. This will help you establish the depth of the hollowed-out section gradually.
- Use Chisels and Gouges: Utilize a combination of chisels and gouges to remove the wood. Start with wider chisels to remove larger chunks, and then switch to smaller chisels and gouges for more precise carving.
- Work in Layers: Hollow out the log in layers, gradually scooping out the wood. Be mindful of the integrity of the log and maintain structural stability as you progress.
- Remove Wood Chips: Clear away wood chips and debris regularly to maintain a clear working area. This will also help you assess your progress and identify any areas that need further hollowing.
- Check Depth and Shape: Periodically check the depth and shape of the hollowed-out section. Compare it with your desired dimensions and make any necessary adjustments to achieve the desired result.
- Create Smooth Surfaces: Use sandpaper to smooth the surfaces inside the log. This will enhance the aesthetics and ensure a comfortable and safe experience when using the finished hollow log.
Remember to take your time and work gradually when hollowing out the log. Regularly assess your progress and make adjustments as needed to achieve the desired shape, depth, and smoothness of the cavity.
Step 5: Finishing Touches
After hollowing out the log, it’s time to add the finishing touches to your project to make it truly exceptional. Here are the final steps to complete your hollow log masterpiece:
- Clean and Sand: Clean the interior and exterior surfaces of the log to remove any remaining wood chips or debris. Use sandpaper of gradually finer grits to achieve a smooth and polished finish.
- Apply Finishing: Consider applying a protective finish to enhance the durability and appearance of the log. You can use wood sealants, oils, or varnishes to seal the wood and bring out its natural beauty.
- Add Decorative Elements: Get creative with decorating your hollow log. You can add wood carvings, paint, or embellishments that complement your overall design. Let your imagination guide you in personalizing your creation.
- Ensure Stability: If your project is intended for functional use, ensure that the base is stable and level. This will make your hollow log a safe and durable piece of furniture or decor.
- Protect and Maintain: As with any wooden piece, it’s important to protect your hollow log from moisture, direct sunlight, and extreme temperatures. Regularly clean and maintain it to ensure its longevity and beauty.
- Showcase Your Creation: Finally, proudly display your hollow log masterpiece in your desired location. Whether it’s indoors or outdoors, your creation will surely be a unique and eye-catching addition to any space.
Take the time to meticulously complete these finishing touches to bring out the full potential of your hollow log. Step back and admire your handcrafted masterpiece – a unique piece of art that showcases your creativity and woodworking skills.
Conclusion
Hollowing out a log with hand tools is a rewarding and creative endeavor that allows you to transform a simple piece of wood into a unique and functional work of art. By following the steps outlined in this guide, you can successfully create a hollow log that adds a touch of nature and rustic charm to any space.
Remember to choose the right log, prioritize safety throughout the process, and use the required tools effectively. Assess the log, mark the opening, cut with precision, hollow carefully, and add the finishing touches to achieve your desired result.
Throughout this journey, embrace your creativity and let it guide your design choices. Incorporate unique elements and showcase your personal style in your hollow log project. Whether you use it as a planter, a candle holder, or a functional piece of furniture, your hollow log creation is sure to captivate attention and spark conversations.
Lastly, enjoy the process and take pride in your handcrafted masterpiece. Share it with others, display it prominently, and inspire others with your woodworking skills. Remember, the possibilities are endless, so let your imagination soar as you embark on your next hollow log project.
Excited about hollowing logs with hand tools? Why stop there? Extend your skills with our guide on the best woodworking projects coming up next year. Whether you're a seasoned craftsperson or just starting, these techniques will sharpen your abilities and inspire new creations. Don't miss out on gaining valuable insights into selecting projects that align with your expertise and interests.
Frequently Asked Questions about How To Hollow Log With Hand Tools
Was this page helpful?
At Storables.com, we guarantee accurate and reliable information. Our content, validated by Expert Board Contributors, is crafted following stringent Editorial Policies. We're committed to providing you with well-researched, expert-backed insights for all your informational needs.






0 thoughts on “How To Hollow Log With Hand Tools”