Articles
How To Vent Downdraft Cooktop
Modified: October 20, 2024
Looking for articles on how to vent a downdraft cooktop? Discover tips, tricks, and expert advice to properly vent your cooktop and improve your kitchen ventilation.
(Many of the links in this article redirect to a specific reviewed product. Your purchase of these products through affiliate links helps to generate commission for Storables.com, at no extra cost. Learn more)
Introduction
Welcome to this comprehensive guide on how to vent a downdraft cooktop. If you’re a cooking enthusiast or a homeowner looking to upgrade your kitchen, you may have considered installing a downdraft cooktop. Unlike traditional range hoods that vent through the ceiling, downdraft cooktops have a ventilation system that pulls smoke, odors, and steam downward and expels them outside or recirculates the air.
Downdraft cooktops offer several advantages, including their sleek and unobtrusive design. They are perfect for kitchen islands or open-concept kitchens where a traditional range hood may obstruct sightlines. However, proper ventilation is crucial to maintain a healthy and comfortable cooking environment.
In this guide, we will explore the ins and outs of downdraft cooktop ventilation. From understanding how they work to choosing the right system for your needs, we will cover it all. We will also provide step-by-step instructions on installing a downdraft vent and discuss the various venting options available. Additionally, we will share maintenance tips and troubleshooting advice to ensure your downdraft vent operates efficiently.
Whether you’re a homeowner planning a kitchen remodel or a professional chef seeking a more efficient cooking environment, this guide will equip you with the knowledge you need to properly vent your downdraft cooktop.
Let’s dive in and explore the world of downdraft cooktop ventilation!
Key Takeaways:
- Proper ventilation is crucial for a healthy and comfortable cooking environment when using a downdraft cooktop. Consider factors like airflow capacity, installation flexibility, and maintenance to ensure efficient ventilation.
- Regular maintenance, cleaning, and troubleshooting are essential for keeping a downdraft vent operating at its best. Follow manufacturer’s guidelines and seek professional assistance when needed to address any ventilation issues.
Read more: What Is Downdraft Cooktop
Understanding Downdraft Cooktop Ventilation
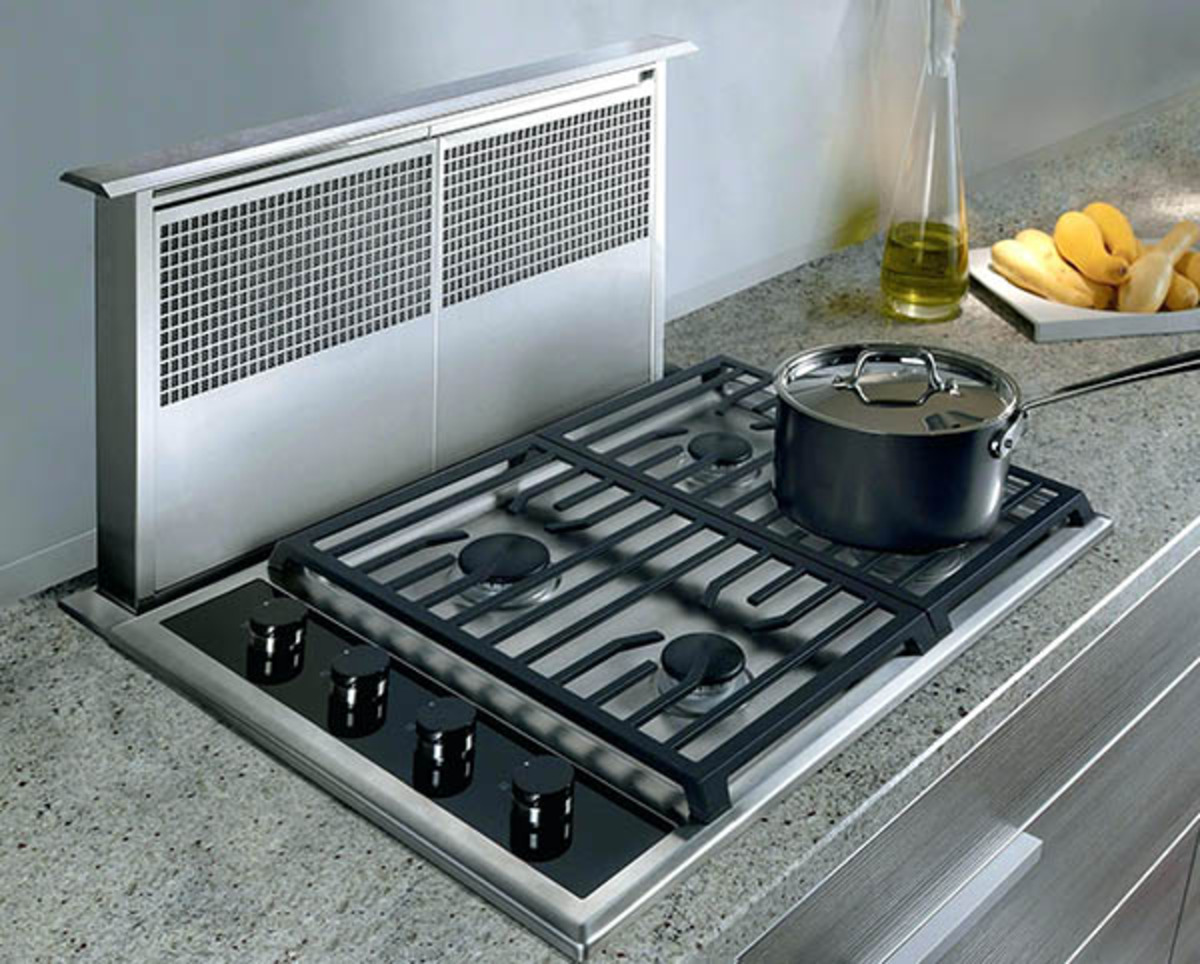
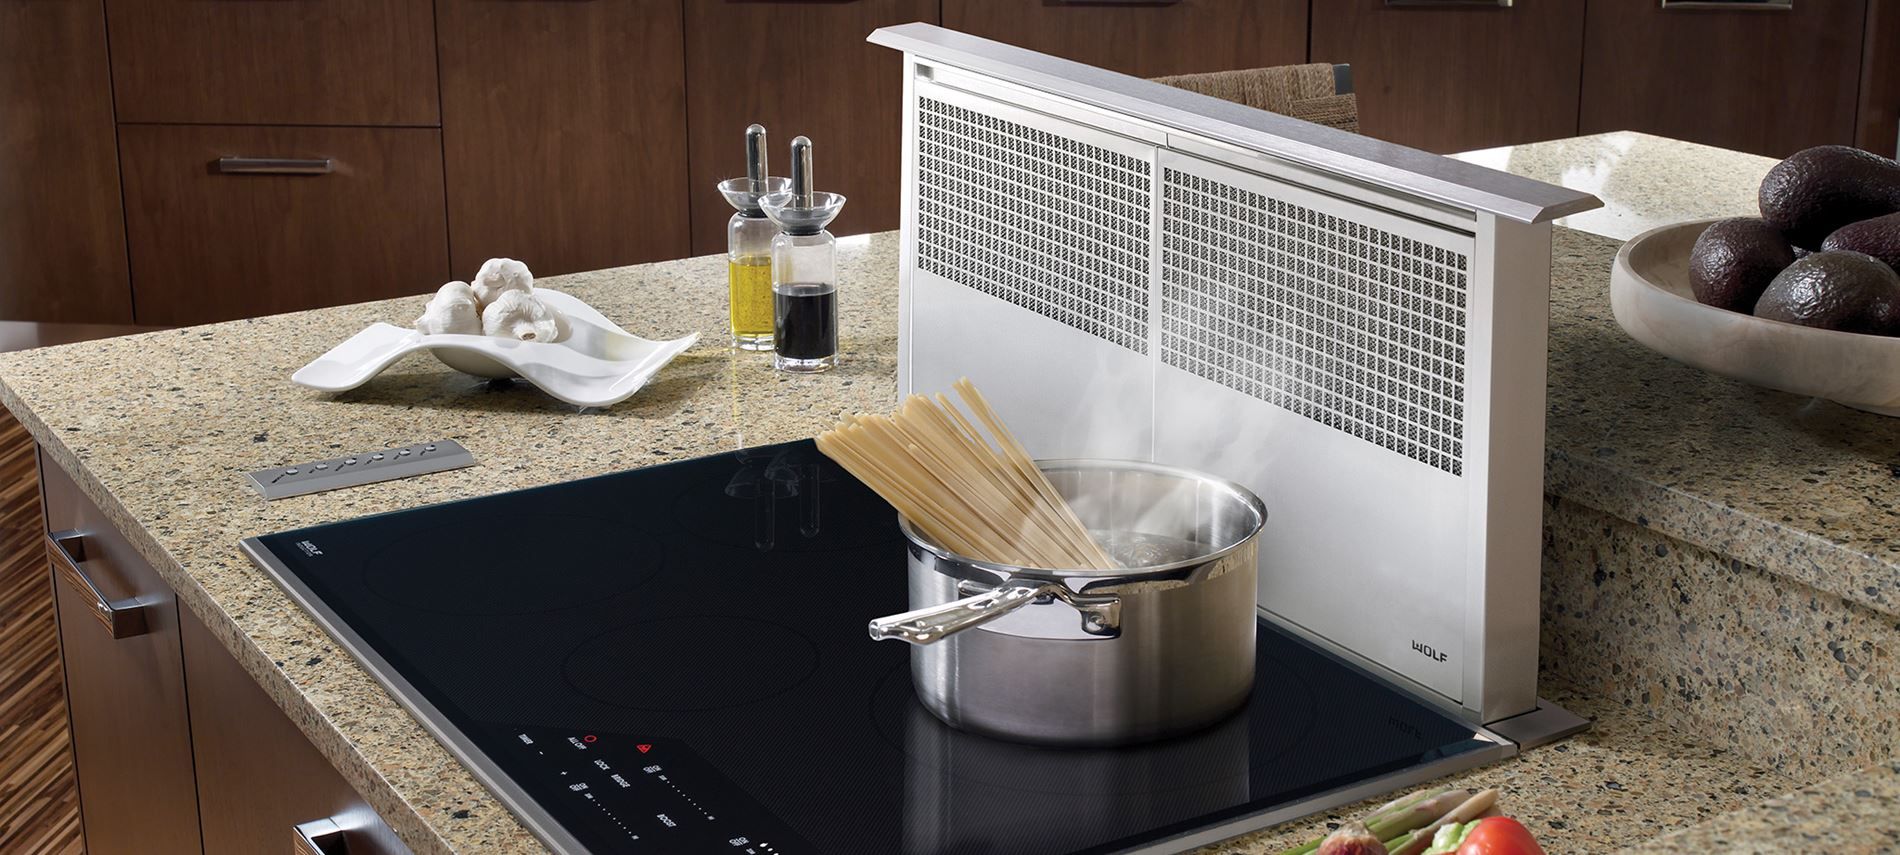
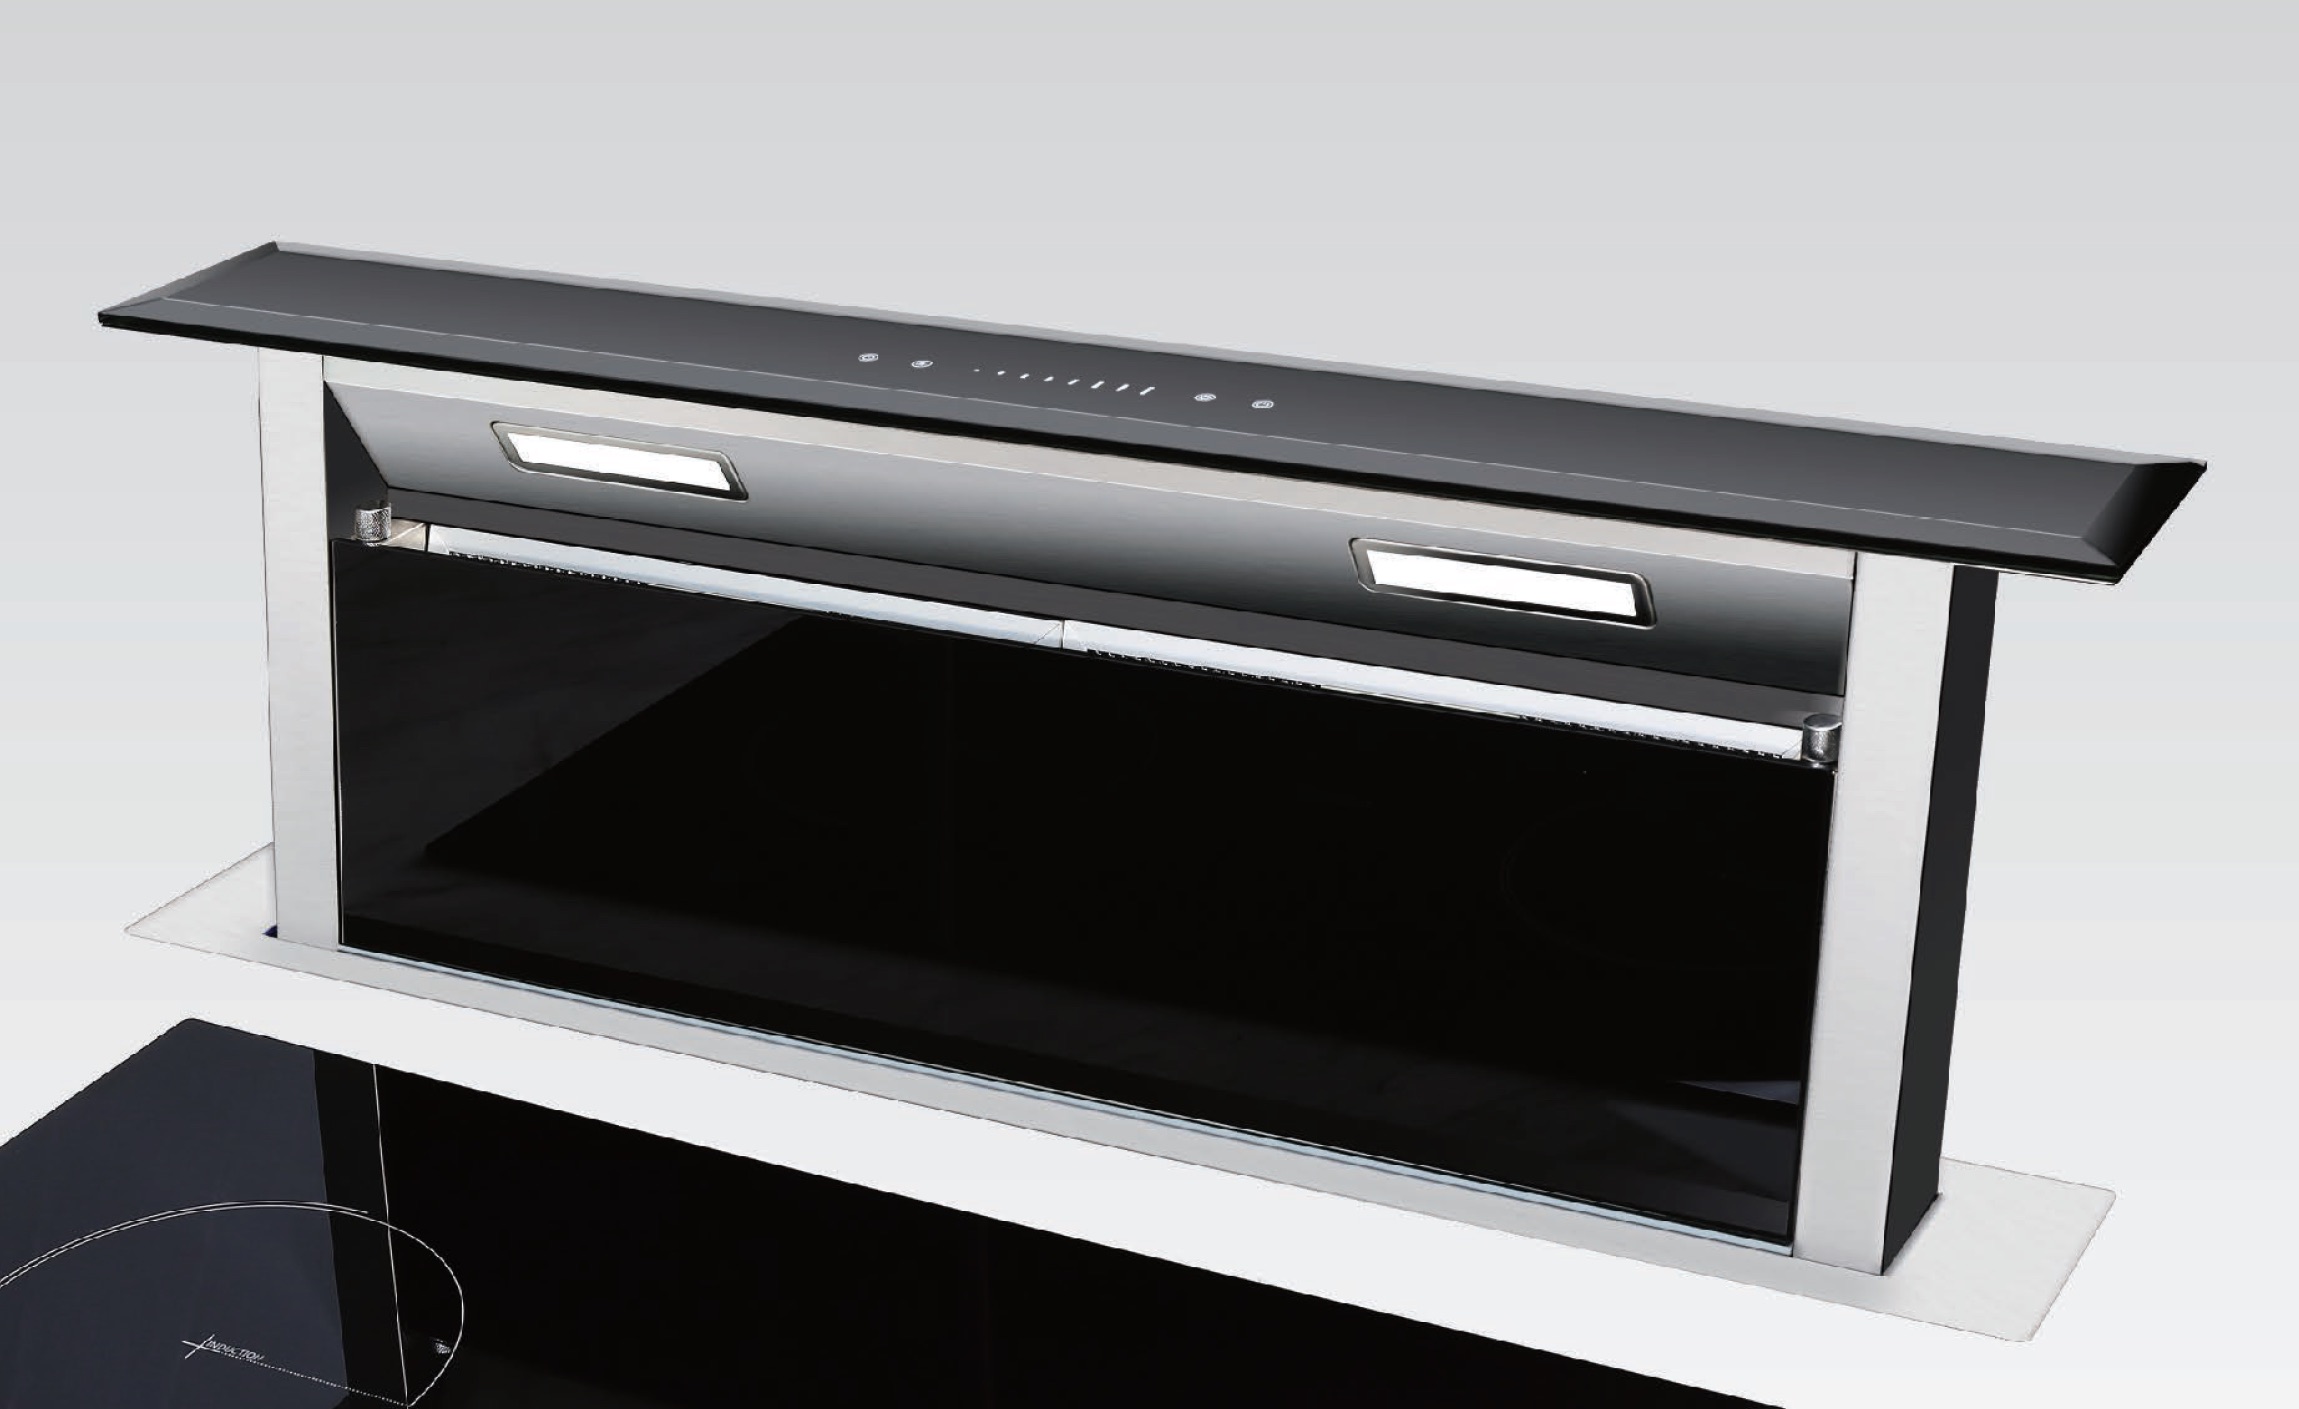
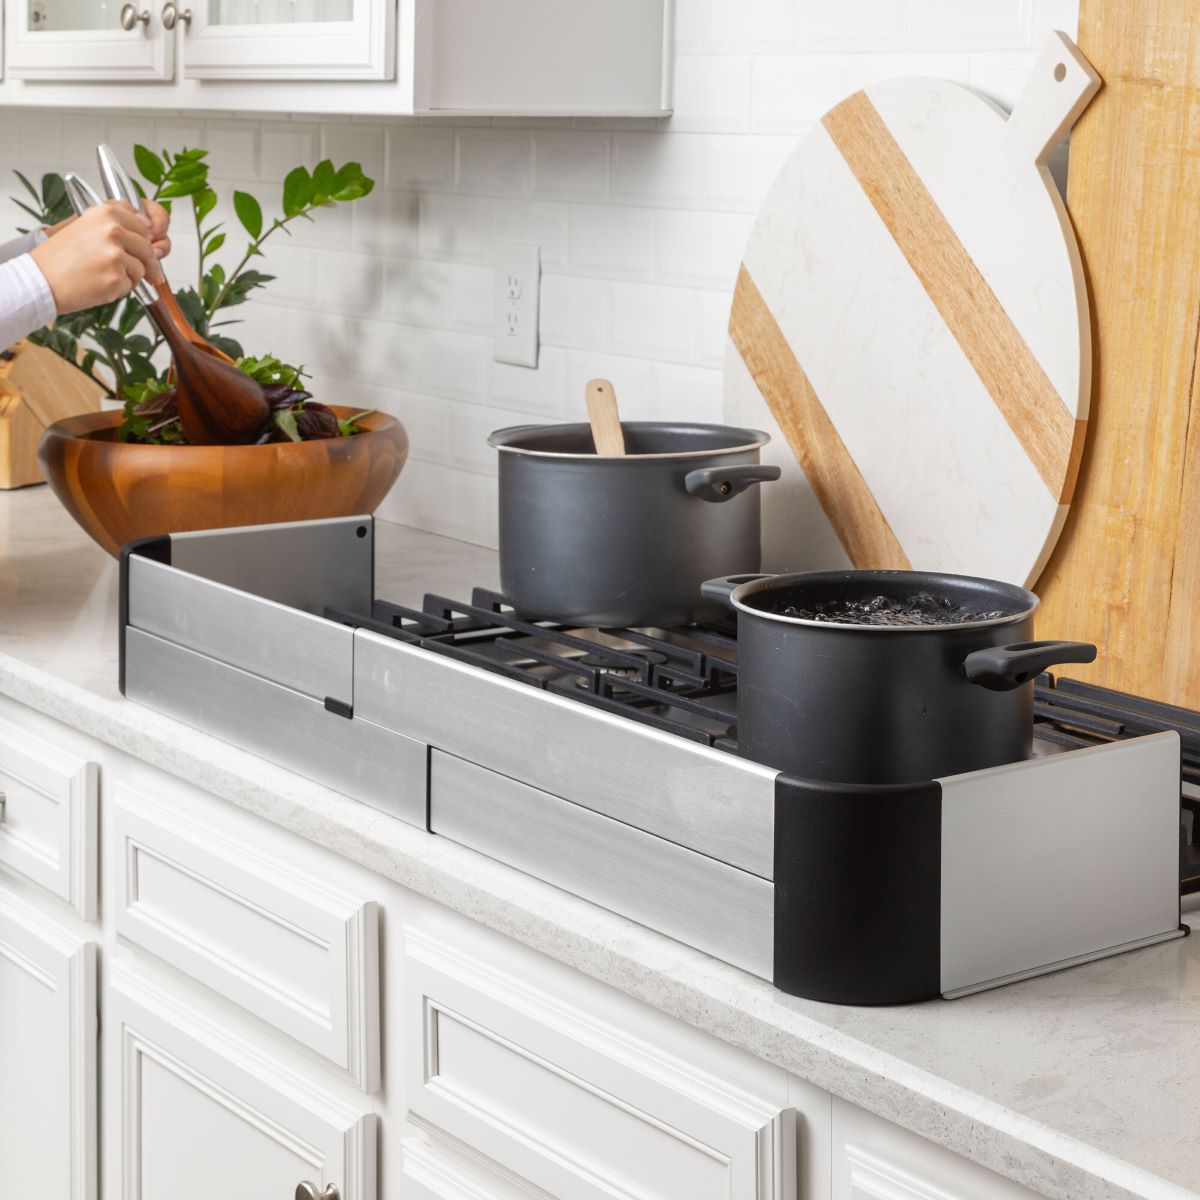
Downdraft cooktop ventilation is a unique system that effectively removes smoke, odors, and steam from the cooking area. Unlike traditional range hoods that are mounted above the cooktop and vented through the ceiling, downdraft vents are installed directly into the cooktop itself. When activated, the vent rises from the surface of the cooktop and pulls the air downward, expelling it either outside or recirculating it through filters.
The primary function of downdraft ventilation is to capture and remove cooking byproducts as close to the source as possible. This helps to eliminate excess moisture, odors, and smoke, improving air quality in the kitchen and preventing them from spreading throughout the house.
One of the benefits of downdraft cooktop ventilation is its discreet nature. When not in use, the vent retracts back into the cooktop, leaving a clean and uncluttered look. This makes it an ideal choice for kitchen islands or open-concept kitchens, where a traditional range hood may obstruct sightlines and disrupt the overall visual appeal of the space.
It’s important to note that downdraft cooktop ventilation may not be as effective as overhead range hoods in terms of capturing and eliminating airborne particles. This is because the downward suction of the vent may not be as powerful as the upward suction of a range hood. However, with proper installation and maintenance, downdraft vents can still provide effective ventilation in most cooking scenarios.
When considering downdraft cooktop ventilation, it’s crucial to ensure that your cooktop is compatible with a downdraft vent system. Not all cooktops are designed to accommodate this type of ventilation, so it’s essential to check the specifications of the cooktop model you’re interested in.
In the next section, we will discuss how to choose the right downdraft vent system for your kitchen.
Choosing the Right Downdraft Vent System
When it comes to choosing the right downdraft vent system for your kitchen, there are several factors to consider. Here are some key considerations that will help you make an informed decision:
- Cooktop Compatibility: Not all cooktops are compatible with downdraft vents, so it’s crucial to choose a vent system that is specifically designed to work with your cooktop model. Check the manufacturer’s specifications and guidelines to ensure compatibility.
- Airflow Capacity: The airflow capacity of the downdraft vent is an important consideration. It determines how effectively the system can capture and remove smoke, odors, and steam. Look for a vent with a high airflow capacity to ensure efficient ventilation.
- Installation Flexibility: Consider the installation requirements and flexibility of the downdraft vent system. Some vents may be easier to install and may offer multiple installation options, such as rear or side venting. Choose a system that fits your kitchen layout and allows for proper installation.
- Noise Level: Downdraft vents can produce noise during operation. Take into account the noise level of the vent system to ensure it doesn’t become a nuisance in your kitchen. Look for vents with sound-reducing features or adjustable fan speeds to minimize noise.
- Filtration System: Downdraft vents typically use filters to capture grease particles and other contaminants. Consider the type of filtration system used and how easy it is to clean or replace the filters. Some vent systems may offer dishwasher-safe filters for convenience.
- Control Options: Look for downdraft vent systems that offer intuitive and user-friendly control options. This could include touch controls, remote controls, or even smartphone apps for convenient operation.
- Aesthetics: Lastly, consider the overall aesthetics of the downdraft vent system. Choose a vent that complements the design of your kitchen and enhances its visual appeal. Some vents even feature customizable finishes or hidden design elements when not in use.
By considering these factors, you can choose a downdraft vent system that meets your specific needs and ensures efficient ventilation in your kitchen. Remember to carefully read the product specifications and reviews, and consult with professionals if needed, to make an informed decision.
In the next section, we will discuss the step-by-step process of installing a downdraft cooktop vent. Stay tuned!
Installing a Downdraft Cooktop Vent
Installing a downdraft cooktop vent requires careful planning and precise execution. Follow these step-by-step instructions to ensure a successful installation:
- Prepare the Area: Before beginning the installation process, make sure the area is clear and free from any obstructions. Disconnect the power supply to the cooktop to ensure safety.
- Measure and Mark: Measure the dimensions of the downdraft vent and mark the installation area on the countertop. Use a template provided by the manufacturer to ensure accurate placement.
- Cut the Countertop: Using a jigsaw or appropriate cutting tool, carefully cut along the marked lines to create a hole for the downdraft vent. Take precautions to protect the surrounding countertop surface.
- Install Vent Housing: Insert the vent housing into the cutout in the countertop, ensuring it fits securely. Follow the manufacturer’s instructions for securing the vent housing in place, which may involve using mounting brackets or screws.
- Connect the Ductwork: Attach the ductwork to the vent housing. Depending on your specific vent system, this may involve connecting flexible ducts or rigid metal ducts. Ensure a tight and secure connection to prevent air leakage.
- Attach the Vent Cover: Install the vent cover over the vent housing. This cover will sit flush with the countertop when not in use and rise when the vent is activated. Follow the manufacturer’s instructions for proper installation.
- Connect to Power: Reconnect the power supply to the cooktop. If necessary, hire a licensed electrician to ensure proper electrical connections and compliance with local codes.
- Test the Ventilation: Once the installation is complete, test the ventilation system to ensure it is functioning properly. Turn on the downdraft vent and check for proper airflow and suction. Make any adjustments or troubleshooting as needed.
It’s important to note that the installation process may vary depending on the specific model and manufacturer of your downdraft vent. Always refer to the manufacturer’s instructions and guidelines for accurate installation steps and safety precautions.
In the next section, we will explore the different venting options available for downdraft cooktops. Continue reading to learn more!
When installing a downdraft cooktop, make sure to have proper ventilation in place to ensure that smoke, steam, and odors are effectively removed from the cooking area. This may involve installing a powerful exhaust fan and ensuring that the ductwork is properly sized and installed for optimal performance.
Venting Options for Downdraft Cooktops
When it comes to venting the downdraft cooktop, you have several options available. Let’s take a look at the different venting methods:
- External Venting: External venting, also known as ducted venting, is the ideal option for maximum ventilation efficiency. In this method, the downdraft vent is connected to a duct that extends through the wall or floor, expelling the air outside. This ensures that all the smoke, odors, and steam are completely removed from your kitchen.
- Recirculating Venting: Recirculating venting, also known as non-ducted venting, is an alternative option when external venting is not possible or desired. In this method, the downdraft vent is equipped with filters that capture grease and odors. The filtered air is then recirculated back into the kitchen. While this method doesn’t completely eliminate the air contaminants, it helps to reduce them and maintain a cleaner cooking environment.
- Flexible Ducts: Flexible ducts are commonly used for venting downdraft cooktops. These ducts are made of flexible aluminum or plastic and allow for easy installation and maneuverability. They are particularly useful in situations where there are space constraints or when the vent needs to be adjusted or moved for maintenance purposes.
- Rigid Metal Ducts: Rigid metal ducts, either made of aluminum or galvanized steel, are another option for venting downdraft cooktops. These ducts provide a sturdier and more durable solution. Rigid metal ducts are recommended for long duct runs or when a higher airflow capacity is required.
- In-line Blower: In some cases, it may be necessary to use an in-line blower to enhance the venting power of the downdraft vent system. An in-line blower is installed in the ductwork and serves as an additional source of suction, improving the overall ventilation effectiveness.
When deciding on the venting method for your downdraft cooktop, consider factors like kitchen layout, available space, and local building codes. If possible, external venting is generally the preferred option as it provides the most efficient removal of airborne contaminants. However, if external venting is not feasible, recirculating venting with high-quality filters can still ensure a satisfactory level of air purification.
Remember to consult the manufacturer’s instructions and guidelines for the recommended venting options for your specific downdraft cooktop model.
Next, we will discuss the proper maintenance and cleaning of downdraft vents to keep them operating at their best. Stay with us!
Proper Maintenance and Cleaning of Downdraft Vents
Maintaining and cleaning your downdraft vent is essential to keep it operating efficiently and prevent any issues. Here are some tips for proper maintenance and cleaning:
- Regular Cleaning: Clean your downdraft vent regularly to remove grease, dust, and other debris that may accumulate over time. Use a mild detergent or cleaner specifically designed for kitchen appliances. Avoid abrasive cleaners or scrub brushes that may damage the vent surface.
- Clean Filters: If your downdraft vent has filters, clean or replace them as recommended by the manufacturer. Grease filters can become clogged over time and impact ventilation performance. Detachable filters can often be washed in warm, soapy water or placed in the dishwasher. Ensure the filters are completely dry before reinstalling them.
- Inspect and Clear Vent Ducts: Periodically inspect the vent ducts for any obstructions or blockages. Clear away any buildup of grease or debris that may hinder proper airflow. Use a vacuum cleaner or a long brush to remove any accumulated residue from the ducts.
- Check Vent Operation: Regularly test the operation of the downdraft vent to ensure it is working as intended. Make sure the vent rises smoothly and retracts properly when activated and deactivated. Check for any unusual sounds or issues such as slow movement or difficulty in raising or lowering the vent.
- Professional Maintenance: Consider scheduling professional maintenance for your downdraft vent on an annual basis. A professional technician can inspect and service the vent, ensuring all components are in working order and addressing any potential problems.
- Monitor Carbon Filter Replacement: If your downdraft vent utilizes carbon filters for recirculating venting, be aware that these filters need periodic replacement. Carbon filters wear out over time and their effectiveness diminishes. Check the manufacturer’s recommendations for the frequency of carbon filter replacement.
- Follow Manufacturer’s Guidelines: Always refer to the manufacturer’s guidelines and instructions for proper maintenance and cleaning procedures specific to your downdraft vent model. Different vent systems may have different requirements, so it’s important to follow the provided guidelines to ensure optimal performance and longevity.
By following these maintenance and cleaning tips, you can keep your downdraft vent in good condition and extend its lifespan. Regular maintenance not only ensures efficient ventilation but also promotes a healthy and clean cooking environment.
In the final section, we will discuss troubleshooting common downdraft cooktop vent issues. Stay tuned!
Troubleshooting Downdraft Cooktop Ventilation Issues
While downdraft cooktop vents are designed to provide efficient ventilation, occasional issues may arise. Here are some common problems you may encounter with downdraft vent systems and possible troubleshooting steps:
- Insufficient Airflow: If you notice reduced airflow from your downdraft vent, first check if the filters are clogged. Clean or replace the filters as necessary. Ensure there are no obstructions in the vent ducts that could hinder proper airflow. Additionally, check if the vent is fully extended and tightly sealed when in use, as any gaps or leaks can affect suction power.
- Noise or Vibration: If your downdraft vent is making excessive noise or vibrations, it could indicate that the unit is not properly installed or secured. Check if all mounting brackets and screws are tightly fastened and if the vent housing is securely attached to the countertop. If the issue persists, consult a professional technician for further inspection.
- Slow or Inconsistent Movement: If your downdraft vent is experiencing slow or inconsistent movement when rising or retracting, it may be due to a lack of lubrication in the moving parts. Apply a small amount of lubricant to the appropriate areas as recommended by the manufacturer. Avoid using excessive amounts of lubricant, as it can attract dirt and debris.
- Electrical Issues: If your downdraft vent fails to operate or experiences electrical issues, check if the power supply is properly connected and if there are any tripped circuit breakers. Ensure that the electrical wiring is not damaged or frayed. If the problem persists, consult a licensed electrician for further investigation.
- Foul Odors: If unpleasant odors persist even after cleaning the filters and inspecting the vent, it may be necessary to deep clean the entire ventilation system. Remove the vent cover and access the interior of the ductwork. Clean any accumulated grease or debris using a mild detergent and a brush. Ensure all components are thoroughly dry before reassembling the vent.
If you encounter persistent issues or are unsure of how to troubleshoot a problem with your downdraft vent, it is always recommended to reach out to a professional technician or the manufacturer’s customer support for assistance. They can provide expert advice and guidance specific to your vent model.
Remember that regular maintenance and prompt troubleshooting can help address ventilation issues and ensure a properly functioning downdraft cooktop vent.
Congratulations! You now have a comprehensive understanding of how to vent a downdraft cooktop. By following the guidelines and tips provided throughout this guide, you can enjoy efficient and effective ventilation in your kitchen, creating a pleasant cooking environment for years to come.
Conclusion
Congratulations! You have reached the end of this comprehensive guide on how to vent a downdraft cooktop. We have covered everything you need to know about downdraft cooktop ventilation, from understanding how it works to choosing the right vent system, installing it, and properly maintaining and troubleshooting any issues.
Downdraft cooktops offer a sleek and unobtrusive solution for removing smoke, odors, and steam from your kitchen. They are particularly suitable for kitchen islands or open-concept kitchens where traditional range hoods may obstruct sightlines. However, proper ventilation is crucial to maintain a healthy and comfortable cooking environment.
When choosing a downdraft vent system, consider factors like cooktop compatibility, airflow capacity, installation flexibility, noise level, and aesthetics. Ensure you follow the manufacturer’s guidelines for installation and consult professionals if needed.
Proper maintenance and cleaning are vital to keep your downdraft vent operating at its best. Regularly clean the vent and filters, inspect and clear the ducts, and test the vent’s operation. Consider scheduling professional maintenance to address any potential issues and ensure optimal performance.
If you encounter any problems with your downdraft vent, such as insufficient airflow, noise or vibration, slow movement, electrical issues, or foul odors, follow the troubleshooting steps we provided or seek assistance from professionals or the manufacturer’s customer support.
Remember, a well-ventilated kitchen not only improves air quality but also enhances your cooking experience. With the knowledge and tips you have gained from this guide, you can confidently vent your downdraft cooktop and create a clean and inviting cooking environment.
Thank you for reading, and happy cooking!
Frequently Asked Questions about How To Vent Downdraft Cooktop
Was this page helpful?
At Storables.com, we guarantee accurate and reliable information. Our content, validated by Expert Board Contributors, is crafted following stringent Editorial Policies. We're committed to providing you with well-researched, expert-backed insights for all your informational needs.


0 thoughts on “How To Vent Downdraft Cooktop”