
Articles
9 Unbelievable HVAC UV Light For 2025
Modified: June 10, 2025
Discover the top 9 HVAC UV lights for 2025 that provide unbelievable germ-killing power. Improve indoor air quality with our recommended UV light solutions.
(Many of the links in this article redirect to a specific reviewed product. Your purchase of these products through affiliate links helps to generate commission for Storables.com, at no extra cost. Learn more)
Introducing the latest innovation in HVAC technology: 9 Unbelievable HVAC UV Light For 2025. As we look towards the future, advancements in UV light technology are revolutionizing the way we think about heating, ventilation, and air conditioning systems. These HVAC UV lights are specifically designed to eliminate harmful bacteria, viruses, and mold from the air, ensuring a healthier and cleaner environment. With nine incredible options available, each with their unique features and benefits, these HVAC UV lights are a game-changer in the industry. Stay ahead of the curve by investing in the most advanced and effective UV lights for your HVAC system in 2025.

Overall Score: 10/10
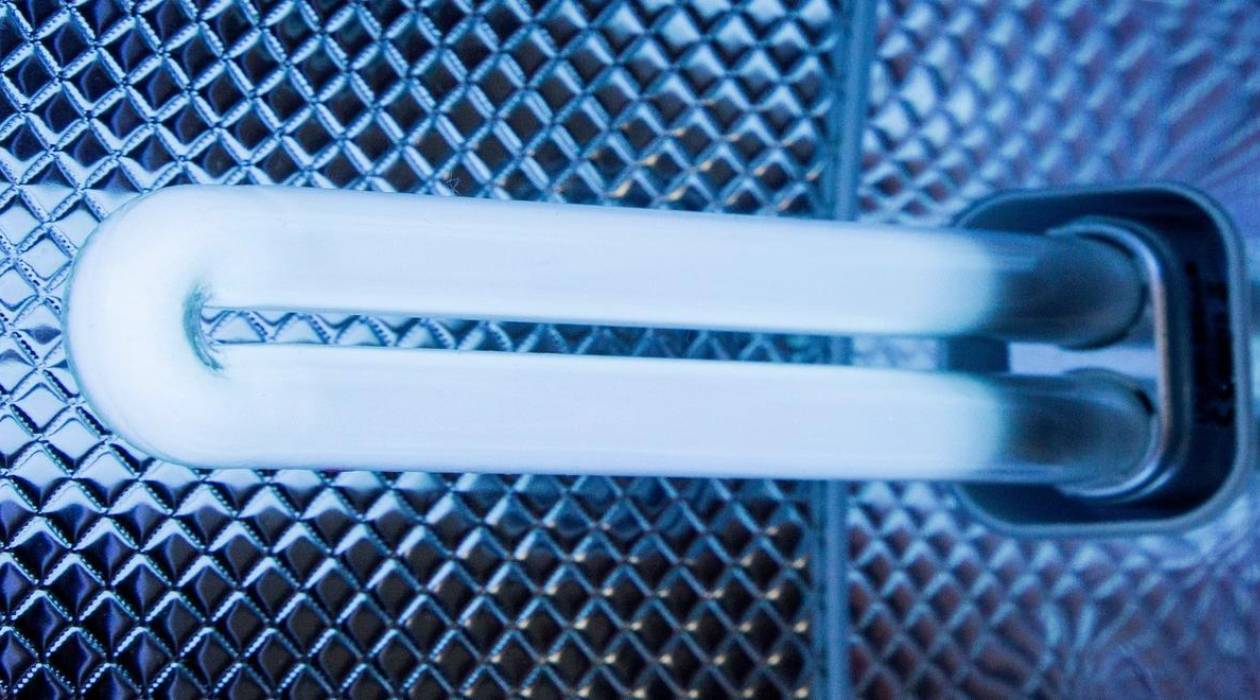
The REKOLIGHTING® 14" UV Light Replacement Bulb is a high-quality replacement bulb for the REKOLIGHTING R600 UV Light. With an energy-efficient 18 watts, this ozone-free germicidal UVC light emits 254 nanometer UV light to effectively kill germs and bacteria. It is compatible with 24v, 120v, and 220v ballasts featuring a 4-pin square connector. The bulb has a lifespan of 9,000 hours, ensuring long-lasting performance. Additionally, it is EPA Est No.96373-FL-1 certified for added reliability. With positive customer ratings and reviews, this bulb offers a cost-effective alternative to other replacement bulbs available. Upgrade your AC HVAC system with the REKOLIGHTING® 14" UV Light Replacement Bulb.
Key Features
- Ozone Free Germicidal UVC Light, 254 Nanometer, 18 Watt energy efficient
- Works with 24v 120v 220v ballasts (4 pins in square connector)
- Lifespan 9,000 Hours
- EPA Est No.96373-FL-1
Specifications
- Color: White
Pros
- Cheaper alternative
- Compatible with REKOLIGHTING R600 UV Light
Cons
The REKOLIGHTING® 14″ UV Light Replacement Bulb is a top-notch choice for those in need of a reliable replacement bulb for their REKOLIGHTING R600 UV Light. Its affordable price and compatibility with multiple ballasts make it a convenient option for users. Furthermore, its energy-efficient design and long lifespan make it a cost-effective solution. The 254 nanometer UV light ensures efficient germ-killing performance without producing ozone. With positive customer ratings and reviews, this bulb is a popular choice among customers. If you’re looking to upgrade your AC HVAC system and maintain a clean and healthy environment, the REKOLIGHTING® 14″ UV Light Replacement Bulb is a fantastic choice.

Overall Score: 8.2/10
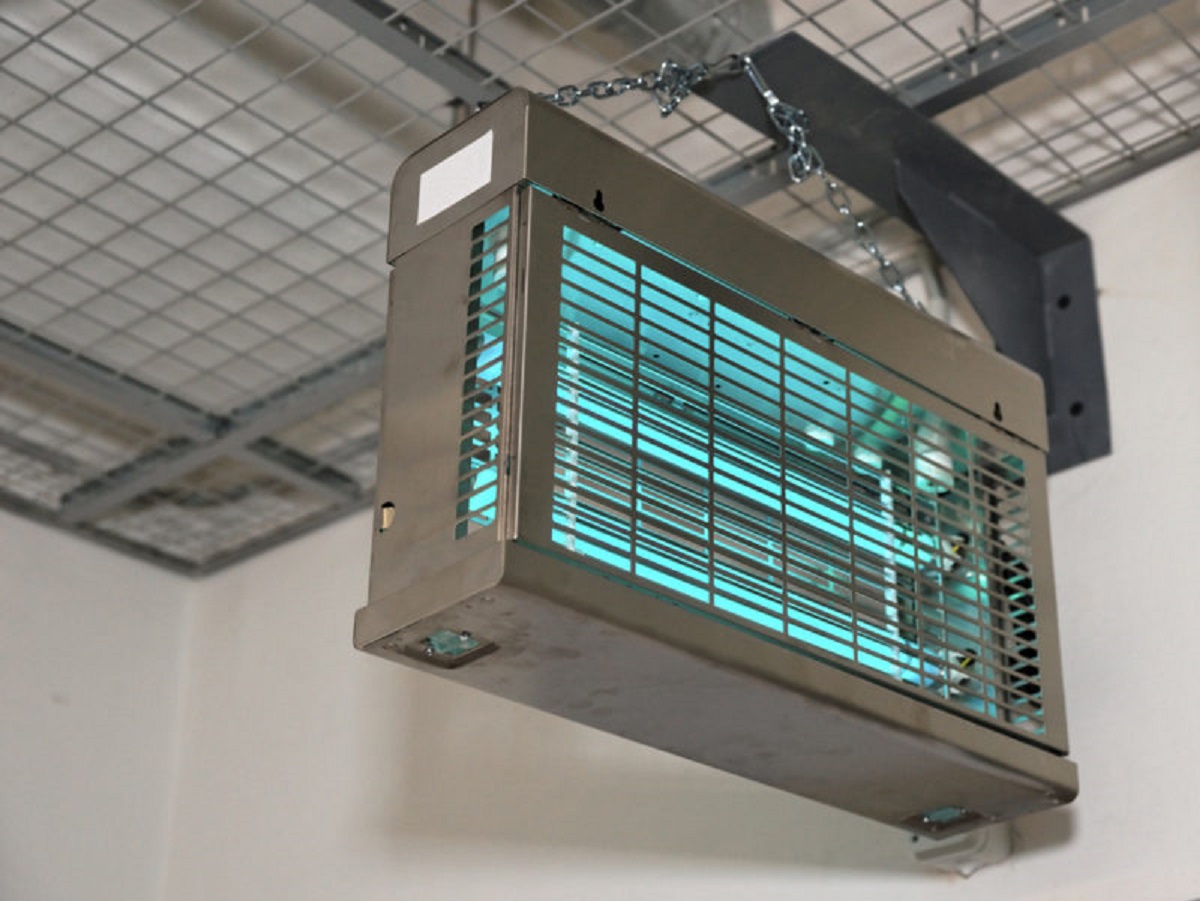
The REKO Lighting R2000 Air Purifier is a powerful UV-C light system designed to be installed on your HVAC duct. The bulbs, made in Europe, emit a UV-C light wavelength of 253.7NM, which effectively destroys odor, mold, and germs. The purifier is 120v and comes with a 9ft power cord for easy installation. With an EPA Est No of 96373-FL-1, you can trust its quality. The product has received positive customer reviews for its effectiveness in reducing mold accumulation, easy installation process, and cost-effectiveness. However, some customers have complained about the bulb burning out or receiving defective units. Overall, the REKO Lighting R2000 Air Purifier is a great option for those looking to improve indoor air quality and reduce mold and odor.
Key Features
- UV-C light system – Bulbs are made in Europe!
- Designed to be installed on your HVAC duct.
- All our bulbs are UVC and put out 253.7NM
- 120v with plug and 9ft power cord
- EPA Est No 96373-FL-1
Specifications
Pros
- Effective in reducing mold accumulation
- Easy installation process
- Cost-effective solution
Cons
- Some customers experienced bulb burnout
- Potential issues with defective units
- Limited specifications provided
The REKO Lighting R2000 Air Purifier is a reliable and affordable option for improving indoor air quality. Its UV-C light system effectively eliminates odor, mold, and germs, resulting in fresher and cleaner air. The installation process is straightforward, allowing you to quickly set it up on your HVAC duct. However, it is important to be cautious about potential bulb burnout and the quality of the units received. While the product lacks detailed specifications, it delivers on its promise of cleaner air. If you are looking for an affordable and efficient solution to combat mold and odor, the REKO Lighting R2000 Air Purifier is worth considering.

Overall Score: 7/10
The COOSPIDER HVAC UV Light Sanitizer is an air purifier designed specifically for HVAC ducts. It utilizes a powerful 253.7nm wavelength UV-C light to disinfect the environment and eliminate mold. The UV light also purifies the air, making it fresher and cleaner. The product comes with 1 spare bulb, ensuring a longer lifespan. It is easy to install and has an observation window to monitor the light's functionality. The COOSPIDER HVAC UV Light Sanitizer offers a 180-day warranty and is backed by the EPA EST NO. : 96998-CHN-1. This product is available in white and black. With a customer rating of 4.0/5, it has received positive feedback for its simplicity of installation and improvement in air quality.
Key Features
- Designed for HVAC duct
- Powerful 253.7nm wavelength UV-C light
- Purifies the air and is Ozone free
- Easy to install with spare bulb included
- 180-day warranty
Specifications
- Color: White, Black
- Size: 1 Count (Pack of 1)
Pros
- Simplicity of installation
- Improvement in air quality
- Easy bulb replacement
- Observation window for monitoring functionality
- 180-day warranty
Cons
- Some concerns about availability of replacement UV tubes
- Quality issues reported by a few customers
The COOSPIDER HVAC UV Light Sanitizer is a reliable air purifier designed for HVAC ducts. It effectively eliminates mold and purifies the air, resulting in fresher and cleaner indoor environments. The ease of installation and the inclusion of a spare bulb make it a convenient option. However, there have been some reports of quality issues and concerns about the availability of replacement UV tubes. Overall, with a customer rating of 4.0/5, this product is a worthwhile investment for those looking to improve air quality in their homes or offices.

Overall Score: 7/10
The Original PURE AIR UV AIR Purifier is a whole house dual UV UVC light designed for HVAC AC ducts. With a sleek black color and compact size, this purifier is easy to install and comes with a 3-year warranty. The unit features an original OEM R-18D model by Pure Air UV, ensuring high-quality performance. An electronic ballast and LED indicator allow users to easily determine if the unit is turned on. The EPA Est. No. 97280-FL-1 certification guarantees its germicidal filter capabilities. However, some users have reported issues such as premature bulb burnout and a lack of detailed instructions. Despite these drawbacks, this purifier offers effective air purification for your home.
Key Features
- 3 Years warranty on the unit
- Original OEM R-18D model by Pure Air UV
- Easy to install
- All our units have an electronic ballast and a LED to see if unit is on
- EPA Est. No. 97280-FL-1
Specifications
- Color: Black
- Dimension: 5.00Lx7.00Wx3.00H
Pros
- 3 Years warranty
- Easy to install
- Electronic ballast and LED indicator
- EPA Est. No. 97280-FL-1
Cons
- Bulbs burnt out after a month
- Lack of dedicated instruction manual and warranty instructions
- No indication of bulb part numbers
- Unit is smaller than expected
The Original PURE AIR UV AIR Purifier is a solid option for those looking to improve the air quality in their homes. With its compact design and easy installation process, it offers convenience alongside its germicidal filter capabilities. The 3-year warranty provides peace of mind, and the electronic ballast and LED indicator ensure ease of use. However, the reported issues with bulb burnout and the lack of detailed instructions are notable drawbacks. Overall, this product offers effective air purification but may require some additional troubleshooting and proactive maintenance. With a score of 7 out of 10, it is a reliable choice for those seeking cleaner air in their living spaces.

Overall Score: 8/10
The HVAC UV Light Sanitizer Air Purifier is a powerful and efficient system designed to be installed on your HVAC Duct or furnace. It utilizes UVC light with a wavelength of 253.7nm to provide a sterilizing defense against mold, mildew, and airborne contaminants. This air purifier helps keep your air conditioner free of odors and moldy smells, while also preventing long-term health problems caused by these contaminants. It is easy to install with a quick 15-minute setup, and it comes with spare UV bulbs for extended service time. With its strong clean ability and reliable performance, this UV air purifier is a great addition to your HVAC system.
Key Features
- UVC Light in duct for HVAC
- 253.7 nm wavelength UV light
- Good UVC device
- Easy installation
- Spare UV bulbs for replacement
Specifications
- Dimension: 4.90Lx6.89Wx6.50H
Pros
- Powerful and efficient purification system
- Prevents mold, mildew, and airborne contaminants
- Easy and quick installation
- Comes with spare UV bulbs for extended service time
Cons
- Bulbs may have shorter lifespan
- Bulbs may need replacement earlier than expected
The HVAC UV Light Sanitizer Air Purifier is a reliable and effective solution for purifying the air in your home. With its powerful UVC light and easy installation process, it provides a sterilizing defense against mold, mildew, and other airborne contaminants. The inclusion of spare UV bulbs ensures that you can enjoy extended service time. While some users have reported shorter bulb lifespans, the overall performance and air quality improvement make this air purifier a valuable addition to any HVAC system. Breathe cleaner and fresher air with the HVAC UV Light Sanitizer Air Purifier.

Overall Score: 8/10
The BioShieldUV Lite 18W 24V HVAC UV Light Air Treatment System is a versatile and energy-efficient solution for air purification. It can be easily installed in your existing HVAC system, providing improved indoor air quality and eliminating unwanted odors. The UVC light is chemical-free and environmentally friendly, while also reducing buildup components and improving energy efficiency. With minimal maintenance required, this system is a convenient choice for any building. Join the BioShield Guardian Club to receive a lifetime warranty. Breathe cleaner air and enjoy the benefits of a more comfortable indoor environment.
Key Features
- AC & DC installation
- Easy to install
- Reduces odors
- Chemical-free air purification
- Minimal maintenance
- Lifetime warranty
Specifications
- Size: 18W (24V)
Pros
- Can be installed using AC or DC power
- Easy installation with included hardware
- Eliminates unwanted odors in the air
- Chemical-free and environmentally friendly
- Improves energy efficiency of HVAC systems
- Lifetime warranty
Cons
- UV Lamp bulb needs to be replaced every 6 months
- Bulb socket connector is stiff and not right angle
The BioShieldUV Lite 18W 24V HVAC UV Light Air Treatment System is an excellent choice for improving indoor air quality and eliminating odors. With its easy installation process, environmentally friendly operation, and minimal maintenance requirements, it offers a convenient solution for any building. The included lifetime warranty is also a great bonus. Just keep in mind that the UV Lamp bulb will need to be replaced every 6 months and the bulb socket connector may require some adjustments. Overall, this product provides great value for its price and can help create a healthier and more comfortable indoor environment.

Overall Score: 8/10
The 120-220v Power R600 UV Light Coil Cleaner is a must-have product for maintaining clean and fresh air in your HVAC system. This coil cleaner features a 14" germicidal bulb that works to eliminate algae and other pollutants. It comes with a magnetic bracket for easy installation, making it a convenient choice for any user. The product has a customer rating of 4.5/5, indicating high satisfaction among users. With its easy installation process and effective performance, it is a top choice for improving air quality in your home. Just plug it into a 110-volt outlet, and let it do its job.
Key Features
- 120V with regular U.S Plug is has switch to 220V
- 14" Uv light germicidal bulb
- Magnetic bracket for easy installation
Specifications
- Color: Black
Pros
- Easy installation process
- Effective in eliminating pollutants
- Comes with a magnetic bracket for easy installation
Cons
- Potential issue with mercury balls rattling around
- Bulb needs to be replaced yearly
- Some difficulty with installation in compacted furnaces
The 120-220v Power R600 UV Light Coil Cleaner is a highly effective and convenient solution for maintaining clean air in your HVAC system. With its germicidal bulb and magnetic bracket, it offers easy installation and efficient performance. While there may be some concerns regarding the mercury balls and the need for yearly bulb replacement, the overall benefits of this product far outweigh the drawbacks. It is a reliable and valuable tool for improving air quality and ensuring a fresh environment in your home. If you’re looking for a practical and effective solution for HVAC coil cleaning, this product is worth considering.

Overall Score: 7.8/10
The BioShieldUV® 72W HVAC UV Light Air Purifier is a whole house UV-C light designed for HVAC AC systems. It features an ON Indicator Light that allows you to easily check if the UV-C light bulb is functional or not. The purifier comes with an installation template sticker, metal screws, and a rubber grommet for an airtight seal. It includes 2 UV Lamp 36W Bulbs that are rated at 8,000 hours each. The purifier has trusted safety certifications like CE, RoHS, FCC, and comes with a 1 Year Hassle-Free Warranty. Overall, it is a reliable and effective solution for improving air quality in your home.
Key Features
- ON Indiciator Light
- Included Installation Template & All Parts
- 2 UV Lamp 36W Bulbs Included
- TRUSTED SAFETY CERTIFICATIONS: CE, Ro HS, FCC + 1 Year Hassle-Free Warranty
Specifications
- Size: 72W (110V)
Pros
- ON Indiciator Light for easy functionality check
- Comes with installation template & all parts
- Includes 2 UV Lamp 36W Bulbs with 8,000 hours lifespan
- Trusted safety certifications and 1 Year Hassle-Free Warranty
Cons
- Some customers experienced installation issues
- A few users reported a bad smell from the bulbs
The BioShieldUV® 72W HVAC UV Light Air Purifier is a reliable and efficient solution for improving air quality in your home. With its ON Indicator Light, installation template, and included UV Lamp Bulbs, it offers convenience and peace of mind. The purifier has received positive reviews for its performance and customer service. While there have been some reported installation issues and concerns about a bad smell, these seem to be isolated incidents. Overall, if you’re looking for an effective and affordable HVAC UV light air purifier, the BioShieldUV® 72W is worth considering.
")
Overall Score: 8/10
The Air Purifier for Whole House Duct UV Light HVAC AC Germicidal Filter UV Air Cleaner is a powerful and effective solution for purifying the air in your home. With its ozone-free UV-C light and strong germicidal function, it eliminates odors, mold, and germs, creating a fresh and clean environment. The easy installation process allows you to quickly set it up in your HVAC duct or furnace, and the included template makes it even simpler. By regularly using this air purifier, you can prevent the growth of mold and mildew, reducing the risk of health problems like asthma and allergies. With a one-year warranty and 90-day free return policy, you can purchase this product with confidence.
Key Features
- Purify Air: UV light has the effect of purifying the air, making the air more fresh and it's Ozone free.
- Special Design: Destroy odor, mold, germs!!! Designed to be installed on your HVAC Duct or furnace as a HVAC air purifier system to provide a sterilization defense.
- Installation: Installation is easy 15 min or less, just cut 2 holes in your duct-work (template included), slip the lamp inside and and plug it in 6 ft cord.
- Tips: For better performance, suggest do the air cleaning three times per week UV-C light kills most of existing mold, mildew and will prevent them from ever growing again and spreading; By killing and preventing airborne contaminants, we will be less susceptible to asthma, breathing problems, headaches, dizziness and other long-term health problems caused by mold dust and mildew.
- Service: 90 watts UV light sanitizer, Strong germicidal function. One year Warranty, 90 days FREE RETURN, 24/7 hours after-sales service EPA EST NO.97826-CHN-1.
Specifications
- Color: Black
- Dimension: 9.00Lx8.00Wx4.60H
Pros
- Purifies air by eliminating odors, mold, and germs
- Easy installation in HVAC duct or furnace
- Ozone-free UV-C light sterilization
- Strong germicidal function with 90 watts UV light
- One-year warranty and 90-day free return policy
Cons
The Air Purifier for Whole House Duct UV Light HVAC AC Germicidal Filter UV Air Cleaner is a powerful and effective solution for purifying the air in your home. With its ozone-free UV-C light and strong germicidal function, it eliminates odors, mold, and germs, creating a fresh and clean environment. The easy installation process allows you to quickly set it up in your HVAC duct or furnace, and the included template makes it even simpler. By regularly using this air purifier, you can prevent the growth of mold and mildew, reducing the risk of health problems like asthma and allergies. With a one-year warranty and 90-day free return policy, you can purchase this product with confidence.
HVAC UV Light Buyer's Guide
UV lights have become increasingly popular in the HVAC industry as an effective tool in maintaining indoor air quality and preventing the growth of mold and bacteria within the heating and cooling systems. When it comes to choosing the right HVAC UV light for your needs, there are several factors to consider. This buyer's guide aims to provide you with the necessary information before making a purchase decision.
Read more: What Do Uv Lights Do In HVAC
Factors to Consider
- Installation: Determine whether you want a DIY installation or if you prefer professional assistance. Some UV light systems are designed for easy installation by homeowners, while others may require professional expertise.
- Compatibility: Ensure the UV light system is compatible with your existing HVAC system. Different units may have specific requirements or limitations, so it's crucial to check compatibility before purchasing.
- Size: Consider the size of the UV light system and choose one that fits your HVAC unit adequately. The dimensions may vary between models, so measure the available space to ensure a proper fit.
- Type of UV Light: There are two main types of UV lights used in HVAC systems: coil sterilization and air sterilization. Coil sterilization UV lights are installed near the evaporator coil to prevent mold and bacteria growth. Air sterilization UV lights, on the other hand, disinfect air passing through the ductwork. Evaluate your needs to determine which type suits your requirements best.
- UV Light Intensity: It's crucial to consider the strength of the UV light. Higher-intensity models may be more effective in killing germs and bacteria but can also emit more ozone. Ensure the UV light intensity is suitable for the size of your HVAC system.
- Maintenance: Research the required maintenance for the UV light system. Some models may need bulb replacement periodically, while others may require cleaning. Consider how often you are willing to perform maintenance tasks to ensure the longevity and efficiency of the UV light system.
- Budget: Determine your budget range before starting your search. UV light systems can vary significantly in price, so understanding your budget will help focus your options and prevent overspending.
Frequently Asked Questions about 9 Unbelievable HVAC UV Light For 2025
Some UV light systems are designed for easy DIY installation. However, if you are uncertain about the installation process or lack experience, it’s recommended to seek professional assistance to ensure proper and safe installation.
UV lights used in HVAC systems have low exposure levels, making them safe for humans when installed and used correctly. However, it’s essential to avoid direct exposure to the UV light, as excessive radiation can be harmful.
UV light systems primarily focus on disinfecting the air and preventing the growth of mold and bacteria. While they may indirectly help reduce certain odors associated with those factors, they are not specifically designed to eliminate bad odors.
The lifespan of UV light bulbs varies depending on the model and usage. On average, bulbs may need replacement every 1 to 2 years. Refer to the manufacturer’s guidelines for specific recommendations regarding bulb replacement.
UV light systems are primarily used for enhancing indoor air quality and preventing microbial growth. While they can contribute to a cleaner HVAC system, their impact on energy efficiency is minimal. For energy efficiency improvements, consider other HVAC maintenance practices such as regular filter replacement and system cleaning.
UV light systems are not effective for cleaning visible mold. They are primarily designed to prevent mold growth rather than remove existing mold. If you suspect mold growth in your HVAC system, it’s recommended to consult a professional for proper cleaning and remediation.
UV lights are primarily designed to kill bacteria, viruses, and mold spores. While they can help reduce certain allergens indirectly by eliminating their sources, they are not specifically designed to eliminate all types of allergens. For comprehensive allergen reduction, consider using UV lights in conjunction with other air purification methods.
UV lights can generally be installed in most types of HVAC systems, including central air systems, heat pumps, and ducted systems. However, it’s essential to check the specific compatibility requirements of the UV light system with your particular HVAC unit before making a purchase.
While UV light can effectively kill bacteria and viruses, including some coronaviruses, it’s important to note that the effectiveness against the COVID-19 virus specifically has not been extensively studied. UV lights should be used as part of a comprehensive approach to reduce the spread of the virus, including proper ventilation, filtration, and following official guidelines and protocols.
When used correctly, UV lights in HVAC systems pose minimal risks. However, direct exposure to UV light can be harmful to the eyes and skin. It’s crucial to follow manufacturer instructions, avoid direct exposure, and ensure the system is installed professionally to minimize any potential risks.
Was this page helpful?
Trust Storables.com for unbiased and honest product reviews. Our reviews are rigorously assessed by our Expert Board Contributors and adhere to strict Editorial Standards. We ensure that each review is transparent and trustworthy, helping you make informed purchasing decisions.
0 thoughts on “9 Unbelievable HVAC UV Light For 2025”