Home>Furniture & Design>Outdoor Furniture>How To Install Outdoor Lighting
Outdoor Furniture
How To Install Outdoor Lighting
Modified: February 18, 2024
Learn how to install outdoor lighting to enhance your outdoor furniture and design. Follow our step-by-step guide for a stunning outdoor space.
(Many of the links in this article redirect to a specific reviewed product. Your purchase of these products through affiliate links helps to generate commission for Storables.com, at no extra cost. Learn more)
Introduction
Welcome to the world of outdoor lighting! Whether you're looking to enhance the ambiance of your garden, illuminate a pathway, or add a layer of security to your outdoor space, installing outdoor lighting can significantly elevate the functionality and aesthetics of your home's exterior. From the warm glow of string lights to the practicality of motion sensor fixtures, the options for outdoor lighting are as diverse as they are impressive.
In this comprehensive guide, we will explore the various aspects of outdoor lighting installation, including planning, fixture selection, and different installation methods. By the end, you'll have a clear understanding of how to bring your outdoor space to life with the perfect lighting solutions.
Outdoor lighting serves multiple purposes, from accentuating architectural features and landscaping to providing safety and security. With the right setup, you can transform a dark, uninviting yard into a captivating and welcoming outdoor retreat. Additionally, well-planned and properly installed outdoor lighting can increase the value of your property and extend the use of your outdoor living spaces into the evening hours.
Before diving into the technical details of installation, it's important to consider the overall goals for your outdoor lighting project. Are you aiming to create a cozy atmosphere for entertaining guests, or do you prioritize the safety and security aspects of lighting? Understanding your objectives will guide your decisions throughout the planning and installation process.
Join us as we embark on this illuminating journey into the world of outdoor lighting, where we'll shed light on everything you need to know to brighten up your outdoor living space. Let's get started!
Key Takeaways:
- Personalized Lighting Design:
Create a unique outdoor lighting plan that suits your needs, whether it’s for cozy gatherings, safety, or highlighting your garden. Tailoring the design to your space can enhance its beauty and functionality. - Embrace Energy Efficiency:
Choose energy-efficient lighting options like LED and solar-powered fixtures to save energy and reduce costs. By going green with your outdoor lighting, you can help the environment and enjoy sustainable illumination.
Read more: How To Install Outdoor Up Lighting
Planning Your Outdoor Lighting
Before you start installing outdoor lighting, it’s crucial to create a well-thought-out plan. This initial step will ensure that your lighting design meets your specific needs and complements the aesthetics of your outdoor space. Here’s how to get started:
Assess Your Outdoor Space: Begin by evaluating the layout of your outdoor area. Identify key features such as walkways, garden beds, patio areas, and architectural elements that could benefit from illumination. Understanding the layout will help you determine the most strategic placements for your lighting fixtures.
Define Your Objectives: Consider the primary purposes of your outdoor lighting. Do you want to create a welcoming ambiance for social gatherings, improve safety and visibility, or highlight specific landscaping elements? Clearly defining your objectives will guide the selection of fixtures and the overall design of your lighting scheme.
Choose the Right Lighting Types: There are various types of outdoor lighting, each serving different functions. Path lights are ideal for illuminating walkways and driveways, while spotlights can accentuate trees, sculptures, or architectural details. Additionally, wall-mounted fixtures can provide ambient lighting for outdoor entertaining areas. Understanding the different lighting types will help you achieve a balanced and functional outdoor lighting setup.
Consider Energy Efficiency: Opt for energy-efficient lighting options to minimize environmental impact and reduce energy costs. LED fixtures are a popular choice for outdoor lighting due to their longevity and low energy consumption. By selecting eco-friendly lighting solutions, you can illuminate your outdoor space responsibly while enjoying long-lasting performance.
Account for Power Sources: Determine the availability of power sources in your outdoor area. If access to electrical outlets is limited, you may need to explore alternative options such as solar-powered or low-voltage lighting. Understanding your power source limitations will influence your choice of lighting fixtures and installation methods.
Create a Lighting Plan: Once you’ve assessed your outdoor space, defined your objectives, and chosen the appropriate lighting types, it’s time to create a detailed lighting plan. This plan should outline the specific locations for each fixture, taking into account the desired intensity of illumination and any potential obstacles or challenges.
By investing time in the planning phase, you can ensure that your outdoor lighting installation aligns with your vision and functional requirements. A well-executed plan will result in a cohesive and captivating outdoor lighting design that enhances the beauty and usability of your outdoor living space.
Choosing the Right Fixtures
When it comes to outdoor lighting, selecting the right fixtures is essential for achieving the desired aesthetic and functional outcomes. With a wide range of options available, it’s important to consider factors such as style, durability, and intended use. Here’s a guide to help you choose the perfect fixtures for your outdoor lighting project:
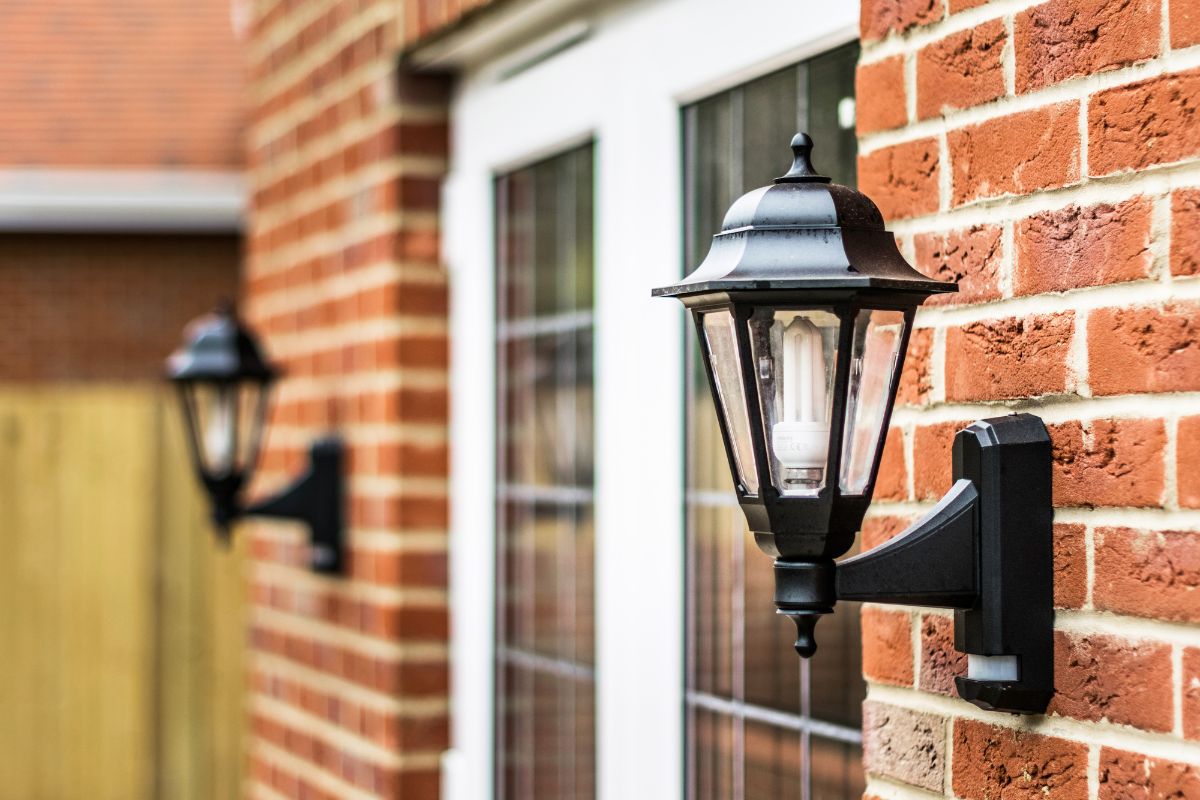
Style and Aesthetics: Consider the overall design theme of your outdoor space. Whether your style is modern, traditional, or eclectic, there are lighting fixtures to complement every aesthetic. From sleek and contemporary designs to classic lantern-style fixtures, the right choice can seamlessly integrate with your outdoor decor while adding a touch of visual appeal.
Weather Resistance: Outdoor lighting fixtures are exposed to the elements, so it’s crucial to select options that are designed to withstand outdoor conditions. Look for fixtures constructed from durable materials such as aluminum, stainless steel, or weather-resistant plastics. Additionally, ensure that the chosen fixtures have adequate protection against moisture and corrosion to maintain their longevity and performance.
Functionality: Determine the specific functions you want your lighting fixtures to serve. For example, if you’re lighting a pathway, consider low-profile path lights with a soft, diffused glow. If you’re aiming to highlight architectural elements or landscaping, adjustable spotlights may be the ideal choice. Understanding the intended use of each fixture will ensure that they fulfill their designated purposes effectively.
Lighting Technology: Explore the different lighting technologies available for outdoor fixtures. LED lights, known for their energy efficiency and long lifespan, are a popular choice for outdoor applications. Additionally, consider features such as adjustable brightness, color temperature options, and smart lighting capabilities to customize the ambiance and functionality of your outdoor space.
Integration with Controls: If you’re incorporating a lighting control system, such as timers, dimmers, or smart home integration, ensure that your chosen fixtures are compatible with the control mechanisms. This compatibility will allow you to fine-tune the lighting settings and automate the operation of your outdoor lighting for added convenience and energy savings.
Budget and Long-Term Value: While it’s important to stay within your budget, consider the long-term value of your lighting fixtures. Investing in high-quality, durable fixtures may require a higher initial investment but can result in lower maintenance costs and greater longevity. Evaluate the overall value proposition to make informed decisions that align with your budget and quality expectations.
By carefully considering style, durability, functionality, technology, integration with controls, and long-term value, you can confidently select the right fixtures to bring your outdoor lighting vision to life. The perfect combination of fixtures will not only illuminate your outdoor space effectively but also enhance its visual appeal and usability for years to come.
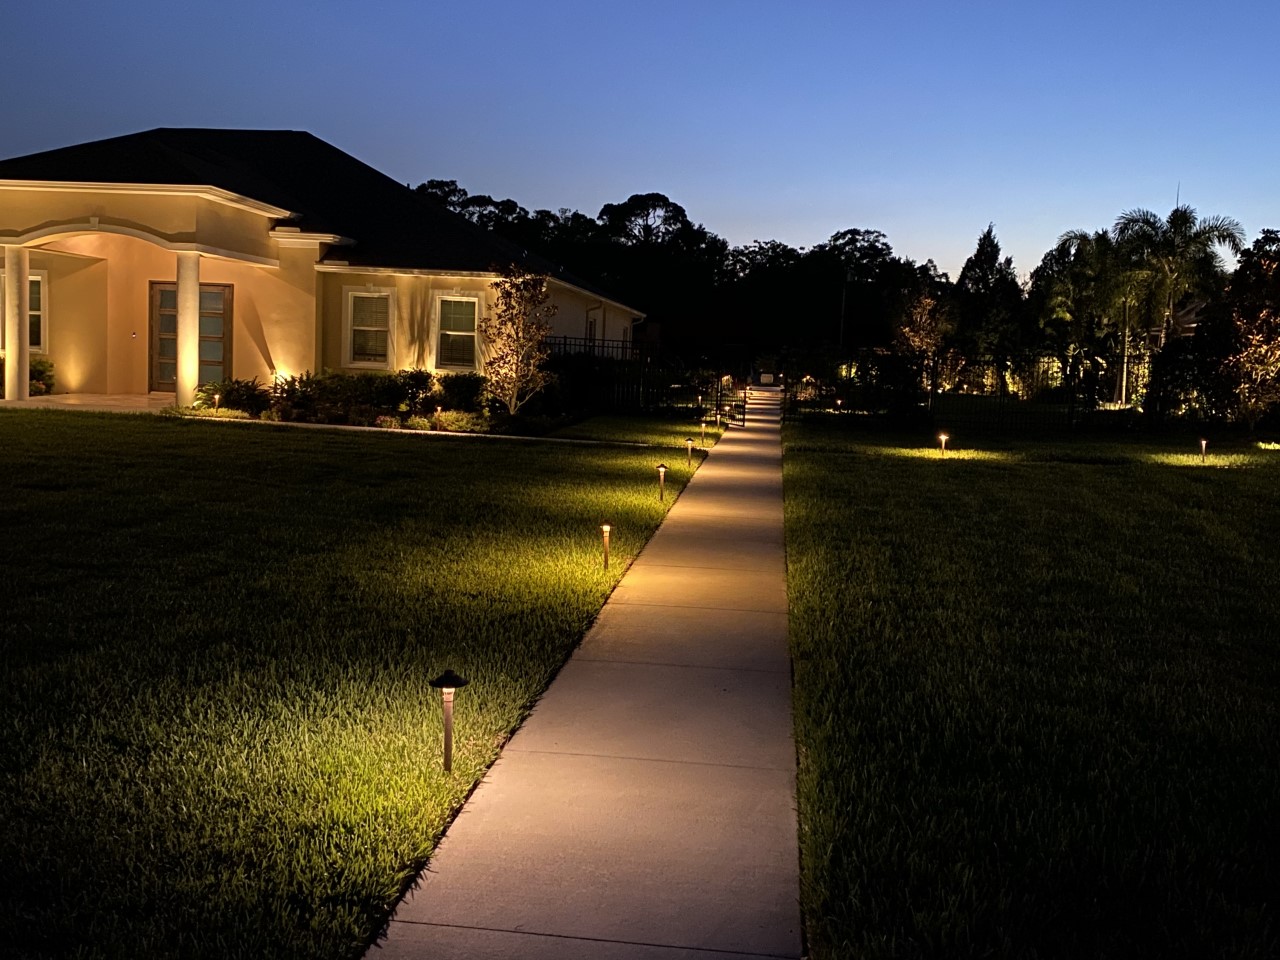
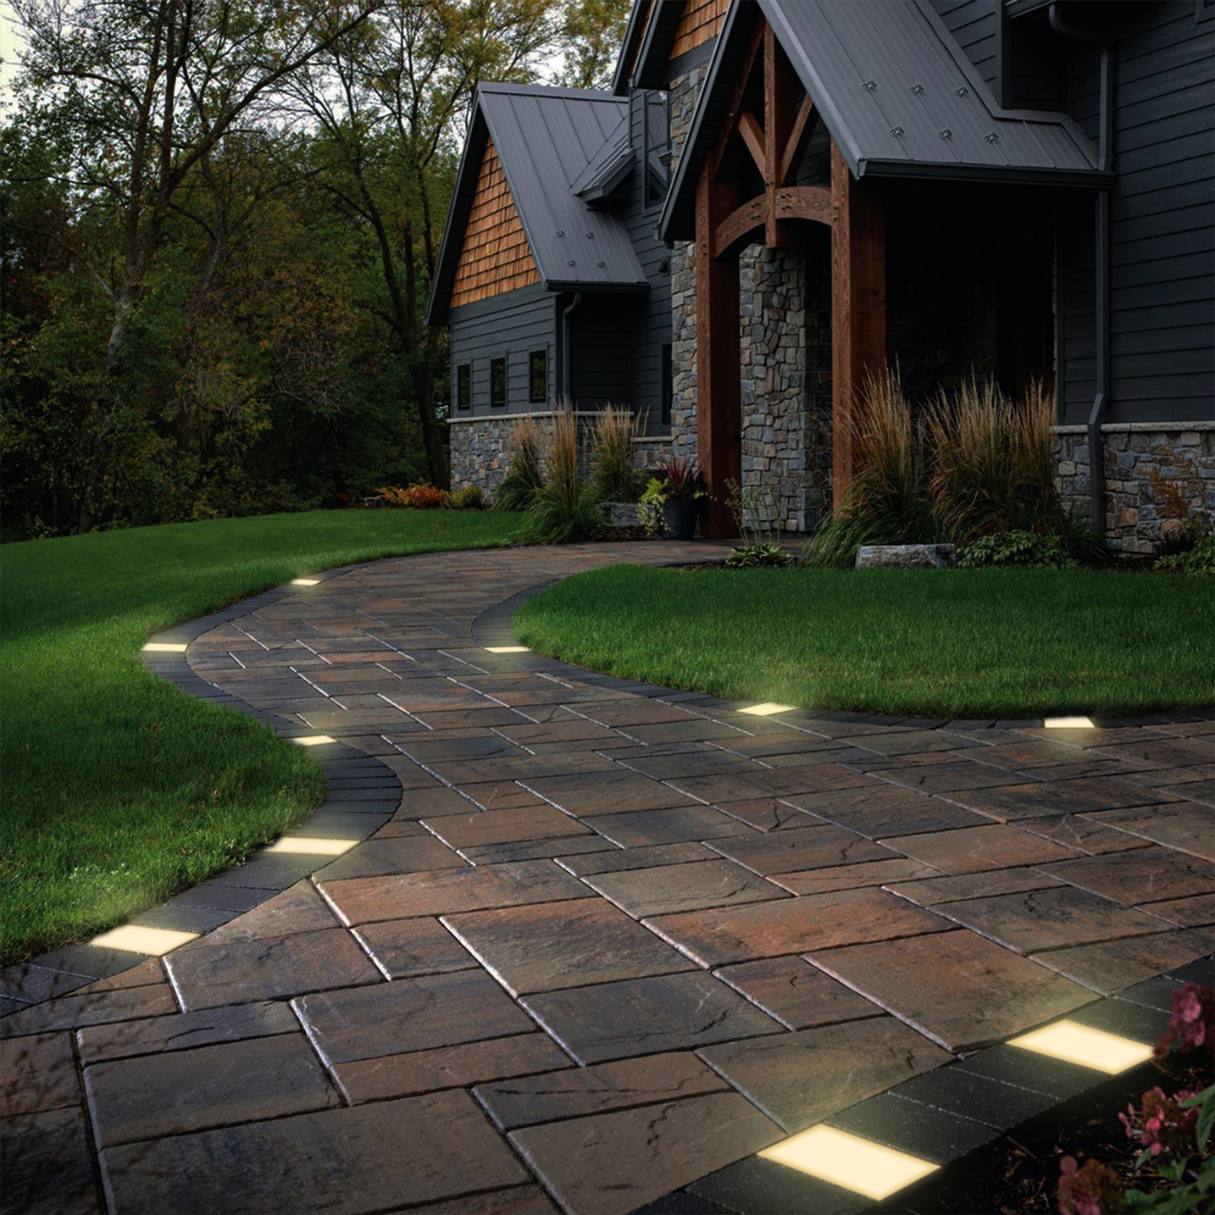
Installing Low Voltage Lighting
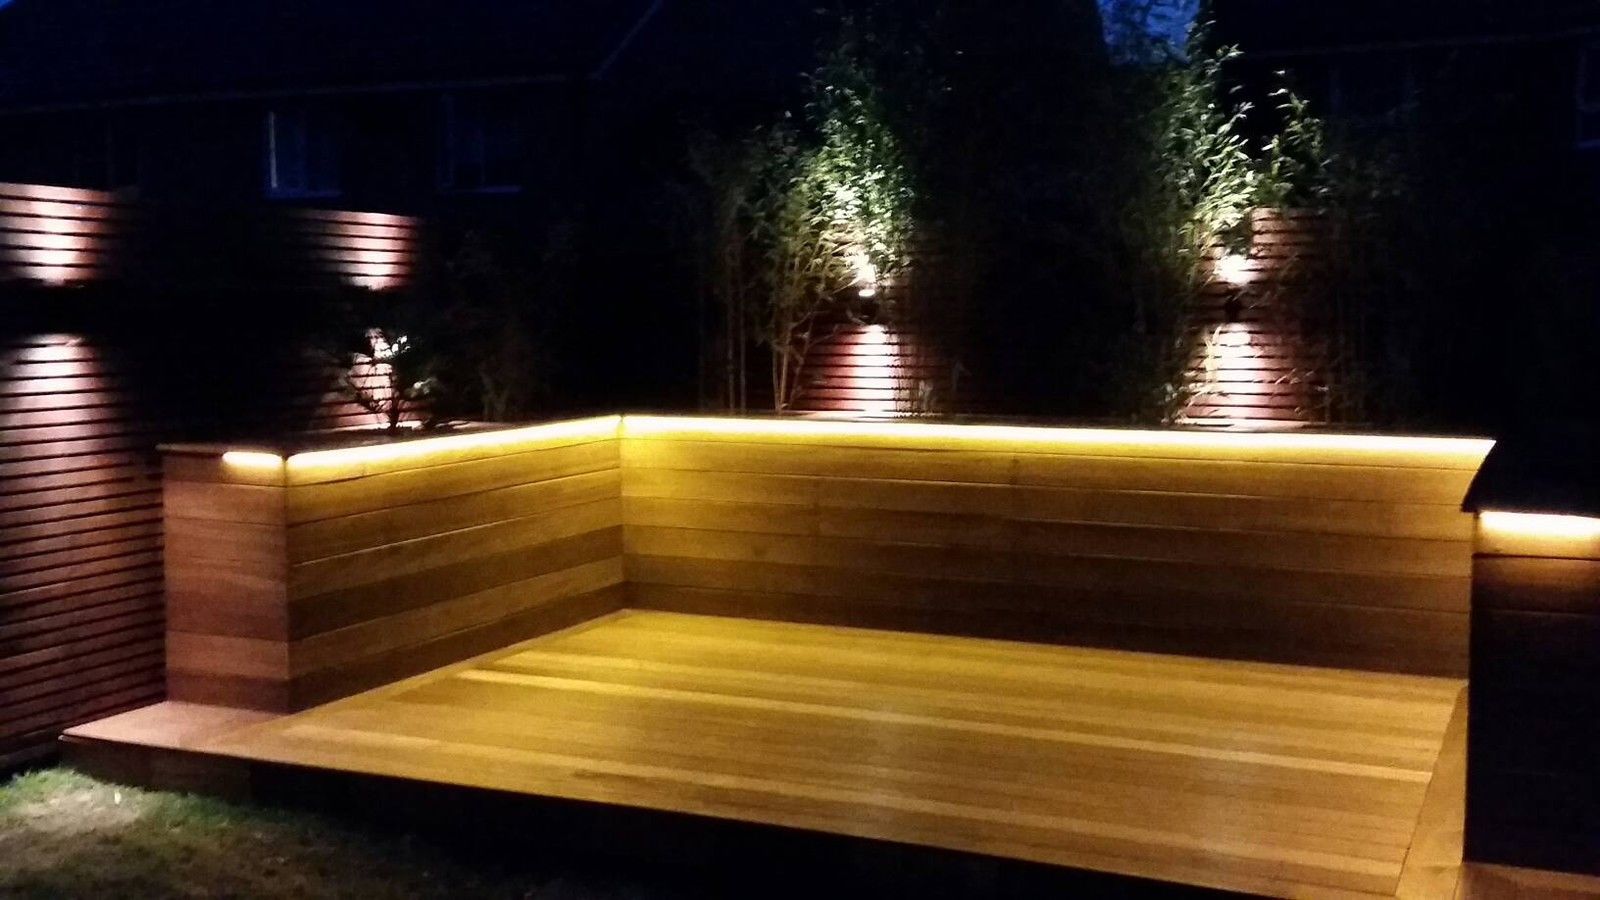
Low voltage lighting offers a versatile and energy-efficient solution for illuminating outdoor spaces. Whether you’re highlighting pathways, accentuating landscaping features, or adding ambiance to your patio, the installation of low voltage lighting can be a rewarding DIY project. Here’s a step-by-step guide to installing low voltage outdoor lighting:
Plan the Layout: Begin by sketching out the placement of your lighting fixtures in the outdoor area. Consider the locations of power sources, the positioning of landscape features, and the desired lighting effects. This planning phase will help you determine the number of fixtures needed and their optimal placement for effective illumination.
Prepare the Transformer: The transformer is a crucial component of a low voltage lighting system, as it converts standard household voltage to a safe 12-volt current. Locate a suitable outdoor power outlet and mount the transformer securely to a wall or post. Ensure that the transformer is equipped with a built-in timer or photocell for automated operation and energy efficiency.
Install the Wiring: Low voltage lighting systems require insulated, weather-resistant cables to connect the fixtures to the transformer. Lay the wiring along the planned lighting paths, ensuring that it remains hidden and protected from potential damage. Use cable connectors to join the wires securely and bury them at a shallow depth to maintain a clean and unobtrusive appearance.
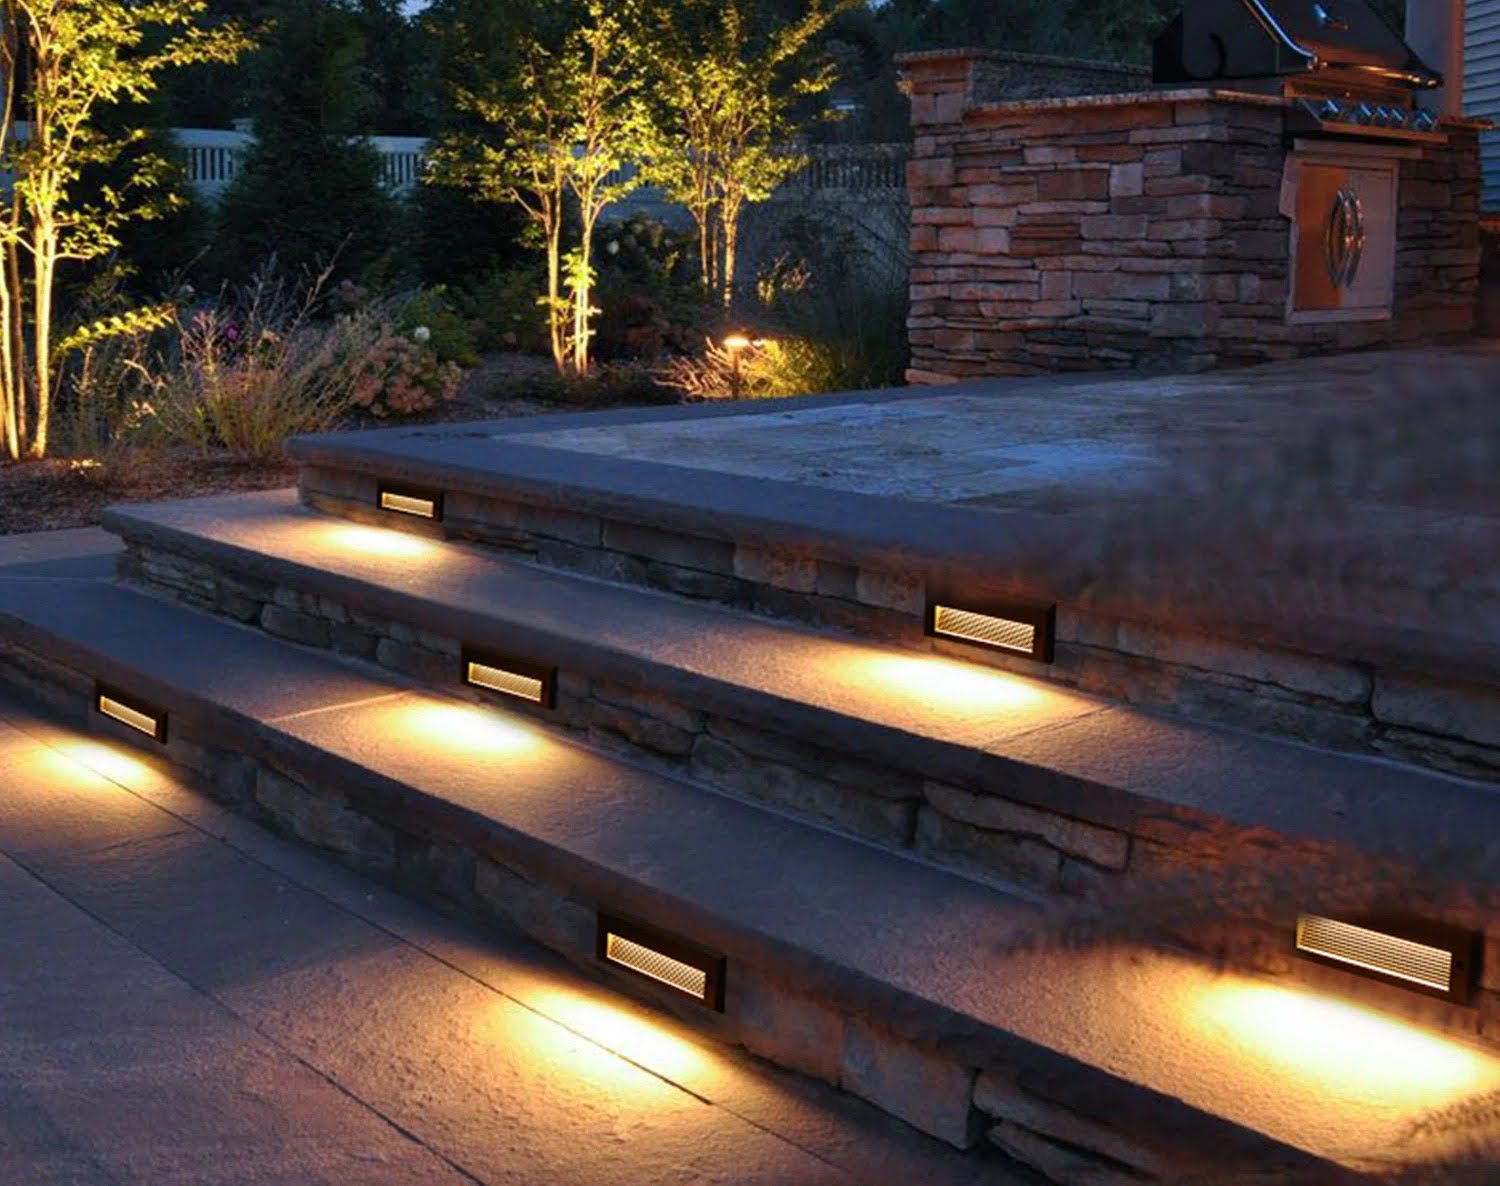
Position the Fixtures: Place the lighting fixtures in their designated locations according to your pre-planned layout. Whether you’re installing path lights, spotlights, or accent fixtures, ensure that they are securely anchored and angled to achieve the desired lighting effects. Adjust the height and direction of the fixtures to optimize their illumination coverage.
Connect the Fixtures: Once the fixtures are in place, connect them to the low voltage wiring using waterproof wire connectors. Follow the manufacturer’s instructions for proper wiring techniques, ensuring that the connections are secure and insulated. Test each fixture to verify that it functions as intended before proceeding with the final installation steps.
Configure the Lighting Effects: With the fixtures connected, adjust any built-in brightness or beam angle settings to achieve the desired lighting effects. Fine-tune the positioning and orientation of the fixtures to optimize the overall illumination while avoiding glare and light pollution. This step allows you to customize the ambiance and functionality of your outdoor lighting design.
Test and Secure the System: Once the installation is complete, test the entire low voltage lighting system to ensure that all fixtures illuminate as expected. Make any necessary adjustments to the fixture positions or wiring connections. Finally, secure the wiring in place using stakes or clips to prevent tripping hazards and protect the system from accidental damage.
By following these steps, you can successfully install low voltage outdoor lighting to enhance the beauty and functionality of your outdoor living space. With its ease of installation and energy-efficient operation, low voltage lighting provides a cost-effective and visually appealing solution for illuminating your outdoor environment.
Before installing outdoor lighting, make sure to plan the layout and consider the power source. It’s important to use weatherproof fixtures and follow safety guidelines.
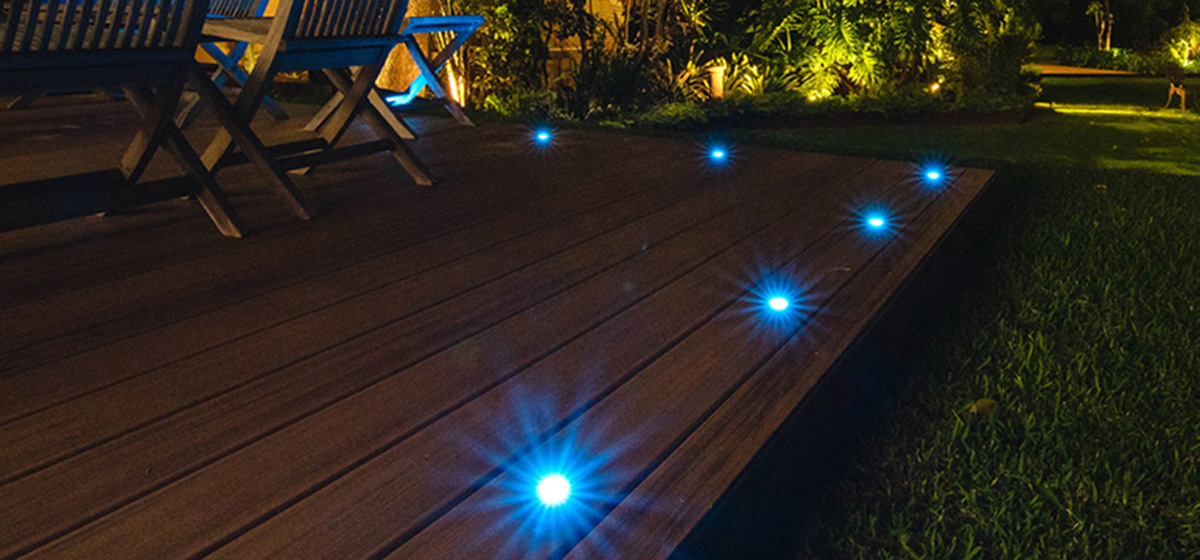
Installing Solar Lighting
Solar lighting offers a convenient and eco-friendly way to illuminate outdoor areas without the need for extensive electrical wiring or reliance on traditional power sources. Whether you’re lighting up a garden, patio, or pathway, installing solar lighting fixtures can enhance the ambiance of your outdoor space while reducing your carbon footprint. Here’s a comprehensive guide to installing solar lighting in your outdoor environment:
Assess Sunlight Availability: Before installing solar lighting, evaluate the sunlight exposure in the areas where you intend to place the fixtures. Solar lights require direct sunlight to charge effectively, so it’s essential to position them in locations with ample access to sunlight throughout the day. Avoid shading from trees, buildings, or other obstructions that may hinder the solar panels’ exposure to sunlight.
Select High-Quality Solar Fixtures: Choose solar lighting fixtures equipped with efficient photovoltaic panels and long-lasting LED bulbs. Look for fixtures with durable, weather-resistant construction to ensure longevity and performance in outdoor conditions. Additionally, consider features such as automatic dusk-to-dawn operation, adjustable brightness settings, and motion-sensing capabilities for enhanced functionality.
Prepare the Installation Sites: Clear the installation sites of debris, vegetation, and obstructions to ensure that the solar lighting fixtures can be securely placed and receive optimal sunlight exposure. If necessary, level the ground or provide a stable foundation for ground-mounted fixtures to prevent tilting or instability over time.
Position the Solar Fixtures: Place the solar lighting fixtures in their designated locations, ensuring that the solar panels are oriented to receive maximum sunlight during the day. Whether you’re installing stake lights, wall-mounted fixtures, or decorative solar lanterns, position them strategically to achieve the desired lighting effects while maximizing their exposure to sunlight.
Secure the Fixtures: Once the fixtures are positioned, secure them in place according to the manufacturer’s instructions. Ground-mounted fixtures may require insertion into the soil, while wall-mounted or post-mounted fixtures should be anchored securely to the respective surfaces. Ensure that the fixtures are stable and aligned for optimal performance and visual appeal.
Test the Operation: After installing the solar lighting fixtures, allow them to receive a full day of sunlight to ensure that the batteries are adequately charged. Test each fixture in the evening to verify that they illuminate as expected and that any automated features, such as motion sensors or dusk-to-dawn operation, function correctly. Make any necessary adjustments to the fixture positions or settings to optimize their performance.
Maintain and Monitor: Regularly clean the solar panels and light fixtures to remove dirt, debris, and any potential obstructions that may hinder their performance. Monitor the battery life and lighting output to ensure consistent operation, especially during periods of reduced sunlight. Additionally, replace rechargeable batteries as needed to maintain optimal performance over time.
By following these steps, you can effectively install solar lighting fixtures to enhance the beauty and functionality of your outdoor living space. With their sustainable operation and hassle-free installation, solar lights offer a practical and environmentally conscious lighting solution for your outdoor environment.
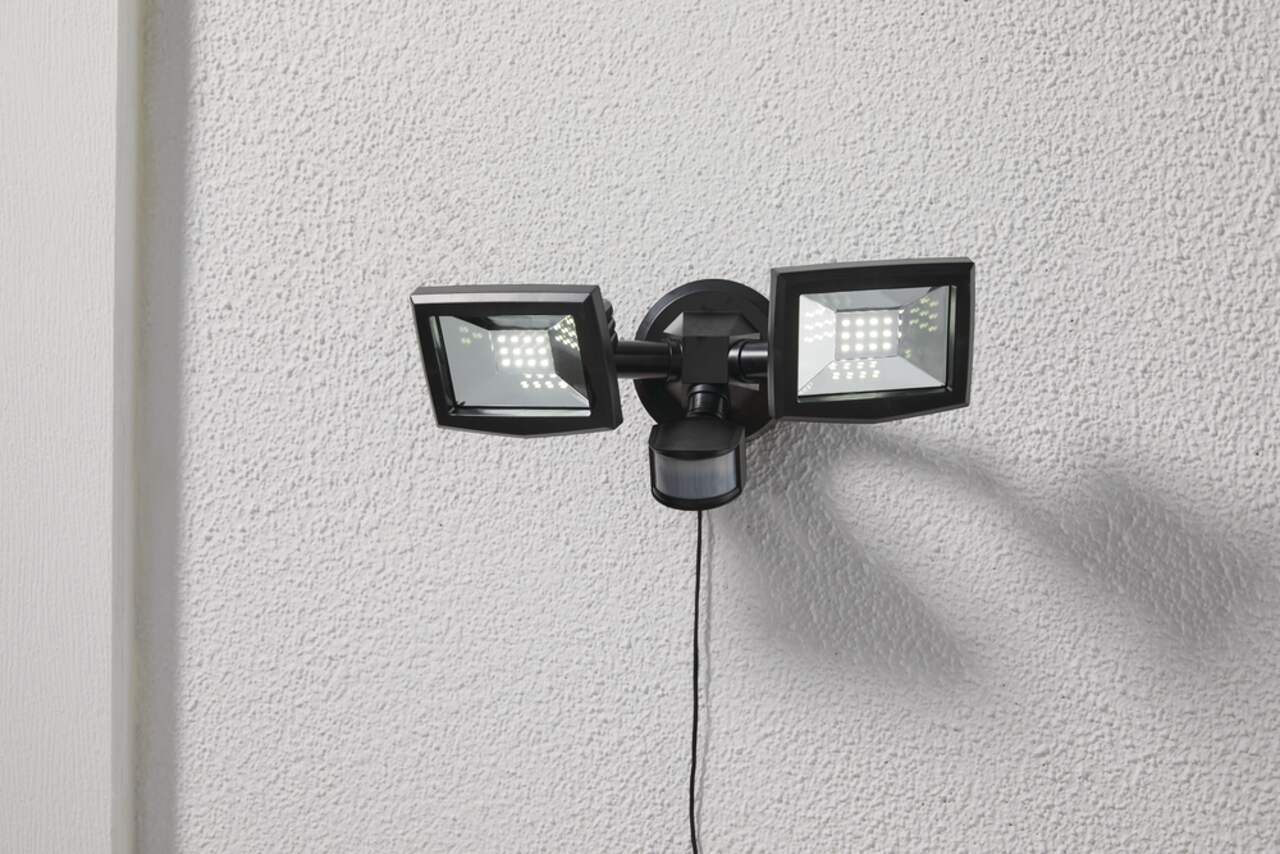
Installing Motion Sensor Lighting
Motion sensor lighting provides a practical and energy-efficient solution for enhancing security and convenience in outdoor spaces. Whether you’re illuminating pathways, entryways, or dark corners of your property, installing motion sensor lights can deter intruders, offer added safety, and conserve energy by activating only when motion is detected. Here’s a comprehensive guide to installing motion sensor lighting in your outdoor environment:
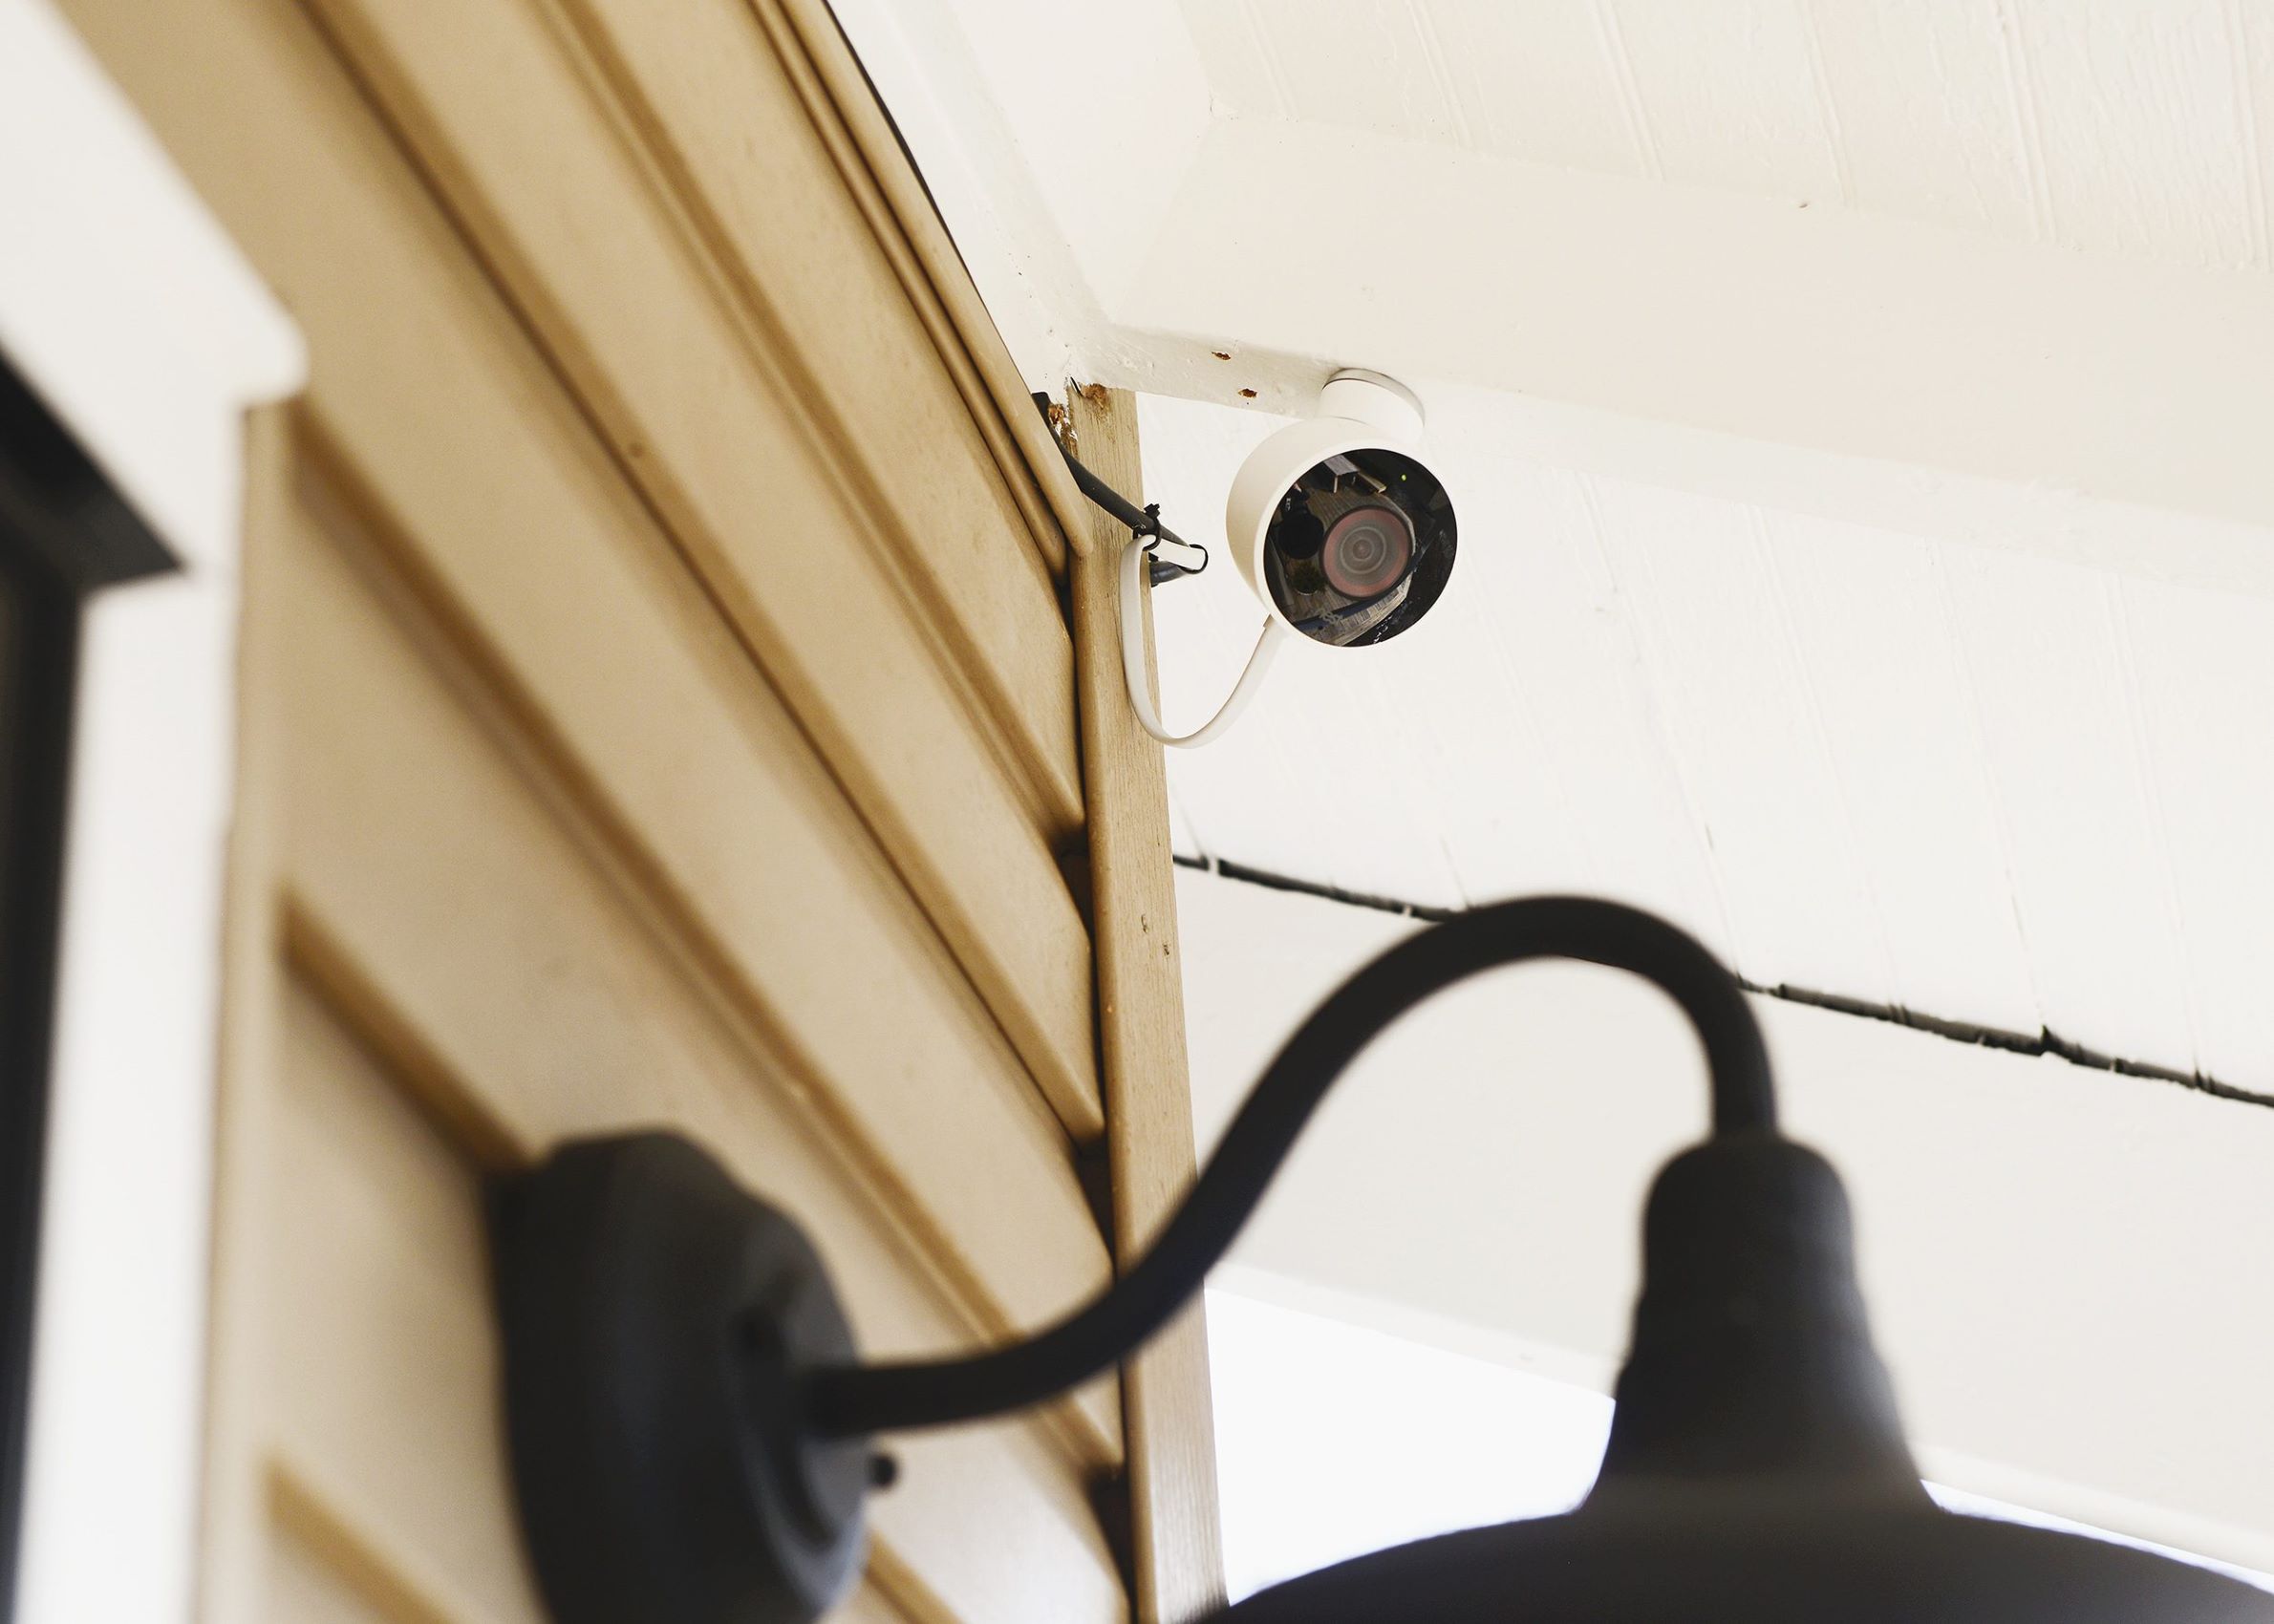
Select Suitable Locations: Identify the areas where motion sensor lighting is needed, such as entry points, driveways, or secluded areas of your property. Assess the range and detection angle of the motion sensor lights to determine the optimal positions for installation. Additionally, consider the proximity to power sources and potential obstructions that may affect the motion sensor’s effectiveness.
Choose High-Quality Motion Sensor Lights: Select motion sensor lights with adjustable sensitivity, range, and duration settings to customize their operation according to your specific needs. Look for weather-resistant fixtures with durable construction to withstand outdoor conditions. Additionally, consider the type of bulbs used, such as LED lights, for energy efficiency and long-term performance.
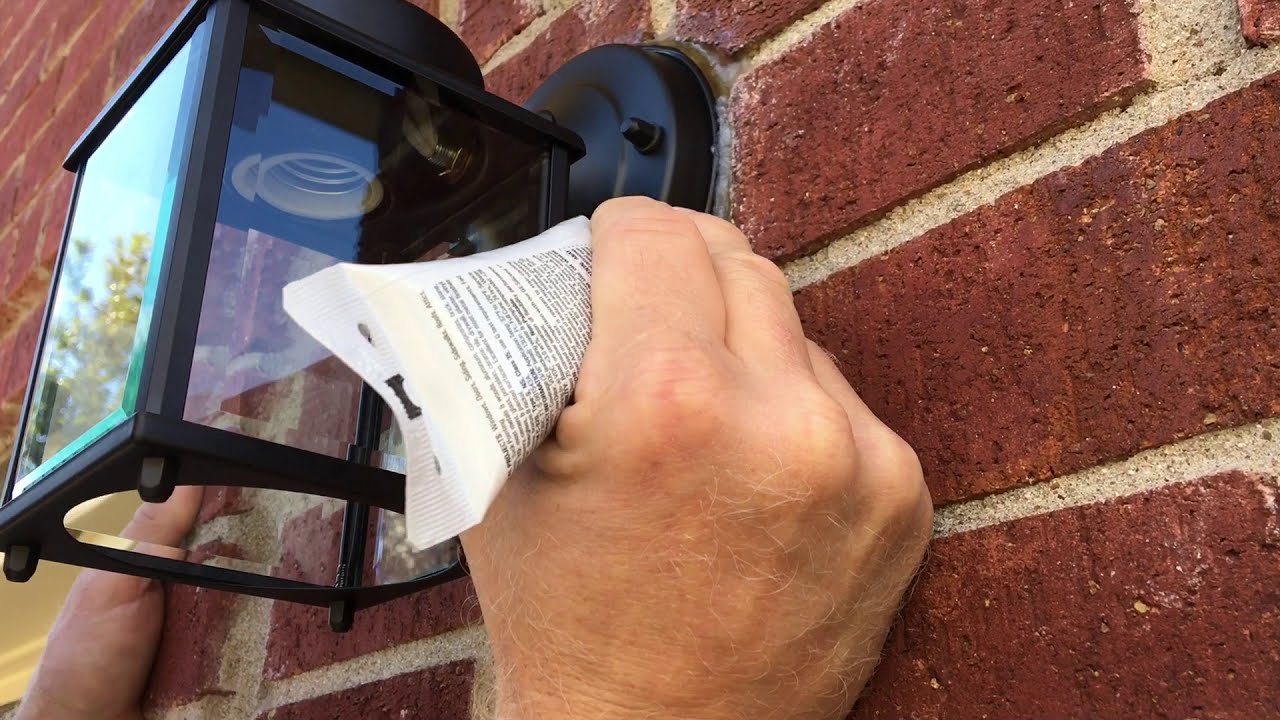
Prepare the Installation Sites: Clear the installation sites of any obstacles, vegetation, or debris that may interfere with the motion sensor’s detection capabilities. Ensure that the mounting surfaces are stable and suitable for securing the light fixtures. If necessary, install mounting brackets or hardware to facilitate the proper positioning of the motion sensor lights.
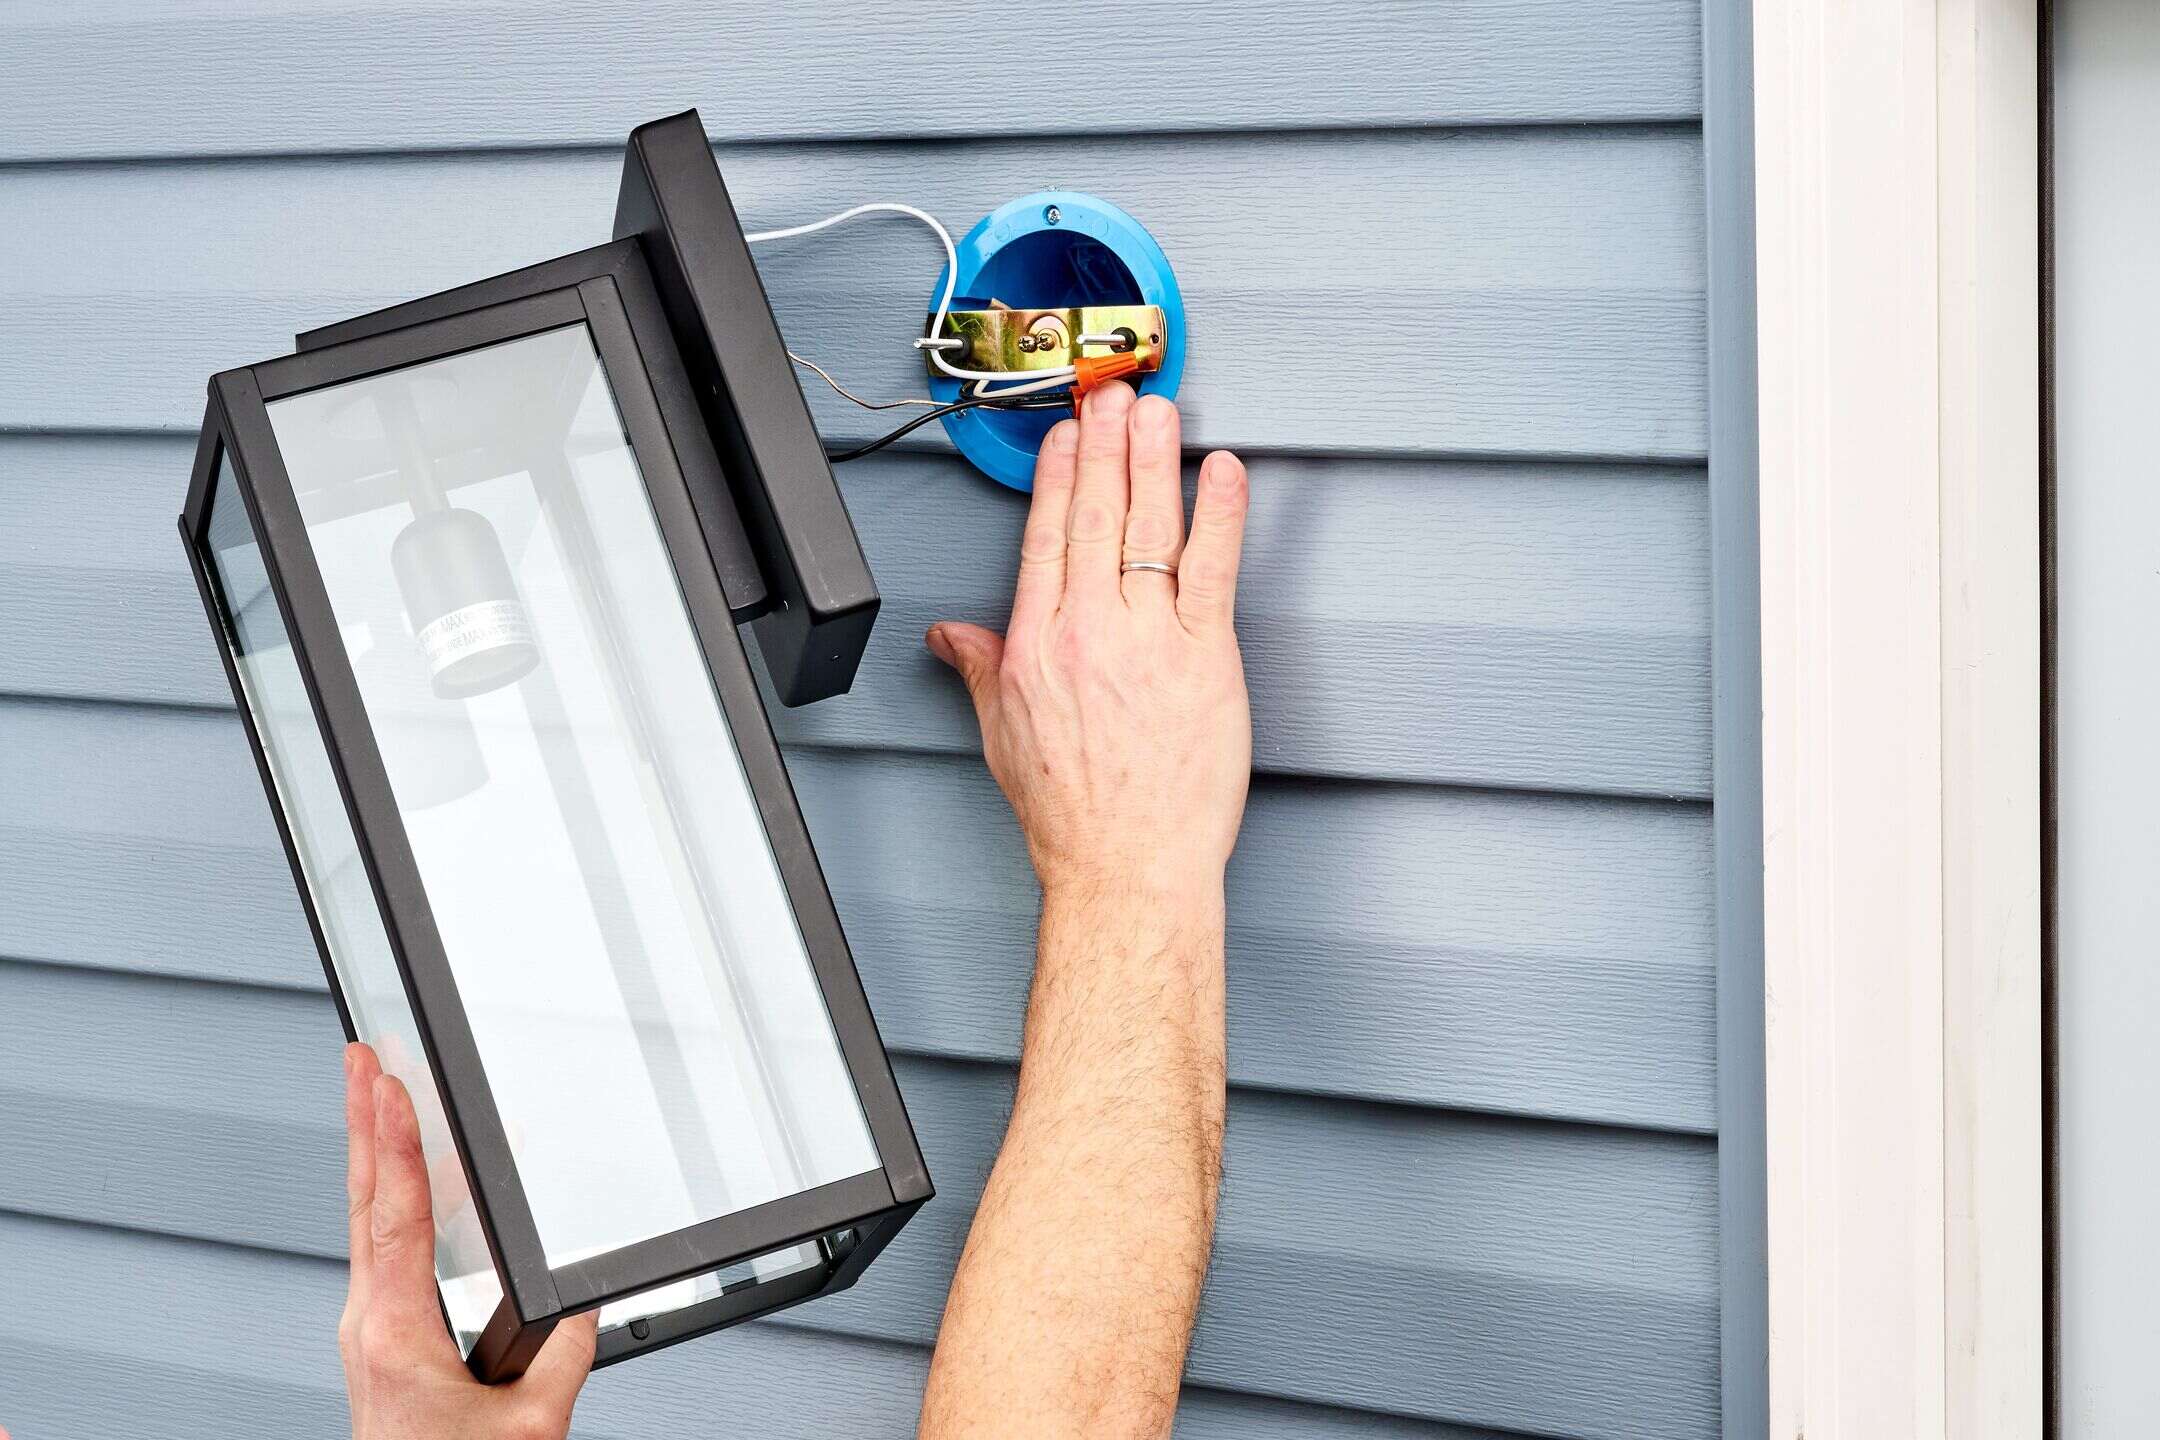
Mount the Fixtures: Following the manufacturer’s instructions, securely mount the motion sensor lights in the designated locations using appropriate hardware and mounting methods. Adjust the angle and orientation of the fixtures to optimize their coverage area while ensuring that the motion sensors have a clear line of sight for effective detection.
Connect to Power: If the motion sensor lights require a direct electrical connection, carefully follow the wiring instructions provided with the fixtures. Ensure that the power source is switched off before making any electrical connections. If you’re not experienced with electrical work, consider hiring a qualified electrician to handle the wiring and ensure compliance with safety standards.
Adjust Settings and Test Operation: Once the motion sensor lights are installed and connected to power, adjust the sensitivity, range, and duration settings according to your preferences. Test the operation of each light by walking within the detection range to verify that the motion sensor activates the light as intended. Make any necessary adjustments to the settings or positioning to optimize the performance of the motion sensor lights.
Monitor and Maintain: Regularly inspect the motion sensor lights to ensure that they remain free of obstructions and debris that could affect their operation. Clean the lenses and sensors as needed to maintain optimal detection capabilities. Additionally, replace any worn-out bulbs and promptly address any issues with the motion sensor’s functionality to ensure consistent operation.
By following these steps, you can effectively install motion sensor lighting to enhance the security and convenience of your outdoor living space. With their ability to provide instant illumination upon detecting motion, motion sensor lights offer a proactive and energy-efficient solution for your outdoor lighting needs.
Maintenance and Troubleshooting
Proper maintenance and troubleshooting are essential for ensuring the long-term performance and functionality of outdoor lighting systems. By implementing routine maintenance practices and addressing common issues promptly, you can maximize the effectiveness and longevity of your outdoor lighting fixtures. Here’s a comprehensive guide to maintaining and troubleshooting outdoor lighting:
Regular Cleaning and Inspection: Schedule regular cleaning and inspection of your outdoor lighting fixtures to remove dirt, debris, and any potential obstructions that may affect their performance. Wipe down the surfaces of the fixtures, clear away vegetation or accumulated debris, and ensure that the light output remains unobstructed for optimal illumination.
Check Electrical Connections: Periodically inspect the electrical connections of wired outdoor lighting systems to ensure that the wiring is secure and free from damage. Verify that the connections are weatherproof and protected from moisture to prevent corrosion or electrical issues. Address any loose or damaged wiring promptly to maintain safe and reliable operation.
Replace Worn-Out Bulbs: Monitor the condition of the light bulbs in your outdoor fixtures and replace any that have dimmed or burned out. Use the appropriate replacement bulbs recommended by the fixture’s manufacturer to maintain consistent illumination levels and prevent premature fixture failure. Consider upgrading to energy-efficient LED bulbs for long-lasting performance.
Inspect and Maintain Solar Panels: If you have solar-powered lighting fixtures, regularly clean the solar panels to remove dirt, dust, and debris that may hinder their ability to charge effectively. Ensure that the panels receive ample sunlight exposure and that there are no shading obstructions that could diminish their charging capacity. Monitor the condition of the rechargeable batteries and replace them as needed to sustain optimal performance.
Address Sensor Issues: For motion sensor lights, troubleshoot any issues related to the motion detection capabilities. Check for potential obstructions or interference that may hinder the sensor’s operation, and adjust the sensor’s settings and positioning as necessary. Ensure that the sensor lens is clean and free from dirt or condensation that could affect its sensitivity.
Test and Calibrate Timers: If your outdoor lighting system includes timers or automated controls, periodically test and calibrate the timers to ensure that the lighting activates and deactivates at the intended times. Adjust the timer settings to align with changes in daylight hours and seasonal variations to maintain consistent operation.
Addressing Common Issues: Troubleshoot common issues such as flickering lights, inconsistent operation, or dim illumination by checking the power source, wiring connections, and fixture conditions. Verify that the power supply is stable, and address any voltage fluctuations that may affect the performance of the lighting system. If persistent issues arise, consult with a qualified electrician or lighting specialist for professional assistance.
Professional Maintenance: Consider scheduling periodic professional maintenance and inspection of your outdoor lighting systems to address any complex issues and ensure that the fixtures are in optimal condition. Professional maintenance can include comprehensive cleaning, electrical system checks, and component inspections to identify and resolve potential issues proactively.
By incorporating regular maintenance practices and promptly addressing any troubleshooting needs, you can uphold the reliability and effectiveness of your outdoor lighting systems. These proactive measures will help you enjoy consistent and visually appealing illumination in your outdoor environment while minimizing the risk of performance issues and component failures.
Conclusion
Congratulations on completing this illuminating journey into the world of outdoor lighting installation! By exploring the planning, selection, and installation of various outdoor lighting solutions, you’ve gained valuable insights into transforming your outdoor space into a captivating and functional environment. As you conclude your exploration, here are some key takeaways to guide you in your outdoor lighting endeavors:
Personalized Lighting Design: Every outdoor space is unique, and your lighting design should reflect your specific needs, preferences, and the architectural elements of your property. Whether you’re aiming to create a cozy ambiance for social gatherings, enhance security, or accentuate landscaping features, a personalized lighting design can elevate the beauty and functionality of your outdoor environment.
Consideration of Energy Efficiency: When selecting outdoor lighting fixtures, prioritize energy-efficient options such as LED lights, solar-powered fixtures, and low-voltage systems. By embracing sustainable lighting solutions, you can minimize environmental impact, reduce energy costs, and contribute to a greener approach to outdoor illumination.
Maintenance and Care: Regular maintenance and troubleshooting play pivotal roles in preserving the performance and longevity of your outdoor lighting systems. By implementing routine cleaning, inspecting electrical connections, and addressing common issues promptly, you can ensure that your outdoor lighting continues to shine brightly and reliably for years to come.
Adaptation to Technological Advancements: Stay informed about the latest advancements in outdoor lighting technology, such as smart lighting controls, motion sensors, and automated features. Embracing technological innovations can enhance the convenience, security, and energy efficiency of your outdoor lighting setup, allowing you to tailor the lighting experience to your evolving needs.
As you embark on your outdoor lighting installation journey, remember that creativity and personal expression are key elements in crafting a captivating outdoor ambiance. Whether you’re illuminating a tranquil garden retreat, a welcoming entryway, or a vibrant entertainment area, the right lighting design can transform your outdoor space into a captivating extension of your home.
With the knowledge and insights gained from this guide, you’re well-equipped to embark on your outdoor lighting installation project with confidence and creativity. By blending functionality, aesthetics, and sustainability, you can create an outdoor environment that beckons with warmth, security, and visual allure. Embrace the art of outdoor lighting, and let your outdoor space shine brightly for all to enjoy.
Thank you for joining us on this enlightening journey, and may your outdoor lighting endeavors bring joy, beauty, and practicality to your outdoor living space.
Frequently Asked Questions about How To Install Outdoor Lighting
Was this page helpful?
At Storables.com, we guarantee accurate and reliable information. Our content, validated by Expert Board Contributors, is crafted following stringent Editorial Policies. We're committed to providing you with well-researched, expert-backed insights for all your informational needs.


0 thoughts on “How To Install Outdoor Lighting”