Articles
How To Change A HVAC Filter
Modified: January 8, 2024
Learn how to change a HVAC filter with our informative articles. Improve air quality and system performance with these easy steps.
(Many of the links in this article redirect to a specific reviewed product. Your purchase of these products through affiliate links helps to generate commission for Storables.com, at no extra cost. Learn more)
Introduction
In order to ensure the optimal performance and longevity of your HVAC system, regular maintenance is essential. One vital aspect of this maintenance is the regular replacement of HVAC filters. While it may seem like a small task, changing your HVAC filter can have a significant impact on your indoor air quality, energy efficiency, and overall comfort.
Over time, HVAC filters can become clogged with dust, dirt, allergens, and other particles. This buildup restricts airflow, making your system work harder to maintain your desired temperature. As a result, your energy bills may increase, and your HVAC system may experience unnecessary wear and tear. Additionally, a dirty filter can lead to poor indoor air quality, potentially aggravating respiratory issues and allergies.
In this article, we will guide you through the process of changing your HVAC filter. We will provide step-by-step instructions, along with important tips and reminders to ensure you perform this task correctly. By regularly changing your HVAC filters, you can improve the efficiency, lifespan, and air quality of your HVAC system.
Key Takeaways:
- Regularly changing HVAC filters improves air quality, energy efficiency, and system lifespan. Follow proper steps, avoid common mistakes, and establish a maintenance routine for optimal HVAC performance.
- Ensure a smooth HVAC filter replacement by locating the filter, shutting off the system, cleaning the housing, and installing the new filter correctly. Regular checks and maintenance are key to long-term efficiency.
Read more: How Often Should You Change HVAC Air Filter
Why is it important to change HVAC filters?
Regularly changing your HVAC filters is crucial for several reasons:
- Improved Indoor Air Quality: HVAC filters are designed to trap dust, pollen, pet dander, mold spores, and other airborne particles. Over time, these particles accumulate on the filter, reducing its efficacy in capturing pollutants. By changing the filter regularly, you ensure that your indoor air remains clean and free from harmful contaminants, promoting a healthier living environment.
- Increased Energy Efficiency: Clogged HVAC filters restrict the airflow, forcing the system to work harder to maintain the desired temperature. This increased workload results in higher energy consumption and, consequently, higher energy bills. By regularly changing the filter, you allow for proper airflow, improving the energy efficiency of your HVAC system and reducing your energy expenses.
- Extended HVAC System Lifespan: When your HVAC system has to strain due to a clogged filter, it leads to increased wear and tear on the components. Over time, this can lead to system failures, costly repairs, or even the need for a premature replacement. By regularly changing the filter, you relieve the strain on the system, helping to prolong its lifespan and save you money in the long run.
- Preserving System Performance: A dirty filter can hinder the performance of your HVAC system. Inadequate airflow can result in uneven temperature distribution throughout your home, hot and cold spots, or reduced cooling and heating effectiveness. By changing the filter, you ensure that your HVAC system operates at its optimal capacity, providing consistent comfort throughout your living space.
- Reduced Maintenance Costs: Neglecting to change your HVAC filter can lead to increased maintenance and repair costs. A filter that is not regularly replaced can allow debris to accumulate within the system, leading to issues with the motor, fan, or even the evaporator coil. By maintaining a clean filter, you minimize the chances of costly HVAC repairs and prolong the time between professional maintenance visits.
Overall, regularly changing your HVAC filters is an easy and cost-effective way to improve indoor air quality, increase energy efficiency, extend the lifespan of your HVAC system, preserve its performance, and reduce maintenance costs. The benefits far outweigh the minimal effort and expense required to change the filters, making it an essential task for every homeowner.
Tools and Materials Needed
Before you begin the process of changing your HVAC filter, it’s important to gather all the necessary tools and materials. Here is a list of what you will need:
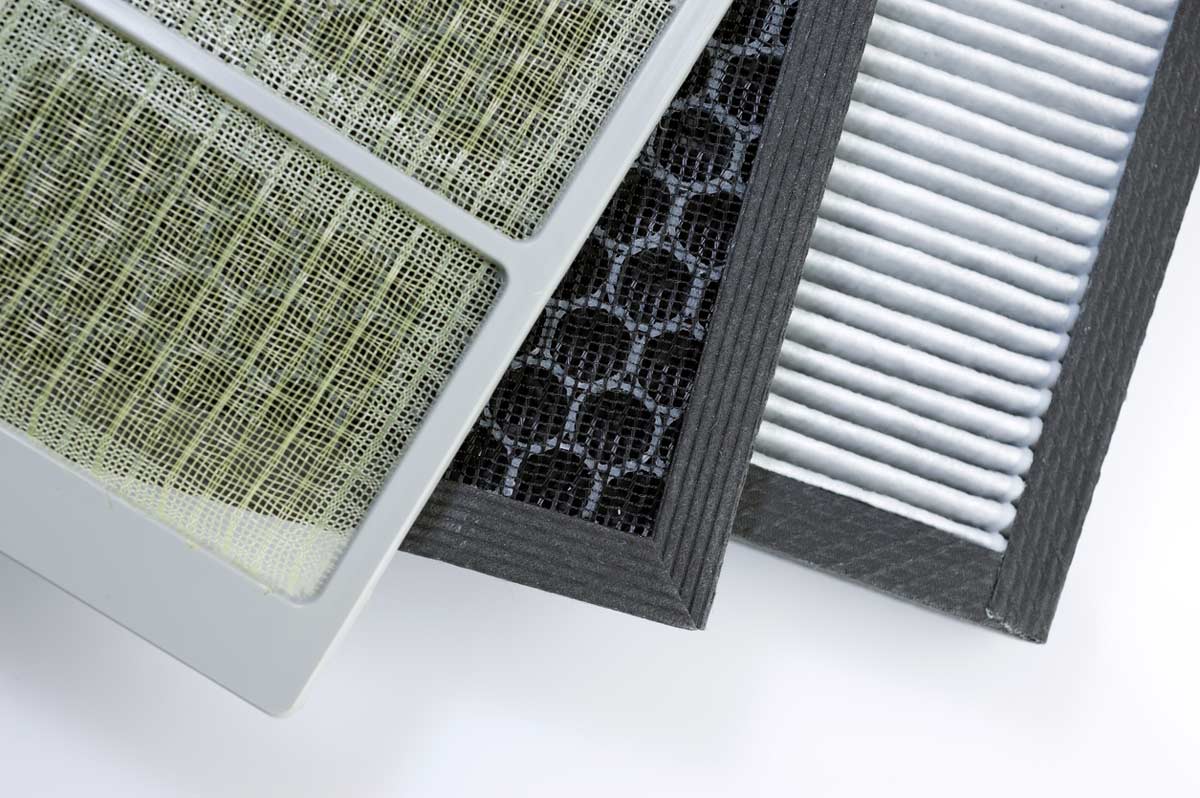
- New HVAC filter: Make sure to purchase a filter that is compatible with your HVAC system. Check the size and type of filter recommended by the manufacturer or consult the user manual.
- Gloves: It’s always a good idea to wear gloves to protect your hands from any dust or debris that may be present on the old filter.
- Screwdriver (if required): Some HVAC systems may have a cover or panel that requires a screwdriver to access the filter. Check if your system requires one and have it on hand if needed.
- Flashlight: In case your HVAC system is located in a dimly lit area, having a flashlight can help you clearly see the filter and any surrounding components.
- Trash bag or plastic sheet: Prepare a designated area nearby where you can safely discard the old filter. A trash bag or plastic sheet will help contain any dirt or debris.
- Cleaning cloth or brush: Before installing the new filter, it’s a good practice to clean the filter housing. A cloth or brush can be used to remove any dust or debris that may have accumulated.
Once you have gathered all the necessary tools and materials, you are ready to proceed with changing your HVAC filter. It’s important to have everything prepared and easily accessible to ensure a smooth and efficient process.
Step 1: Locate the HVAC Filter
The first step in changing your HVAC filter is to locate its position within your HVAC system. The filter is typically located near the return air duct or the air handler unit. Here’s how you can find it:
- Check the main air intake: Look for a large vent or grille in your home where the air is drawn into the HVAC system. This is usually located on a wall, ceiling, or floor in a central area of your home.
- Inspect nearby access panels: Once you have located the main air intake, check for any nearby access panels or doors. These panels may be labeled or have indicators pointing to the location of the filter.
- Consult the user manual: If you’re having trouble locating the filter, refer to the user manual or documentation provided by the HVAC system manufacturer. It will often contain detailed instructions on where to find and how to change the filter.
- Ask a professional: If all else fails, don’t hesitate to reach out to a qualified HVAC technician. They can help you locate the filter and provide guidance on how to change it.
Every HVAC system is different, so the exact location of the filter may vary. It’s essential to find the filter before proceeding with the replacement to ensure you’re working with the correct component.
Once you have successfully located the HVAC filter, you’re ready to move on to the next step, which involves shutting off the HVAC system to safely perform the filter replacement.
Step 2: Shut off the HVAC System
Before you begin replacing the HVAC filter, it’s crucial to shut off the HVAC system to ensure your safety and prevent any potential damage. Here are the steps to follow:
- Find the thermostat: Locate the thermostat in your home, typically found on a wall in a central area. This is where you control the temperature settings for your HVAC system.
- Turn off the HVAC system: Set the thermostat to the “off” position or adjust it to a temperature that will prevent the system from turning on while you’re replacing the filter. This will ensure that the HVAC system remains inactive during the filter replacement process.
- Wait a few minutes: After shutting off the system, wait a few minutes to allow any remaining airflow to dissipate. This will help minimize any potential dust or debris being circulated during the filter change.
By shutting off the HVAC system, you prevent any accidental startup while working on the filter. This protects you from potential injuries and avoids any potential damage to the system that could occur if it were to turn on during the replacement process.
Once you have taken the necessary precautions and ensured that the HVAC system is disconnected, you can proceed with the next step: removing the old filter.
Read more: How To Clean HVAC Filter
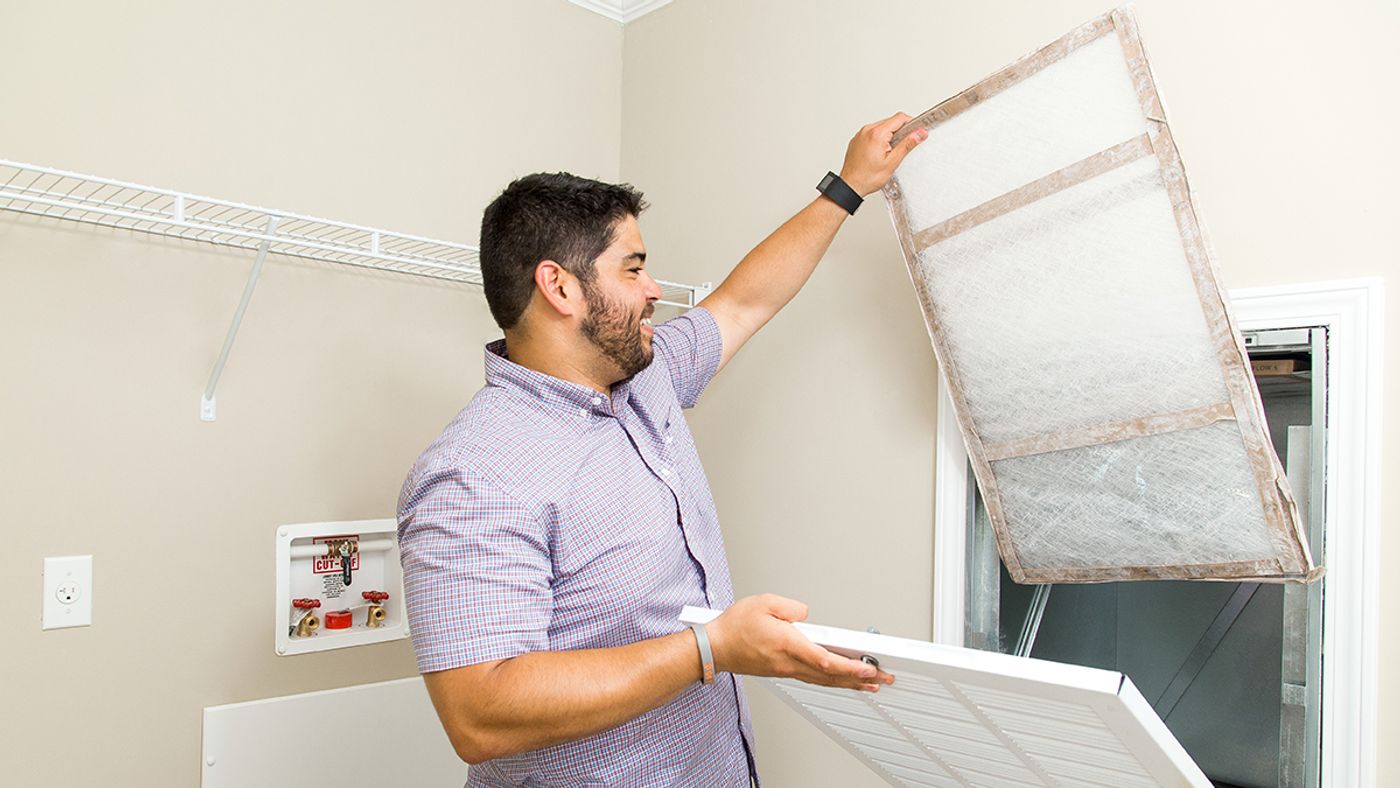
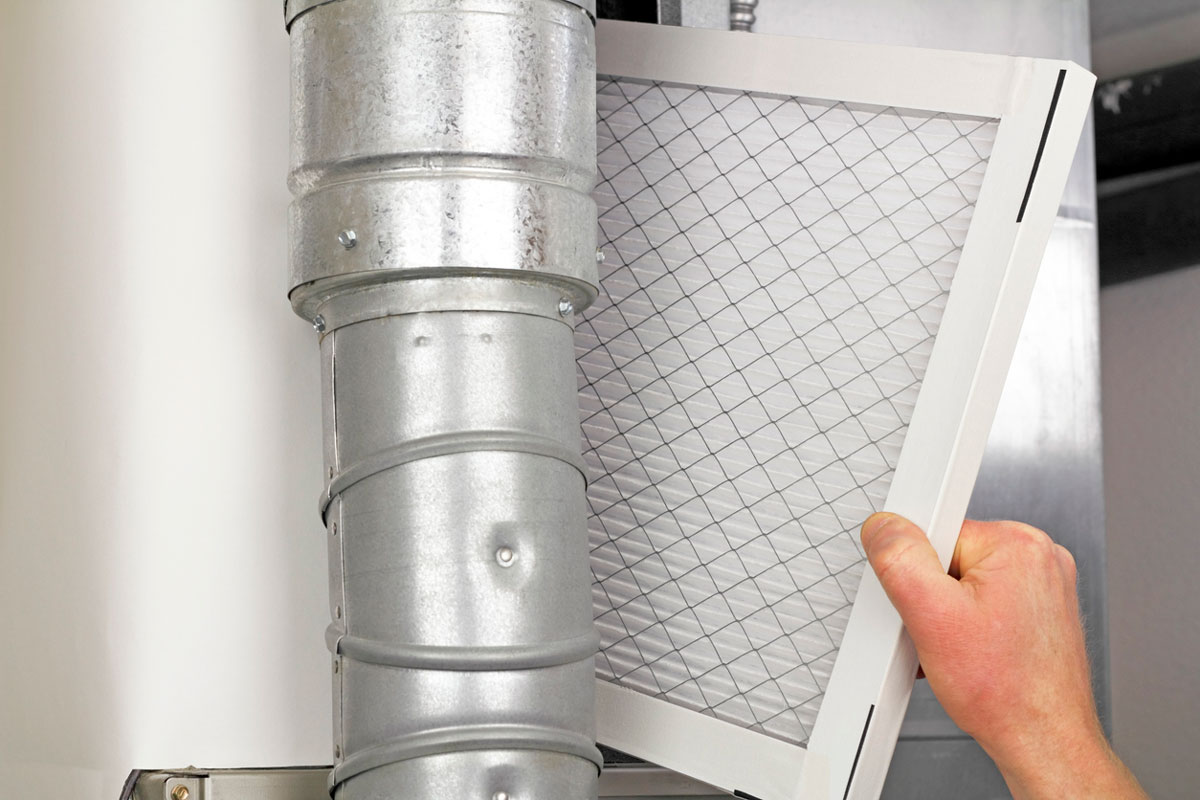
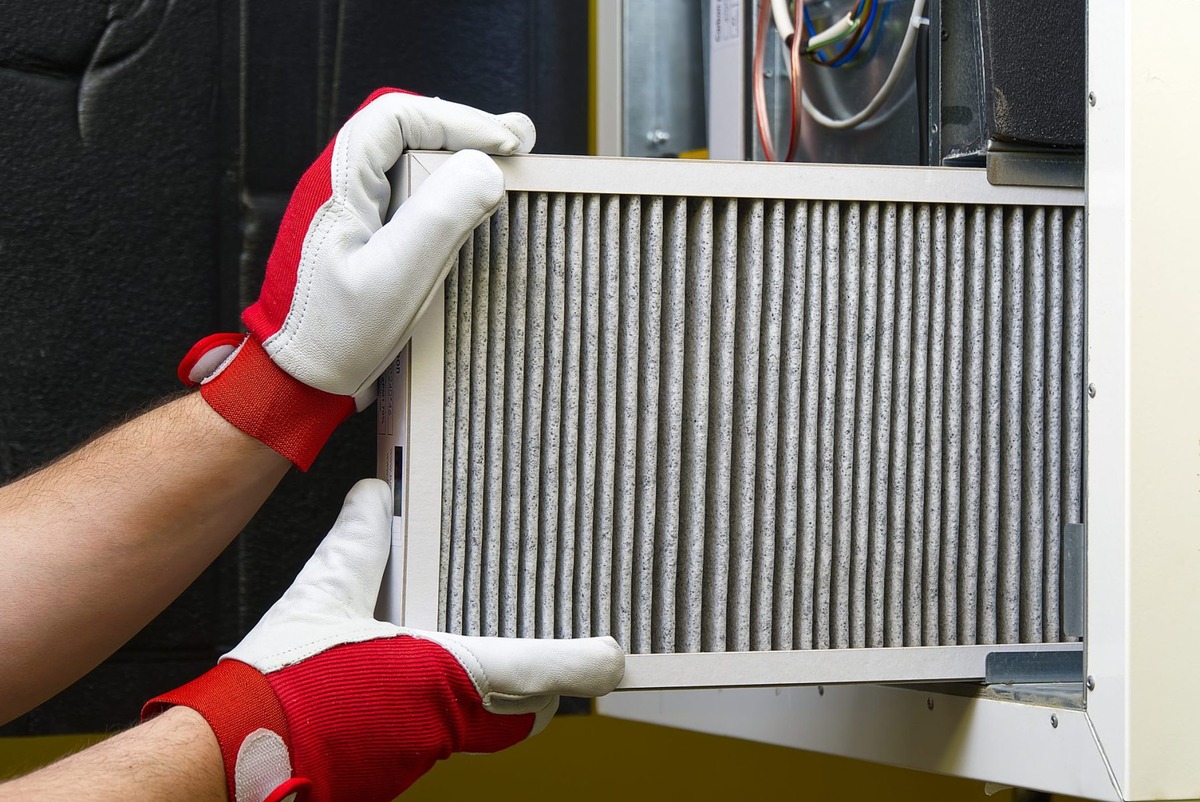
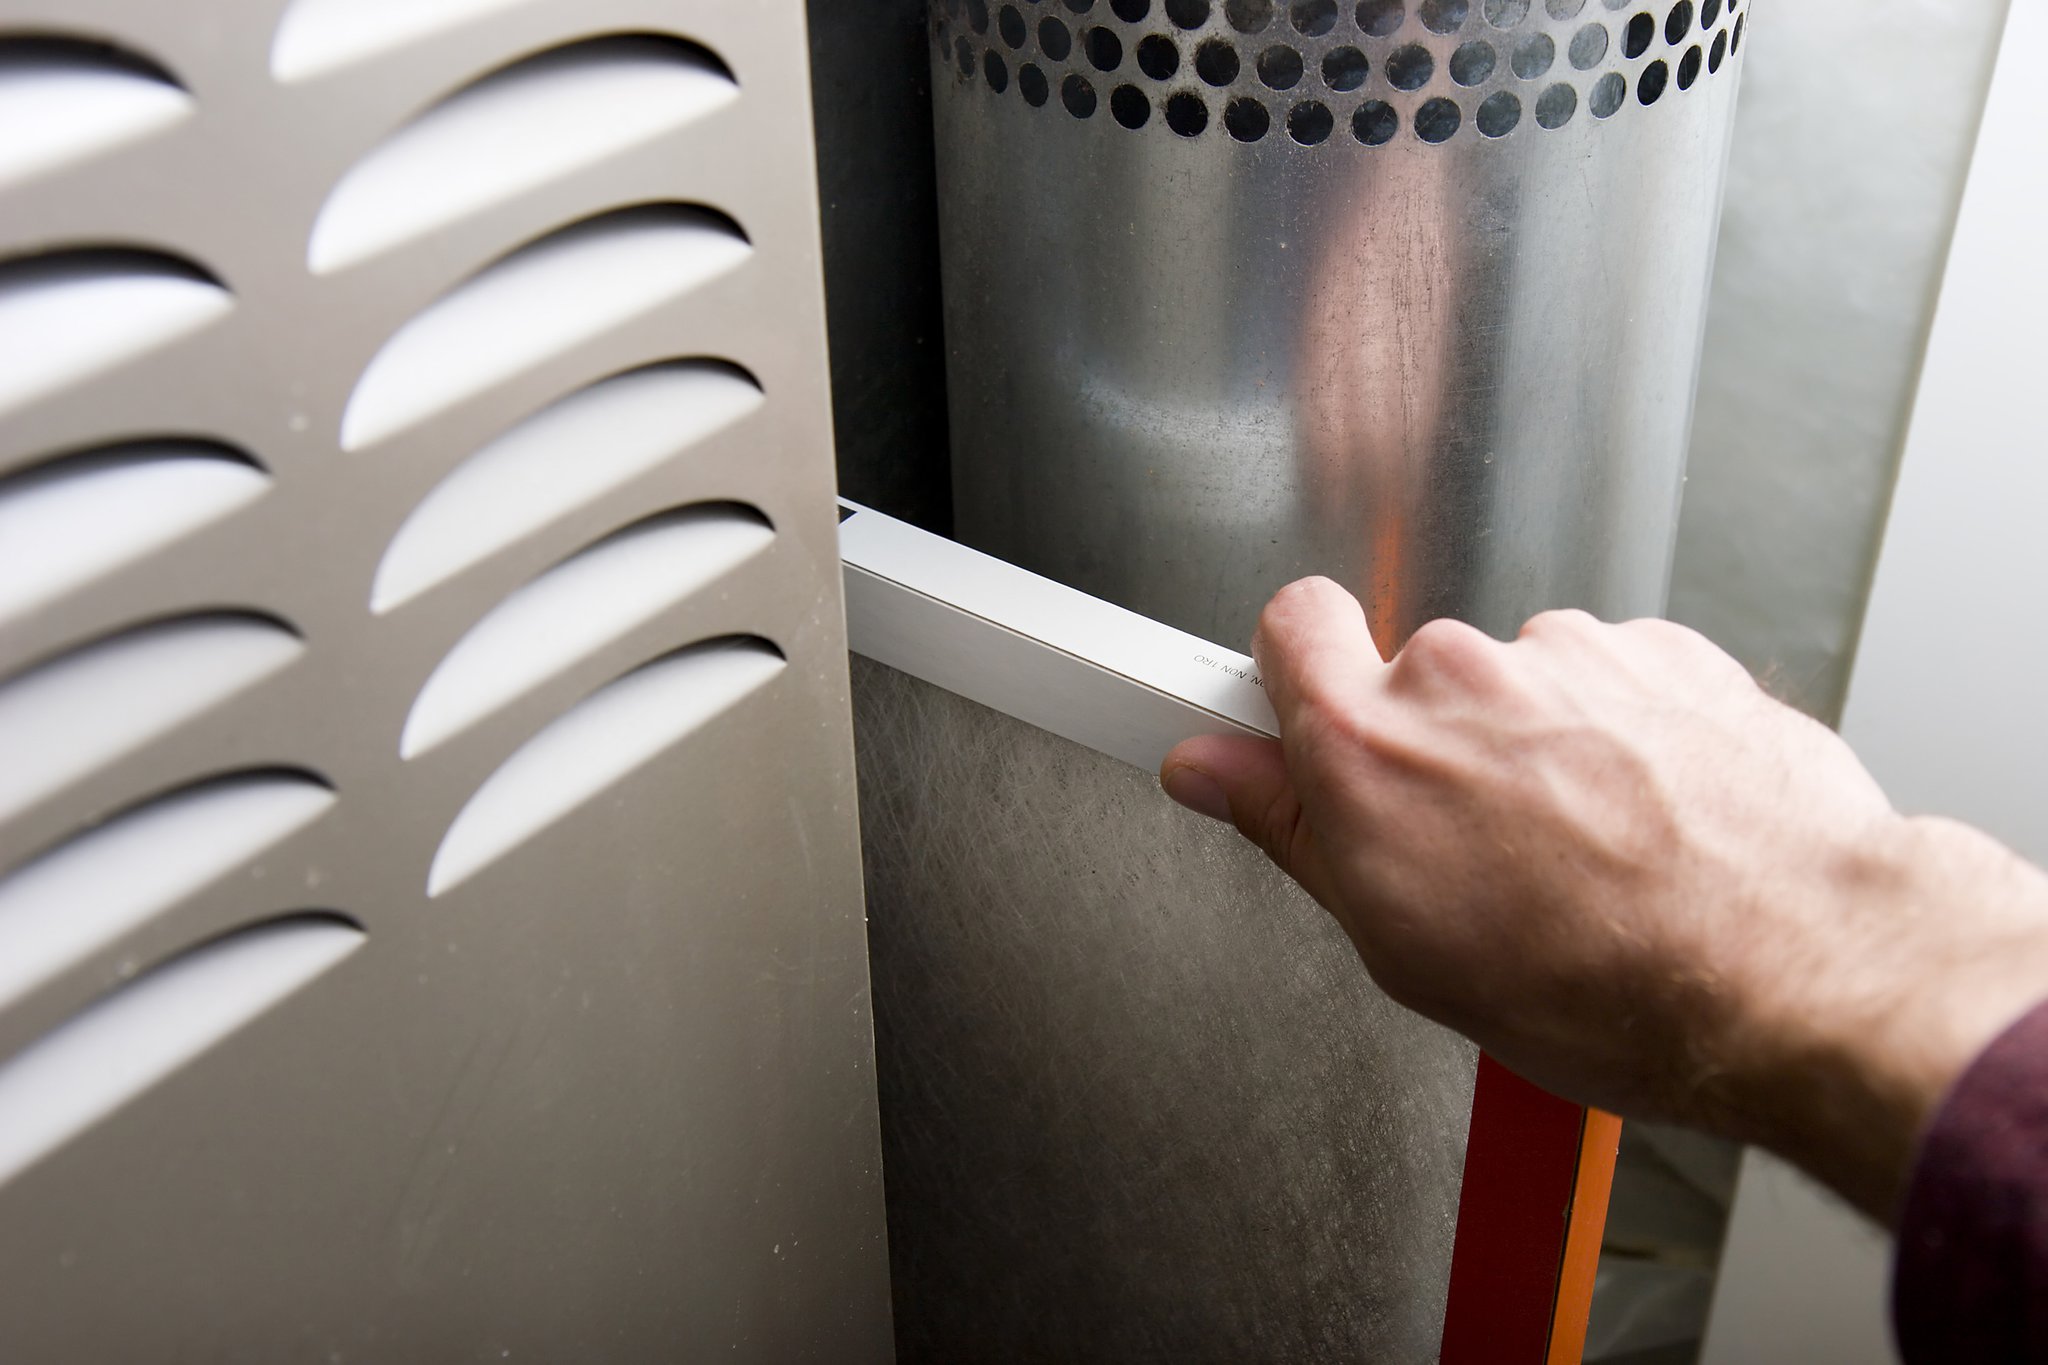
Step 3: Remove the Old Filter
Now that you have safely shut off the HVAC system, it’s time to remove the old filter. Follow these steps:
- Inspect the filter housing: Take a moment to inspect the filter housing. Look for any clips, latches, or fasteners that may be securing the housing cover or panel.
- Open the housing: Carefully remove any clips or unscrew any fasteners to open the filter housing. In some cases, you may need to use a screwdriver to remove screws that secure the housing cover. Be sure to place any screws or fasteners in a secure location to avoid losing them.
- Remove the old filter: Once the housing is open, you can easily remove the old filter. Grasp the filter firmly but gently and pull it straight out. Take note of the direction the filter is facing, as this will help you install the new filter correctly.
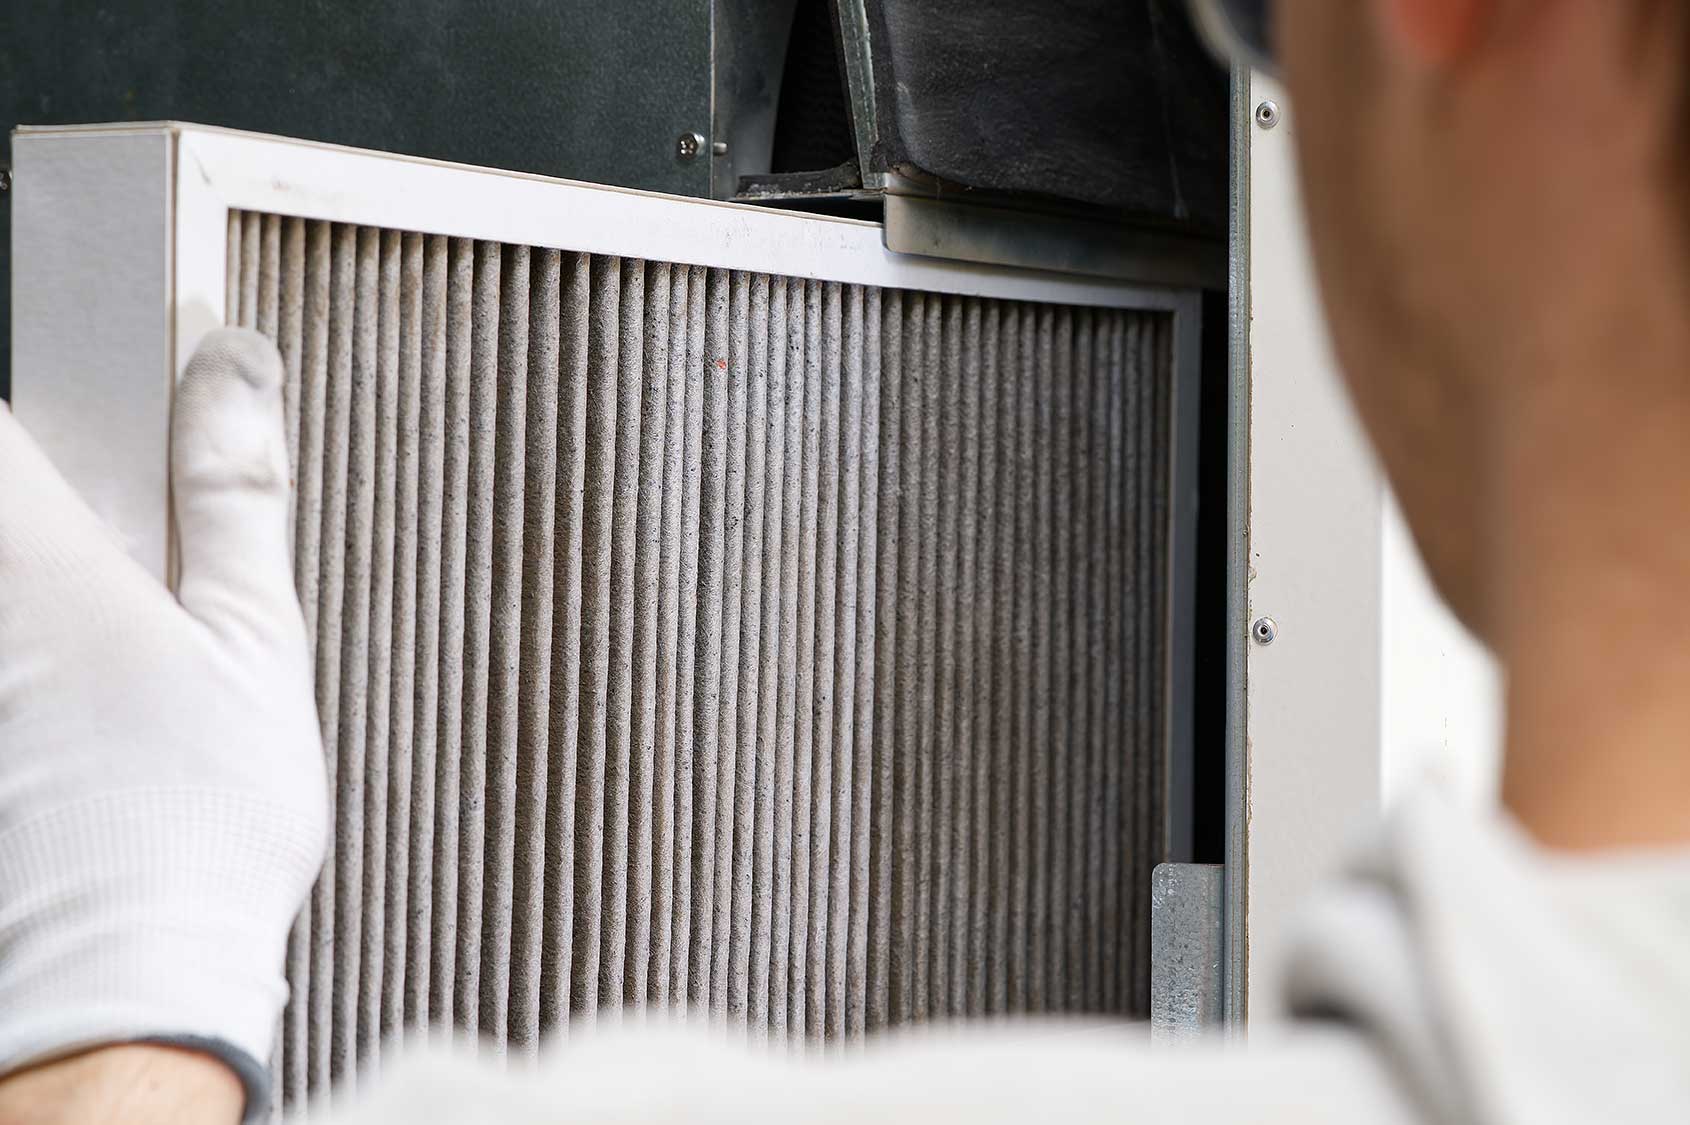
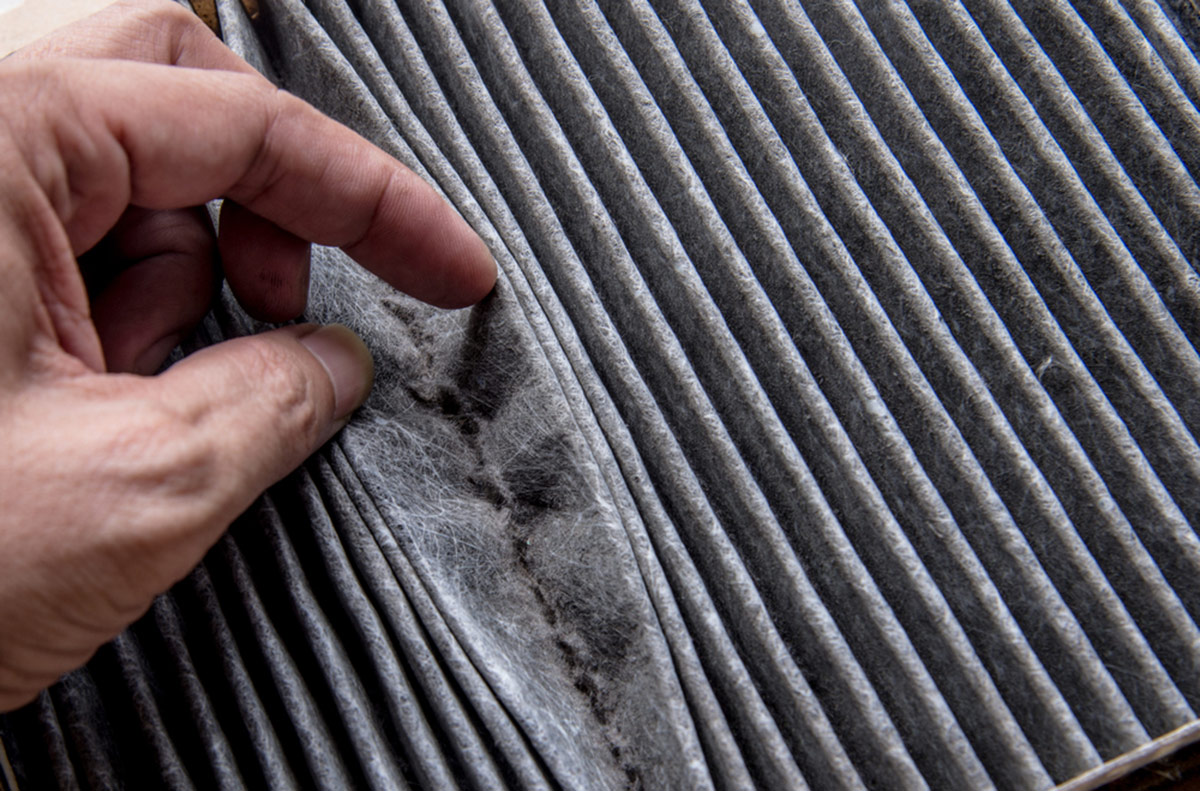
- Inspect the old filter: Take a moment to inspect the old filter. Check for any signs of dirt, dust, or damage. It’s a good idea to wear gloves during this step to protect your hands from any debris.
- Dispose of the old filter: Place the old filter in a trash bag or on a plastic sheet to contain any dust or debris. Properly dispose of the old filter according to your local waste disposal regulations.
By removing the old filter, you remove any buildup of dust, allergens, and other particles that have accumulated over time. This step prepares the way for a fresh and clean filter, ensuring optimal airflow and improved indoor air quality.
With the old filter removed, you can now move on to the next step: cleaning the filter housing to ensure a clean and smooth installation of the new filter.
When changing your HVAC filter, make sure to turn off the system first to avoid any potential damage or injury. This will also make it easier to remove and replace the filter safely.
Step 4: Clean the Filter Housing
After removing the old filter, it’s important to take a moment to clean the filter housing. This step helps remove any dust, dirt, or debris that may have accumulated over time. Follow these steps to clean the filter housing:
- Inspect the filter housing: Take a close look at the filter housing to identify any visible dirt or debris. Pay attention to the walls and corners of the housing where dust may have settled.
- Use a cleaning cloth or brush: Take a clean cloth or a soft brush and gently wipe or brush away any dust or debris from the filter housing. Be thorough but careful not to damage any components within the housing.
- Pay attention to corners and crevices: Dust and debris often accumulate in corners and crevices. Use a cloth or brush to reach these areas and ensure they are clean.
- Remove any loose debris: If there is any loose debris within the filter housing, carefully remove it with a cloth or vacuum cleaner. This ensures that the housing is clear of any obstructions.
- Inspect for any damage: While cleaning, take the opportunity to look for any signs of damage within the filter housing such as cracks or loose components. If you notice any significant issues, it may be necessary to contact a professional HVAC technician for further inspection or repairs.
By cleaning the filter housing, you create a clean and optimal environment for the new filter to be installed. A clean housing helps ensure proper airflow and prevents any potential issues that may arise from debris accumulation.
With the filter housing cleaned, you’re now ready to move on to the next step: installing the new HVAC filter.
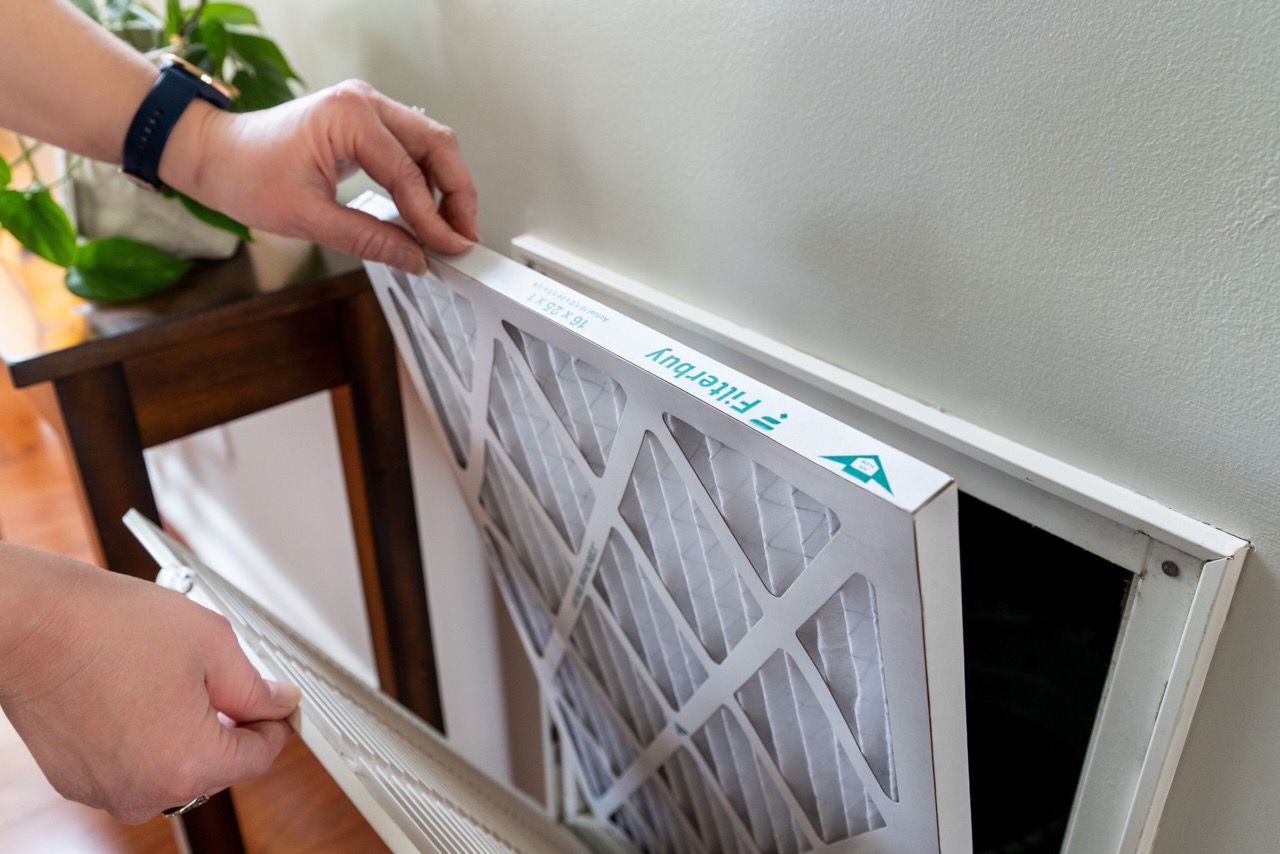
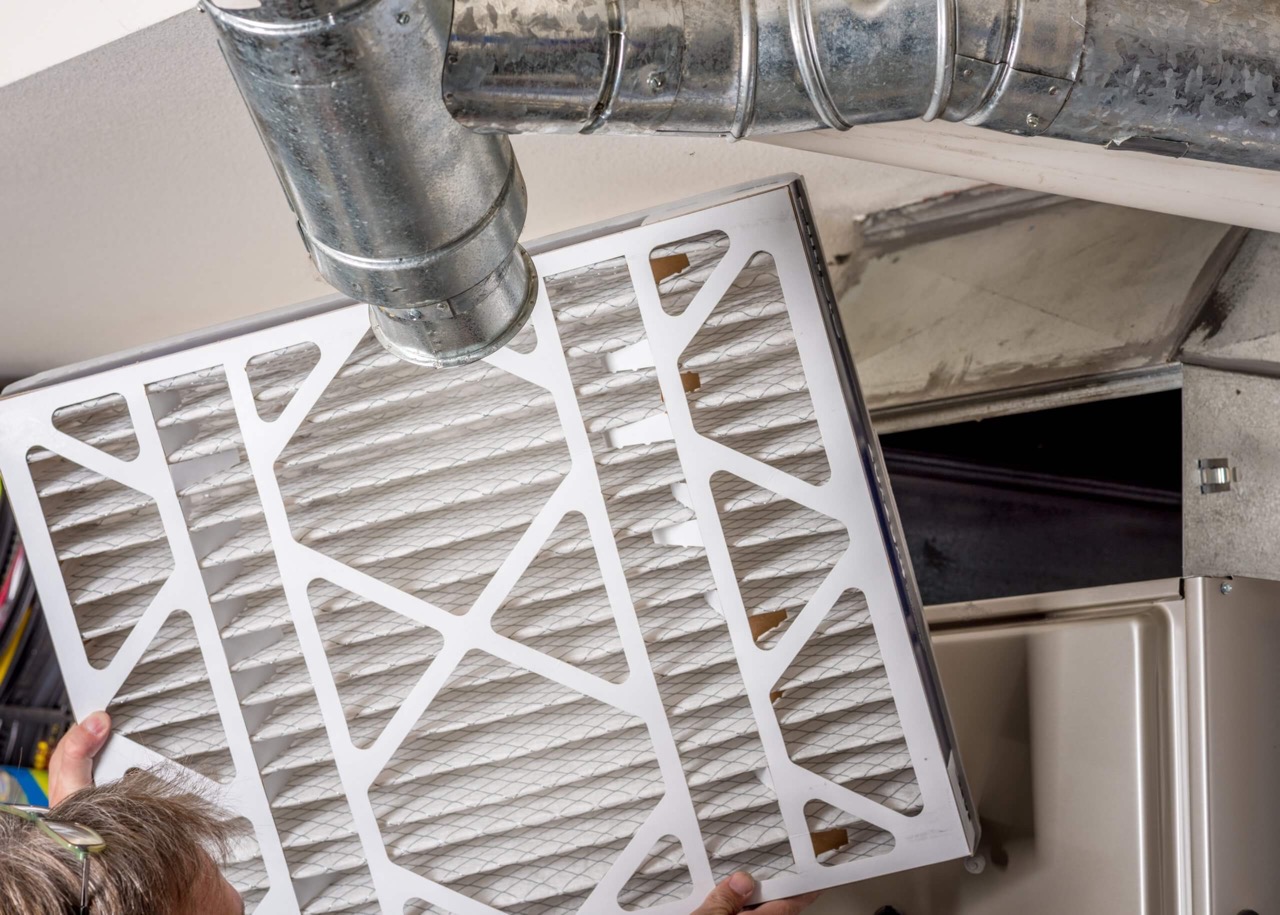
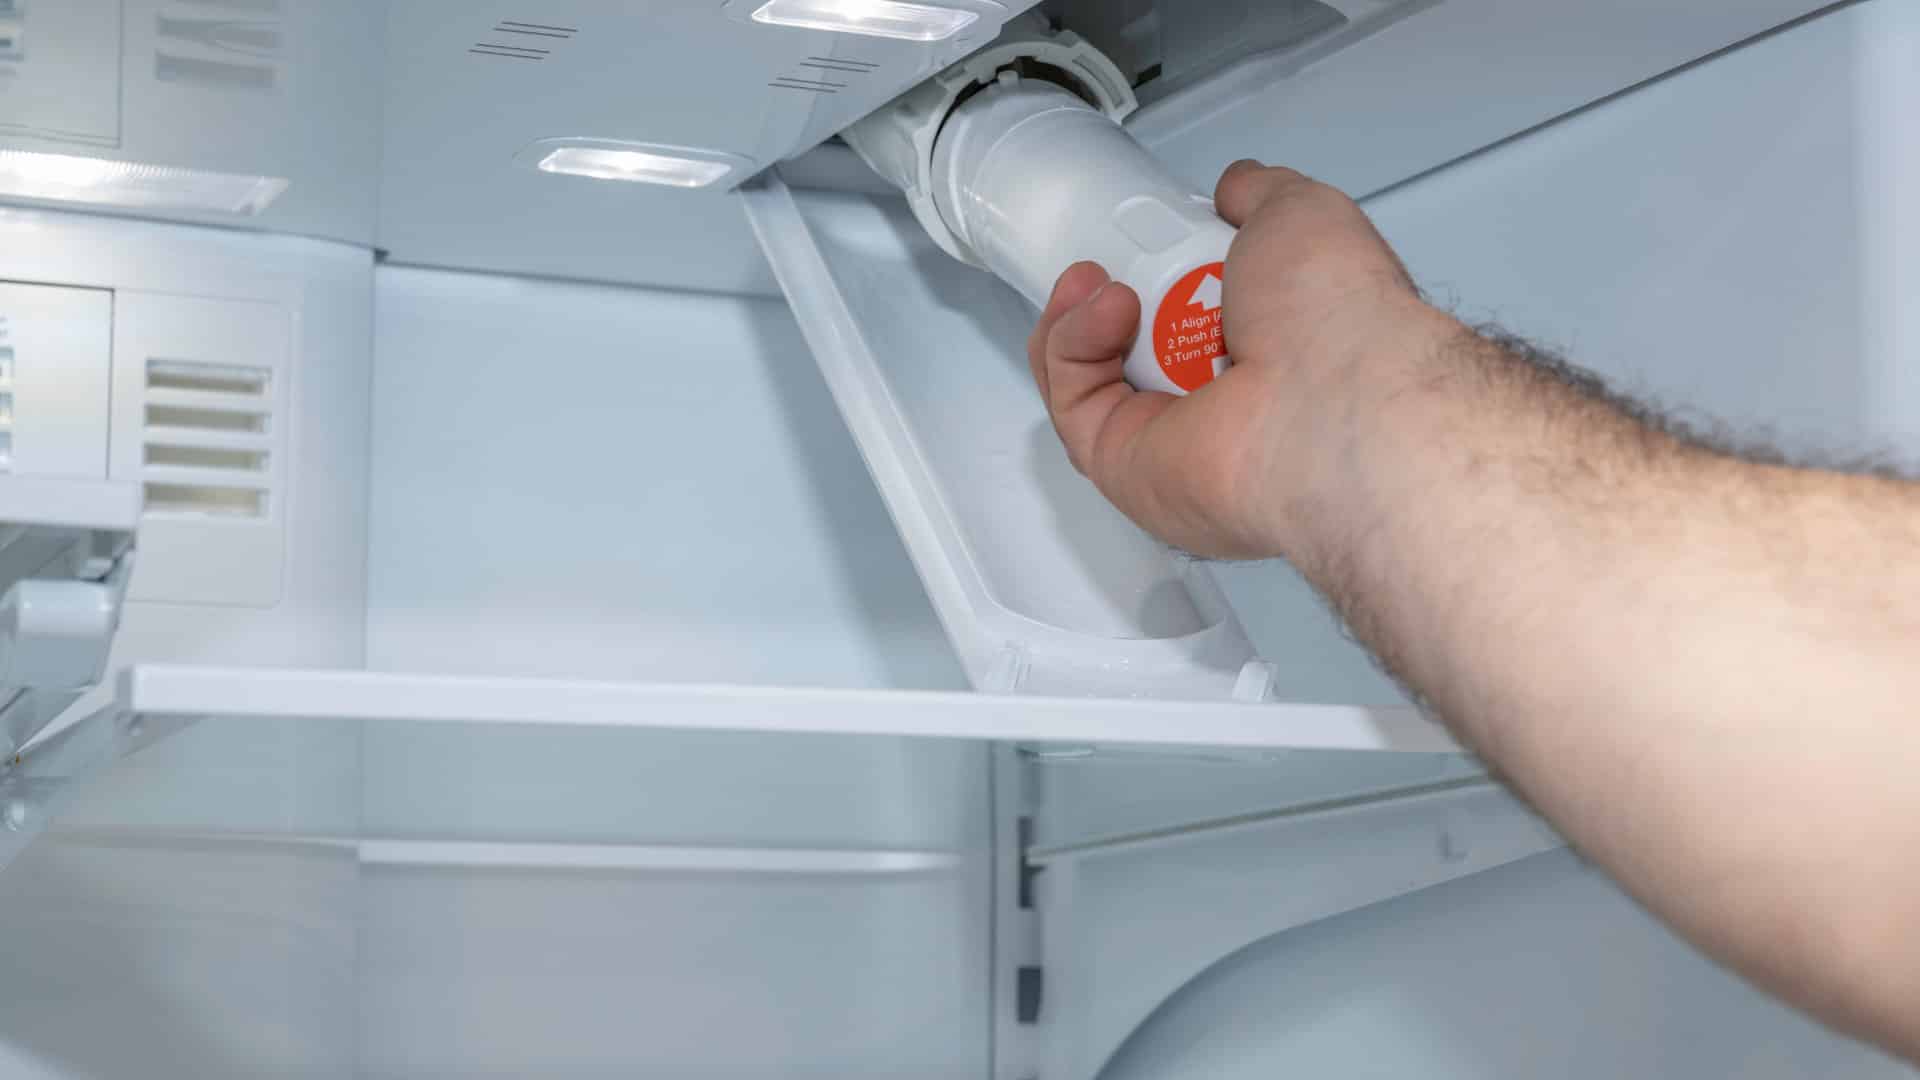
Step 5: Install the New Filter
With the filter housing cleaned and prepped, it’s time to install the new HVAC filter. Follow these steps to ensure a proper and secure installation:
- Check the new filter: Before installing the new filter, verify that it is the correct size and type for your HVAC system. Ensure that the airflow direction arrow on the filter is pointing in the same direction as the old filter or according to the manufacturer’s instructions.
- Position the new filter: Align the new filter with the filter housing, making sure it fits securely within the designated space. The arrow indicating the airflow direction should be facing towards the HVAC system.
- Secure the filter: If your filter housing has clips, latches, or fasteners, use them to secure the filter in place. If applicable, reattach the housing cover or panel using the screws or fasteners you removed earlier. Ensure that everything is properly tightened.
- Double-check the installation: Take a moment to double-check that the new filter is securely installed and properly aligned. Verify that there are no gaps or loose areas where air could bypass the filter.
Properly installing the new filter is essential for maintaining efficient airflow and effective filtration within your HVAC system. A secure installation helps prevent air leakage and ensures that all air passing through the system is filtered as intended.
With the new filter installed, you’re now ready to move on to the next step: turning on the HVAC system and checking the filter regularly.
Step 6: Turn on the HVAC System
After successfully installing the new HVAC filter, it’s time to turn on the HVAC system and resume normal operation. Follow these steps:
- Double-check the installation: Before turning on the HVAC system, make sure that the filter is securely installed and properly aligned. Verify that there are no gaps or loose areas that could compromise the airflow.
- Set the thermostat: Adjust the thermostat settings to the desired temperature or switch it back to the “on” position if you had turned it off completely. This will signal the HVAC system to start running.
- Listen for normal operation: As the HVAC system starts up, listen for any strange noises or vibrations that could indicate a problem. If you notice anything unusual, it’s advisable to contact a professional HVAC technician for further inspection.
- Monitor the system: Keep an eye on your HVAC system in the following hours and days. Ensure that the air flow remains consistent, and there are no issues with temperature regulation or airflow distribution throughout your home.
By turning on the HVAC system, you can enjoy the benefits of a clean and properly functioning filter. The new filter will help improve indoor air quality, optimize energy efficiency, and maintain the performance of your HVAC system.
Remember to regularly check the filter and observe the manufacturer’s guidelines for replacement intervals. This will ensure that the filter continues to perform effectively and that your HVAC system functions at its best.
With the HVAC system successfully turned on, you have completed the main steps in changing your HVAC filter. However, to maintain the efficiency and longevity of your system, it is crucial to develop a habit of regular filter check-ups and replacements. Let’s explore this in the next step.
Read more: How Much Are HVAC Filters
Step 7: Check the Filter Regularly
After replacing the HVAC filter, it’s essential to establish a regular maintenance routine by checking the filter at regular intervals. Regular filter checks and replacements will ensure that your HVAC system continues to function optimally. Here’s what you need to do:
- Establish a maintenance schedule: Determine how often you should check or replace your HVAC filter. This will depend on factors such as the type of filter, the level of dust and debris in your home, and any specific recommendations from the filter manufacturer or HVAC system manual. A general guideline is to check the filter every 30-60 days, but adjusting this timeframe to your specific circumstances is recommended.
- Inspect the filter: During each maintenance check, take a few moments to inspect the filter for any signs of dirt, dust, or damage. Look for excessive buildup that may impede airflow or any visible tears or holes in the filter material.
- Replace the filter as needed: If the filter appears dirty or damaged, follow the manufacturer’s instructions to replace it promptly. Make sure to use an appropriate and properly sized filter that is recommended for your HVAC system.
- Note any issues: Pay attention to any recurring issues such as reduced airflow, unusual odors, or inconsistent heating or cooling. These could be signs of a problem with the HVAC system that may require professional attention.
- Keep a maintenance record: Maintain a log or record of when you check or replace the filter. This will help you track your maintenance schedule and provide valuable information to HVAC technicians during regular service visits.
Regularly checking and changing your HVAC filter is a simple yet essential task that ensures the continued efficiency and performance of your HVAC system. By staying proactive, you can prevent potential issues, maintain healthy indoor air quality, and prolong the lifespan of your system.
Remember, regular filter checks are just one part of overall HVAC system maintenance. It’s important to schedule professional service visits at appropriate intervals to address any other maintenance needs and ensure optimal system performance.
By regularly checking and replacing your HVAC filter, you can enjoy the benefits of a well-maintained system that provides clean and comfortable air throughout your home.
Congratulations! You have now completed all the necessary steps to change and maintain your HVAC filter. By following this guide, you can ensure the longevity, efficiency, and air quality of your HVAC system. Keep up with regular maintenance tasks to keep your HVAC system running smoothly for years to come.
Thank you for reading this article, and we hope it has been helpful. If you have any further questions or need assistance, don’t hesitate to consult with a professional HVAC technician.
Common Mistakes to Avoid
When it comes to changing HVAC filters, there are some common mistakes that homeowners often make. By being aware of these mistakes, you can ensure a successful filter replacement and prevent potential issues. Here are some common mistakes to avoid:
- Forgetting to shut off the HVAC system: Always remember to turn off the HVAC system before attempting to replace the filter. Failure to do so can result in accidental startup and potential injuries.
- Using the wrong filter size or type: Make sure to use the correct size and type of filter recommended for your HVAC system. Using an incorrect filter can lead to reduced efficiency, airflow problems, and potential damage to the system.
- Skipping regular maintenance checks: Regularly checking and replacing the filter is crucial for optimal HVAC system performance. Skipping these checks can result in decreased indoor air quality, increased energy consumption, and potential damage to the system.
- Neglecting to clean the filter housing: Cleaning the filter housing removes dust and debris that can obstruct airflow. Neglecting this step can impact the effectiveness of the new filter and compromise system efficiency.
- Not following the manufacturer’s instructions: Each HVAC system might have specific instructions for filter replacement. It’s essential to read and follow the manufacturer’s guidelines to ensure proper installation and system function.
- Overlooking the maintenance records: Keeping a record of filter checks and replacements helps you stay on schedule and provides valuable information for future maintenance. Neglecting to maintain these records can result in a disorganized maintenance routine.
- Ignoring other maintenance needs: While changing the filter is an important aspect of HVAC maintenance, remember to address other maintenance needs as well. Regular professional service visits and addressing any operational issues are essential for the proper functioning of your HVAC system.
Avoiding these common mistakes will help you maintain an efficient and properly functioning HVAC system. By following the correct procedures and being proactive in your maintenance efforts, you can ensure that your HVAC system performs optimally and provides clean air throughout your home.
By being aware of these common mistakes and taking the necessary precautions, you can successfully change your HVAC filter and maintain a healthy and efficient HVAC system. Remember to consult with professionals if you have any concerns or need further assistance.
Conclusion
Changing your HVAC filter is a simple yet crucial maintenance task that can significantly impact the efficiency and air quality of your HVAC system. By following the steps outlined in this guide and avoiding common mistakes, you can successfully replace your HVAC filter and reap the benefits of a well-maintained system.
Regularly changing your HVAC filter helps improve indoor air quality by removing dust, allergens, and other particles from the air. It also promotes energy efficiency by allowing proper airflow and reducing strain on the HVAC system. Additionally, changing the filter extends the lifespan of your HVAC system, saving you money on costly repairs or premature replacements.
Remember to locate the filter within your HVAC system, shut off the system before starting any work, and remove the old filter carefully. Clean the filter housing to ensure a clean environment for the new filter, and install the new filter correctly. Turn on the HVAC system, check the filter regularly, and maintain a proper maintenance schedule.
By adopting these steps as part of your HVAC maintenance routine, you can enjoy clean air, improved energy efficiency, and a well-functioning HVAC system. Regularly checking and replacing the filter is one of the simplest and most effective ways to ensure your HVAC system operates optimally and provides a comfortable living environment.
Thank you for reading this comprehensive guide on how to change your HVAC filter. We hope you found it informative and helpful. If you have any further questions or require assistance, don’t hesitate to consult with a professional HVAC technician who can provide expert advice tailored to your specific system.
Take care of your HVAC system, and it will take care of you and your home for years to come!
Frequently Asked Questions about How To Change A HVAC Filter
Was this page helpful?
At Storables.com, we guarantee accurate and reliable information. Our content, validated by Expert Board Contributors, is crafted following stringent Editorial Policies. We're committed to providing you with well-researched, expert-backed insights for all your informational needs.

0 thoughts on “How To Change A HVAC Filter”