
Articles
How To Install Vinyl Fence On A Slope
Modified: January 6, 2024
Learn how to install a vinyl fence on a slope with our comprehensive articles. Master the art of fence installation with step-by-step instructions and expert tips.
(Many of the links in this article redirect to a specific reviewed product. Your purchase of these products through affiliate links helps to generate commission for Storables.com, at no extra cost. Learn more)
Introduction
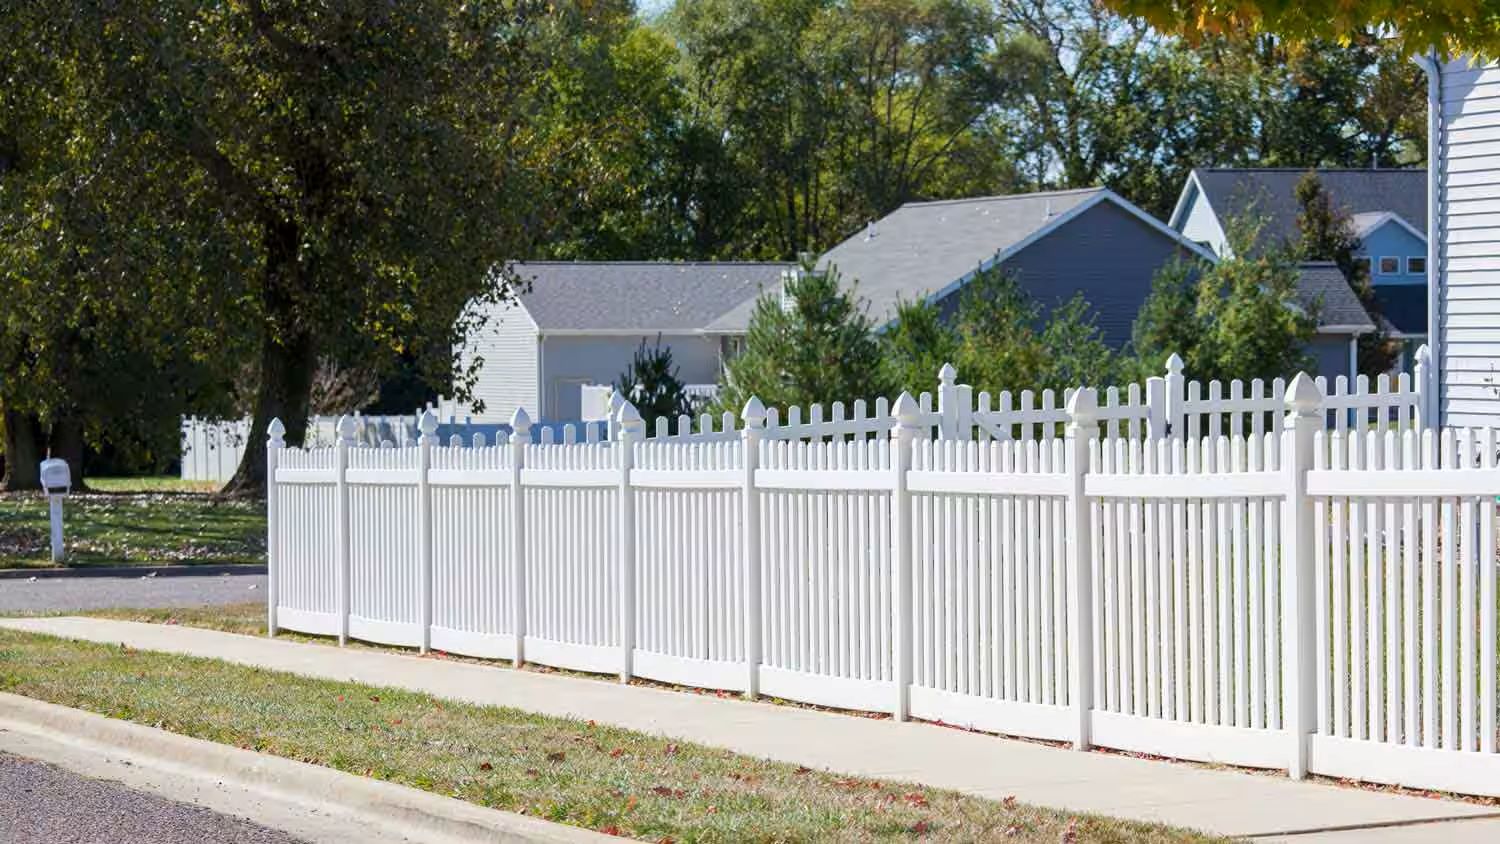
Welcome to our comprehensive guide on how to install a vinyl fence on a slope. Vinyl fences are not only durable and low maintenance, but they also add a touch of elegance to any outdoor space. However, installing a vinyl fence on uneven terrain can pose some challenges. Fortunately, with proper planning and the right tools, you can successfully install a vinyl fence on a slope without compromising its functionality or aesthetic appeal.
Before you begin this project, it is important to understand that installing a vinyl fence on a slope requires careful consideration of factors such as the degree of slope, the type of soil, and the layout of your property. By taking these factors into account and following the steps outlined in this guide, you’ll be able to create a visually pleasing and structurally sound vinyl fence that will stand the test of time.
In this article, we will walk you through the step-by-step process of installing a vinyl fence on a slope. We will also provide you with a list of the necessary tools and materials you’ll need to complete the project. So, let’s get started!
Key Takeaways:
- Proper planning, ground preparation, and secure installation of corner and line posts are crucial for successfully installing a visually pleasing and structurally sound vinyl fence on a slope.
- Careful trimming, alignment, and secure attachment of vinyl fence panels are essential for creating a seamless, professional, and stable appearance on a slope.
Read more: How To Install Fence On A Slope
Factors to Consider
Before you start installing a vinyl fence on a slope, it’s essential to consider a few factors that will impact the overall success of your project. These factors include:
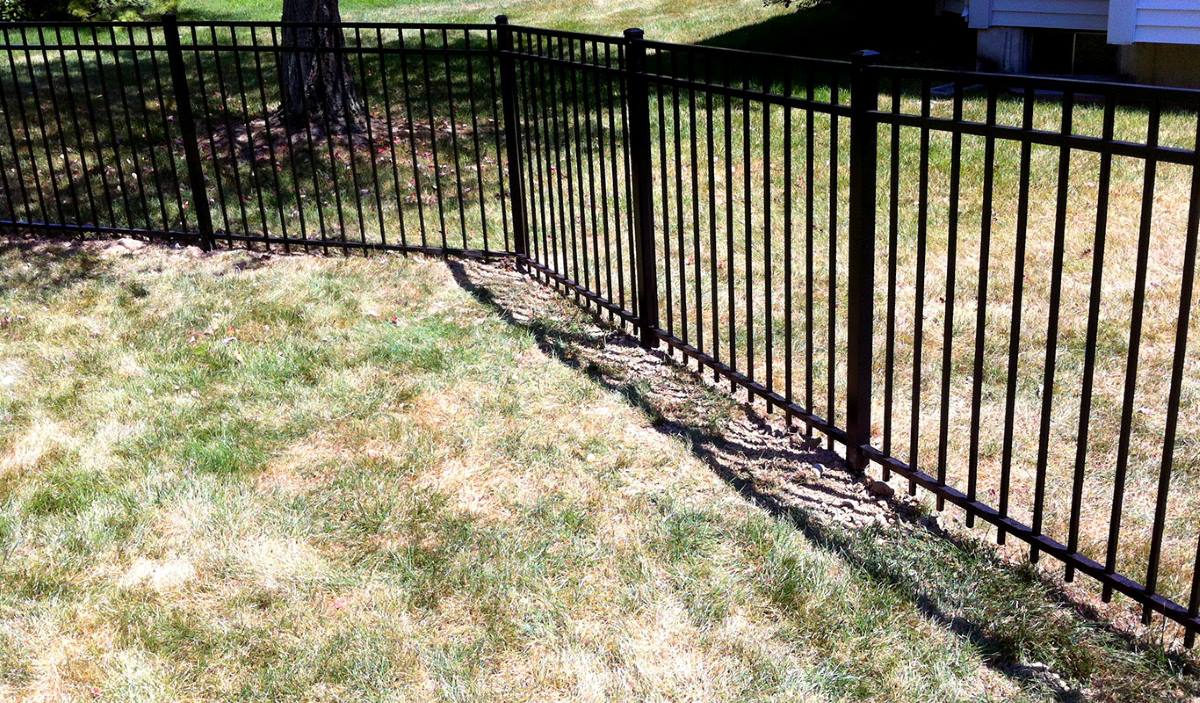
- Slope gradient: The degree of slope on your property will determine the complexity of the installation process. A gentle slope is easier to work with compared to a steep incline.
- Soil type: Understanding the type of soil you have will help you determine the best method for anchoring the fence posts. Different soil types, such as clay, sandy, or loamy soil, may require specific installation techniques.
- Water drainage: If your slope has poor water drainage, it can lead to erosion and damage to your fence over time. Consider implementing proper drainage solutions to avoid these issues.
- Property lines and regulations: It’s crucial to know the exact location of your property lines and any local regulations or permits required for fence installation. Ensure that your fence does not encroach on neighboring properties or violate any legal requirements.
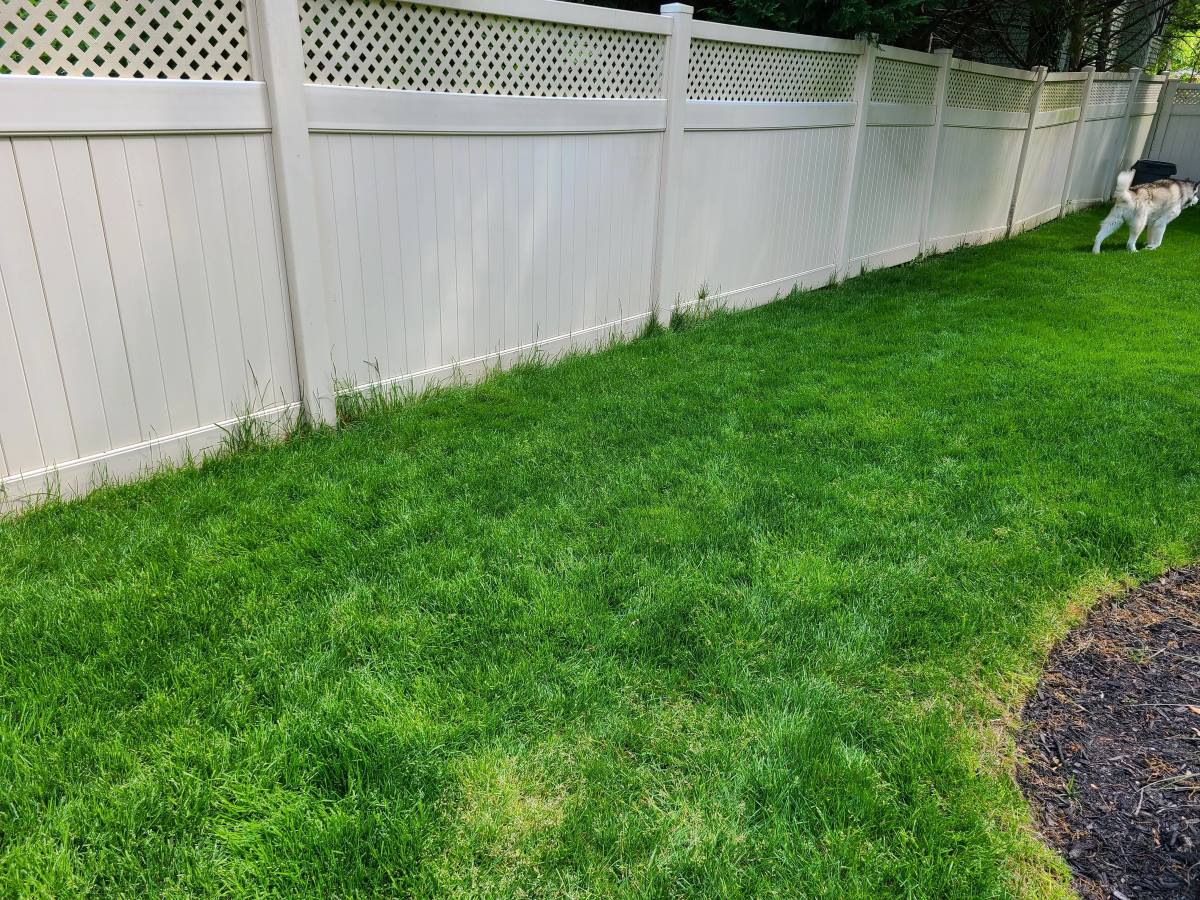
- Aesthetic preferences: Remember that a vinyl fence on a slope may have a different appearance than a fence on level ground. Consider how the slope will impact the overall look and design of your fence and discuss any aesthetic preferences with your neighbors if it affects shared boundaries.
By taking these factors into account, you will be better prepared to tackle the installation process and ensure that your vinyl fence not only functions well but also enhances the overall aesthetics of your property.
Tools and Materials Needed
Before you begin the installation process, gather the necessary tools and materials to ensure a smooth and efficient project. Here’s a list of what you’ll need:
Tools:
- Measuring tape
- Level
- Post hole digger or auger
- Shovel
- Mallet or hammer
- Saw (for trimming panels if needed)
- Drill or screwdriver
- String or chalk line
- Tape measure
- Pliers
- Safety goggles
Materials:
- Vinyl fence panels
- Fence posts
- Concrete mix
- Gravel
- Rail brackets
- Screws or nails
- Gate kit (if installing a gate)
- Gate latch and hinges (if installing a gate)
- Corner and end posts
- Post caps
- Trim pieces
Make sure to check the quantity of materials required based on the length and height of your fence, as well as the number of corners and gates you plan to install. It’s always a good idea to have some extra materials on hand for any unexpected issues that may arise during the installation.
By having all the necessary tools and materials prepared, you’ll be ready to tackle each step of the installation process and ensure a successful outcome for your vinyl fence on a slope.
Read more: How To Install Chain Link Fence On A Slope
Step 1: Measure and Mark
The first step in installing a vinyl fence on a slope is to accurately measure and mark the layout of your fence. This will ensure that you have a clear plan and can properly position the fence posts and panels.
Here’s how you can measure and mark your fence layout:
- Identify property boundaries: Determine the exact location of your property boundaries, and mark the perimeter where you want to install the fence. Use stakes or flags to mark the corners and straight sections of your fence line.
- Check for slope: Determine the slope of your land by using a level or measuring the vertical height difference between the highest and lowest points of the fence line. This will help you plan for adjustments in the installation process.
- Measure post spacing: Determine the desired spacing between each post along the fence line. Keep in mind that the distance between the posts may vary depending on the slope of the terrain.
- Mark post positions: Use a string or chalk line to mark the positions of the fence posts along the fence line. Make sure the string is pulled taut and level to ensure accuracy.
- Mark gate locations: If you plan to install gates, mark their positions as well. Ensure that gate openings are wide enough to accommodate any necessary equipment or vehicles.
Double-check your measurements and marks to ensure accuracy before moving on to the next step. Taking the time to properly measure and mark the layout of your fence will save you time and frustration during the installation process.
Step 2: Prepare the Ground
Once you have measured and marked the layout of your vinyl fence on the slope, the next step is to prepare the ground for installation. Proper ground preparation is crucial for ensuring the stability and longevity of your fence.
Follow these steps to prepare the ground:
- Clear the area: Remove any debris, rocks, or vegetation from the fence line. Clearing the area will provide a clean surface for the fence installation and help prevent any obstruction or damage to the fence.
- Level the ground: Use a shovel and rake to level the ground along the fence line. Remove any high spots and fill in any low areas to create a smooth and even surface. This will minimize the gaps under the fence and ensure proper alignment.
- Excavate post holes: Use a post hole digger or auger to excavate the necessary post holes along the fence line. The depth and diameter of the holes will depend on the height and type of your fence. Consult the manufacturer’s guidelines for the recommended hole dimensions.
- Add gravel: Place a layer of gravel at the bottom of each post hole. This will allow for proper drainage and prevent moisture from accumulating around the fence posts, which can lead to rot or instability.
- Insert the posts: Insert the fence posts into the post holes, ensuring they are plumb and level. Use a level to check the alignment of each post in both the horizontal and vertical directions. Adjust the positioning as necessary.
- Secure the posts: Backfill the post holes with concrete mix, firmly pressing the mix around the posts to provide stability and support. Follow the manufacturer’s instructions for mixing and setting the concrete.
By properly preparing the ground, you will create a solid foundation for your vinyl fence on the slope. This will help ensure the fence stands up to the elements and remains sturdy for years to come.
Step 3: Install the Corner Posts
Now that you have prepared the ground for your vinyl fence on the slope, it’s time to install the corner posts. Corner posts provide the primary support and stability for the fence, so it’s important to ensure they are properly installed.
Follow these steps to install the corner posts:
- Measure and mark the corner locations: Use a tape measure and the layout plan to accurately measure and mark the locations of the corner posts. Double-check the measurements to ensure accuracy.
- Dig the corner post holes: Using a post hole digger or auger, dig the corner post holes according to the specified depth and diameter. Make sure the holes are deep enough to provide sufficient stability and support.
- Insert the corner posts: Place the corner posts into the holes, ensuring they are level and plumb. Use a level to check the alignment in both directions. You may need someone to assist you in holding the posts in position.
- Backfill with concrete: Fill the post holes with concrete mix, gradually adding water and mixing it thoroughly. Ensure that the concrete fills the hole completely and supports the corner posts.
- Check alignment: Double-check the alignment and position of the corner posts before the concrete sets. Make any necessary adjustments to ensure they are straight and level.
- Allow the concrete to set: Follow the manufacturer’s instructions for the recommended curing time of the concrete. Avoid putting any weight or strain on the posts until the concrete has fully set and hardened.
Installing the corner posts correctly is crucial for the stability and longevity of your vinyl fence. Take your time in ensuring they are properly aligned and supported, as they will serve as the anchor points for the rest of the fence installation.
Step 4: Install the Line Posts
After successfully installing the corner posts for your vinyl fence on the slope, it’s time to move on to installing the line posts. Line posts provide additional support and stability for the fence panels between the corner posts.
Follow these steps to install the line posts:
- Measure and mark the line post locations: Use a tape measure and layout plan to accurately measure and mark the locations of the line posts along the fence line. Ensure that the spacing between the line posts is consistent.
- Dig the line post holes: Use a post hole digger or auger to dig the line post holes according to the specified depth and diameter. Make sure the holes are deep enough to provide sufficient stability for the line posts.
- Insert the line posts: Place the line posts into the holes, making sure they are level and plumb. Use a level to check the alignment in both directions. You may need someone to assist you in holding the posts in position.
- Backfill with concrete: Fill the post holes with concrete mix, gradually adding water and mixing it thoroughly. Ensure that the concrete fills the hole completely and supports the line posts.
- Check alignment: Double-check the alignment and position of the line posts before the concrete sets. Make any necessary adjustments to ensure they are straight and level.
- Allow the concrete to set: Follow the manufacturer’s instructions for the recommended curing time of the concrete. Avoid putting any weight or strain on the line posts until the concrete has fully set and hardened.
Installing the line posts properly is crucial for maintaining the structural integrity of your vinyl fence. Take your time to ensure they are evenly spaced and aligned, as they will provide the support for the fence panels and contribute to the overall stability of the fence.
Read more: What Is A Vinyl Fence
Step 5: Attach the Rails
With the corner and line posts securely installed, it’s time to attach the rails to create the framework for your vinyl fence on the slope. The rails will provide stability and support for the fence panels.
Follow these steps to attach the rails:
- Measure and cut the rails: Measure the distance between the corner and line posts to determine the length of the rails. Use a saw to cut the rails to the appropriate size.
- Align the rails: Position the rails horizontally between the posts, making sure they are level and evenly spaced. Use a level to ensure the rails are straight and aligned.
- Attach rail brackets: Place rail brackets on the inside of each post, where the rails will connect. Make sure the brackets are properly aligned and secure them in place with screws or nails.
- Secure the rails: Slide the ends of the rails into the rail brackets on each post, ensuring they fit securely and snugly. Use screws or nails to fasten the rails to the brackets, providing additional stability.
- Repeat for additional rails: If your fence requires multiple rails, repeat the process of measuring, cutting, aligning, and attaching the rails for each level. Make sure all the rails are evenly spaced and properly secured.
By attaching the rails securely, you are creating a strong framework for your vinyl fence on the slope. Take the time to ensure that the rails are level, aligned, and securely fastened to the posts to ensure the overall stability and durability of your fence.
When installing a vinyl fence on a slope, it’s important to use adjustable brackets to accommodate the angle. This will ensure a smooth and professional-looking installation.
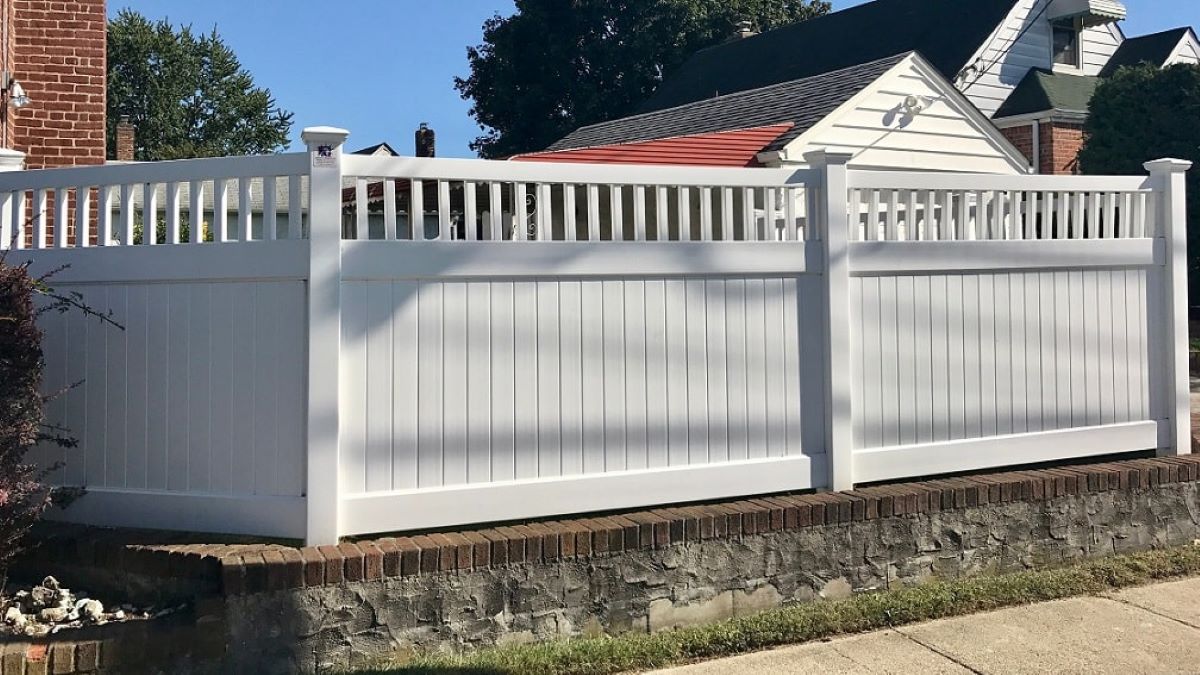
Step 6: Install the Panels
With the rails in place, it’s time to install the vinyl fence panels. These panels will give your fence its distinctive appearance and provide privacy and security to your outdoor space.
Follow these steps to install the panels:
- Start at a corner: Begin installing the panels at one corner of the fence. The corner post should have pre-drilled holes or slots specifically designed for attaching the panels.
- Slide the panel into place: Slide the first panel into the slots or attach it to the brackets on the corner post. Ensure that the panel is level and aligned with the ground and adjacent panels.
- Secure the panel: Use screws or nails to secure the panel to the railings. Place the fasteners through the pre-drilled holes or notches in the panel and into the railings. Make sure the panel is securely attached but not over tightened to allow for expansion and contraction.
- Continue with the remaining panels: Repeat the process of sliding the panels into place and securing them to the rails. Ensure that each panel is properly aligned with the previous one and the ground. Use a level to check for accuracy.
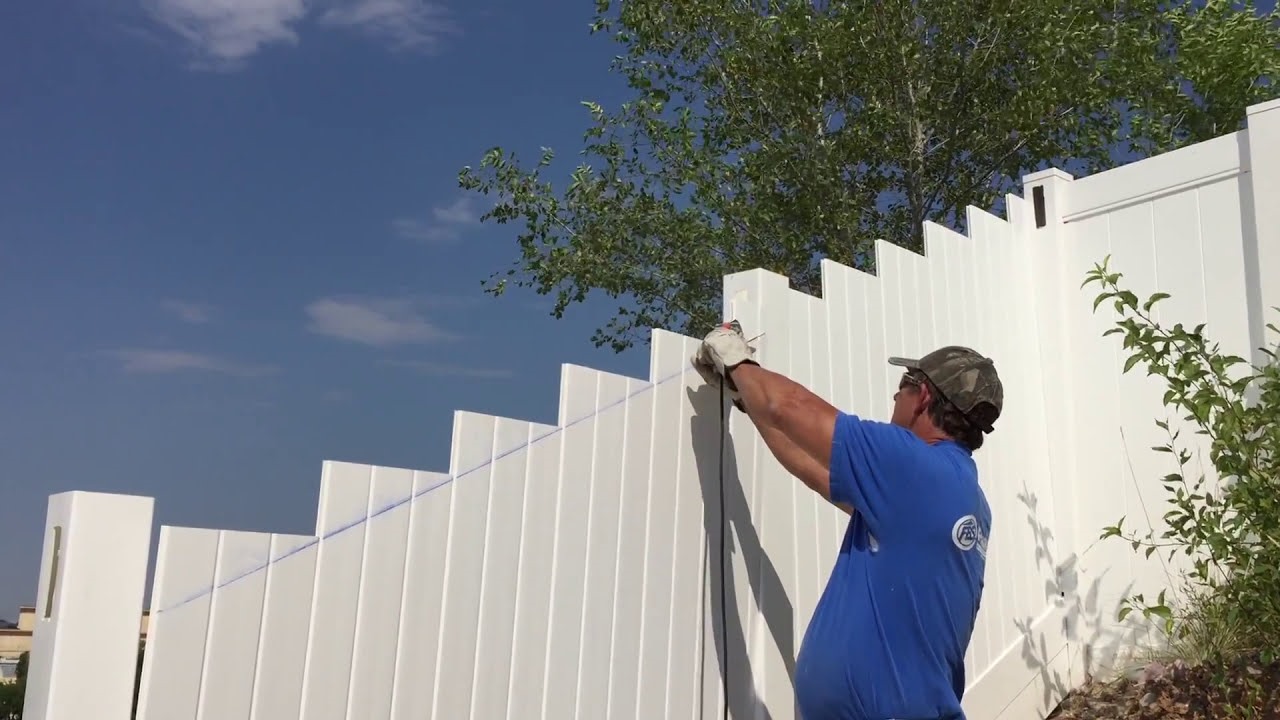
- Trim panels if necessary: If any panels need to be trimmed to fit the slope, use a saw to carefully cut them to the desired size. Measure and double-check before making any cuts to avoid errors.
- Inspect and adjust: Once all the panels are installed, inspect the fence to ensure that they are securely attached and aligning properly. Make any necessary adjustments to the panel placement or fasteners.
By following these steps, your vinyl fence panels will be securely installed on the slope. Take care to align the panels properly for an aesthetically pleasing and structurally sound fence.
Step 7: Trim the Panels
After installing the vinyl fence panels on the slope, it may be necessary to trim them to ensure a clean and professional appearance. Trimming the panels will help create a seamless and uniform look along the slope.
Follow these steps to trim the panels:
- Evaluate the panel alignment: Step back and assess the alignment of the panels. Look for any noticeable gaps or uneven edges that require trimming.
- Measure and mark: Measure the section of the panel that needs to be trimmed. Use a tape measure to determine the exact length or width that needs to be cut.
- Secure the panel: Temporarily secure the panel to prevent any movement during the trimming process. This could involve holding or clamping the panel in place.
- Trim the panel: Use a saw or appropriate cutting tool to carefully trim the marked section of the panel. Take your time and make precise cuts to ensure a clean and straight edge.
- Remove any rough edges: After trimming, use sandpaper or a file to smooth any rough or jagged edges on the trimmed section of the panel. This will give it a polished and finished look.
- Check the fit: Once the panel is trimmed, reattach it to the rails and verify that it fits seamlessly with the neighboring panels. There should be no visible gaps or inconsistencies.
- Repeat if necessary: If there are multiple panels that require trimming, repeat the above steps for each one until all the panels have been properly trimmed.
By carefully trimming the vinyl fence panels, you can achieve a precise and professional appearance along the slope. Take your time and be meticulous to ensure that each trimmed panel fits seamlessly with the others.
Step 8: Secure the Panels
After trimming the panels and ensuring they are aligned correctly, the next step is to secure them in place. Properly securing the vinyl fence panels on the slope is essential to maintain their stability and prevent any shifting or damage.
Follow these steps to secure the panels:
- Inspect the panel attachments: Check the fasteners that connect the panels to the rails. Ensure that they are properly tightened but not overly tightened, as this could damage the vinyl material.
- Reinforce with additional fasteners: If necessary, add extra screws or nails at strategic points along the panels and rails. This will provide additional security and prevent any potential movement or sagging.
- Check for gaps: Carefully inspect the spaces between the panels for any visible gaps. If you notice any gaps, adjust the panels as needed or add additional fasteners in those areas.
- Verify alignment: Double-check the alignment of the panels to ensure they are level and evenly spaced. Use a level to ensure vertical alignment and maintain a consistent appearance.
- Secure the bottom of the panels: Secure the bottom edge of the panels to the ground using concrete anchors or other suitable fasteners. This will provide added stability and prevent any movement caused by wind or other external factors.
- Inspect the entire fence: Once all the panels are secure, thoroughly inspect the entire fence to confirm that all the panels are properly attached and aligned. Make any necessary adjustments as needed.
By following these steps, you can ensure that the vinyl fence panels on the slope are securely in place and ready to withstand various weather conditions and daily use. Taking the time to properly secure the panels will contribute to the longevity and aesthetic appeal of your fence.
Read more: How To Disassemble Vinyl Fence
Step 9: Add Gates (Optional)
If you desire access points or want to enhance the functionality of your vinyl fence on the slope, you can add gates. Gates provide convenience and allow for easy entry and exit from your fenced area.
Follow these steps to add gates to your vinyl fence:
- Select the gate type: Decide on the type of gate that suits your needs and complements the overall design of your fence. Common gate types include single swing gates, double swing gates, and sliding gates.
- Measure and mark gate locations: Measure and mark the desired locations of the gate openings along the fence line. Ensure that the gate openings are wide enough to accommodate your needs, such as equipment or vehicles.
- Install gate posts: If necessary, install additional gate posts at the designated gate locations. These posts should be sturdy and firmly anchored to support the weight and movement of the gate.
- Attach gate hardware: Install the necessary gate hardware, such as hinges and latches, to the gate and the corresponding gate posts. Ensure that the hardware is designed for vinyl fencing and can withstand the weight and usage of the gate.
- Hang the gate: Hang the gate on the hinges attached to the gate posts. Test the gate to ensure smooth operation and make any necessary adjustments to the hardware for proper alignment.
- Secure the gate: Use additional hardware, such as gate latches or locks, to securely close and lock the gate when not in use. This will provide additional security and peace of mind.
- Inspect and test: Thoroughly inspect the gate and its operation. Open and close the gate multiple times to ensure smooth movement and proper alignment. Make any adjustments if needed.
Adding gates to your vinyl fence on the slope can greatly enhance the accessibility and functionality of your fenced area. Whether for pedestrian access or larger equipment, gates provide convenience and security while maintaining the cohesive look of your fence.
Conclusion
Installing a vinyl fence on a slope may seem like a challenging task, but with proper planning and execution, it can be accomplished successfully. By considering factors such as slope gradient, soil type, and property boundaries, you can ensure a smooth installation process and a fence that meets both your functional and aesthetic requirements.
Throughout the installation process, it’s important to have the necessary tools and materials readily available. This includes measuring and marking the fence layout, preparing the ground, and securely installing the corner and line posts. Attaching the rails, panels, and optionally adding gates will complete the construction of your vinyl fence on the slope.
Take the time to trim the panels to create a seamless appearance and secure them properly to ensure their stability over time. Regular inspections and maintenance will help to ensure the longevity and performance of your vinyl fence.
Remember, if you’re not confident in your DIY skills or prefer professional assistance, it’s always a good idea to consult with a fence installation expert or contractor. They can help guide you through the process and provide valuable insights specific to your property and slope conditions.
Installing a vinyl fence on a slope can be a rewarding project that enhances both the functionality and appearance of your outdoor space. With the right tools, knowledge, and careful execution, you’ll enjoy the benefits of a beautiful and durable fence for years to come.
Frequently Asked Questions about How To Install Vinyl Fence On A Slope
Was this page helpful?
At Storables.com, we guarantee accurate and reliable information. Our content, validated by Expert Board Contributors, is crafted following stringent Editorial Policies. We're committed to providing you with well-researched, expert-backed insights for all your informational needs.


0 thoughts on “How To Install Vinyl Fence On A Slope”