Articles
How To Install Fender Mirrors
Modified: December 7, 2023
Learn how to properly install fender mirrors with our informative articles. Ensure a secure and stylish addition to your vehicle.
(Many of the links in this article redirect to a specific reviewed product. Your purchase of these products through affiliate links helps to generate commission for Storables.com, at no extra cost. Learn more)
Introduction
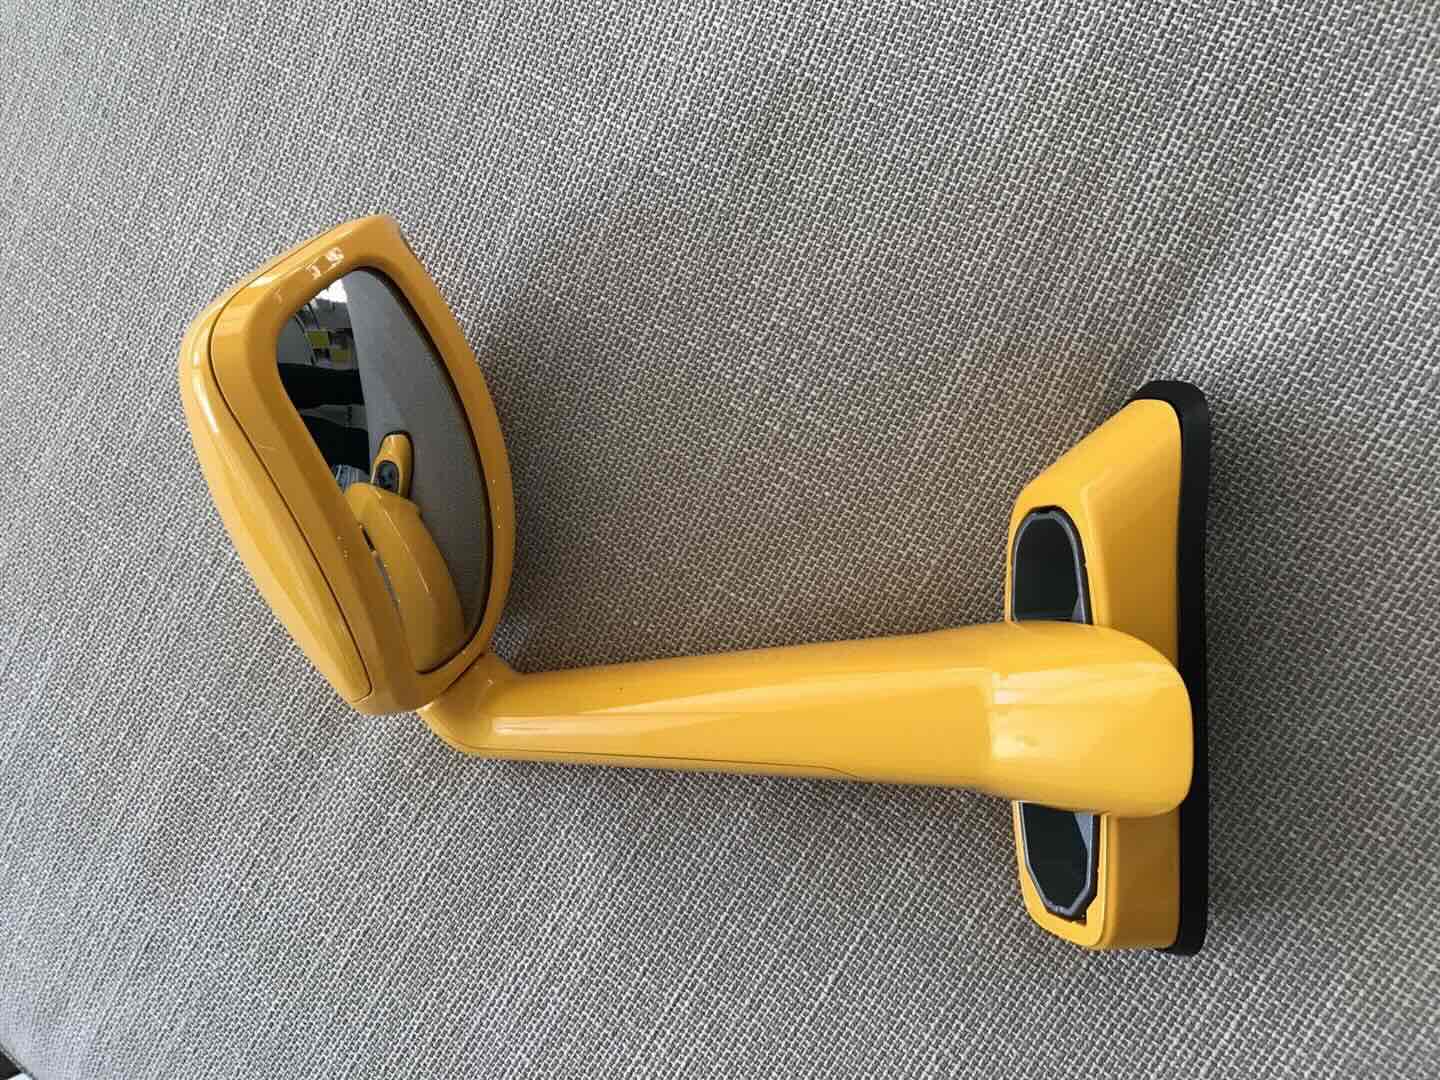
Installing fender mirrors on your vehicle can not only enhance its appearance but also improve visibility while driving. Fender mirrors, also known as wing mirrors or side mirrors, are mounted on the fenders or wings of a vehicle and provide an extended field of view for the driver.
Whether you’re looking to replace your existing mirrors or upgrade to fender mirrors for the first time, this step-by-step guide will walk you through the installation process. With the right tools and materials, you’ll be able to install fender mirrors efficiently and effectively.
Before we dive into the installation process, it’s important to note that the specific steps may vary depending on the make and model of your vehicle. It’s always recommended to consult the manufacturer’s instructions or seek professional assistance if you’re unsure about any aspect of the installation.
Now, let’s gather the tools and materials you’ll need for the installation.
Key Takeaways:
- Proper preparation is essential for successful fender mirror installation. Thoroughly inspect, clean, and test the mirrors before positioning and aligning them on your vehicle’s fenders.
- Testing the functionality of the fender mirrors is crucial for ensuring optimal visibility and stability. Conduct thorough tests before hitting the road to enjoy improved driving experience.
Read more: How To Install Vanity Mirror
Tools and Materials Required
Before you begin the installation process, make sure you have the following tools and materials on hand:
- Screwdriver set
- Socket wrench
- Torque wrench
- Trim removal tools
- Drill and drill bits
- Measuring tape
- Masking tape
- Protective gloves
- Clean cloth or microfiber towel
- Adhesive promoter
- Adhesive or mounting brackets (depending on the type of fender mirrors)
In addition to these tools, you will also need the fender mirrors themselves. Ensure that you have selected the correct size and style of fender mirrors that are compatible with your vehicle. It’s always recommended to purchase fender mirrors from a reputable retailer or manufacturer to ensure quality and proper fitment.
With all the necessary tools and materials gathered, you’re ready to begin the installation process. Follow the next steps to install fender mirrors on your vehicle.
Step 1: Prepare the Fender Mirrors
Before you can install the fender mirrors, it’s important to prepare them for the installation. This involves inspecting the mirrors for any damages or defects, cleaning them, and ensuring all necessary components are included. Follow these steps to prepare the fender mirrors:
- Inspect the mirrors: Carefully examine the fender mirrors for any cracks, scratches, or other damages. If you notice any defects, it’s recommended to contact the manufacturer for a replacement.
- Clean the mirrors: Use a clean cloth or microfiber towel to remove any dust, dirt, or debris from the mirror surface. Ensure that the mirrors are completely clean before proceeding with the installation.
- Check the components: Ensure that all necessary components, such as mounting brackets or adhesive, are included with the fender mirrors. Double-check the package contents against the manufacturer’s instructions to make sure nothing is missing.
- Test the adjustment mechanism: If the fender mirrors come with an adjustable mechanism, test it by moving the mirror in different directions. Make sure the adjustment is smooth and functions properly.
By thoroughly inspecting and preparing the fender mirrors, you can ensure a seamless installation process and identify any issues beforehand. Once you’ve prepared the fender mirrors, you’re ready to move on to the next step: removing the old mirrors (if applicable).
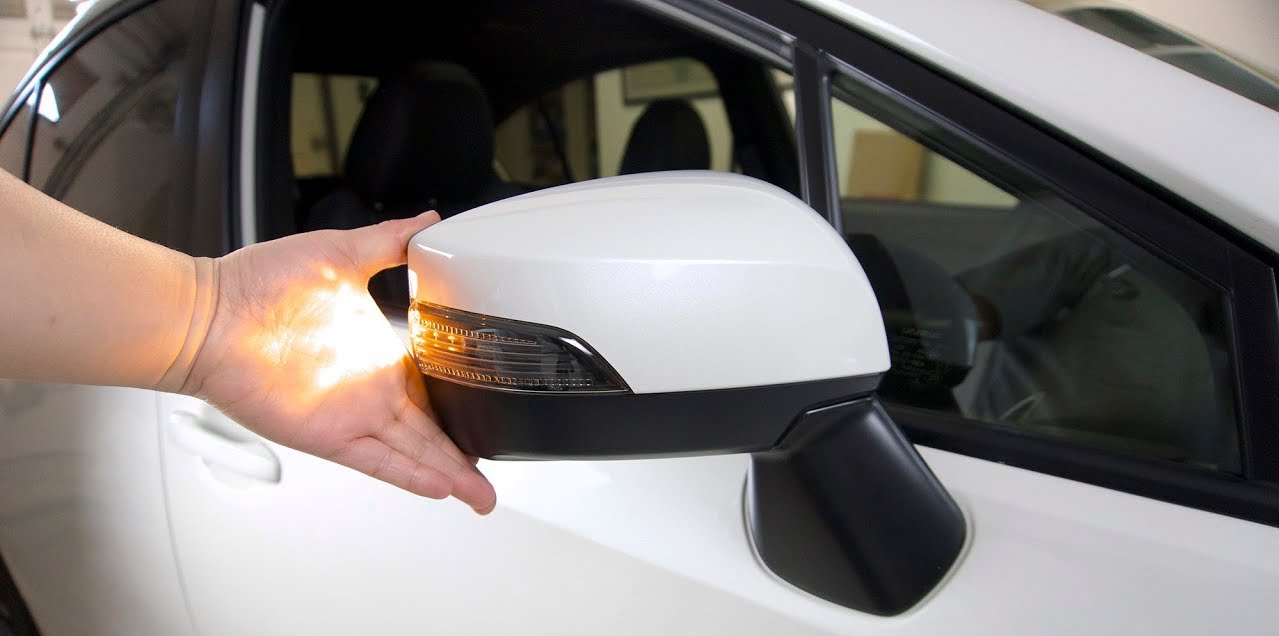
Step 2: Remove the Old Mirrors (if applicable)
If your vehicle already has side mirrors installed, you’ll need to remove them before installing the fender mirrors. Follow these steps to remove the old mirrors:
- Locate the mirror mounting point: Identify the attachment point of the old mirrors on the vehicle’s door or fender. It may be secured with screws or bolts.
- Remove the screws/bolts: Use a screwdriver or socket wrench to remove the screws or bolts that secure the old mirrors. Set them aside in a safe place.
- Disconnect the wiring (if applicable): If your vehicle has power mirrors, there may be wiring connected to the mirror assembly. Carefully disconnect the wiring harness to remove the mirrors completely.
- Gently pry off the mirror housing: In some cases, the mirror assembly may be attached with clips or adhesive. Use a trim removal tool or your hands to carefully pry off the mirror housing from the vehicle.
- Remove any residue: Once the mirror housing is removed, check for any residue or adhesive left behind. Use a clean cloth and adhesive remover to clean the surface and ensure a clean mounting point for the new fender mirrors.
It’s important to handle the old mirrors with care to avoid any damage to your vehicle’s paint or body. Be mindful of any wiring connections and ensure they are properly disconnected before removing the mirrors completely.
With the old mirrors removed, you’re ready to proceed to the next step: positioning and aligning the fender mirrors.
Step 3: Position and Align the Fender Mirrors
Now that you’ve removed the old mirrors (if applicable), it’s time to position and align the fender mirrors on your vehicle. The proper positioning and alignment are crucial for optimal visibility and functionality. Follow these steps to position and align the fender mirrors:
- Refer to the manufacturer’s instructions: Consult the installation guide or manual provided by the manufacturer for specific guidance on the placement of the fender mirrors. Different vehicles and mirror styles may have varying recommendations.
- Use masking tape to mark the desired position: Place a strip of masking tape on the vehicle’s fender or wing where you intend to install the fender mirrors. This will act as a temporary guide to help you position the mirrors accurately.
- Measure and align for symmetry: Use a measuring tape to ensure that both fender mirrors are positioned symmetrically on either side of the vehicle. Measure the distance from various reference points on the vehicle (e.g., the edge of the hood, the door frame) to ensure consistent placement.
- Consider the driver’s line of sight: Position the fender mirrors in a way that allows the driver to have a clear and unobstructed view of the adjacent lanes and blind spots. Make sure the mirrors provide adequate coverage and do not hinder visibility.
- Take into account legal requirements: Check the local regulations regarding the placement and orientation of side mirrors. Ensure that the fender mirrors comply with the legal requirements to avoid any issues or penalties.
Take your time during this step to ensure the fender mirrors are positioned and aligned correctly. Proper placement and alignment will not only enhance your driving experience but also contribute to the overall aesthetics of your vehicle.
Once you have determined the optimal position and alignment for the fender mirrors, it’s time to move on to securing them in place, which will be covered in the next step.
When installing fender mirrors, make sure to properly align and secure the mounting brackets to ensure the mirrors are stable and provide a clear view.
Read more: How To Install A Mirror On The Ceiling
Step 4: Secure the Fender Mirrors in Place
After positioning and aligning the fender mirrors, the next step is to securely mount them on your vehicle. The method of mounting may vary depending on the type of fender mirrors you have, so it’s important to refer to the manufacturer’s instructions for specific guidance. Nevertheless, here are some general steps to secure the fender mirrors in place:
- Prepare the mounting surface: If using adhesive, clean the mounting surface with a clean cloth and ensure it is free of any dust, debris, or residue. If using mounting brackets, attach them to the appropriate mounting points on the vehicle.
- Apply adhesive promoter (if applicable): Some adhesive-backed fender mirrors may require the application of an adhesive promoter to ensure a strong and durable bond. Follow the manufacturer’s instructions for applying the promoter, if necessary.
- Attach the fender mirrors: Carefully position the fender mirrors according to the markings you made earlier. Press firmly to secure them in place, applying even pressure across the surface. If using adhesive, hold the mirrors in position for the recommended amount of time to allow the adhesive to bond.
- If using mounting brackets, secure them with screws or bolts: Once the fender mirrors are in position, use the provided screws or bolts to secure the mounting brackets to the vehicle. Ensure they are tight but avoid over-tightening, which could damage the brackets or the vehicle’s body.
Remember, the specific steps may vary depending on the manufacturer’s instructions and the type of fender mirrors you have. Always refer to the provided documentation for the most accurate and detailed instructions.
With the fender mirrors securely mounted, you’re ready to move on to the next step: adjusting and fine-tuning the mirrors for optimal visibility.
Step 5: Adjust and Fine-Tune the Mirrors
Once the fender mirrors are securely mounted on your vehicle, it’s important to adjust and fine-tune them to ensure optimal visibility and functionality. Follow these steps to adjust and fine-tune the fender mirrors:
- Sit in the driver’s seat: Position yourself in the driver’s seat and adjust the seat and mirrors to your preferred driving position.
- Use a helper or utilize reflective surfaces: Ask a friend or utilize reflective surfaces (such as glass windows) to help you see the reflection from the fender mirrors while making adjustments.
- Adjust the mirror angle: Use the adjustment mechanism on the fender mirrors to change the angle and orientation of the mirror surface. Tilt and rotate them until you have a clear view of the surrounding areas.
- Consider blind spots: Pay close attention to the areas that are typically considered blind spots, such as the rear corners of the vehicle. Adjust the fender mirrors to minimize these blind spots and improve your overall visibility.
- Ensure symmetry: While adjusting the fender mirrors, make sure they are aligned symmetrically in relation to the vehicle. This will provide a balanced and uniform appearance.
- Double-check the stability: Ensure that the fender mirrors remain securely in place during the adjustment process. If any adjustments cause the mirrors to become loose, tighten the mounting brackets or adhesive as necessary.
Take your time during this step to find the optimal mirror position that suits your driving preferences and provides the best visibility. Remember that proper mirror adjustment is crucial for safe driving, as it allows you to effectively monitor and react to the surrounding traffic.
Once you are satisfied with the mirror adjustments, the next and final step is to test the functionality of the fender mirrors, which we will cover in the next section.
Step 6: Test the Functionality of the Fender Mirrors
After adjusting and fine-tuning the fender mirrors, it’s crucial to test their functionality to ensure they are working properly. This step allows you to confirm that the mirrors provide the desired visibility and that they remain stable during driving. Follow these steps to test the functionality of the fender mirrors:
- Start the vehicle: Turn on the ignition and start the engine.
- Engage the mirrors: Activate the mirror controls inside the vehicle to adjust the position of the fender mirrors. Test both the side-to-side and up-and-down movement of the mirrors to ensure they respond properly.
- Check for stability: While the vehicle is stationary, carefully observe the fender mirrors to ensure they remain securely in place. Check for any wobbling or movement that could indicate loose mounting or inadequate adhesive bonding.
- Test visibility: With the vehicle parked, sit in the driver’s seat and use the fender mirrors to assess your visibility. Check the coverage of the mirrors, focusing on blind spots and areas that may be challenging to see with the vehicle’s rearview mirror.
- Perform a road test: Take the vehicle for a short test drive on local roads to further evaluate the functionality of the fender mirrors. Use them to monitor traffic and ensure they provide clear and accurate reflections.
- Make final adjustments if necessary: If you encounter any issues during the test, such as limited visibility or instability, park the vehicle and make any necessary adjustments to the fender mirrors.
By conducting thorough functionality tests, you can identify and address any issues before hitting the road. Remember, it may take some time to get used to the new fender mirrors and find your preferred settings, so take the opportunity to make any final adjustments to enhance your driving experience.
Congratulations! You have successfully installed and tested your new fender mirrors. Enjoy improved visibility and a stylish appearance as you drive your vehicle!
Note: The specific steps may vary depending on the make and model of your vehicle, as well as the type of fender mirrors you are installing. Always consult the manufacturer’s instructions for the most accurate guidance.
Conclusion
Installing fender mirrors can greatly enhance the functionality and aesthetic appeal of your vehicle. Through proper positioning, alignment, and adjustment, you can improve your visibility and have a clear view of the surrounding areas while driving. By following the step-by-step guide outlined in this article, you should be able to install fender mirrors on your vehicle with ease.
Remember to gather all the necessary tools and materials before you begin the installation process. Inspect and prepare the fender mirrors, ensuring they are free from any defects or damages. Remove the old mirrors (if applicable), and carefully position and align the fender mirrors on your vehicle’s fenders or wings.
Once the positioning is complete, securely mount the fender mirrors using adhesive or mounting brackets, following the manufacturer’s instructions. Take the time to adjust and fine-tune the mirrors for optimal visibility and functionality, and ensure they remain stable during the adjustment process.
Don’t forget to thoroughly test the functionality of the fender mirrors before hitting the road. Engage the mirrors from inside the vehicle, check for stability, and verify the visibility they provide. Take your vehicle on a short test drive to further evaluate their performance.
By following these steps and taking your time throughout the installation process, you can enjoy the benefits of fender mirrors on your vehicle. Improved visibility and added style are just a few of the advantages these mirrors bring. As always, refer to the manufacturer’s instructions and seek professional assistance if needed.
Now that you have successfully installed and tested your fender mirrors, get ready to hit the road with confidence and enjoy a safer and more enjoyable driving experience!
Frequently Asked Questions about How To Install Fender Mirrors
Was this page helpful?
At Storables.com, we guarantee accurate and reliable information. Our content, validated by Expert Board Contributors, is crafted following stringent Editorial Policies. We're committed to providing you with well-researched, expert-backed insights for all your informational needs.


0 thoughts on “How To Install Fender Mirrors”