Articles
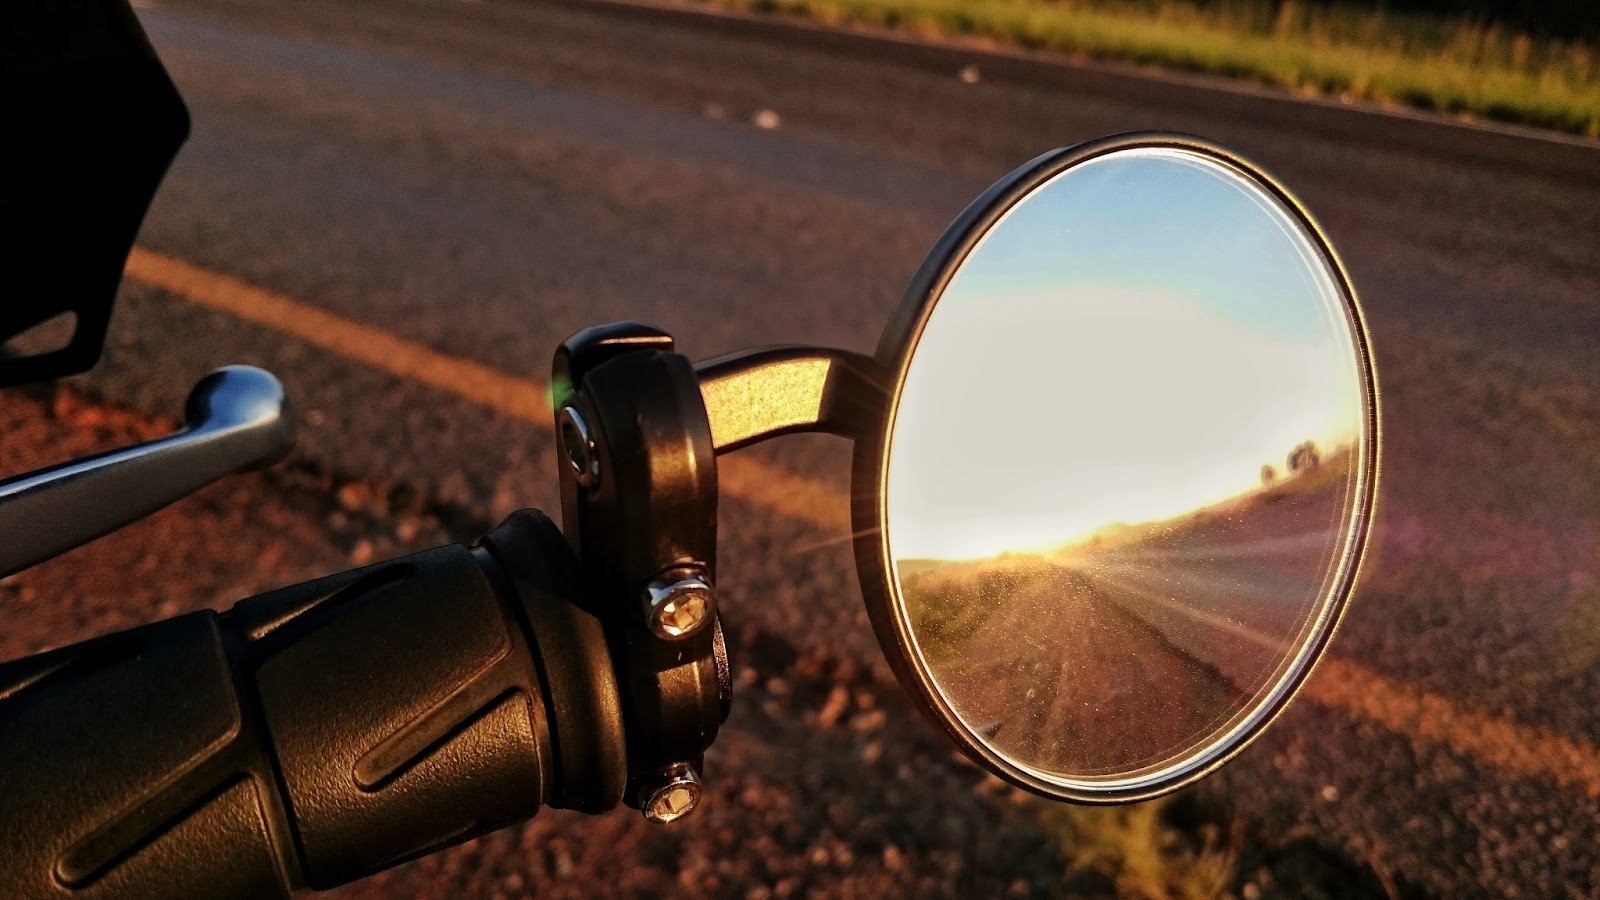
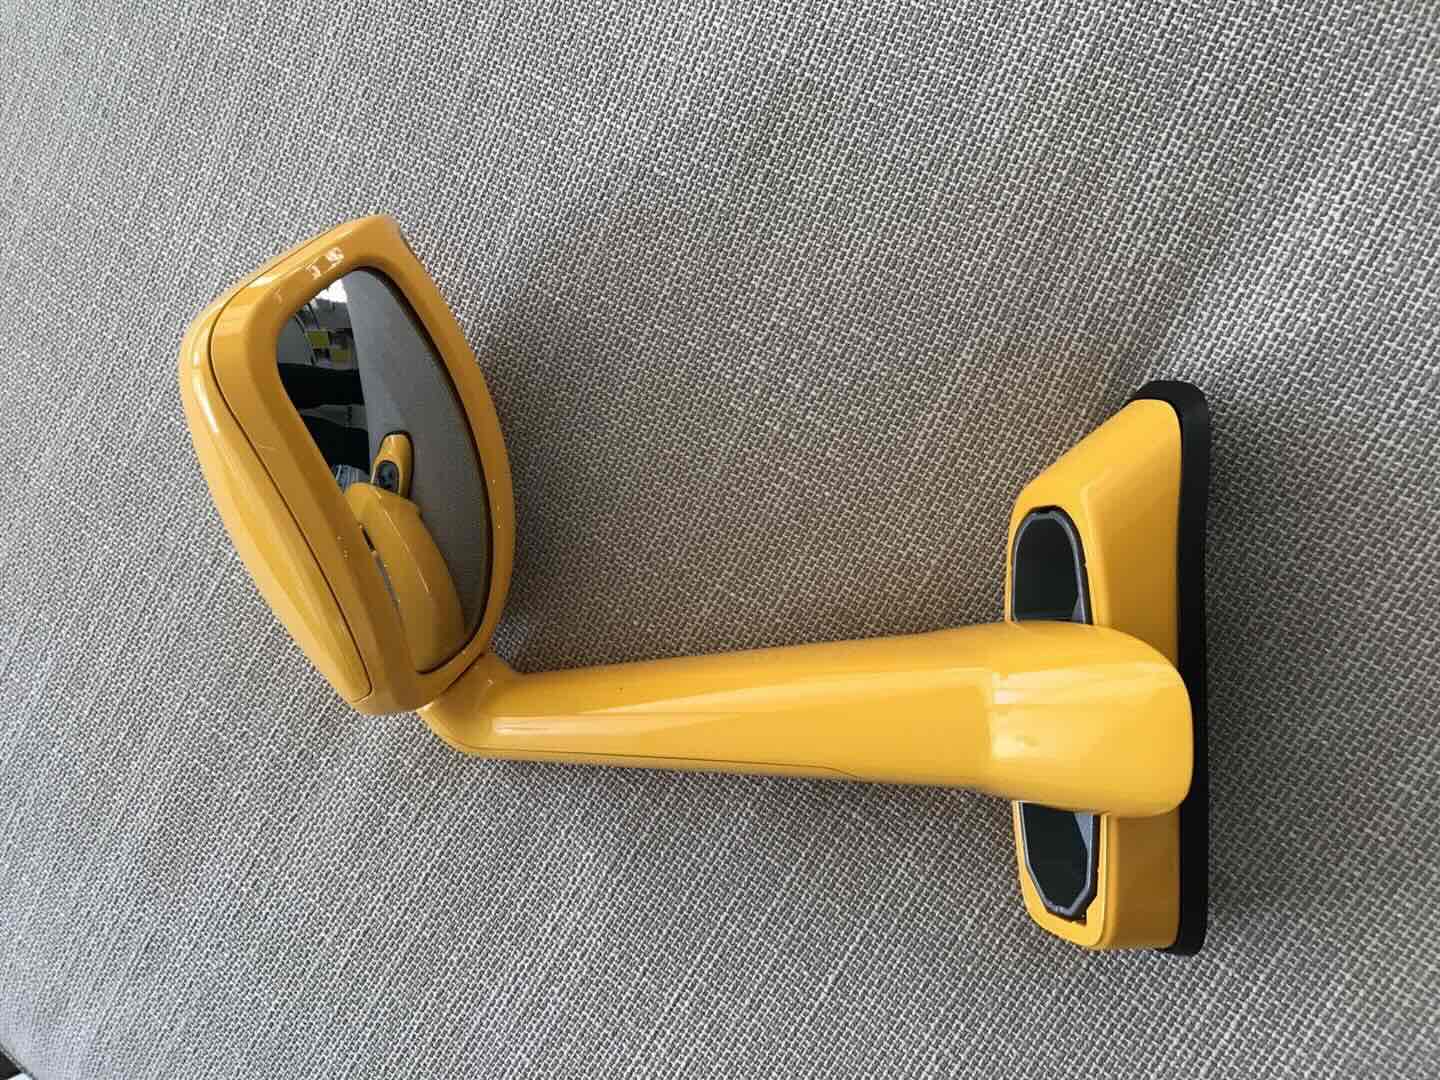
How To Install Bar End Mirrors
Modified: February 23, 2024
Learn how to properly install bar end mirrors on your motorcycle with our step-by-step guide. Find out what tools and techniques you need to ensure a secure and functional installation.
(Many of the links in this article redirect to a specific reviewed product. Your purchase of these products through affiliate links helps to generate commission for Storables.com, at no extra cost. Learn more)
Introduction
Bar end mirrors are a popular aftermarket accessory for motorcycles and bicycles. They provide improved visibility and style, offering a sleek and minimalist alternative to traditional handlebar-mounted mirrors. Installing bar end mirrors is a relatively simple process that can be done at home with a few basic tools and materials. In this article, we will guide you through the step-by-step process of installing bar end mirrors, ensuring a secure and properly positioned setup.
Before we begin, it’s important to note that the specific installation process may vary depending on the make and model of your vehicle. Always refer to the manufacturer’s instructions for any specific requirements or modifications needed.
Now, let’s dive into the detailed steps to successfully install bar end mirrors on your motorcycle or bicycle.
Key Takeaways:
- Enhance your ride with bar end mirrors, improving visibility and style. Follow our step-by-step guide for a secure and sleek installation process, ensuring optimal positioning and functionality.
- Elevate your motorcycle or bicycle with bar end mirrors, offering improved visibility and a minimalist design. With our detailed installation instructions, achieve a secure and stylish setup for a confident and enjoyable riding experience.
Read also: 13 Best Bar End Mirrors for 2025
Step 1: Gather the Necessary Tools and Materials
Before you start installing bar end mirrors, it’s essential to gather all the necessary tools and materials. This will ensure a smooth and hassle-free installation process. Here’s a list of what you’ll need:
- Bar end mirrors
- Bar end mirror adapters (if required)
- Socket set or wrench
- Allen wrench or hex key set
- Threadlocker (optional, but recommended)
- Clean cloth or towel
Bar end mirrors come in various styles and sizes, so choose ones that are suitable for your vehicle. Additionally, some motorcycles or bicycles may require specific adapters to mount the mirrors correctly. Make sure to check the compatibility and purchase any necessary adapters.
A socket set or wrench will be needed to remove the existing mirrors (if applicable) and tighten the bar end mirrors in place. An Allen wrench or hex key set may also be required to adjust the position and angle of the mirrors.
Using threadlocker is optional, but highly recommended. Applying a small amount of threadlocker to the screw threads will prevent the mirrors from loosening due to vibration during rides.
Lastly, have a clean cloth or towel on hand to wipe away any grease, dirt, or debris from the handlebars and mirror mounts. This will ensure a clean and secure installation.
Step 2: Remove the Existing Mirrors (if applicable)
If your motorcycle or bicycle already has mirrors installed on the handlebars, you’ll need to remove them before installing the bar end mirrors. Here’s how to do it:
- Start by locating the mounting bolts or screws that secure the mirrors to the handlebars. These are typically located at the base or on the sides of the mirrors.
- Using a socket set or wrench, loosen and remove the mounting bolts/screws. Be sure to keep track of the hardware as you’ll need it later to install the bar end mirrors.
- Gently slide the mirrors off the handlebars, taking care not to damage any wiring or other components.
- Once the mirrors are removed, inspect the handlebars for any leftover adhesive or residue. Clean the handlebars using a clean cloth or towel.
If your vehicle doesn’t have existing mirrors or you’ve already removed them, you can skip this step and move on to the next one.
Removing the existing mirrors will provide a clean slate for the installation of the bar end mirrors. It’s essential to ensure that the handlebars are free from any obstruction or attachments.
Step 3: Attach the Bar End Mirror Adapters
If your motorcycle or bicycle requires adapters to mount the bar end mirrors, you’ll need to attach them before proceeding with the installation. Here’s how to do it:
- Check the compatibility of the bar end mirror adapters with your vehicle and the bar end mirrors you’ve chosen.
- Inspect the adapters and identify the side that will be attached to the handlebars.
- Apply a small amount of threadlocker to the screw threads of the adapters to ensure a secure connection.
- Slide the adapters onto the handlebars, aligning them with the desired positioning for the mirrors. Make sure they are tight enough to hold their position but still allow for adjustments.
- Tighten the mounting bolts or screws of the adapters using a socket set or wrench. Ensure that they are securely fastened, but be careful not to overtighten and damage the handlebars.
Bar end mirror adapters serve as a bridge between the handlebars and the bar end mirrors. They provide a stable and secure mounting point for the mirrors to be attached.
Make sure to follow the manufacturer’s instructions when attaching the adapters, as the specific process may vary depending on the type and design of the adapters.
With the bar end mirror adapters securely in place, you’re ready to move on to the next step.
When installing bar end mirrors, make sure to use the correct size adapter to fit your handlebars. Tighten the mirrors securely to prevent any movement while riding.
Step 4: Position the Bar End Mirrors
Now that you have the bar end mirror adapters installed, it’s time to position the bar end mirrors themselves. Follow these steps to ensure optimal visibility and comfort:
- Start by loosening the mounting screws or bolts on the bar end mirrors. This will allow you to easily adjust the position and angle of the mirrors.
- Sit on your motorcycle or straddle your bicycle, and grasp the handlebars in a natural riding position.
- Use a combination of your own sight and the reflection in the mirrors to determine the ideal placement. Adjust the mirrors until you have a clear view of the rear and sides without needing to strain or move your head excessively.
- Take note of the angle and orientation of the mirrors. They should be angled slightly outward to provide a wider field of view, but not so much that they are pointing too far outwards.
- Once you’re satisfied with the positioning, tighten the mounting screws or bolts of the bar end mirrors using an Allen wrench or hex key set. Ensure they are securely fastened, but be cautious not to overtighten and risk damaging the mirrors or the adapters.
It’s important to take your time while positioning the bar end mirrors. Getting the right angle and orientation will significantly improve your visibility, making your rides safer and more enjoyable.
Remember, the exact positioning may vary depending on your personal preferences and riding style. Experiment with different angles and mirror placements until you find what works best for you.
With the bar end mirrors properly positioned, you’re almost done! All that’s left is to secure them in place.
Read more: How To Install End Caps On Gutters
Step 5: Tighten and Secure the Mirrors
After positioning the bar end mirrors, it’s crucial to ensure that they are securely tightened and properly fastened. This will prevent any unnecessary vibrations or movements during your rides. Follow these steps to tighten and secure the mirrors:
- Double-check that the bar end mirror mounting screws or bolts are snug but not overly tight. Use an Allen wrench or hex key set to make any necessary adjustments.
- If you have chosen to use threadlocker, apply a small amount to the screw threads before tightening. This will help prevent the mirrors from loosening due to vibrations during rides.
- Once the mirrors are properly tightened, give them a gentle tug to ensure they are secure and do not move or rotate excessively. If there is any significant movement, double-check the tightness of the mounting screws or bolts.
- Wipe away any excess threadlocker or debris from the mirrors and the surrounding area using a clean cloth or towel.
It’s important to strike a balance when tightening the bar end mirrors. Avoid overtightening, as it can damage the mirrors or their mounting hardware. On the other hand, ensure they are secure enough to withstand regular usage and potential vibrations.
Remember to periodically check the tightness of the mirrors, especially after long rides or over time, as vibrations and normal wear and tear can cause them to loosen. If you notice any movement or instability, re-tighten the mounting screws or bolts as needed.
With the bar end mirrors securely tightened and in the desired position, you’re almost ready to hit the road. But first, there’s one final step to complete.
Step 6: Test and Adjust the Mirrors
Before fully concluding the installation process, it’s important to test the bar end mirrors and make any necessary adjustments. This step ensures that you have optimal visibility and a clear view of the rear and sides while riding. Follow these steps to test and adjust the mirrors:
- Sit on your motorcycle or straddle your bicycle and assume your normal riding position.
- Adjust your line of sight and your focus to the bar end mirrors.
- Observe the reflection in the mirrors to check the visibility of the rear and sides.
- If needed, make slight adjustments to the position and angle of the mirrors to improve your field of view.
- Ensure that the mirrors do not obstruct or interfere with your hands, arms, or any other parts of your body.
- Take your vehicle for a test ride to further evaluate the visibility and functionality of the bar end mirrors.
- During the test ride, pay attention to any vibrations or movements of the mirrors. If necessary, re-tighten the mounting screws or bolts to ensure a secure fit.
Testing and adjusting the bar end mirrors will help you fine-tune their position for optimal visibility and comfort. Everyone’s riding style and preferences may differ, so it’s important to customize the mirror placement to suit your needs.
Continue to periodically assess the position and functionality of the mirrors as you ride. If you notice any changes in your rearward visibility or if the mirrors become loose or misaligned, make the necessary adjustments.
With the mirrors properly tested and adjusted, you have successfully installed and set up your bar end mirrors. Now, you can confidently ride with improved visibility and a stylish look.
Conclusion
Installing bar end mirrors on your motorcycle or bicycle is a fantastic way to enhance both the style and functionality of your ride. With their sleek design and improved visibility, bar end mirrors offer a great alternative to traditional handlebar-mounted mirrors.
In this article, we have walked you through the step-by-step process of installing bar end mirrors. From gathering the necessary tools and materials to positioning, tightening, and testing the mirrors, each step is essential for a successful installation.
By following these instructions, you can ensure a secure and properly positioned setup for your bar end mirrors. Always refer to the manufacturer’s instructions for any specific requirements or modifications tailored to your vehicle.
Remember, it’s crucial to periodically check the tightness of the mirrors and perform any necessary adjustments. Vibrations and normal wear and tear can cause them to come loose over time, potentially affecting your visibility and safety on the road.
Now that you have successfully installed your bar end mirrors, take some time to familiarize yourself with their positioning and functionality before hitting the road. Enjoy the improved visibility that these mirrors provide, allowing you to have a more confident and enjoyable riding experience.
Whether you ride a motorcycle or a bicycle, bar end mirrors are a stylish and practical addition to your vehicle. So, gear up, adjust your mirrors, and embark on your next adventure with added confidence and clarity.
Frequently Asked Questions about How To Install Bar End Mirrors
Was this page helpful?
At Storables.com, we guarantee accurate and reliable information. Our content, validated by Expert Board Contributors, is crafted following stringent Editorial Policies. We're committed to providing you with well-researched, expert-backed insights for all your informational needs.


0 thoughts on “How To Install Bar End Mirrors”