Articles
How To Load Ryobi Nail Gun
Modified: December 7, 2023
Learn how to load a Ryobi nail gun with these step-by-step instructions. Our articles provide helpful tips and tricks for safely and efficiently using this powerful tool.
(Many of the links in this article redirect to a specific reviewed product. Your purchase of these products through affiliate links helps to generate commission for Storables.com, at no extra cost. Learn more)
Introduction
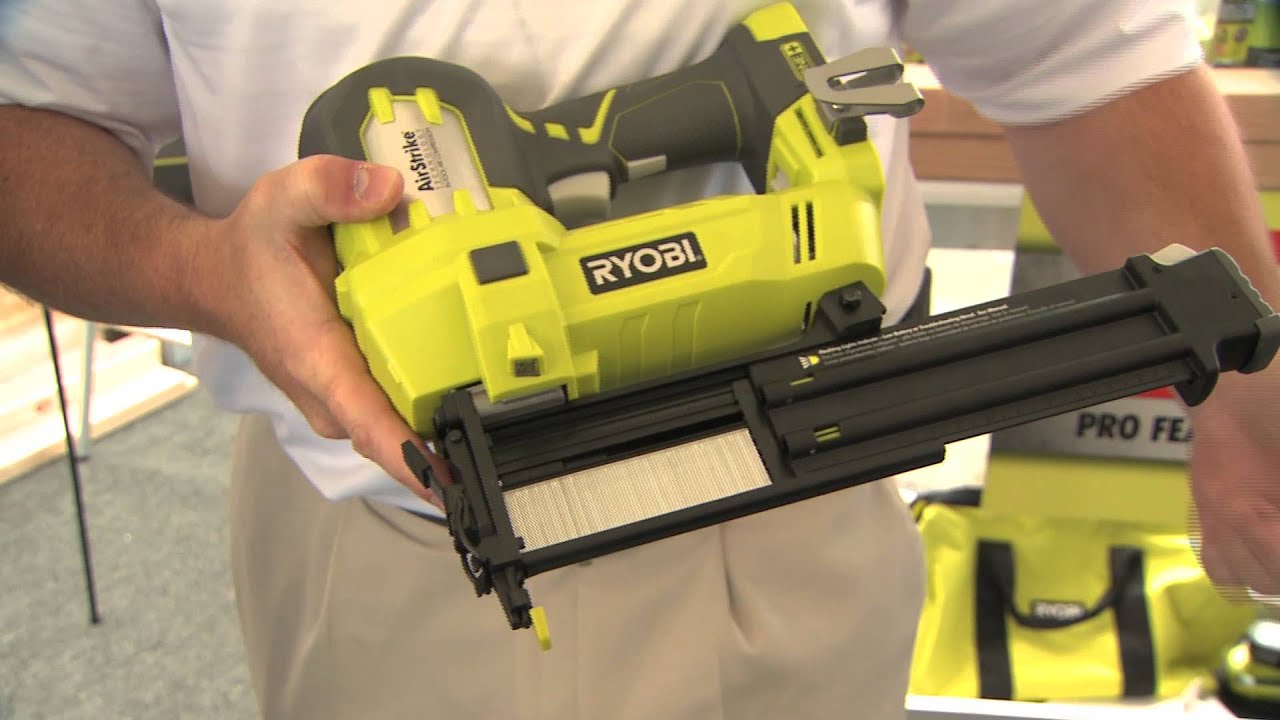
Welcome to this comprehensive guide on how to load a Ryobi nail gun! A nail gun, also known as a nailer, is a powerful tool that allows you to drive nails with ease and precision. Whether you are a DIY enthusiast or a professional contractor, knowing how to properly load and use a nail gun is essential for any project.
In this article, we will walk you through the step-by-step process of loading a Ryobi nail gun, one of the most popular and reliable nail gun brands on the market. With our detailed instructions and safety tips, you’ll be able to load your nail gun safely and efficiently, ready to tackle any woodworking or construction task.
Before we dive into the loading process, it’s important to note that safety should always be your top priority when using any power tool. Nail guns can be dangerous if not handled properly, so make sure to follow all safety precautions and wear appropriate protective gear, including safety glasses and hearing protection. Let’s get started!
Key Takeaways:
- Master the art of safely loading and using a Ryobi nail gun by following step-by-step instructions and essential safety precautions. Embrace the convenience and efficiency of this powerful tool for your woodworking and construction projects.
- Ensure your well-being and project success by gathering necessary equipment, preparing the nail gun, aligning it accurately, and testing it before confidently nailing with your Ryobi nail gun. Unload it safely and enjoy professional-quality results with ease.
Read more: What Nails Can You Use In A Ryobi Nail Gun
Safety Precautions
Before you begin loading and using your Ryobi nail gun, it’s crucial to take some safety precautions to ensure your well-being and the well-being of those around you. Here are some important safety guidelines to follow:
- Read the instruction manual: Familiarize yourself with the manufacturer’s guidelines and recommendations provided in the instruction manual. This will help you understand the proper operation and maintenance of the nail gun.
- Wear appropriate protective gear: Always wear safety glasses to protect your eyes from flying debris. Additionally, wearing hearing protection and a dust mask can be beneficial, especially when working in enclosed spaces or for extended periods.
- Inspect the nail gun: Before using the nail gun, thoroughly inspect it for any signs of damage or wear. Check the power cord, trigger mechanism, and any other moving parts to ensure they are in good working condition.
- Ensure proper power source: If your nail gun is powered by electricity, make sure to use a grounded outlet and an appropriate extension cord. For pneumatic nail guns, ensure that the air compressor is properly connected and pressurized.
- Keep a clean and organized work area: Maintain a clutter-free work area to minimize the risk of accidents. Remove any obstacles or debris that could cause you to trip or lose balance while operating the nail gun.
- Handle the nail gun with care: Always carry the nail gun with the trigger finger off the trigger. This prevents accidental firing and reduces the risk of injuries.
- Store the nail gun properly: When not in use, store the nail gun in a safe and secure place, away from the reach of children. Ensure that the nail gun is disconnected from the power source and properly stored to prevent any accidents.
- Never point the nail gun at anyone: Treat the nail gun as if it were loaded at all times and never point it towards yourself or others, even if you believe it’s not loaded. Accidental discharges can happen, so exercise caution.
By following these safety precautions, you can greatly reduce the risk of accidents and ensure a safe working environment when using a Ryobi nail gun. Now that you’re aware of the safety measures, let’s move on to the next step: gathering the necessary equipment.
Step 1: Gather Necessary Equipment
Before you begin loading your Ryobi nail gun, it’s important to gather all the necessary equipment to ensure a smooth and efficient process. Here’s what you’ll need:
- Ryobi nail gun: Ensure that you have your Ryobi nail gun ready and in good working condition. Check for any visible damage or parts that may need to be replaced before proceeding.
- Nails: Determine the appropriate type and size of nails that are compatible with your Ryobi nail gun. These nails typically come in strips or coils, and it’s important to select ones that are specifically designed for your nail gun model.
- Nail strip or coil: Depending on the type of nails you’re using, you’ll need either a nail strip or a nail coil. Nail strips consist of nails connected together in a strip, while nail coils are wound together in a circular shape. Ensure that the strip or coil is compatible with your nail gun.
- Safety gear: As mentioned earlier, it’s crucial to wear the appropriate safety gear to protect yourself during the loading process. Safety glasses, hearing protection, and gloves are highly recommended to prevent any injuries.
- A clean and well-lit workspace: Find a sturdy and flat surface where you can comfortably load your nail gun. Ensure that the area is well-lit and free from any debris that could interfere with the loading process.
Once you have gathered all the necessary equipment, you’re ready to move on to the next step: preparing the nail gun for loading. Take your time to collect everything you need, as having everything readily available will make the loading process much smoother and quicker.
Step 2: Prepare the Nail Gun
Before you can load the nails into your Ryobi nail gun, you need to properly prepare the nail gun itself. Follow these steps to ensure that your nail gun is ready for the loading process:
- Disconnect the power source: If you have an electric nail gun, unplug it from the power source. For pneumatic nail guns, ensure that the air compressor is turned off and disconnected.
- Inspect the magazine: The magazine is the part of the nail gun that holds the nails. Carefully open the magazine to visually inspect it for any debris, obstructions, or leftover nails. Make sure the magazine is clean and free from any foreign particles that could interfere with the loading process.
- Release the nail gun’s follower: Locate the follower, which is the spring-loaded mechanism that pushes the nails forward in the magazine. There is usually a latch or release mechanism that allows you to pull back or release the follower. Push or release the follower to its furthest back position to ensure that it’s ready to accept the nails.
- Check the depth adjustment: Some Ryobi nail guns have a depth adjustment feature that allows you to control how deeply the nails are driven into the material. Ensure that the depth adjustment is set according to your requirements. Refer to the nail gun’s instruction manual for guidance on adjusting the depth, if necessary.
- Inspect the nose of the nail gun: Take a moment to inspect the nose piece of the nail gun. Ensure that it is clear of any obstructions or damaged parts. The nose of the nail gun is where the nails will be driven out, so it needs to be clear and in good condition for optimal performance.
By following these steps, you’ll ensure that your Ryobi nail gun is properly prepared for loading. Once you have completed the preparation process, you’re ready to move on to the next step: loading the nail strip or coil into the magazine.
Step 3: Load the Nail Strip
Now that you’ve prepared your Ryobi nail gun, it’s time to load the nail strip into the magazine. Follow these steps to load the nail strip effectively:
- Identify the direction: Determine the correct direction in which the nail strip should be loaded into the magazine. The strip typically has arrows or indicators indicating the proper orientation. Ensure that the arrows on the strip align with the direction specified in your nail gun’s instruction manual.
- Align the nail strip: Hold the nail strip firmly with one hand and align the first nail at the top with the opening in the magazine. Ensure that the nail is positioned correctly, with the pointed end facing down and the head of the nail facing up.
- Push the nail strip into the magazine: With the nail strip properly aligned, slide it into the magazine until it reaches the end. Apply gentle pressure to ensure that the strip is securely seated in the magazine but avoid using excessive force that may cause damage.
- Push the follower forward: After loading the nail strip, gently push the follower forward, applying slight pressure to advance the strip towards the nose of the nail gun. This action will position the first nail in the firing position.
- Confirm proper loading: Check the magazine to ensure that the nail strip is loaded correctly and that there are no jams or misalignments. Verify that the nails are properly positioned and ready for firing. If there are any issues, consult the nail gun’s instruction manual for troubleshooting tips.
Remember to handle the nail strip with care to avoid bending or damaging the nails. Loading the nail strip correctly will ensure smooth operation and prevent any jams or misfires during use.
Now that the nail strip is loaded, you’re ready to move on to the next step: aligning the nail gun for accurate and precise nailing.
Before loading your Ryobi nail gun, always disconnect the power source and ensure the gun is not loaded. Follow the manufacturer’s instructions for loading the specific model of nail gun.
Read more: Why Is My Ryobi Nail Gun Not Firing
Step 4: Align the Nail Gun
Proper alignment is crucial for accurate and precise nailing with your Ryobi nail gun. Follow these steps to ensure that the nail gun is aligned correctly:
- Hold the nail gun with a firm grip: Grasp the handle of the nail gun with one hand and place your other hand on the body or the base of the nail gun for stability.
- Position the nose against the surface: Align the nose of the nail gun against the surface where you want to drive the nails. Ensure that the nose is flat and flush against the material.
- Adjust the angle: Depending on the application and the type of material, you may need to adjust the angle of the nail gun slightly. For example, when nailing into corners or tight spaces, you may need to tilt the nail gun at an angle to ensure proper placement of the nails.
- Ensure a secure hold: Press the nail gun firmly against the surface to ensure a secure hold and prevent any movement or wobbling during operation. This will help you achieve accurate and consistent nailing results.
- Double-check the alignment: Take a moment to visually inspect the alignment of the nail gun. Ensure that the nose is still flush against the surface and that the angle, if adjusted, is appropriate for the task at hand. Minor adjustments may be necessary before proceeding.
Proper alignment is essential for accurate nailing and minimizing the risk of nails going off course or damaging the material. By following these alignment steps, you’ll be well-positioned to achieve professional-quality results with your Ryobi nail gun.
With the nail gun properly aligned, you’re now ready to perform a quick test before starting your nailing project. Move on to the next step to learn how to test the nail gun effectively.
Step 5: Test the Nail Gun
Before you start nailing, it’s essential to perform a quick test to ensure that your Ryobi nail gun is functioning properly. Follow these steps to test the nail gun:
- Choose a scrap piece of material: Find a scrap piece of wood or another appropriate material that you can use for the test. This will allow you to assess the firing and driving capabilities of the nail gun without damaging your actual workpiece.
- Position the nail gun: Align the nose of the nail gun against the scrap material, ensuring that it is securely held in place and in a comfortable position for operation.
- Press the trigger: With a firm grip on the nail gun, squeeze the trigger to activate the firing mechanism. Observe the nail gun’s performance as it drives the nail into the scrap material.
- Assess the results: Check the depth and placement of the nail in the scrap material. The nail should be driven in firmly, with the head of the nail flush with the surface. If the nail is not driven deep enough or is not properly aligned, you may need to adjust the depth or the angle of the nail gun.
- Repeat the test if necessary: If the nail gun performed as expected during the test, you can proceed with your nailing project confidently. However, if there are any issues or inconsistencies in the results, repeat the test and make the necessary adjustments or seek assistance from the manufacturer.
Performing a test ensures that your Ryobi nail gun is working correctly and that the nails are being driven accurately. It also allows you to make any necessary adjustments before proceeding with your project, ensuring that you achieve the desired results.
Now that your Ryobi nail gun has passed the test, it’s time to move on to the exciting part: using the nail gun to start your nailing project. Continue to the next step to learn how to begin nailing with your nail gun.
Step 6: Start Nailing
Now that you’ve successfully tested your Ryobi nail gun, it’s time to put it to work and start nailing. Follow these steps to begin nailing with your nail gun:
- Position the nail gun: Align the nose of the nail gun against the surface where you want to drive the nails. Ensure that the nail gun is securely held and that the nose is flat against the material.
- Press the trigger: Firmly grip the nail gun with one hand and squeeze the trigger with your other hand. This will activate the firing mechanism, driving the nail into the material. Maintain a steady pressure on the surface to keep the nail gun stable during operation.
- Repeat the process: Continue positioning the nail gun and pressing the trigger to drive nails into the desired locations. Work systematically and ensure that each nail is driven in properly before moving on to the next one.
- Space the nails appropriately: Depending on your project, you may need to space the nails at specific intervals. Use a measuring tape or a pencil mark to ensure consistent spacing between the nails and maintain a professional-looking result.
- Monitor the nail supply: As you’re nailing, keep an eye on the nail strip or coil in the magazine. If the strip or coil is running low, pause to reload the nail gun to prevent any interruptions in your nailing process.
- Take breaks if needed: Nailing can be physically demanding, so take breaks as needed to rest and recharge. This will help you maintain focus and accuracy throughout your project.
By following these steps, you’ll be able to efficiently and effectively drive nails into your workpiece using your Ryobi nail gun. Remember to maintain a steady hand, position the nail gun correctly, and space the nails appropriately to achieve professional results.
Once you’ve completed the nailing process, you can proceed to the final step of unloading the nail gun. Continue reading to learn how to safely unload the nail gun when you’re finished with your project.
Step 7: Unloading the Nail Gun
After you have completed your nailing project with your Ryobi nail gun, it’s important to properly unload it to ensure safe storage and prevent any accidental firing. Follow these steps to unload your nail gun:
- Disconnect the power source: If you have an electric nail gun, unplug it from the power source. For pneumatic nail guns, turn off the air compressor and disconnect it from the nail gun.
- Release the remaining nails: Carefully open the magazine of the nail gun and check if there are any nails remaining. If there are nails left, release the follower or follow the instructions provided in your nail gun’s manual to remove the remaining nails.
- Inspect the nail gun: After unloading the nails, take a moment to inspect the nail gun. Check for any signs of damage, wear, or debris in the magazine or the nose of the gun. Clean any debris if necessary and ensure that the nail gun is in good working condition.
- Store the nail gun safely: Once you have unloaded and inspected the nail gun, store it in a safe and secure location. Make sure it is stored out of reach of children and protected from potential damage or accidents.
Following these steps will ensure the safe and proper unloading of your Ryobi nail gun. It’s important to always exercise caution when handling power tools, even when unloading them, to prevent any mishaps or injuries.
Congratulations! You have now successfully learned how to load, use, and unload a Ryobi nail gun. By following these steps and practicing proper safety precautions, you can confidently and effectively use your nail gun for various woodworking or construction projects.
Remember to refer to your nail gun’s instruction manual for specific details and guidelines, as different models may have slight variations in their operation and maintenance. Now, go ahead and put your newly acquired knowledge to use and enjoy the convenience and efficiency that a Ryobi nail gun brings to your projects!
Read more: What Kind Of Nail Gun For Siding
Conclusion
Congratulations! You’ve reached the end of this comprehensive guide on how to load and use a Ryobi nail gun. By following the step-by-step instructions and safety precautions outlined in this article, you’re now equipped with the knowledge and skills to effectively and safely operate your nail gun for various woodworking or construction projects.
Throughout this guide, we covered essential steps such as gathering the necessary equipment, preparing the nail gun, loading the nail strip, aligning the nail gun, testing it, starting the nailing process, and unloading the nail gun. By adhering to each step and paying attention to safety precautions, you can achieve professional-quality results while ensuring your well-being and the well-being of those around you.
Remember, safety should always be your top priority when using any power tool. Wear the appropriate protective gear, inspect your nail gun for any damage, and maintain a clean and organized workspace. By doing so, you can minimize the risk of accidents and make each nailing project a successful and enjoyable experience.
Should you have any doubts or questions, always refer to the instruction manual of your Ryobi nail gun for specific details and guidelines. Each model may have unique features and requirements that are important to follow.
Now that you’ve gained a solid understanding of how to load and use a Ryobi nail gun, it’s time to unleash your creativity and tackle your upcoming woodworking or construction projects with confidence. Embrace the power and efficiency that a nail gun provides, and enjoy the smooth and precise nailing experience it offers.
Thank you for reading this guide, and best of luck with your future endeavors using your Ryobi nail gun!
Frequently Asked Questions about How To Load Ryobi Nail Gun
Was this page helpful?
At Storables.com, we guarantee accurate and reliable information. Our content, validated by Expert Board Contributors, is crafted following stringent Editorial Policies. We're committed to providing you with well-researched, expert-backed insights for all your informational needs.


0 thoughts on “How To Load Ryobi Nail Gun”