Articles
How To Build Gun Cabinet
Modified: August 31, 2024
Looking for storage ideas for your gun cabinet? Discover practical and innovative ways to maximize space and keep your firearms organized with our expert tips and suggestions.
(Many of the links in this article redirect to a specific reviewed product. Your purchase of these products through affiliate links helps to generate commission for Storables.com, at no extra cost. Learn more)
Introduction
Building your own gun cabinet is not only a practical DIY project but also a way to showcase your craftsmanship and ensure that your firearms are stored safely and securely. Whether you are an avid hunter, gun collector, or simply interested in firearms, having a dedicated gun cabinet is essential to keep your weapons organized and out of reach from unauthorized individuals.
In this guide, we will walk you through the step-by-step process of designing and building your own gun cabinet. We will cover everything from selecting the right materials to the final touches and safety considerations. So, if you’re ready to embark on this rewarding project, let’s get started!
Note: Before proceeding with this project, it’s important to research and comply with local laws and regulations regarding gun storage and safety. The project and suggestions in this guide are not intended as legal advice, and you should consult with local authorities to ensure compliance.
Key Takeaways:
- Building a gun cabinet is a rewarding DIY project that requires careful planning, precise woodworking skills, and a focus on safety. From selecting the right materials to installing locking mechanisms, each step contributes to creating a secure and visually appealing storage solution for firearms.
- Prioritizing safety and compliance with local laws and regulations is essential when building and using a gun cabinet. Educating household members on firearm safety, regularly maintaining the cabinet, and ensuring secure storage of keys or combinations are crucial for responsible firearm ownership.
Read more: How To Build An Outdoor Gun Range
Materials and Tools Needed
Before diving into the construction of your gun cabinet, you’ll need to gather the necessary materials and tools to ensure a smooth and efficient building process. Here is a list of what you’ll need:
Materials:
- Wood boards – Choose a sturdy and durable type of wood, such as oak or maple, for the cabinet frame and panels.
- Plywood – For the shelves, dividers, and cabinet doors, select a high-quality plywood that matches the aesthetics of the cabinet.
- Wood glue – Use a strong wood glue to join the panels and frame together securely.
- Screws – Choose appropriate screws for the construction, ensuring that they are long enough to hold the pieces tightly.
- Hinges – Select durable hinges that can support the weight of the cabinet doors.
- Handles or knobs – Pick handles or knobs that complement the overall design of the cabinet.
- Finish – Decide on the type of wood finish you prefer, such as stain or varnish, to protect and enhance the natural beauty of the wood.
- Locking mechanisms – Depending on your preference, consider installing locks or other security features to safeguard your firearms.
Tools:
- Measuring tape – Accurate measurements are crucial for a precise and well-fitted cabinet.
- Pencil – To mark the measurements and outlines on the wood.
- Circular saw or table saw – Necessary for cutting the wood boards and plywood to the desired dimensions.
- Drill – Used for making holes and driving screws into the wood.
- Screwdriver – For manually inserting and tightening screws.
- Sanding block or sandpaper – To smoothen the wood surfaces before applying the finish.
- Paintbrush or foam brush – For applying the wood finish evenly.
- Safety equipment – Don’t forget to wear safety goggles, gloves, and a dust mask to protect yourself during the construction process.
By gathering all the necessary materials and tools beforehand, you can ensure a hassle-free experience as you progress through the various stages of building your gun cabinet. Now that we have everything prepared, let’s move onto the next step: designing the gun cabinet.
Step 1: Designing the Gun Cabinet
Before you start cutting wood or assembling any parts, it’s important to have a well-thought-out design for your gun cabinet. Consider the number of firearms you plan to store, the size of your available space, and any additional features you might want, such as shelves or drawers for accessories.
Begin by sketching out the dimensions and layout of the cabinet on paper. Take accurate measurements of the space where you intend to place the cabinet to ensure a proper fit. Keep in mind any specific requirements or regulations for gun storage in your area.
Once you have a general design in mind, consider the layout of the cabinet. This includes deciding on the number of shelves or dividers, the spacing between them, and whether or not you want adjustable shelves to accommodate different firearm sizes.
Think about the appearance of the cabinet as well. Choose a style that matches your taste and blends well with your home decor. Consider using glass panels for the doors to showcase your firearms, or opt for a more discreet solid wood design.
With your design finalized, create a detailed materials list, including dimensions and quantities of all the required wood pieces. Ensure that all the necessary hardware, such as hinges and handles, are also included.
Having a well-planned design before starting the construction phase will save you time, money, and frustration. It will also ensure that your gun cabinet meets your specific storage needs and aesthetic preferences. Once you’re satisfied with your design, it’s time to move on to Step 2: Choosing the Right Wood.
Step 2: Choosing the Right Wood
When building a gun cabinet, selecting the right wood is crucial for both its aesthetic appeal and durability. You want a wood type that is strong, stable, and able to withstand the weight of your firearms. Two popular choices for gun cabinets are oak and maple, known for their strength and durability.
Oak: Oak is a hardwood known for its sturdy nature and beautiful grain patterns. It is resistant to wear and tear, making it an excellent choice for a gun cabinet that will last for years. Oak is available in various finishes, including natural, stained, or painted, allowing you to customize the appearance of your cabinet to match your preferences and home decor.
Maple: Maple is another hardwood often used in furniture making due to its hardness and durability. It has a light color and a smooth, even grain, giving it a clean and contemporary look. Maple can be finished with clear varnish or stained to enhance its natural beauty.
When selecting the wood for your gun cabinet, consider the overall style and color scheme of your home. If you prefer a more rustic or traditional look, oak may be the ideal choice. If you lean towards a modern or minimalist design, maple might be a better option.
Regardless of the wood type you choose, ensure that it is kiln-dried, as it will be less prone to warping or shrinking over time. Warping can affect the functionality and longevity of the cabinet and compromise the security of your firearms.
It’s worth noting that some individuals opt for plywood for the cabinet panels to save costs and reduce the overall weight of the cabinet. However, keep in mind that plywood may not provide the same level of durability and strength as solid wood.
Once you’ve decided on the wood type, calculate the amount of wood needed based on the dimensions of your design. Purchase the necessary wood from a reputable supplier and ensure that the boards are free from any defects or damages.
Now that you have chosen the right wood for your gun cabinet, it’s time to move on to Step 3: Cutting and Preparing the Wood Panels.
Step 3: Cutting and Preparing the Wood Panels
With your chosen wood in hand, it’s time to start cutting and preparing the panels for your gun cabinet. This step is crucial to ensure precise dimensions and proper fit during the assembly process. Follow these steps to effectively cut and prepare the wood panels:
1. Measure and mark: Begin by measuring and marking the dimensions of each panel based on your design. Use a measuring tape and pencil to ensure accurate and straight lines.
2. Set up your cutting area: Create a well-lit and spacious area for cutting the wood panels. Make sure you have a stable workbench or cutting surface to support the wood securely.
3. Use appropriate tools: Depending on your preference and availability, you can use a circular saw, table saw, or a handheld saw to cut the wood panels. Make sure the blade of your chosen saw is suitable for cutting through your selected wood type.
4. Cut the panels: Align the marked lines with the saw blade and carefully cut each panel according to your measurements. Take your time and make smooth, steady cuts to avoid any splintering or damage to the wood.
5. Finishing touches: Once the panels are cut, use sandpaper or a sanding block to smooth the edges and surfaces of the wood. This step helps to remove any rough edges or imperfections and prepares the wood for the next stages of the construction process.
6. Label the panels: To prevent confusion during assembly, consider labeling each panel with a pencil or tape indicating its placement within the cabinet. This is especially helpful if you have many similar-sized panels.
7. Check for accurate dimensions: After cutting and sanding the panels, double-check their dimensions against your design to ensure accuracy. This will help prevent any issues during the assembly process.
Remember to handle the cut wood panels with care to avoid any injuries and wear appropriate safety equipment, such as safety goggles and gloves, while working with power tools. By accurately cutting and preparing the wood panels, you’re now ready for the next step: assembling the cabinet frame.
Read more: How To Build A Cabinet
Step 4: Assembling the Cabinet Frame
Now that you have cut and prepared the wood panels, it’s time to start assembling the frame of your gun cabinet. The frame provides the structural support and stability for the entire cabinet. Follow these steps to effectively assemble the cabinet frame:
1. Lay out the panels: Lay the bottom, top, and side panels on a flat surface, ensuring that the edges align properly.
2. Apply wood glue: Apply a thin layer of wood glue to the edges of the bottom panel where it will join with the side panels.
3. Align and secure: Carefully align the edges of the bottom panel with the side panels and use clamps to hold them together firmly. Use a carpenter’s square to ensure the corners are perfectly square.
4. Pre-drill and screw: Pre-drill holes through the bottom panel into the side panels, and then insert screws to secure the panels together. Repeat this step for the top panel as well.
5. Reinforce with corner brackets: For additional strength, you can reinforce each corner of the frame by attaching corner brackets with screws. This will further stabilize the cabinet.
6. Install a center support: If your gun cabinet is larger or will bear a significant amount of weight, consider installing a center support along the back of the frame. This will provide extra stability and prevent sagging.
7. Check for squareness: Once the frame is assembled, use a carpenter’s square to verify that it is square and properly aligned. Adjust as needed before proceeding.
Remember to work carefully and make sure all panels are securely attached before moving on to the next step. The cabinet frame forms the foundation of your gun cabinet, so it’s important to ensure its stability and strength.
With the cabinet frame successfully assembled, it’s time to move on to Step 5: Building the Cabinet Doors. This step will help bring your gun cabinet one step closer to completion.
Step 5: Building the Cabinet Doors
Building the cabinet doors is an essential step in completing your gun cabinet. The doors not only provide access to the firearms but also contribute to the overall aesthetics of the cabinet. Follow these steps to effectively build the cabinet doors:
1. Measure and mark: Measure the dimensions of the door openings in the cabinet frame. Take into account any overlap or gaps you want between the doors and the frame. Mark these measurements on your chosen plywood or solid wood boards.
2. Cut the door panels: Using a circular saw or a table saw, cut the plywood or wood boards according to the marked dimensions. Ensure clean and precise cuts for a professional appearance.
3. Create a design: Decide on the design of your doors. You can opt for a traditional solid panel design or incorporate glass inserts for a more decorative look. If using glass, measure and cut the openings for the glass before assembling the doors.
4. Assemble the doors: For solid panel doors, use wood glue and clamps to secure the stiles (vertical pieces) and rails (horizontal pieces) together. Make sure the joints are tight, and use a carpenter’s square to ensure the doors are square and properly aligned. For glass panel doors, carefully install the glass inserts before securing the stiles and rails.
5. Add additional embellishments: If desired, you can add decorative moldings, trim, or edge banding to enhance the appearance of the doors. This step is optional but can add a personalized touch to your gun cabinet.
6. Sand and finish: Once the doors are assembled and any additional embellishments are in place, sand the surfaces of the doors to smooth out any imperfections. Apply the desired finish, such as stain or varnish, following the manufacturer’s instructions. Allow the finish to dry completely before moving on to the next step.
7. Install hinges and handles: Carefully measure and mark the locations for the hinges and handles on both the doors and the cabinet frame. Use a drill to create pilot holes, then attach the hinges and handles according to the manufacturer’s instructions.
By following these steps, you will be able to create sturdy and aesthetically pleasing cabinet doors for your gun cabinet. With the doors complete, you’re one step closer to finishing your project. Step 6 will guide you through the process of installing the hinges and handles to attach the doors to the cabinet frame.
When building a gun cabinet, make sure to use sturdy and durable materials such as hardwood or metal to ensure the safety and security of your firearms. Additionally, consider adding a secure locking mechanism to prevent unauthorized access.
Step 6: Installing the Hinges and Handles
Now that you have completed building the cabinet doors, it’s time to install the hinges and handles to attach the doors to the cabinet frame. Proper installation of hinges and handles ensures smooth operation and secure closure of the doors. Follow these steps to install the hinges and handles:
1. Determine the placement: Place one of the doors in the desired position on the cabinet frame. Mark the locations for the hinges on both the door and the frame. Ensure that the hinges are positioned evenly and vertically.
2. Pre-drill pilot holes: Using a drill with a drill bit slightly smaller than the screws that came with the hinges, pre-drill pilot holes at the marked locations. This will prevent the wood from splitting when attaching the hinges.
3. Attach the hinges to the door: Hold the door in position and align the hinges’ screw holes with the pilot holes. Insert the screws through the hinges and into the door. Tighten the screws until the hinges are securely attached to the door.
4. Attach the hinges to the frame: With the door still in position, open it to a 90-degree angle. Align the hinges on the frame with the hinges on the door. Insert the screws through the hinges and into the frame. Tighten the screws until the hinges are securely attached to the frame.
5. Test the movement: Close and open the door to ensure that it moves smoothly and that the hinges are properly aligned. Make any necessary adjustments to ensure a proper fit.
6. Install the handles: Determine the desired height for the handles on the doors. Use a measuring tape to ensure consistency. Mark the handle locations on the doors and pre-drill pilot holes using a drill bit appropriate for the handle screws. Attach the handles using the provided screws.
By carefully following these steps, you will successfully install the hinges and handles on your gun cabinet doors. Properly installed hinges and handles ensure smooth operation and secure closure of the doors, enhancing the functionality and aesthetics of your cabinet.
With the hinges and handles installed, you’re ready to move on to Step 7: Adding Shelves and Dividers. This step will provide organization and customization to your gun cabinet, allowing you to store your firearms and accessories efficiently.
Step 7: Adding Shelves and Dividers
In this step, you will add shelves and dividers to your gun cabinet, providing organization and structure to store your firearms and accessories. By customizing the interior of the cabinet, you can create a space that meets your specific storage needs. Follow these steps for adding shelves and dividers:
1. Measure and mark: Measure the height and width of the cabinet interior to determine the dimensions for your shelves and dividers. Consider the size and number of firearms you plan to store.
2. Cut the shelves and dividers: Use a circular saw or table saw to cut plywood panels to the desired dimensions for your shelves and dividers. Ensure clean, straight cuts to achieve a professional finish.
3. Install the shelves: Position the shelves inside the cabinet by placing them on support brackets or directly securing them to the cabinet frame. Use a level to ensure they are straight and even. For adjustable shelves, install shelf pins or supports that allow for height adjustments.
4. Add dividers: Dividers can help in organizing your firearms and preventing them from moving around. Measure and cut dividers from plywood to fit securely in the cabinet. Install the dividers vertically or horizontally as per your preference.
5. Secure the shelves and dividers: Attach the shelves and dividers to the cabinet using screws or brad nails. Ensure they are securely fastened to withstand the weight of your firearms and any additional accessories you plan to store.
6. Test the stability: Once all shelves and dividers are installed, check their stability by gently applying pressure and ensuring that they are properly secured. Make any necessary adjustments to ensure a stable and sturdy interior structure.
7. Consider additional storage options: Depending on your needs, you may want to add hooks or racks to hang accessories like holsters, cleaning kits, or range bags. This will maximize the storage capacity and organization of your gun cabinet.
By following these steps, you will be able to add shelves and dividers to your gun cabinet, creating a well-organized and functional interior space. This will make it easier to store and access your firearms and accessories.
With the shelves and dividers in place, you’re now ready for Step 8: Sanding and Finishing. This step will give your gun cabinet a polished and professional appearance.
Read more: How To Build A Shelf In A Cabinet
Step 8: Sanding and Finishing
After completing the construction and interior organization of your gun cabinet, it’s time to focus on sanding and finishing. This step will help refine the wood surfaces and enhance the overall appearance of your cabinet. Follow these steps to effectively sand and finish your gun cabinet:
1. Prepare your workspace: Set up a clean and well-ventilated area for sanding and finishing. Cover the work surface with a drop cloth or protective material to catch any dust or drips.
2. Sand the wood surfaces: Use medium-grit sandpaper or a sanding block to sand all visible wood surfaces of the cabinet, including the frame and doors. Sand with the grain of the wood to avoid scratches or inconsistencies. Focus on smoothing out any rough edges, imperfections, or noticeable seams between wood panels.
3. Progress to finer-grit sandpaper: After sanding with medium-grit sandpaper, switch to a finer-grit sandpaper, such as 220-grit. Continue sanding to achieve a smooth and uniform surface. This step helps to prepare the wood for the application of the finish.
4. Remove sanding dust: Use a damp cloth or tack cloth to remove any sanding dust from the wood surfaces. This ensures a clean and pristine surface for the finish.
5. Apply the wood finish: Choose a wood finish that matches your desired look and provides adequate protection to the wood. This may include stain, paint, varnish, or a combination of products. Follow the manufacturer’s instructions for the chosen finish and apply it evenly to all surfaces. Consider applying multiple coats for the desired depth and durability.
6. Allow the finish to dry: Give the finish ample time to dry between coats and after the final application. Follow the manufacturer’s recommended drying times to ensure a proper curing process. Keep the cabinet in a well-ventilated area to aid the drying process.
7. Perform a final sanding (optional): If desired, lightly sand the surfaces between coats of finish with a fine-grit sandpaper. This step can help achieve a smoother surface and remove any raised grain or imperfections.
8. Polish and buff: Once the finish is fully dry, use a soft cloth to lightly polish and buff the wood surfaces. This will enhance the shine and smoothness of the finish, giving your gun cabinet a professional and attractive appearance.
By following these steps, you will effectively sand and finish your gun cabinet, leaving it with a refined and beautiful look. The finishing process not only enhances the aesthetics of your cabinet but also protects the wood from moisture, scratches, and wear.
With the sanding and finishing complete, you’re ready for Step 9: Installing Locking Mechanisms. This step will help ensure the security and safe storage of your firearms.
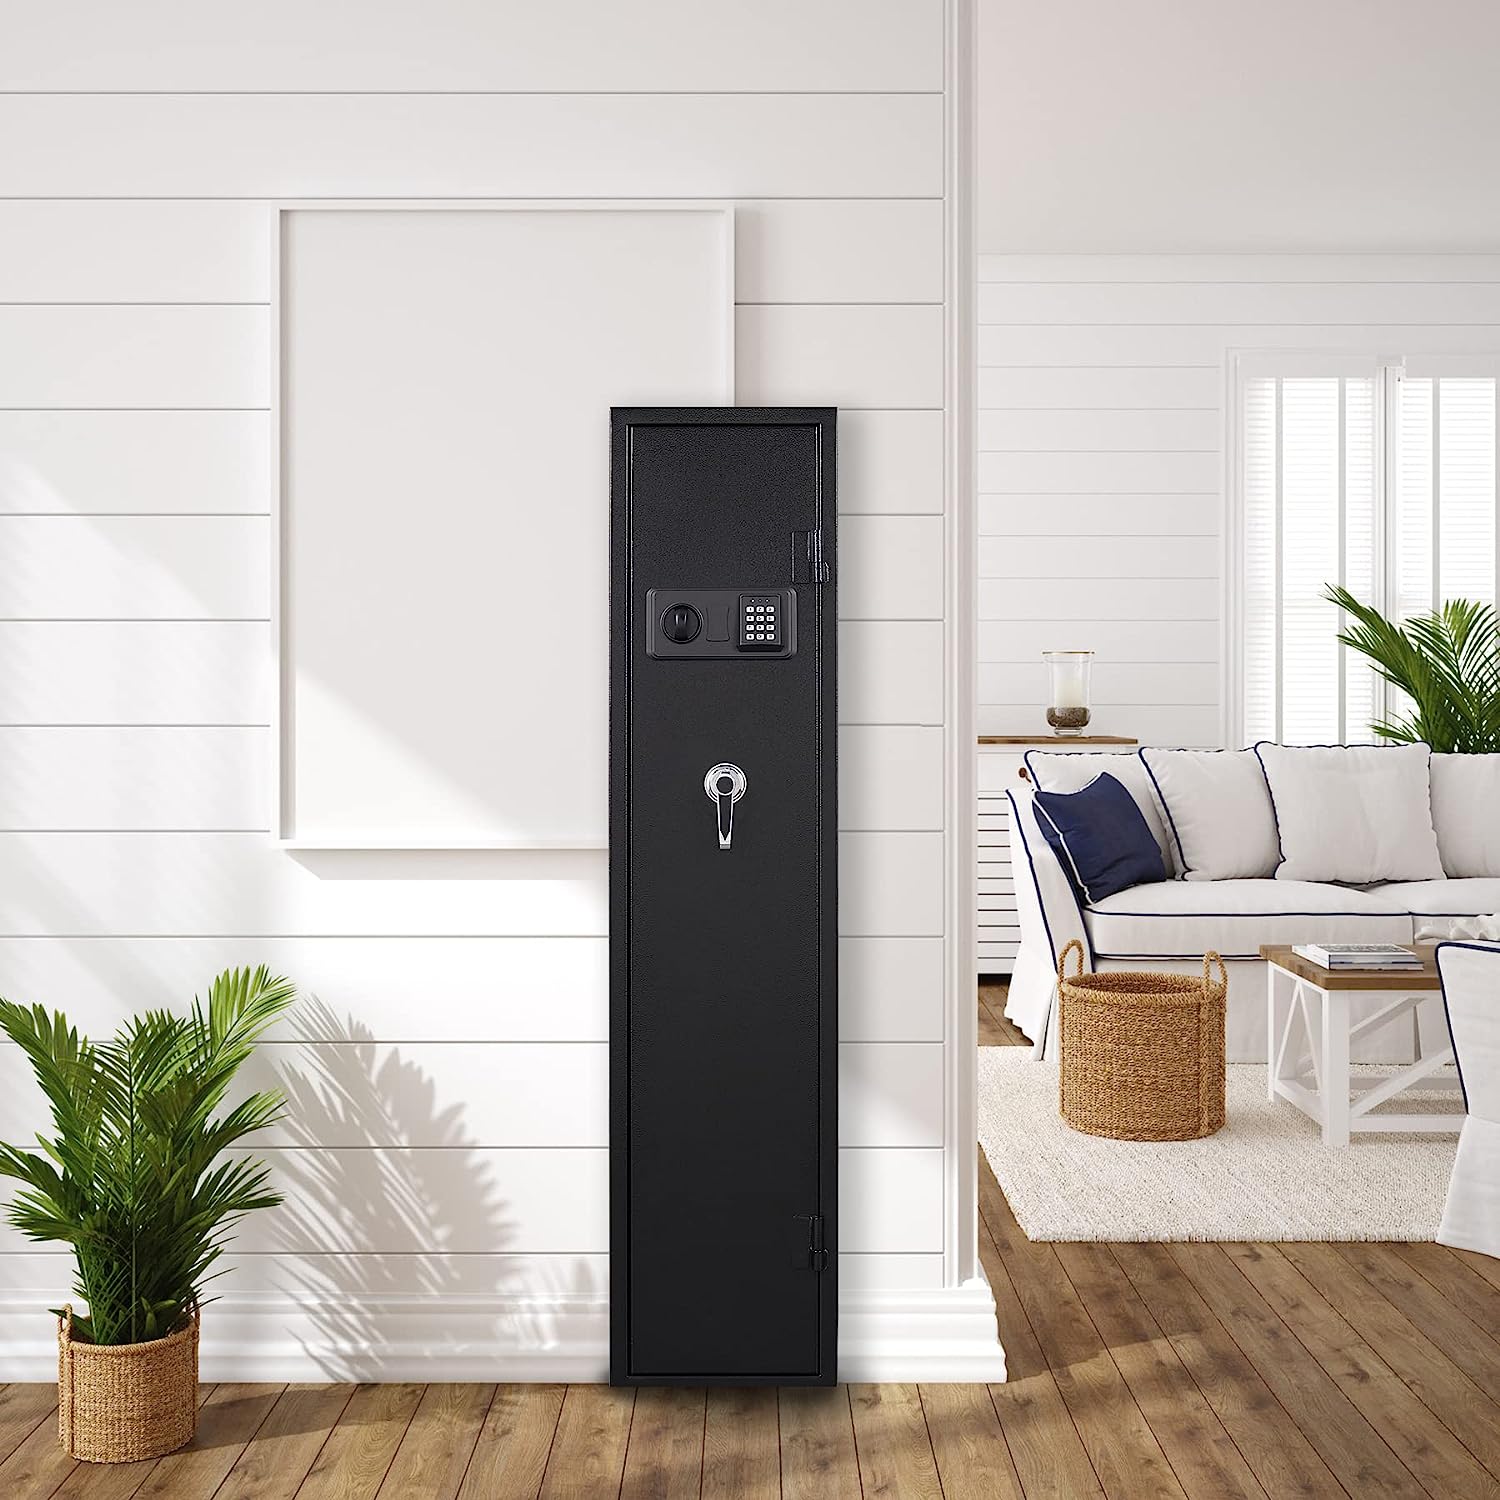
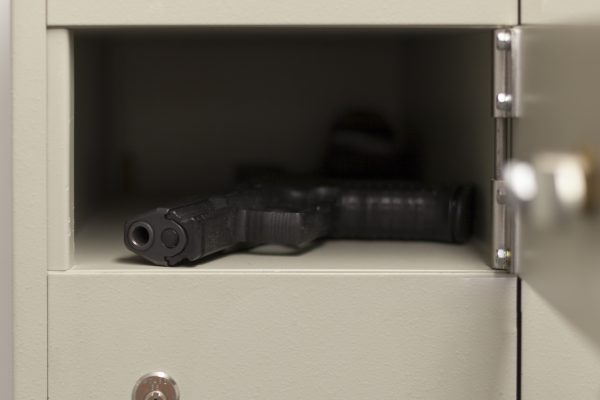
Step 9: Installing Locking Mechanisms
Ensuring the security of your firearms is of utmost importance. Step 9 involves installing locking mechanisms to provide an added level of protection and prevent unauthorized access to your gun cabinet. Follow these steps to effectively install locking mechanisms:
1. Determine the type of locking mechanism: There are various types of locking mechanisms available, including traditional key locks, combination locks, electronic locks, and biometric locks. Consider your preference, budget, and level of security desired when choosing the type of lock for your gun cabinet.
2. Measure and mark: Determine the ideal placement of the locking mechanism on the cabinet doors or frame. Measure and mark the correct locations for the lock and any accompanying hardware, such as bolts or strike plates.
3. Pre-drill pilot holes: Using a drill bit appropriate for the size of the screws or bolts accompanying the locking mechanism, pre-drill pilot holes at the marked locations. This will ensure that the screws or bolts can be installed securely without damaging the wood.
4. Install the locking mechanism: Attach the main locking mechanism to the cabinet according to the manufacturer’s instructions. Securely tighten the screws or bolts to ensure that the lock is firmly in place.
5. Test the lock: Before considering the installation complete, test the lock to ensure that it functions properly. Ensure that the key turns smoothly or that the combination or electronic mechanism operates without any issues. Verify that the lock securely holds the cabinet doors closed.
6. Consider additional security measures: In addition to the primary locking mechanism, you may want to further enhance the security of your gun cabinet. This can include installing secondary locks, reinforcing the cabinet frame, or integrating an alarm system. These measures can provide added peace of mind and further deter unauthorized access.
7. Store keys or combinations safely: Remember to keep the keys or the combination to your gun cabinet in a secure location away from unauthorized individuals. Consider utilizing a lockbox, safe, or other secure storage option for these items.
By following these steps, you will effectively install locking mechanisms to enhance the security of your gun cabinet. These measures will help safeguard your firearms and prevent unauthorized access.
With the locking mechanisms in place, you’re now ready for the final step: Step 10: Final Touches and Safety Considerations. This step will ensure the completion and proper use of your gun cabinet.
Step 10: Final Touches and Safety Considerations
As you near the completion of your gun cabinet project, Step 10 focuses on adding final touches and ensuring important safety considerations. These final steps will help ensure that your gun cabinet is not only visually appealing but also safe and secure for storing your firearms. Follow these guidelines for the finishing touches and safety considerations:
1. Clean and inspect: Thoroughly clean the entire gun cabinet, removing any dust or debris that may have accumulated during the construction process. Inspect the cabinet for any loose screws, nails, or splinters that may present hazards.
2. Secure the gun cabinet: Properly secure the gun cabinet to the wall or floor to prevent tipping or tampering. Use heavy-duty screws or bolts and ensure that the cabinet is securely anchored in place.
3. Apply a final protective coating: Consider applying a final protective coating, such as polyurethane or lacquer, to the entire cabinet. This will provide an additional layer of protection against wear, moisture, and other elements.
4. Place warning labels: Affix warning labels or signs on the gun cabinet to remind individuals of the importance of firearm safety and to indicate that access to the cabinet is restricted.
5. Organize and place firearms: Carefully organize your firearms inside the gun cabinet, placing them in a way that minimizes the risk of accidental damage or discharge. Consider using gun racks or foam inserts to securely hold each firearm in place.
6. Educate household members: Ensure that all members of your household are aware of gun safety measures and the importance of keeping firearms securely stored. Educate them on proper handling and discourage unauthorized access to the gun cabinet.
7. Check and maintain regularly: Regularly check the condition of the gun cabinet and its locking mechanisms. Ensure that the cabinet is always locked when not in use and that the key or combination is kept secure.
8. Comply with local laws: Be aware of and adhere to local laws and regulations concerning firearm storage and safety. Familiarize yourself with any specific requirements that may apply in your jurisdiction.
9. Review insurance coverage: Consider reviewing your homeowner’s insurance policy to ensure that your firearms are adequately covered in case of any unfortunate events. Update your policy if necessary.
By following these final touches and safety considerations, you will complete your gun cabinet project with confidence, knowing that it meets both aesthetic and safety requirements. Remember to prioritize safety at all times and enforce responsible firearm handling within your household.
Congratulations on completing your gun cabinet! You have now created a secure and organized space to store your firearms. Enjoy the peace of mind that comes with knowing your firearms are safely stored and protected.
Disclaimer: The recommendations and suggestions provided in this guide are for informational purposes only. It is essential to research and comply with local laws and regulations regarding gun storage and safety. Consult with local authorities or a professional for specific guidance.
Conclusion
Building your own gun cabinet is a rewarding and fulfilling project that allows you to showcase your woodworking skills while ensuring the safe and secure storage of your firearms. Throughout this guide, we have walked you through the step-by-step process of designing, constructing, and completing your gun cabinet. By following these steps and incorporating safety considerations, you can create a functional and visually appealing cabinet that meets your specific storage needs.
From selecting the right materials and tools to cutting and assembling the wood panels, building the cabinet frame, and adding shelves and dividers, each step has brought you closer to achieving a custom-designed gun cabinet. Installing hinges and handles, applying a finish, and installing locking mechanisms are vital for enhancing the cabinet’s functionality and security.
However, it’s important to remember that this guide serves as a general outline, and you should always research and comply with local laws and regulations regarding gun storage and safety. Consulting with local authorities will help ensure that your gun cabinet meets the necessary requirements in your area.
As a responsible gun owner, it is your duty to prioritize safety at all times. Educate household members on proper firearm handling, restrict access to the cabinet to authorized individuals only, and regularly check and maintain the cabinet to ensure its optimal condition.
By embarking on this DIY project, you have not only crafted a functional and secure storage solution for your firearms but also gained valuable woodworking skills and knowledge. You can take pride in the fact that you built a custom gun cabinet that meets your specific needs and preferences.
Remember, safety should always be the top priority when it comes to firearm storage. By building and using a gun cabinet, you are taking a crucial step towards responsible firearm ownership.
Congratulations on completing your gun cabinet project! Enjoy the peace of mind that comes with knowing your firearms are safely stored and protected.
Frequently Asked Questions about How To Build Gun Cabinet
Was this page helpful?
At Storables.com, we guarantee accurate and reliable information. Our content, validated by Expert Board Contributors, is crafted following stringent Editorial Policies. We're committed to providing you with well-researched, expert-backed insights for all your informational needs.


0 thoughts on “How To Build Gun Cabinet”