Articles
How To Make A Drop Ceiling Look Better
Modified: September 1, 2024
Learn practical tips and strategies on how to enhance the appearance of a drop ceiling with these informative articles. Transform your space and create a more aesthetically pleasing environment.
(Many of the links in this article redirect to a specific reviewed product. Your purchase of these products through affiliate links helps to generate commission for Storables.com, at no extra cost. Learn more)
Introduction
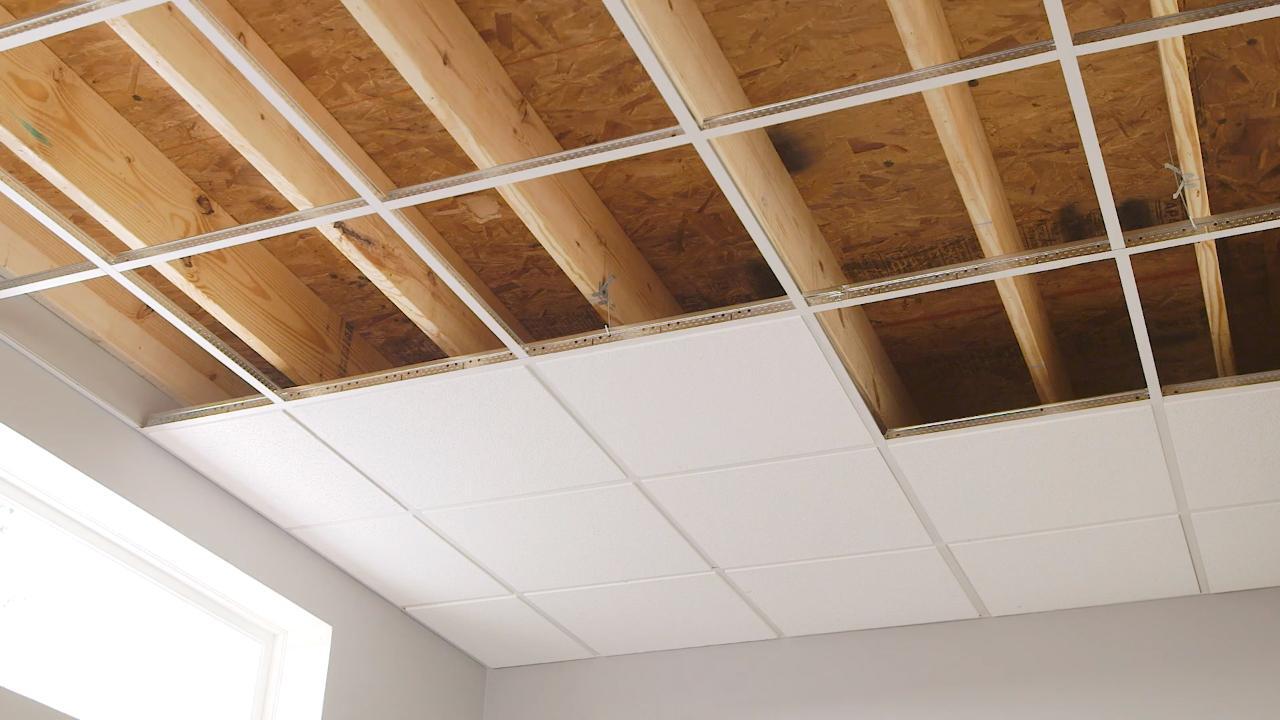
A drop ceiling, also known as a suspended ceiling or false ceiling, is a common feature in many homes and commercial buildings. While it serves practical purposes such as hiding plumbing, electrical wiring, and HVAC systems, it is often considered an eyesore due to its plain and utilitarian appearance. However, with a few creative and strategic modifications, you can transform your drop ceiling into a visually appealing and stylish element in your space.
In this article, we will explore various techniques and ideas on how to make a drop ceiling look better. From choosing the right materials to incorporating decorative elements, we will guide you through the process of transforming your ordinary drop ceiling into a standout feature that adds charm and character to your environment.
Key Takeaways:
- Transform your drop ceiling with materials like acoustic tiles, metal tiles, wood tiles, or translucent/frosted tiles to add style and personality while improving sound insulation and natural light.
- Elevate your drop ceiling with accent lighting, decorative panels, crown molding, ceiling medallions, wood beams, fabric, or faux finishes to create a visually stunning and inviting atmosphere.
Read more: How To Make Siding Look Better
Choosing the Right Materials
The first step in making your drop ceiling look better is to choose the right materials. While the standard tiles used in drop ceilings are often plain and uninspiring, there are alternative options available that can completely transform the look and feel of your ceiling.
One popular option is to use acoustic ceiling tiles with a more visually appealing design. These tiles are available in a variety of patterns, textures, and colors, allowing you to customize the look of your ceiling to suit your style and taste. Additionally, acoustic tiles can help improve sound insulation in your space, making it a practical and aesthetic choice.
Another alternative is to use metal ceiling tiles, which can add a touch of elegance and sophistication to your drop ceiling. Metal tiles are available in different finishes, such as copper, brass, or tin, and can create a stunning visual impact in any room. They are durable, easy to clean, and can be painted to match your desired color scheme.
If you prefer a more natural look, consider using wood ceiling tiles. Wood tiles bring warmth and texture to a space, creating a cozy and inviting atmosphere. They are available in various wood species and finishes, allowing you to achieve the desired aesthetic effect.
Additionally, you may also consider using translucent or frosted ceiling tiles. These tiles can help enhance natural light in your space, making it brighter and more welcoming. They can be particularly useful in areas that lack windows or natural light sources.
When choosing the right materials for your drop ceiling, it’s important to consider factors such as durability, ease of installation, and maintenance requirements. Take the time to explore different options and consider consulting a professional to ensure you make the best choice for your specific needs and preferences.
Applying New Paint
One of the simplest and most effective ways to enhance the look of your drop ceiling is by applying a fresh coat of paint. A new color can completely transform the appearance of the ceiling and create a more cohesive and stylish look in the space.
When choosing a paint color, consider the overall aesthetic of the room and the mood you want to create. Lighter colors, such as whites, creams, or pastels, can help make the space feel larger and brighter. On the other hand, darker colors, like grays or deep blues, can add drama and sophistication to the room.
Before you start painting, make sure to properly prepare the surface of the ceiling by cleaning it and repairing any imperfections, such as cracks or water stains. Use a high-quality primer to ensure proper adhesion of the paint and to achieve a smooth and even finish.
When it comes to applying the paint, you have a few options. You can use a roller for larger areas of the ceiling and a brush for the edges and corners. Alternatively, if you want to achieve a more professional and seamless look, consider using a paint sprayer. A paint sprayer can ensure an even application and eliminate brush or roller marks.
Remember to apply multiple coats of paint if needed, allowing sufficient drying time between each coat. This will help achieve a solid and uniform color on the ceiling.
Additionally, don’t forget to consider the finish of the paint. A flat or matte finish can hide imperfections and create a more subtle look, while a semi-gloss or high-gloss finish can add shine and reflect light in the room.
By applying a new coat of paint to your drop ceiling, you can instantly update its appearance and breathe new life into your space.
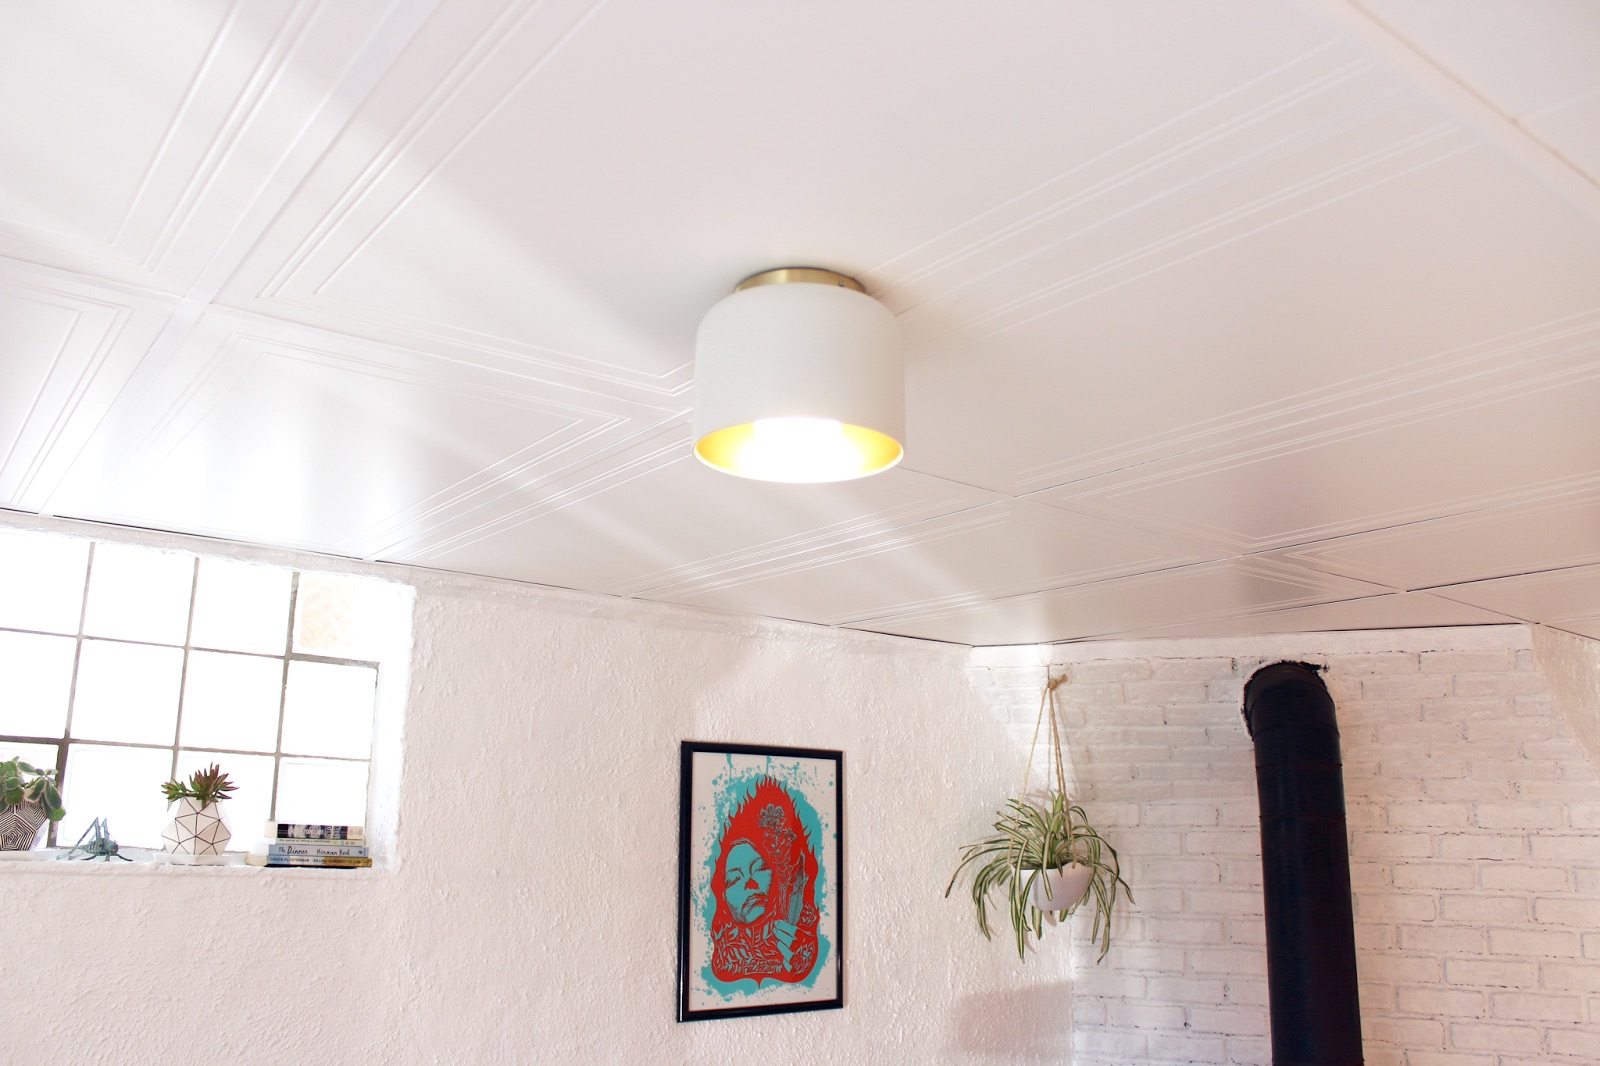
Installing Accent Lighting
Adding accent lighting to your drop ceiling is a fantastic way to create a captivating and inviting ambiance in your space. Accent lighting refers to strategically placed lights that highlight specific areas or features, adding depth and visual interest to the room.
There are various types of accent lighting that you can consider for your drop ceiling. One popular option is recessed lighting, also known as can lights. These lights are installed into the ceiling, providing a seamless and clean look. Recessed lights can be used to highlight artwork, architectural features, or specific areas in the room, such as a dining table or a reading nook.
Another option is track lighting, which consists of multiple light fixtures mounted on a track that can be adjusted to focus light on different areas. Track lighting is versatile and can be easily customized to suit your specific lighting needs. It can be used to highlight specific artwork, decorative elements, or create a general warm and inviting atmosphere.
String lights are another popular choice for accent lighting in a drop ceiling. These lights can be draped across the ceiling to create a whimsical and enchanting effect. They work especially well in spaces such as bedrooms, living rooms, or outdoor patios, where a cozy and romantic atmosphere is desired.
In addition to traditional lighting fixtures, you can also consider using LED strip lights to add accent lighting to your drop ceiling. These lights are flexible and can be easily installed along the edges or middle of the ceiling tiles. They come in a variety of colors and can be dimmed to create the desired ambiance.
When installing accent lighting, it’s important to consider the wiring requirements, safety measures, and the overall balance of light in the room. If you are not experienced with electrical work, it’s recommended to consult a professional electrician to ensure a safe and proper installation.
By incorporating accent lighting into your drop ceiling, you can create a stunning visual impact and transform your space into a welcoming and extraordinary environment.
Incorporating Decorative Panels
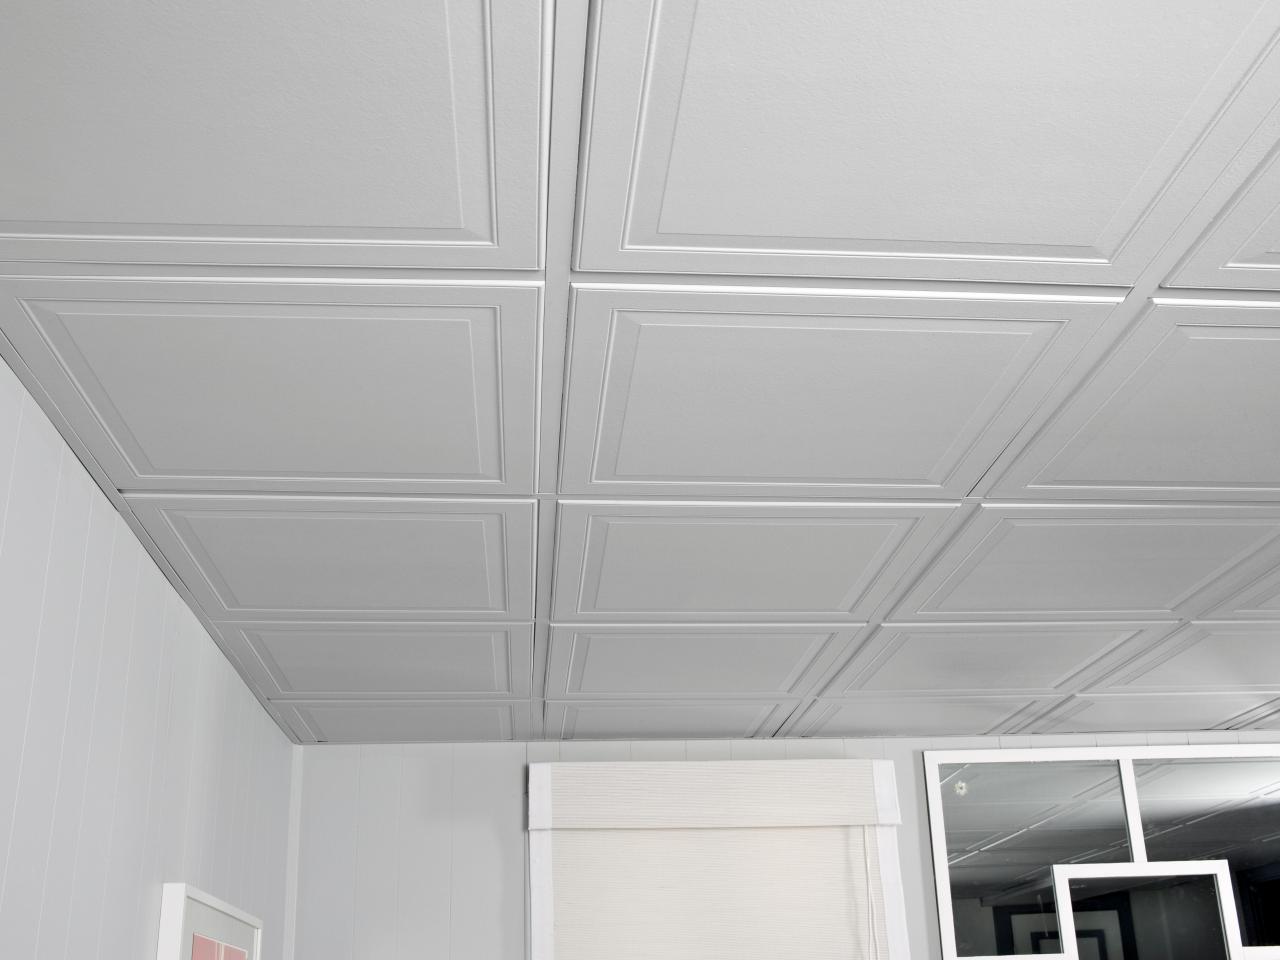
To elevate the look of your drop ceiling, consider incorporating decorative panels. These panels are designed to replace or cover the standard tiles, adding texture, pattern, and visual interest to your ceiling.
There are numerous types of decorative panels available, allowing you to choose a design that complements the style of your space. One popular option is embossed or textured panels, which feature raised patterns or designs that add depth and dimension to the ceiling. These panels are often made of lightweight materials such as PVC or foam, making them easy to install and maintain.
If you prefer a more contemporary or modern look, consider using geometric or 3D panels. These panels feature intricate patterns or shapes that create a visually stunning effect. They can be made from a variety of materials, including metal, wood, or gypsum, and add a unique and artistic touch to your drop ceiling.
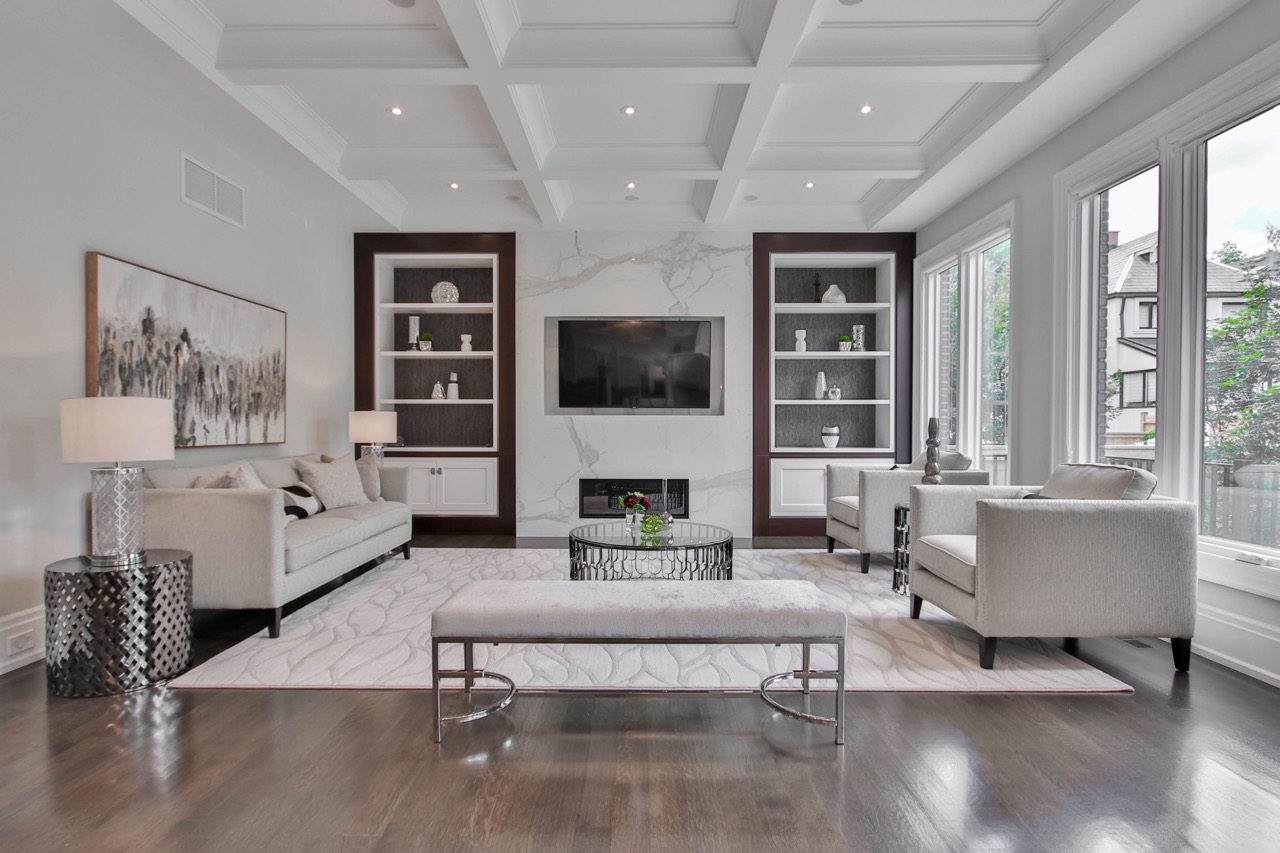
For a more traditional or elegant aesthetic, you can choose decorative panels that mimic the look of coffered ceilings. These panels create the illusion of classic architectural details, such as beams or ornate molding, and can transform your drop ceiling into a focal point of the room. They are typically made from lightweight materials like foam or high-density polyurethane and can be easily installed over the existing tiles.
When incorporating decorative panels into your drop ceiling, it’s essential to consider the size and layout of the room. Opt for panels that are appropriately scaled to the space and ensure that the pattern or design complements the overall aesthetic. Additionally, make sure to carefully follow the manufacturer’s instructions for installation and use proper adhesive or clips to secure the panels in place.
By incorporating decorative panels, you can add style and personality to your drop ceiling, transforming it from a plain and utilitarian feature into a beautiful and visually captivating element in your space.
Read more: How To Make Vertical Blinds Look Better
Adding Crown Molding
Add a touch of elegance and sophistication to your drop ceiling by incorporating crown molding. Crown molding is a decorative trim that is installed where the ceiling meets the walls, creating a seamless transition between the two surfaces and adding architectural interest to the space.
When choosing crown molding for your drop ceiling, consider the style of the room and the overall aesthetic you want to achieve. There are various types of crown molding available, ranging from simple and understated designs to more elaborate and ornate options.
Before installation, ensure that the drop ceiling is properly prepared. This may involve removing the existing tiles around the perimeter of the room where the crown molding will be installed. Measure and cut the molding to fit the length of each wall, making mitered cuts in the corners for a seamless appearance.
To attach the crown molding, use construction adhesive or nails, ensuring that it is securely fastened to the walls. Fill any gaps or seams with wood filler and sand the molding to create a smooth and cohesive look.
The addition of crown molding to your drop ceiling instantly elevates its appearance, giving it a polished and refined finish. This architectural detail not only adds visual interest but can also make the space feel more grand and luxurious.
Consider painting the crown molding in a color that complements the ceiling and walls for a cohesive look. You can also use a contrasting color to create a statement piece and draw attention to the molding.
Whether your space is traditional, modern, or somewhere in between, crown molding can enhance the overall aesthetic and create a visually appealing and cohesive look in your room.
Consider painting the drop ceiling tiles with a fresh coat of paint to give them a cleaner and more modern look. Choose a color that complements the rest of the room for a cohesive appearance.
Utilizing Ceiling Medallions
If you want to add a touch of elegance and vintage charm to your drop ceiling, consider utilizing ceiling medallions. Ceiling medallions are decorative elements that are typically installed in the center of the ceiling, surrounding light fixtures or fans.
These ornamental circular or oval-shaped pieces are available in a variety of designs and materials, including polyurethane, wood, or metal. They can feature intricate patterns, textures, or motifs that add visual interest and a focal point to your drop ceiling.
To install a ceiling medallion, start by turning off the power to the light fixture. Carefully remove the light fixture or fan from the ceiling, exposing the electrical box. Hold the medallion against the ceiling and mark the center where the electrical box is located.
Next, apply adhesive or construction glue to the back of the medallion and position it over the electrical box, aligning the center hole of the medallion with the hole in the ceiling. Press the medallion firmly against the ceiling to ensure a secure bond.
Once the adhesive is dry and the medallion is securely in place, reattach the light fixture or fan to the medallion, following the manufacturer’s instructions.
Ceiling medallions not only add visual interest but they also create a sense of architectural elegance and elevate the overall aesthetic of the room. They can be used in various spaces, including dining rooms, living rooms, or entryways, to create a focal point and make a statement.
For a cohesive look, consider painting the medallion in a coordinating color with the ceiling or contrast it with a bold hue to create a visual impact. Additionally, you can enhance the medallion’s appearance by adding light fixtures that complement its design or by placing a chandelier or pendant light in the center of the medallion.
By utilizing ceiling medallions, you can transform your drop ceiling into a stunning focal point that adds character and a vintage touch to your space.
Installing Wood Beams
If you want to create a rustic and inviting atmosphere in your space, consider installing wood beams on your drop ceiling. Wood beams add warmth, character, and architectural interest, instantly transforming the look and feel of the room.
Before you start the installation process, it’s important to choose the right type of wood for your beams. Popular options include reclaimed wood, solid wood, or faux wood beams made from high-density polyurethane. Each type has its own unique characteristics and benefits, so consider your budget, desired look, and maintenance requirements when making your choice.
To install wood beams, start by measuring the length and width of the beams you want to install. Cut the beams to size and sand them to achieve a smooth finish. Next, locate the positions where the beams will be attached to the ceiling, ensuring they are evenly spaced and aligned.
Using a stud finder, locate the ceiling joists or support beams. Mark their locations on the ceiling. For added stability, it’s best to attach the wood beams to these underlying structures.
Next, use a drill to create pilot holes in the wood beams. Align the pilot holes with the marked positions on the ceiling. Attach the beams to the ceiling using wood screws, making sure they are securely fastened.
After all the beams are attached, fill any gaps or seams with wood filler and sand the beams to achieve a cohesive and seamless look. You can then choose to stain the wood beams to enhance their natural beauty or paint them to match your desired color scheme.
Wood beams not only add visual interest but they also create a cozy and inviting atmosphere in the room. They work well in spaces such as living rooms, kitchens, or bedrooms, adding a touch of natural beauty and architectural charm.
To complete the look, consider decorating the beams with accessories such as hanging plants, string lights, or even draping fabric for a romantic and whimsical touch.
By installing wood beams on your drop ceiling, you can achieve a rustic and charming look that elevates the overall aesthetic of your space.
Concealing with Fabric
If you want to create a soft and elegant look for your drop ceiling, consider concealing it with fabric. Fabric is a versatile material that can add texture, color, and visual interest to your space while giving your ceiling a tailored and finished appearance.
One of the simplest ways to use fabric to conceal your drop ceiling is by draping it from one end of the room to the other, creating a canopy effect. This works particularly well in spaces such as bedrooms, living rooms, or dining areas, where a touch of luxury and romance is desired.
To begin, measure the length and width of your room and choose a fabric that complements your overall color scheme and style. Lightweight and sheer fabrics like chiffon or voile can create a dreamy and ethereal look, while heavier fabrics like velvet or satin can add drama and opulence to the space.
Install curtain rods or hooks on the walls or use a ceiling-mounted curtain track system to hang the fabric. Measure the desired length of the fabric panels and cut them accordingly, leaving extra material for draping and gathering.
Attach the fabric panels to the curtain rods or hooks, allowing them to hang and cascade down from the ceiling. You can experiment with different draping techniques, such as gathering them in the center or letting them flow freely along the edges of the room.
In addition to a canopy effect, you can also create a more tailored look by installing fabric panels that cover the entire drop ceiling. Measure the dimensions of each ceiling tile and cut the fabric to fit, adding a few inches for hemming.
Use fabric adhesive or a hot glue gun to attach the fabric panels to the tiles, ensuring a secure and seamless bond. Smooth out any wrinkles or creases as you go along, taking care to align the patterns and edges of the fabric panels.
Concealing your drop ceiling with fabric can create a stunning visual impact and instantly transform the look of the room. It adds a softness and elegance that complements various design styles, whether it’s a traditional, modern, or bohemian aesthetic.
Remember, fabric can accumulate dust and may require occasional cleaning or replacement. Consider also the fire safety regulations in your area when using fabric near electrical components or fixtures.
By creatively using fabric to conceal your drop ceiling, you can add a touch of charm and sophistication to your space while creating a cozy and inviting atmosphere.
Read more: How To Make Basement Walls Look Better
Applying Faux Finishes
If you’re looking to add a touch of drama and sophistication to your drop ceiling, consider applying faux finishes. Faux finishes are techniques that imitate the appearance of materials like marble, stone, wood, or metal, allowing you to achieve a high-end look without the cost or maintenance requirements of the real materials.
There are various faux finishes you can apply to your drop ceiling, depending on the desired aesthetic and the existing style of the room.
One popular option is faux wood grain, which can give your drop ceiling the look of real wood. Start by applying a base coat of paint in your desired wood color. Once the base coat is dry, use a brush or a wood graining tool to create the illusion of wood grain by dragging it through a glaze or a slightly different shade of paint.
Another faux finish technique is faux stone or concrete. Begin by applying a base coat in a neutral color, imitating the natural tone of stone or concrete. Then, use a sponge or a rag to dab on various shades of paint in a random pattern to mimic the texture and appearance of stone or concrete.
If you want to add a luxurious touch to your drop ceiling, consider a faux metallic finish. Apply a metallic paint or glaze in your desired shade, such as gold, silver, or copper, using a brush or a sponge. You can also experiment with layering different metallic finishes to create a multidimensional effect.
To create the look of a faux tin ceiling, use metallic paint or glaze in silver or copper tones. Apply it to the drop ceiling using a brush or a roller, creating a pattern of squares or rectangles. Then, use a small brush or a sponge to add texture and depth by highlighting some areas with a darker shade of metallic paint or glaze.
Before applying any faux finishes to your drop ceiling, make sure to properly clean and prepare the surface. Fill any cracks or imperfections with spackling compound or putty, and sand the ceiling to create a smooth surface for painting. It’s also important to test the faux finish technique on a small area or a sample board before applying it to the entire ceiling.
Faux finishes can completely transform the appearance of your drop ceiling, giving it a custom and high-end look. They allow you to personalize your space and create a unique and visually striking atmosphere.
Remember to consider the overall style and color scheme of the room when choosing a faux finish. By selecting the right technique and executing it with precision, you can achieve stunning results and make your drop ceiling a focal point in your space.
Conclusion
Your drop ceiling doesn’t have to be a mundane and uninspiring feature in your space. With a little creativity and strategic modifications, you can transform it into a visually appealing and stylish element that enhances the overall aesthetic of your room.
From choosing the right materials and applying new paint to installing accent lighting and incorporating decorative panels, there are numerous techniques you can employ to make your drop ceiling look better.
Consider utilizing ceiling medallions or adding crown molding for an elegant and sophisticated touch. Installing wood beams or concealing the ceiling with fabric can create a cozy and inviting atmosphere. And if you’re looking for a more dramatic look, apply faux finishes or incorporate accent lighting to enhance the impact of your drop ceiling.
Remember, it’s important to choose materials and techniques that align with the style and functionality of your space. Consult with professionals if needed and always prioritize safety precautions during the installation process.
By applying these techniques, you can turn your ordinary drop ceiling into a standout feature that adds charm, character, and a unique visual appeal to your environment. So, don’t overlook your drop ceiling—embrace the opportunity to transform it into something extraordinary.
Your space will be not only functional but also visually stunning, providing you with a more enjoyable and aesthetically pleasing atmosphere.
So, go ahead and take the necessary steps to make your drop ceiling look better. Your efforts will be rewarded with a space that reflects your personal style and creates a lasting impression on all who enter.
Frequently Asked Questions about How To Make A Drop Ceiling Look Better
Was this page helpful?
At Storables.com, we guarantee accurate and reliable information. Our content, validated by Expert Board Contributors, is crafted following stringent Editorial Policies. We're committed to providing you with well-researched, expert-backed insights for all your informational needs.


0 thoughts on “How To Make A Drop Ceiling Look Better”