Home>Articles>How To Make A Horse Bit Into A Toilet Paper Holder
Articles
How To Make A Horse Bit Into A Toilet Paper Holder
Modified: October 28, 2024
Discover creative ways to repurpose horse bits with this step-by-step article on how to transform one into a unique and rustic toilet paper holder.
(Many of the links in this article redirect to a specific reviewed product. Your purchase of these products through affiliate links helps to generate commission for Storables.com, at no extra cost. Learn more)
Introduction
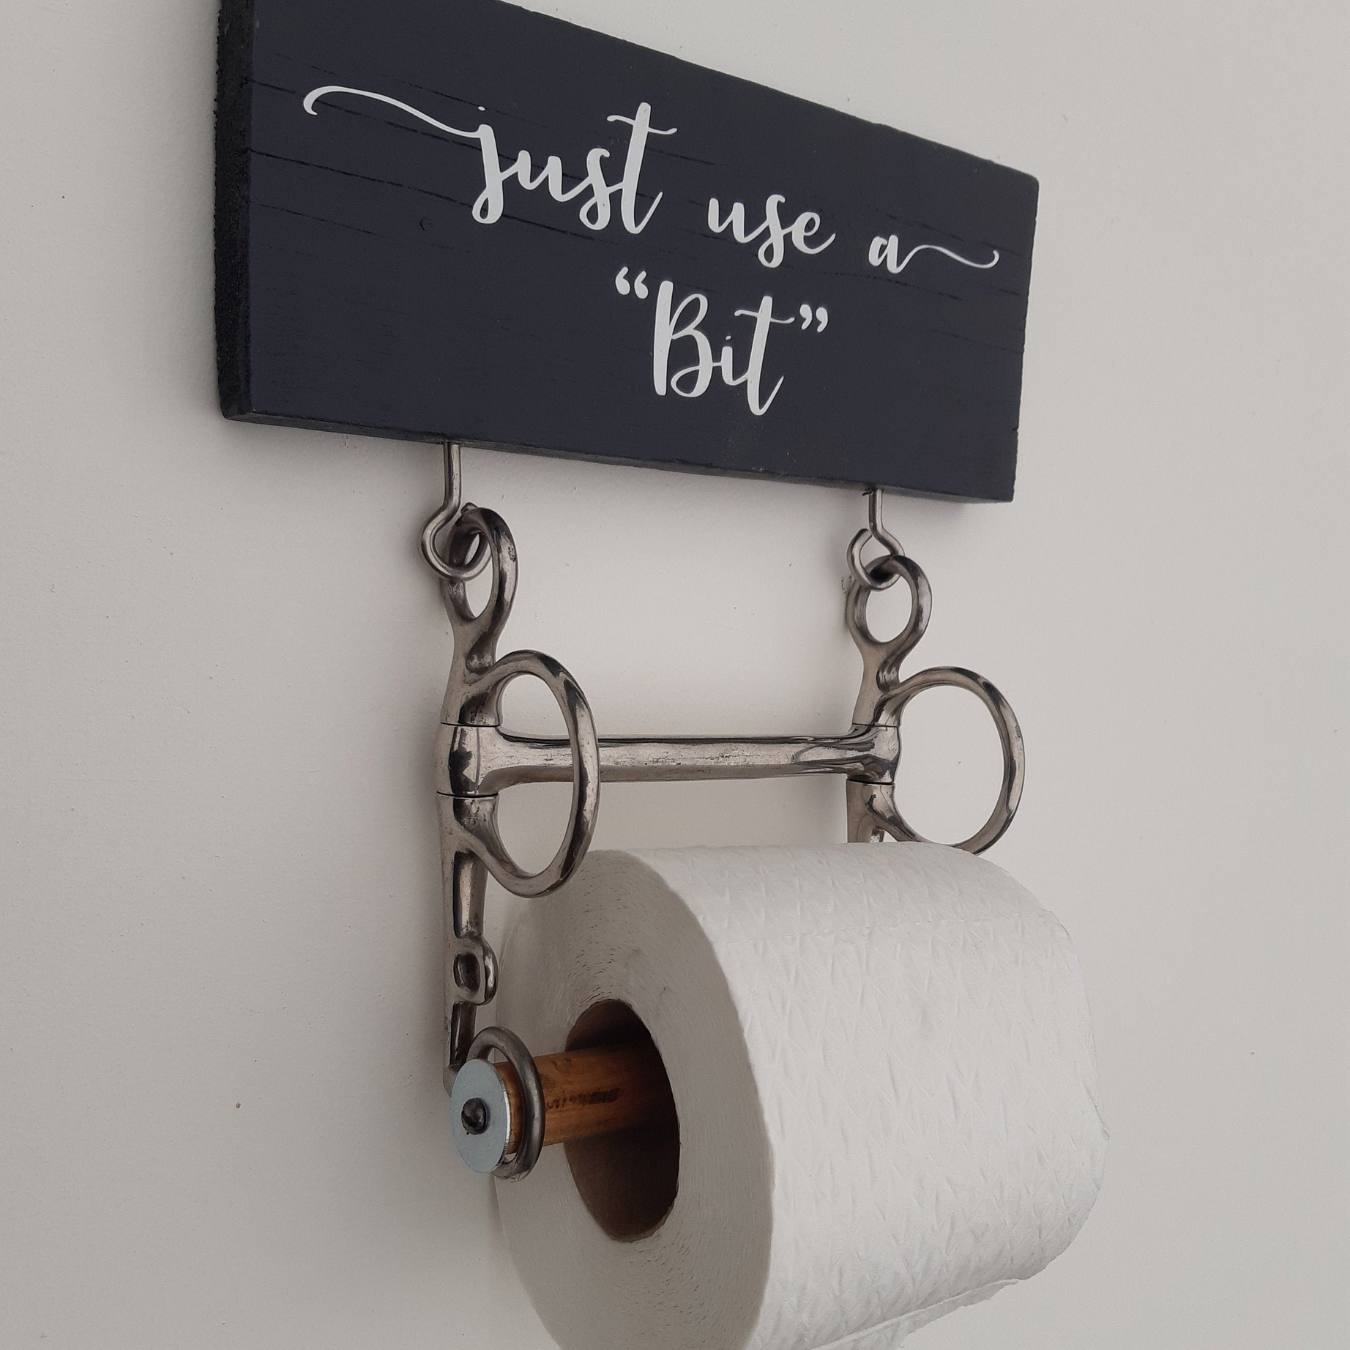
Welcome to our step-by-step guide on how to repurpose a horse bit into a unique and stylish toilet paper holder. If you have an old horse bit lying around, this DIY project is a fantastic way to give it a new lease on life and add a touch of equestrian charm to your bathroom decor.
Not only does repurposing items help reduce waste and promote sustainability, but it also allows you to create one-of-a-kind pieces that reflect your personal style and interests. So, whether you’re a horse lover looking for a creative way to incorporate your passion into your home or simply someone who appreciates the beauty of upcycling, this project is perfect for you.
Before we dive into the fun part of transforming the horse bit into a toilet paper holder, let’s gather all the materials you’ll need to complete this project successfully.
Key Takeaways:
- Repurpose a horse bit into a charming toilet paper holder to add equestrian flair to your bathroom while reducing waste and showcasing your creativity and passion for upcycling.
- Transform an old horse bit into a functional and visually appealing toilet paper holder by following a step-by-step guide, adding personal touches, and embracing sustainable DIY projects.
Read more: How To Make A Toilet Paper Holder
Gathering Materials
Before you can begin repurposing the horse bit, you’ll need to gather a few essential materials. Here’s a list of what you’ll need:
- A horse bit: Look for an old or unused horse bit that you’re willing to repurpose. You can find them at equestrian supply stores, online marketplaces, or even ask your local horse riding community if they have any spare bits they’d be willing to part with.
- Toilet paper holder brackets: You’ll need a set of toilet paper holder brackets to attach the horse bit to the wall securely. These brackets are easily found at hardware stores or online.
- Screws: Make sure you have screws that are suitable for attaching the brackets to the wall. The size of the screws will depend on the type of wall you have, so choose accordingly.
- A screwdriver or drill: You’ll need a screwdriver or drill to attach the brackets to the wall. Make sure you have the appropriate tool on hand before you begin.
- Painter’s tape: This will come in handy when you’re marking the placement of the brackets on the wall. Painter’s tape is easy to remove and won’t leave any residue.
- Decorative accents (optional): If you want to add some personal flair to your horse bit toilet paper holder, consider gathering decorative accents such as ribbons, ropes, or even small horse-themed charms that can be easily attached to the bit. This will help customize the holder and make it even more unique.
Once you have all the necessary materials, you’re ready to move on to the next step: preparing the horse bit for its new role as a toilet paper holder.
Preparing the Horse Bit
Before you can transform the horse bit into a functional toilet paper holder, it’s important to prepare it properly. Follow these steps to ensure the bit is clean and ready for its new purpose:
- Clean the horse bit: Start by thoroughly cleaning the bit. Use warm, soapy water to remove any dirt, grime, or residue. If needed, use a soft brush or toothbrush to gently scrub hard-to-reach areas. Rinse the bit and dry it completely before moving on to the next step.
- Inspect for damage: Carefully examine the horse bit for any signs of damage, such as breaks, sharp edges, or excessive rust. If you notice any issues that could compromise the safety or functionality of the toilet paper holder, it’s best to choose a different bit or consider repairing the damage if possible.
- Consider painting or polishing: Depending on the look you want to achieve, you can choose to leave the horse bit as is for a rustic or vintage feel. However, if you prefer a sleek and modern look, you can paint the bit using a spray paint suitable for metal surfaces or polish it to restore its original shine.
- Let it dry and cure: If you decide to paint the horse bit, make sure to let it dry and cure according to the manufacturer’s instructions. This step is crucial to ensure the paint adheres properly and doesn’t chip or flake off over time.
Once the horse bit is cleaned, inspected, and prepared to your satisfaction, you’re ready to move on to the next step: attaching the bit to the wall and transforming it into a functional toilet paper holder.
Attaching the Bit to the Wall
Now that you have a clean and prepared horse bit, it’s time to attach it to the wall and transform it into a stylish toilet paper holder. Follow these steps to securely mount the bit:
- Choose the ideal location: Determine the best spot in your bathroom to mount the horse bit. It should be easily reachable and in a convenient location for accessing the toilet paper.
- Measure and mark: Use a tape measure and a pencil to mark the exact placement of the brackets on the wall. Make sure the marks are level and evenly spaced.
- Align the brackets: Take the toilet paper holder brackets and align them with the marked spots on the wall. Double-check the alignment to ensure they are straight and centered.
- Attach the brackets: Using a screwdriver or drill, securely attach the brackets to the wall using the appropriate screws. Make sure they are tightly secured and in the correct position.
- Test the stability: Give the bit a gentle tug to test the stability of the brackets. If it feels loose or wobbly, reinforce the screws or brackets as necessary to ensure a firm hold.
Once the horse bit is securely mounted to the wall, it’s time to move on to the next step: adding a mechanism for holding the toilet paper roll.
To make a horse bit into a toilet paper holder, clean the bit thoroughly, attach it securely to a wooden board, and then mount the board to the wall. This will create a unique and rustic toilet paper holder.
Securing the Toilet Paper Roll
Now that the horse bit is securely attached to the wall, you’ll need to create a mechanism to hold the toilet paper roll in place. Follow these steps to ensure the roll stays firmly secured:
- Measure the width of the horse bit: Use a tape measure to determine the width of the horse bit. This measurement will help you determine the appropriate size of the mechanism needed to hold the toilet paper roll.
- Choose the holding mechanism: There are various options for securing the toilet paper roll to the horse bit. You can use a narrow metal rod, a spring-loaded spindle, or even repurpose a small curtain rod holder.
- Install the holding mechanism: Depending on the type of mechanism you chose, carefully install it onto the horse bit. This may involve using screws, brackets, or other hardware to securely attach it to the bit.
- Test the functionality: Place a toilet paper roll onto the holding mechanism and ensure it stays in place. Give it a gentle tug to make sure the roll doesn’t easily slip off the bit.
Once the toilet paper roll is securely held in place, you can move on to the final step: adding some finishing touches to your horse bit toilet paper holder.
Read more: How To Make Pipe Toilet Paper Holder
Adding Finishing Touches
With the horse bit securely mounted to the wall and the toilet paper roll in place, now it’s time to add some personal flair and finishing touches to your DIY toilet paper holder. Here are a few ideas to consider:
- Decorative accents: Enhance the visual appeal of your horse bit toilet paper holder by adding decorative accents. You can tie ribbons or ropes around the bit, or attach small horse-themed charms or trinkets to give it a personalized touch.
- Paint or stain: If you haven’t already painted or stained the horse bit, you can further customize the holder by adding a pop of color or choosing a stain that complements your bathroom decor. Be sure to use paint or stain suitable for metal surfaces and let it fully dry and cure before using the holder.
- Creative display: Consider displaying other equestrian-themed elements near the toilet paper holder to create a cohesive theme in your bathroom. This could include horse artwork, pictures, or even a small shelf with horse figurines.
- Maintenance and cleaning: Keep your horse bit toilet paper holder looking its best by regularly cleaning it with a soft cloth and mild soap. Avoid using harsh chemicals or abrasive materials that could damage the finish.
By adding these finishing touches, you’ll create a unique and visually appealing toilet paper holder that showcases your love for horses and adds a touch of charm to your bathroom decor.
Now that you’ve completed the process of repurposing a horse bit into a toilet paper holder, take a step back and admire your handiwork. Not only have you transformed an old item into something functional, but you’ve also added a unique and personal touch to your bathroom. Enjoy the satisfaction of knowing you’ve created a one-of-a-kind piece that reflects your creativity and passion.
Remember, repurposing items is not only a sustainable practice but also an opportunity to bring new life to old objects. So, why not explore more DIY projects and continue to find inventive ways to repurpose and upcycle items in your home?
With a bit of imagination and a touch of creativity, the possibilities are endless. Happy crafting!
Conclusion
Repurposing a horse bit into a unique and stylish toilet paper holder is a fun and creative DIY project that adds a touch of equestrian charm to your bathroom decor. By giving an old item a new purpose, you not only reduce waste but also create a visually appealing and functional piece that showcases your personal style and interests.
Throughout this step-by-step guide, we have explored the process of transforming a horse bit into a toilet paper holder, from gathering the necessary materials to adding finishing touches. By following these instructions, you can successfully repurpose a horse bit and create a one-of-a-kind toilet paper holder that adds character and charm to your bathroom.
Remember to thoroughly clean and prepare the horse bit before attaching it to the wall. Take the time to ensure the bit is securely mounted, using appropriate brackets and screws. Then, create a mechanism to hold the toilet paper roll firmly in place, ensuring it stays put when in use.
Don’t be afraid to add some personal flair and finishing touches to your horse bit toilet paper holder. Consider using decorative accents, painting or staining the bit, and creating a cohesive theme in your bathroom by displaying other equestrian-themed elements.
By repurposing items and embracing your creativity, you not only contribute to sustainable practices but also create a unique and personalized home. So, gather your materials, follow the steps outlined in this guide, and get ready to enjoy the satisfaction of a DIY project that adds a touch of equestrian charm to your bathroom.
Remember, the possibilities for repurposing and upcycling items are endless. So, continue exploring new projects and unleash your creativity to transform old items into functional and visually appealing pieces.
Happy crafting!
Frequently Asked Questions about How To Make A Horse Bit Into A Toilet Paper Holder
Was this page helpful?
At Storables.com, we guarantee accurate and reliable information. Our content, validated by Expert Board Contributors, is crafted following stringent Editorial Policies. We're committed to providing you with well-researched, expert-backed insights for all your informational needs.


0 thoughts on “How To Make A Horse Bit Into A Toilet Paper Holder”