Articles
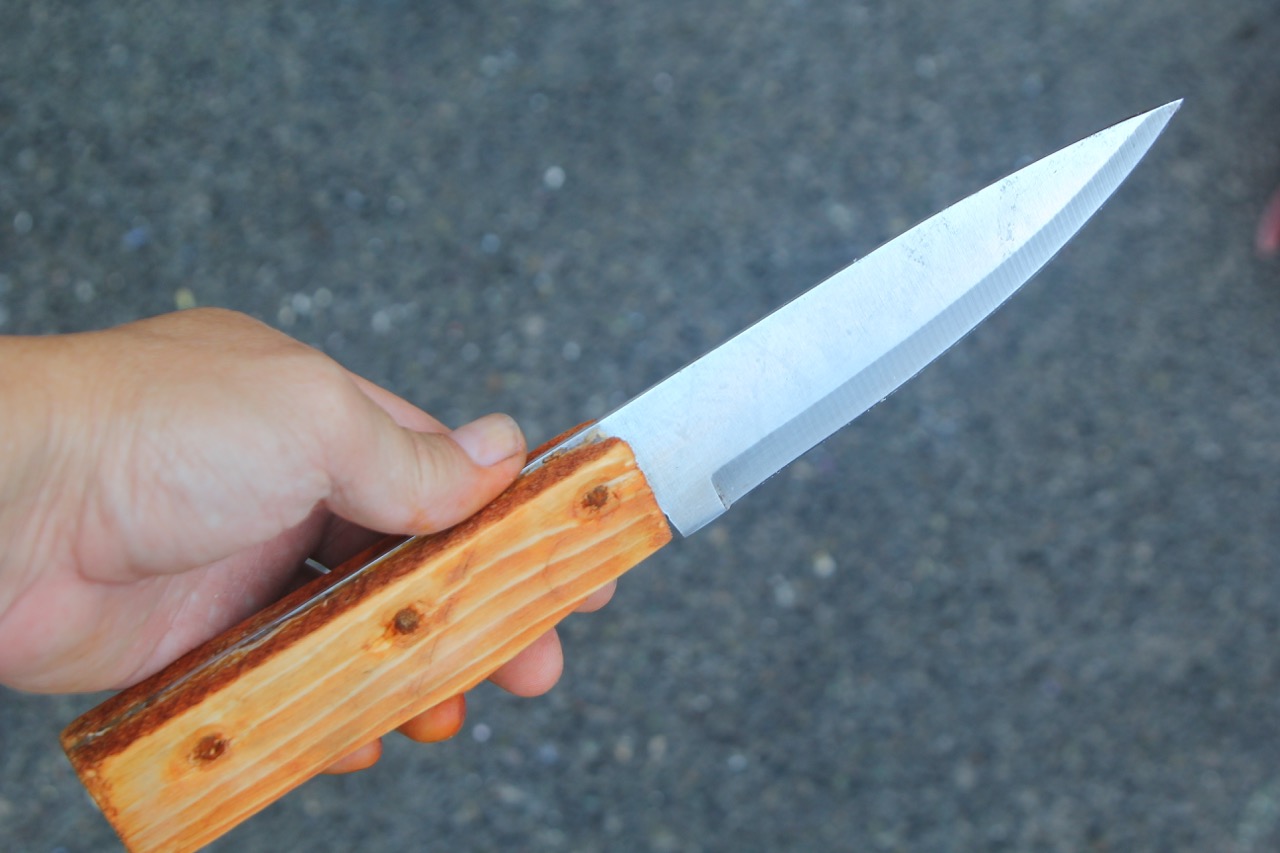
How To Make A Knife Handle With Hand Tools
Modified: January 19, 2024
Learn how to craft a unique and durable knife handle using only hand tools. Our step-by-step articles will guide you through the process with ease.
(Many of the links in this article redirect to a specific reviewed product. Your purchase of these products through affiliate links helps to generate commission for Storables.com, at no extra cost. Learn more)
Introduction
When it comes to making a knife, crafting a custom handle can add a unique touch and personal flair to your blade. While there are many methods and materials to choose from, this article will guide you through the process of making a knife handle with hand tools.
Creating a knife handle by hand allows you to have complete control over the design and outcome of your project. Whether you are a seasoned knife maker or a beginner looking to dive into the world of knife crafting, this step-by-step guide will help you bring your vision to life.
Before we dive into the process, let’s take a look at the materials you’ll need to get started:
Key Takeaways:
- Personalize your knife with a custom handle using hand tools. Choose from wood, bone, or synthetic materials and follow step-by-step instructions to create a unique, functional, and visually appealing handle.
- Prioritize safety and creativity while crafting a knife handle. From material selection to attaching the handle, enjoy the rewarding process of shaping, refining, and customizing your own one-of-a-kind knife handle.
Read more: How To Shape A Knife Blade With Hand Tools
Materials Needed
Before you embark on making a knife handle with hand tools, make sure you have the following materials ready:
- A knife blade
- A handle material of your choice (such as wood, bone, or synthetic materials)
- A coping saw or a small hand saw
- A rasp or a file
- Sandpaper in various grits (from coarse to fine)
- A chisel or a gouge
- A drill with bits
- A finish (such as lacquer or oil)
- Clamps or a vise
- Protective gear (such as safety glasses and gloves)
Once you gather these materials, you’ll be fully equipped to begin the process of creating your own unique knife handle. Remember to prioritize safety and take the necessary precautions throughout the entire process.
Step 1: Selecting the Knife Handle Material
The first step in making a knife handle is selecting the right material. The handle material not only plays a crucial role in the aesthetics of the knife but also determines its durability and comfort in use.
There are various options to choose from, each with its own unique qualities. Some popular handle materials include:
- Wood: Wood handles are versatile and offer a natural, warm feel. Hardwoods like walnut, ebony, or birch are commonly used for their strength and durability.
- Bone: Bone handles have a distinctive appearance and provide a traditional and classic look to the knife. They often require special treatment to ensure longevity.
- Synthetic materials: Materials like G-10, Micarta, or carbon fiber are popular choices due to their durability, resistance to moisture, and wide range of colors and patterns.
Consider the purpose and style of your knife when selecting the handle material. If it’s for a kitchen knife, you may prefer a moisture-resistant material like synthetic or stabilized wood. For a hunting or outdoor knife, a durable and weather-resistant material like bone or synthetic may be a better choice.
Once you have chosen your handle material, ensure that it is of suitable thickness to accommodate the tang of the knife blade. This is important for a secure and stable attachment.
Now that you have selected the material for your knife handle, it’s time to move on to the next step: designing the handle.
Step 2: Designing the Handle
Designing the handle of your knife is an important step in the customization process. The handle design not only affects the overall aesthetics of the knife but also plays a role in ergonomics and comfort during use.
Start by visualizing the shape and size of the handle that will best suit your needs and preferences. Consider the intended use of the knife and how it will feel in your hand. Do you prefer a handle with straight lines or a more contoured shape? Think about what will provide you with the best grip and control.
You can sketch your design on paper or use a CAD software to create a digital representation. Ensure that the design includes ample space for your fingers to wrap around the handle comfortably.
Next, transfer the design onto your chosen handle material. Use a pencil or marker to mark the measurements and outline of your handle on the material. This will serve as a guide as you shape and refine the handle.
Remember that the design of the handle is a personal preference, so take the time to experiment and make adjustments if necessary. The goal is to create a handle that not only looks visually appealing but also feels comfortable and secure in your hand.
Now that you have a design in place, it’s time to move on to the next step: marking the measurements on your handle material.
Step 3: Marking the Measurements
With your handle material and design ready, it’s time to mark the measurements on the material. This step will ensure precision and guide you as you shape the handle.
Start by placing the handle material on a flat and stable surface. Use a ruler or measuring tape to mark the desired length and width of the handle. Pay attention to the overall size and proportions, as well as any specific dimensions you have in mind.
If your handle design includes finger grooves or other detailed features, use a compass or template to mark their positions accurately. This will help maintain consistency throughout the handle.
Additionally, mark the location of the tang hole on the handle material. The tang hole is where the blade will attach to the handle. Ensure that it aligns properly with the tang of the blade to ensure a secure fit.
Take your time during this step and double-check your measurements to ensure accuracy. It’s always better to be precise from the beginning to avoid any issues later on.
Once you have marked all the necessary measurements, you’re ready to move on to shaping the handle in the next step.
Read more: Who Makes Milwaukee Hand Tools?
Step 4: Rough Shaping the Handle
With the measurements marked on the handle material, it’s time to start shaping the handle. In this step, you’ll begin by removing excess material to achieve the basic shape of the handle.
Using a coping saw or a small hand saw, carefully cut along the marked outline of the handle. Take your time and follow the lines closely, ensuring smooth and precise cuts. If your design includes curves or intricate details, you may need to use a combination of straight and curved cuts.
Once you have the rough shape of the handle, use a rasp or a file to further shape and contour the handle. Be mindful of the material you are working with and adjust your technique accordingly. For example, wood may require more delicate handling compared to synthetic materials.
Focus on removing excess material and achieving a comfortable grip. Keep referring to your design and measurements to ensure you are on the right track. Work slowly and steadily, maintaining an even and symmetrical shape.
As you shape the handle, periodically check how it feels in your hand. This will help you identify any areas that need further adjustment. Remember, the goal is to create a handle that is not only visually appealing but also comfortable to hold during use.
Once you are satisfied with the rough shaping of the handle, you’re ready to move on to refining the shape in the next step.
When shaping a knife handle with hand tools, start with a rough shaping tool like a rasp or file to remove excess material, then use finer tools like sandpaper to smooth and refine the shape. Always work slowly and carefully to avoid removing too much material.
Step 5: Refining the Handle Shape
Now that you have the rough shape of the handle, it’s time to refine and fine-tune the shape to achieve the desired design and ergonomics.
Using a combination of rasps, files, and sandpaper, carefully work on shaping the handle. Focus on smoothing out any rough edges and contours, as well as creating a seamless transition between different sections of the handle.
Pay attention to the details of your design, such as finger grooves or decorative elements. Use a chisel or a gouge to carefully carve out these features, ensuring precision and consistency. Take your time and make small adjustments as needed.
As you work on refining the handle shape, periodically check how it feels in your hand. Grip the handle and assess its comfort and ergonomics. If necessary, make additional adjustments to achieve the desired grip and feel.
Continue refining the handle shape until you are satisfied with both the aesthetics and the functionality of the handle. Remember that this step requires patience and attention to detail, as it significantly affects the final result.
Once you have achieved the desired handle shape, it’s time to move on to the next step: sanding the handle to smooth it out further.
Step 6: Sanding the Handle
Now that you have refined the handle shape, it’s important to smooth out the surface and prepare it for the final finish. This is where sanding comes into play.
Start by using coarse-grit sandpaper to remove any remaining rough areas or tool marks on the handle. Apply even pressure and sand in the direction of the grain, especially if you are working with a wooden handle. Gradually work your way up to finer grits of sandpaper, ensuring that each successive grit removes the scratches left by the previous grit.
Sanding not only helps in achieving a smooth and polished surface but also brings out the natural beauty of the handle material. Take your time during this step and pay attention to every inch of the handle.
After sanding with fine-grit sandpaper, consider wet sanding for an even smoother finish. Wet sanding involves using water or a lubricant like mineral oil to minimize friction and create a smoother surface. This step can further enhance the handle’s appearance and feel.
As you sand, periodically wipe away the dust and debris with a damp cloth to assess the progress. This will help you identify any areas that need further sanding or smoothing.
Once you are satisfied with the smoothness of the handle, it’s time to move on to the next step: applying a finish to protect and enhance the handle.
Step 7: Applying a Finish
Applying a finish to the handle not only protects it from moisture and wear but also enhances its appearance. There are various finishes to choose from, depending on the type of handle material and the desired outcome.
If you are working with wood, you can opt for a natural oil finish, such as linseed oil or tung oil. Apply the oil using a cloth or brush, making sure to cover the entire surface of the handle. Allow the oil to penetrate the wood for a few minutes before wiping off any excess. Repeat this process multiple times, allowing each layer to dry before applying the next.
If you prefer a glossy finish, you can use lacquer or varnish. Apply the chosen finish with a brush, following the manufacturer’s instructions. Be mindful of any drying times and make sure to apply multiple coats for a durable and shiny finish. Sand lightly between coats to ensure a smooth surface.
For synthetic handle materials, such as G-10 or Micarta, you can use epoxy resin to achieve a durable and glossy finish. Mix the epoxy according to the instructions and apply it evenly to the handle. Allow it to cure completely before sanding lightly and applying additional coats if desired.
Remember to wear protective gloves and work in a well-ventilated area when applying finishes, as some may have strong odors or contain chemicals.
Once you have applied the finish and allowed it to dry, inspect the handle for any rough spots or imperfections. Use fine-grit sandpaper to smooth out any uneven areas, taking care not to remove the finish.
With the finish applied, the handle will be protected, and its natural beauty or chosen aesthetic will shine through. Now, it’s time to move on to the final step: attaching the handle to the knife blade.
Read more: How To Store Chef Knife
Step 8: Attaching the Handle to the Knife
Now that you have completed the shaping, sanding, and finishing of the handle, it’s time to attach it to the knife blade. The method of attachment will depend on the type of blade and handle material you are working with.
If your knife blade has a full tang, which means the metal extends throughout the length of the handle, you can use pins or rivets for a secure attachment. Drill matching holes in the handle material and align them with the holes in the tang. Insert the pins or rivets through the holes and secure them with epoxy adhesive if necessary.
If your blade has a partial tang or a hidden tang, which means the metal does not extend throughout the length of the handle, you can use epoxy adhesive to bond the handle to the tang. Apply the epoxy to the tang and inside the handle material, ensuring full coverage. Insert the tang into the handle and hold it firmly in place until the epoxy cures.
Regardless of the attachment method, make sure that the handle is properly aligned with the blade and that it sits securely without any gaps or wobbling.
Once the handle is attached, check for any excess epoxy or adhesive and clean it up using a cloth or solvent if necessary.
Allow the handle to fully cure or dry according to the instructions provided by the adhesive or epoxy manufacturer.
Once the handle is securely attached and fully cured, give it a final inspection. Check for any sharp edges or rough spots that may need some additional sanding or refinement.
Congratulations! You have successfully made a knife handle with hand tools. Give it a final polish and admire your craftsmanship.
Remember to always exercise caution and prioritize safety while working with sharp tools and materials. Enjoy your new custom knife and the satisfaction of creating something unique and functional!
Conclusion
Crafting a knife handle with hand tools is a rewarding and creative endeavor that allows you to personalize your knife and showcase your woodworking skills. By following the steps outlined in this guide, you can create a custom handle that is not only visually appealing but also comfortable and functional.
Remember to start by selecting a handle material that suits your preferences and the intended use of the knife. Whether you choose wood, bone, or a synthetic material, each has its own unique qualities and considerations.
Designing the handle and marking the measurements are crucial steps in ensuring a successful outcome. Take the time to sketch your design and transfer the measurements accurately onto the handle material.
Rough shaping the handle and then refining its shape is where your creativity and attention to detail will shine. With the use of rasps, files, and sandpaper, you can sculpt the handle to meet your desired design and ergonomics.
Sanding the handle is essential for achieving a smooth surface, and applying a finish protects the handle and enhances its appearance. Choose the appropriate finish for your handle material and apply it carefully, following the manufacturer’s instructions.
Lastly, attaching the handle to the knife blade is the final step. Whether using pins, rivets, or epoxy adhesive, ensure a secure and proper attachment that aligns the handle with the blade.
Throughout the entire process, exercise caution and prioritize safety. Wear protective gear, work in a well-ventilated area, and use tools with care.
By following these steps and infusing your own creativity and flair, you can create a one-of-a-kind knife handle that reflects your style and craftsmanship. Enjoy the satisfaction of completing a handmade project and the pride of using a knife that you’ve personally crafted.
Now, it’s time to unleash your creativity and get started on your own knife handle-making journey with hand tools!
Frequently Asked Questions about How To Make A Knife Handle With Hand Tools
Was this page helpful?
At Storables.com, we guarantee accurate and reliable information. Our content, validated by Expert Board Contributors, is crafted following stringent Editorial Policies. We're committed to providing you with well-researched, expert-backed insights for all your informational needs.


0 thoughts on “How To Make A Knife Handle With Hand Tools”