Articles
How To Make A Bow With Hand Tools
Modified: August 17, 2024
Learn how to make a stylish bow using just hand tools with this step-by-step guide. Perfect for DIY enthusiasts and craft lovers.
(Many of the links in this article redirect to a specific reviewed product. Your purchase of these products through affiliate links helps to generate commission for Storables.com, at no extra cost. Learn more)
Introduction
Whether you’re an archery enthusiast or simply eager to try your hand at crafting your own traditional weapon, making a bow with hand tools can be a rewarding and fulfilling experience. While modern bows are often mass-produced using advanced machinery, there’s something special about crafting a bow with your own two hands using traditional methods.
In this article, we will guide you through the step-by-step process of making a bow using hand tools. From choosing the right type of wood to shaping the limbs and stringing the bow, you’ll learn all the techniques and tricks needed to create your very own functional bow.
Before we begin, it’s important to note that making a bow requires time, patience, and attention to detail. It is a craft that has been honed over centuries, and by following these guidelines, you can ensure that your bow turns out strong and reliable.
So, grab your hand tools, let’s get started on this exciting journey of making your own bow!
Key Takeaways:
- Embrace the ancient art of bow making with hand tools, from selecting the perfect wood to shaping the limbs and stringing the bow. Craft your personalized and functional bow for a rewarding archery experience.
- Dive into the fulfilling journey of creating a bow with hand tools, honing your craftsmanship and understanding of bow design. Enjoy the satisfaction of crafting a functional piece of art for archery pursuits.
Read more: Who Makes Milwaukee Hand Tools?
Step 1: Gather the necessary hand tools
Before you embark on your bow-making adventure, it’s essential to have the right hand tools at your disposal. These tools will help you shape and carve the wood into the desired form. Here are the essential tools you’ll need:
- Bow Saw: A bow saw is used to cut the wood into the initial shape of the bow. Look for a bow saw with a sturdy frame and sharp blade for clean cuts.
- Rasp: A rasp is a coarse file used for refining the shape of the bow. It helps to smooth rough edges and shape the contours of the limbs.
- Flat and Round Files: These files come in handy for smoothing and shaping the wood. A flat file helps flatten the bow limbs, while a round file is useful for creating notches in the wood for the bowstring.
- Spokeshave: A spokeshave is a tool used for shaving off thin layers of wood. It helps refine the shape and contours of the bow limbs.
- Sandpaper: Sandpaper of various grits, from coarse to fine, is essential for smoothing the bow and achieving a polished finish. Start with a coarse grit and work your way up to finer grits for optimal results.
- Clamps: Clamps are useful for securing the wood in place while you work on it. They help provide stability and precision during shaping.
- Measuring Tape and Marker: Accurate measurements are crucial throughout the bow-making process. Use a measuring tape and marker to mark out important points on the wood.
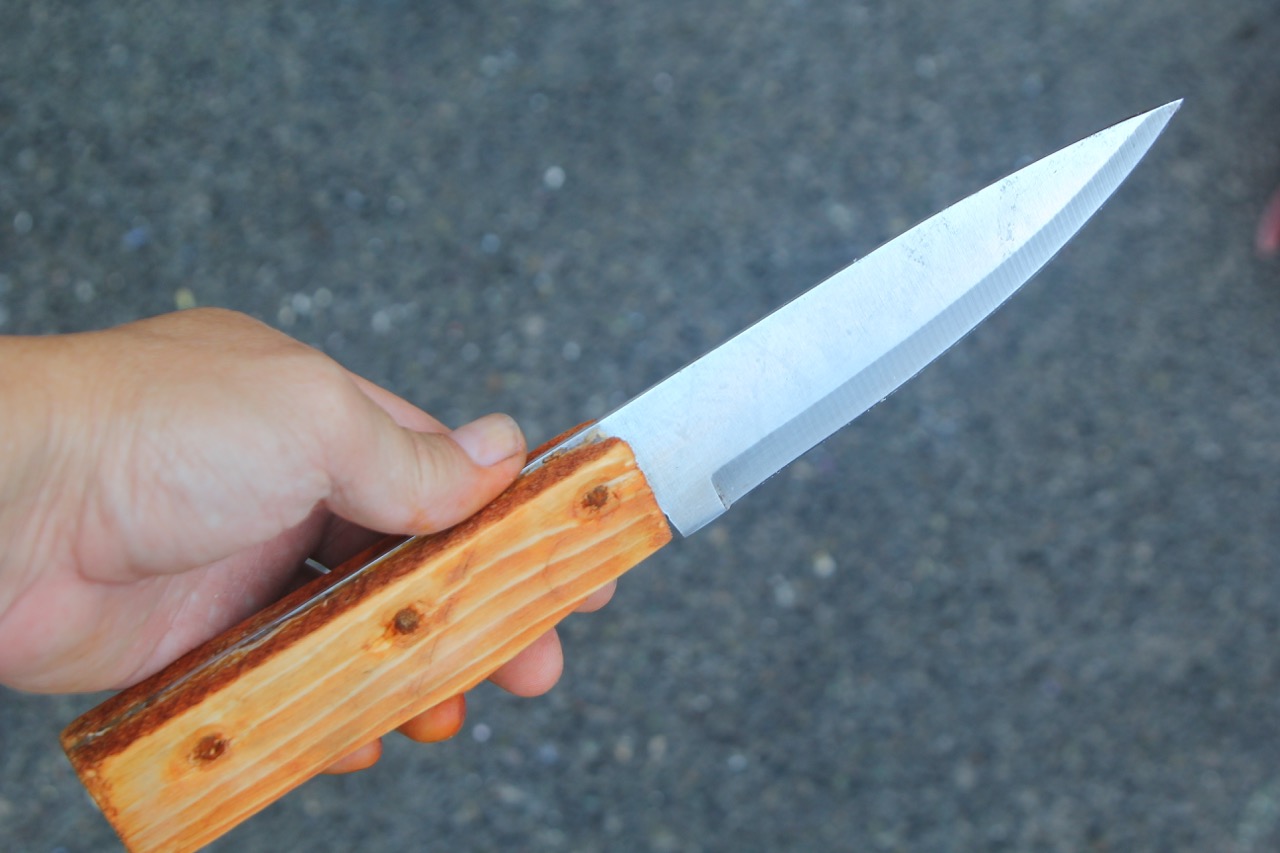
- Sharp Knife or Chisel: A sharp knife or chisel is necessary for carving the handle or grip section of the bow. It allows you to create a comfortable and functional grip for optimal control.
- Bowstring: While not a hand tool per se, a high-quality bowstring is essential for stringing your bow and ensuring proper tension.
Having these hand tools readily available will make the bow-making process much smoother and more enjoyable. Now that you have everything you need, it’s time to move on to the next step: choosing the type of wood for your bow.
Step 2: Choose the type of wood for your bow
Choosing the right type of wood is essential for creating a durable and resilient bow. Different woods have varying properties that affect the strength, flexibility, and overall performance of the bow. Here are some popular wood choices for traditional bow making:
- Hickory: Hickory is a common choice for bow making due to its strength and flexibility. It is known for its excellent shock resistance and is ideal for both beginner and experienced bow makers.
- Yew: Yew wood has been prized for centuries for its exceptional properties in bow making. It is known for its elasticity, allowing the bow to store and release energy efficiently. However, yew can be more challenging to work with compared to other woods.
- Osage Orange: Also known as bois d’arc, osage orange is a dense and tough wood that makes for a powerful bow. It has excellent elasticity and durability, making it a popular choice among bow makers.
- Maple: Maple wood is another favored option for bow making. It offers a good balance of strength and flexibility and is relatively easy to work with. Maple bows can produce excellent speed and accuracy.
- Red Oak: Red oak is a strong and durable wood that is widely available and affordable. It is a popular choice for beginner bow makers due to its forgiving nature and ease of shaping.
When selecting your wood, consider factors such as your experience level, preferred draw weight, and the availability of the wood in your area. It’s crucial to choose a wood that suits your specific needs and preferences.
Before working with your chosen wood, it’s important to let it acclimate to your workshop environment. Wood needs time to adjust to its surroundings, and allowing it to stabilize will prevent warping or cracking in the future.
Now that you have selected the perfect wood for your bow, it’s time to move on to the next step: preparing the wood for shaping.
Step 3: Prepare the wood for shaping
Once you have chosen the type of wood for your bow, it’s essential to prepare it before shaping. Proper preparation ensures that the wood is stable and ready to be crafted into a bow. Here are the steps involved in preparing the wood:
- Cut the wood to length: Use a bow saw or a similar tool to cut the wood to the desired length for your bow. Take into account the length you want the bow to be, as well as the length required for the handle or grip section.
- Remove any bark: Use a knife or chisel to carefully remove the bark from the wood. This helps prevent moisture buildup and ensures a smooth surface for shaping.
- Check for knots and defects: Inspect the wood for any knots, cracks, or defects. These can weaken the bow and affect its performance. If you find any issues, consider cutting or shaping the wood to avoid these problematic areas.
- Smooth the surface: Use sandpaper or a rasp to smooth the surface of the wood. This will remove any rough spots or imperfections, making it easier to shape and work with.
- Seal the ends: Apply a coat of wood sealer or wax to the ends of the wood to prevent moisture absorption and minimize the risk of splitting. This step is crucial for maintaining the integrity of the bow.
By following these steps, you will ensure that your wood is prepared and ready for shaping. Take your time during this stage to ensure that you have a solid and stable foundation for your bow.
Now that the wood is prepared, it’s time to move on to the next exciting step: shaping the limbs of the bow.
Step 4: Shape the limbs of the bow
Shaping the limbs of the bow is a crucial step in creating its unique form and structure. This is where you will start to see the bow taking shape. Follow these steps to shape the limbs:
- Mark the centerline: Use a measuring tape and marker to draw a centerline along the length of the wood. This will serve as a guide for shaping the limbs evenly.
- Decide on the width and thickness: Determine the width and thickness you want for your bow limbs. This will depend on your personal preferences and the type of wood you are working with.
- Gradually remove wood: Begin shaping the limbs by gradually removing wood from the sides of the bow. Use a rasp or spokeshave to carefully shape the wood, following the contour of the limb. Work slowly and evenly on both sides to maintain balance.
- Check the width and thickness regularly: As you shape the limbs, regularly check the width and thickness to ensure consistency. Measure and compare both limbs to make adjustments as necessary.
- Create a taper towards the tips: To achieve the desired flexibility and performance, taper the limbs towards the tips. Use a rasp or file to gradually thin out the wood towards the ends of the limbs.
It’s important to note that while shaping the limbs, you should focus on creating smooth and flowing curves. This helps distribute stress evenly throughout the bow.
Take your time during this step, as precision and attention to detail are vital for creating a well-balanced and functional bow. Pause occasionally to check the symmetry and ensure that both limbs are evolving symmetrically.
Now that you have shaped the limbs of your bow, it’s time to move on to the next step: tapering the limbs to create flexibility.
Read more: How To Make Beams With Hand Tools
Step 5: Taper the limbs to create flexibility
Tapering the limbs of the bow is a critical step in creating the necessary flexibility and dynamic performance. This technique ensures that the bow can bend and store energy effectively. Follow these steps to taper the limbs:
- Mark the tapering points: Use a measuring tape and marker to mark the desired tapering points on each limb. These points determine where the thickness of the limb will gradually decrease towards the tips.
- Gradually remove wood: Begin tapering the limbs by removing wood from the marked points towards the tips. Use a rasp, file, or spokeshave to carefully shape the wood, creating a gradual thinning towards the tips of the limbs.
- Maintain symmetry: As you work on tapering, ensure that both limbs are being shaped symmetrically. Regularly check and compare the thickness of each limb to maintain balance and consistency.
- Smooth the transition: Pay attention to the transition area between the tapered section and the rest of the limb. Smooth out any rough edges or uneven surfaces to ensure a seamless transition and optimal performance.
Tapering the limbs is crucial for achieving the desired flexibility and power of the bow. The gradual thinning allows the limbs to bend more easily during the draw, storing energy that will be released upon release of the arrow.
Remember, take your time during this step and pay close attention to detail. The evenness of the taper, as well as the symmetry between the limbs, will greatly impact the performance of the bow.
Now that you have successfully tapered the limbs of your bow, it’s time to move on to the next step: creating the grip section.
When making a bow with hand tools, ensure that the wood you choose is flexible and strong, such as hickory or yew. This will ensure a durable and effective bow.
Step 6: Create the grip section
The grip section of the bow plays a crucial role in providing comfort, control, and stability while shooting. This step focuses on shaping the handle area to create a functional and ergonomic grip. Follow these steps to create the grip section:
- Identify the center of the handle: Measure the overall length of your bow and mark the exact center point on the handle section. This will ensure that the grip is positioned correctly.
- Determine the grip style: Decide on the type of grip you prefer, such as a straight grip, a locator grip, or a recurve grip. Consider your personal shooting style and comfort when choosing the grip style.
- Carve the grip: Use a sharp knife or chisel to carefully carve the grip section. Start by removing excess wood around the handle area, gradually shaping it according to your chosen grip style.
- Create rounded edges: Smooth the edges of the grip to prevent discomfort and blisters. Use sandpaper or a file to gently round the edges, ensuring a comfortable hold on the bow.
- Test the grip: Hold the bow and test the grip’s feel and comfort. Make any necessary adjustments or refinements to ensure a secure and natural grip.
The grip section is an essential component of your bow, as it determines your control and accuracy while shooting. Take the time to carefully shape and refine the grip to ensure a comfortable and personalized experience.
Once you have created the grip section to your satisfaction, it’s time to move on to the next step: stringing your bow.
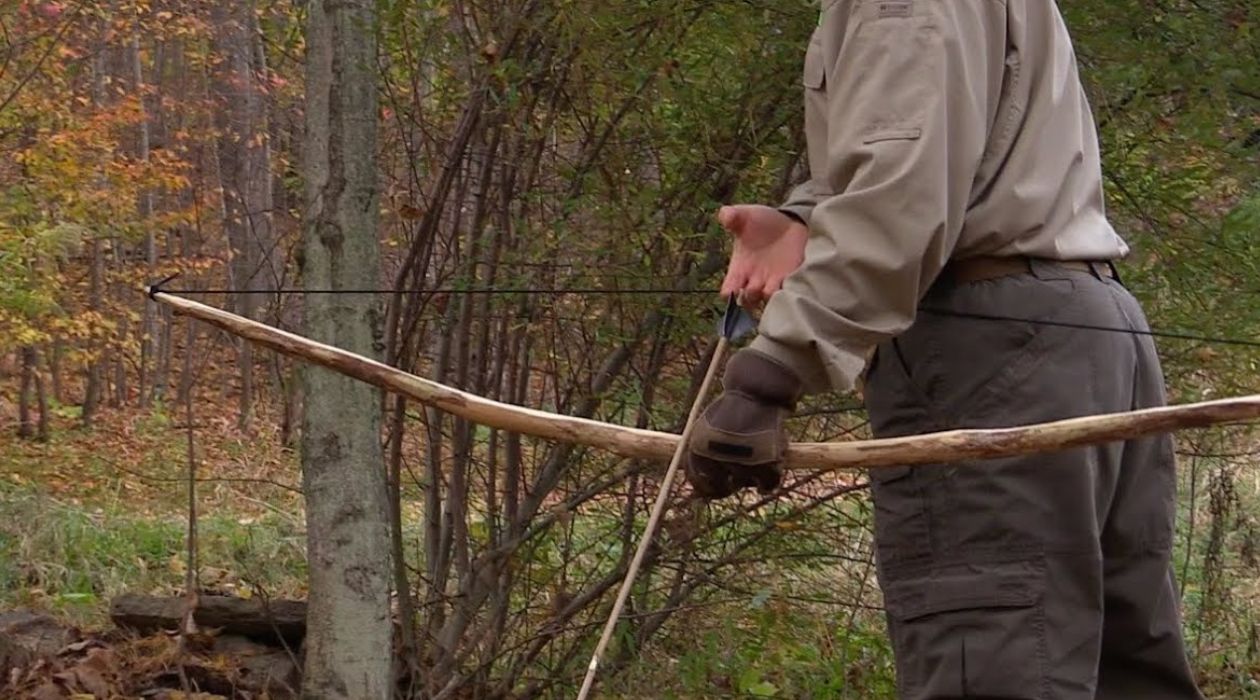
Step 7: String your bow
Stringing your bow is an essential step to make it functional and ready for shooting. Stringing the bow involves attaching the bowstring securely to the bow’s limbs. Here’s how to string your bow:
- Obtain a bowstring: Ensure you have a bowstring that is suitable for your bow and your desired draw weight. Ensure it is the correct length, properly conditioned, and made of durable material.
- Measure the string length: Measure the length of your bow from tip to tip. Add a few inches to this measurement to account for the string’s length when it is under tension.
- Create string loops: Using a bow stringer or another reliable method, create loops at each end of the bowstring. These loops will be attached to the notches or grooves on the bow’s limbs.
- Double-check alignment and tension: Confirm that the string is aligned properly along the centerline of the bow and under the same tension on both limbs. Make any necessary adjustments to maintain symmetry.
Take caution when stringing your bow, as improperly stringing it can lead to damage or injury. Using a bow stringer is recommended, as it provides a safe and reliable method for stringing bows.
Now that your bow is properly strung, it is almost ready for use. The next step involves testing and adjusting your bow’s draw weight to match your preference.
Step 8: Test and adjust your bow’s draw weight
Testing and adjusting your bow’s draw weight is an important step to ensure optimal performance and shooting experience. The draw weight refers to the amount of force required to pull back the bowstring to its maximum draw length. Here’s how to test and adjust your bow’s draw weight:
- Choose a draw length: Decide on your desired draw length, which is the distance you pull the bowstring back before releasing the arrow. This can vary depending on your shooting style and comfort.
- Measure the draw weight: Use a bow scale or a draw weight gauge to measure the force required to draw the bowstring to your chosen draw length. Take note of the reading on the scale.
- Evaluate the draw weight: Compare the measured draw weight to your desired draw weight. If the measured weight is too heavy, you may need to reduce it. If it’s too light, you may need to increase it.
- Adjust limb tension: To increase the draw weight, tighten the limb bolts or screws on your bow. To decrease the draw weight, loosen the limb bolts or screws. Make small adjustments and test the draw weight after each adjustment.
- Test and shoot: With each adjustment, draw the bowstring to your chosen length and release it safely. Take note of the draw weight and assess the feel and performance. Continue making minor adjustments until you achieve your desired draw weight.
It’s important to find a draw weight that suits your strength and shooting comfort. A draw weight that is too heavy can cause fatigue and affect accuracy, while a draw weight that is too light may lack power or penetration.
Remember to exercise caution when making adjustments to the limb tension and always follow the manufacturer’s guidelines. Additionally, ensure that you are using proper form and technique while testing the draw weight to get accurate results.
With your bow’s draw weight adjusted to your preference, you are nearing the completion of your bow-making journey. The final step involves applying a finish to protect the wood.
Read more: How To Make A Bow With A Napkin
Step 9: Apply a finish to protect the wood
Applying a finish to your bow not only enhances its appearance but also protects the wood from moisture, dirt, and wear. Choosing and applying the right finish will help prolong the life of your bow and maintain its performance. Follow these steps to apply a finish to protect the wood:
- Choose the right finish: Select a finish that is suitable for the type of wood you used for your bow. Options can include varnish, polyurethane, tung oil, or linseed oil. Consider factors such as durability, flexibility, and ease of application.
- Prepare the surface: Ensure the surface of your bow is clean and free from any dust or debris. If necessary, lightly sand the wood to smooth out any imperfections.
- Apply the finish: Use a clean cloth or brush to apply a thin and even layer of the chosen finish to the entire surface of the bow. Follow the manufacturer’s instructions regarding the application method and drying time.
- Allow for proper drying and curing: After applying the initial coat, allow the finish to dry and cure according to the instructions provided. This may involve leaving the bow in a well-ventilated area for a specific period or keeping it in a controlled drying environment.
- Repeat if necessary: Depending on the type of finish and desired level of protection, you may need to apply multiple coats. Follow the same application and drying process for each additional layer, ensuring proper curing between coats.
Applying a finish not only protects the wood but also adds a beautiful luster and depth to your bow. It enhances the natural grain and color, giving it a polished and professional appearance.
Once the finish has completely cured, your bow is ready to be used and enjoyed for many shooting sessions to come. Always remember to properly care for and maintain your bow to ensure its longevity and optimal performance.
Congratulations! You’ve completed all the steps to make a bow with hand tools. Now, take a step back and admire the beautiful craftsmanship of your own handmade bow. Enjoy the satisfaction of knowing that you have created a functional and personalized piece of art that can be used for archery or as a symbol of your creative prowess.
Remember, bow making is a continuous learning process, and each bow you make will contribute to your understanding and expertise. Embrace the journey and keep refining your skills to create more exceptional bows in the future.
Happy shooting with your handmade bow!
Conclusion
Creating a bow with hand tools is a labor of love that combines craftsmanship, skill, and a deep appreciation for the art of archery. Throughout the step-by-step process, from gathering the necessary tools to applying a protective finish, you have learned the nuances of bow making and embraced the satisfaction of creating a functional and personalized bow.
Making a bow with hand tools allows for a deeper connection with the craft and a greater understanding of the intricacies and principles of bow design. It is a journey that harkens back to ancient times when bows were essential tools for survival and hunting.
By carefully selecting the type of wood, shaping the limbs with precision, and attaching a sturdy bowstring, you have crafted a bow that is unique to you. The time and effort invested in this process have resulted in a functional piece of art that is ready to be used for target practice, hunting, or simply as a symbol of your dedication to the ancient craft of bow making.
Remember, bow making is a continuous learning process. Each bow you create will teach you something new and allow you to refine your techniques. Don’t be afraid to experiment with different woods, grip styles, and finishes to create bows that suit your preferences and shooting style.
As you embark on your archery journey with your handmade bow, always prioritize safety and proper shooting techniques. Practice consistently, hone your skills, and enjoy the connection between you, your bow, and the art of archery.
Whether you’re a seasoned archer or a beginner looking to explore the world of archery, the experience of creating a bow with hand tools is a fulfilling and rewarding endeavor. Embrace the process, cherish the knowledge you’ve gained, and may your handmade bow bring you endless joy and success in your archery pursuits.
Frequently Asked Questions about How To Make A Bow With Hand Tools
Was this page helpful?
At Storables.com, we guarantee accurate and reliable information. Our content, validated by Expert Board Contributors, is crafted following stringent Editorial Policies. We're committed to providing you with well-researched, expert-backed insights for all your informational needs.


0 thoughts on “How To Make A Bow With Hand Tools”