Articles
How To Make Beams With Hand Tools
Modified: January 6, 2024
Learn how to make sturdy and durable beams using only hand tools with our informative articles. Discover expert tips and techniques to create high-quality beams for your construction projects.
(Many of the links in this article redirect to a specific reviewed product. Your purchase of these products through affiliate links helps to generate commission for Storables.com, at no extra cost. Learn more)
Introduction
When it comes to constructing structures such as pergolas, decks, or even traditional timber frame homes, beams are a crucial component that provides strength and support. While there are various modern tools available for beam making, traditional hand tools can still be used to create beautiful and functional beams. Not only does this allow for a more hands-on and personal approach, but it also adds a sense of craftsmanship to the project.
In this article, we will explore the process of making beams with hand tools. We will delve into the basic principles, discuss the necessary tools, and provide a step-by-step guide to help you create beams that are both structurally sound and aesthetically pleasing.
Before we dive into the specifics, it’s important to note that working with hand tools requires a certain level of patience, precision, and skill. It may take more time and effort compared to using power tools, but the end result can be incredibly rewarding.
So, if you’re ready to unleash your inner craftsman and create beams that stand the test of time, let’s get started on our journey of hand tool beam making.
Key Takeaways:
- Embrace the art of traditional woodworking and unleash your creativity by crafting structurally sound and visually appealing beams with hand tools. Patience and precision yield timeless, personalized results that showcase your dedication and craftsmanship.
- From selecting the right wood to incorporating traditional joinery techniques, the process of making beams with hand tools is a rewarding journey that combines skill, artistry, and attention to detail. Create beams that stand as a testament to your passion for woodworking.
Read more: Who Makes Milwaukee Hand Tools?
Basic Principles of Beam Making
Before we jump into the practical aspects of making beams with hand tools, it’s essential to understand the basic principles that govern the process. These principles will help ensure that your beams are structurally sound and able to withstand the test of time.
1. Proper Wood Selection:
The choice of wood is crucial when it comes to beam making. It’s important to select a wood species that is sturdy, durable, and resistant to rot and insects. Common choices include oak, cedar, and Douglas fir. Additionally, consider the size and configuration of the beam when selecting the wood. Certain wood species may have limitations in terms of length and load-bearing capacity.
2. Grain Orientation:
When selecting and cutting the wood for your beams, pay close attention to the grain orientation. Beams are strongest when the grain runs along the length of the beam. This ensures that the natural fibers in the wood provide maximum strength and support. Avoid selecting wood with irregular grain patterns or significant knots, as they may weaken the beam.
3. Proper Joinery:
The joinery techniques used to connect beam components play a significant role in the overall strength and stability of the structure. Traditional joinery methods, such as mortise and tenon or dovetail joints, are not only aesthetically pleasing but also provide strong and durable connections. Take the time to learn and master these techniques to ensure your beams are securely joined.
Read more: How To Make A Bow With Hand Tools
4. Drying and Moisture Content:
Properly seasoned wood is essential for beam making. Green or freshly cut wood contains a high amount of moisture, which can lead to warping, shrinking, and cracking over time. Allow the wood to dry and reach an optimal moisture content before working with it. This can be done by storing the wood in a well-ventilated area and monitoring its moisture levels with a moisture meter.
5. Aesthetics:
While the main function of beams is structural support, aesthetics should not be overlooked. Take the time to choose wood with a visually appealing grain pattern and texture. Additionally, consider adding decorative details or chamfers to enhance the overall look of the beams. A well-crafted beam not only provides strength but also adds a touch of beauty to any structure.
By keeping these basic principles in mind, you’ll be well-equipped to create beams that are not only structurally sound but also visually appealing. Now, let’s move on to the essential hand tools you’ll need for the beam making process.
Necessary Hand Tools
When it comes to making beams with hand tools, having the right tools is essential. While the specific tools you will need may vary depending on the size and complexity of your project, here are some essential hand tools that will help you get started:
1. Hand Saw:
A quality hand saw is a must-have tool for cutting timber to the desired lengths. Look for a crosscut saw or a rip saw, depending on the type of cuts you will be making. A well-sharpened and properly maintained hand saw will make quick and accurate cuts, ensuring precise beam dimensions.
Read more: How To Make Beams For Ceiling
2. Chisels:
Chisels are indispensable when it comes to shaping and smoothing the surfaces of the beams. Invest in a set of high-quality chisels in various sizes to accommodate different tasks. A sharp chisel allows for precise cutting, creating clean and smooth edges.
3. Mallet or Hammer:
A mallet or hammer is necessary for driving chisels and other tools. Look for a mallet made from hardwood or a hammer with a wooden handle for better control and reduced risk of damaging the tools or your workpiece.
4. Marking Tools:
Accurate marking is essential for precise cuts and joinery. A combination square, marking gauge, and marking knife are indispensable tools for measuring and marking your workpiece. The combination square allows for quick and accurate measurements, while the marking gauge and knife ensure precise marking for clean cuts and joinery.
5. Planes:
Hand planes are useful for flattening and smoothing the surfaces of the beams. A jack plane or smoothing plane can be used to remove any roughness or irregularities, creating a polished and even surface.
Read more: How To Make A Tobacco Pipe With Hand Tools
6. Measuring Tools:
In addition to marking tools, other measuring tools like a tape measure or a folding rule are necessary for taking accurate measurements. These tools will help ensure that your beams are cut to the desired lengths and dimensions.
7. Clamps:
Clamps are essential for holding the workpiece firmly in place during cutting, shaping, and joining. They help prevent movement and ensure accuracy. Invest in a variety of clamps to accommodate different sizes and shapes of beams.
While these are the essential hand tools for beam making, depending on your project, you may require additional tools such as a hand drill, chisel mallet, or coping saw. It’s important to assess the specific requirements of your project and equip yourself accordingly to ensure a smooth and successful beam making process.
Now that we have covered the necessary hand tools, let’s move on to the step-by-step guide on how to make beams with hand tools.
Step 1: Choosing the Right Wood
The first step in making beams with hand tools is selecting the right type of wood for your project. Choosing the appropriate wood species is crucial, as it will impact the strength, durability, and overall appearance of your beams. Here are some factors to consider when choosing the wood:
1. Strength and Durability:
Look for wood species that are known for their strength and durability. Hardwoods like oak, cedar, and Douglas fir are popular choices for beams due to their excellent load-bearing capabilities and resistance to rot and insects. Research the strength and durability ratings of different wood species to ensure they will be suitable for your project.
Read more: How To Make A Knife Handle With Hand Tools
2. Wood Moisture Content:
Opt for wood with an appropriate moisture content. Green or freshly cut wood contains a high amount of moisture, which can lead to warping, splitting, and shrinking over time. It’s important to use properly seasoned or kiln-dried wood for your beams. The ideal moisture content for beam making is usually around 10-12%, which can be checked using a moisture meter.
3. Size and Configuration:
Consider the size and configuration of the beams you need for your project. Some wood species may have limitations in terms of length and load-bearing capacity. Ensure that the wood you choose can accommodate the dimensions and structural requirements of your project.
4. Aesthetics:
Aside from strength and durability, the visual appearance of the wood is also important. Consider the grain pattern, color, and overall aesthetics of the wood. Some wood species have unique grain patterns and natural beauty that can enhance the visual appeal of your beams. Take into account the existing décor and style of your project when selecting the wood.
5. Sustainability:
As a responsible woodworker, it’s important to consider the sustainability of the wood you choose. Look for wood that is sourced from well-managed forests or has certification from organizations such as the Forest Stewardship Council (FSC). Choosing sustainably harvested wood helps protect natural resources and ensures a greener future.
Once you have considered all these factors, you can source your wood from reputable suppliers or local sawmills. Take the time to inspect the wood for any visible defects, such as knots or splits. While natural imperfections can add character to your beams, ensure they do not compromise the structural integrity of the wood.
By carefully choosing the right type of wood, you’re setting the foundation for a successful beam making project. Now that you have selected your wood, let’s move on to the next step: measuring and marking the beams.
Read more: Who Makes Kobalt Hand Tools
Step 2: Measuring and Marking
Once you have selected the right wood for your beams, the next step in the process is to accurately measure and mark the wood to ensure precise cuts and joinery. Proper measurements and markings are crucial for the overall success and structural integrity of your beams. Here’s a step-by-step guide on how to measure and mark your wood:
1. Gather the Necessary Tools:
Before you begin measuring and marking, gather the necessary tools such as a combination square, marking gauge, marking knife, tape measure, and pencil. These tools will help you achieve accurate measurements and markings on the wood.
2. Measure and Mark the Length:
Using a tape measure or folding rule, measure the desired length of your beam on the wood. Make sure to account for any overhang or trimming that may be required. Once you have obtained the correct measurement, use a pencil to make a visible mark on the wood, indicating the length of the beam.
3. Square the Ends:
Take the combination square and align the blade with the end of the wood. Slide the square along the length of the wood, ensuring that it remains perpendicular to the sides. Use the pencil to mark a straight line across the width of the wood, creating a square end.
Read more: Who Makes Cat Hand Tools
4. Mark Joinery Locations:
If your project requires joinery, use the marking gauge or marking knife to mark the locations where the joinery will be made. The marking gauge helps create consistent and accurate lines parallel to the edges of the wood. Alternatively, a marking knife can be used to score the wood, creating precise and visible marks for the joinery locations.
5. Additional Measurements and Marks:
Depending on the complexity of your beam design, you may need to make additional measurements and marks for miters, notches, or any other specific requirements. Use the appropriate measuring tool and take accurate measurements before marking the wood. Double-check your measurements to avoid any mistakes that could affect the overall fit and finish of your beams.
Remember to measure and mark each piece of wood individually, ensuring that they are clearly labeled to avoid any confusion during the cutting and assembly process.
By taking the time to accurately measure and mark your wood, you’ll be setting yourself up for success when it comes to cutting and shaping the beams. With the measurements and markings in place, it’s now time to move on to the next step: cutting the beams.
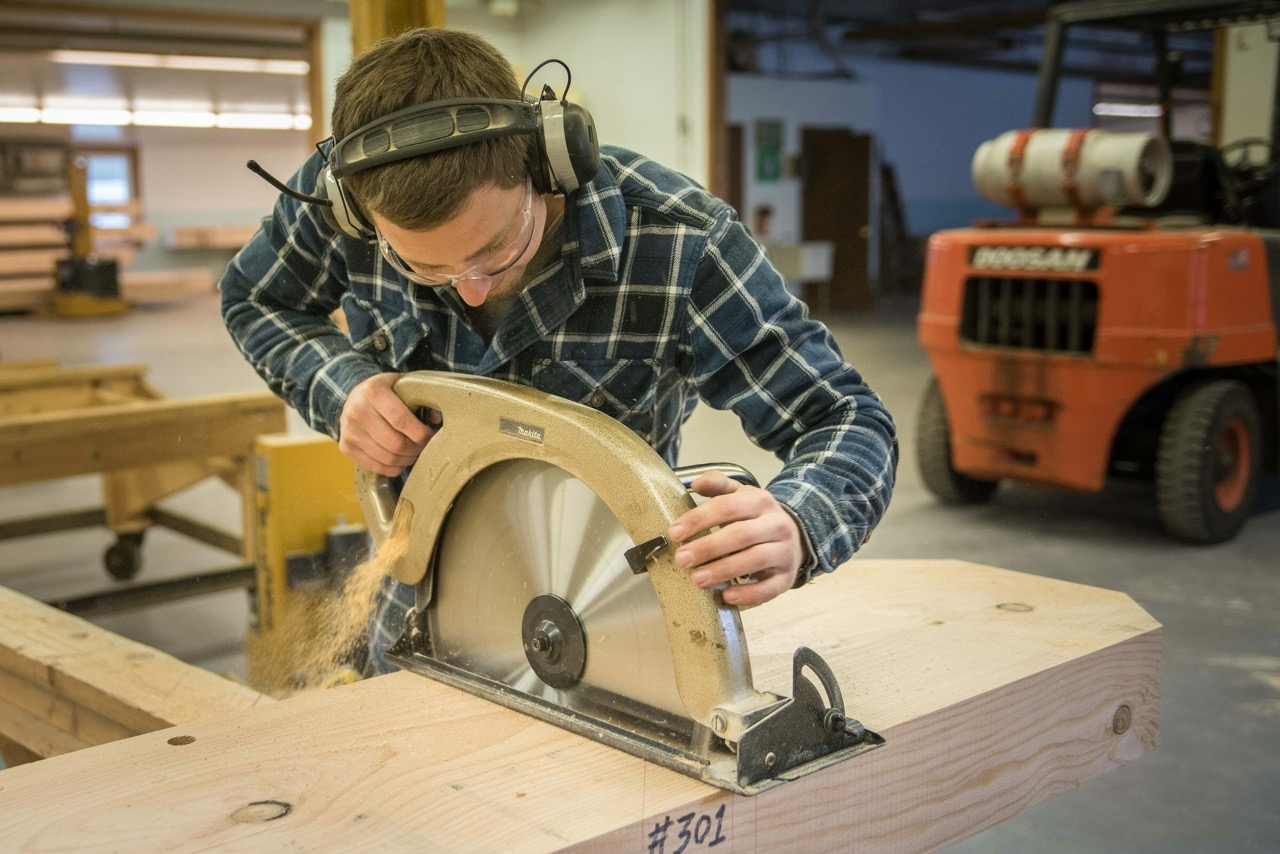
Step 3: Cutting the Beam
With the measurements and markings in place, it’s time to move on to cutting the wood to create your beams. This step requires precision and careful attention to detail to ensure accurate cuts that align with your project’s specifications. Here’s a step-by-step guide on how to cut the beams:
1. Prepare the Work Area:
Before you begin cutting, set up a clean and organized work area. Ensure that you have sufficient space to maneuver the wood and that the area is well-lit for better visibility. Remove any potential hazards or distractions to create a safe working environment.
Read more: Who Makes Bostitch Hand Tools
2. Select the Correct Saw:
Choosing the right saw for the job is crucial. Depending on the thickness of the wood and the type of cut you need to make, you may use a crosscut saw or a rip saw. A crosscut saw is ideal for creating smooth and accurate cuts across the grain, while a rip saw is designed for cutting parallel to the grain.
3. Follow the Marked Lines:
Using the marked lines as your guide, carefully align the saw blade with the edge of the wood and start cutting. Apply even pressure and maintain a steady hand to ensure a straight and clean cut. It’s important to cut just outside the marked line to allow for any discrepancies in the marking process.
4. Take Your Time:
Cutting the wood with hand tools requires patience and precision. Take your time to ensure accurate cuts and avoid rushing through the process. Use long, fluid strokes to maintain control over the saw and produce smooth cuts. Always keep your fingers and hands clear of the saw blade to prevent any injuries.
5. Double-Check the Cuts:
Once you have made the initial cuts, double-check their accuracy and alignment. Use a straight edge or combination square to ensure that the cuts are perpendicular and the edges are straight. Make any necessary adjustments or additional cuts to achieve the desired dimensions and ensure a proper fit.
Read more: Who Makes Dewalt Hand Tools
6. Repeat the Process:
If you are cutting multiple beams, repeat the process for each piece of wood, using the same careful technique to maintain consistency across all your beams.
By following these steps, you’ll be able to accurately cut your wood and create the beams for your project. Remember to work methodically and prioritize safety throughout the cutting process.
Now that you have successfully cut your beams, it’s time to move on to the next step: shaping and smoothing.
Step 4: Shaping and Smoothing
After cutting the beams to size, the next step is to shape and smooth them to create a refined and visually appealing finish. Shaping and smoothing the wood not only enhances its appearance but also ensures a comfortable and safe interaction with the finished beams. Here’s a step-by-step guide on how to shape and smooth your beams:
1. Remove Any Rough Edges:
Begin by using a hand plane or chisel to remove any rough edges left from the cutting process. Carefully run the hand plane along the edges of the beam, gradually removing any unevenness and creating a smoother surface. Pay close attention to maintain a consistent profile and avoid removing too much material. Alternatively, a chisel can be used to carefully shave and shape the edges.
2. Create Chamfers or Bevels:
If desired, you can add chamfers or bevels to the edges of the beams to give them a decorative touch and prevent sharp corners. Use a chisel or block plane to carefully shape the edges, creating a beveled or chamfered profile. Take your time to ensure that the angles are uniform and clean.
Read more: Who Makes Husky Hand Tools
3. Smooth the Surfaces:
Next, focus on smoothing the surfaces of the beams. Use a hand plane or a sanding block to remove any imperfections and create a polished finish. Work in the direction of the wood grain, taking light and even passes with the plane or sandpaper. Pay attention to maintaining a consistent smoothness across the entire surface.
4. Gradually Refine the Shape:
If you have a specific shape or profile in mind for your beams, gradually work on refining the shape using hand tools. Whether it’s rounding the edges, creating curves, or adding decorative details, take your time and work carefully to achieve the desired shape. Use a combination of hand planes, files, rasps, and sandpaper to gradually shape and smooth the wood.
5. Test and Adjust:
Throughout the shaping and smoothing process, periodically test the fit and feel of the beams to ensure they are comfortable and meet your requirements. Make any necessary adjustments to the shape or surface until you are satisfied with the final result.
By following these steps, you’ll be able to shape and smooth your beams, creating a refined and visually appealing finish. Remember to work slowly and pay attention to detail to achieve the desired shape and surface quality.
Now that your beams have been shaped and smoothed, it’s time to move on to the next step: joinery techniques.
Step 5: Joinery Techniques
Now that your beams are shaped and smoothed, it’s time to focus on joining them together using traditional joinery techniques. The joinery not only adds strength and stability to the structure but also contributes to the overall aesthetic appeal of your project. Here’s a step-by-step guide on how to incorporate joinery techniques into your beams:
Read more: Who Makes Masterforce Hand Tools
1. Choose the Right Joinery Method:
Consider the specific requirements of your project and choose the appropriate joinery method. Traditional joinery techniques such as mortise and tenon, dovetail, or half-lap joints are commonly used for beam construction. Each method has its own advantages and considerations, so research and choose the method that best suits your project’s needs.
2. Layout and Mark the Joinery:
Using your measuring and marking tools, carefully layout and mark the locations where the joinery will be incorporated. Ensure that the measurements are accurate and aligned with the corresponding pieces of wood. Use a marking knife or pencil for precise and visible markings.
3. Cut the Joinery:
Once the joinery locations are marked, proceed with cutting the joinery. This step requires precision and attention to detail. Use chisels, saws, or specialized hand tools specific to the chosen joinery method to create the necessary cuts and shapes. Take your time during this step to ensure accurate and clean joinery cuts.
4. Dry-Fit and Test:
After cutting the joinery, dry-fit the pieces together without glue or fasteners to check the fit and alignment. This allows you to make any necessary adjustments before final assembly. Ensure that the joints are snug and secure, providing a solid connection between the beams.
Read more: Who Makes Paramount Hand Tools?
5. Glue and Assemble:
Once you are satisfied with the dry-fit, apply an appropriate wood glue to the mating surfaces and carefully assemble the pieces. Use clamps to hold the joints together while the glue dries. Follow the manufacturer’s instructions for the recommended clamping time to ensure a strong bond. Wipe off any excess glue that squeezes out of the joints during assembly.
6. Clean and Sand:
After the glue has fully cured, remove any excess dried glue using a chisel, scraper, or sandpaper. Take care not to damage the surrounding wood while doing so. Once the wood surfaces are clean, sand the joints and surrounding areas to achieve a seamless and smooth finish.
By following these steps, you’ll be able to incorporate traditional joinery techniques into your beams, ensuring strong and visually appealing connections. Remember to be patient and meticulous during the cutting and assembly process to achieve the best possible results.
With the joinery complete, it’s time to move on to the final step: adding the finishing touches to your beams.
Step 6: Finishing Touches
As you near the completion of your handcrafted beams, it’s time to add the finishing touches that will enhance their appearance and protect the wood. The finishing process involves applying a protective finish and enhancing the natural beauty of the wood. Follow these steps to give your beams that final touch:
1. Select a Suitable Finish:
Consider the desired look and level of protection when choosing a finish for your beams. There are various options available, including oils, varnishes, lacquers, and stains. Each type of finish has its own characteristics and application methods. Research and select a finish that suits your project and the type of wood used.
Read more: Who Makes Tekton Hand Tools
2. Prepare the Surface:
Before applying the finish, ensure that the surface of the beams is clean and smooth. Remove any dust or debris using a brush or vacuum cleaner. If necessary, lightly sand the surface to remove any imperfections or unevenness, ensuring a uniform and smooth finish.
3. Apply the Finish:
Follow the manufacturer’s instructions for applying the chosen finish. Use a brush, cloth, or applicator appropriate for the type of finish you are using. Apply the finish evenly, working with the grain of the wood. Make sure to cover all exposed surfaces, including the ends of the beams, for complete protection.
4. Allow for Drying and Curing:
After applying the finish, allow ample time for drying and curing. Follow the recommended drying time provided by the manufacturer. It’s crucial to ensure that the finish is fully cured before handling or installing the beams.
5. Inspect and Finish Any Details:
After the finish has dried, inspect the beams for any missed spots or imperfections. Touch up any areas that require additional attention or finish. Take the time to ensure that every aspect of your beams is complete and well-finished.
Read more: Who Makes Quinn Hand Tools
6. Prepare for Installation:
Once the finish is fully cured, your beams are ready for installation. Take care when handling and transporting them to avoid any damage to the finished surfaces. Follow the appropriate installation techniques for your specific project to ensure the beams are securely and safely positioned.
With the finishing touches complete, you can now stand back and admire your beautifully crafted beams. The protective finish will not only seal and enhance the natural beauty of the wood but also contribute to their longevity and durability.
Congratulations! You have successfully completed the process of making beams with hand tools. Your handcrafted beams will not only provide structural integrity but also add a touch of craftsmanship and beauty to any project.
As you gain more experience and confidence in working with hand tools, you can continue to refine your techniques and explore new designs and joinery methods. Embrace the art of handcrafted woodworking and continue to create remarkable pieces that showcase your skills and passion.
Conclusion
Creating beams with hand tools is a rewarding and fulfilling process that allows you to unleash your creativity and craftsmanship. By following the step-by-step guide outlined in this article, you have learned the basic principles of beam making, the necessary hand tools required, and how to select the right wood for your project. You have also gained insight into measuring and marking, cutting, shaping and smoothing, incorporating joinery techniques, and adding the finishing touches to your beams.
Working with hand tools requires patience, precision, and attention to detail. Although it may take more time and effort compared to using power tools, the end result is a personalized and timeless piece that showcases your skills and dedication. Handcrafted beams not only provide structural support but also add a unique touch of beauty and craftsmanship to any structure.
Throughout the process, remember to prioritize safety by using protective equipment and practicing proper tool handling techniques. Take your time to ensure accurate measurements, precise cuts, and clean joinery. Additionally, consider the aesthetics of your beams by choosing an appropriate wood species, incorporating decorative details, and applying a suitable finish.
As you embark on your beam making journey, continue to hone your skills and explore new techniques. The more you work with hand tools, the more your expertise and confidence will grow. Embrace the art of traditional woodworking and savor the joy of creating functional and beautiful beams.
So, go forth with your newfound knowledge and skills, and let your handcrafted beams stand as a testament to your craftsmanship and passion. Whether it’s a pergola, deck, or timber frame home, your handcrafted beams will leave a lasting impression and contribute to the timeless beauty of your project.
Frequently Asked Questions about How To Make Beams With Hand Tools
Was this page helpful?
At Storables.com, we guarantee accurate and reliable information. Our content, validated by Expert Board Contributors, is crafted following stringent Editorial Policies. We're committed to providing you with well-researched, expert-backed insights for all your informational needs.


0 thoughts on “How To Make Beams With Hand Tools”