Articles
How To Make Under Bed Drawers With Hand Tools
Modified: January 19, 2024
Learn how to make practical and space-saving under bed drawers using basic hand tools with our step-by-step articles. Enhance your storage capabilities today!
(Many of the links in this article redirect to a specific reviewed product. Your purchase of these products through affiliate links helps to generate commission for Storables.com, at no extra cost. Learn more)
Introduction
Having limited storage space in your home can be a challenge. Clutter can quickly accumulate, making it difficult to keep your living environment organized. However, with some handy tools and a bit of creativity, you can make the most of the space you have by building under bed drawers.
Under bed drawers are a practical and efficient solution for storing items such as clothing, linens, shoes, and other belongings. They utilize the often-underused space beneath your bed, allowing you to maximize the storage capacity of your bedroom.
In this article, we will guide you through the process of making under bed drawers using only hand tools. This means you won’t need any power tools, making it a suitable project for beginners or those who prefer a more traditional woodworking approach.
Before we dive into the step-by-step instructions, let’s take a look at the tools and materials you will need for this project.
Key Takeaways:
- Maximize bedroom storage with DIY under bed drawers using only hand tools. Transform unused space into functional storage for clothing, linens, and more.
- Enjoy the satisfaction of building and installing under bed drawers, creating a clutter-free and organized bedroom environment. Access belongings with ease and maximize storage space.
Read more: How To Build A Drawer With Hand Tools
Tools Required
Before you begin building your under bed drawers, it’s important to gather the necessary tools. While power tools can speed up the process, we will focus on hand tools for this project. Here are the tools you will need:
- Measuring tape
- Pencil
- Saw (hand or miter)
- Chisel
- Drill (with various drill bits)
- Screwdriver (Phillips and flathead)
- Sandpaper (medium and fine grit)
- Clamps
- Ruler or straight edge
- Hammer
- Screw and nail set
These tools will enable you to accurately measure, cut, drill, assemble, and finish your under bed drawers. Remember to prioritize safety and use protective gear, such as goggles and gloves, when necessary.
Now that we have the tools covered, let’s move on to the materials you will need for this project.
Materials Needed
Before you start building your under bed drawers, it’s essential to gather all the required materials. Here’s a list of what you’ll need:
- Plywood sheets: Choose a sturdy and durable plywood, preferably around ½ inch thick. The number of sheets will depend on the number of drawers you plan to build and their dimensions.
- Wood glue: Opt for a high-quality wood glue that provides a strong bond.
- Wood screws: Get a variety of sizes that are suitable for your plywood thickness.
- Drawer slides or wheels: These will allow your drawers to glide smoothly when pulled in and out. Select the appropriate size and style for your project.
- Sandpaper: Use medium and fine-grit sandpaper to smooth rough edges and prepare the surface for finishing.
- Wood finish: Choose a finish that suits your preference – whether it’s paint, stain, or varnish.
- Paintbrush or foam roller: Use these tools to apply the wood finish.
- Optional: Drawer handles or knobs. These can add a decorative touch to your under bed drawers.
Make sure to measure the space under your bed and determine the dimensions of your drawers before purchasing the materials. This will ensure that you have enough plywood and other supplies to complete the project.
Now that you have all the necessary tools and materials, let’s move on to the step-by-step process of making your under bed drawers.
Step 1: Measure the Space Under the Bed
The first step in building your under bed drawers is to measure the available space beneath your bed. This will help you determine the dimensions of your drawers and ensure that they fit snugly.
Start by clearing out any items or clutter under the bed to get a clear view of the space. Next, take your measuring tape and measure the width, length, and height of the area. Make sure to measure the tightest points to ensure your drawers will fit properly.
Consider any obstructions such as bed frames, support structures, or floor vents that may limit the available space for your drawers. It’s important to account for these when determining the dimensions.
Once you have your measurements, add a few extra inches to each dimension. This buffer will allow your drawers to slide in and out easily without getting stuck.
Write down the final dimensions as this information will be crucial when cutting the plywood pieces in later steps. It’s always better to double-check and measure twice to ensure accuracy.
With the space under your bed properly measured, you can now move on to planning the design and dimensions of your drawers in the next step.
Step 2: Plan the Design and Dimensions of the Drawers
Now that you have measured the space under your bed, it’s time to plan the design and dimensions of your under bed drawers. This step is crucial for optimizing storage capacity and ensuring that the drawers will fit seamlessly into the available space.
Consider how many drawers you want to build and how they will be arranged under the bed. This will depend on your storage needs and the size of your bed. For larger beds, you may be able to fit multiple rows of drawers, while smaller beds may only accommodate one or two drawers.
Once you have decided on the number of drawers, determine the dimensions for each individual drawer. Keep in mind that the height of the drawers should allow for easy access to the contents, while the width and length should fit within the measured space under the bed.
Take into account any floor vents or obstacles that may affect the available width and length of the drawers. You want to ensure that the drawers slide in and out smoothly without any hindrances.
Sketch out a rough diagram or create a digital representation of your under bed drawer design. This will help you visualize the placement of the drawers and ensure that everything fits together harmoniously.
With the design and dimensions finalized, you can now move on to gathering the necessary materials for constructing your under bed drawers in the next step.
Read more: Who Makes Milwaukee Hand Tools?
Step 3: Gather the Necessary Materials
Now that you have a plan for your under bed drawers, it’s time to gather all the materials you will need to bring your design to life. Making sure you have everything ready will ensure a smoother and more efficient construction process.
Refer to the list of materials needed and confirm that you have all the required items. Here’s a quick recap of what you’ll need:
- Plywood sheets
- Wood glue
- Wood screws
- Drawer slides or wheels
- Sandpaper
- Wood finish
- Paintbrush or foam roller
- Optional: Drawer handles or knobs
If you don’t already have these materials, make a trip to your local home improvement store or order them online. Make sure to purchase the appropriate quantity based on your design and dimensions.
Remember to choose high-quality materials, especially for the plywood and wood screws. This will ensure the durability and longevity of your under bed drawers.
Once you have gathered all the materials, double-check to ensure that you have everything you need before proceeding to the next step. Having everything prepared will allow you to work efficiently and complete the project seamlessly.
Now that you have all the materials at hand, it’s time to start cutting the plywood pieces for the drawers in Step 4.
Step 4: Mark and Cut the Plywood Pieces for the Drawers
In this step, you will mark and cut the plywood pieces that will form the structure of your under bed drawers. A precise and accurate cutting process is essential to ensure that the drawers are sturdy and fit together seamlessly.
Start by taking one of the plywood sheets and measuring and marking the dimensions for the sides, bottom, and back of the drawer using your measurements from Step 2. Use a pencil and a ruler or straight edge to ensure straight and accurate lines.
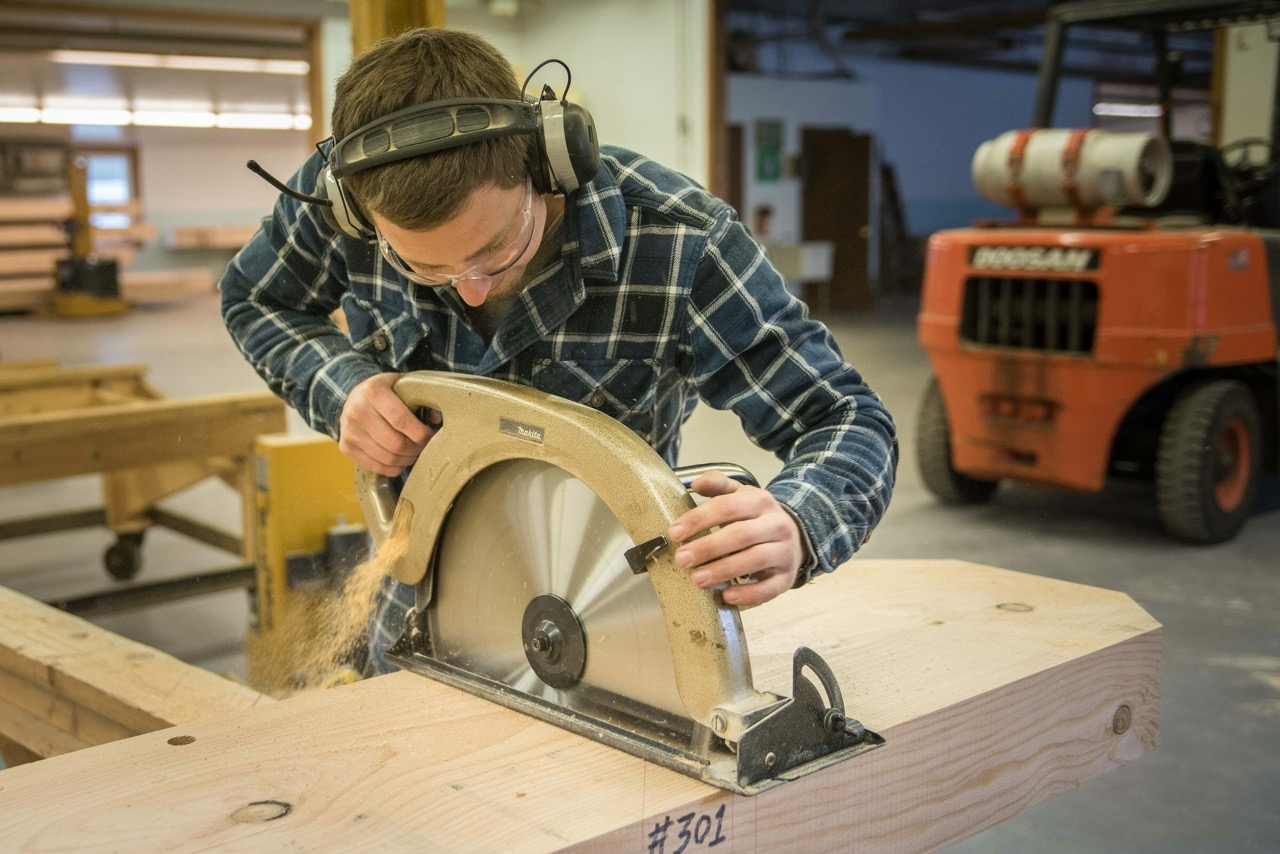
Once you have marked the dimensions, use a saw (hand or miter) to cut the plywood along the marked lines. Take your time and make smooth, even cuts. Remember to wear safety goggles and follow proper safety measures when using the saw.
Repeat this process for the remaining plywood sheets, ensuring that you have enough pieces for each drawer you plan to build.
After cutting the plywood pieces for the sides, bottom, and back of the drawers, you will need to mark and cut the plywood for the front of the drawers. The dimensions for the front piece will depend on the width and height of the drawer opening, which may be slightly smaller than the sides, allowing for easy opening and closing.
Measure and mark the dimensions for the front piece of each drawer, and then cut the plywood accordingly.
Once you have finished cutting the plywood pieces for all the drawers, double-check their dimensions and make any necessary adjustments. Accuracy at this stage is crucial to ensure that the drawers fit together correctly.
With the plywood pieces cut, you are now ready to move on to the next step, where you will assemble the sides and bottom of the drawers.
When making under bed drawers with hand tools, measure the space under the bed carefully to ensure the drawers will fit properly. Take into account any obstructions such as wheels or support beams.
Step 5: Assemble the Drawer Sides and Bottom
Now that you have cut the plywood pieces for your under bed drawers, it’s time to start assembling them. This step will involve joining the sides and bottom of each drawer to create the basic structure.
Start by applying a thin layer of wood glue along the edge of one of the side pieces. Align the edge of the bottom piece with the glued edge and press them together firmly.
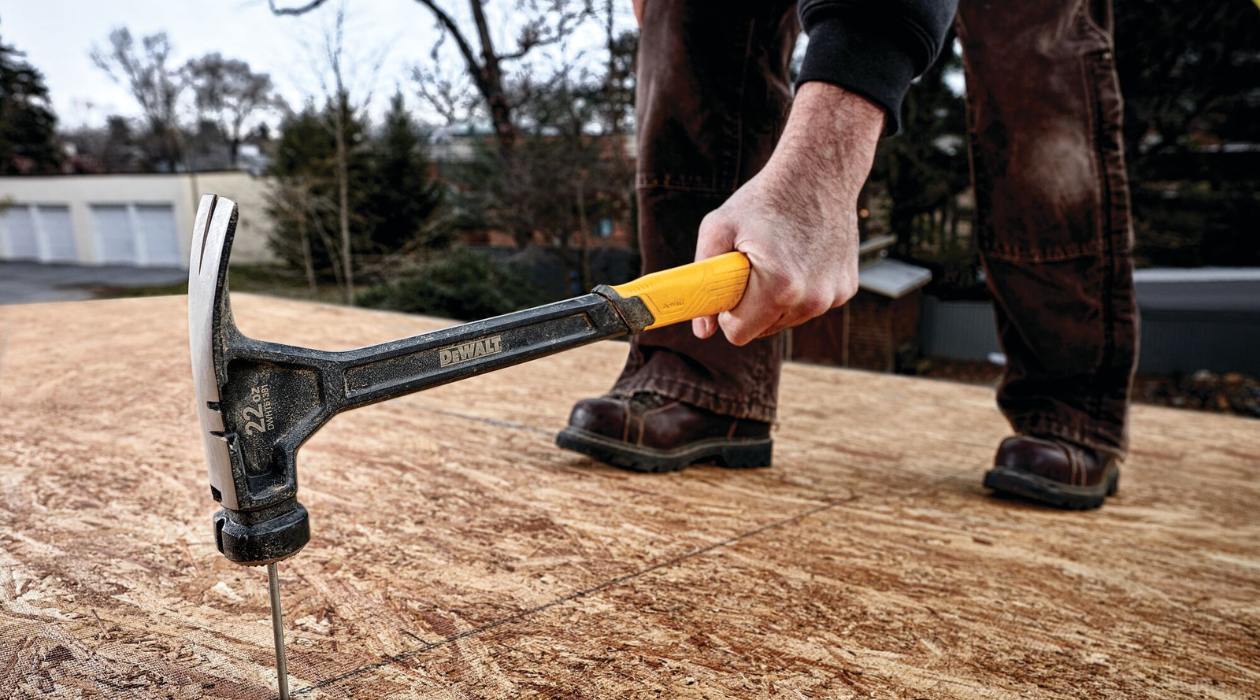
For added strength, you can reinforce the joint by securing it with wood screws. Pre-drill pilot holes through the side piece and into the bottom piece, then insert the screws and tighten them. Repeat this process on the other side to complete the assembly of the drawer’s frame.
Make sure that the corners are square and the edges are aligned properly. Use clamps to hold the pieces in place while the glue dries.
Continue this process to assemble the rest of the drawers, ensuring that each one is built with the same precision and attention to detail.
Once all the drawer frames are assembled, allow the wood glue to dry completely. This may take a few hours or overnight, depending on the type of glue used. Be sure to follow the manufacturer’s instructions for the recommended drying time.
With the drawer frames fully dried and solid, you have completed the assembly of the sides and bottom. Now, it’s time to move on to attaching the front and back pieces in the next step.
Note: If desired, you can also consider adding drawer slides or wheels at this stage to facilitate smooth opening and closing of the drawers. However, we will cover that in more detail in Step 8.
Step 6: Attach the Drawer Fronts and Backs
Now that you have the drawer frames assembled, it’s time to attach the front and back pieces to complete the construction of your under bed drawers.
Start by positioning one of the front pieces on the assembled drawer frame. Align it with the edges of the frame and make sure it is flush with the top and sides.
Next, apply a thin layer of wood glue along the edges of the front piece that will come into contact with the frame. Press the front piece firmly against the frame, ensuring that it is securely attached.
For added stability, you can reinforce the attachment by driving in wood screws from the inside of the drawer frame. Pre-drill pilot holes through the frame and into the front piece, then insert the screws and tighten them. Repeat this process for the back piece of the drawer.
Once the front and back pieces are securely attached, make any necessary adjustments to ensure that they are aligned properly. This will ensure that the drawers open and close smoothly.
After attaching the front and back pieces to all the drawers, allow the wood glue to dry completely according to the manufacturer’s instructions. This typically takes several hours or overnight.
Once the glue is fully dried, your under bed drawers will have taken shape. However, they may still require some finishing touches to ensure smooth operation and an aesthetically pleasing appearance.
In the next step, we will guide you through the process of sanding and finishing the drawers.
Read more: How To Make A Bow With Hand Tools
Step 7: Sand and Finish the Drawers
After assembling the drawer frames and attaching the front and back pieces, it’s time to give your under bed drawers a smooth and polished finish. This step will involve sanding the surfaces and applying a suitable finish to protect the wood and enhance its appearance.
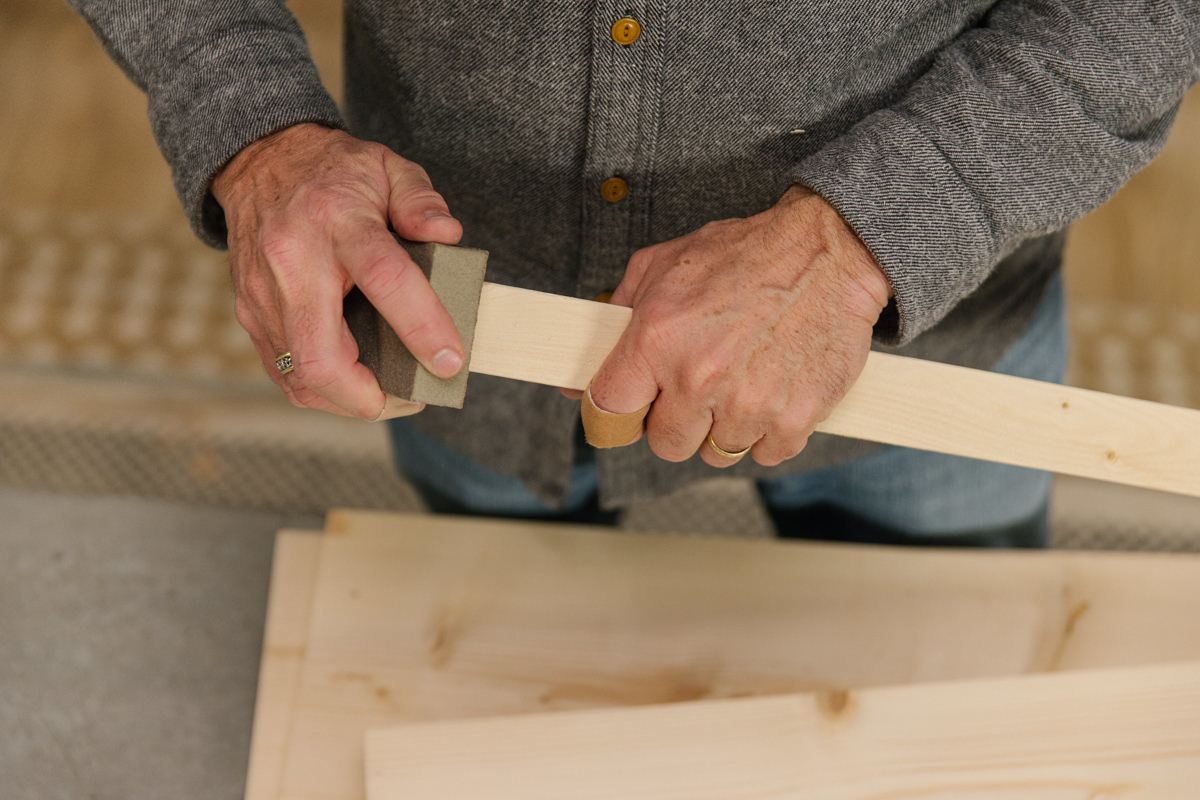
Begin by using medium-grit sandpaper to sand the surfaces of the drawers. Focus on removing any rough edges, splinters, or imperfections in the wood. Sand in smooth, even strokes, following the grain of the wood.
After sanding with the medium-grit sandpaper, switch to a finer-grit sandpaper to achieve a smoother finish. This will help create a more polished surface for the final finish.
Take care to sand all visible surfaces, including the sides, front, back, and edges of the drawers. Ensure that they are smooth and free of any rough spots or unevenness.
Once you are satisfied with the smoothness of the sanded surfaces, it’s time to apply the wood finish. You can choose to paint, stain, or varnish the drawers, depending on your preference.
Before applying the finish, make sure to clean any dust or debris from the sanded surfaces. Use a soft cloth or brush to remove any residual particles.
Apply the chosen wood finish evenly onto the surfaces of the drawers. You can use a paintbrush or foam roller for this task. Follow the manufacturer’s instructions for the application and drying time of the finish.
If desired, add any drawer handles or knobs to further enhance the functionality and aesthetics of your under bed drawers. Make sure to position them in a convenient and visually pleasing location on the front of the drawers.
Allow the finish to dry completely before moving on to the next step. This will ensure a durable and professional-looking finish for your under bed drawers.
Now that your drawers have been sanded and finished, it’s time to install drawer slides or wheels in the next step for smooth and easy operation.
Step 8: Install Drawer Slides or Wheels
To ensure smooth and effortless opening and closing of your under bed drawers, it’s essential to install drawer slides or wheels. These components will allow the drawers to glide in and out of the space under your bed.
First, determine whether you prefer drawer slides or wheels for your drawers. Drawer slides provide a more secure and stable option, while wheels offer more flexibility and ease of movement.
If you choose drawer slides, measure and mark the appropriate positions on the sides of your drawers and the corresponding spots on the inside of the bed frame. Follow the specific instructions provided with your drawer slides to attach them securely to the drawers and the bed frame.
If you prefer wheels, measure and mark the positions for the wheels on the bottom of your drawers. Use screws or bolts to attach the wheels firmly to the bottom of each drawer.
Ensure that the drawer slides or wheels are aligned and level for optimal performance. Test the movement of the drawers to make sure they glide smoothly in and out of the underneath space of your bed.
If using drawer slides, gently pull the drawer open and test its stability. If using wheels, move the drawers in and out to ensure that they roll smoothly and do not wobble. Make any necessary adjustments to ensure proper installation.
Once you are satisfied with the functionality and stability of the drawer slides or wheels, the installation is complete.
Now you can move on to the exciting moment of placing your under bed drawers into position.
Continue to Step 9 for the final step in completing your under bed drawers.
Step 9: Place the Drawers Under the Bed
Congratulations! You have successfully built and assembled your under bed drawers. Now it’s time to put them in their designated space and start reaping the benefits of your hard work and ingenuity.
Carefully lift each drawer and slide or roll it into the space beneath your bed. Make sure the drawers fit snugly and slide smoothly, without any obstructions or difficulties. Take a moment to admire your well-organized and efficient storage solution.
As you place the drawers under the bed, ensure that they are aligned properly and do not interfere with any surrounding furniture or structures. Test the movement of the drawers by pulling them in and out to ensure they glide seamlessly.
Once your drawers are in position, organize your belongings and items inside them, keeping similar items together for easy access and convenience. Consider using drawer dividers or organizers to maximize the use of space and keep things tidy.
Remember to close the drawers when not in use to maintain a clean and organized appearance in your bedroom.
With your under bed drawers in place, you now have extra storage space that is easily accessible and neatly tucked away. Say goodbye to clutter and hello to a more organized living environment.
Take a moment to appreciate your handiwork and enjoy the benefits of your newly built under bed drawers. You’ve turned an unused space into a valuable storage solution.
Thank you for following along with this guide. We hope you found it helpful and that you enjoy the functionality and convenience of your newly constructed under bed drawers for years to come.
Happy organizing!
Conclusion
Building under bed drawers with hand tools is a rewarding and practical DIY project that allows you to maximize storage space in your bedroom. By following the step-by-step process outlined in this guide, you can create functional and stylish drawers that seamlessly fit under your bed.
Throughout this project, you have learned the importance of measuring the space under your bed, carefully planning the dimensions and design of the drawers, and gathering the necessary materials and tools. You have also acquired valuable skills such as cutting and assembling plywood, sanding surfaces, and applying a finish.
The installation of drawer slides or wheels ensures smooth and effortless operation, allowing you to access your belongings with ease. By incorporating these drawers into your bedroom, you have transformed an underutilized space into a valuable storage solution.
Remember, customization options such as choosing different finishes, adding decorative drawer handles, or incorporating drawer dividers can further enhance the functionality and aesthetics of your under bed drawers.
Now that you have completed the construction and installation of your under bed drawers, it’s time to appreciate the organization and convenience they bring to your living space. Enjoy the ability to efficiently store and access your belongings, while maintaining a clutter-free and organized bedroom environment.
Thank you for joining us on this DIY journey. We hope you found this guide helpful and that your newly crafted under bed drawers serve you well for years to come.
Happy organizing!
Frequently Asked Questions about How To Make Under Bed Drawers With Hand Tools
Was this page helpful?
At Storables.com, we guarantee accurate and reliable information. Our content, validated by Expert Board Contributors, is crafted following stringent Editorial Policies. We're committed to providing you with well-researched, expert-backed insights for all your informational needs.


0 thoughts on “How To Make Under Bed Drawers With Hand Tools”