
Articles
How To Make A Root Cellar In Your Basement
Modified: January 20, 2024
Looking for articles on how to make a root cellar in your basement? Discover step-by-step instructions and expert tips in our comprehensive guide.
(Many of the links in this article redirect to a specific reviewed product. Your purchase of these products through affiliate links helps to generate commission for Storables.com, at no extra cost. Learn more)
Introduction
Welcome to the world of root cellars! If you’re a gardener or someone who loves preserving fresh produce, having a root cellar in your basement can be a game-changer. Not only does it provide a convenient and efficient way to store and extend the shelf life of fruits and vegetables, but it also allows you to enjoy your garden’s bounty throughout the year.
In this article, we will guide you through the process of creating your own root cellar in your basement. From planning and preparation to building and maintaining, we’ll cover all the essential steps and considerations to ensure the success of your homemade root cellar project.
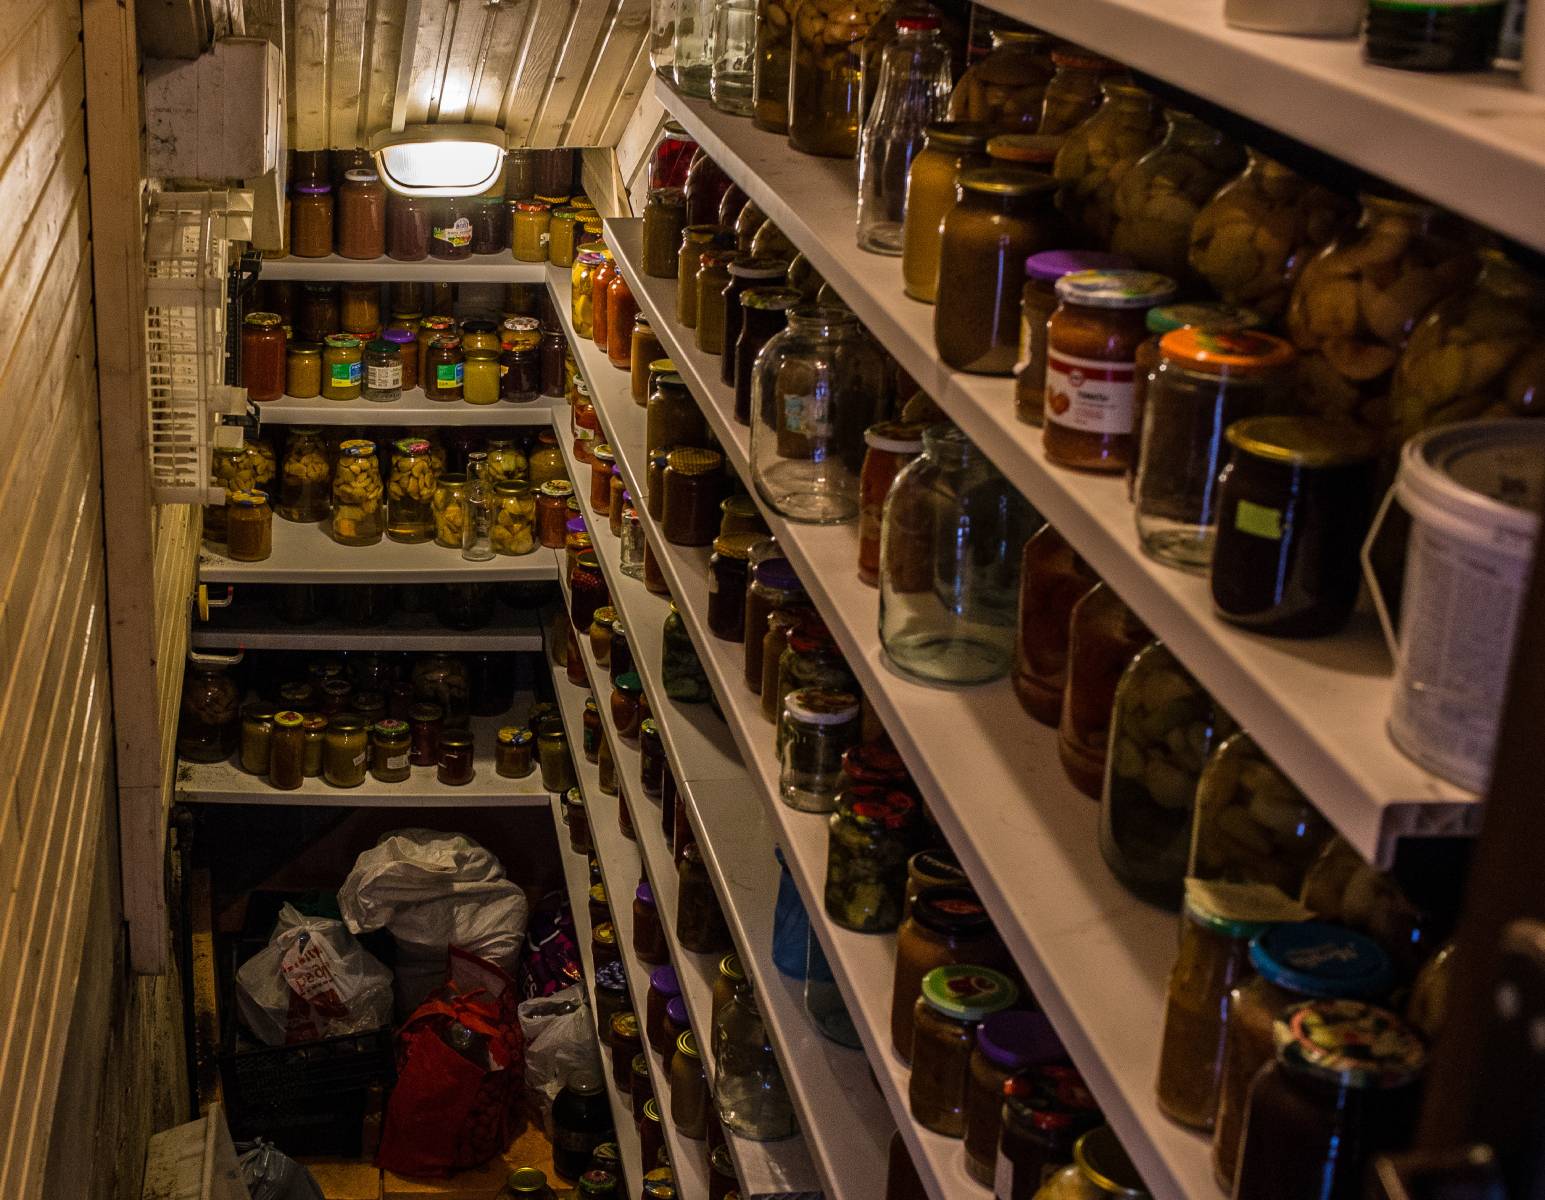
Before we get started, let’s quickly touch on what exactly a root cellar is. Essentially, it’s a storage space that provides the ideal conditions for keeping certain types of produce fresh and preserved for an extended period of time. By controlling factors such as temperature, humidity, and air circulation, a root cellar creates an environment that prolongs the life of fruits, vegetables, and even other perishable items like canned goods and homemade preserves.
Having a root cellar in your basement offers several advantages. Firstly, it allows you to reduce your reliance on commercial refrigeration or freezing methods, which can be costly and energy-intensive. Secondly, it provides a space-saving solution for storing your harvest, freeing up valuable space in your main refrigerator. Lastly, a root cellar offers a more natural and sustainable approach to preserving your food, as it essentially mimics the conditions found in traditional underground cellars that have been utilized for centuries.
Are you ready to embark on this exciting journey of creating your own root cellar? Great! Let’s dive into the planning and preparation phase to ensure a successful and fruitful outcome.
Key Takeaways:
- Planning and preparation are crucial for creating a successful root cellar. From evaluating storage needs to setting a budget and creating a project timeline, thorough preparation sets the stage for a fruitful outcome.
- Maintenance and upkeep are essential for ensuring the long-term effectiveness of your root cellar. Regular cleaning, monitoring temperature and humidity, and addressing any damages or pest infestations are key to preserving your stored produce.
Read more: Root Cellar How To Build
Planning and Preparing
Before you start building your root cellar in the basement, it’s crucial to spend some time on planning and preparation. This stage will help you determine the feasibility of the project, understand the specific requirements of your chosen location, and ensure that you have all the necessary materials and tools at hand.
Here are the key steps to follow during the planning and preparation phase:
- Evaluate your needs: Assess your storage needs by considering the amount and types of produce you plan to store. This will help you determine the size and layout of your root cellar.
- Check local regulations: Research any local regulations or building codes that may affect your root cellar project. Some areas might have restrictions on modifications to basements or ventilation requirements.
- Consider climate conditions: Take into account the climate in your area, as it will impact the design and insulation requirements of your root cellar. For example, if you live in a colder region, you may need additional insulation to maintain the desired temperature.
- Assess accessibility: Evaluate the accessibility of your basement and ensure that you have enough space to construct the root cellar without disrupting other areas of your home.
- Determine budget: Set a budget for your project, including costs for materials, tools, and any professional assistance you might need.
- Research storage methods: Familiarize yourself with different storage methods for various fruits and vegetables. Some produce, like potatoes and onions, require different conditions than others, such as apples or carrots.
- Create a project timeline: Develop a timeline to keep your project on track. Consider the time needed for each stage, from excavation to finishing touches.
By taking the time to plan and prepare, you’ll have a clear vision of what you should expect and be better equipped to handle any challenges that may arise during the construction process. So, let’s move on to the next step: choosing the perfect location for your root cellar.
Choosing the Location
The success of your root cellar greatly depends on selecting the right location within your basement. The ideal spot should provide the necessary conditions for storing produce, ensuring proper temperature, humidity levels, and ventilation. Here are some aspects to consider when choosing the location for your root cellar:
- Temperature: Look for a spot in your basement that stays consistently cool throughout the year. The temperature should ideally be between 32°F (0°C) and 40°F (4°C) for most fruits and vegetables.
- Avoid direct sunlight: Ensure that the chosen location is not exposed to direct sunlight, as this can cause fluctuations in temperature and negatively impact the storage conditions.
- Avoid damp areas: Select an area in your basement that is free from excessive moisture or water leaks. Dampness can lead to mold and spoilage of your stored produce.
- Accessibility: Consider the convenience of accessing your root cellar. Choose a location that allows easy entry and exit without obstructing other areas of your basement.
- Space availability: Determine the size of the area you have available for your root cellar. Take into account the amount of produce you plan to store, as well as additional space needed for ventilation and shelving.
- Proximity to utilities: If possible, choose a location near water and electrical outlets for the convenience of cleaning and adding lighting or ventilation systems.
When assessing potential locations, it’s essential to understand that every basement is unique in terms of temperature and humidity conditions. Consider monitoring the temperature and humidity levels in different areas of your basement over a period of time to identify the most suitable spot for your root cellar.
Once you’ve found the ideal location, it’s time to assess and prepare your basement for the construction of your root cellar. The next section will guide you through this process to ensure a solid foundation for your project.
Assessing and Preparing the Basement
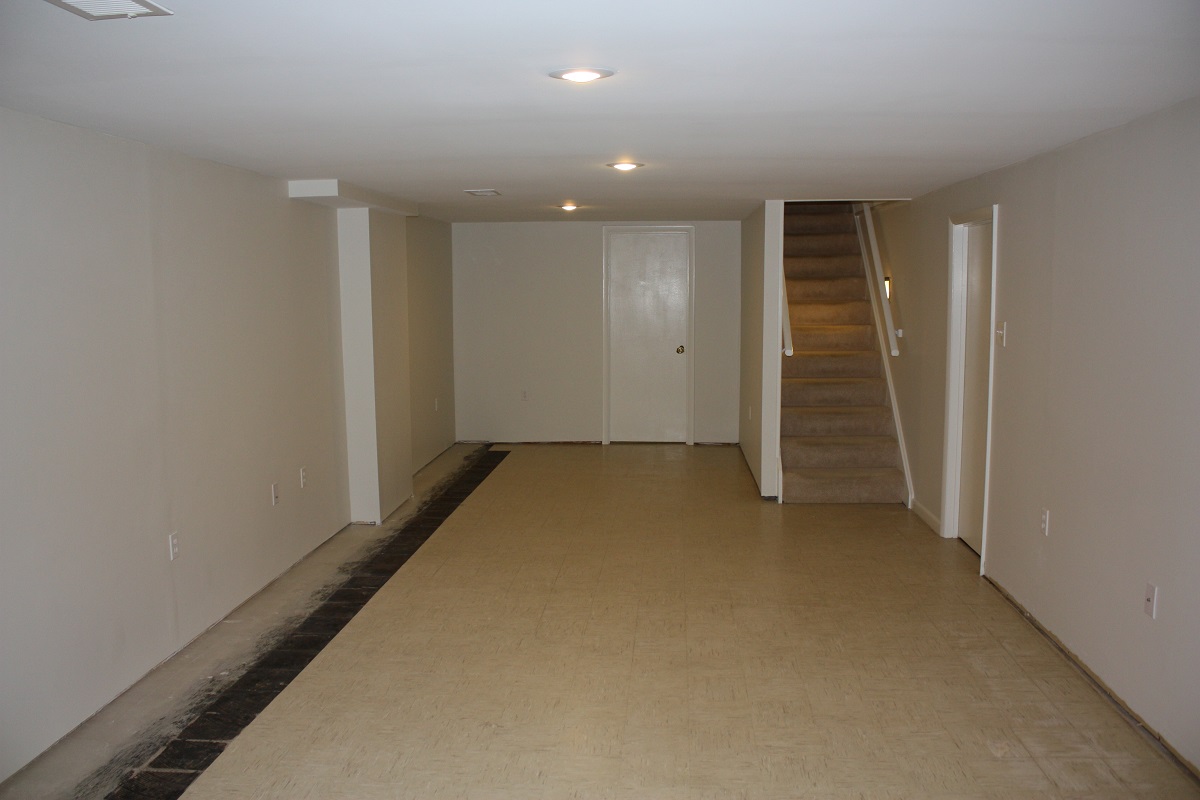
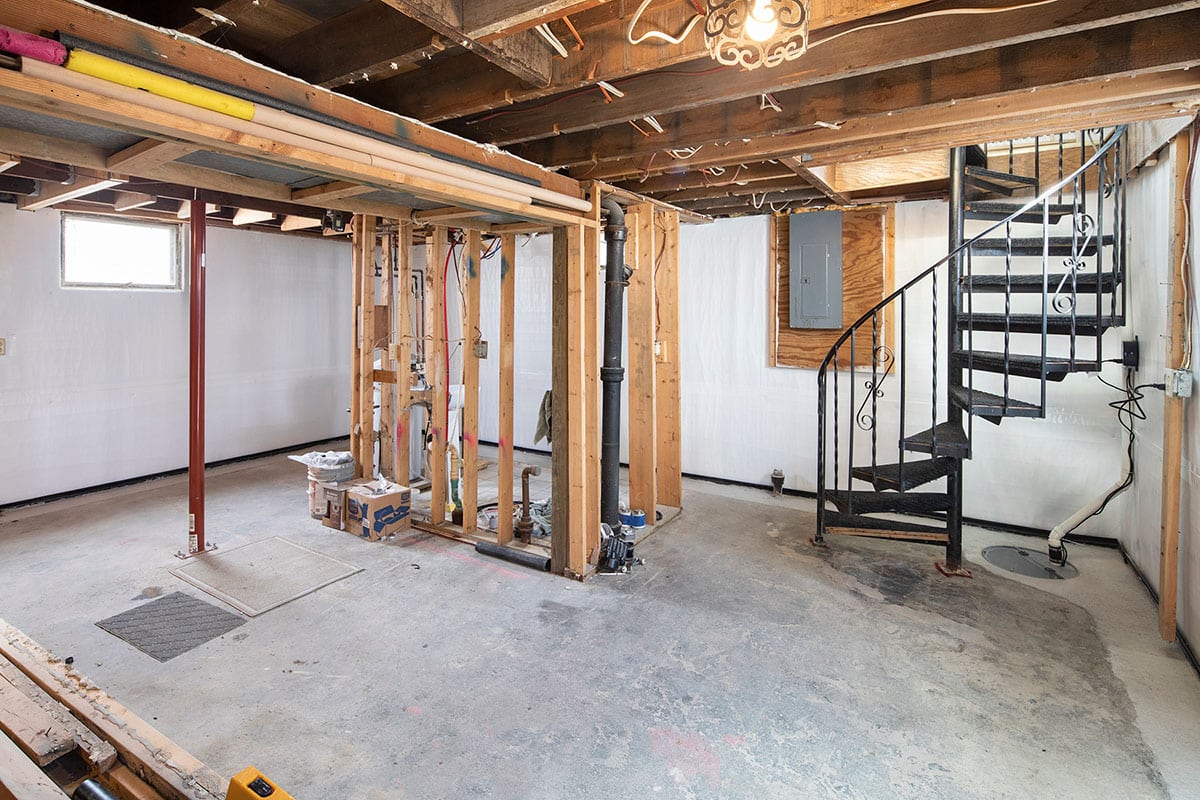
Before you begin the construction of your root cellar, it’s essential to assess and prepare your basement to ensure a suitable environment for your produce storage. Follow these steps to get your basement ready:
- Clean and declutter: Start by removing any items or clutter from your basement. This will provide you with a clear workspace and make it easier to assess the available space for your root cellar.
- Check for moisture and leaks: Inspect your basement for signs of moisture, leaks, or water seepage. Repair any leaks, address any dampness issues, and ensure proper drainage to prevent water damage to your root cellar.
- Assess ventilation: Evaluate the existing ventilation in your basement. Proper ventilation is crucial to maintain airflow and control humidity levels in your root cellar. If necessary, consider installing fans or vents to enhance air circulation.
- Inspect walls and floor: Examine the condition of the walls and floor in your basement. Look for any cracks, damage, or signs of water intrusion. Repair and seal any cracks or gaps to prevent moisture from entering your root cellar.
- Consider insulation: Depending on your climate and basement conditions, you may need to insulate the walls and floor of your root cellar. Insulation helps maintain a consistent temperature and prevents outside temperature fluctuations from affecting your produce.
- Address pests: Take measures to prevent or eliminate pests, such as rodents and insects, from entering your basement. Seal any entry points and consider using traps or professional pest control services if necessary.
By assessing and preparing your basement, you create a solid foundation for your root cellar project. This ensures that you have a clean, dry, and well-ventilated space to store your produce properly. Once your basement is ready, it’s time to gather the necessary materials and tools for constructing your root cellar, which we will discuss in the next section.
Gathering Materials and Tools
As you embark on building your root cellar, it’s important to gather all the necessary materials and tools beforehand. Having everything ready will not only streamline the construction process but also ensure that you have everything you need at your fingertips. Here’s a list of essential materials and tools you’ll need:
Materials:
- Concrete blocks or pressure-treated lumber for constructing the walls and shelves
- Plastic or metal sheeting for moisture barrier
- Insulation material (such as foam board or fiberglass) for insulating the walls and floor
- Plywood or boards for constructing the ceiling
- Door and frame for the entrance of the root cellar
- PVC pipes or flexible ventilation tubes for airflow
- Appropriate fasteners (nails, screws, brackets) for securing materials together
Tools:
- Measuring tape, level, and marking tools for accurate measurements
- Hammer, screwdriver, and drill for assembling the structure
- Saw or cutting tools for cutting materials to the desired size
- Insulation knife or scissors for cutting insulation
- Caulking gun and sealant for sealing cracks and gaps
- Work gloves and safety goggles for protection
- Utility knife for trimming materials
Ensure that you have the appropriate quantity of each material and that they are of good quality to ensure the durability and longevity of your root cellar. It’s also a good idea to have a first aid kit and a fire extinguisher in your work area for safety precautions.
Once you have gathered all the necessary materials and tools, you’re ready to move on to the next step: designing the layout of your root cellar. This stage will help you visualize the space and plan for efficient storage. Let’s dive into designing your root cellar layout in the following section.
Read more: How To Store Carrots In A Root Cellar
Designing the Layout
Designing the layout of your root cellar is an important step that will help you optimize the use of space and create an efficient storage system for your produce. When designing the layout, consider the types of fruits and vegetables you plan to store and their specific storage requirements. Here are some key factors to consider:
- Shelving: Plan the placement and size of shelves to accommodate different types of produce. Some fruits and vegetables may require individual bins or trays, while others can be stored directly on the shelves. Ensure that there is enough space between shelves for easy access and airflow.
- Storage containers: Determine the types and sizes of storage containers or bins you will need. Consider using breathable containers, such as wooden crates or mesh bags, for better air circulation.
- Dividers and labels: Use dividers or labels to separate different types of produce. This will help you easily identify and locate specific items in your root cellar.
- Grouping: Group similar fruits and vegetables together based on their storage requirements. For example, store apples and potatoes separately as apples emit ethylene gas, which can cause potatoes to sprout.
- Access and organization: Plan for easy access and organization within your root cellar. Consider creating pathways or aisles for convenient movement and ensure that stored items are easily visible and within reach.
- Temperature control: Pay attention to the location of temperature-sensitive produce. Place items that require cooler temperatures, such as apples or carrots, closer to the ventilation system or on lower shelves.
When designing the layout, take into account the available space, ventilation requirements, and any structural elements that may affect the placement of shelves and storage containers. Creating a well-organized and efficient layout will not only make it easier to find and access your produce but also help maintain optimal storage conditions for each item.
With the layout in mind, you’re now ready to start constructing your root cellar. The next section will guide you through the construction process, starting with excavating the basement floor to create the foundation of your root cellar.
Building the Root Cellar
Building your root cellar in the basement involves a series of steps, starting with excavating the basement floor. Follow these steps to construct your root cellar:
- Excavating the Basement Floor: Determine the size and shape of your root cellar and mark the area on the basement floor. Using a jackhammer or other suitable tools, carefully remove the concrete or flooring in the designated area. Excavate the soil to create the desired depth for your root cellar.
- Constructing the Walls and Ceiling: Depending on your preference and the structural integrity of your basement, use either concrete blocks or pressure-treated lumber to build the walls of your root cellar. Secure the walls firmly and ensure they are level and plumb. Additionally, construct a solid ceiling using plywood or boards.
- Insulating and Ventilating the Root Cellar: Insulate the walls and ceiling of your root cellar to maintain a consistent temperature. Install insulation material, such as foam board or fiberglass, carefully sealing any gaps or joints. Next, install ventilation pipes or tubes to ensure proper airflow and regulate humidity levels.
- Installing Shelves and Storage Units: Once the structure is complete, install shelves and storage units according to your designed layout. Ensure that they are sturdy and properly secured to the walls or freestanding units, allowing for easy access and maximum utilization of space.
- Finishing Touches: Apply a waterproof sealant or paint to the walls and floor of your root cellar to protect against moisture. Add any finishing touches, such as lighting fixtures, and ensure that the entrance door is properly installed and sealed.
Throughout the construction process, double-check measurements, align the walls and shelves accurately, and use appropriate fasteners and construction techniques to ensure durability and stability.
It’s worth noting that building a root cellar requires varying degrees of construction skills and tools. If you’re not confident in your abilities or prefer professional assistance, consider hiring a contractor or seeking guidance from experienced individuals.
Now that your root cellar is built, it’s time to move on to the next steps: cleaning and organizing your root cellar and maintaining its optimal conditions. We’ll explore these aspects in the following sections.
Excavating the Basement Floor
The process of excavating the basement floor is a crucial step in creating a solid foundation for your root cellar. This step involves removing the existing flooring to make space for the desired depth of your root cellar. Here’s a step-by-step guide to help you with the excavation process:
- Plan and measure: Determine the size and shape of your root cellar by measuring the designated area on the basement floor. Take into account the amount of space you require to store your produce and ensure that it fits comfortably within the available area.
- Check for utility lines: Before beginning any excavation work, it’s important to research and locate any utility lines, such as water, gas, or electrical lines, that may be present in the area. Contact a professional if you’re uncertain about the location of utility lines.
- Gather the necessary tools: Equip yourself with the appropriate tools for the excavation process. This may include a jackhammer or a concrete saw for breaking up the existing flooring, a shovel for digging, and a wheelbarrow for removing debris.
- Prepare the work area: Clear the surrounding area and remove any furniture or objects that may obstruct the excavation process. Make sure the area is well-lit to ensure safe and efficient work conditions.
- Break up the existing flooring: Using a jackhammer or concrete saw, carefully break up the existing flooring within the marked area. Start at one corner and work your way across, ensuring that you create a level surface and break up the concrete into manageable pieces.
- Dispose of debris: As you break up the concrete, collect the debris in a wheelbarrow or other suitable container. Dispose of the debris properly, following local regulations and guidelines for construction waste.
- Remove excess dirt: Once the flooring is removed, you may need to excavate some of the excess dirt to reach the desired depth for your root cellar. Use a shovel to carefully remove the dirt, ensuring that the floor is even and level.
- Level and compact the floor: Use a tamper or compactor to firmly pack the soil and create a solid, level surface for the floor of your root cellar. This step is important to ensure the stability of your root cellar’s foundation.
Throughout the excavation process, ensure your safety by wearing protective gear such as gloves, goggles, and a dust mask. Take breaks as needed and stay hydrated during the physical labor.
Excavating the basement floor lays the groundwork for the construction of your root cellar. Once this step is completed, you can proceed to the next stages of building the walls, insulating, and installing shelving and storage units. With each step, remember to follow proper safety measures and construction guidelines.
Ensure proper ventilation in your root cellar by installing vents to allow for air circulation. This will help prevent mold and mildew growth and maintain the ideal storage conditions for your produce.
Constructing the Walls and Ceiling
After excavating the basement floor, it’s time to move on to constructing the walls and ceiling of your root cellar. This step forms the structural foundation of your storage space. Follow these steps to ensure a sturdy and well-built root cellar:
- Choose your materials: Depending on your preference and the structural integrity of your basement, you can use either concrete blocks or pressure-treated lumber to construct the walls. Consider factors such as durability, affordability, and availability when selecting your materials.
- Measure and mark: Begin by measuring the height, width, and length of the walls. Mark these measurements on the basement floor using a chalk line or pencil to indicate the layout of your root cellar.
- Build the walls: Start at one corner and work your way around, aligning the blocks or lumber according to your marked measurements. Ensure that each piece is level, plumb, and tightly secured. Use appropriate fasteners such as nails or screws to reinforce the structure.
- Frame the entrance: Leave an opening for the entrance of your root cellar and frame it with sturdy materials such as pressure-treated lumber. This will provide support for the door and ensure a secure and well-fitted entrance.
- Construct the ceiling: To build the ceiling, use plywood or boards and attach them securely to the top of the walls. Ensure that the ceiling is level and provides proper support for the insulation and ventilation systems.
- Check for stability: Throughout the construction process, double-check the stability and structural integrity of the walls and ceiling. Ensure that they are firmly in place and can withstand the weight of the materials and produce stored within your root cellar.
By taking the time to construct solid and well-aligned walls and ceiling, you create a strong foundation for the rest of your root cellar. This ensures stability and durability as you proceed with insulating the walls, installing ventilation systems, and adding shelving and storage units.
Remember to follow relevant building codes and guidelines specific to your area to ensure that your construction meets the necessary safety and structural requirements.
With the walls and ceiling in place, you’re ready to move on to insulating and ventilating your root cellar, which we will discuss in the next section.
Read more: How To Build A Wine Cellar In Basement
Insulating and Ventilating the Root Cellar
Insulating and ventilating your root cellar is crucial for maintaining the desired temperature, humidity levels, and air circulation within the space. Proper insulation helps prevent temperature fluctuations, while effective ventilation ensures adequate airflow to prevent excessive moisture buildup. Follow these steps to insulate and ventilate your root cellar:
- Insulating the Walls: Start by applying insulation material to the walls of your root cellar. Common options include foam board or fiberglass insulation. Cut the insulation panels to the appropriate size and securely attach them to the walls using construction adhesive or nails. Ensure that there are no gaps or spaces between the insulation panels.
- Insulating the Ceiling: Similarly, insulate the ceiling of your root cellar using the same insulation material. Cut the insulation panels to fit between the joists and securely attach them to the ceiling using adhesive or staples. This helps maintain a consistent temperature throughout the root cellar.
- Moisture Barrier: Install a moisture barrier, such as plastic or metal sheeting, over the insulated walls and ceiling. This barrier helps prevent moisture from seeping into the root cellar and causing damage to the insulation and stored produce. Secure the barrier tightly and seal any seams or overlaps to ensure proper moisture protection.
- Install Ventilation System: Plan and install a ventilation system to ensure proper airflow within the root cellar. This can be achieved through the installation of PVC pipes or flexible ventilation tubes. Place vents near the floor and ceiling to facilitate air circulation. Consider incorporating a small fan or air exchange system to enhance ventilation.
- Monitor Humidity Levels: Regularly monitor and manage the humidity levels within your root cellar. Use a hygrometer or a humidity meter to ensure that the humidity remains within the desired range for the stored produce. Consider using a dehumidifier or moisture-absorbing products if excessive moisture becomes a concern.
Proper insulation and ventilation are key to maintaining the optimal storage conditions for your produce. They help regulate temperature, control humidity, and prevent the growth of mold and mildew. Additionally, a well-ventilated root cellar ensures that ethylene gas produced by some fruits does not accumulate, which can negatively impact the longevity of other produce items.
By insulating and ventilating your root cellar, you’re one step closer to creating an environment that will keep your fruits and vegetables fresh and preserved for an extended period of time. Now that the basic infrastructure is in place, it’s time to move on to the next step: installing shelves and storage units within your root cellar.
Installing Shelves and Storage Units
Installing shelves and storage units within your root cellar is essential for organizing and maximizing the use of space. With a well-designed storage system, you can easily access and store your produce, ensuring efficient rotation and proper airflow. Follow these steps to install shelves and storage units in your root cellar:
- Measure and plan: Measure the height, width, and depth of your root cellar to determine the dimensions of your shelves and storage units. Consider the size of your produce containers and the layout you designed earlier.
- Select appropriate materials: Choose sturdy materials that are resistant to moisture and can withstand the weight of your produce. Common options include pressure-treated lumber, wire shelving, or food-grade plastic shelving.
- Install wall-mounted shelves: Start by installing wall-mounted shelves. Determine the desired height and spacing between shelves, ensuring there is enough room for the height of your stored produce. Use appropriate brackets and fasteners to secure the shelves to the walls.
- Add freestanding shelves or units: If you have space in your root cellar, consider adding freestanding shelves or storage units. These can be placed in the center of the room or against the walls to provide additional storage options. Ensure that they are stable and level to avoid any accidents or product damage.
- Organize the shelves: Once the shelves are installed, organize your produce according to your planned layout. Group similar items together and consider the specific storage requirements of each fruit or vegetable. Use dividers or labels to keep items separated and clearly labeled.
- Allow for proper airflow: Arrange your produce containers in a way that allows for proper airflow within the root cellar. Leave enough space between items to ensure good ventilation, preventing condensation and mold growth.
By installing well-organized shelves and storage units, you create an efficient and functional storage system for your root cellar. This allows you to easily access and rotate your produce, helping to maintain its freshness and shelf life.
Remember to periodically inspect and clean your shelves and storage units to ensure that they remain in good condition. Regularly remove any spoiled produce and maintain proper organization to optimize the storage space.
With shelves and storage units in place, your root cellar is almost complete. In the next section, we will discuss the finishing touches to make your root cellar a functional and aesthetically pleasing space.
Finishing Touches
As you near the completion of your root cellar, it’s time to add the finishing touches that will enhance its functionality and aesthetics. These final details will ensure that your root cellar is not only a practical storage space but also a visually appealing addition to your basement. Here are some important finishing touches to consider:
- Seal the walls and floor: Apply a waterproof sealant or paint to the walls and floor of your root cellar. This helps to protect against moisture and makes cleaning the space easier. Choose a non-toxic and food-safe sealant that is compatible with the materials used in your root cellar construction.
- Add appropriate lighting: Proper lighting is crucial for navigating and organizing your root cellar. Install bright, energy-efficient lighting fixtures that illuminate the entire space. Consider using LED lights that emit minimal heat to prevent any unwanted temperature fluctuations.
- Enhance security: Depending on your preferences and the location of your root cellar, you may want to consider adding additional security measures. Install a lock or secure the entrance to prevent unauthorized access and protect your stored produce.
- Create an inventory system: Develop an inventory system to keep track of the produce in your root cellar. This can be as simple as using labels or markers to keep a list of the items stored and their expiration dates. Regularly update the inventory to ensure efficient rotation and prevent spoilage.
- Consider decorative elements: Personalize your root cellar by adding decorative elements that enhance its visual appeal. This can include painting the walls in a soothing color, hanging artwork or signs related to gardening or food preservation, or adding potted plants for a touch of nature.
These finishing touches will not only contribute to the overall functionality and efficiency of your root cellar but also make it a pleasant and inviting space to work in. Take the time to implement these details to create a root cellar that meets both your practical and aesthetic needs.
With the finishing touches complete, your root cellar is now ready for use. However, the journey doesn’t end here. The next section will cover the important aspects of cleaning, organizing, and maintaining your root cellar to ensure its long-term effectiveness.
Cleaning and Organizing the Root Cellar
Once your root cellar is complete, it’s important to establish a regular cleaning and organizing routine. This will help ensure that your stored produce remains fresh and free from contaminants. Follow these steps to keep your root cellar clean and well-organized:
- Regular cleaning: Set a schedule for regular cleaning sessions. Sweep or vacuum the floor to remove any debris or dust buildup. Wipe down the walls and shelves with a damp cloth to remove any dirt or residue. Cleaning the root cellar regularly will help maintain a clean and sanitary environment for your produce.
- Inspect for spoilage: Regularly check your stored produce for signs of spoilage or rot. Remove any spoiled items immediately to prevent the spread of mold or bacteria to other items. Keeping a vigilant eye on your produce will help maintain the quality of your stored food.
- Organize by expiration date: Arrange your produce based on their expiration dates. Place items that have a shorter shelf life towards the front or at eye level so that they are easily visible and consumed first. This helps prevent waste and ensures that you utilize your produce before it spoils.
- Rotate your stock: Routinely rotate your stock by moving older items to the front and placing newer items towards the back. This practice ensures that produce is used in a timely manner and minimizes the risk of forgetting about items that may spoil.
- Monitor temperature and humidity: Regularly check the temperature and humidity levels within your root cellar. Use a thermometer and hygrometer to ensure they remain within the desired range for the stored produce. Adjust ventilation or use additional methods, such as dehumidifiers, if necessary.
- Keep it dry: Moisture control is vital for preventing mold or mildew growth. Regularly check for any signs of moisture or condensation and take appropriate measures to address the issue. This may include using moisture-absorbing products, adjusting ventilation, or repairing any leaks or cracks.
Maintaining a clean and organized root cellar not only ensures the longevity of your stored produce but also provides a pleasant and efficient space to work in. By following these steps, you can create an environment that promotes the quality and freshness of your fruits and vegetables.
With a clean and organized root cellar, you can enjoy the benefits of your homegrown or locally sourced produce all year-round. However, it’s important to remember that maintenance and upkeep are ongoing responsibilities. In the next section, we will discuss some crucial aspects of maintaining your root cellar to ensure its long-term effectiveness.
Read more: How To Store Potatoes Without A Root Cellar
Maintenance and Upkeep
To ensure the long-term effectiveness and functionality of your root cellar, regular maintenance and upkeep are essential. By implementing a few simple practices, you can prevent potential issues and extend the lifespan of your storage space. Here are some important steps to follow for the maintenance and upkeep of your root cellar:
- Monitor temperature and humidity: Continuously monitor the temperature and humidity levels within your root cellar. Use a thermometer and hygrometer to keep track of these parameters. Make adjustments to ventilation or other systems if necessary to maintain optimal storage conditions.
- Inspect for damages: Regularly inspect the walls, ceiling, and floor of your root cellar for any signs of damages such as cracks, leaks, or pest infestations. Address these issues immediately to prevent further damage and maintain a secure and clean environment.
- Check for ventilation: Ensure that the ventilation system in your root cellar is functioning properly. Clear any obstructions in the ventilation ducts or pipes and check that fans or air exchange systems are operational. Proper ventilation is critical for controlling humidity and maintaining airflow.
- Address pest control: Routinely inspect your root cellar for any signs of pests such as rodents, insects, or mold. Take preventive measures to keep pests out, such as sealing any entry points, using traps or repellents, and practicing good hygiene in the storage area.
- Rotate and replenish stock: Regularly rotate your produce stock, ensuring that items are used within their recommended shelf life. Remove any spoiled or decaying produce promptly to avoid contamination. Replenish your stock of fruits and vegetables regularly to maintain a fresh supply.
- Perform routine cleaning: Regularly clean and sanitize your root cellar by sweeping or vacuuming the floor, wiping down surfaces, and discarding any debris. Use appropriate cleaning agents to ensure a hygienic environment without leaving any harmful residues on your stored produce.
- Inspect shelving and storage units: Check the stability and condition of your shelves and storage units. Ensure that they are securely fastened and properly support the weight of your produce. If any repairs or reinforcements are needed, address them promptly.
By following these maintenance and upkeep practices, you can ensure that your root cellar remains in good working condition and prolong the shelf life of your stored produce. Regular checks and preventive measures can help you catch and address any issues before they become major problems.
Remember to stay vigilant and proactive in maintaining your root cellar. By investing a little time and effort into its upkeep, you can enjoy the benefits of fresh and preserved produce throughout the year.
Now that you’re well-equipped with knowledge on how to maintain your root cellar, it’s time to put it into action. Enjoy the abundance of homegrown or locally sourced fruits and vegetables and savor the taste of your preserved harvest!
Conclusion
Congratulations on successfully creating your very own root cellar in your basement! By following the steps outlined in this guide, you have taken an important step towards preserving and extending the shelf life of your fruits, vegetables, and other perishable items. With a well-designed and properly maintained root cellar, you can enjoy the taste of your garden’s bounty all year-round.
Throughout this journey, you have learned the importance of planning and preparing, choosing the right location, assessing and preparing your basement, gathering materials and tools, designing the layout, building the walls and ceiling, insulating and ventilating, installing shelves and storage units, adding finishing touches, and maintaining your root cellar. Each step has contributed to the creation of a functional and efficient storage space.
Remember to regularly clean and organize your root cellar, monitor temperature and humidity levels, inspect for damages or pest infestations, rotate and replenish your stock, and perform routine maintenance tasks to ensure the longevity of your root cellar.
With your root cellar in place, you now have the ability to enjoy the flavors of your harvest throughout the year, reduce your reliance on commercial refrigeration, and embrace a more sustainable and natural approach to food preservation. Additionally, the convenience and cost-saving benefits of having your own root cellar will surely enhance your gardening and culinary experiences.
Lastly, don’t forget to share your knowledge and experiences with others who may be interested in creating their own root cellar. By spreading awareness of this traditional and efficient storage method, you can inspire others to embark on their own preservation journeys.
Now it’s time to fill your root cellar with an assortment of fresh and vibrant produce, and enjoy the satisfaction of tasting the fruits of your labor throughout the year. Happy preserving!
Frequently Asked Questions about How To Make A Root Cellar In Your Basement
Was this page helpful?
At Storables.com, we guarantee accurate and reliable information. Our content, validated by Expert Board Contributors, is crafted following stringent Editorial Policies. We're committed to providing you with well-researched, expert-backed insights for all your informational needs.








0 thoughts on “How To Make A Root Cellar In Your Basement”