Articles
How To Build A Wine Cellar In Basement
Modified: October 20, 2024
Learn how to build a wine cellar in your basement with our informative articles. Discover the best tips and techniques for creating the perfect wine storage space.
(Many of the links in this article redirect to a specific reviewed product. Your purchase of these products through affiliate links helps to generate commission for Storables.com, at no extra cost. Learn more)
Introduction
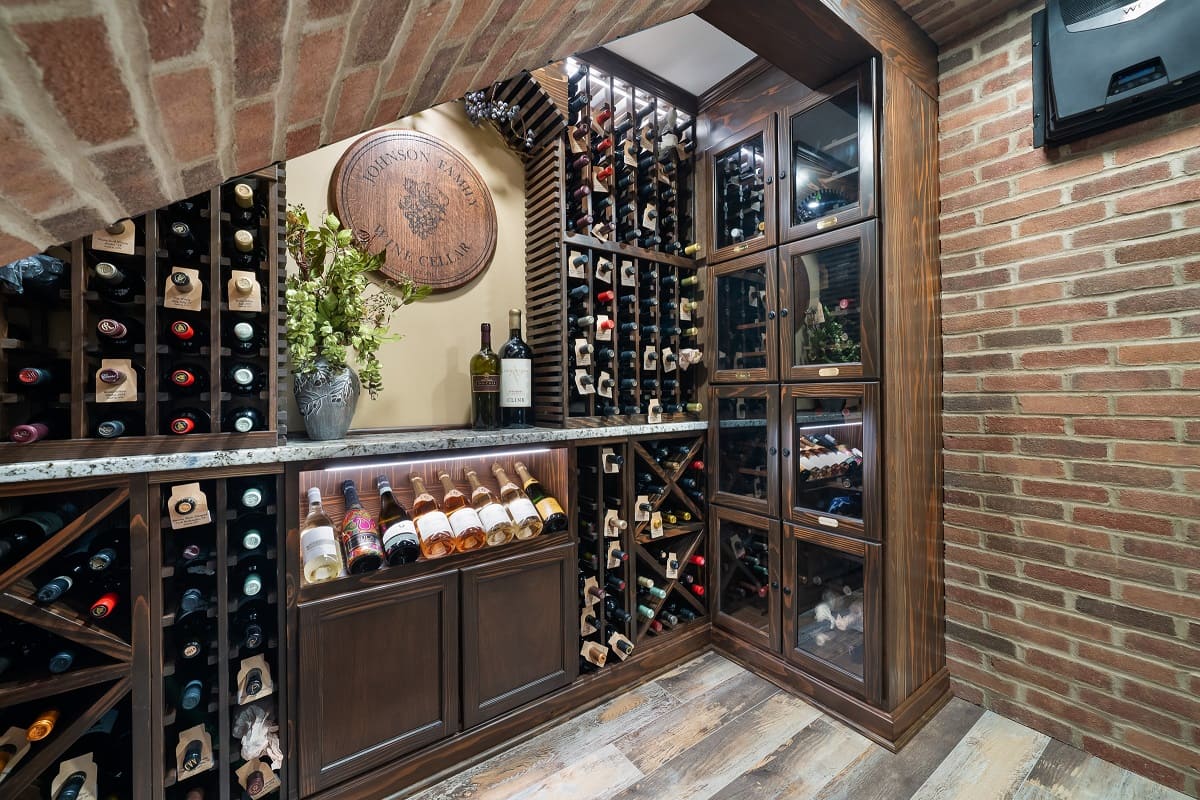
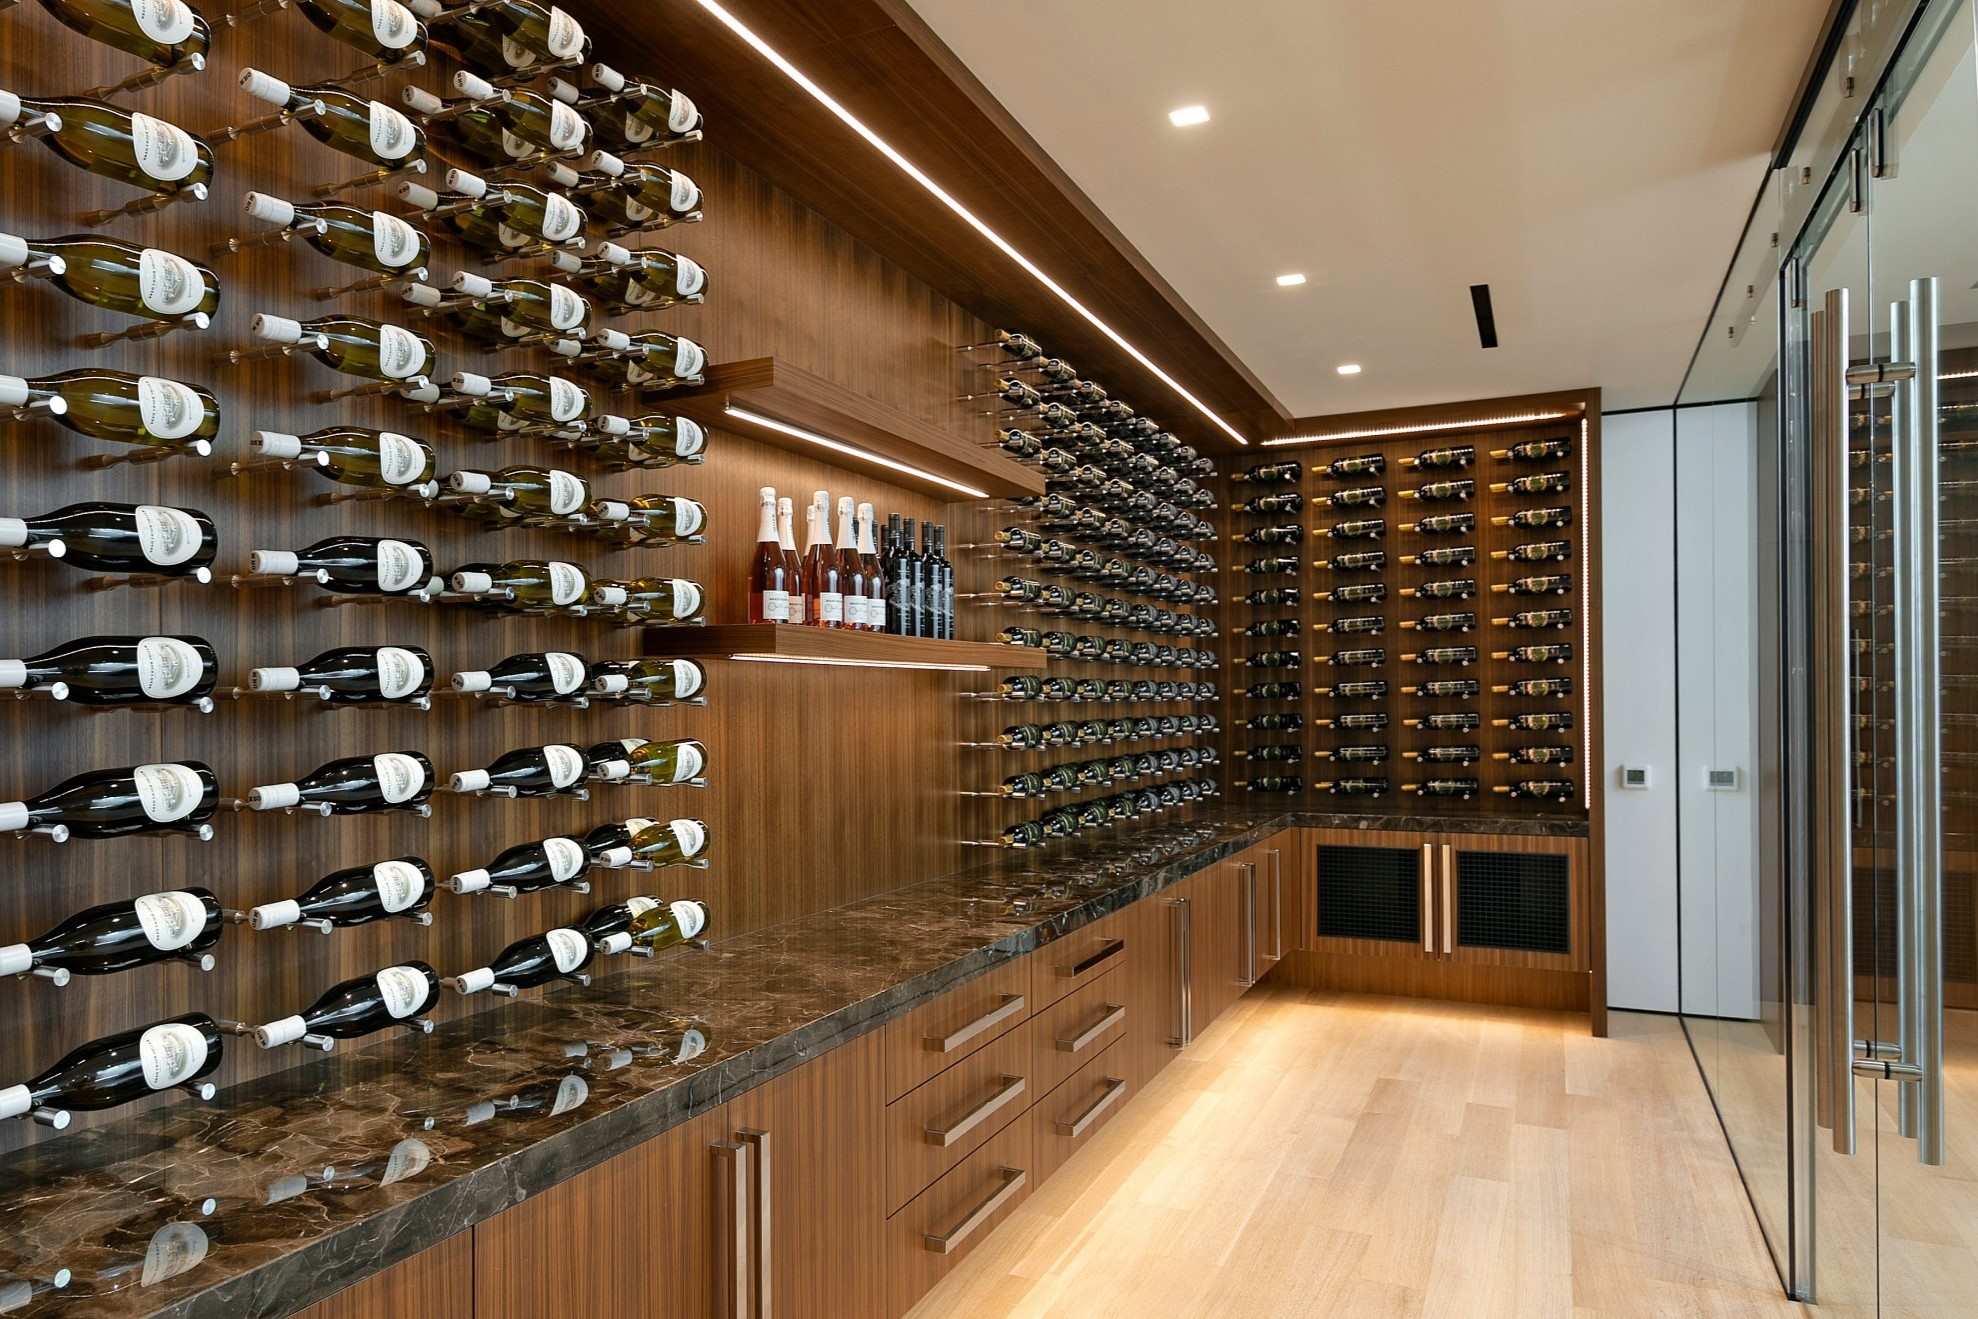
Welcome to the world of wine connoisseurs! If you are a wine enthusiast, you know that storing and aging your precious bottles in a proper environment is vital to preserving their quality and taste. One of the best ways to achieve this is by building a wine cellar in your basement. Not only does a wine cellar provide the ideal conditions for wine storage, but it also adds a touch of elegance and sophistication to your home.
In this comprehensive guide, we will take you through the step-by-step process of building a wine cellar in your basement. From planning and design to selecting the right cooling system and organizing your wine collection, we will cover every aspect you need to know to create a perfect wine cellar tailored to your needs.
Before we delve into the details, it’s important to note that building a wine cellar requires careful planning and consideration. You will need to assess your basement, determine the optimal location, prepare the space, construct the wine racks, install a cooling system, insulate and seal the cellar, choose appropriate lighting and flooring options, and ultimately organize and maintain your wine collection. So let’s get started!
Key Takeaways:
- Building a wine cellar in your basement requires careful planning, from assessing the space to selecting the ideal location, preparing the area, and choosing the right cooling system. It’s a comprehensive process that demands attention to detail and consideration of various factors to create the perfect environment for storing and aging your wine collection.
- Once your wine cellar is built, ongoing maintenance is crucial to ensure the preservation of your wines. Regular monitoring of temperature and humidity, cleaning, organization, and pest prevention are essential for maintaining the quality and value of your collection.
Read more: Wine Cellar How To Build
Planning and Designing Your Wine Cellar
Before you start construction, it’s essential to spend time planning and designing your wine cellar. This step will ensure that you create a space that not only accommodates your wine collection but also reflects your personal style and preferences. Here are some key factors to consider:
- Determine your storage needs: Assess the size of your wine collection and estimate how many bottles you plan to store. This will help you determine the size and layout of your wine cellar.
- Consider your budget: Set a budget for your wine cellar project. This will influence your design choices, materials, and overall scope of the project.
- Choose a theme or style: Decide on the overall aesthetic of your wine cellar. Whether you prefer a rustic, modern, or traditional look, selecting a theme will guide your design choices, such as wood finishes, lighting fixtures, and decor elements.
- Think about accessibility: Consider how you want to access your wine collection. Would you like a walk-in cellar where you can browse your bottles, or do you prefer a more compact space with easy access to your favorite wines?
- Take storage options into account: Research different types of wine racks and shelving systems. Determine whether you prefer traditional wooden racks, metal racks, or a combination of both. Consider features like adjustable shelves and display options for showcasing your wine labels.
- Consider additional features: Think about incorporating additional features into your wine cellar design. These may include a tasting area, a wine-themed mural or artwork, a wine bar, or even a seating area for hosting wine tasting sessions.
Once you have a clear vision of your wine cellar, it’s a good idea to sketch out a floor plan or work with an architect or wine cellar specialist to create a detailed design. This will help you visualize the layout, the placement of racks, and the overall flow of the space.
Remember, the planning and design phase is crucial for ensuring that your wine cellar meets your needs and preferences. Take the time to plan carefully and make informed decisions to create a wine cellar that you will enjoy for years to come.
Assessing the Basement Space for Your Wine Cellar
Before you begin the construction of your wine cellar, it’s important to assess the space in your basement where you plan to build it. Here are some key points to consider:
- Size and dimensions: Measure the dimensions of the basement area where you intend to construct your wine cellar. Consider the height, width, and length of the space. This will help determine how many bottles you can store and the layout of the cellar.
- Temperature and humidity: Basements typically have more stable temperatures and higher humidity levels, which are ideal for wine storage. Use a digital thermometer to monitor the temperature in different areas of the basement. Look for spots that stay consistently cool and avoid areas near heating vents or appliances that generate heat.
- Lighting: Assess the natural and artificial lighting in your basement. Avoid areas with direct sunlight as it can cause wine to deteriorate. If there are windows, consider installing blackout curtains or UV-resistant glass to protect your wine collection from harmful light exposure.
- Noise and vibrations: Determine if there are any sources of excessive noise or vibrations in the basement, such as nearby utility rooms or HVAC systems. These factors can disturb the sediment in the wine and affect its aging process. Choose a location away from these disturbances.
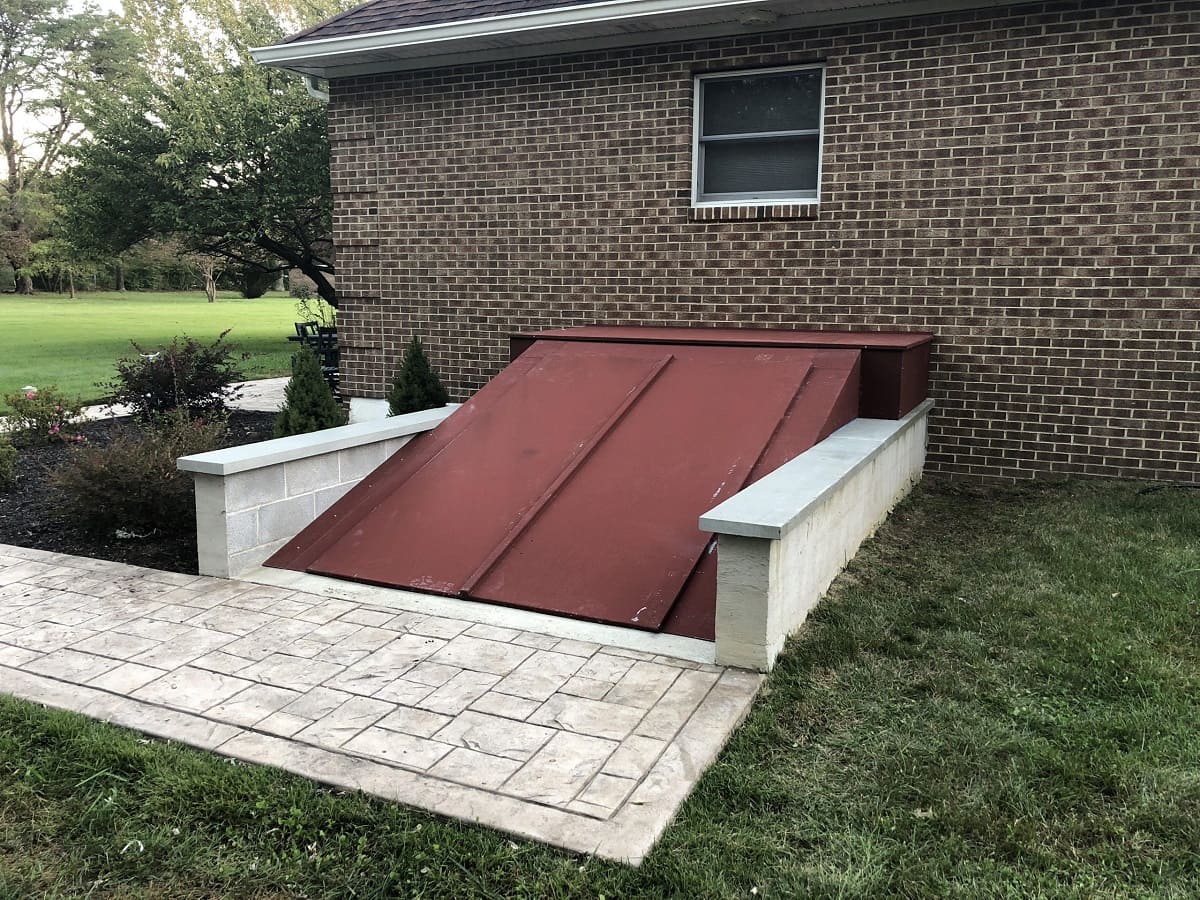
- Accessibility: Consider the ease of access to the basement space. Ensure there is a convenient pathway to transport your wine bottles in and out of the cellar. If there are stairs leading to the basement, ensure they are sturdy and wide enough to accommodate the movement of racks and bottles.
Keep in mind that a wine cellar requires adequate space not only for the wine racks but also for maneuverability and proper airflow. Avoid overcrowding the cellar, as it can make organizing the wine collection and accessing bottles difficult.
By thoroughly assessing the space in your basement, you can choose the optimal location for your wine cellar and ensure that it provides the necessary conditions for storing and aging your wines. Once you’ve completed this step, you’re ready to move on to selecting the location within the basement and preparing it for construction.
Selecting the Location within the Basement for Your Wine Cellar
Now that you have assessed the overall space in your basement, it’s time to select the specific location for your wine cellar. Consider the following factors when choosing the ideal spot:
- Stability: Look for an area in your basement that is structurally stable and free from water leaks or excessive moisture. Avoid locations that are prone to flooding or have a high humidity level.
- Noise and vibrations: Select a spot that is away from noisy appliances, such as furnaces or washing machines, as well as areas with high foot traffic. Minimizing noise and vibrations will help maintain the overall quality of your wine.
- Temperature control: Choose an area of the basement that naturally maintains a cool and consistent temperature. Avoid spots directly next to heating or cooling systems, as they can create temperature fluctuations that are detrimental to your wine.
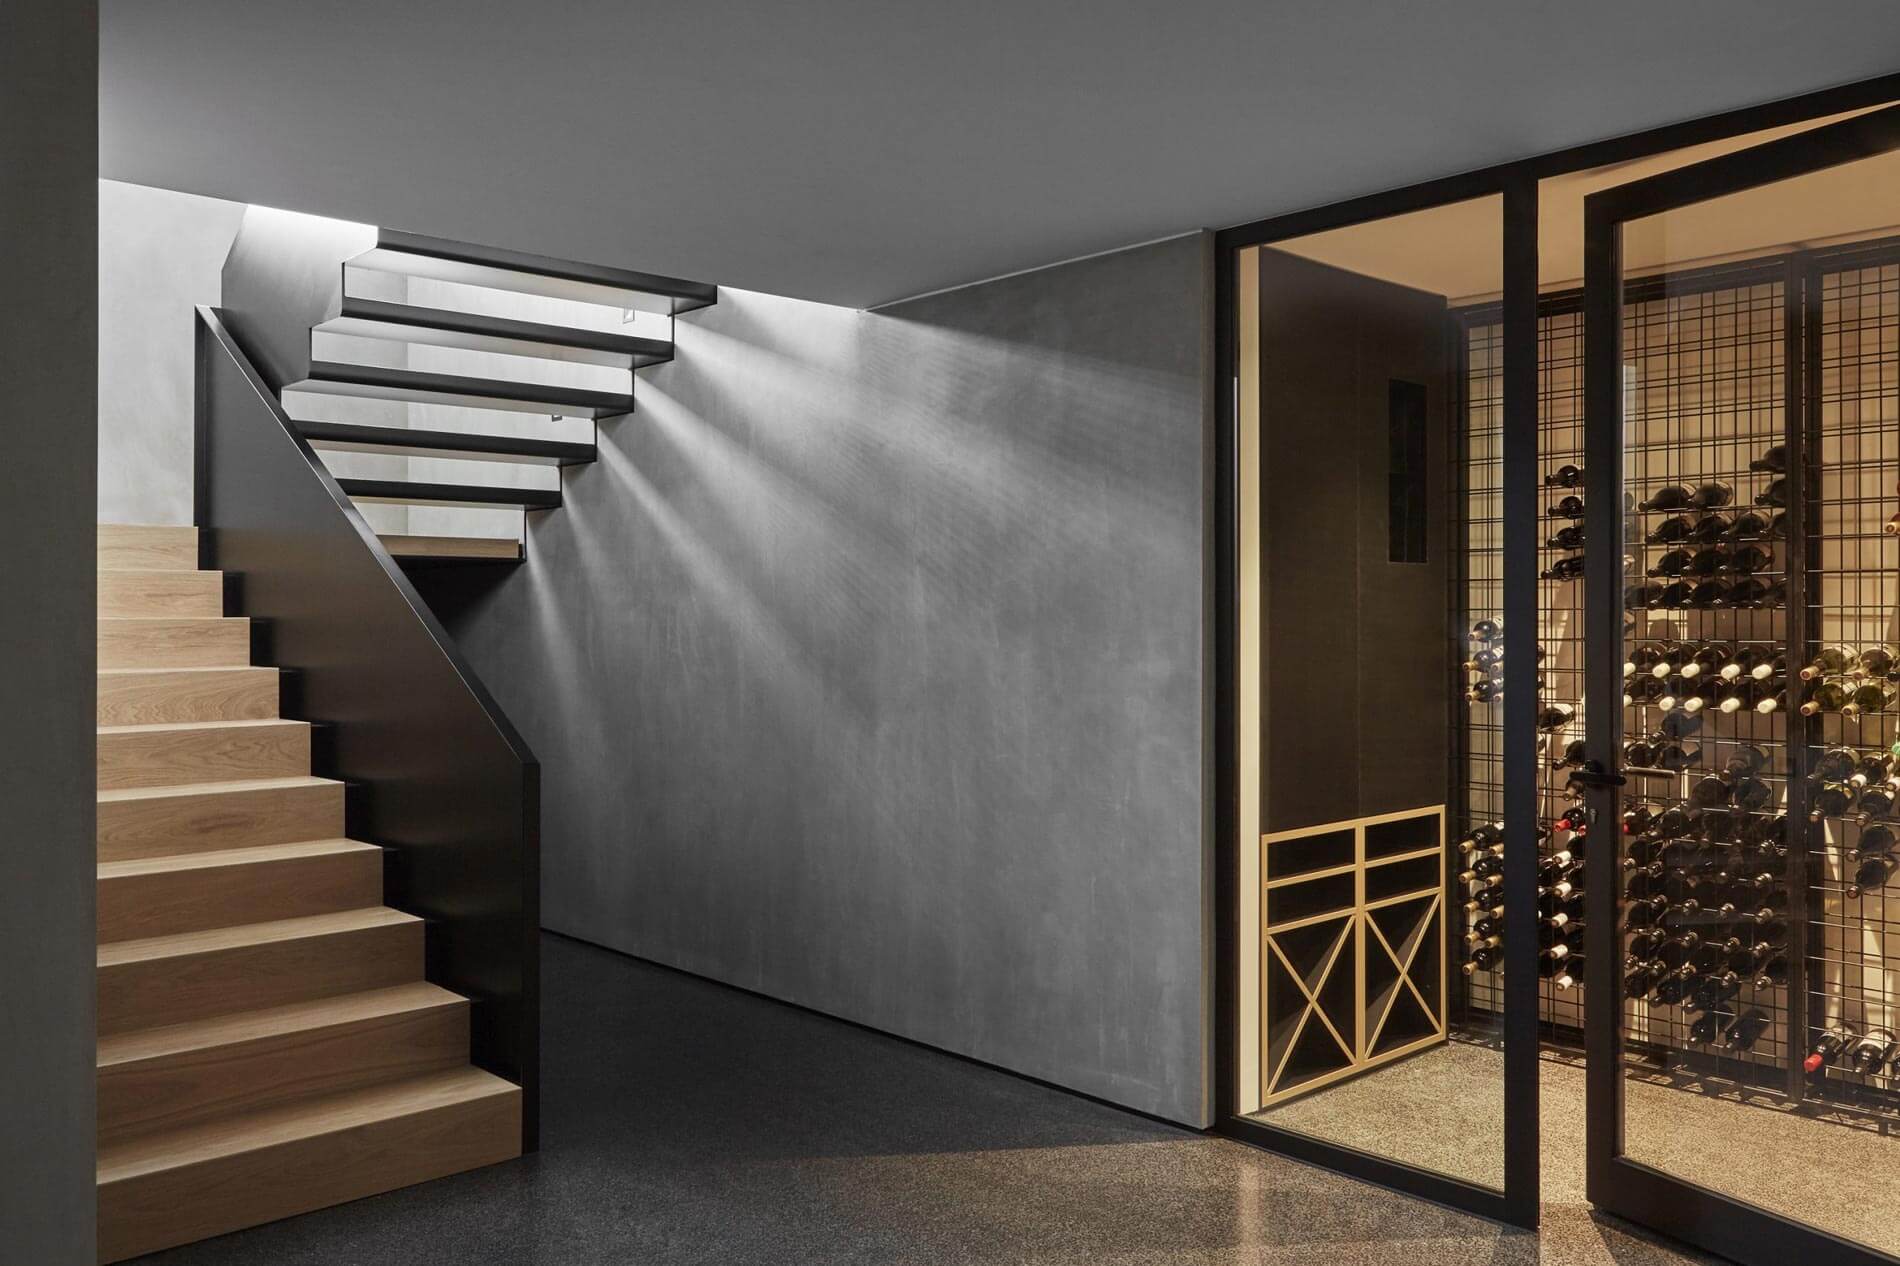
- Accessibility: Consider how easily you can enter and exit the wine cellar. It should be convenient to transport wine bottles in and out of the cellar. If possible, locate the cellar near a staircase or directly adjacent to the main living area.
- Space requirements: Take into account the overall dimensions of the wine cellar and the number of wine bottles you plan to store. Make sure the location has enough space to accommodate the racks, shelving, and any additional features you desire.
- Aesthetics: Consider the aesthetics of the chosen location within your basement. Choose an area that complements the overall design of your home. You may want to consider creating a focal point by incorporating decorative elements or using glass doors to showcase your wine collection.
Once you have identified the ideal location, mark out the dimensions of your wine cellar on the floor. This will provide a visual representation of the space and help you determine the layout and placement of the wine racks and shelving.
By carefully selecting the location of your wine cellar within the basement, you can create a functional and visually appealing space that will enhance your wine storage experience. The next step is to prepare the basement for the construction of your wine cellar.
Preparing the Basement for Wine Cellar Construction
Before you begin building your wine cellar in the basement, it’s crucial to prepare the space properly. This preparation process will ensure a stable foundation and create an environment that is conducive to storing and aging your wines. Follow these steps to prepare your basement for wine cellar construction:
- Clean and declutter: Remove any items or debris from the designated area where you plan to construct your wine cellar. Clearing the space will make it easier to work and prevent any potential damage to your belongings.
- Inspect for moisture: Check for any signs of water damage or moisture in the basement. Look for leaks, dampness, or musty odors. If you detect any issues, address them before proceeding with construction. Consider hiring a professional waterproofing company to ensure your cellar remains dry.
- Address ventilation: Basements can be prone to poor air circulation. Ensure there is proper ventilation in the space to prevent odors and maintain fresh air. Install fans or vents if necessary.
- Seal cracks and gaps: Inspect the walls and floors for any cracks or gaps. Use a waterproofing sealant to fill in these areas to prevent moisture infiltration.
- Consider insulation: Basements tend to have cooler temperatures, but insulation can help maintain stable conditions. Insulate the walls, ceiling, and floor of your wine cellar area to create a more climate-controlled environment. This will help regulate the temperature and humidity levels more effectively.
- Install a vapor barrier: Adding a vapor barrier, such as a plastic sheet or specialized membrane, will further protect your wine cellar from moisture and humidity. It prevents seepage from the surrounding soil and acts as an extra layer of protection.
Once you have completed these preparation steps, your basement will be ready for the construction of your wine cellar. By taking the time to properly prepare the space, you are ensuring a stable and suitable environment for your wine collection. Now, it’s time to move on to building the wine racks and shelving in your cellar!
Read more: How To Organize A Wine Cellar
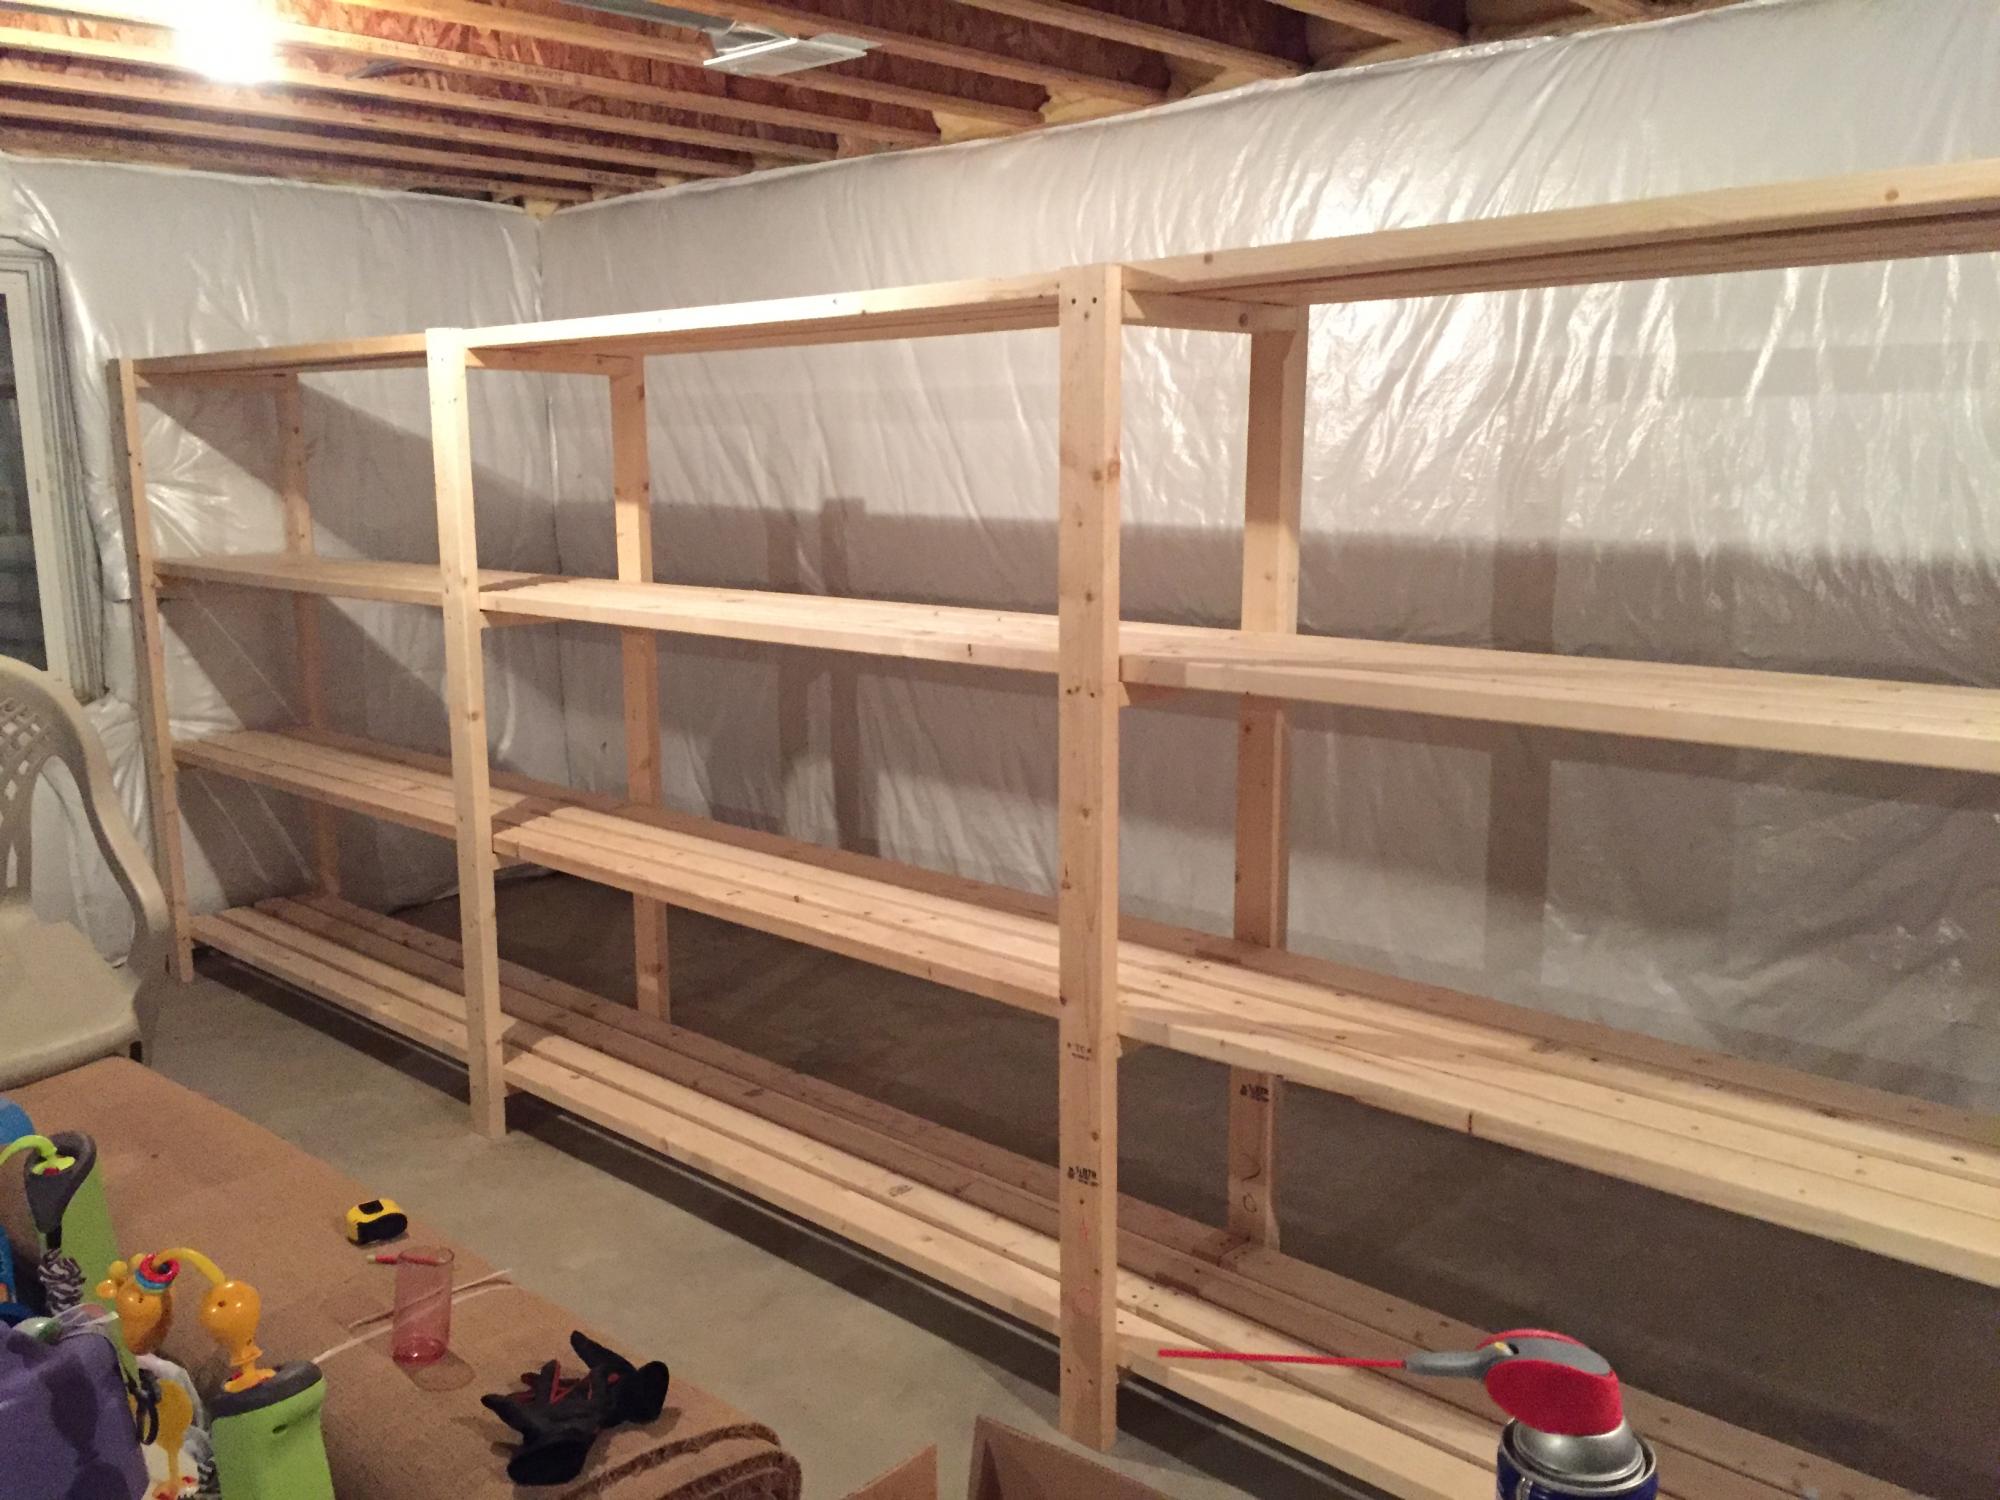
Building the Wine Racks and Shelving
Building the wine racks and shelving for your cellar is an exciting and creative process. Customizing the racks and shelves not only allows you to showcase your wine collection but also adds a personal touch to your wine cellar. Here’s a step-by-step guide to help you in the construction process:
- Measure and plan: Take accurate measurements of your wine cellar to determine the dimensions of the racks and shelves. Consider the types of wines you will be storing, such as standard bottles, magnums, or odd-shaped bottles, and plan accordingly.
- Select materials: Choose high-quality materials for your wine racks and shelving that can withstand the weight of the bottles and provide stability. Common materials include wood, metal, or a combination of both. Ensure the chosen materials are moisture-resistant and suitable for a cellar environment.
- Design the layout: Determine the configuration and layout of your wine racks and shelving. Consider factors such as bottle capacity, spacing between racks, and ease of access to your wine collection. There are various options, including traditional racking systems, modular racks, or custom-designed racks to suit your personal style and needs.
- Start with the base: Begin building the base of the wine racks, ensuring it is level and stable. This will act as the foundation for the rest of the racks and shelves. Use proper bracing and reinforcing techniques to ensure durability.
- Assemble the racks: Construct each section of the wine racks, following your design plan. Install the supports, shelves, and crossbars securely. Ensure that each rack is level and properly aligned with the rest of the structure.
- Consider wine display options: Incorporate display features such as horizontal or angled bottle storage to showcase your favorite bottles or highlight special vintages. This adds visual interest to your wine cellar and makes selecting a bottle a pleasurable experience.
- Test for stability: Once you have completed the construction, test the stability of the wine racks. Gently shake or apply pressure to ensure they are securely in place. Reinforce any weak areas if needed.
Remember to leave enough space between the racks to allow for air circulation and easy access to your wine bottles. Proper organization and storage of your wine collection will contribute to maintaining its quality.
Building your own wine racks and shelving can be a rewarding experience. However, if you prefer a professional touch, many companies specialize in constructing custom wine racks tailored to your specifications. With your wine racks now in place, it’s time to consider the cooling system for your cellar to create an optimal environment for your wine to age gracefully.
Choosing the Right Cooling System for Your Wine Cellar
Creating the ideal climate conditions in your wine cellar is essential to preserving the quality and flavor of your wines. A cooling system is crucial in maintaining a consistent temperature and humidity level. Here are some factors to consider when choosing the right cooling system for your wine cellar:
- Evaluate cellar size and insulation: Consider the size of your wine cellar and its insulation. Larger cellars or cellars in warmer climates may require a more robust cooling system. Well-insulated cellars will retain the desired temperature more efficiently.
- Determine cooling capacity: Calculate the cooling capacity needed to maintain your desired temperature range based on the size of your cellar. You’ll want a cooling system that can adequately cool the space without overworking or underperforming.
- Choose between self-contained and split systems: Self-contained cooling systems, such as through-the-wall units or ceiling-mounted units, are easier to install and more suitable for smaller cellars. Split systems, consisting of an outdoor condensing unit and an indoor evaporator unit, provide greater flexibility and are ideal for larger or custom cellars.
- Consider noise level: Some cooling systems can produce noise, which may be a concern if your wine cellar is located near living spaces. Opt for a cooling system that operates quietly or has noise reduction features.
- Look for energy efficiency: Choose a cooling system that is energy-efficient to save on utility costs in the long run. Look for units with energy-saving features, such as variable-speed fans or digital temperature controls.
- Check for humidity control: Ideally, the cooling system should include a humidity control feature. This will help maintain the proper humidity level for wine storage, usually between 50% and 70% relative humidity.
- Consider maintenance requirements: Look into the maintenance requirements of the cooling system. Some units require regular filter changes or professional maintenance, while others are more low-maintenance. Consider your willingness and ability to perform routine maintenance tasks.
It’s important to consult with a professional HVAC technician or a wine cellar specialist to assess your specific needs and recommend the most suitable cooling system for your wine cellar. They can help ensure the system is properly installed and calibrated to maintain the optimal temperature and humidity levels for your wine collection.
Once you have selected the cooling system, it’s time to proceed with installing it in your wine cellar to create the perfect conditions for storing and aging your wines. We will cover the installation process in the next section.
Installing the Cooling System
Installing the cooling system in your wine cellar is a crucial step in creating the optimal environment for your wine collection. Proper installation is essential to ensure that the system functions effectively and maintains the desired temperature and humidity levels. Here’s a step-by-step guide to help you through the installation process:
- Consult the manufacturer’s instructions: Read and familiarize yourself with the installation instructions provided by the manufacturer of the cooling system. This will help you understand the specific requirements and guidelines for installation.
- Choose the optimal location: Select the ideal location for the cooling system. Consider accessibility for maintenance and ensure that the system can expel hot air and draw in cool air without obstruction. If necessary, consult with a professional to determine the best placement within your wine cellar.
- Prepare the installation area: Clear the area where the cooling system will be installed. Remove any obstructions or debris that may impede installation or airflow.
- Mount the cooling system: Follow the manufacturer’s instructions to mount the cooling system in the designated location. Use appropriate hardware and ensure that it is securely fastened to the wall or ceiling.
- Connect the electrical wiring: If required, connect the electrical wiring according to the manufacturer’s instructions. Ensure that the electrical outlet or circuit is capable of supplying the necessary power for the cooling system.
- Install the ventilation ducts: If the cooling system includes ventilation ducts, carefully install them according to the manufacturer’s guidelines. Ensure that the ducts are properly aligned and securely connected to both the cooling system and the cellar space for optimum airflow.
- Test the system: Once the installation is complete, test the cooling system to ensure it is functioning properly. Monitor the temperature and humidity levels in your wine cellar to verify that they are within the desired range.
- Adjust settings and calibrate: Fine-tune the settings of the cooling system to achieve the desired temperature and humidity levels. Consult the manufacturer’s instructions or seek professional assistance if needed.
It’s important to note that if you’re unsure or uncomfortable with the installation process, it is recommended to seek the help of a professional technician experienced in wine cellar cooling systems. They have the expertise and knowledge to ensure a proper and efficient installation.
With the cooling system successfully installed, your wine cellar is one step closer to providing the ideal environment for your wine collection. Next, we will discuss the importance of insulating and sealing the wine cellar to maintain stable conditions.
When building a wine cellar in your basement, make sure to insulate the walls and ceiling to maintain a consistent temperature and humidity level, which is crucial for storing wine.
Insulating and Sealing the Wine Cellar
Insulating and sealing your wine cellar is crucial to create a controlled environment that maintains a stable temperature and humidity level. Proper insulation and sealing help prevent temperature fluctuations, minimize moisture infiltration, and ensure the longevity of your wine collection. Here’s a step-by-step guide to insulating and sealing your wine cellar:
- Choose insulation materials: Select insulation materials that are suitable for your wine cellar. Common options include foam board insulation, fiberglass batts, or spray foam insulation. Consider the R-value of the insulation, which measures its thermal resistance.
- Apply insulation to the walls, ceiling, and floor: Install the insulation material on the walls, ceiling, and floor of your wine cellar. Follow the manufacturer’s instructions and ensure a proper fit to minimize gaps or air leaks. Pay particular attention to corners, joints, and any areas prone to temperature exchange.
- Seal gaps and cracks: Inspect the wine cellar for any gaps, cracks, or air leaks. Use caulk or foam sealant to fill in these areas, paying attention to windows, doors, electrical outlets, and any other potential entry points for air or moisture.
- Install a vapor barrier: Once the insulation is in place, consider installing a vapor barrier. This barrier helps prevent moisture from penetrating the walls and reaching the insulation. Use a specialized moisture barrier or a thick plastic sheeting to cover the walls and ceiling.
- Seal windows and doors: Ensure that windows and doors are properly sealed to prevent air infiltration. Use weatherstripping and caulk to seal any gaps or areas where air may leak in or escape.
- Consider an airtight door: If possible, install an airtight door for your wine cellar. A well-sealed door will help maintain a consistent temperature and humidity level by minimizing air exchange with the surrounding areas.
- Monitor insulation effectiveness: Regularly monitor the effectiveness of your insulation by checking for any signs of temperature fluctuations or condensation. Make adjustments and repairs as necessary to maintain the proper environment for your wine collection.
Proper insulation and sealing play a vital role in creating a wine cellar with stable conditions for storing and aging wine. By ensuring a well-insulated and sealed space, you can enjoy the benefits of wine maturation and preserve the quality of your collection.
Now that your wine cellar is insulated and sealed, it’s time to consider the lighting options that will enhance the ambiance and showcase your wine collection. We will explore lighting choices in the next section.
Read more: Root Cellar How To Build
Proper Lighting for Your Wine Cellar
Choosing the right lighting for your wine cellar is essential to create an inviting and visually appealing space while ensuring the preservation of your wine collection. Proper lighting not only allows you to showcase your bottles but also helps you navigate the cellar and read wine labels easily. Here are some key factors to consider when selecting lighting options for your wine cellar:
- Avoid direct sunlight: Direct sunlight can damage wine by causing temperature fluctuations and harmful UV exposure. Avoid windows or use UV-resistant glass or window coverings to block out sunlight.
- Opt for low-heat lighting: Choose lighting fixtures that produce minimal heat to prevent any negative impact on the ambient temperature in the cellar. LED lights are an excellent choice as they are energy-efficient and emit very little heat.
- Use LED lighting: LED lights are highly recommended for wine cellars due to their low heat emission, energy efficiency, and ability to showcase wine labels effectively. LED strip lighting is particularly popular for illuminating wine racks and shelves.
- Consider dimmable lighting: Installing dimmable lighting fixtures allows you to adjust the brightness as desired. This flexibility is useful when you want to create different lighting atmospheres, such as ambiance or functional lighting for organizing or showcasing specific bottles.
- Focus on accent lighting: Use accent lighting to highlight focal points in your wine cellar, such as custom wine displays, artwork, or architectural features. This type of lighting can add a touch of elegance and draw attention to specific areas of your collection.
- Distribute lighting evenly: Ensure uniform lighting distribution throughout the wine cellar to eliminate shadows and make it easier to read wine labels. Aim for a well-lit space that enhances the visibility of your wine bottles without creating harsh or glaring effects.
- Install motion-sensor or automatic lighting: Consider motion-sensor or automatic lighting systems to conserve energy and enhance convenience. These systems will activate the lights when you enter the cellar and turn them off when the space is unoccupied.
Remember, the goal of lighting in your wine cellar is to create an attractive and functional space while prioritizing the preservation of your wine collection. Experiment with different lighting arrangements and intensities to find the perfect balance that suits your aesthetic preferences and showcases your wines in their best light.
Now that you have illuminated your wine cellar with proper lighting, it’s time to consider the flooring options that will not only enhance the beauty of your cellar but also provide durability and ease of maintenance. Let’s explore flooring choices in the next section.
Flooring Options for Your Wine Cellar
Choosing the right flooring for your wine cellar is essential to create a functional and aesthetically pleasing space. The flooring should not only complement the overall design but also withstand the cellar’s temperature and humidity conditions. Here are some flooring options to consider for your wine cellar:
- Tiled flooring: Porcelain or ceramic tiles are a popular choice for wine cellars due to their durability and resistance to moisture. They are available in a variety of styles, textures, and patterns to suit your design preferences. Opt for non-slip tiles to ensure safety when walking on them.
- Engineered wood flooring: Engineered wood flooring is an excellent alternative to natural hardwood for wine cellars. It consists of layers of real wood veneer bonded to a sturdy composite base, providing stability and resistance to moisture. Engineered wood offers the warmth and elegance of hardwood while being more resistant to humidity-related issues.
- Vinyl flooring: Vinyl flooring is a practical and cost-effective option for wine cellars. It is waterproof, easy to maintain, and available in a wide range of colors and designs. Look for luxury vinyl planks or tiles that mimic the appearance of wood or stone for an elevated, sophisticated look.
- Concrete flooring: Concrete is a durable and versatile flooring option for wine cellars. It can be left bare for a rustic, industrial look or stained and polished for a more refined finish. Consider adding an epoxy coating or sealant to protect the concrete from moisture absorption.
- Natural stone flooring: Natural stone, such as slate, limestone, or travertine, adds a timeless and elegant touch to your wine cellar. Stone is durable, moisture-resistant, and provides excellent insulation. However, it may require regular sealing and can be more expensive than other flooring options.
- Cork flooring: Cork is a sustainable and eco-friendly flooring option that is naturally resistant to moisture and mold. It provides excellent insulation and is gentle on bottles if they accidentally fall. Cork tiles are available in various colors and patterns, allowing for creative design possibilities.
- Carpeting: While less common, carpeting can be a cozy and luxurious option for a wine cellar. Consider a high-quality, low-pile carpet that is moisture-resistant and easy to clean. Keep in mind that carpeting may require more maintenance and may not be suitable for cellars with higher humidity levels.
When choosing the flooring material, consider factors such as durability, maintenance requirements, aesthetics, and your personal preferences. It’s also important to ensure that the flooring option is compatible with the overall climate control system of your wine cellar.
Selecting the right flooring will add the finishing touch to your wine cellar, making it a beautiful and functional space to showcase and enjoy your wine collection. Now that your flooring is in place, let’s move on to the next step: storing and organizing your precious bottles.
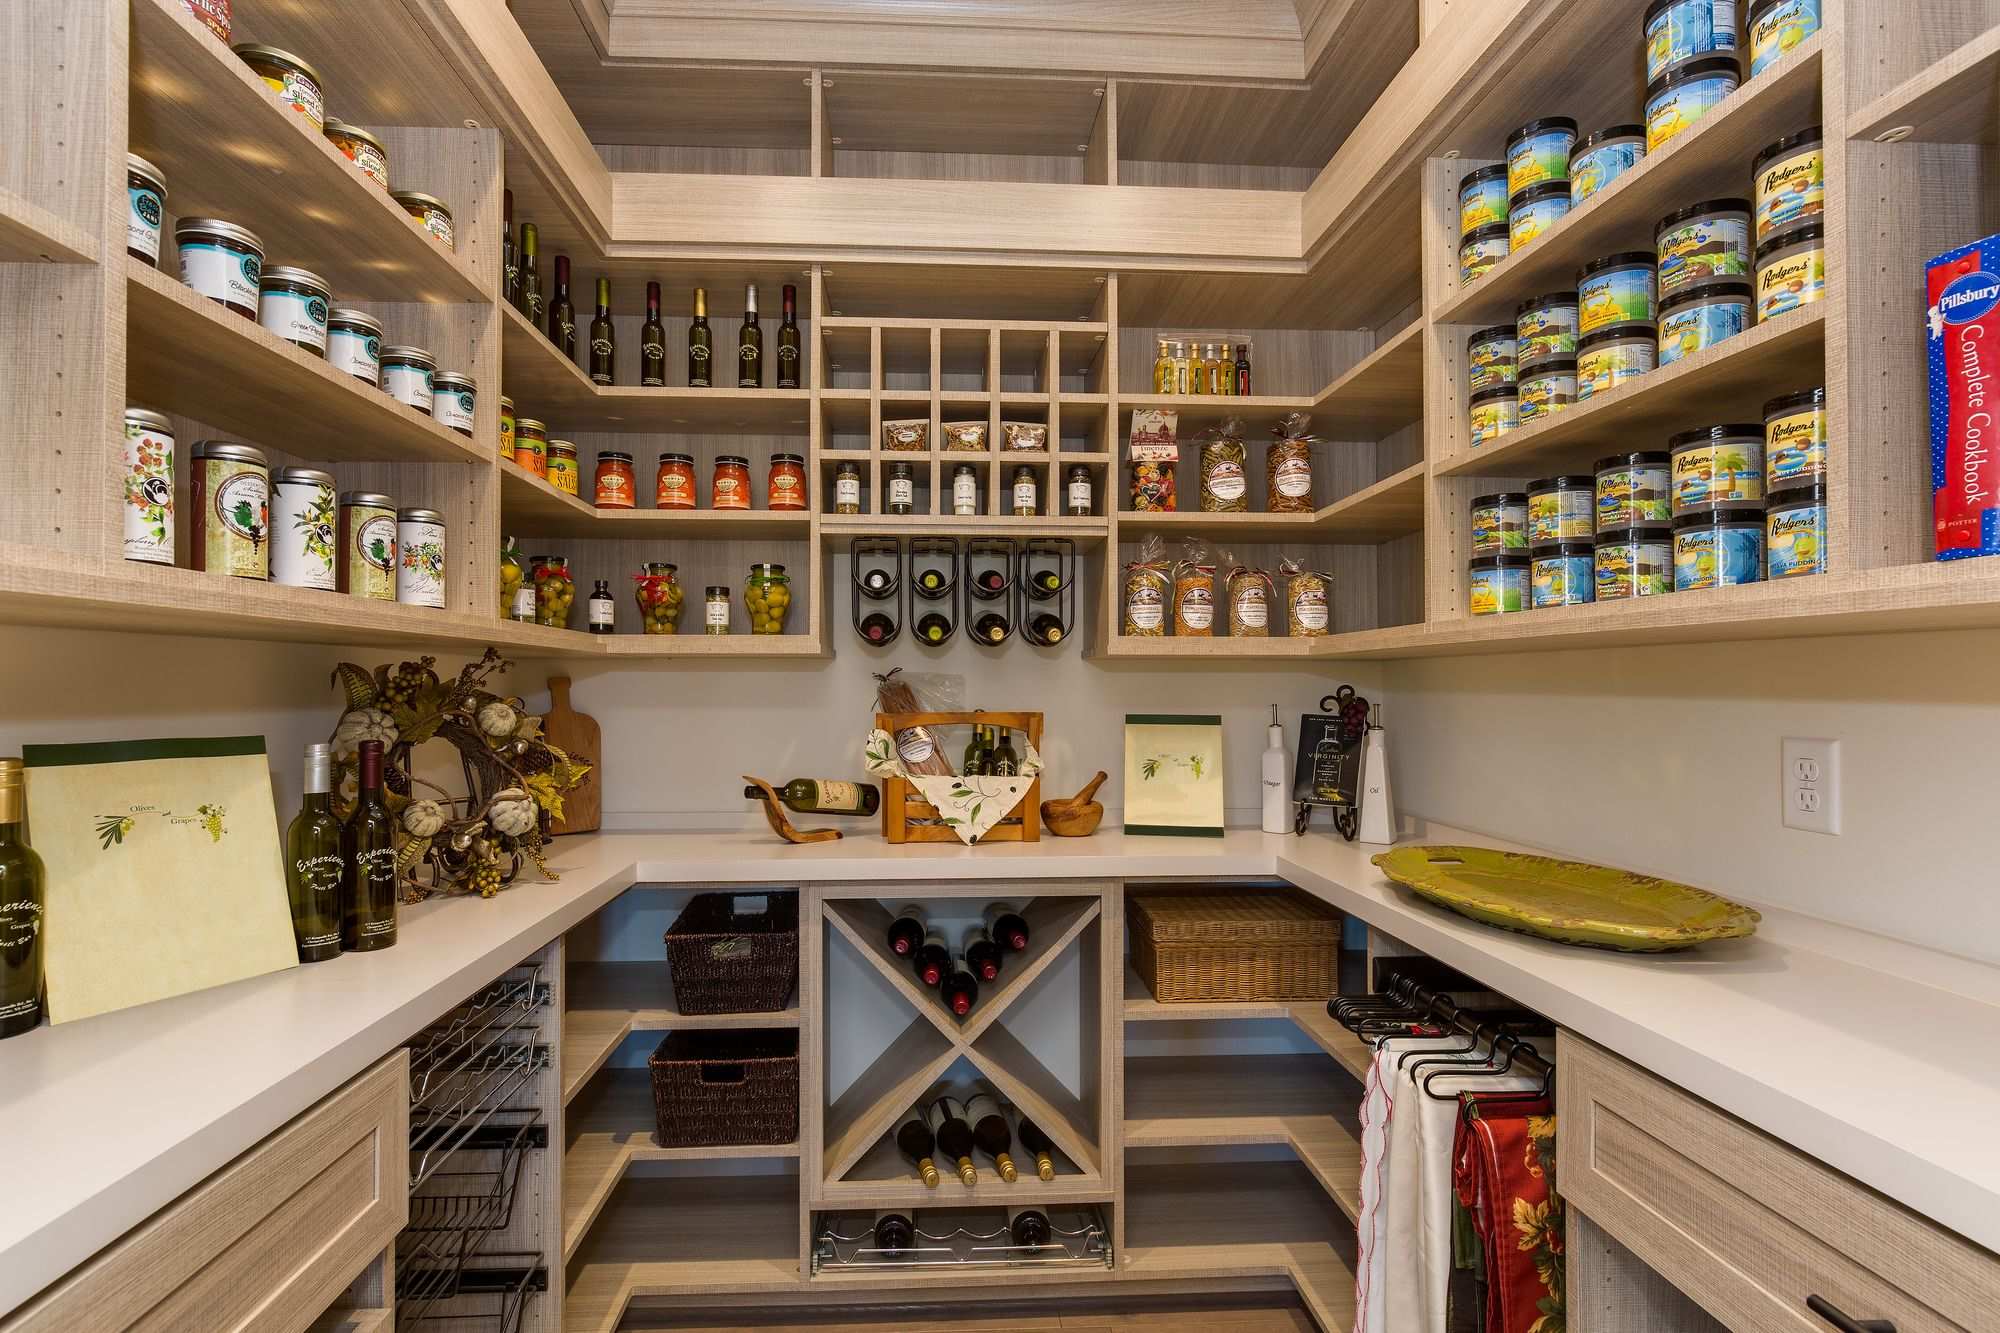
Storing and Organizing Your Wine Collection
Storing and organizing your wine collection in a systematic and efficient manner not only enhances the aesthetic appeal of your wine cellar but also ensures easy access to your bottles and proper preservation. Here are some tips for effectively storing and organizing your wine collection:
- Sort by type or region: Consider organizing your wines by type (red, white, sparkling) or by region (France, Italy, California) to make it easier to locate specific bottles when desired. This method helps you maintain a clear inventory and simplifies the selection process.
- Group wines by age or vintage: If you have a collection with varying aging potential, consider grouping wines by their optimal drinking windows or vintages. This allows you to access wines that are ready to be enjoyed and helps preserve the aging potential of others.
- Label and track inventory: Label each bottle or use a wine inventory management system to keep track of your collection. This helps you monitor the age, storage location, and tasting notes for each bottle, making it easier to access and plan for future consumption.
- Consider a wine cellar management system: Explore digital wine cellar management systems or smartphone apps that help you track your collection, suggest food pairings, and provide detailed information for each bottle. These tools can streamline organization and enhance your wine cellar experience.
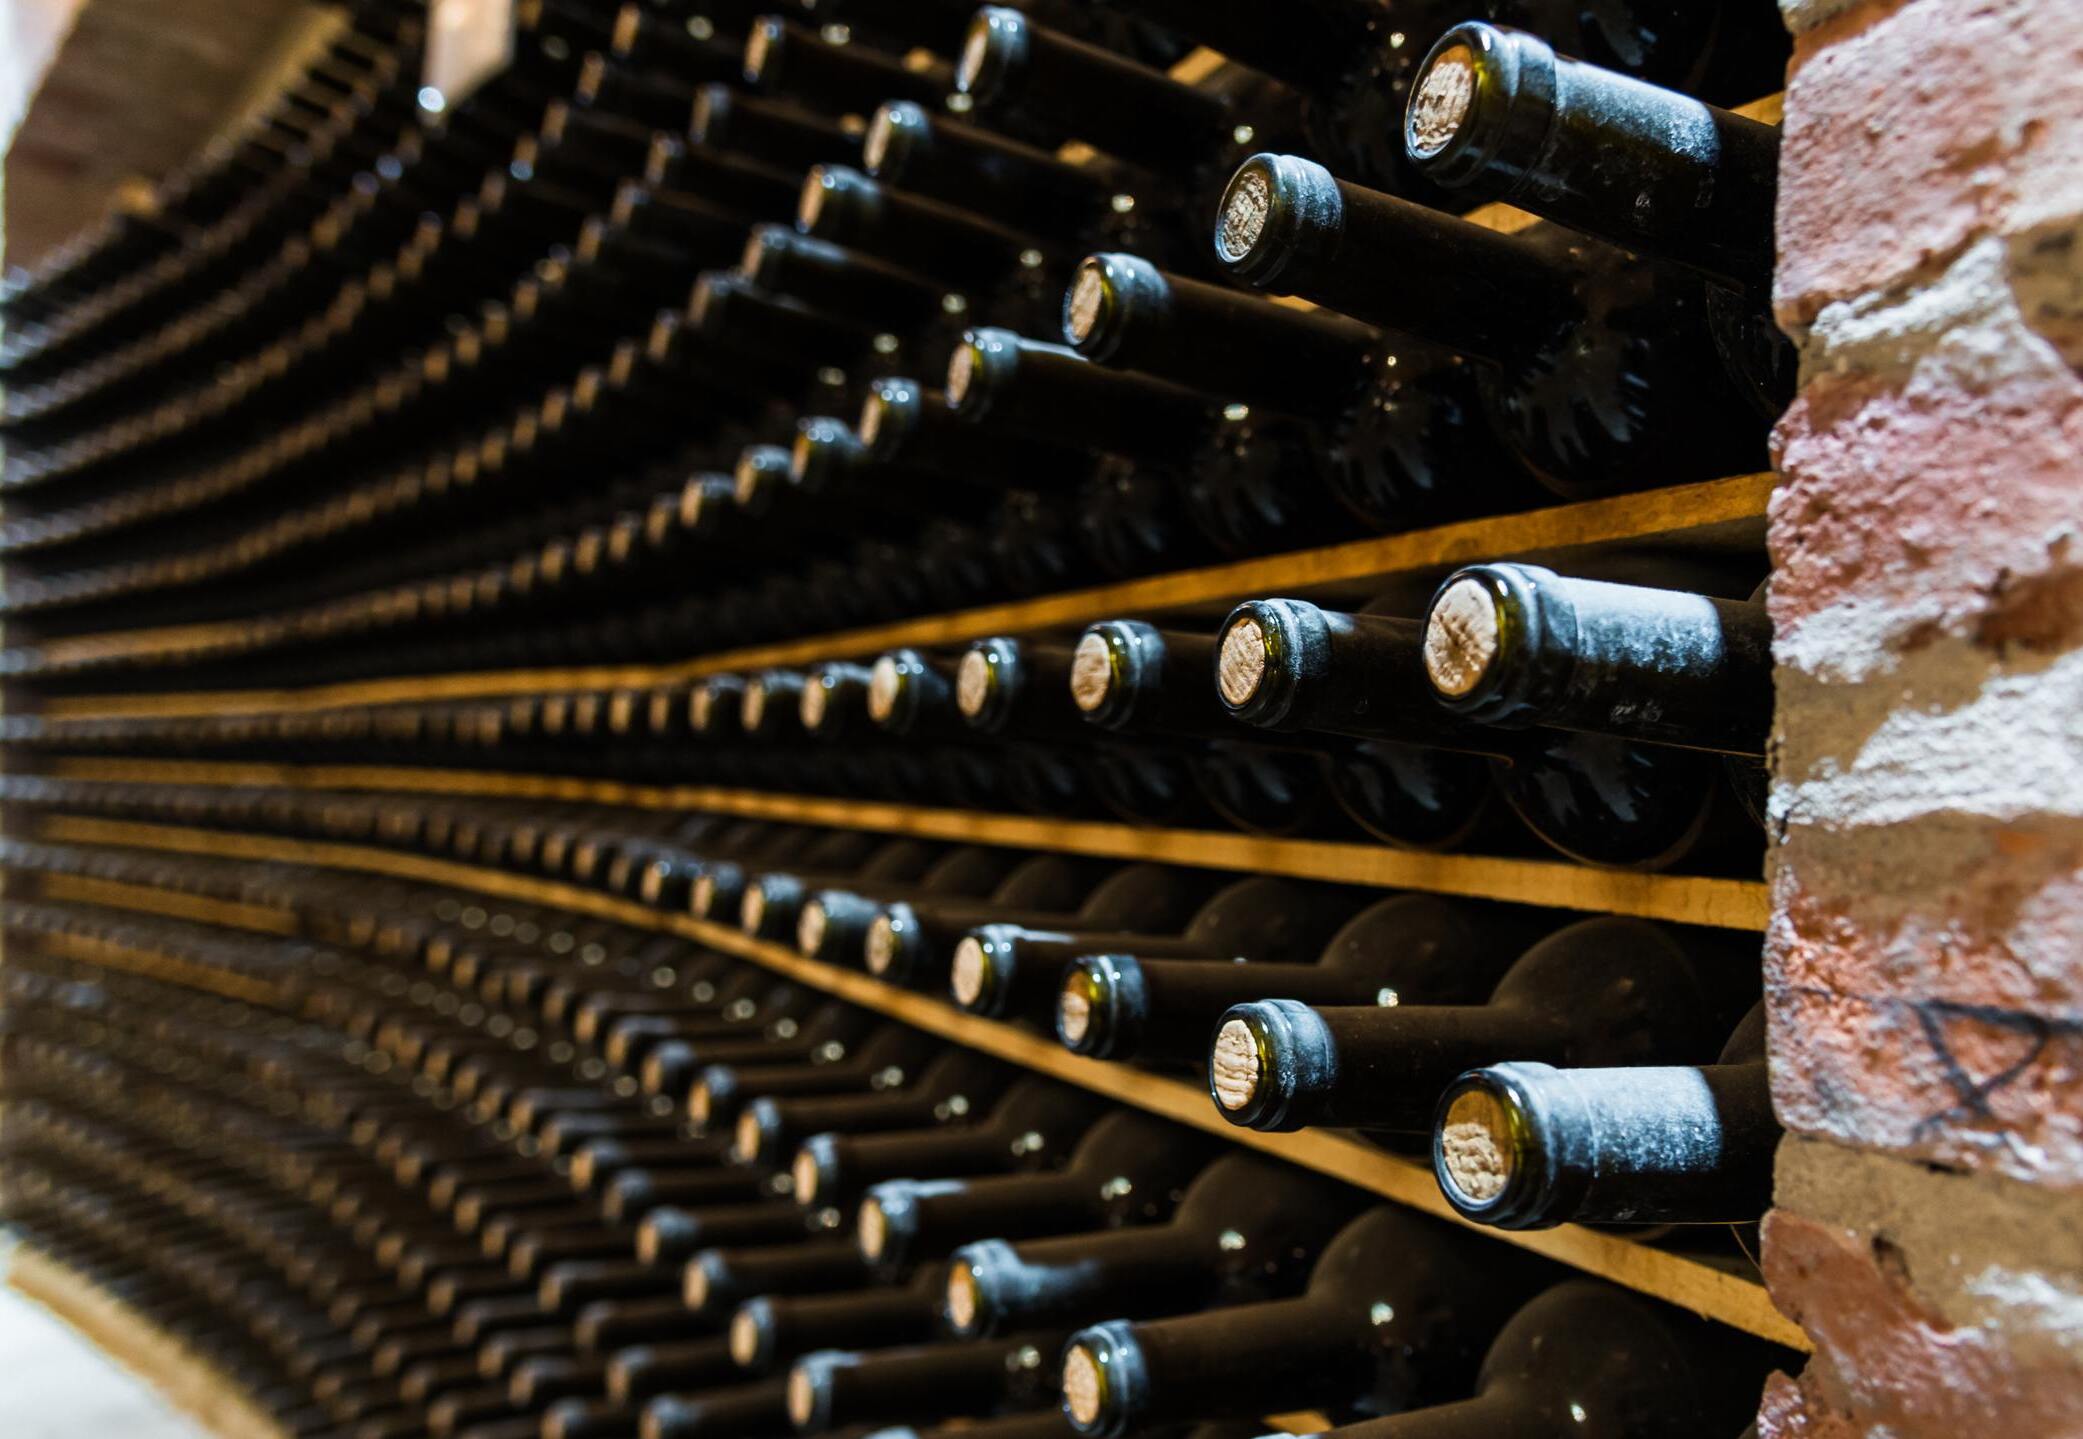
- Store wine horizontally: Most wine bottles benefit from horizontal storage as it keeps the cork in contact with the wine, preventing it from drying out. This is especially important for wines with natural cork closures. Use wine racks or shelving that allows you to store bottles horizontally.
- Maintain proper temperature and humidity levels: Regularly monitor and maintain the temperature and humidity levels in your wine cellar to ensure optimal storage conditions. Aim for a temperature between 50°F and 59°F (10°C and 15°C) and a humidity level between 50% and 70%.
- Avoid excessive vibrations: Minimize vibrations from appliances, HVAC systems, or foot traffic near the wine cellar. Vibrations can disturb the sediments in the wine and potentially affect its quality over time.
- Consider wine storage accessories: Invest in wine storage accessories such as wine racks, bottle tags, or inventory software to help keep your collection organized. These tools can make it easier to locate specific bottles and maintain an efficient storage system.
Ultimately, the goal of storing and organizing your wine collection is to ensure easy access, maintain proper aging conditions, and maximize the enjoyment of your wines. Regularly update your inventory and take the time to rearrange or reorganize your collection as it grows and evolves.
Now that your wine collection is properly stored and organized, let’s explore some final touches and decorations to add a touch of elegance and personality to your wine cellar.
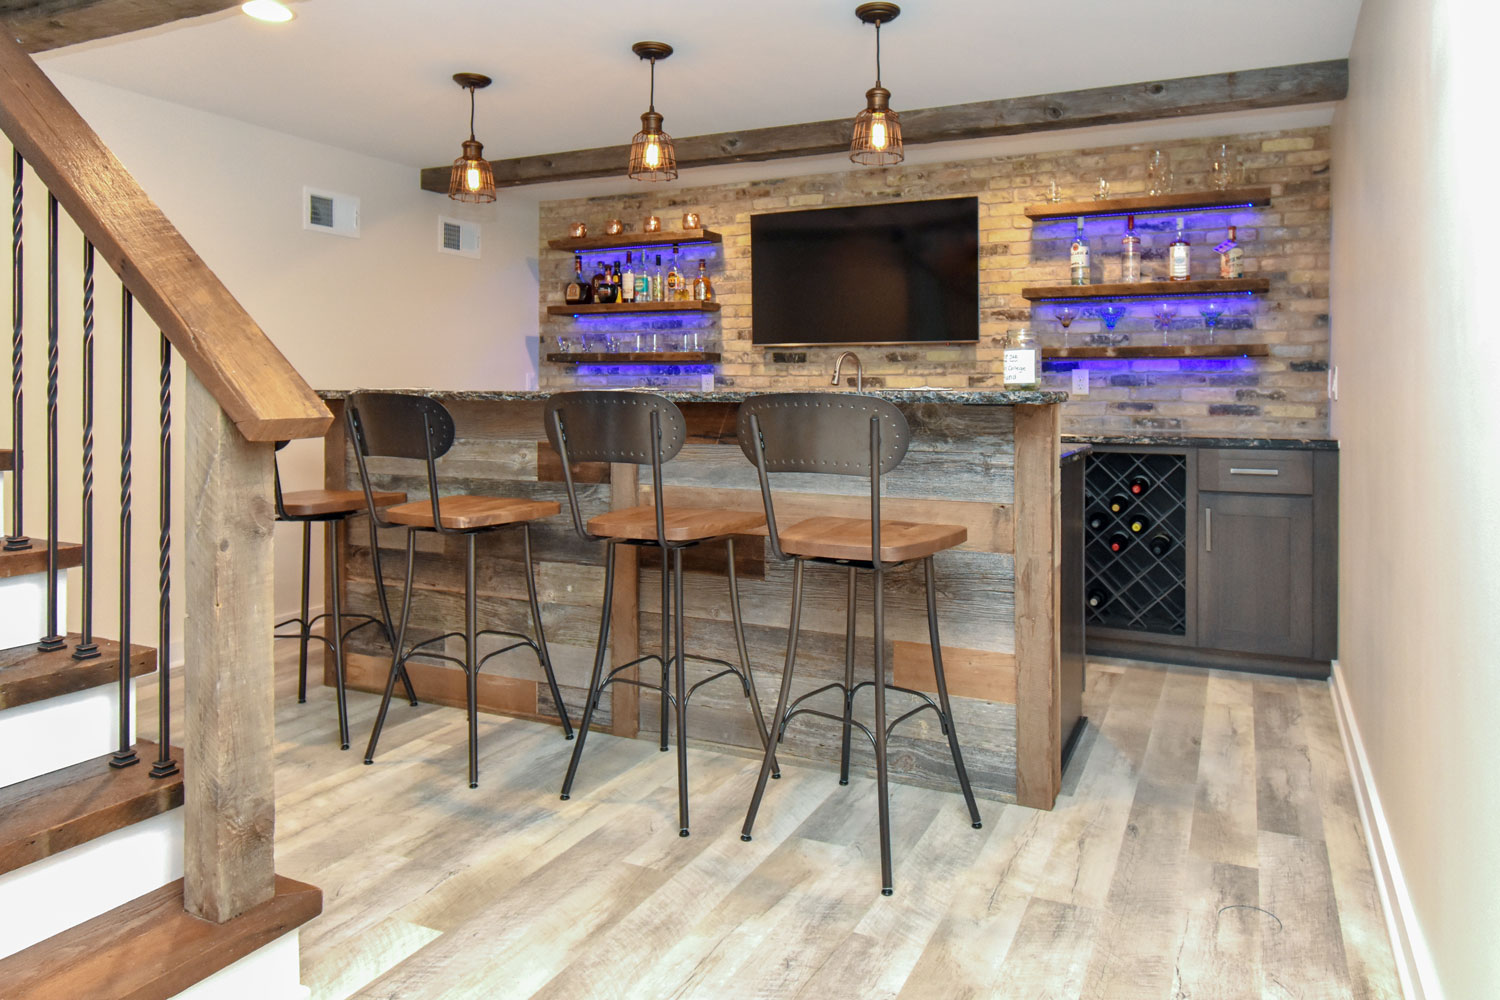
Final Touches and Decorations for Your Wine Cellar
Adding the final touches and decorations to your wine cellar can elevate its aesthetic appeal and create a welcoming atmosphere. These finishing touches not only enhance the visual appeal of the space but also reflect your personal style and add a sense of luxury. Here are some ideas for final touches and decorations:
- Wine-themed artwork: Hang wine-related artwork, such as paintings, photographs, or prints, to create a focal point and add a touch of sophistication to your wine cellar. Look for artwork that depicts vineyards, wine bottles, or wine country landscapes.
- Wine-related decor: Incorporate wine-related decor items, such as wine barrel stools, vintage wine openers, or wine-themed sculptures, to enhance the wine cellar ambiance. These items can add character and charm to the space.
- Wine cellar door: Consider investing in a custom-designed wine cellar door that exudes elegance and creates a grand entrance to your collection. Choose a door made of beautiful wood or glass to showcase your wine cellar as a centerpiece in your home.
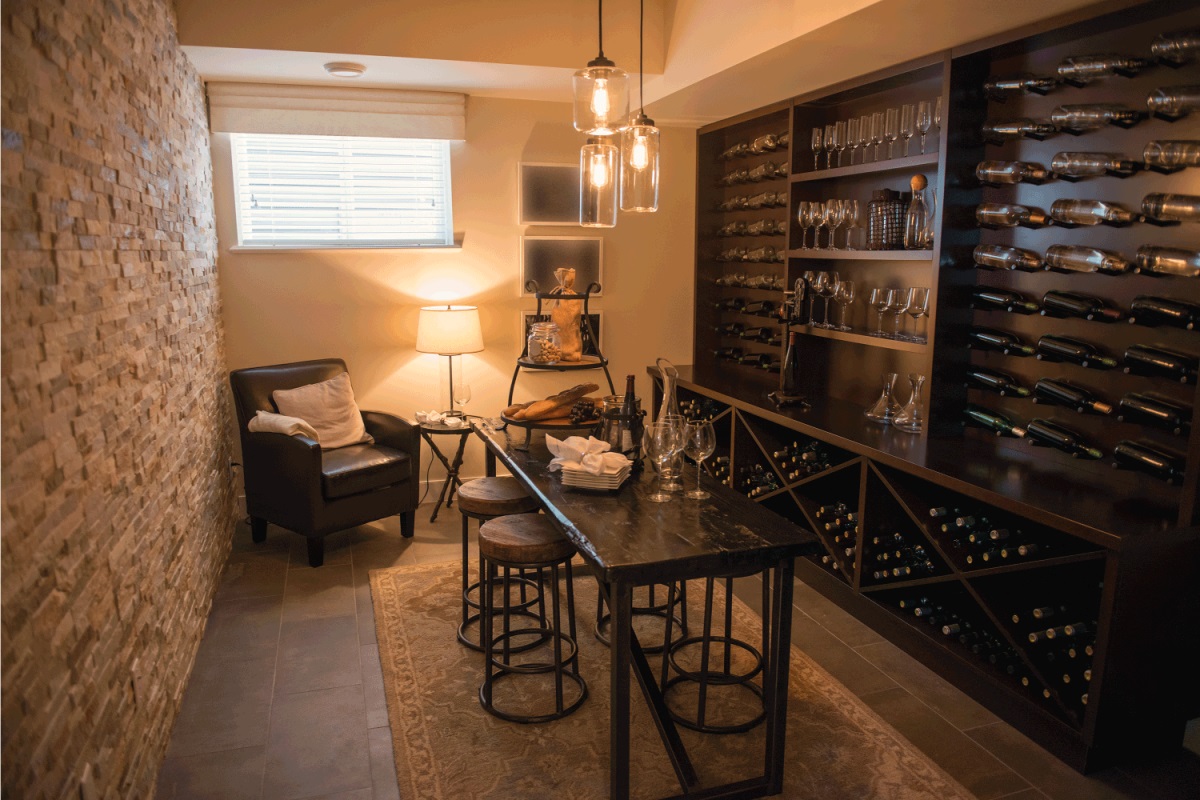
- Wine tasting area: If space permits, create a designated area within your wine cellar for wine tasting. Install a small table or countertop, comfortable seating, and appropriate glassware to create a cozy space where you can enjoy your wine with friends and family.
- Display your wine accessories: Showcase your wine accessories, such as decanters, wine glasses, and corkscrews, on open shelves or glass display cabinets. This not only adds visual interest but also makes them easily accessible for future use.
- Wine barrel decoration: Incorporate a wine barrel or repurpose one as a decorative element in your wine cellar. You can use it as a table, a shelf, or even as a base for a wine tasting area. Wine barrels add a rustic and authentic touch to the space.
- Proper signage: Consider hanging attractive signage such as custom-made wine cellar nameplates or engraved wooden signs that indicate the name or theme of your wine cellar. This adds a personalized touch to the space and helps create a unique ambiance.
Remember, the final touches and decorations should harmonize with the overall design and style of your wine cellar. Whether you prefer a rustic, modern, or traditional look, choose decor items that reflect your taste and enhance the atmosphere you wish to create.
With the addition of these final touches and decorations, your wine cellar will truly become a captivating space for both displaying and enjoying your wine collection. However, it’s important to also prioritize the ongoing maintenance and care of your wine cellar, which we will discuss in the next section.
Read more: How To Store Wine Without A Cellar
Maintenance and Care for Your Wine Cellar
Maintaining and caring for your wine cellar is crucial to ensure that the optimal conditions for storing and aging wine are consistently upheld. Regular maintenance and attention to detail will help preserve the quality of your wine collection and prolong its lifespan. Here are some important maintenance and care tips for your wine cellar:
- Monitor temperature and humidity: Regularly check the temperature and humidity levels in your wine cellar using a digital thermometer and hygrometer. Make adjustments to your cooling system if necessary to maintain the desired range of temperature (around 50°F to 59°F) and humidity (between 50% and 70%).
- Inspect for leaks or water damage: Regularly inspect your wine cellar for any signs of leaks or water damage. Check for dampness, mold, or musty odors. Address any issues immediately as water can damage labels and compromise the integrity of your wine bottles.
- Clean regularly: Keep your wine cellar clean and free from dust and debris. Dust can accumulate on bottles and racks, potentially affecting the quality of your wines. Wipe down bottles and shelves periodically using a soft, lint-free cloth or a specialized wine cellar cleaning solution.
- Rotate and organize your collection: Periodically rotate your wine bottles to ensure even aging. This can be done during regular inventory checks. Take the opportunity to organize and reorganize your collection to maintain an efficient and accessible system as your collection grows.
- Perform regular cork inspections: Check your wine bottles for any signs of cork deterioration, such as crumbling or seepage. If you notice any issues, consider re-corking or transferring the wine to a new bottle to ensure proper sealing and preservation.
- Maintain appropriate lighting: Regularly check the lighting fixtures in your wine cellar to ensure they are in working order. Replace any faulty bulbs or fixtures promptly to maintain the proper lighting conditions. Avoid using excessive or harsh lighting that may affect the quality of the wine.
- Keep a record of wine inventory: Continuously update and maintain a record of your wine inventory. Note important information such as purchase dates, drinking windows, and tasting notes. This helps you keep track of your collection and plan for future enjoyment.
- Protect against pests: Keep an eye out for any signs of pests, such as insects or rodents, in your wine cellar. Take preemptive measures to prevent infestations, such as sealing cracks and holes, and regularly inspecting your cellar for any potential entry points.
Regular and proactive maintenance is key to preserving the quality and value of your wine collection. By paying close attention to the condition of your wine cellar and implementing a routine care schedule, you can ensure that your collection ages gracefully and continues to bring you joy for years to come.
As we conclude this comprehensive guide, we hope that you feel equipped with the knowledge and insights to build, maintain, and enjoy a beautiful wine cellar in your basement. Cheers to creating a space that celebrates and enhances your passion for wine!
Conclusion
Congratulations on completing this comprehensive guide to building a wine cellar in your basement! With the knowledge and insights you’ve gained, you are well-equipped to embark on creating a space that not only preserves your precious wine collection but also adds a touch of elegance and sophistication to your home.
We started by emphasizing the importance of careful planning and designing, considering factors such as storage needs, budget, theme, and accessibility. Then, we discussed assessing and selecting the ideal location within your basement, preparing the space, and insulating and sealing the cellar to maintain stable conditions.
We guided you through building the wine racks and shelving and choosing the right cooling system to provide the perfect environment for your wines. Proper lighting, flooring options, and final touches and decorations were also explored to enhance the visual appeal and ambiance of your wine cellar.
We emphasized the significance of storing and organizing your wine collection, following best practices for temperature, humidity, and bottle orientation. We also discussed the importance of ongoing maintenance, including monitoring conditions, regular cleaning, inventory management, and pest prevention.
By following the tips and guidelines outlined in this guide, you can create a wine cellar that reflects your personal style, protects your investment, and allows you to truly savor the joy of collecting and enjoying fine wines.
Remember that building a wine cellar is an exciting and ongoing project. As your collection grows and your tastes evolve, you may want to make adjustments and improvements. Keep exploring new wines, learning about different regions, and further enhancing your wine cellar experience.
Cheers to your journey as a wine enthusiast, and may your wine cellar bring you endless enjoyment and appreciation for the art and science of winemaking. Happy collecting, storing, and savoring!
Now that you've got plans for that stunning wine cellar, why not tackle another exciting project? If you're curious about the time commitment for updating another key part of your home, our next guide covers all you need to know about transforming your living space. Check out our detailed breakdown on how quick and efficient a basement makeover can be, ensuring you're well-prepared for your next big home improvement adventure.
Frequently Asked Questions about How To Build A Wine Cellar In Basement
Was this page helpful?
At Storables.com, we guarantee accurate and reliable information. Our content, validated by Expert Board Contributors, is crafted following stringent Editorial Policies. We're committed to providing you with well-researched, expert-backed insights for all your informational needs.


0 thoughts on “How To Build A Wine Cellar In Basement”