Articles
How To Build A Sauna In Basement
Modified: October 18, 2024
Discover step-by-step articles on how to build a sauna in your basement. Transform your space into a relaxing oasis with our expert guides.
(Many of the links in this article redirect to a specific reviewed product. Your purchase of these products through affiliate links helps to generate commission for Storables.com, at no extra cost. Learn more)
Introduction
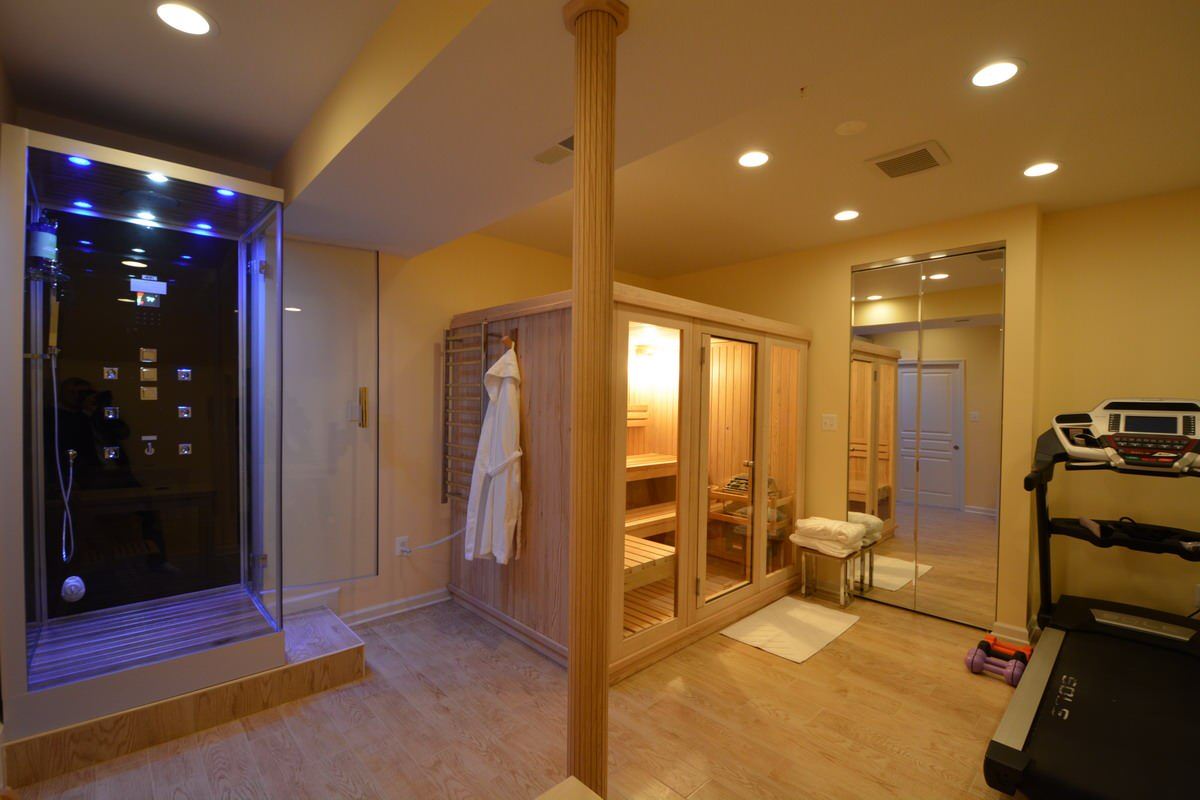
Welcome to the world of relaxation and rejuvenation – the sauna. Nothing beats the therapeutic experience of a sauna, and what better place to have one than in the comfort of your own home? If you have a basement that is underutilized and you want to transform it into a personal oasis, then this article is for you. Here, we will guide you through the process of building a sauna in your basement, step by step.
Having a sauna in your basement can provide you with numerous benefits. It not only offers a luxurious escape from the daily stresses of life but also promotes better health and well-being. The heat and humidity of a sauna can help relax your muscles, improve circulation, detoxify your body, and reduce stress.
While building a sauna in your basement may seem like a complex task, with proper planning and execution, it can be a rewarding project. In this article, we will break down the process into simple steps, providing you with the knowledge and guidance needed to transform your basement into a personal sauna sanctuary.
Before we dive into the specific steps, it’s important to note that building a sauna in your basement may require specific permits or inspections. It is essential to consult with your local building department to ensure you are following all necessary regulations and safety guidelines.
So, if you’re ready to embark on a journey of relaxation and create your very own oasis, let’s begin by assessing the space in your basement and determining the size of your sauna.
Key Takeaways:
- Transform your underutilized basement into a personal oasis of relaxation and rejuvenation by following the step-by-step guide to building a sauna. Enjoy the therapeutic benefits and create lasting memories with friends and family in your new sauna sanctuary.
- Prioritize safety, comfort, and functionality when building your sauna in the basement. Thoroughly assess the space, plan the layout, and ensure proper insulation, ventilation, and temperature control for a truly enjoyable and rejuvenating sauna experience.
Read more: How To Build A Basement
Step 1: Assessing the Basement Space
The first step in building a sauna in your basement is to assess the available space. Take a thorough look at your basement and determine the area where you want to build your sauna.
Consider the ceiling height, as saunas typically require a minimum ceiling height of 7 feet to ensure proper heat distribution and comfort for users. Measure the dimensions of the area and take note of any obstacles, such as support beams or plumbing fixtures, that may affect the sauna’s layout and design.
It’s important to have enough space to comfortably accommodate the sauna dimensions, including the seating area, heater, and ventilation system. Keep in mind that the sauna should have sufficient clearance from walls and other objects to allow for air circulation.
In addition to the physical space, consider the accessibility of the basement area where you plan to build the sauna. Ensure that there is a clear path and sufficient access for materials and equipment during the construction process.
Furthermore, evaluate the existing electrical and plumbing systems in your basement. Depending on the type of sauna heater you choose, you may need to have a dedicated electrical circuit installed to handle the power requirements. Consult with a professional electrician to assess the capacity of your electrical system and make any necessary upgrades.
Lastly, take into consideration any potential moisture issues that may exist in your basement. Basements are prone to dampness, and humidity can cause damage to the sauna and affect its performance. Assess the basement for any signs of moisture, such as water stains or mildew. It’s crucial to address any waterproofing or moisture control issues before proceeding with the sauna construction.
By thoroughly assessing the basement space, you will have a clear understanding of its limitations, requirements, and potential for building a sauna. This assessment will lay the foundation for the subsequent steps in the process, allowing you to plan and execute the construction with confidence.
Step 2: Determining the Sauna Size
After assessing the basement space, the next step in building a sauna in your basement is to determine the size of the sauna. The size of your sauna will depend on various factors, including the available space in your basement and your personal preferences.
Consider the number of people you intend to accommodate in your sauna. If you plan on using the sauna alone or with a small group, a compact sauna might be sufficient. However, if you envision hosting larger gatherings or having multiple people in the sauna at once, then a larger sauna might be more suitable.
Typically, saunas range in size from small, single-person saunas up to larger, multi-person saunas. The dimensions of a single-person sauna can be around 4 feet by 5 feet, while larger saunas can range from 6 feet by 8 feet up to 8 feet by 12 feet or more.
Take into account the seating arrangements within the sauna. You will need to allocate enough space for benches or platforms where people can sit or recline comfortably. Additionally, plan for at least 2 feet of space between the top bench and the ceiling to allow for proper airflow and heat circulation.
Consider the layout of the sauna and how it will fit into the available basement space. Determine whether a square or rectangular sauna is better suited for your needs and the shape of the space. Keep in mind any existing features or obstacles, such as support columns or windows, that may affect the sauna’s size and layout.
Furthermore, think about the overall aesthetic and functionality of the sauna. Do you want additional features such as a changing room, a shower area, or a relaxation zone? Factor in these elements when determining the size and layout of your sauna.
Once you have determined the approximate size of your sauna, create a scaled drawing or layout to visualize how it will fit into the basement space. Consider using software or online tools to help you create a detailed plan that takes into account all the necessary dimensions and features.
By carefully determining the size of your sauna, you can ensure that it fits seamlessly into your basement space, provides ample room for users, and meets your specific needs and preferences. This step will serve as a guide for the subsequent steps in the construction process, making it easier to materialize your sauna vision.
Step 3: Planning the Sauna Layout
Once you have determined the size of your sauna, the next step is to plan the layout. The layout of your sauna involves considering the placement of various components, such as benches, heater, door, and ventilation system, to create an efficient and enjoyable sauna experience.
Start by visualizing how you want the sauna to flow and function. Consider the entrance and exit points, the positioning of the benches, and the location of the heater. The layout should provide a comfortable and convenient space for users to move around and enjoy the sauna experience.
Begin by deciding where you want to place the sauna door. The door should be strategically positioned to allow for easy access and to minimize heat loss when entering or exiting the sauna. It is common for the sauna door to be located on the longer wall rather than the shorter ones.
Next, determine the placement of the benches within the sauna. Consider the number of users and ensure that there is enough seating area for everyone to sit or lie down comfortably. Typically, saunas have two levels of benches, allowing users to choose their preferred level of heat intensity.
Position the sauna heater in a central location within the sauna to ensure even heat distribution. The heater should be easily accessible and at a height that allows for safe operation and temperature adjustment. Make sure there is enough clearance around the heater for proper air circulation.
In addition to the benches and heater, plan for the installation of a ventilation system. Proper ventilation is essential to ensure fresh air circulation and to keep the humidity levels in check. Determine the best location for the ventilation system, taking into account the layout and airflow within the sauna.
Consider the lighting requirements for your sauna. Determine where the light fixtures will be positioned to provide adequate illumination. Select fixtures that are designed for sauna use and can withstand the high temperature and humidity levels.
Keep in mind any other additional features you want to include in your sauna, such as a shower area, changing room, or relaxation zone. Plan their layout to maximize functionality and comfort.
It is helpful to create a scaled drawing or blueprint of your sauna layout to visualize how all the components will fit together. This will aid in ensuring proper space allocation and functionality of the sauna.
By carefully planning the sauna layout, you can create an inviting and well-organized space that optimizes the sauna experience. This step sets the stage for the subsequent construction steps, allowing for a seamless integration of all the sauna elements.
Step 4: Checking Basement Waterproofing
Before proceeding with the construction of your sauna, it is crucial to check the basement for any signs of moisture and ensure proper waterproofing measures are in place. This step is essential to avoid any potential water damage to your sauna and to maintain a safe and comfortable environment.
Begin by inspecting the basement walls and floor for any visible signs of water seepage, such as dampness, water stains, or mold growth. Check for any cracks or gaps that could allow water to penetrate into the basement space.
If you notice any moisture issues, it is important to address them before proceeding with the sauna construction. Consult with a professional basement waterproofing specialist to evaluate the extent of the problem and recommend appropriate solutions. Depending on the severity, solutions could range from simple sealing of cracks to more extensive waterproofing methods.
Proper waterproofing measures for your basement may include installing a sump pump to redirect water away from the foundation, applying waterproof sealant or membranes to the walls and floor, and ensuring adequate drainage systems are in place.
Additionally, consider the moisture levels in the basement. Use a moisture meter to measure the relative humidity and moisture content in the air. Ideally, the relative humidity should be maintained at around 40-60% for optimal sauna performance and to prevent any moisture-related issues.
If the basement has high humidity levels, consider using a dehumidifier to control the moisture and maintain a dry environment. This will help prevent any potential damage to the sauna and ensure a comfortable sauna experience.
By thoroughly checking and addressing any waterproofing concerns in your basement, you can create a safe and long-lasting environment for your sauna. This step will provide peace of mind and guarantee the longevity of your sauna, allowing you to enjoy its benefits for years to come.
Read more: How To Build A Basement Door
Step 5: Insulating the Basement
Insulating your basement is a crucial step in building a sauna, as it helps create a comfortable and energy-efficient environment. Proper insulation will not only regulate the temperature inside the sauna but also prevent heat loss and moisture buildup.
Start by determining the type of insulation suitable for your basement. There are various insulation options available, including foam board insulation, fiberglass batt insulation, and spray foam insulation. Each option has its advantages and disadvantages, so consider factors such as your budget, insulation effectiveness, and any specific requirements for your basement.
Prioritize insulating the walls and ceiling of the sauna area. Insulating the walls will prevent heat loss and help maintain a constant temperature inside the sauna. Consider using insulation with a high R-value to maximize its effectiveness in retaining heat.
While insulating the walls, ensure that there is sufficient space for wiring and electrical installations. Recessed conduits can be used to provide a neat and organized layout for electrical wiring, without compromising the insulation quality.
Insulate the ceiling of the sauna to prevent heat from escaping through the roof. This is especially crucial if your basement has a concrete or unheated space above it. Choose insulation materials that are resistant to heat and moisture, such as closed-cell foam insulation or mineral wool insulation.
Another important area for insulation is the floor of the sauna. Insulating the floor will prevent cold air from seeping through and help maintain a cozy atmosphere. Consider using insulation boards or reflective foil insulation to create a thermal barrier between the sauna and the basement floor.
In addition to the sauna walls, ceiling, and floor, it is recommended to insulate any exposed pipes or ductwork in the basement. This will help prevent heat loss and protect the pipes from freezing during colder seasons.
Properly insulating the basement will not only improve the efficiency of your sauna but also contribute to overall energy savings for your home. It will create a comfortable and well-insulated space where you can fully enjoy the sauna experience.
By insulating the walls, ceiling, and floor, as well as addressing any exposed pipes or ductwork, you will ensure that your sauna space is well-regulated, energy-efficient, and free from any potential temperature fluctuations or moisture-related issues. This step is essential for creating a cozy and enjoyable sauna environment in your basement.
Step 6: Installing Vapor Barrier
Installing a vapor barrier in your sauna is a critical step to prevent moisture buildup and protect the integrity of the sauna’s construction materials. A vapor barrier acts as a barrier against moisture infiltration, helping to maintain a dry and comfortable sauna environment.
Begin by selecting a suitable vapor barrier material. The most commonly used material is a plastic sheet or vapor barrier membrane made of polyethylene. Ensure that the material you choose is durable, water-resistant, and has a high vapor permeability rating.
Before installing the vapor barrier, it is essential to properly prepare the surfaces. Clean the walls, ceiling, and floor of the sauna area, ensuring they are free from dust, dirt, and moisture. Repair any cracks or imperfections to provide a smooth and even surface for the vapor barrier installation.
Measure and cut the vapor barrier material according to the dimensions of the sauna area. Allow for some overlap at the seams to ensure a proper seal and to prevent any gaps where moisture could penetrate. Secure the vapor barrier to the walls, ceiling, and floor using adhesive or staples, ensuring a tight fit and complete coverage.
Pay special attention to sealing the seams and edges of the vapor barrier. Use vapor barrier tape or caulk to create a watertight seal, preventing any moisture from seeping through the joints. This step is crucial to maintaining the effectiveness of the vapor barrier and ensuring its integrity.
Be careful when installing the vapor barrier around any electrical or plumbing fixtures in the sauna. Create openings or slits in the vapor barrier to accommodate these fixtures, ensuring a snug fit while maintaining the barrier’s integrity.
In addition to the walls, ceiling, and floor, consider installing a vapor barrier under the sauna benches to prevent moisture from rising up through the wooden surfaces. This will help protect the benches and ensure their longevity.
By installing a vapor barrier, you create a protective barrier that prevents moisture from entering the sauna space. This is especially important in basement saunas, as basements are often susceptible to higher humidity levels. The vapor barrier safeguards the sauna’s construction materials, insulating them from moisture damage and maintaining a comfortable sauna environment.
Remember, proper installation and sealing of the vapor barrier are crucial to its effectiveness. Take the time to ensure a thorough and watertight installation, paying attention to details such as seams, edges, and openings. This will guarantee the long-lasting performance of your sauna and protect your investment in building a sauna in your basement.
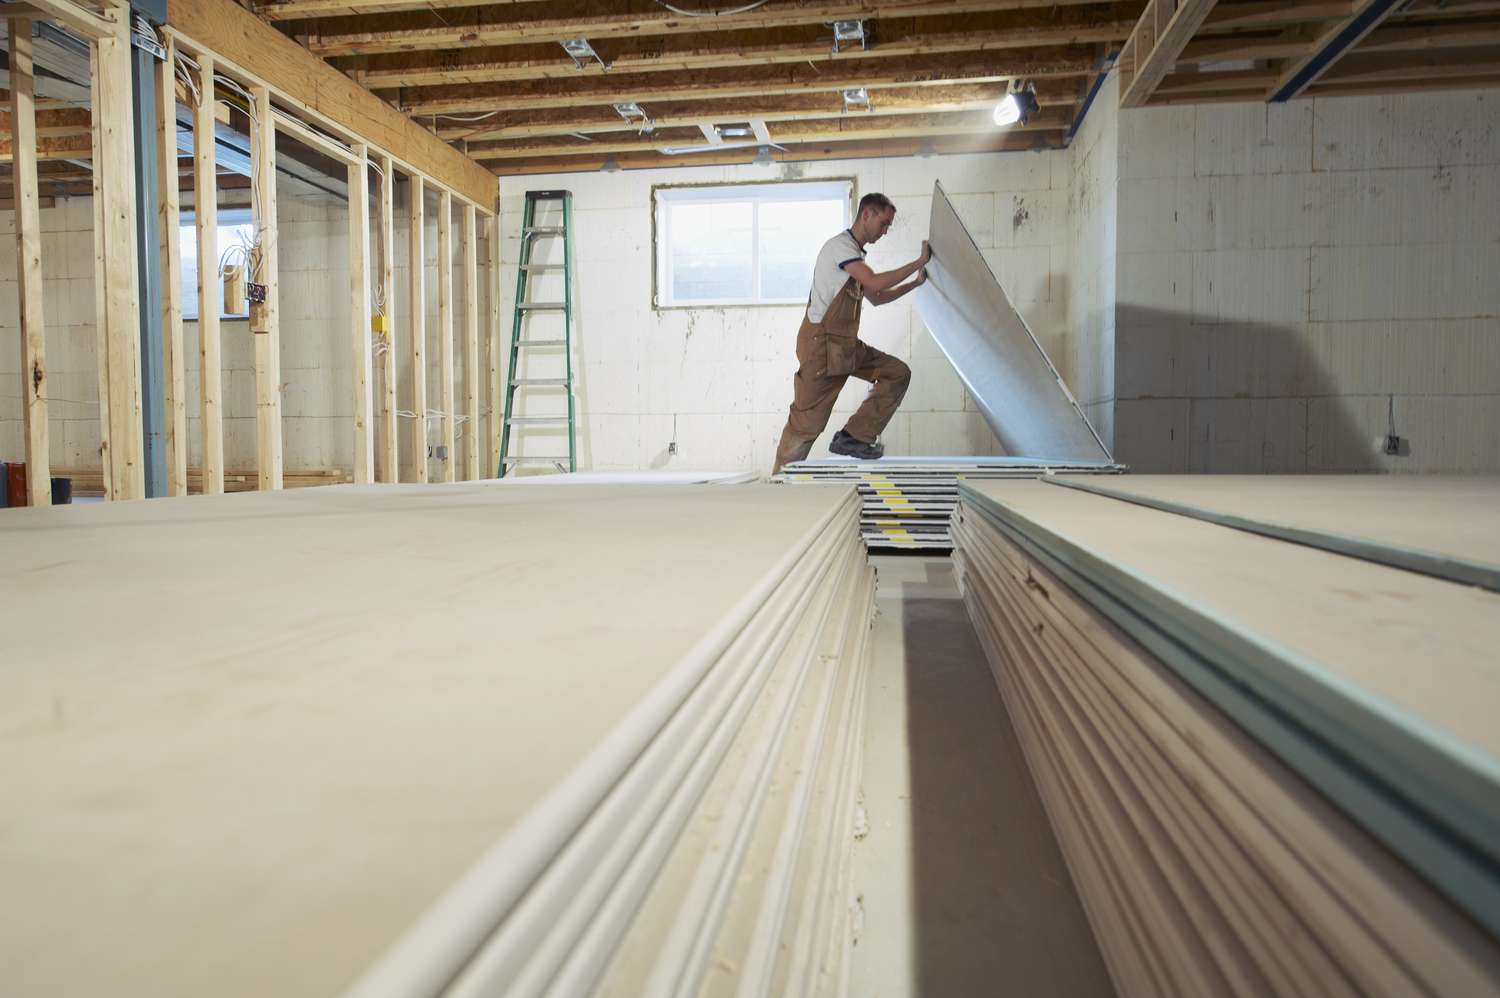
Step 7: Framing the Sauna Walls
Framing the sauna walls is a crucial step in the construction process, as it provides the structure and support for the sauna. Proper framing ensures that the walls are sturdy, durable, and able to withstand the high temperatures and humidity of the sauna environment.
Start by selecting the appropriate materials for framing the walls. The most common choice for sauna walls is cedar wood, as it is known for its durability, resistance to moisture, and pleasant aroma. Cedar wood is also excellent at retaining heat, making it an ideal choice for sauna construction.
Measure and mark the locations for the wall frames, keeping in mind the layout and dimensions outlined in the sauna planning phase. Use a level and a chalk line to ensure precise alignment and straightness of the walls.
Construct the wall frames by attaching vertical studs to the floor and ceiling plates. You can use nails, screws, or appropriate fasteners to secure the wood pieces together. Ensure that the frames are plumb and level to create a solid and uniform structure.
Leave openings in the wall frames for the sauna door, windows (if desired), and ventilation system. These openings should be strategically placed for ease of access, light entry, and proper air circulation within the sauna.
Depending on the design and aesthetic you desire, you may choose to add horizontal supports or additional framing as needed. These additions will enhance the overall strength and stability of the sauna walls.
Once the frames are completed, install the interior and exterior sauna wall surfaces. Tongue-and-groove cedar boards are commonly used for sauna walls, as they provide a smooth and visually appealing finish. Attach the boards to the frames using appropriate fasteners, ensuring a tight and secure fit.
As you progress with the framing and wall installation, it is essential to periodically check for plumbness, levelness, and alignment. Making adjustments during the framing process will ensure that the final result is a well-constructed and aesthetically pleasing sauna.
Framing the sauna walls is a critical step that establishes the foundation for the sauna structure. Proper framing ensures the stability and durability of the sauna walls, allowing them to withstand the heat and humidity of the sauna environment. Take your time and pay attention to detail during this step to ensure a structurally sound and visually appealing sauna.
When building a sauna in the basement, make sure to properly insulate the walls and ceiling to prevent moisture and heat from escaping. This will help maintain a consistent and comfortable sauna environment.
Step 8: Building the Sauna Ceiling
Building the sauna ceiling is an important step in creating a comfortable and well-constructed sauna. The ceiling not only adds to the overall aesthetics of the sauna but also helps to trap and circulate the heat within the sauna space.
Before starting the construction of the sauna ceiling, it is essential to ensure that the supporting structures, such as wall frames, are securely in place. Confirm that they are plumb, level, and properly aligned.
Choose an appropriate material for the sauna ceiling. Cedar wood is a popular choice due to its durability and ability to withstand high temperatures and moisture. Other suitable options include tongue-and-groove panels or heat-resistant ceiling boards specifically designed for sauna use.
Measure and cut the ceiling material to fit the sauna area. Take care to leave adequate space for ventilation and any desired lighting fixtures. Tongue-and-groove boards can be securely attached to the sauna ceiling frame, while panels or boards can be attached using suitable fasteners.
Pay attention to the joints and edges of the ceiling boards or panels. Ensure they fit tightly together to minimize any potential gaps that could allow heat to escape or affect the sauna’s performance.
If desired, add additional insulation above the sauna ceiling to further enhance heat retention and energy efficiency. Insulation material with a high R-value can be installed between the ceiling and any unheated space above the sauna, such as an attic or crawlspace.
Consider the placement of any lighting fixtures in the ceiling. If you plan to install lights, make sure to follow safety guidelines and use fixtures designed for sauna use. Avoid positioning lights too close to the heat source or any potential water splashing areas.
Throughout the construction process, periodically check the levelness and alignment of the sauna ceiling. Make any necessary adjustments to ensure a smooth and even finish.
Building the sauna ceiling is a crucial step in completing the sauna construction. A well-built ceiling helps to trap the heat within the sauna and creates a cozy and inviting atmosphere. Take your time during this step to ensure proper installation and alignment, resulting in a beautiful and functional sauna ceiling.
Read more: How To Build Your Own Outdoor Sauna
Step 9: Installing Sauna Door
The installation of the sauna door is a significant step in the construction process, as it provides both functionality and aesthetic appeal. The sauna door not only allows for easy access to the sauna but also helps to retain heat and ensure privacy within the sauna.
Start by selecting a sauna door that is specifically designed for high-temperature environments. Sauna doors are typically made of heat-resistant materials, such as glass and wood, and are constructed to withstand the heat and humidity conditions inside the sauna.
Measure the doorway opening to determine the size of the sauna door needed. Ensure that there is sufficient clearance for the door to open and close smoothly. The door should fit snugly within the doorway, creating a tight seal to prevent heat loss.
Prepare the doorway by ensuring it is clean and free from any debris or obstructions. Remove any excess framing or materials that may hinder the installation of the sauna door.
Install the door frame or jamb according to the manufacturer’s instructions. Secure it firmly in place, ensuring it is level and plumb. This will provide a solid support for the sauna door and ensure a proper fit.
If using a glass sauna door, carefully fit and secure the glass panel within the frame or jamb. Ensure that the glass is appropriately tempered and able to withstand the high temperatures of the sauna. Consider using silicone or heat-resistant sealant to secure the glass in place and provide an airtight seal.
For wooden sauna doors, attach the door slabs or panels to the frame using suitable hinges. Ensure that the door opens and closes smoothly, without any hindrance or friction.
Verify that the sauna door properly aligns with the sauna walls and creates a tight seal. This will help to maintain the heat and humidity levels within the sauna.
Consider adding a handle or latch to the sauna door for easy opening and closing. Choose a handle or latch that is heat-resistant and provides a secure grip.
During the installation process, make sure to follow all safety guidelines and manufacturer recommendations. Consult any supplied instructions to ensure a proper and secure installation of the sauna door.
By installing the sauna door, you complete the enclosure and create a defined space for the sauna. The door not only adds functionality to the sauna but also enhances its appearance. Take your time during this step to ensure that the sauna door is properly installed and provides a seamless and secure entry into your sauna space.
Step 10: Wiring and Lighting
Wiring and lighting are crucial aspects of building a sauna, as they contribute to the functionality, ambiance, and safety of the space. Properly installed electrical components and suitable lighting fixtures will enhance your sauna experience and create a welcoming atmosphere.
Before proceeding with any wiring or electrical work, consult with a licensed electrician to ensure that you comply with local building codes and regulations. Electrical work should always be performed by a qualified professional to ensure safety and proper installation.
Start by planning the electrical layout for your sauna. Determine the location of electrical outlets, switches, and any other electrical fixtures you plan to include, such as heater controls or audio systems. Take into consideration the placement of these components to optimize accessibility and functionality.
Ensure that your sauna has an adequate power supply. Consult with your electrician to determine if any electrical upgrades are required to handle the power demands of the sauna heater and other electrical devices.
Install the necessary electrical wiring according to the specific requirements of your sauna setup. Use appropriately sized wires and conduits to safely handle the electrical load. The wiring must be protected and installed in compliance with building regulations.
Place electrical boxes at designated locations for outlets, switches, and other electrical connections. These boxes will house the wiring and provide a secure junction point for electrical connections.
Install electrical outlets and switches in accessible and convenient locations. Make sure they are installed at a safe distance from any potential water sources and comply with safety standards for sauna environments. Consider using ground fault circuit interrupters (GFCIs) for added safety.
Consider the lighting requirements for your sauna. Select lighting fixtures that are designed for high-temperature environments and capable of withstanding the heat and humidity of the sauna. Recessed LED lights or heat-resistant light fixtures are commonly used in saunas.
Install the chosen lighting fixtures strategically to ensure adequate illumination and a soothing ambiance. Position the lights to avoid shining directly onto sauna users, as this can cause discomfort. Aim for indirect lighting that provides a soft and relaxing glow.
Ensure that all wiring connections and electrical fixtures are properly grounded to prevent electrical hazards. Work with your electrician to test and verify the functionality and safety of the electrical system in your sauna.
By properly wiring your sauna and installing suitable lighting fixtures, you ensure a safe and enjoyable sauna experience. Consult with an experienced electrician to ensure compliance with electrical codes and regulations, and to ensure that all wiring and electrical work is performed correctly.
Step 11: Ventilation System Installation
Installing a ventilation system in your sauna is essential for maintaining air quality, removing excess humidity, and ensuring a comfortable and safe sauna environment. The ventilation system helps to regulate the temperature, prevent condensation, and circulate fresh air within the sauna space.
Start by selecting a suitable ventilation system that is specifically designed for use in high-temperature and high-humidity environments. Look for a system that can effectively remove moist air and provide adequate ventilation for the size of your sauna.
Choose the location for the ventilation system carefully. It is common to position the ventilation outlet near the upper section of the sauna, as hot air tends to rise. Additionally, consider installing intake vents at the lower section of the sauna to create proper airflow and circulation.
Install the ventilation ducts or pipes, connecting the outlets to the intake vents. Use heat-resistant materials, such as aluminum or stainless steel, to handle the high temperatures of the sauna. Ensure that the ducts are properly insulated to prevent heat loss and condensation.
Verify that the ventilation system is properly connected to an external exhaust vent or chimney. This allows for the expulsion of moist air and ensures that fresh air is brought in from the outside. Installing a vent cover or grille on the exterior helps to protect the system from debris and pests.
Consider incorporating adjustable dampers or vents into your ventilation system. These allow you to control the amount of air flow and adjust the sauna’s temperature and humidity levels according to your preferences.
Test the ventilation system to ensure its effectiveness and proper operation. Check for any leaks, obstructions, or airflow restrictions that may affect its performance. Make any necessary adjustments to ensure optimal ventilation.
Remember to follow manufacturer recommendations and local building codes and regulations when installing the ventilation system. Consulting with a professional or an HVAC specialist is recommended to ensure proper sizing, installation, and functionality of the system.
By installing a ventilation system in your sauna, you create a comfortable and enjoyable environment. The ventilation system ensures proper air circulation, removes excess humidity, and helps maintain the desired temperature. This step is crucial for a safe and pleasant sauna experience.
Step 12: Adding Sauna Benches and Flooring
Adding sauna benches and flooring is an important step in completing the construction of your sauna. The benches provide a comfortable seating area, while the flooring enhances the overall aesthetic and functionality of the space. Consider the materials you choose for these elements, as they should be able to withstand the heat and humidity of the sauna environment.
Start by selecting suitable materials for the sauna benches. Cedar wood is a popular choice due to its natural resistance to moisture, durability, and warmth. Choose high-quality cedar boards that are smooth and free from any sharp edges or splinters.
Measure and cut the cedar boards to the desired length for the sauna benches. Allow for sufficient space between each level of benches to ensure proper airflow and comfort for sauna users.
Construct the sauna benches by securely attaching the boards to the sauna walls or frames. Use appropriate fasteners, such as stainless steel screws or nails, to ensure a sturdy and long-lasting construction. Make sure the benches are level and provide a comfortable seating surface.
Consider the design and layout of the benches to maximize space usage. Some sauna designs incorporate L-shaped or U-shaped benches to accommodate more users or create a more spacious feel.
Next, focus on the flooring of the sauna. Select a flooring material that can withstand high temperatures, exposure to moisture, and frequent traffic. Cedar wood is often used for sauna flooring due to its natural resistance to moisture and heat, as well as its pleasant aroma.
Measure and cut the cedar boards to fit the sauna floor. Install the boards by securely fastening them to the sauna frame or foundation. Ensure that the boards are level and properly aligned to create a smooth and comfortable surface for sauna users.
Consider the seating arrangement and layout in relation to the flooring. If desired, lay a protective mat or towel on the sauna floor near the benches, providing a comfortable and hygienic surface for seating or resting.
Ensure that the sauna benches and flooring are well-maintained to preserve their quality and appearance. Regular cleaning and occasional sanding or resealing may be required to keep them in optimal condition.
By adding sauna benches and flooring, you complete the functional and aesthetic aspects of your sauna. The benches provide a comfortable seating area, while the flooring contributes to the overall ambiance and cleanliness of the space. Take your time during this step to ensure proper installation and create a relaxing and inviting sauna environment.
Read more: How To Build Basement Shelves
Step 13: Installing Sauna Heater
Installing the sauna heater is a pivotal step in bringing warmth and creating the ideal sauna experience. The sauna heater is responsible for generating the heat that envelops the space, providing the soothing and therapeutic effects that saunas are known for.
Before proceeding with the installation, determine the appropriate location for the sauna heater. It should be placed in a central position within the sauna, allowing for even heat distribution. Ensure that there is sufficient clearance around the heater for safe operation and maintenance.
Select a sauna heater that matches the size and heating requirements of your sauna. Consider factors such as the size of the sauna, desired temperature range, and electrical power supply available. Sauna heaters are available in various types, including electric, wood-burning, and infrared options.
Consult the manufacturer’s instructions for the proper installation of the sauna heater. Follow electrical and ventilation guidelines provided to ensure safety and efficient operation.
If installing an electric sauna heater, consult with a qualified electrician to ensure that the electrical circuits and wiring can handle the power requirements. A dedicated circuit may be necessary to prevent overloading and ensure the heater functions properly.
Prepare the area for the heater installation by ensuring that any necessary insulation or protection is in place. Insulate the walls around the heater to prevent heat loss and protect neighboring surfaces.
Carefully install the sauna heater according to the manufacturer’s instructions, taking care to connect all electrical components securely. Follow proper grounding techniques to ensure electrical safety.
Once the heater is in place, verify that the temperature controls and settings are functioning correctly. Some sauna heaters come with built-in thermostats, timers, and controls for easy operation.
Test the sauna heater to ensure that it reaches and maintains the desired temperature within the sauna. Allow the sauna to run for a sufficient amount of time to ensure that it is properly heating the space and providing the desired sauna experience.
Throughout the installation process, prioritize safety and refer to any local building codes and regulations. Consult a professional if needed, especially for wood-burning or larger sauna heaters that may require specialized expertise.
By installing the sauna heater, you create the essential element that generates the desired heat and creates a relaxing and rejuvenating sauna experience. Take the time to ensure proper installation, follow manufacturer guidelines, and prioritize safety to enjoy the full benefits of your sauna heater.
Step 14: Testing and Adjusting the Sauna
After completing the installation of your sauna, the final step is to thoroughly test and adjust the sauna to ensure optimal performance and comfort. This step allows you to fine-tune the sauna environment to meet your preferences and address any potential issues.
Start by conducting a thorough inspection of the sauna to check for any loose connections, gaps, or signs of damage. Ensure that all electrical and ventilation systems are functioning properly and safely.
Test the sauna heater to verify that it reaches and maintains the desired temperature consistently. Allow sufficient time for the sauna to heat up and stabilize, paying attention to any fluctuations or irregularities in temperature.
Monitor the humidity levels within the sauna as well. Use a hygrometer or sauna-specific humidity gauge to measure and adjust the humidity as desired. Proper humidity control enhances the comfort and effectiveness of the sauna experience.
During the testing phase, pay attention to any excessive heat loss, cold spots, or areas of discomfort within the sauna. Adjust the insulation, seals, or ventilation if needed to ensure proper heat retention and consistent heat distribution throughout the space.
Assess the ventilation system to ensure adequate airflow and freshness of air within the sauna. Ventilation should effectively remove excess humidity and ensure a continuous supply of fresh air. Make any necessary adjustments to achieve the desired air quality and circulation.
Take the time to adjust any lighting fixtures to create the desired ambiance and ensure sufficient illumination without causing discomfort for sauna users. Experiment with different lighting settings and angles to achieve the perfect sauna atmosphere.
Conduct a thorough cleaning of the sauna to remove any debris, dust, or odors that may have accumulated during the installation process. Regular maintenance and cleaning are essential to prolong the life of your sauna and ensure a hygienic environment.
Throughout the testing and adjustment process, pay attention to your personal comfort and preferences. Experiment with the sauna temperature, humidity levels, and ventilation settings to find the ideal combination that suits your relaxation and wellness needs.
If you encounter any issues during the testing phase that you are unable to resolve, consider consulting with a professional sauna installer or technician. They can provide guidance and assist with troubleshooting any technical or performance-related problems.
By thoroughly testing and adjusting your sauna, you can fine-tune its performance, ensure optimal comfort, and create a truly enjoyable and rejuvenating sauna experience. Regular monitoring and adjustments will allow you to continue enjoying the benefits of your sauna for years to come.
Conclusion
Congratulations on successfully building your sauna in the basement! You have transformed an underutilized space into a personal oasis of relaxation and rejuvenation. By following the step-by-step process outlined in this guide, you have created a comfortable and functional sauna that brings numerous benefits to your well-being.
Throughout the construction process, you assessed the basement space, determined the sauna size, planned the layout, checked for moisture issues, insulated the basement, installed a vapor barrier, framed the sauna walls, built the sauna ceiling, installed the sauna door, completed the wiring and lighting, installed the ventilation system, added sauna benches and flooring, installed the sauna heater, and tested and adjusted the sauna.
Each step played a vital role in creating a safe, efficient, and enjoyable sauna environment. You took into consideration various factors, such as proper insulation, ventilation, and temperature control, to ensure a comfortable and soothing experience in your sauna.
Remember to regularly maintain and clean your sauna to preserve its functionality and appearance. Regular inspections and adjustments will help ensure that your sauna continues to provide optimal performance and relaxation for years to come.
Now that your sauna is complete, it’s time to reap the rewards. Enjoy the therapeutic benefits of heat, steam, and relaxation that the sauna provides. Use this space to unwind, relieve stress, detoxify your body, improve circulation, and promote overall well-being.
Invite friends and family to share in the sauna experience, creating lasting memories and fostering a sense of togetherness. Embrace the tranquility and serenity of your sauna sanctuary as a peaceful retreat from the demands of daily life.
Thank you for embarking on this journey of creating your own sauna in the basement. We hope that this guide has provided you with the knowledge and guidance needed to successfully complete your sauna project. Enjoy the countless hours of relaxation and rejuvenation that your new sauna brings. Here’s to your well-deserved oasis of wellness, comfort, and bliss!
Frequently Asked Questions about How To Build A Sauna In Basement
Was this page helpful?
At Storables.com, we guarantee accurate and reliable information. Our content, validated by Expert Board Contributors, is crafted following stringent Editorial Policies. We're committed to providing you with well-researched, expert-backed insights for all your informational needs.


0 thoughts on “How To Build A Sauna In Basement”