
Articles
How To Make Beeswax Scented Candles
Modified: August 27, 2024
Learn how to make beeswax scented candles with our informative articles. Discover step-by-step instructions and tips for creating beautifully fragrant candles.
(Many of the links in this article redirect to a specific reviewed product. Your purchase of these products through affiliate links helps to generate commission for Storables.com, at no extra cost. Learn more)
Introduction
Creating your own beeswax scented candles is a rewarding and enjoyable craft. Beeswax candles not only add a warm and inviting ambiance to any space, but they also have a natural and soothing fragrance. Making these candles at home allows you to customize the scent and create unique blends that suit your preferences.
In this step-by-step guide, we will walk you through the process of making your own beeswax scented candles. From preparing the work area to pouring the wax and adding fragrance, we will cover every detail to ensure your candles turn out beautifully.
Before we dive into the process, let’s take a moment to understand why beeswax is a preferred choice for candle making. Beeswax is a natural wax produced by bees, making it an eco-friendly option. It has a higher melting point than other waxes, which means that beeswax candles burn longer and produce less soot.
Beeswax also emits a subtle honey-like scent when burned, adding a pleasant aroma to your candles. However, to enhance the fragrance, we will be adding essential oils or fragrance oils to create scented candles with captivating aromas.
Are you ready to embark on this creative journey? Let’s gather the materials needed and prepare our work area to begin making beeswax scented candles!
Key Takeaways:
- Embrace the Joy of Handmade Treasures
Crafting beeswax scented candles is a fulfilling and creative journey, allowing you to personalize fragrances and create a cozy ambiance. Share the joy with loved ones and continue exploring new scent combinations. - Create a Tranquil Atmosphere with Personalized Fragrances
Crafting beeswax scented candles offers the opportunity to infuse your space with delightful aromas. Experiment with different scents, molds, and designs to create unique and captivating blends that reflect your personal style and preferences.
Read more: How To Make Scents For Candles
Materials Needed
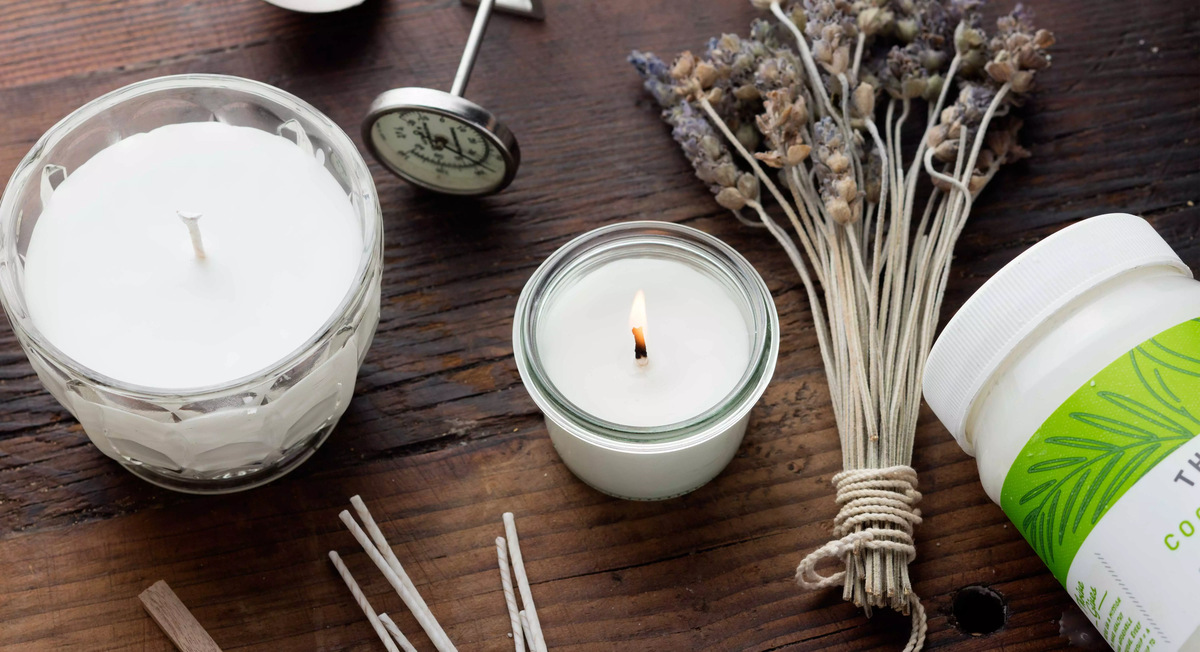
Before we start making our beeswax scented candles, let’s gather all the necessary materials. Here’s a list of what you’ll need:
- Beeswax: Look for 100% pure beeswax pellets or blocks. The amount will depend on how many candles you plan to make. A rough estimate is around 1 pound of beeswax per 16-ounce candle.
- Candle wicks: Choose cotton or hemp wicks that are specifically designed for beeswax candles. Make sure they are the appropriate length for your candle molds.
- Candle molds: You can use metal or silicone molds in various shapes and sizes, such as pillar, votive, or tea light molds.
- Fragrance oils or essential oils: These will add the scented element to your candles. Choose oils that are safe for candle making and select fragrances that complement each other or align with your personal preference.
- Double boiler or melting pot: This is used to melt the beeswax gently and evenly. If you don’t have a double boiler, you can create a makeshift one by placing a heatproof bowl over a saucepan with water.
- Thermometer: A candy or candle-making thermometer will help you keep track of the wax temperature during the melting process.
- Stirring utensil: Use a heat-resistant spoon or spatula to stir the wax and mix in the fragrance.
- Hot glue gun or adhesive tabs: These are used to secure the wicks to the bottom of the candle molds.
- Optional: Decorative elements such as dried flowers, herbs, or colored wax chips to add a creative touch to your candles.
- Protective gear: To ensure your safety, consider wearing heat-resistant gloves and an apron to protect your clothing.
Now that we have all the necessary materials ready, let’s move on to preparing our work area before we start making our beeswax scented candles.
Step 1: Preparing the Work Area
Before diving into the candle-making process, it’s important to set up a clean and organized work area. This will ensure a smooth and efficient experience. Here’s how you can prepare your work area:
- Clear a flat and stable surface: Choose a sturdy table or countertop where you can comfortably work without the risk of the surface shifting or items getting knocked over.
- Cover the work area: Place a protective covering such as butcher paper, a plastic tablecloth, or old newspapers to catch any spills or drips. This will make cleanup easier later on.
- Organize your materials: Arrange all your materials and tools within easy reach. This will save you time and prevent any unnecessary scrambling during the candle-making process.
- Ensure proper ventilation: Beeswax has a natural scent that some may find pleasant, but if you prefer to minimize the aroma, make sure you have good ventilation by opening windows or using a fan.
- Set up a heat-safe area: Since melting beeswax involves heat, it’s crucial to have a designated heat-safe area. This can be a separate section of your workspace or a heat-resistant mat or tray where you can place hot items safely.
- Keep fire safety in mind: Have a fire extinguisher nearby and ensure there are no flammable items or materials close to the candle-making area. Safety should always be a top priority.
- Put on your protective gear: To protect yourself from potential burns or spills, put on heat-resistant gloves and an apron. Safety goggles may also be used if desired.
By following these steps, you can create a well-organized and safe work area for your candle-making adventure. Now that everything is set up, it’s time to move on to the exciting step of melting the beeswax!
Step 2: Melting the Beeswax
Now that our work area is prepared, it’s time to melt the beeswax. This step is essential to transform the solid wax into a liquid state that can be poured into molds. Follow these steps to melt the beeswax:
- Prepare your double boiler: Fill the bottom pot of your double boiler with water, making sure it’s about one-third full. Place it on the stovetop over medium heat.
- Add the beeswax: Measure the desired amount of beeswax based on your candle-making plans. Add the beeswax pellets or blocks to the top pot of the double boiler.
- Melt the beeswax: Place the top pot of the double boiler on the bottom pot, ensuring it fits securely. As the water in the bottom pot heats up, the steam will gently heat the top pot and melt the wax. Stir occasionally to help the wax melt evenly.
- Monitor the temperature: Use a thermometer to keep an eye on the wax temperature. The ideal temperature for melting beeswax is between 145-175°F (63-79°C). Be cautious not to overheat the wax, as this can cause discoloration or scorching.
- Be patient: The melting process can take some time, depending on the amount of beeswax you’re melting. Avoid rushing the process by turning up the heat to high. Slow and steady melting will yield the best results.
- Remove from heat: Once the beeswax is fully melted and reaches the desired temperature, carefully remove the top pot from the heat source. Place it on a heat-resistant mat or tray to prevent any accidental spills.
Remember to exercise caution while melting the beeswax, as it can be hot and potentially cause burns. Pay attention to safety measures and handle the melted wax with care. Once the beeswax has been melted, we can proceed to the next step of adding fragrance to our candles.
Step 3: Adding Fragrance
Adding fragrance to your beeswax scented candles is where you can get creative and personalize the aroma. Whether you prefer floral, citrusy, or woody scents, this step allows you to infuse your candles with delightful fragrances. Follow these steps to add fragrance to your beeswax:
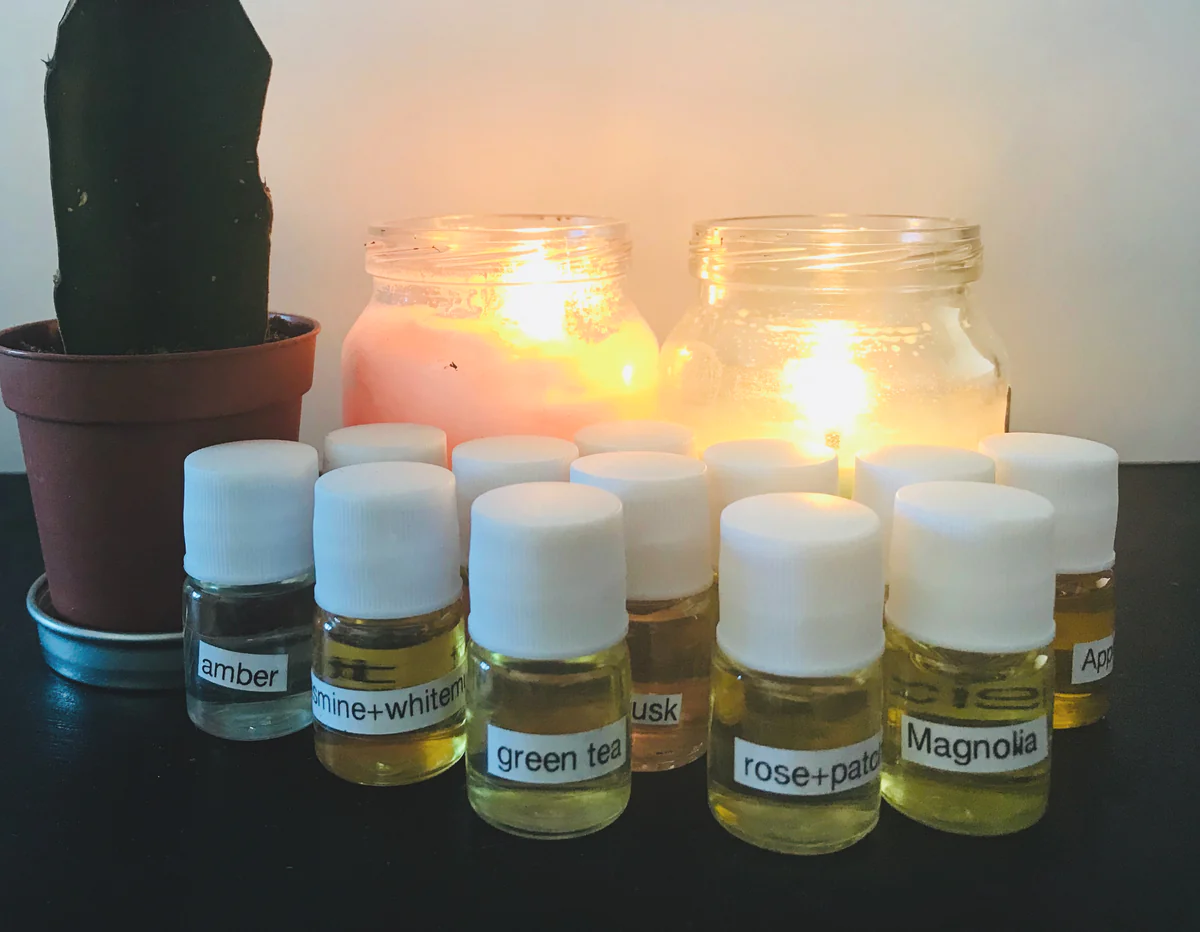
- Select your fragrance: Choose either essential oils or fragrance oils specifically designed for candle making. Consider scents that complement each other or create a unique blend. Start with a few drops and adjust according to your preference.
- Add the fragrance: Stir the melted beeswax gently with a heat-resistant utensil, and then add the desired amount of fragrance oil or essential oil. Stir thoroughly to ensure the scent is evenly distributed throughout the wax.
- Experiment with scent combinations: Feel free to experiment and mix different scents together to create your signature fragrance. Keep track of the amounts used for future reference if you discover a blend you love.
- Be mindful of scent strength: Remember that different fragrances have varying intensity levels. Some scents may be more potent, requiring fewer drops, while others may need a bit more to achieve the desired aroma. Adjust accordingly to achieve the scent strength you desire.
- Avoid overcrowding scents: While it’s tempting to add multiple scents to create complex fragrances, be cautious not to overdo it. Too many scents can overwhelm the final aroma, so it’s best to stick to a few well-balanced combinations.
Remember to stir the melted beeswax and fragrance thoroughly to ensure the scent is evenly distributed. The fragrance will become more apparent as the candles cool, giving you an idea of the final aroma. With the fragrance added, we’re ready to move on to preparing the candle molds for pouring the beeswax.
Read more: How To Make Rolled Beeswax Candles
Step 4: Preparing the Candle Molds
Once you have added fragrance to your melted beeswax, it’s time to prepare the candle molds. Properly preparing the molds will ensure that the beeswax pours smoothly and that the candles retain their desired shape. Follow these steps to prepare your candle molds:
- Choose the appropriate molds: Select the candle molds that best suit the size and shape of the candles you want to make. Ensure that the molds are clean and dry before using them.
- Grease the molds (if necessary): Some candle molds may require greasing to ensure easy wax release. If your molds are made of metal, consider using a non-stick cooking spray or rubbing a thin layer of vegetable oil inside the molds. Silicone molds generally do not require greasing.
- Secure the wick: Place a small dot of hot glue on the bottom center of each mold. Quickly press the metal base of the wick into the glue, ensuring it is centered and straight. Alternatively, you can use adhesive tabs designed specifically for candle wicks.
- Ensure wick stability: To keep the wick centered and upright during the pouring process, tie the excess length of the wick around a wooden skewer or pencil, resting it horizontally across the top of the mold. Make sure the wick is taut but not overly tight.
- Place the molds on a stable surface: Set the prepared molds on a level and stable surface, making sure they won’t be disturbed during the pouring process. Placing them on a baking tray or a raised wire cooling rack can help catch any potential spills.
By following these steps, you will have properly prepared your candle molds for pouring the melted beeswax. Taking the time to ensure the molds are ready will result in a smoother and more successful candle-making process. Now we’re ready to move on to the exciting step of pouring the beeswax into the molds!
Step 5: Pouring the Beeswax into Molds
Now that your candle molds are prepared, it’s time to pour the melted beeswax into them. This step is where you bring your candles to life by shaping them into the desired form. Follow these steps to pour the beeswax into the molds:
- Ensure the melted beeswax is at the proper pouring temperature: Check the thermometer to make sure the melted beeswax is still within the recommended pouring temperature range (around 145-175°F or 63-79°C).
- Pour the beeswax slowly and steadily: Using a heat-resistant pouring pitcher or a steady hand, slowly pour the melted beeswax into each prepared mold. Start from the side of the mold, allowing the wax to fill in gradually, and avoid pouring too quickly to prevent spills.
- Fill the molds to the desired level: Depending on your preference, you can fill the molds all the way to the top or leave a small space at the top for decorations or additional wax layers. Leave a bit of melted wax leftover for any necessary touch-ups.
- Be cautious with overflow prevention: To prevent any potential overflow, keep an eye on the wax level as you pour. If the wax reaches close to the top of the mold, pause and wait a few moments for it to settle before continuing.
- Tap out air bubbles: After pouring the beeswax, gently tap the sides of the mold to release any trapped air bubbles. This will help ensure a smooth and even final appearance.
Take your time when pouring the beeswax into the molds to ensure accuracy and precision. Remember to work in a well-ventilated area and handle the hot wax with caution. Once you have poured the beeswax, it’s time to move on to the next step of inserting the wicks.
When making beeswax scented candles, be sure to use high-quality essential oils for the scent. Lower quality oils may not provide a strong or long-lasting fragrance in the finished candle.
Step 6: Inserting the Wicks
With the beeswax poured into the molds, it’s time to insert the wicks. Properly placing the wicks ensures that your candles have a central and upright burning flame. Follow these steps to insert the wicks into your beeswax candles:
- Remove the skewer or pencil: If you tied the wicks around a wooden skewer or pencil to keep them centered during the pouring process, gently untie and remove the skewer or pencil.
- Trim the wicks: Use a pair of scissors to trim the wicks to the desired length. The ideal length is usually about half an inch above the top of the candle mold, but you can adjust it to your preference.
- Attach wick sustainers (optional): If you prefer a sturdier wick, you can attach wick sustainers to the bottom of the wicks. Wick sustainers are small metal discs with a hole in the center that provide stability and strength to the wick.
- Thread the wicks through the wick sustainers (if using): If you chose to use wick sustainers, thread the wick through the hole in the center and pull it until the sustainer rests firmly against the bottom of the mold.
- Center the wicks: Gently center each wick in the center of its respective mold. You can do this by pressing the wick sustainers down slightly or adjusting the wick’s position with a pair of tweezers.
- Ensure straightness: Make sure the wicks are straight and upright. Adjust the position as needed, ensuring they stay centered and in a vertical position.
By following these steps, you will have successfully inserted the wicks into your beeswax candles. Properly placed wicks allow for a clean and even burn, ensuring you get the most out of your homemade scented candles. Once the wicks are inserted, we can move on to the next step of allowing the candles to cool and solidify.
Step 7: Allowing the Candles to Cool
After inserting the wicks into the molds, it’s important to allow the beeswax candles to cool and solidify. This step ensures that the candles set properly and maintain their shape. Follow these steps to allow your candles to cool:
- Set the candles aside: Carefully move the molds to a safe and undisturbed location where they can cool. Make sure they are placed on a heat-resistant surface away from drafts to ensure even cooling.
- Be patient: It typically takes several hours for the beeswax candles to cool and solidify completely. The cooling time can vary depending on factors such as the size of the candles, the ambient temperature, and the type of molds used.
- Avoid touching or moving the candles: It’s important to resist the temptation to touch or move the candles while they are cooling. Even slight disturbances can cause the wax to not set properly or result in uneven surfaces.
- Check for signs of solidification: After a few hours, check the candles by gently tapping the sides of the molds. If the candles feel firm and unmoving, they have likely solidified. If they still feel soft or give under gentle pressure, allow more time for cooling.
Remember to exercise patience during the cooling process. Rushing the process can lead to deformed or melted candles. Once the beeswax candles have completely cooled and solidified, we can move on to the next step of removing them from the molds.
Read more: How To Make Coffee Scented Candles
Step 8: Removing the Candles from Molds
With the beeswax candles fully cooled and solidified, it’s time to carefully remove them from the molds. Proper removal ensures that the candles retain their shape and appearance. Follow these steps to safely remove your candles from the molds:
- Gently tap the molds: Begin by gently tapping the sides of the molds. This helps loosen the candles from the mold walls and facilitates easier removal.
- Invert the molds: Once you’ve tapped the molds, carefully invert them over a clean and soft surface such as a towel or a soft cloth. Give the molds a gentle shake to encourage the candles to release from the molds.
- Apply gentle pressure: If the candles are not releasing easily, use your fingers to apply gentle pressure to the bottom of the molds or gently flex the sides of the molds to loosen the candles. Avoid using excessive force, as this can deform or damage the candles.
- Release the candles: Once the candles have released from the molds, lift the molds away. If any part of the candle sticks to the mold, gently push it back into place using your fingers or a smooth object.
- Inspect the candles: After removing the candles from the molds, inspect them for any imperfections or uneven edges. If necessary, use a small knife or a candle shaver to trim any excess wax or correct any irregularities.
It’s important to handle the candles with care during the removal process to prevent any damage. With the candles successfully removed from the molds, we can move on to the next step of trimming the wicks.
Step 9: Trimming the Wicks
Once you have removed the candles from the molds, it’s time to trim the wicks to the desired length. Trimming the wicks not only improves the appearance of the candles but also promotes a cleaner and more efficient burn. Follow these steps to trim the wicks:
- Examine the wicks: Take a close look at the wicks of each candle. Ensure that they are centered and upright. Look for any signs of soot or mushrooming at the top of the wicks, which can be indicators of excessive wick length.
- Trim to the appropriate length: Using a sharp pair of scissors or wick trimmers, trim the wicks to approximately a quarter of an inch (0.6 centimeters) above the surface of the candle. This shorter length helps prevent excessive flickering, smoking, or potential fire hazards.
- Dispose of the excess wick: Gather the trimmed wick remnants and dispose of them properly. You can discard them in a trash bin or compost them if they are made of natural materials.
Trimming the wicks to the appropriate length not only enhances the aesthetic appeal of the candles but also ensures a cleaner and safer burn. With the wicks trimmed, we can move on to the final step of enjoying your beautifully crafted beeswax scented candles.
Step 10: Enjoying Your Beeswax Scented Candles
Congratulations! You have successfully made your own beeswax scented candles. Now it’s time to sit back, relax, and enjoy the warm ambiance and delightful fragrance they provide. Follow these steps to fully enjoy your homemade candles:
- Find the perfect spot: Choose a suitable location in your home where you want to place your beeswax candles. Whether it’s the living room, bedroom, or bathroom, select a spot that will allow you to fully enjoy their scent and glow.
- Set the mood: Light your beeswax candles and immerse yourself in the calming and soothing atmosphere they create. Allow the soft, natural glow to create a cozy and inviting ambiance in your space.
- Discover the fragrance: As the candles burn, the fragrance will infuse the air with a delightful aroma. Take a moment to inhale the scent and appreciate the unique blend you have created. Allow it to uplift your mood and enhance your relaxation.
- Practice candle safety: While enjoying your candles, always prioritize safety. Never leave burning candles unattended and keep them away from flammable materials. Place them on a heat-resistant surface and trim the wicks if necessary to avoid uneven burning.
- Experiment with scent combinations: Don’t be afraid to experiment with different fragrance combinations on your next batch of beeswax candles. Mix and match scents to create new and captivating blends that reflect your personal style and preferences.
- Share the joy: If you’re proud of your candle-making skills, consider sharing your handmade beeswax scented candles with friends and family. They make wonderful gifts for birthdays, holidays, or special occasions.
- Continue the craft: Making beeswax scented candles can become a fulfilling hobby. Continue exploring different fragrances, molds, and designs to keep expanding your candle-making skills and create beautiful creations for yourself and others to enjoy.
By following these steps, you can fully immerse yourself in the pleasure of your homemade beeswax scented candles. Enjoy their captivating fragrance, soothing glow, and the tranquil atmosphere they bring to your home. Remember to always practice candle safety and never leave burning candles unattended. Happy candle-burning!
Conclusion
Congratulations on completing your journey to make beeswax scented candles! You have not only crafted beautiful candles but also experienced the joy and satisfaction of creating something with your own hands. These handmade candles not only add warmth and charm to any space but also fill the air with their delightful and personalized fragrances.
Throughout the process, you have learned the importance of preparing the work area, melting the beeswax, adding fragrance, preparing the molds, pouring the beeswax, inserting the wicks, allowing the candles to cool, removing them from the molds, trimming the wicks, and, finally, enjoying the fruits of your labor.
By using high-quality beeswax, selecting your favorite fragrance oils or essential oils, and taking care with each step, you have created unique and artisanal candles that bring a touch of luxury to your home. These candles are not only a source of gentle light but also a means of relaxation, creating a cozy and soothing atmosphere wherever they are placed.
Don’t be afraid to experiment with different scents, molds, and combinations as you refine your candle-making skills. Each time you embark on this creative endeavor, you have the opportunity to create new and enchanting blends that reflect your personal style and preferences.
Remember to always prioritize safety when working with candles and follow proper guidelines for candle usage. Never leave a burning candle unattended and keep them away from flammable materials.
Now, it’s time to sit back, revel in the ambiance of your homemade beeswax scented candles, and bask in the gentle glow and captivating fragrance they emit. Whether you choose to enjoy these candles yourself or share them with loved ones, they are a testament to your creativity, craftsmanship, and the joy of handmade treasures.
So go ahead, light your candles, embrace the tranquility they bring, and relish in the art of candle-making. Your handmade beeswax scented candles are ready to illuminate your space and ignite your senses.
Frequently Asked Questions about How To Make Beeswax Scented Candles
Was this page helpful?
At Storables.com, we guarantee accurate and reliable information. Our content, validated by Expert Board Contributors, is crafted following stringent Editorial Policies. We're committed to providing you with well-researched, expert-backed insights for all your informational needs.
